
07 Drum Brake DIY


Thread Starter
|
Member

Joined: Sep 2006
Posts: 66
From: Raleigh, NC!!
07 Drum Brake DIY
So I did my first set of drum brakes tonight. It was pretty frustrating but eventually it became easy. I had to redo the first one because it wasn't spinning right. Turns out I didn't have the spring in the right hole. Very easy to mess something up with all the loose parts floating around, so only do one side at a time.
I bought the shoes from Honda. The spring/retainer/clip kit came from Autozone for 8 bucks.
On with the show:
1. Jack car, remove wheels, and release parking brake. Use a bolt to help push the brake drum off of the hub. There are two holes for this I only needed one to get it off.
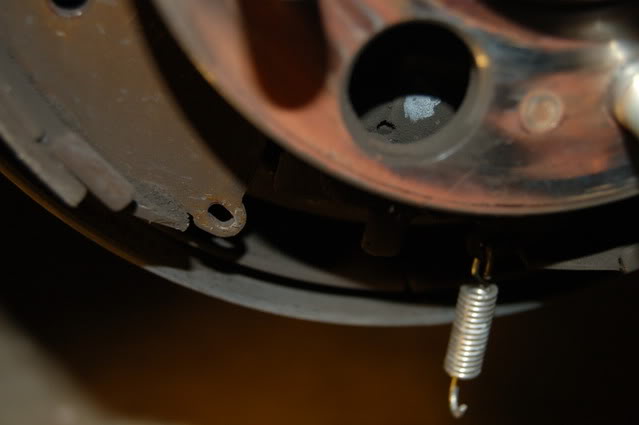
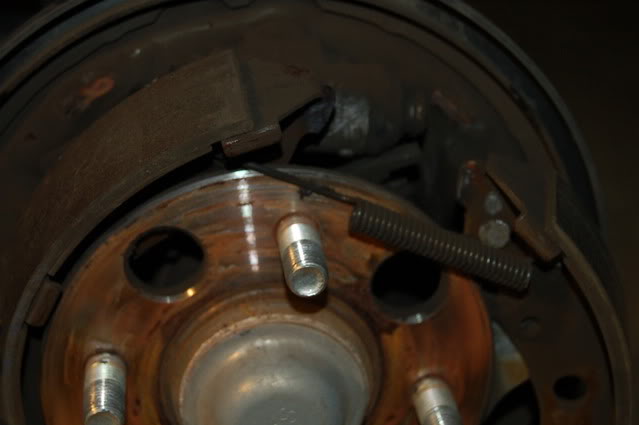
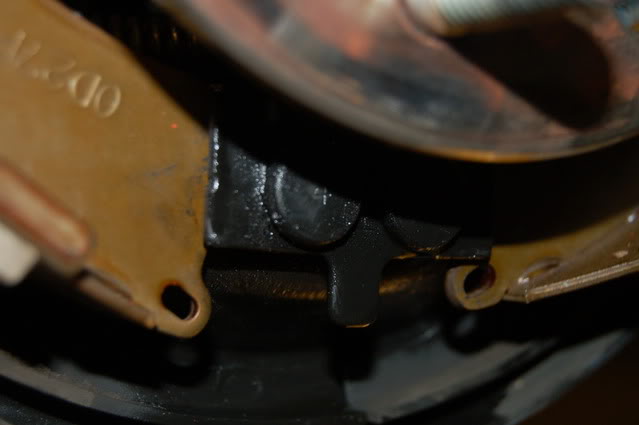
2. This is what you should be looking at. Three springs and two twist tabs are the only things you will take off at this point.

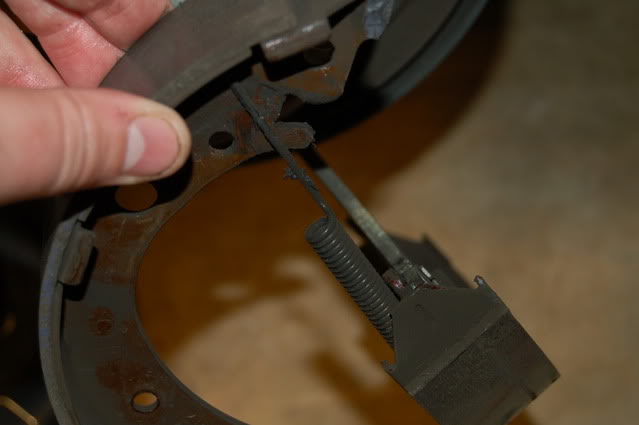
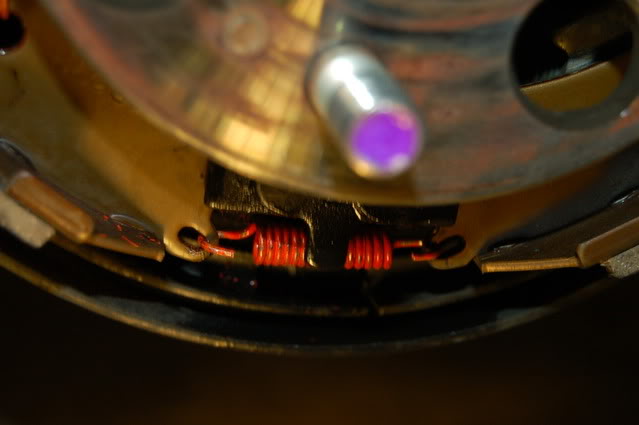
3. Start with the bottom spring. I used a flat head screw driver to pry it back into the hole and push it out.
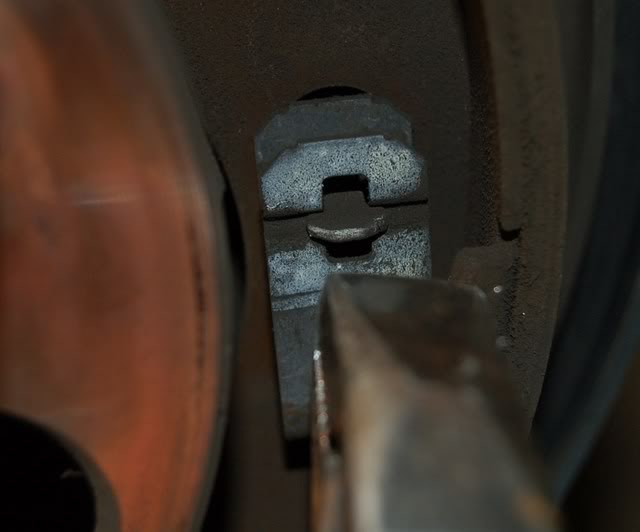
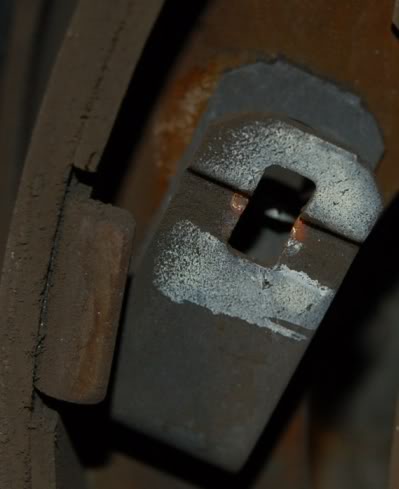
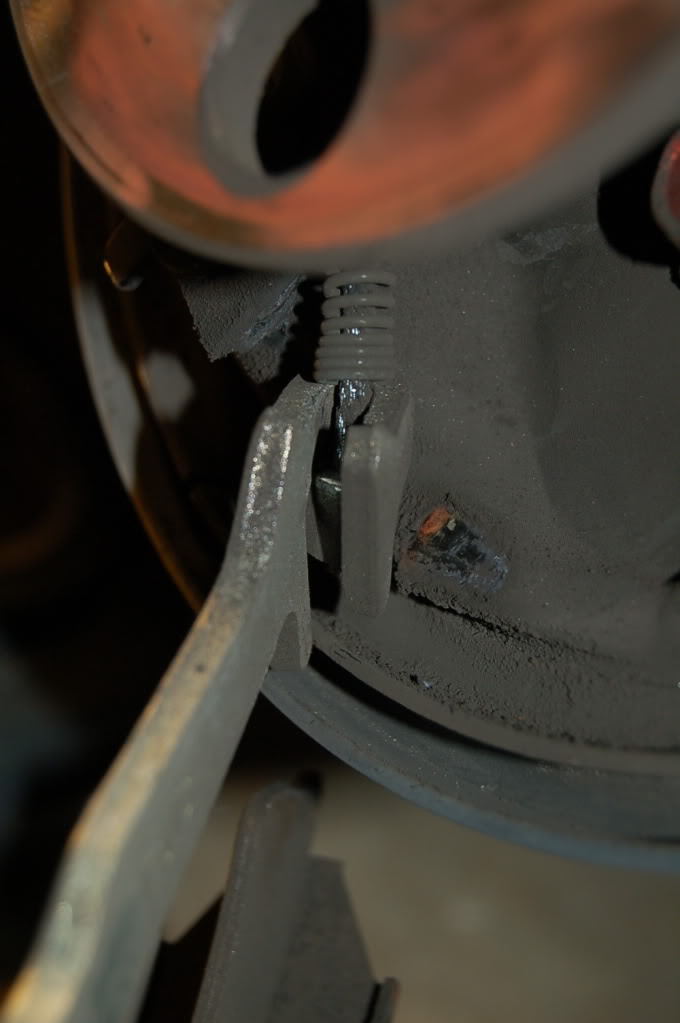
4. I moved on to the side tabs. You twist the center part until it fits into the slot. The pins are pushed in from behind. These can be a pain so twist them in the direction that jams the tabs against the shoe.
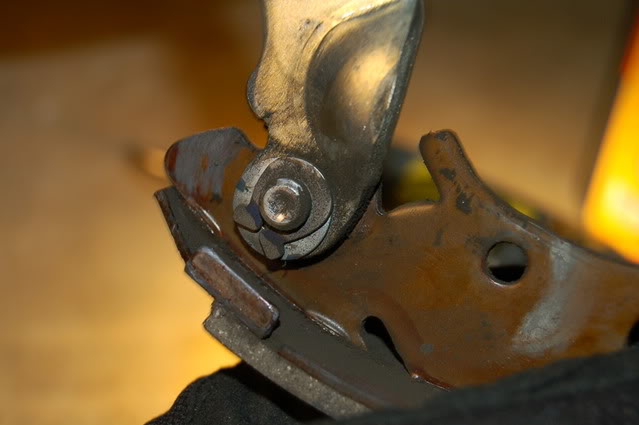
5. Next is the tensioner spring. This is the only easy spring so enjoy.
6. Now you can pull out the shoes, the top spring, and the tensioner all at the same time. The only thing holding all of this to the car is the parking brake.
I bought the shoes from Honda. The spring/retainer/clip kit came from Autozone for 8 bucks.
On with the show:
1. Jack car, remove wheels, and release parking brake. Use a bolt to help push the brake drum off of the hub. There are two holes for this I only needed one to get it off.
2. This is what you should be looking at. Three springs and two twist tabs are the only things you will take off at this point.
3. Start with the bottom spring. I used a flat head screw driver to pry it back into the hole and push it out.
4. I moved on to the side tabs. You twist the center part until it fits into the slot. The pins are pushed in from behind. These can be a pain so twist them in the direction that jams the tabs against the shoe.
5. Next is the tensioner spring. This is the only easy spring so enjoy.
6. Now you can pull out the shoes, the top spring, and the tensioner all at the same time. The only thing holding all of this to the car is the parking brake.
Last edited by caeaves; Mar 1, 2011 at 12:33 AM.
Thread Starter
|
Member
Joined: Sep 2006
Posts: 66
From: Raleigh, NC!!
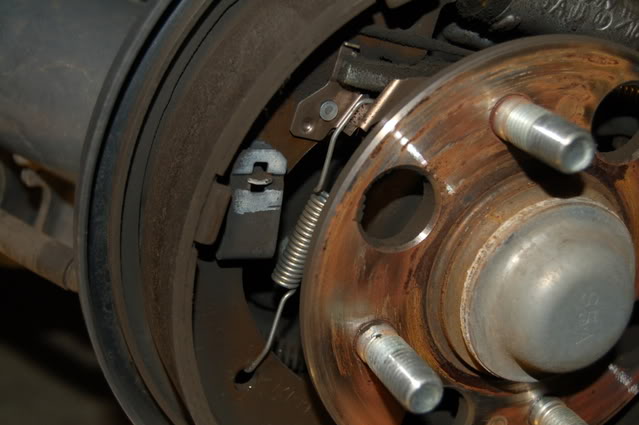
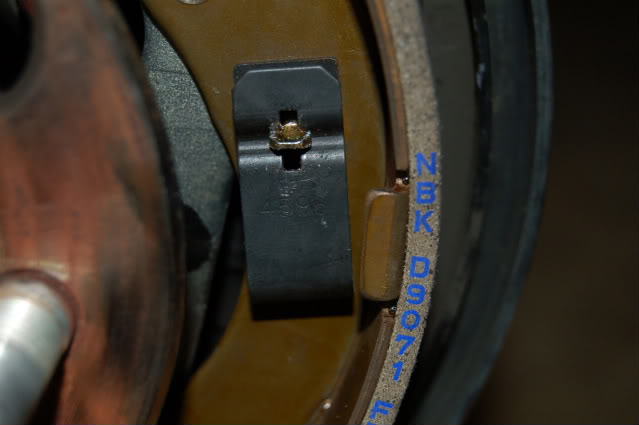
7. This clip needs to be removed to get the shoe off of the parking brake cable. You can buy new ones in the kit or you can carefully remove the clip and reuse it. I had to do one of each because my 8 dollar kit was missing one. Go figure.
8. So now you have everything apart. Try to keep things together so that it makes it easier to put it back the same way. Be careful not to let the brake cylinder get pushed out all the way. It's a mess but it will go right back together. I used anti seize on the brake dust shield on three places per side. Each shoe has three contact points that need to be coated to prevent squealing.
9. Start with the shoe connected to the parking brake. The parking brake arm stays on the inside of the drum.
10. I put the big top spring in first and then put on end on the brake cylinder while holding the other side so it doesn't push out. I then pulled other shoe over to the other side of the cylinder and got them both in place.
11. I used my foot to hold one side of the brakes because they want to flip out due to the upper spring pressure. I put the pin and clip onto the side with the parking brake. This will hold it all in place while allowing you to move the other shoe to insert the tensioner.
12. I slid the tensioner into the side with the parking brake first. Make sure the long part of the rod end is facing out. Now I pulled the other shoe up and out until I could fit the other end of the tensioner rod and tensioner bracket in place. The tensioner bracket should be almost touching the gear teeth. It won't touch it perfectly until all the rest of the pieces are in but you should be close.
13. You can reinstall the tensioner spring at this point.
14. Now it's time to install the bottom spring. This sucker is tough. I pulled the shoe out and closer to the other in order to get the spring installed. Then you can pull the shoes back into place. They go behind the metal at the bottom.
15. The spring goes behind the tab.
I stopped taking pictures at this point. Sorry but I was covered in brake dust and needed to focus on figuring this out.
Last edited by caeaves; Mar 1, 2011 at 12:28 PM.
Thread Starter
|
Member
Joined: Sep 2006
Posts: 66
From: Raleigh, NC!!
So at this point you should have everything back in place. I almost left out the tensioner spring so be thorough. At this point you can test fit the drum. If it doesn't go on easy a spring may be out of place. Don't ask how I know this. The brake should spin freely. Remove the cover and adjust the tensioner out until it gets just a little bit harder to spin but not by much. This will auto-tension itself in time. I pulled the parking brake up and few times between adjustments to make sure everything worked.
Bleeding the brakes is a good idea anytime working with brake but it is especially important if you accidentally open up the wheel cylinders and allow air in.
I had to go back and redo the first side when I realized that the drum cover should go back on fairly easy. I realized that I had put the top spring in the wrong hole. I took pictures as I was doing it to prevent stuff like that from happening. Again, it's a good idea to work on one side at a time.
Last edited by caeaves; Mar 1, 2011 at 01:11 AM.


Thread Starter
|
Member
Joined: Sep 2006
Posts: 66
From: Raleigh, NC!!
Sorry for the late reply...its either a 10 or 12 mm bolt. Usually, you can pull one off of the car and use it. Like the bolts that hold the brake lines or abs lines often works. Gotta love Honda.

Member
Joined: Nov 2009
Posts: 824
From: Atlanta, Georgia
when to change rears?
Hello,
I ordered a set of rear shoes for my 09 that currently has 84,000 on it. Since I had to work on my front pads I figured I'd at least take the drum off and see if replacement was needed.
I compared the two shoes and it didnt seem like a significant difference between them. So I cleaned up the brake dust within the assembly and then tested the parking brake . 5 clicks while rolling before the car comes to a complete stop.
So that said, when should I replace these things? is there some indicator other than mileage?
Thanks
Member
Joined: Mar 2007
Posts: 1,704
From: Second house on the left

Replace them when you hear them grinding. Drum shoe life will depend on how often you adjust them.
Often, owners do not adjust them, ever. Then, the front pads do most of the work and the rear shoes last FOREVER.
I adjust our rear drums (using the star wheel to position the shoes close to the drum) every 25K miles or so. The Fit stops on a dime when the rear brakes are actually helping to slow down.

Member
Joined: Dec 2007
Posts: 500
From: Los Angeles
I think I'm going to have to get into this tomorrow. Hearing squealing noise intermittently.
Anybody have part numbers for Front Pads and Rear Shoes? Mine's an '08 Fit. Parts guy at Honda of Hollywood said that '96 Civic shoes were the same for my car, but why trust him?
Anybody have part numbers for Front Pads and Rear Shoes? Mine's an '08 Fit. Parts guy at Honda of Hollywood said that '96 Civic shoes were the same for my car, but why trust him?


Member
Joined: Aug 2006
Posts: 311
From: Minneapolis, Minnesota
Replace them when you hear them grinding. Drum shoe life will depend on how often you adjust them.
Often, owners do not adjust them, ever. Then, the front pads do most of the work and the rear shoes last FOREVER.
I adjust our rear drums (using the star wheel to position the shoes close to the drum) every 25K miles or so. The Fit stops on a dime when the rear brakes are actually helping to slow down.
Often, owners do not adjust them, ever. Then, the front pads do most of the work and the rear shoes last FOREVER.
I adjust our rear drums (using the star wheel to position the shoes close to the drum) every 25K miles or so. The Fit stops on a dime when the rear brakes are actually helping to slow down.
Where is the wheel?
Thanks
Member
Joined: Dec 2007
Posts: 500
From: Los Angeles
Thanks. I forgot about that site.
So, with regard to brake shoes: The two halves on each side (total of 4 pieces) are identical? I ask because handpartsdeals seems to offer just a set of 4 of the same thing.
Member
Joined: Mar 2007
Posts: 1,704
From: Second house on the left
In the first picture in this Topic, (step 2) the star wheel is below the wheel cylinder. You can only see the ends of it behind the words "remove second".
IIRC there is a rubber plug on the backside of the brake to access the adjuster. If the wheel hub is rotated in that first picture, the adjuster (Star Wheel) would be visible through the holes.
++++++
Regarding the self-adjusting: They may adjust somewhat, but a periodic manual adjustment is more effective, IMO.