
DIY: Torque Solution Shifter Cable Bushings Install (With Pics)


DIY: Torque Solution Shifter Cable Bushings Install (With Pics)
Alrighty guys. I installed these bushings today and figured I would make a DIY for you guys. Now, before it is said I know there is already one or two for these bushings, but none have pictures and I figured I would try to add some to help out the guys who aren't as comfortable with DIY work.
Now that they are a sponsor, I will mention I picked up my bushings from http://www.jbautosports.com
You will notice in the pictures some conflicting order information. This is because I started off removing the air box first and then realized that isn't ideal. I am posting the procedure in the order I recommend completing it.
Tools Needed
1/4" or 3/8" Ratchet
10mm Socket
12mm Socket
Phillips Screwdriver
Needle Nose Pliers
Ready to get started?
Procedure
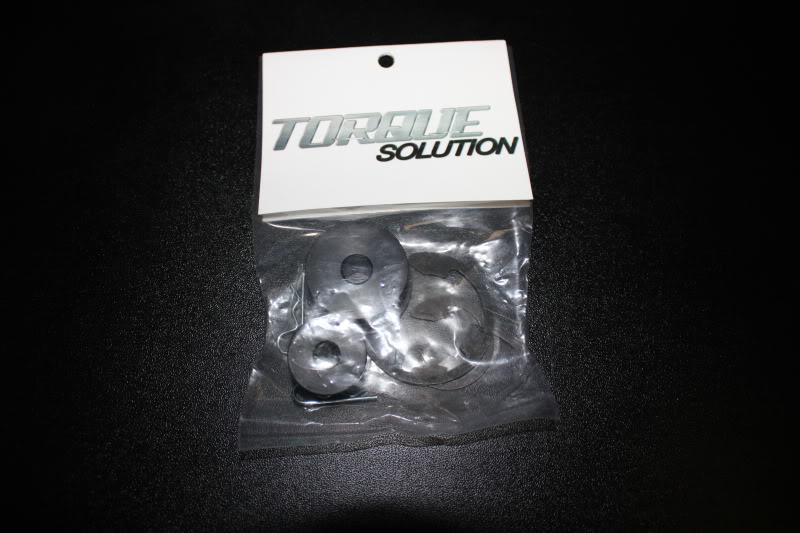
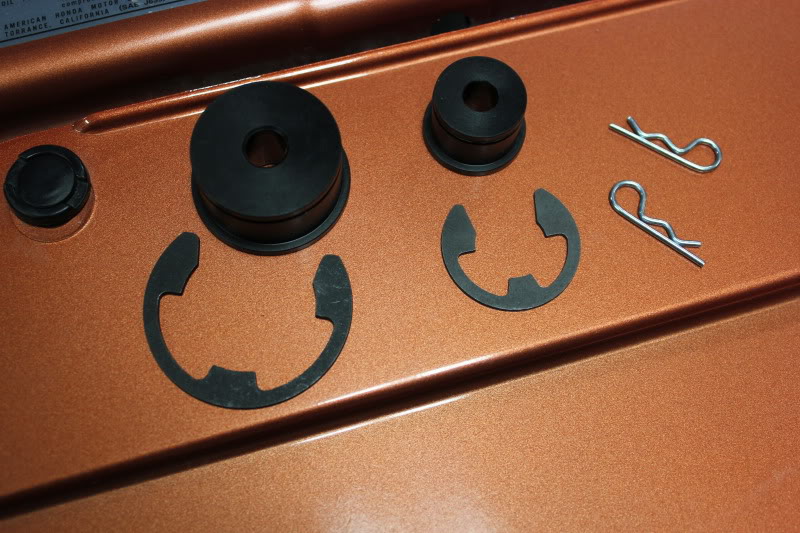
Here are a couple pictures of the parts included.
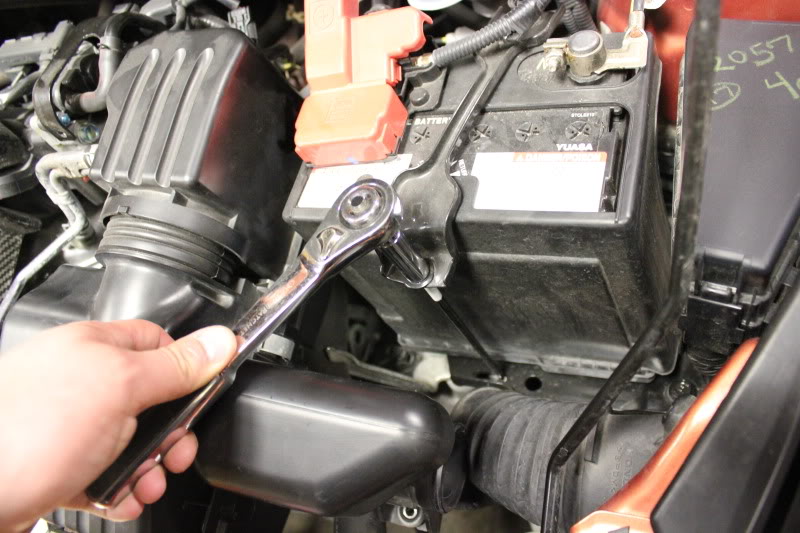
#1 - Using a 10mm socket, remove the battery tie down.
#2 - Move the tie down out of the way and using the same 10mm socket loosen the battery terminals.
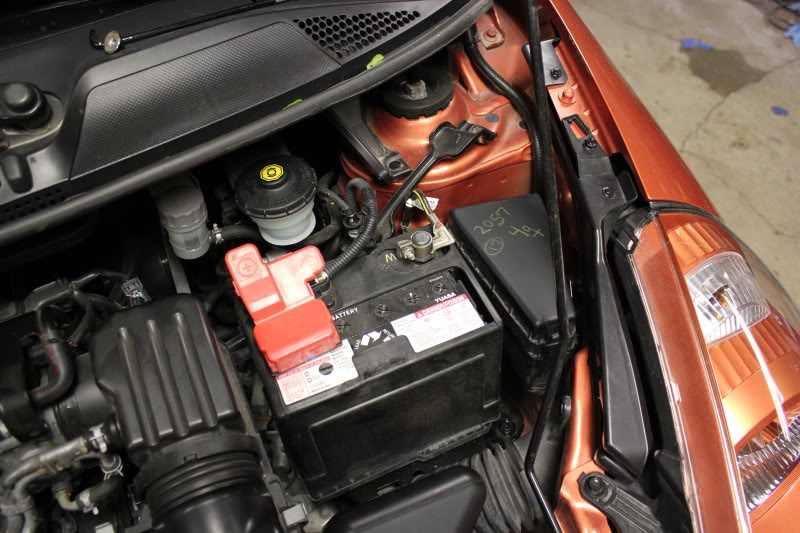
#3 - Remove the battery itself from the tray. Then using a 12mm socket, take out the three bolts holding in the battery tray and remove it.
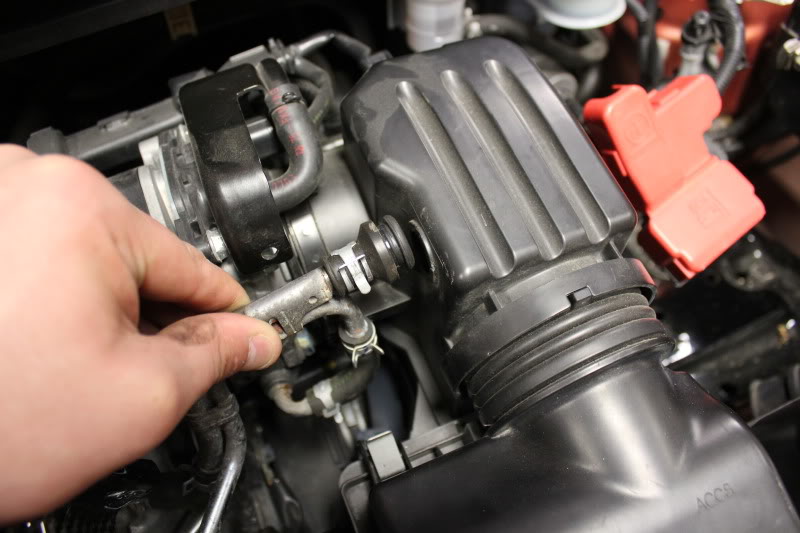
#4 - Again using your 10mm remove the two bolts on the air box assembly.
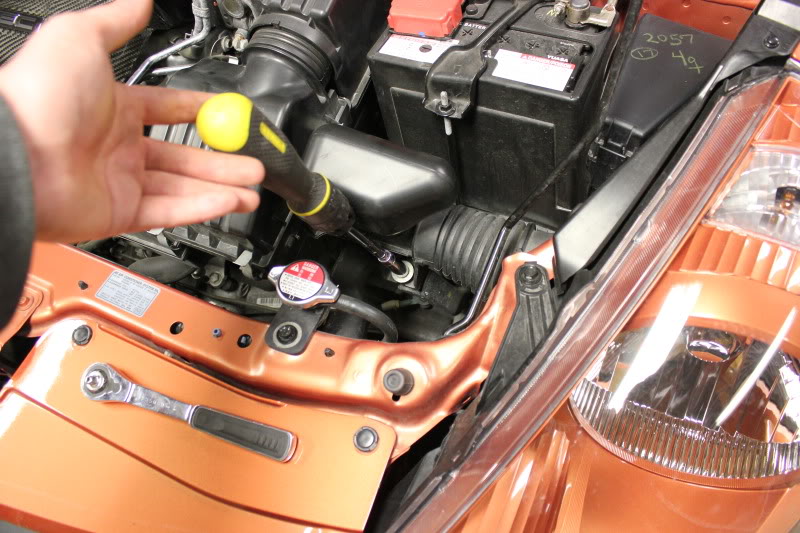
#5 - Using a Phillips screwdriver remove the bolt clamping the box over the throttle body.
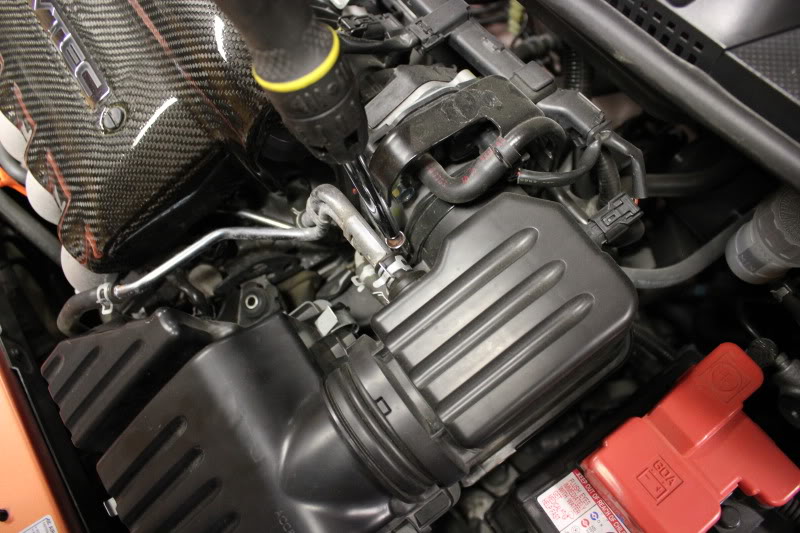
#6 - Unclip the electrical connector on the back of the air box.
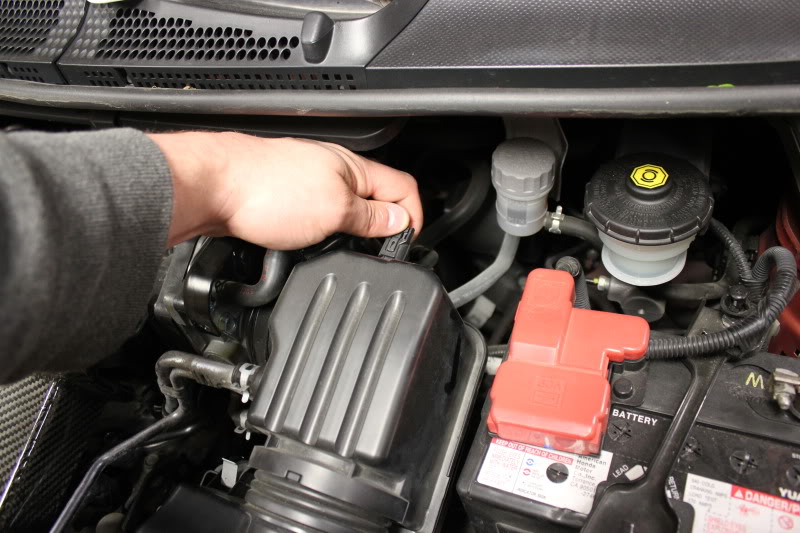
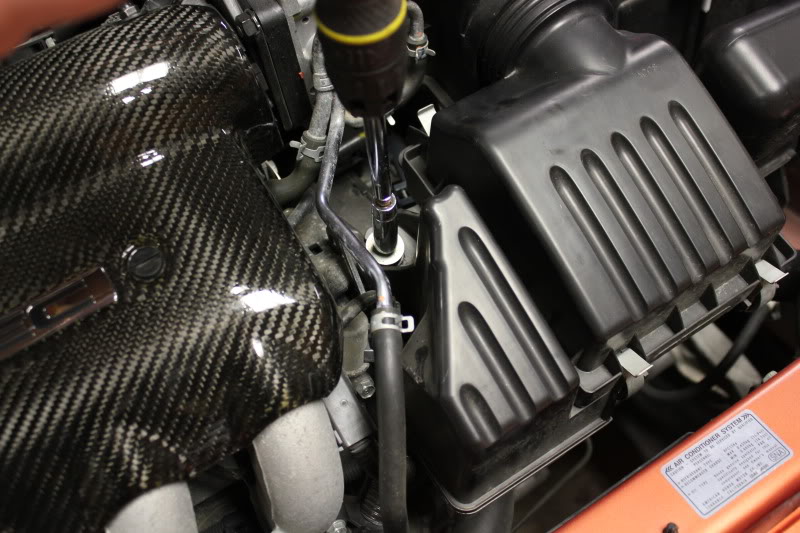
#7 - Remove the air hose going into the air box by clamping the clip together.
#8 - Remove the front hose leading to the actual opening of the intake from the air box.
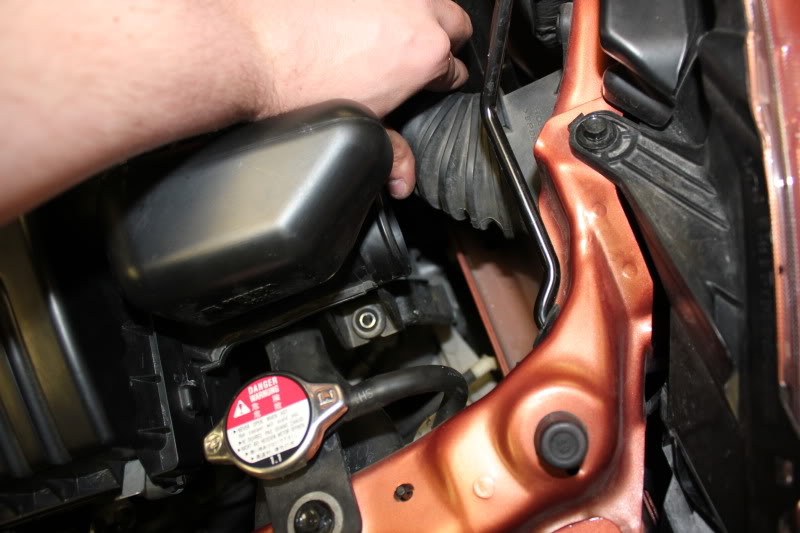
# 8.5 - You now safely remove the airbox assembly.
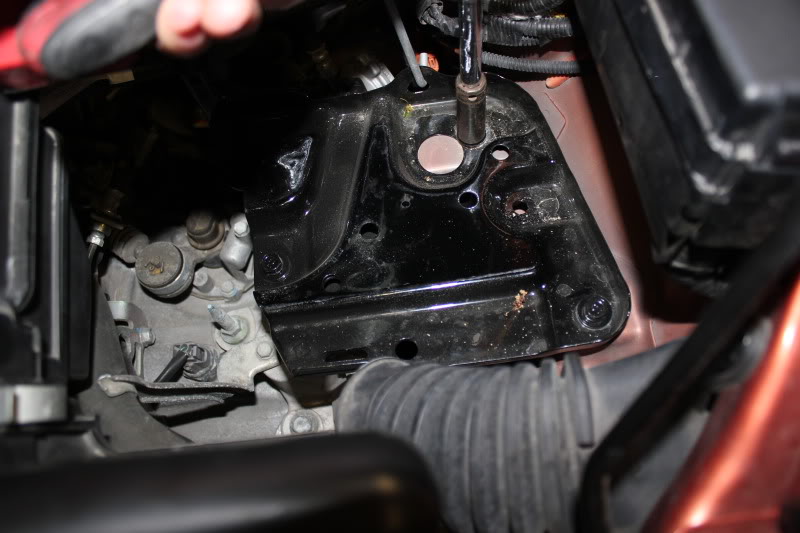
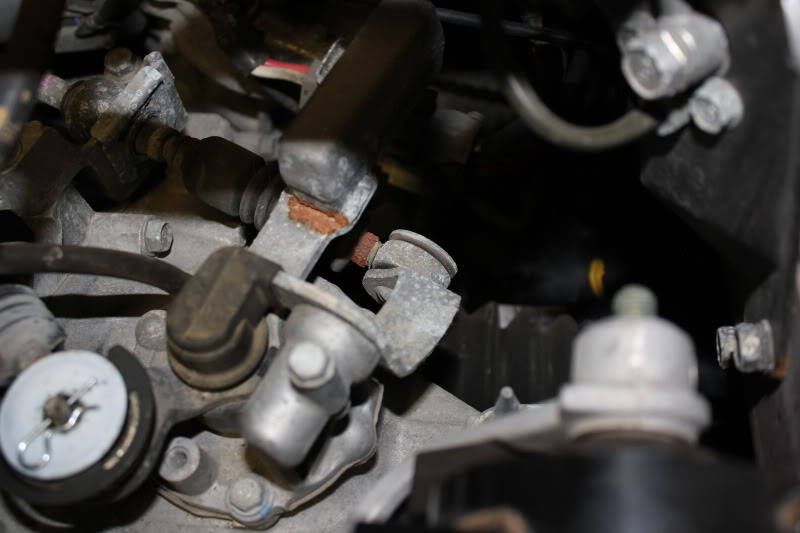
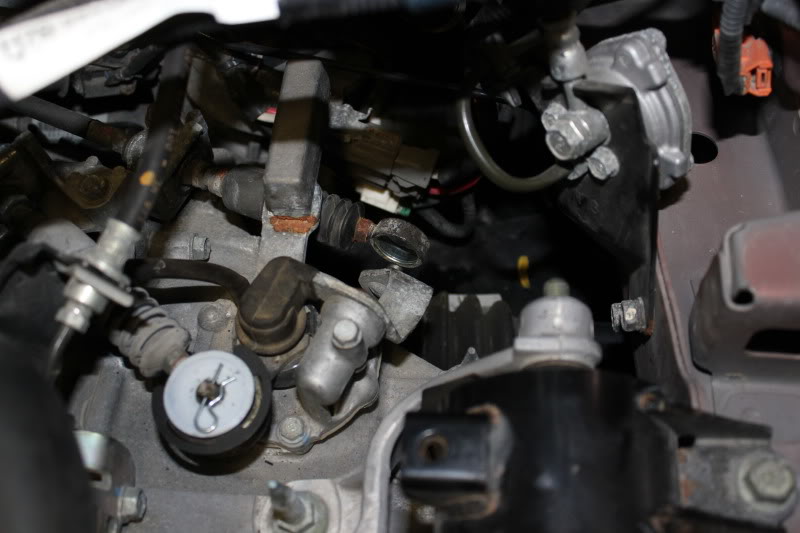
#9 - Now you can see what we are trying to get to.
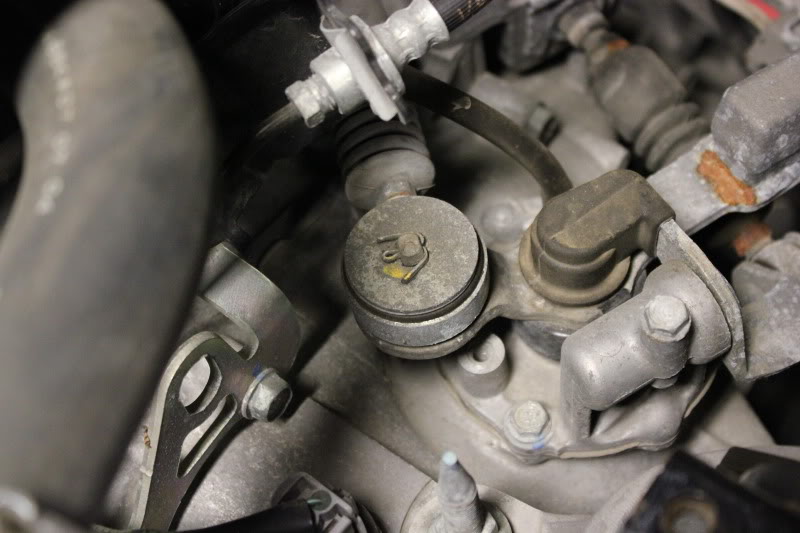
#10 - Remove the cotter pin that is place. You can straighten it and remove it or do what I did and wiggle the arms until they break off and then simply remove the remaining bit. The cable will come off the spindle with a metal and plastic washer.
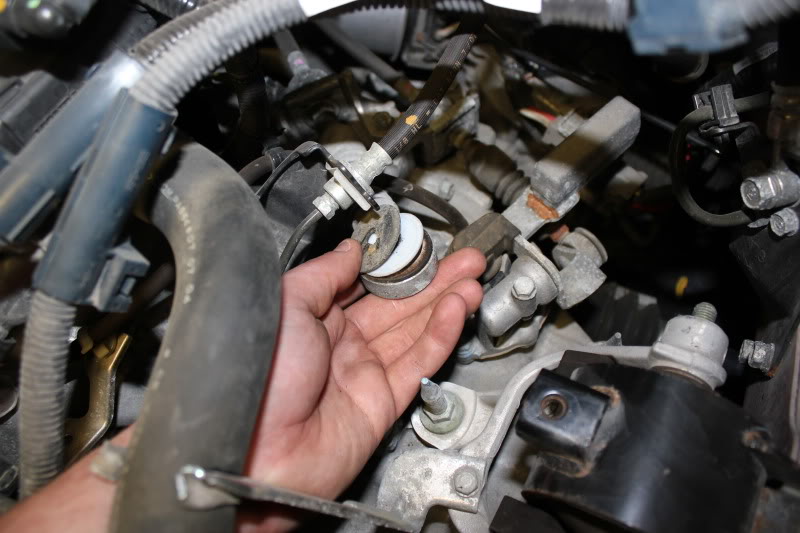
#11 - Using your fingers, pliers or whatever it taked push the rubber pushing out from around the cable end.
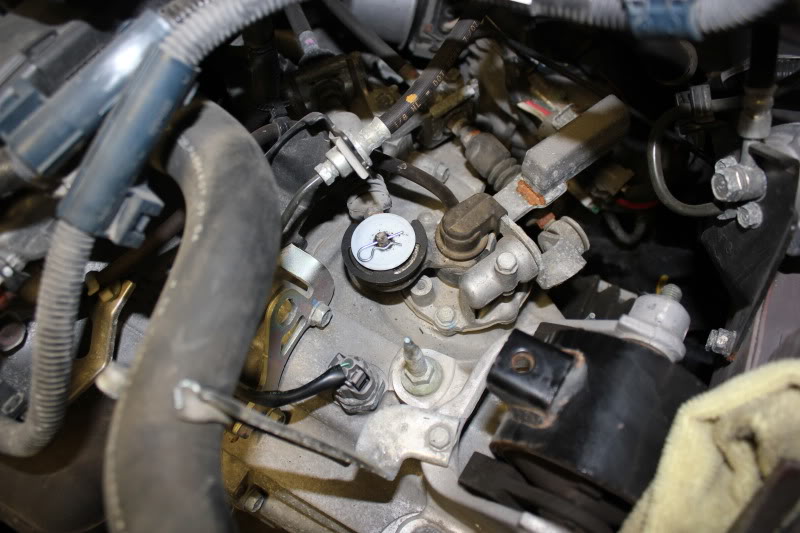
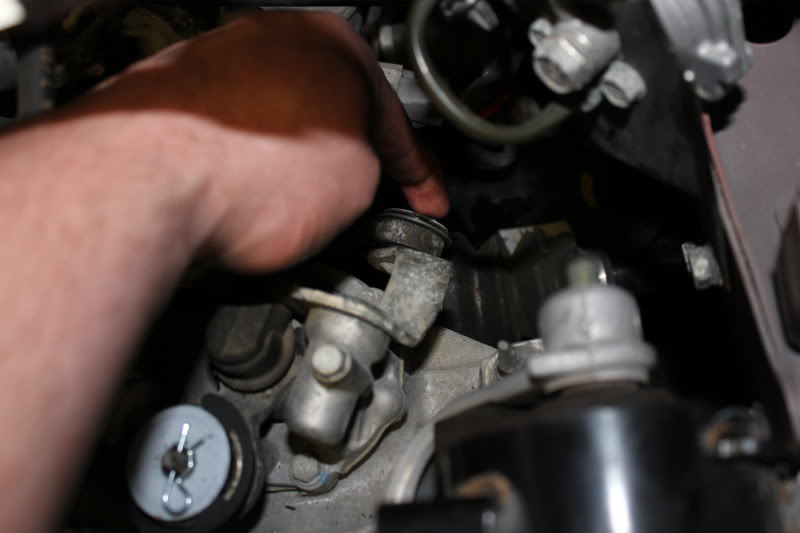
#12 - Now install the new bushing on the spindle with the larger portion on the transmission so the c-clip will be attached on top. Push the cable end over the new bushing and install the c-clip in place. Put the plastic washer back on top of the new bushing and install the cotter pin.
One down, one to go.
This next one is a little bit more of a pain. You are going to be working basically blind. The steps are the same, just you will now have a bit more of a tough time if you are like me. My advice is to be patient, take a break if needed. Getting frustrated and banging things around can do some damage to these components.
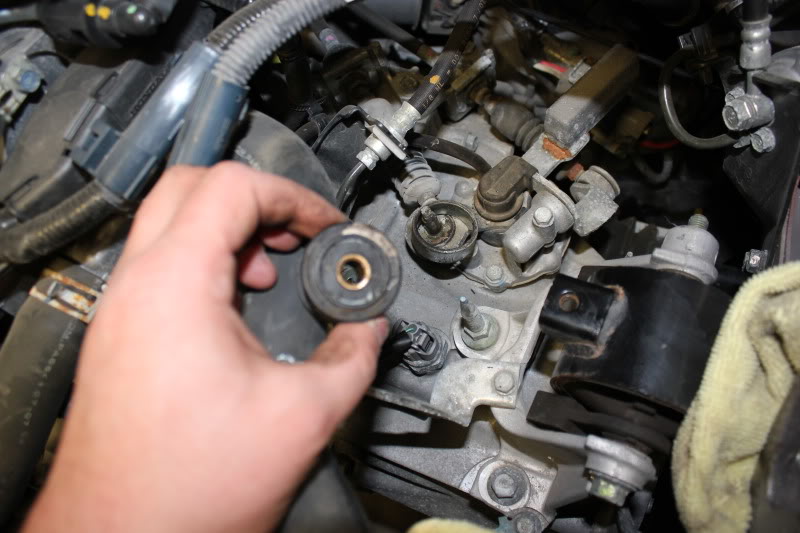
#13 - Locate the smaller shifter cable and bushing.
#14 - Following the same steps above remove the bushing from the cable end.
#15 - Again following the steps for the previous bushing, install your new bushing.
#16 - At this point simply sit in your car (DO NOT START IT) and run through the gears to make sure everything operates smoothly.
#17 - If all is well, reinstall everything by following the steps above in reverse.
That completes the install. You should notice a more solid shifter feel. In my experience the gears engaged more easily and when completing the shifts the shifter had a more solid feel once all the way into gear. Basically the shifter feels more like that of a high end sports car.
Enjoy!
Now that they are a sponsor, I will mention I picked up my bushings from http://www.jbautosports.com
You will notice in the pictures some conflicting order information. This is because I started off removing the air box first and then realized that isn't ideal. I am posting the procedure in the order I recommend completing it.
Tools Needed
1/4" or 3/8" Ratchet
10mm Socket
12mm Socket
Phillips Screwdriver
Needle Nose Pliers
Ready to get started?
Procedure
Here are a couple pictures of the parts included.
#1 - Using a 10mm socket, remove the battery tie down.
#2 - Move the tie down out of the way and using the same 10mm socket loosen the battery terminals.
#3 - Remove the battery itself from the tray. Then using a 12mm socket, take out the three bolts holding in the battery tray and remove it.
#4 - Again using your 10mm remove the two bolts on the air box assembly.
#5 - Using a Phillips screwdriver remove the bolt clamping the box over the throttle body.
#6 - Unclip the electrical connector on the back of the air box.
#7 - Remove the air hose going into the air box by clamping the clip together.
#8 - Remove the front hose leading to the actual opening of the intake from the air box.
# 8.5 - You now safely remove the airbox assembly.
#9 - Now you can see what we are trying to get to.
#10 - Remove the cotter pin that is place. You can straighten it and remove it or do what I did and wiggle the arms until they break off and then simply remove the remaining bit. The cable will come off the spindle with a metal and plastic washer.
#11 - Using your fingers, pliers or whatever it taked push the rubber pushing out from around the cable end.
#12 - Now install the new bushing on the spindle with the larger portion on the transmission so the c-clip will be attached on top. Push the cable end over the new bushing and install the c-clip in place. Put the plastic washer back on top of the new bushing and install the cotter pin.
One down, one to go.
This next one is a little bit more of a pain. You are going to be working basically blind. The steps are the same, just you will now have a bit more of a tough time if you are like me. My advice is to be patient, take a break if needed. Getting frustrated and banging things around can do some damage to these components.
#13 - Locate the smaller shifter cable and bushing.
#14 - Following the same steps above remove the bushing from the cable end.
#15 - Again following the steps for the previous bushing, install your new bushing.
#16 - At this point simply sit in your car (DO NOT START IT) and run through the gears to make sure everything operates smoothly.
#17 - If all is well, reinstall everything by following the steps above in reverse.
That completes the install. You should notice a more solid shifter feel. In my experience the gears engaged more easily and when completing the shifts the shifter had a more solid feel once all the way into gear. Basically the shifter feels more like that of a high end sports car.
Enjoy!
Last edited by Funkster; May 18, 2012 at 11:39 AM.


Hope all goes well with the install. Don't worry, I have been the guy under his hood at midnight dozens of times.

It is a nice little upgrade for sure.


So the main function of the bushings would be the same and in that regard I imagine so would the end result.
However, the brass ones may cause there to be a more "weighted" feel on the shifts. I track and daily drive my Fit and the Torque Solutions pieces have made me happy.
CorSport: Honda - 2007-2008 Honda Fit - 1000.001
Member
Joined: Mar 2009
Posts: 146
From: westerville, oh
the ones i got, are metal but not brass... the weight increase was nice, i think the brass might be ok if you're going to stay with a stock knob and shifter...
CorSport: Honda - 2007-2008 Honda Fit - 1000.001
CorSport: Honda - 2007-2008 Honda Fit - 1000.001