JDM red badge DIY *warning* lots of pics
#41
 01-06-2009, 03:57 PM


Join Date: Feb 2008
Location: Long Island
Posts: 1,088

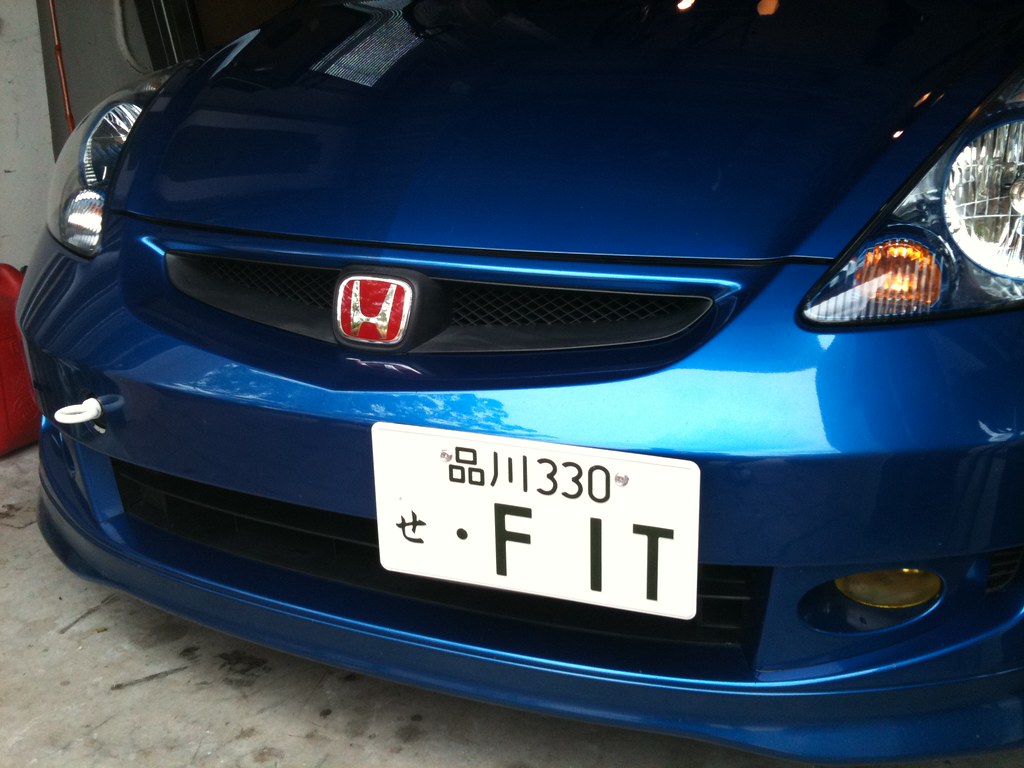
just measure the H badges that came on your car and base it off that.

#44
01-21-2009, 06:17 AM
I used a different front badge to what most people use.
For the rear I used P/N - 75701-S6M-Z01
And the front I used P/N-75700-SMT-E00
The front badge is the exact fit for the jazz/fit grille.
Its also curved so the only part you have to sand off the grille is the little nobbly bits the old pins went into.
For the rear I used P/N - 75701-S6M-Z01
And the front I used P/N-75700-SMT-E00
The front badge is the exact fit for the jazz/fit grille.
Its also curved so the only part you have to sand off the grille is the little nobbly bits the old pins went into.


#47
08-08-2009, 11:57 AM
Yes, pretty much sanding is the only way if you want the emblem to stick right. Not sure of any model Honda out there will work perfect for it or not. I doubt it otherwise Jdmland/icb would of had them.
If you decide to do it without a dremel get very coarse sand paper. I used 3M 60 grit automotive sandpaper. (Green) and it took a little while. If you have the money, get a dremel, if not get some 60 grit or below and some elbow grease.
If you decide to do it without a dremel get very coarse sand paper. I used 3M 60 grit automotive sandpaper. (Green) and it took a little while. If you have the money, get a dremel, if not get some 60 grit or below and some elbow grease.
Last edited by Fitguy07; 08-09-2009 at 07:24 PM.


#51
01-15-2010, 10:28 PM
Yea, I want to do mine--I remember the GE thread but haven't seen it in a while.
Hmm...searching...
Hmm...searching...
#52
01-15-2010, 11:09 PM
Hey I found it here it is in case anyone needs it. https://www.fitfreak.net/forums/2nd-...m-emblems.html


#57
04-20-2010, 04:01 PM
I think they should make one for all GE8 09-10, and one for Gd3 07-08, so that ppl know where to find them when they need a DIY Thread. it seem like theres not alot for Ge8 thread how to diy to replace your jdm red h emblems?...just my $0.02 cents:}
#58
11-14-2010, 02:30 AM

Red H Badges off of eBay + '10 Rear badge -DOESNT FIT!
Arrived quickly - did all the prep work (cutting off the two tabs, removing grill, cleaning area, etc). Placed them on. Front went on well, the back however is SO OFF (I have a '10 Fit Sport). It's at LEAST 1/4" off because of the curveature. So if you place the rear badge on, you can either have the top part of the H stick or the bottom. I figured the TOP would be best to allow the rain or water to fall over it.
in just TWO DAYS, the badges were falling off. I had to keep on "pushing" them on. Got sick of it, so I removed them (it was SO EASY) , and just removed the 3m tape (which took 30 seconds).
Purcahsed 3m tape from my local NAPA store then redid it myself. I also compensated (added more tape) towards the bottom of the rear badge to take care of the space issue.
It's now SOLID. no movement at ALL.. which is how is suppose to be.
Anyone else have this issue??

