
DIY: Painted Tail Lights


Thread Starter
|
Member
Joined: Sep 2007
Posts: 30
From: SOFL
DIY: Painted Tail Lights
DISCLAIMER: ONLY ATTEMPT THIS AT YOUR OWN RISK, HAVE ALL THE TOOLS NECESSARY TO DO THE JOB PROPERLY. ONLY ATTEMPT IF YOU ARE COMFORTABLE WITH DIY PROJECTS AND HAVE SOME SORT OF MECHANICAL EXPERIENCE.
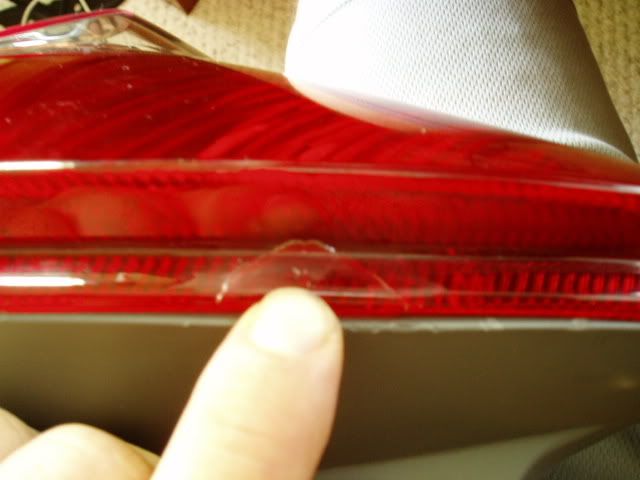
First off, this is not an easy task. If you are impatient, I don't recommend this modification. It takes time and patience to remove the lens from the taillight housing. A lot more than the headlights. It is very easy to crack the lens. Some have completely broken a corner of the lens. I even chipped a portion of the lens as shown below.
If you are willing to risk breaking the lens, by all means, continue....
1) Remove the tailights: https://www.fitfreak.net/forums/fit-yourself-discuss-do-yourself-repair-maintenance/11396-diy-taillight-install.html?highlight=rear+bumper+remove
There is 1 screw and 3 nuts holding the taillight to the body. The above post is missing a couple of pictures so I will provide them here.
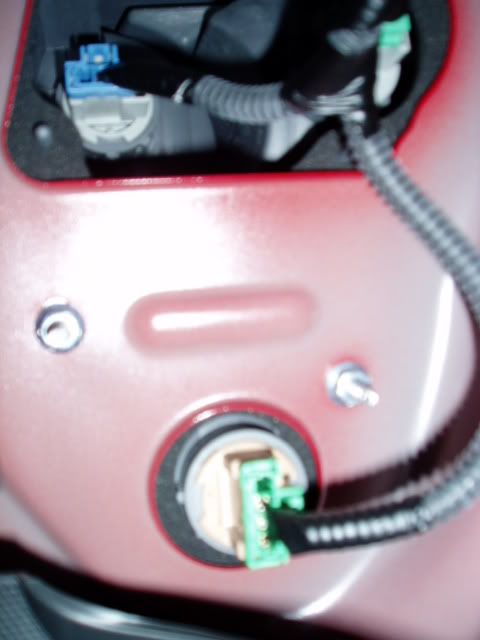
2 on the bottom behind the light:
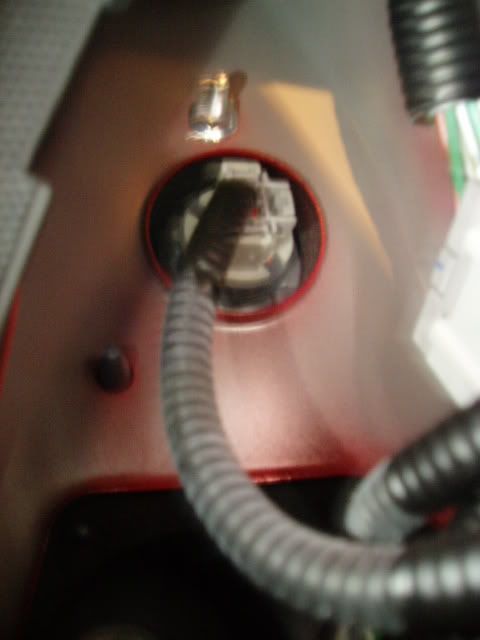
and 1 on top:
You should be left with:

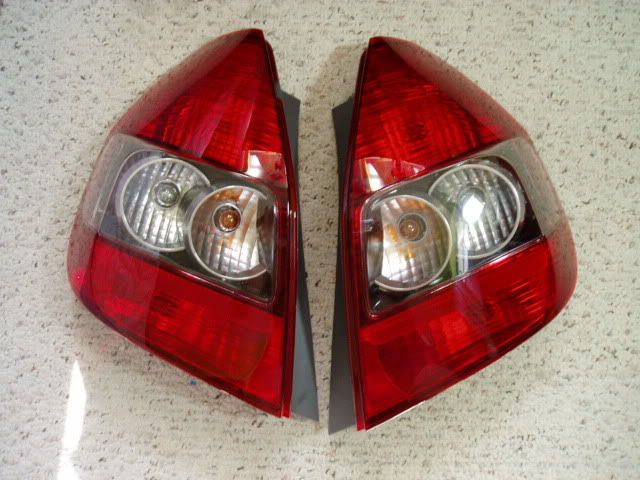
2) Remove the lens
Since I have a heat gun, I used it to heat the seal from the housing side. I do not recommend putting these things in the oven. I had to constantly use the heat gun over and over to get the lens off. The material used to seal the lens to the housing is tough! The headlights were a piece of cake compared to these.
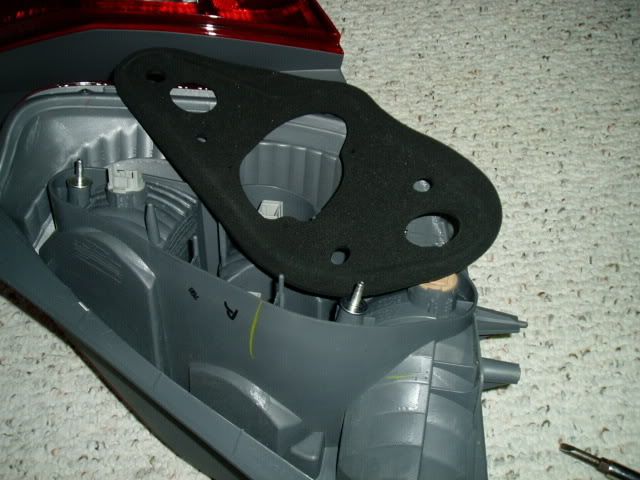
Remove these, or they will burn:
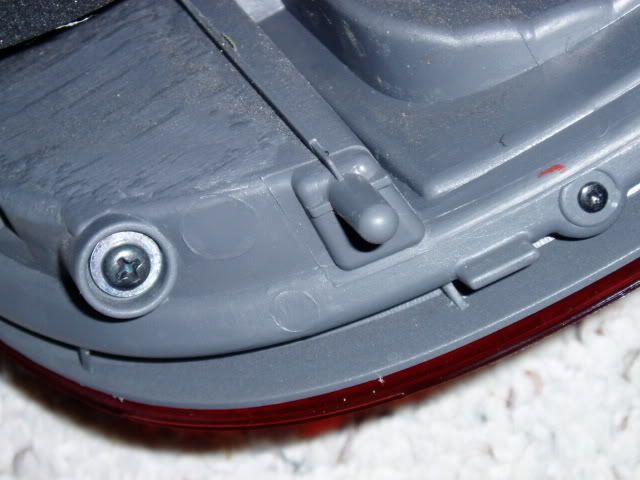
There are 3 screws, but you will only need to remove 2 of them. Remove the two tiny torx head screws with a T-"very small" torx wrench or a small flat head. The picture shows 2 of the three screws. Only remove the smaller ones.
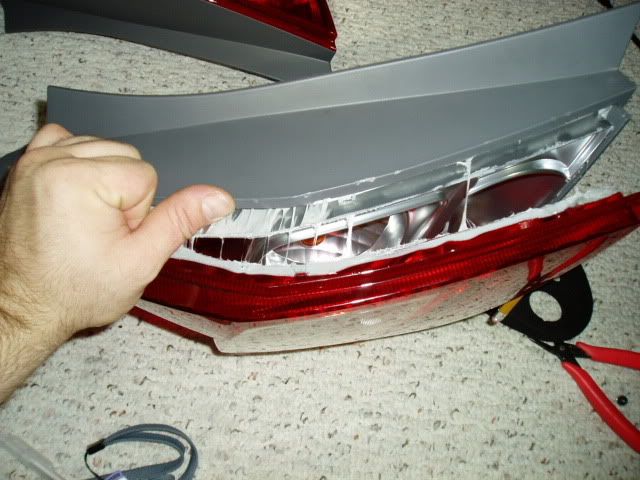
Heat the edges of the housing, but not the lens, or it will become very soft and may become disfigured or just plain melt. If you are going to pry, use something wide...not a flat head screwdriver. Or this will happen:
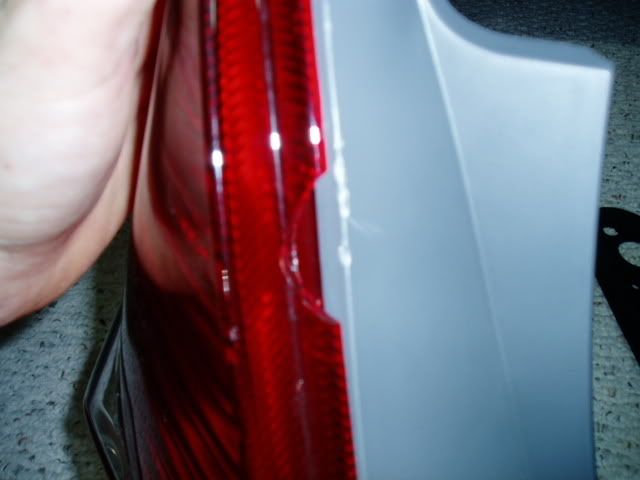
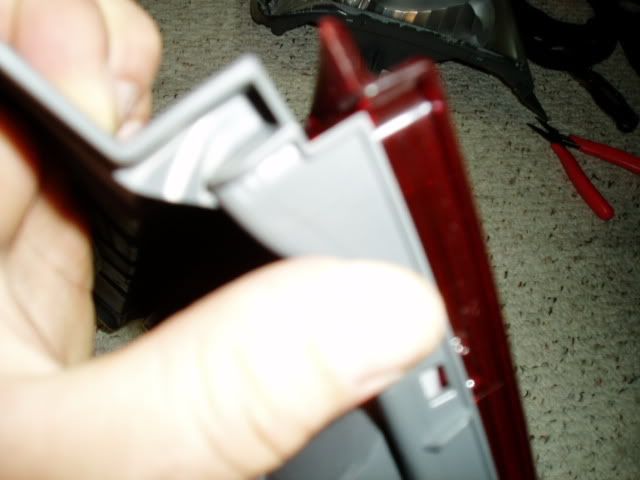
It's going to take a while to get this thing open. Work carefully without applying too much force. Don't rush it! As soon as there is a gap between the lens and the housing, put something in the gap.
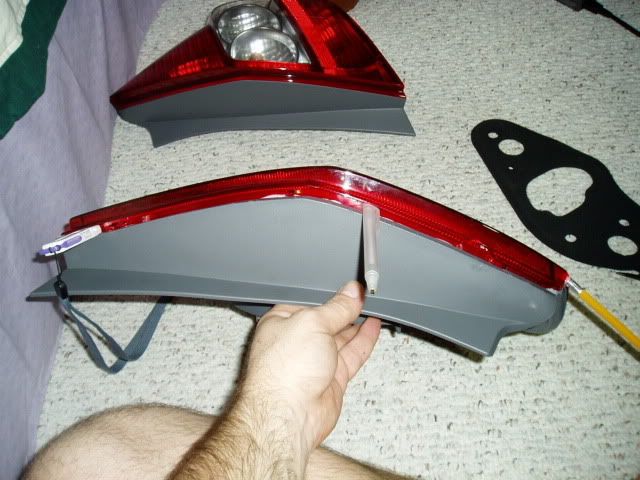
As you work around, be careful of the plastic tabs. I found it necessary to bend the gray plastic down to get it to release from the tab. The whole process should start on this side, that normally is closer to the hatch. If you start on the outer side, something will break.
The first side of the lens will release parallel to the housing. The other side is not so friendly. It also pulls out parallel, but perpendicular to the first side. Just be careful...
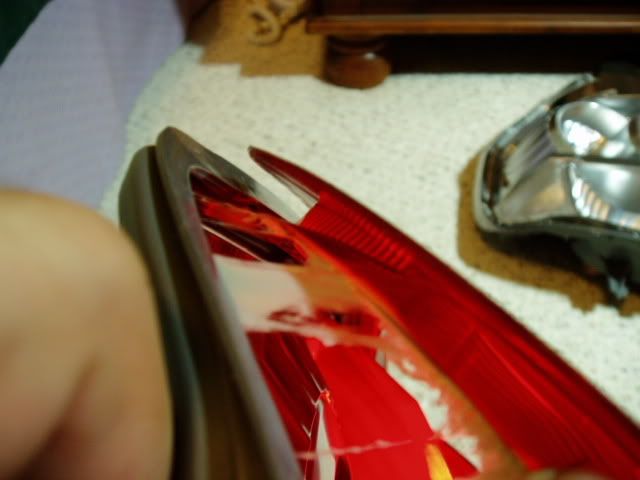
Once the seal begins to separate, run a razor blade down it:

Success!!!

Put the lens somewhere where it cannot collect dust.
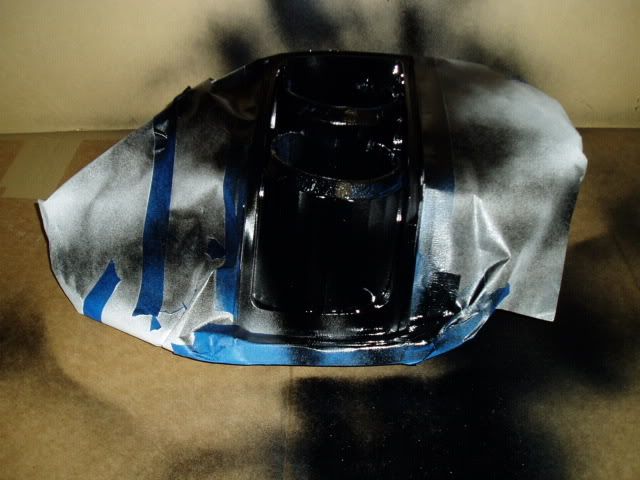
3) Mask
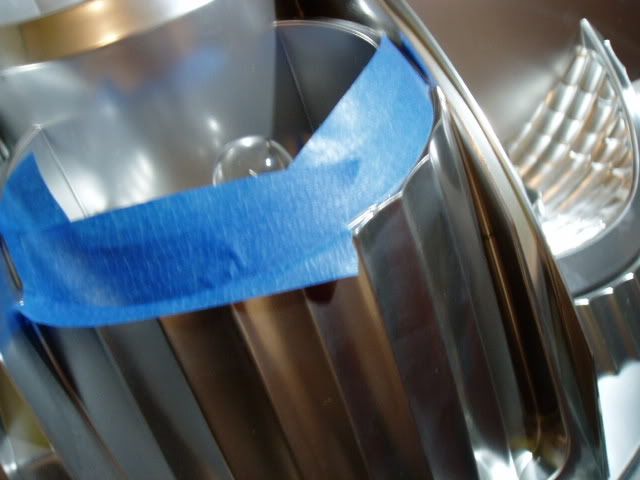
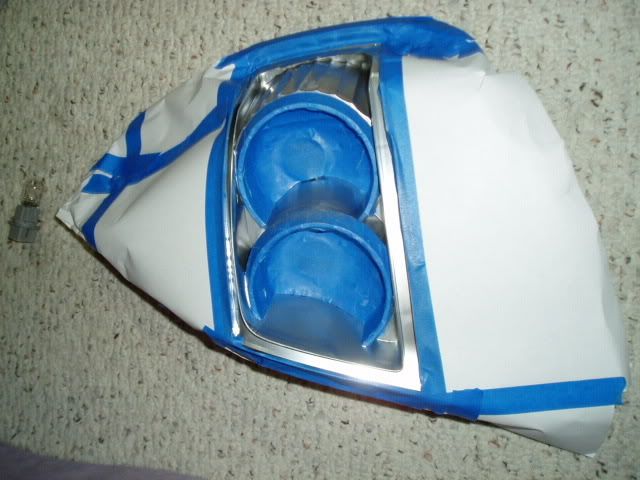
Pull out your masking tape, the blue stuff, and begin masking.....I used a ton of small pieces of tape and a sharp razor blade to do the trimming. The outer reflector ring is easy, there is a guide to trim the curve, the inside reflector requires some precision:
In the paint booth....I had some bond-aid and semi-gloss engine enamel left over from the retro:
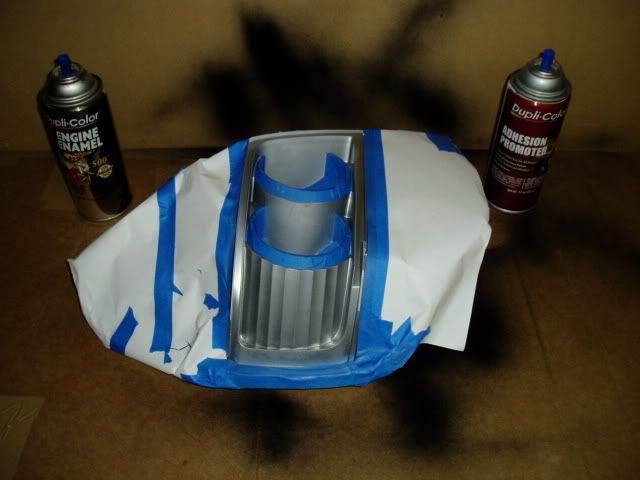
2 light coats, one medium coat:
So far, I have spent 6 hours...
Now I will let them cure while I sleep!
To be continued.......in the morning/afternoon
First off, this is not an easy task. If you are impatient, I don't recommend this modification. It takes time and patience to remove the lens from the taillight housing. A lot more than the headlights. It is very easy to crack the lens. Some have completely broken a corner of the lens. I even chipped a portion of the lens as shown below.
If you are willing to risk breaking the lens, by all means, continue....
1) Remove the tailights: https://www.fitfreak.net/forums/fit-yourself-discuss-do-yourself-repair-maintenance/11396-diy-taillight-install.html?highlight=rear+bumper+remove
There is 1 screw and 3 nuts holding the taillight to the body. The above post is missing a couple of pictures so I will provide them here.
2 on the bottom behind the light:
and 1 on top:
You should be left with:
2) Remove the lens
Since I have a heat gun, I used it to heat the seal from the housing side. I do not recommend putting these things in the oven. I had to constantly use the heat gun over and over to get the lens off. The material used to seal the lens to the housing is tough! The headlights were a piece of cake compared to these.
Remove these, or they will burn:
There are 3 screws, but you will only need to remove 2 of them. Remove the two tiny torx head screws with a T-"very small" torx wrench or a small flat head. The picture shows 2 of the three screws. Only remove the smaller ones.
Heat the edges of the housing, but not the lens, or it will become very soft and may become disfigured or just plain melt. If you are going to pry, use something wide...not a flat head screwdriver. Or this will happen:
It's going to take a while to get this thing open. Work carefully without applying too much force. Don't rush it! As soon as there is a gap between the lens and the housing, put something in the gap.
As you work around, be careful of the plastic tabs. I found it necessary to bend the gray plastic down to get it to release from the tab. The whole process should start on this side, that normally is closer to the hatch. If you start on the outer side, something will break.
The first side of the lens will release parallel to the housing. The other side is not so friendly. It also pulls out parallel, but perpendicular to the first side. Just be careful...
Once the seal begins to separate, run a razor blade down it:
Success!!!
Put the lens somewhere where it cannot collect dust.
3) Mask
Pull out your masking tape, the blue stuff, and begin masking.....I used a ton of small pieces of tape and a sharp razor blade to do the trimming. The outer reflector ring is easy, there is a guide to trim the curve, the inside reflector requires some precision:
In the paint booth....I had some bond-aid and semi-gloss engine enamel left over from the retro:
2 light coats, one medium coat:
So far, I have spent 6 hours...
Now I will let them cure while I sleep!
To be continued.......in the morning/afternoon
Thread Starter
|
Member
Joined: Sep 2007
Posts: 30
From: SOFL
After the paint has dried, begin removing the mask:
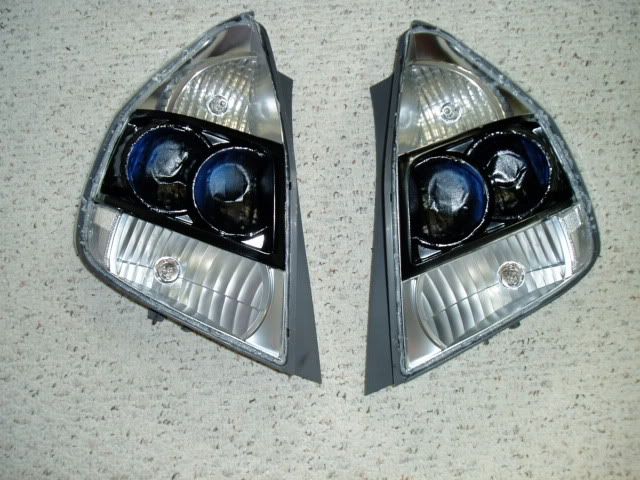
Both are now ready to be reassembled. Grab the heat gun and begin warming up the edges of the housing. At this point you can add some other sealant if you wish. I choose not too. The assembly is infinitely easier than the removal. Make sure all surfaces are clean before you put the lens back on. Do not use alcohol as this will remove the reflective surface from the housing. Place both sides together and press. Use the heat gun as necessary. Re-install the screws you removed earlier. Both sides together:
Be sure to put the foam seal back on the housing before installation, or you will have to take off the bumper and remove the headlights like I did...
I used JB Weld to fix the cracked portion from before:
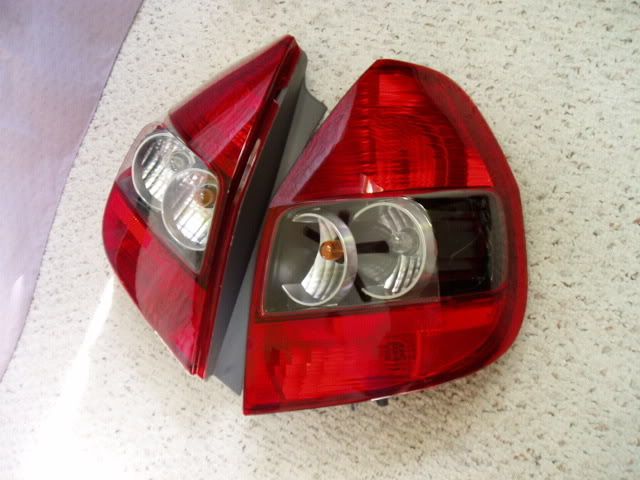
Install the tail lights back into the car and enjoy:
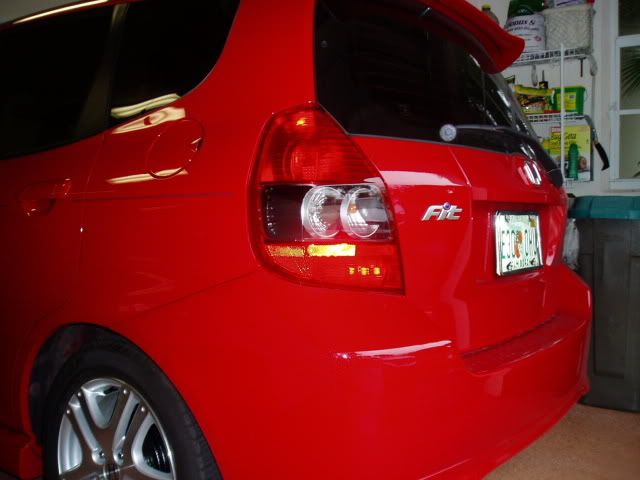
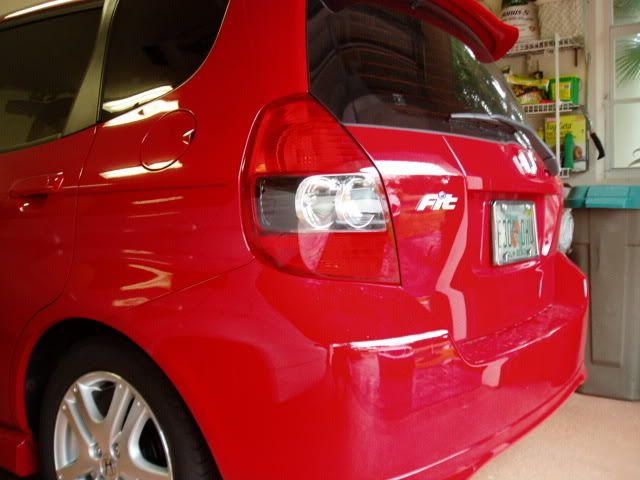
Since the weather is crappy and she needs to be detailed, better pictures will follow......
Both are now ready to be reassembled. Grab the heat gun and begin warming up the edges of the housing. At this point you can add some other sealant if you wish. I choose not too. The assembly is infinitely easier than the removal. Make sure all surfaces are clean before you put the lens back on. Do not use alcohol as this will remove the reflective surface from the housing. Place both sides together and press. Use the heat gun as necessary. Re-install the screws you removed earlier. Both sides together:
Be sure to put the foam seal back on the housing before installation, or you will have to take off the bumper and remove the headlights like I did...
I used JB Weld to fix the cracked portion from before:
Install the tail lights back into the car and enjoy:
Since the weather is crappy and she needs to be detailed, better pictures will follow......

+1 to you.
I have to say though personally, it just doesn't seem worth all the trouble - the change is so subtle, not like the effect you get from blacking out the headlights. But that's just me. But I def. give you rep for taking on this project and successfully accomplishing it as well as putting together an awesome DIY!
I'm either going to get LED tails or just spray the lense with some tint.
Bravo to you!
Member
Joined: Dec 2007
Posts: 1,783
From: Torrance, CA
Congrats....it was pins and needles all night!
what do you think about having the indicator bulb housing (innermost reflective cup in your pics) retaining the silver on the inside and just making some arbitrary line where the black stops? Not that you would redo it...just wondering if you think that would look nice also, or just odd? I could just ps it but its just not the same...
...your opinion?
Nice DIY, I guess I'll follow up on yours and add the smoking part to it. Hmmm maybe I'll paint the part that you painted black...TW white instead. I'll be backing my tail lights instead of using a heatgun. I'll find out if it is any easier or not.
Member

Joined: Feb 2007
Posts: 425
From: fort lauderdale
After the paint has dried, begin removing the mask:
Both are now ready to be reassembled. Grab the heat gun and begin warming up the edges of the housing. At this point you can add some other sealant if you wish. I choose not too. The assembly is infinitely easier than the removal. Make sure all surfaces are clean before you put the lens back on. Do not use alcohol as this will remove the reflective surface from the housing. Place both sides together and press. Use the heat gun as necessary. Re-install the screws you removed earlier. Both sides together:
Be sure to put the foam seal back on the housing before installation, or you will have to take off the bumper and remove the headlights like I did...
I used JB Weld to fix the cracked portion from before:
Install the tail lights back into the car and enjoy:
Since the weather is crappy and she needs to be detailed, better pictures will follow......
You might be waiting a while since I dont have a spare set of tail lights yet.  I think I WILL paint the reflector bowl though after seeing how it looks like. I'll just have to get some bright LED bulbs. I think once you smoke red part of the tail lights the black part will blend in better.
I think I WILL paint the reflector bowl though after seeing how it looks like. I'll just have to get some bright LED bulbs. I think once you smoke red part of the tail lights the black part will blend in better.
Thread Starter
|
Member
Joined: Sep 2007
Posts: 30
From: SOFL
Thanks guys.....yea, it took a lot of work, probably 8 hours all together. I'm not sure if I even like it that much. I'll have to see if it grows on me.
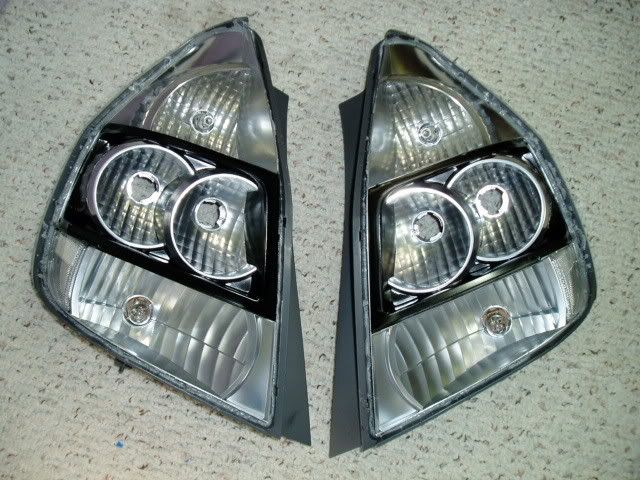
In regards to painting the reflector, if I had to do it again, I would paint the reflector black, but leave the smooth part of the outer bowl silver....I think thats how the original one was done....
BTW, a heat gun cost $30 at Home Depot.....go get one!
In regards to painting the reflector, if I had to do it again, I would paint the reflector black, but leave the smooth part of the outer bowl silver....I think thats how the original one was done....
BTW, a heat gun cost $30 at Home Depot.....go get one!
oh for sure dude!! i bought a spare set of taillights from rickygoshdarn. i put a taillight in the oven today at 225 degrees for 7 minutes. teh cover wouldn't budge. damn. im gonna try again tomorrow, but bump up the heat. i really want this to work.
what i plan to do is to paint the housing ALL flat black. just leaving the rings around the bowls silver.
what i plan to do is to paint the housing ALL flat black. just leaving the rings around the bowls silver.
Member
Joined: Jul 2006
Posts: 667
From: california
oh for sure dude!! i bought a spare set of taillights from rickygoshdarn. i put a taillight in the oven today at 225 degrees for 7 minutes. teh cover wouldn't budge. damn. im gonna try again tomorrow, but bump up the heat. i really want this to work.
what i plan to do is to paint the housing ALL flat black. just leaving the rings around the bowls silver.
what i plan to do is to paint the housing ALL flat black. just leaving the rings around the bowls silver.
Member
Joined: Feb 2007
Posts: 425
From: fort lauderdale
i agree more time, same heat or less, just going by the diy for opening the headlights, i also want to see how they come out, because thats what i originally wanted to do, paint the whole inside black except for the rings.
but after deocder had a hard time opening his i didnt want to try it, plus the stock tails have really grown on me. i like them alot.
but after deocder had a hard time opening his i didnt want to try it, plus the stock tails have really grown on me. i like them alot.
Member
Joined: Dec 2007
Posts: 1,783
From: Torrance, CA
I like your idea for what you are going to cover in flat black. Leaving the rings sounds and looks good!
 )
)