
GE Morimoto H1 retro DIY


GE Morimoto H1 retro DIY
Over in the "what did you do to your fit today" thread I mentioned that I completed my retrofit, and some people asked me to do a how-to on it. So, here it is.
Fitfreak, nor anyone else, including me, are responsible for anything you do to your car. Don't blame me if you melt your headlight!
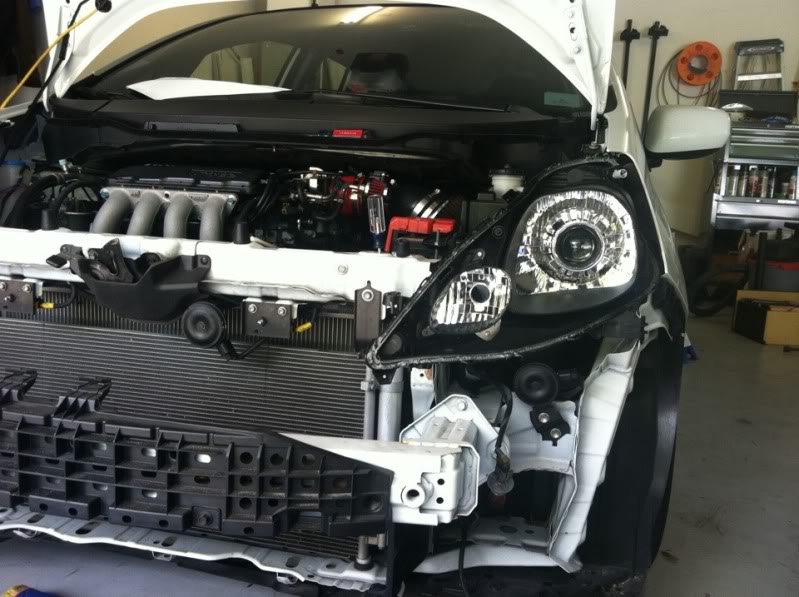
Step 1: Remove your bumper/headlights.
If you've never taken your bumper off before, there are how-to's on the forum
Step 2: Remove the mounting bracket.
I don't have a good picture for this, but turn the headlight upside down. There's a 10mm bolt holding the L-shaped plastic bracket on. Take that off.
Step 3: Pre-disassemble the headlight. There are 5 screws holding the clear plastic cover to the black base. Take those out. remove the vent cover too. (i wasn't planning on writing a diy, so i don't have these pics)
Step 4: Open the headlights.
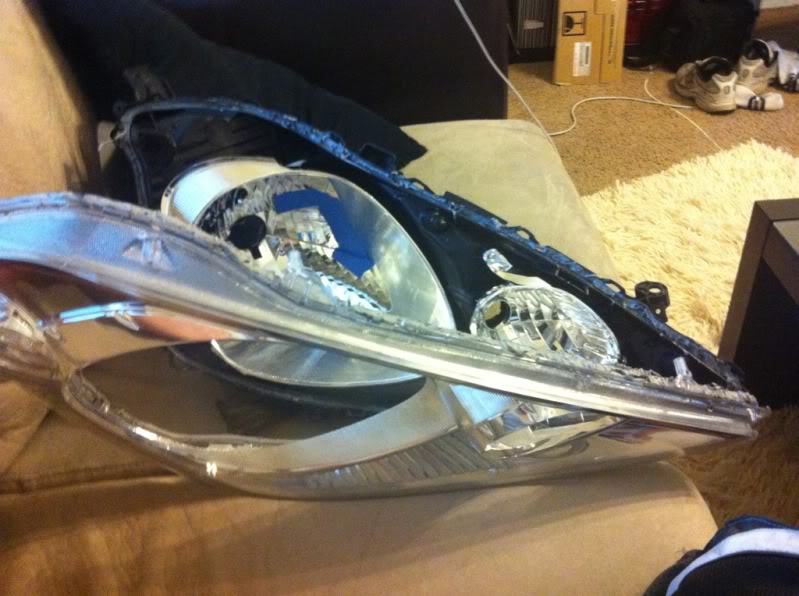
This is by far the scariest part of the project. Heat your oven to about 225. Place a piece of wood on the wire rack and stick your headlight in there for about 4 minutes. It's gonna smell. I'd suggest some gloves at this point. Pull the headlight out and with a flat head screwdriver, start prying up all those tabs holding the clear plastic cover to the base. It's a pain and you have to work a little quick while the perma-seal is soft from the oven. If you don't get it done the first go, stick it back in the oven for about 2 min and keep working at it. This part is hard and makes you feel like you're gonna melt your light or break something. Just try not to.
I couldn't get pics while I was prying it apart because I had to work so quick, but here's a shot of it cracked open.
Step 5: Customize
Once it's open, you cam unscrew the smaller reflector bowl, you can take the 3 screws out that hold the dress-up chrome on the plastic cover and you can design as you want. You're adding projectors, so you don't have to leave anything reflective anymore. It's all custom, or leave it all chrome. If you decide to paint, use an adhesion promoter on the chrome and high-heat paint.
Dupli-Color :: Adhesion Promoter
Dupli-Color :: Engine Paint with Ceramic
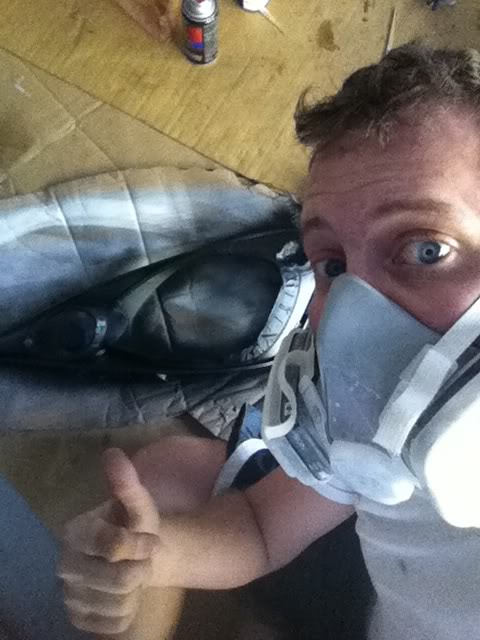
I also sprayed the reflectors w nite shades.
VHT Nite-Shades™
Step 6: wait.
Ok, this was the hardest part for me. IF you painted, you need to let that paint FULLY cure before you re-assemble the headlights. You could stick the pieces in the oven to help speed it up, but as paint cures it releases the solvents which would create a haze inside your headlight. Not good.
Step 7: retro-fit
This is the real project right here. I bought my kit from TRS. They ROCK and their kits make it a simple process. I got the morimoto mini H1 projectors with Gatling Gun 2.0 shrouds and 6000k bulbs. I already had ballasts from a plug-n-play hid kit.
here's how the set-up gets put together. There are a lot of little pieces in the boxes from TRS. You won't use all of them. The GE's have an H4 headlight, so you'll only use the parts that are related to H4's. The order will be projector, bigger silicone ring, your headlight, the H4 adaptor (it's the 3 prong metal piece), the screw on ring, then the bulb holder and bulb itself and the bulb clamp.
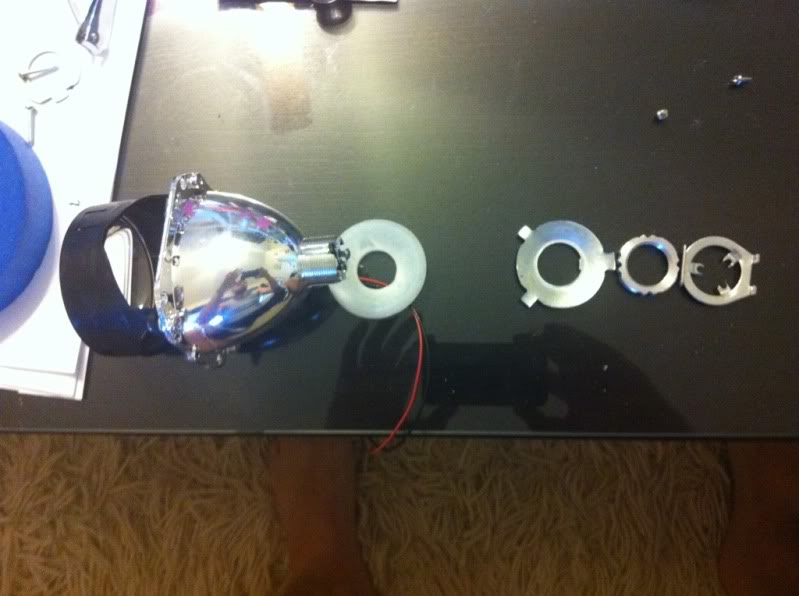
it's pretty easy to figure out how to stick the projector in the hole in the headlight (don't forget to remove the little bulb hider thing from the original headlight. it's just one philips screw). You have to get the H4 adaptor on as far as possible, then tighten the screw-on ring as tight as possible. you'll get pretty far with your fingers, then grab a pair of pliers and really tighten it down.
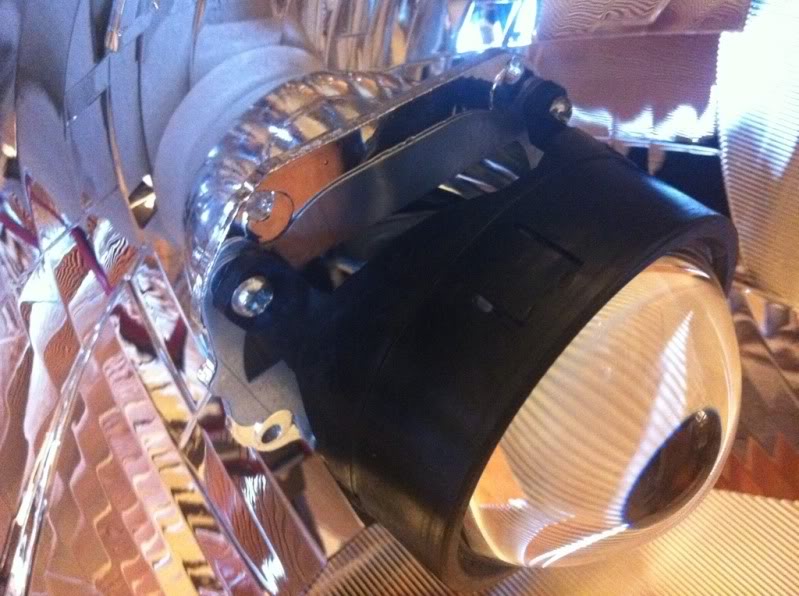
At this point, your projector will probably still seem pretty loose. Here's the trick (it's not really a trick) clamp down the OEM bulb holder and all of the sudden, your projector barely moves! screw the bulb holder back on, and you're pretty much set. Put the shroud of your choice on the front, make sure there are no finger prints, and close it up!
Step 8: Close it back up
Best thing to do is to use new rubber butyl, but if you want (and what i did) you can stick the headlight back in the oven, let everything warm back up, then take it out and start pressing it together. Get all the clips to snap back in place and put those 5 screws back in!
Step 9: Back on the car
Throw them back on the car, make all your connections and fire up those bad boys! Our cars are pretty good at being lined up with the H4 adaptors, and I hear that the morimoto mini d2s come pre-aligned and everything, but i had to shave down the h4 adaptors just a little bit so that I could rotate my cut-off line.
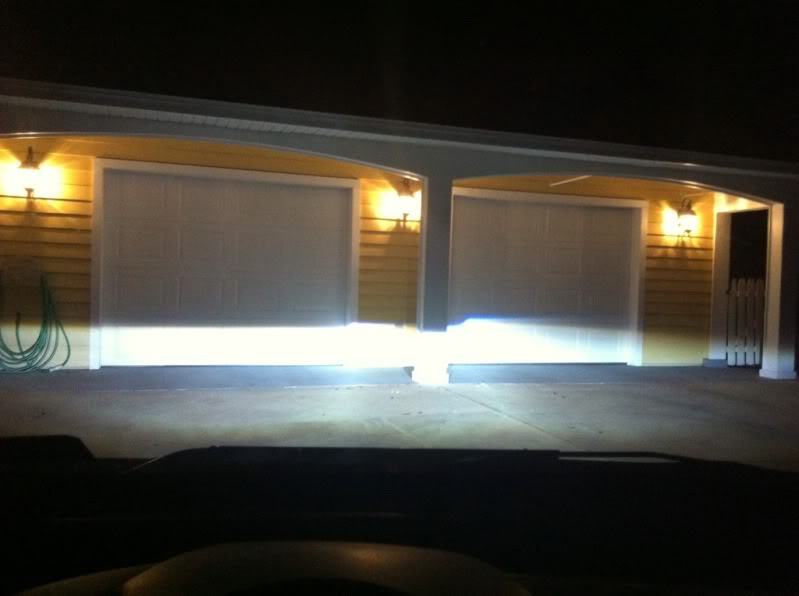
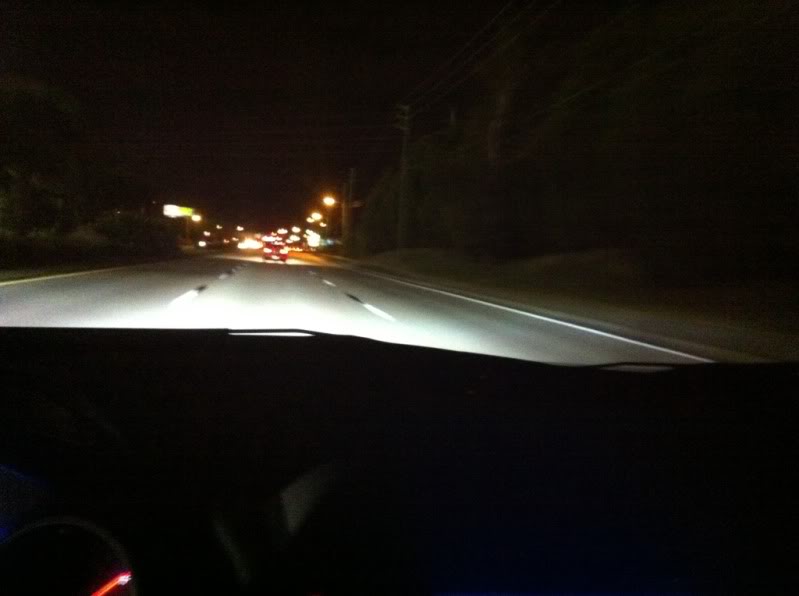
Step 10: Alignment.
Now, the biggest reason to do a full retrofit (other than looking sick) is for output. You'll notice your amazing new cut-off line, you enhanced output, and how great the color is. The rule of thumb is that from 25-feet away, your cut-off line should be 5-inches lower than where the bulb is on your car. I found that with my car lowered, this seems to do pretty well, but I might raise it an inch or two. I'm not getting the distance I want.
Fitfreak, nor anyone else, including me, are responsible for anything you do to your car. Don't blame me if you melt your headlight!
Step 1: Remove your bumper/headlights.
If you've never taken your bumper off before, there are how-to's on the forum
Step 2: Remove the mounting bracket.
I don't have a good picture for this, but turn the headlight upside down. There's a 10mm bolt holding the L-shaped plastic bracket on. Take that off.
Step 3: Pre-disassemble the headlight. There are 5 screws holding the clear plastic cover to the black base. Take those out. remove the vent cover too. (i wasn't planning on writing a diy, so i don't have these pics)
Step 4: Open the headlights.
This is by far the scariest part of the project. Heat your oven to about 225. Place a piece of wood on the wire rack and stick your headlight in there for about 4 minutes. It's gonna smell. I'd suggest some gloves at this point. Pull the headlight out and with a flat head screwdriver, start prying up all those tabs holding the clear plastic cover to the base. It's a pain and you have to work a little quick while the perma-seal is soft from the oven. If you don't get it done the first go, stick it back in the oven for about 2 min and keep working at it. This part is hard and makes you feel like you're gonna melt your light or break something. Just try not to.
I couldn't get pics while I was prying it apart because I had to work so quick, but here's a shot of it cracked open.
Step 5: Customize
Once it's open, you cam unscrew the smaller reflector bowl, you can take the 3 screws out that hold the dress-up chrome on the plastic cover and you can design as you want. You're adding projectors, so you don't have to leave anything reflective anymore. It's all custom, or leave it all chrome. If you decide to paint, use an adhesion promoter on the chrome and high-heat paint.
Dupli-Color :: Adhesion Promoter
Dupli-Color :: Engine Paint with Ceramic
I also sprayed the reflectors w nite shades.
VHT Nite-Shades™
Step 6: wait.
Ok, this was the hardest part for me. IF you painted, you need to let that paint FULLY cure before you re-assemble the headlights. You could stick the pieces in the oven to help speed it up, but as paint cures it releases the solvents which would create a haze inside your headlight. Not good.
Step 7: retro-fit
This is the real project right here. I bought my kit from TRS. They ROCK and their kits make it a simple process. I got the morimoto mini H1 projectors with Gatling Gun 2.0 shrouds and 6000k bulbs. I already had ballasts from a plug-n-play hid kit.
here's how the set-up gets put together. There are a lot of little pieces in the boxes from TRS. You won't use all of them. The GE's have an H4 headlight, so you'll only use the parts that are related to H4's. The order will be projector, bigger silicone ring, your headlight, the H4 adaptor (it's the 3 prong metal piece), the screw on ring, then the bulb holder and bulb itself and the bulb clamp.
it's pretty easy to figure out how to stick the projector in the hole in the headlight (don't forget to remove the little bulb hider thing from the original headlight. it's just one philips screw). You have to get the H4 adaptor on as far as possible, then tighten the screw-on ring as tight as possible. you'll get pretty far with your fingers, then grab a pair of pliers and really tighten it down.
At this point, your projector will probably still seem pretty loose. Here's the trick (it's not really a trick) clamp down the OEM bulb holder and all of the sudden, your projector barely moves! screw the bulb holder back on, and you're pretty much set. Put the shroud of your choice on the front, make sure there are no finger prints, and close it up!
Step 8: Close it back up
Best thing to do is to use new rubber butyl, but if you want (and what i did) you can stick the headlight back in the oven, let everything warm back up, then take it out and start pressing it together. Get all the clips to snap back in place and put those 5 screws back in!
Step 9: Back on the car
Throw them back on the car, make all your connections and fire up those bad boys! Our cars are pretty good at being lined up with the H4 adaptors, and I hear that the morimoto mini d2s come pre-aligned and everything, but i had to shave down the h4 adaptors just a little bit so that I could rotate my cut-off line.
Step 10: Alignment.
Now, the biggest reason to do a full retrofit (other than looking sick) is for output. You'll notice your amazing new cut-off line, you enhanced output, and how great the color is. The rule of thumb is that from 25-feet away, your cut-off line should be 5-inches lower than where the bulb is on your car. I found that with my car lowered, this seems to do pretty well, but I might raise it an inch or two. I'm not getting the distance I want.
Last edited by jnesselroad; Nov 11, 2011 at 11:50 PM.

Member
Joined: Oct 2011
Posts: 25
From: Squampton
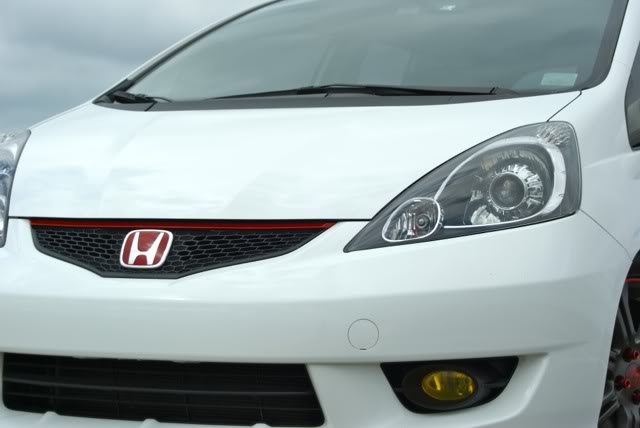
Damn you: I just did an HID retrofit (although far more plug and play) on my Passat. Now you got me itching this to do it on my Fit, which is also Taffeta White. The projectors with the red emblem look really good.


Well, I think I did 275 for about 6 min on the first one on a cookie sheet and I melted part of it. Oops!! No big deal though, I sealed it back up.


Member

Joined: Aug 2009
Posts: 692
From: bay area, cali
i think i did 240* at 8 minutes although i checked it out at 5 minutes to see how it was going.
many folks on HIDplanet agree on a 2-3 inch drop at 25 feet. since you're lowered, i'd probably do 2 inches. you're not going to be an a-hole, i promise! as long as your beams aren't in people's side view mirrors most of the time, you're being considerate. 95% of the time, my beams are way below side view mirrors of cars ahead of me (and i live in hilly bay area, cali). the only time in the past week that i felt bad was when there was a lambo diablo in front of me. my beams were directly in his mirrors (then again, he has a lambo, can't feel too bad).
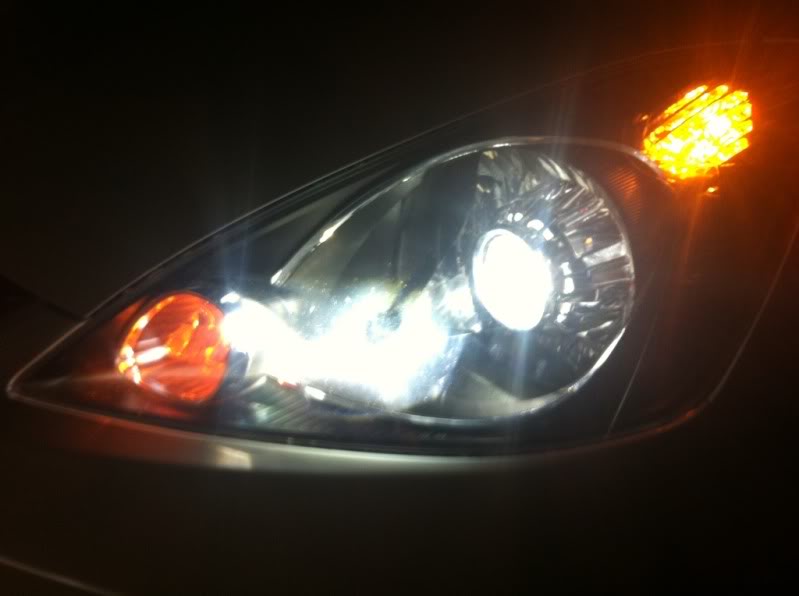
and you're retro looks really, really good. i love that you left some of the chrome lines. it looks really clean.
and you're retro looks really, really good. i love that you left some of the chrome lines. it looks really clean.
many folks on HIDplanet agree on a 2-3 inch drop at 25 feet. since you're lowered, i'd probably do 2 inches. you're not going to be an a-hole, i promise! as long as your beams aren't in people's side view mirrors most of the time, you're being considerate. 95% of the time, my beams are way below side view mirrors of cars ahead of me (and i live in hilly bay area, cali). the only time in the past week that i felt bad was when there was a lambo diablo in front of me. my beams were directly in his mirrors (then again, he has a lambo, can't feel too bad).
Aim your cutoffs directly in front of your headlights aimed at the bottom of a passenger car's mirrors (camry, corolla, accord, etc.) at 2 car lengths. Boom done.
Member
Joined: Aug 2009
Posts: 692
From: bay area, cali
^ that's pretty good.
i actually had to adjust the height twice after my wall adjustments. first time, i found it was too low during real world driving so i raised it. the second time, i found that my pass side beam was going into sideview mirrors. i think i've found my sweet spot as far as distance and consideration for other drivers. i'm glad it's relatively easy to do the height adjustment. i actually drove around with a 10mm wrench in my glove box for a while.
i actually had to adjust the height twice after my wall adjustments. first time, i found it was too low during real world driving so i raised it. the second time, i found that my pass side beam was going into sideview mirrors. i think i've found my sweet spot as far as distance and consideration for other drivers. i'm glad it's relatively easy to do the height adjustment. i actually drove around with a 10mm wrench in my glove box for a while.

Andrew might be able to better explain what the vehicle kits are, but my understanding is that they are basically mounting brackets for certain headlights. You don't need one for the fit. If you want simplicity, just grab one of the morimoto mini kits and go at it (d2s is easier than the h1 for the fit from what I hear, but this was my first retro and I didn't have any problems)
Thanks for the correction. HIDplanet is where I did my research before jumping in to this. GREAT resource for anyone thinking about doing a retro.
Andrew might be able to better explain what the vehicle kits are, but my understanding is that they are basically mounting brackets for certain headlights. You don't need one for the fit. If you want simplicity, just grab one of the morimoto mini kits and go at it (d2s is easier than the h1 for the fit from what I hear, but this was my first retro and I didn't have any problems)
For the Mini H1, the adapter plates, such as H13, 9006, and 9007, are made so that when installing in those respective sockets there is no need for rotational alignment. Basically you just pop the plate in from the back, put the projector in from the front, and tighten down from the back.
For the Mini D2S, since it is made specifically for the H4 socket like the Fit has, it just bolts right up with its enclosed hardware. There isn't a specific adapter plate because the entire unit is basically H4-exclusive. We might as well call it the Mini H4 but that would confuse everyone as H4 indicates a high and low beam bulb, which a projector cannot use.

Clean.... Really clean. + reps.
So the difference in installation is the mini H1's you have to open the headlights, but with the D2S's you don't. (I know the output and other things are different between the two)
I've read so many retrofit DIY's here and on trs.com, I think I confused myself, you made the DIY look so easy.
Can't wait to get to this, but $$$ will slow me down.
The main difference is that the D2S is an OEM bulb size meaning you can pick them up in an emergency at almost any BMW, Mercedes, Land Rover, etc... Also the D2S is made for the H4 size bulb replacement which is what our fit's use. Therefore you don't have to do any rotational aiming. Just vertical and horizontal. Making for a slightly easier install.
I went for the D2S for the OEM size and ease of install mainly.
BlueBoogers you need another service rep over at TRS?
lol
We did but hired one yesterday, actually. I'm going to ease out of answering emails and more into work on forums, eBay, etc.
Can you imagine answering 150 of those emails a day? Gets old. :P
Can you imagine answering 150 of those emails a day? Gets old. :P
Lol I do something that could compete with that. Say remote computer trouble shooting with computer illiterate morons lol. One of the few times I hate being at work.