


DIY GE8 Cargo Cover (Lots of Pics)


Thread Starter
|
New Member
Joined: Jul 2012
Posts: 9
From: Eastern CT
DIY GE8 Cargo Cover (Lots of Pics)
I was so impressed with the DIY talent on this board and disappointed by the high cost of the OEM cargo cover, that I thought – I can make one of those too! I have lots of wood scraps kicking around, so I figured it wouldn’t cost me much to give it a try.
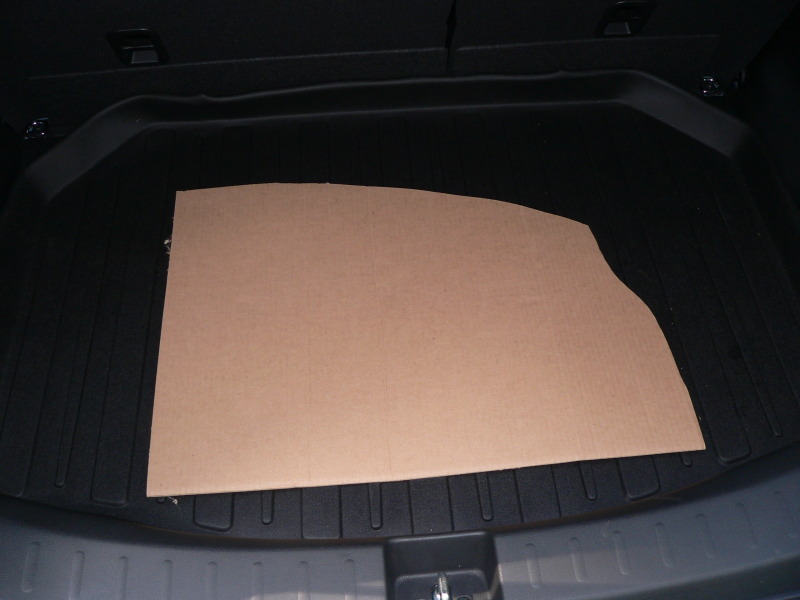
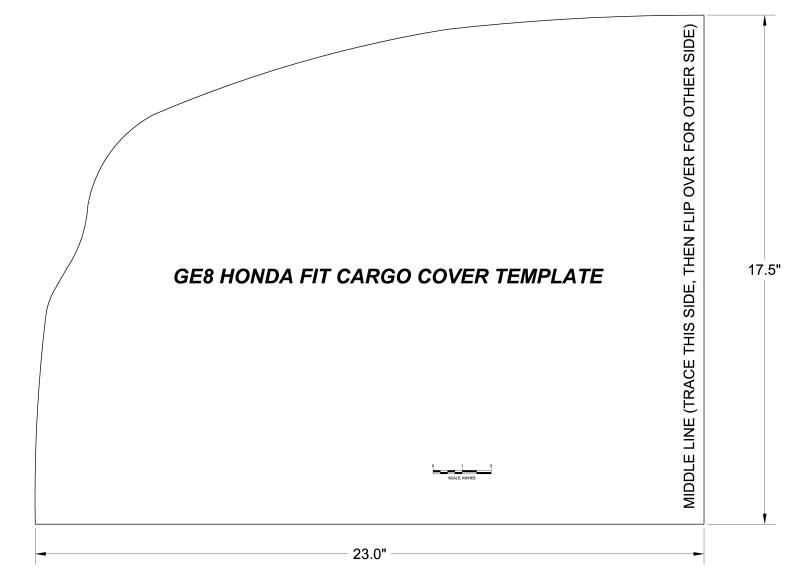
First, I made a cardboard template of the contours of the back of the car:
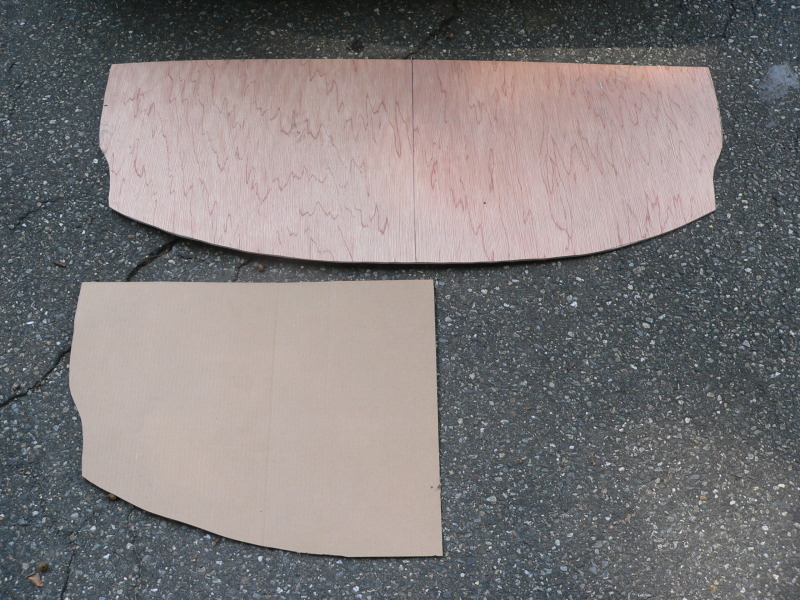
Then I transferred this to a sheet of luan underlayment:
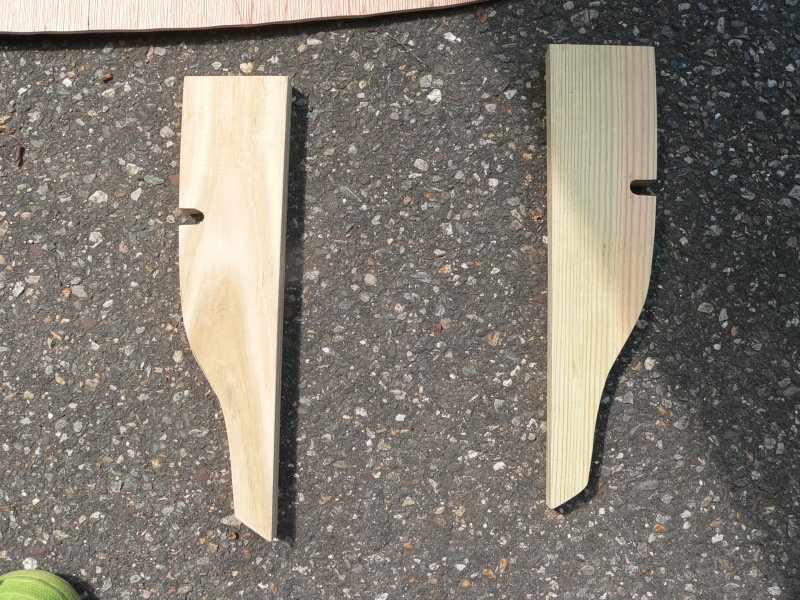
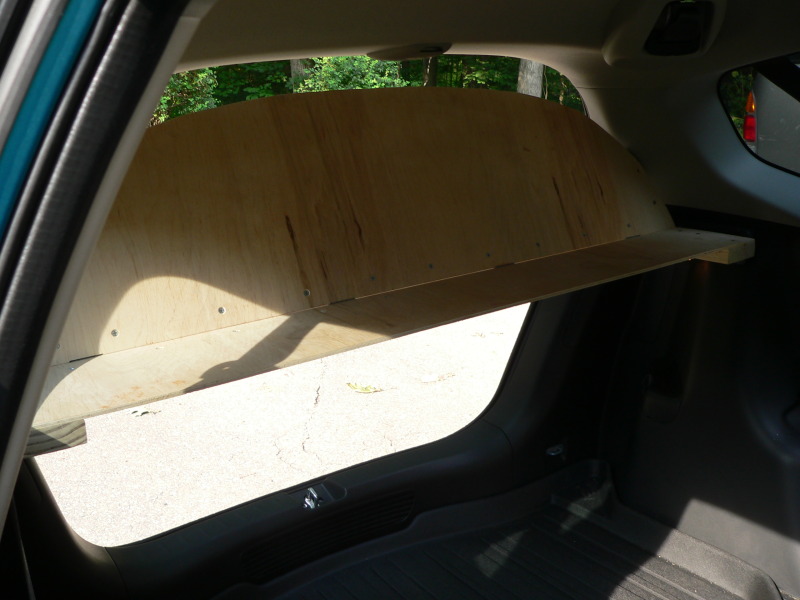
I wanted to take advantage of the pins on the shelves in the back to lock the tray in position and lift it to a height consistent with those shelves on the side. I had some 5/4 (1” thick) deck board scraps that did the trick:
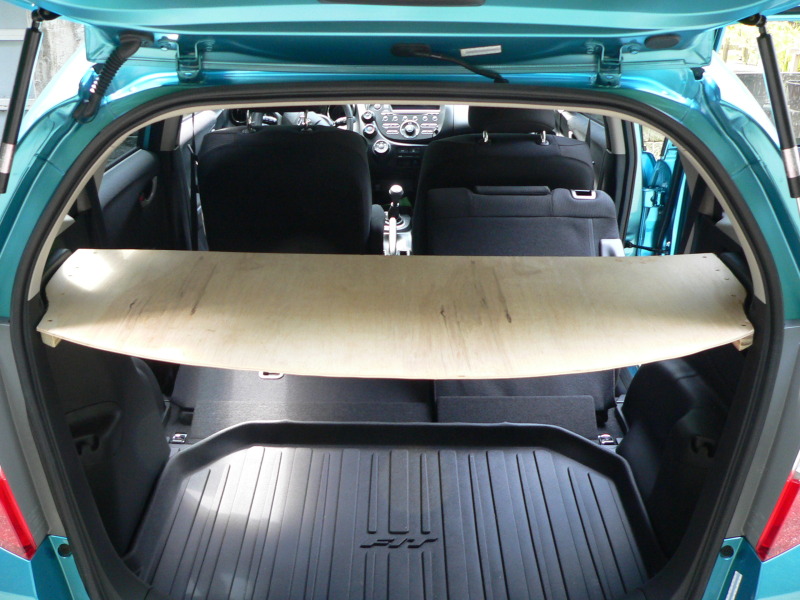
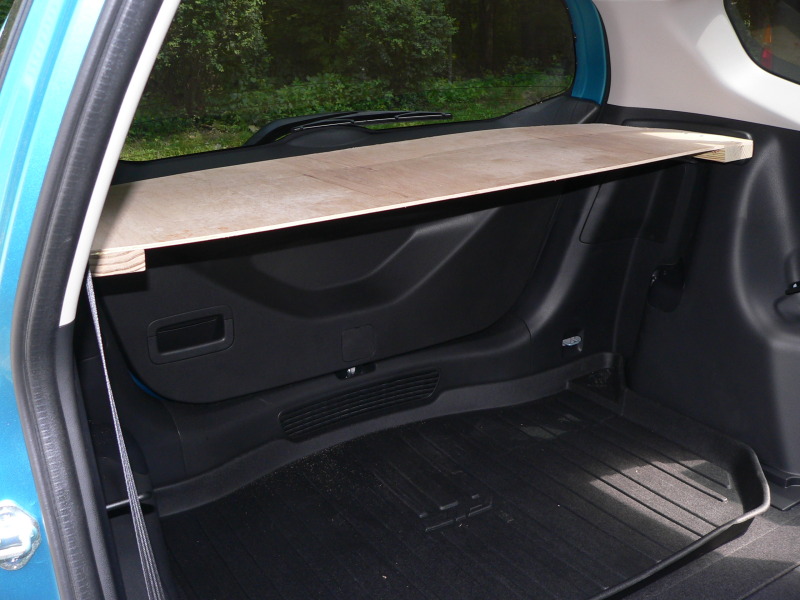
Glued & screwed the side supports and luan board together and test fitted in the car:
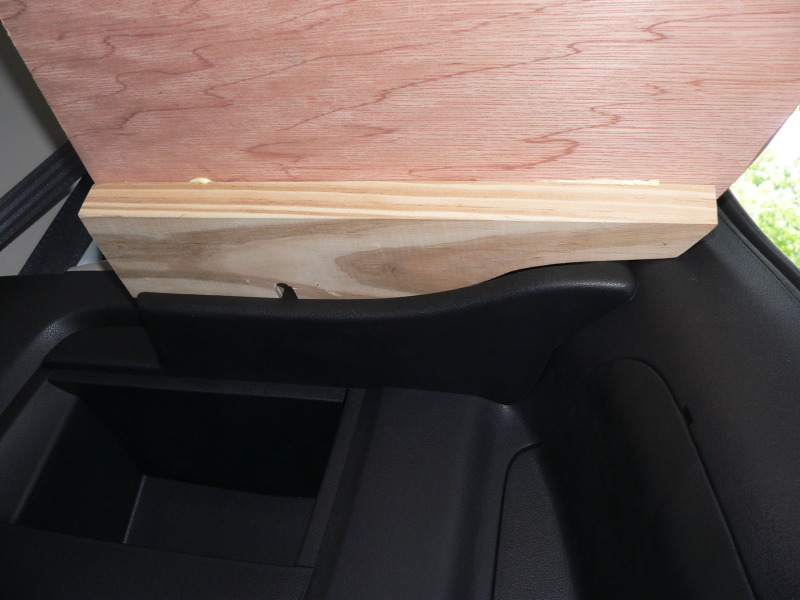
The underside of the cover/support:
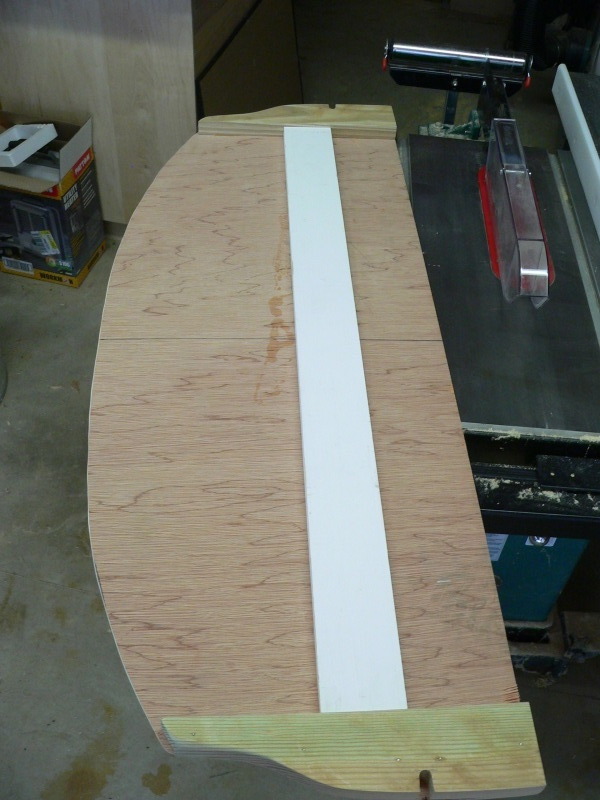
The luan alone was not strong enough, so I ripped a piece of ¾” lumber to 3” thickness for this purpose. I wanted to hinge my cover like the OEM, so I glued & screwed the board where I wanted the cover to hinge:
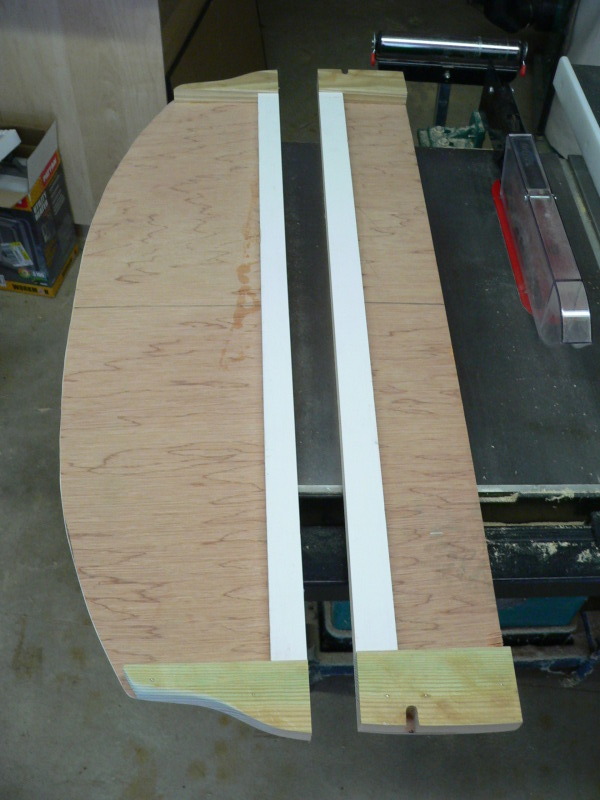
Next, I ripped the cover down the middle of the reinforcement board I’d just added on the tablesaw:
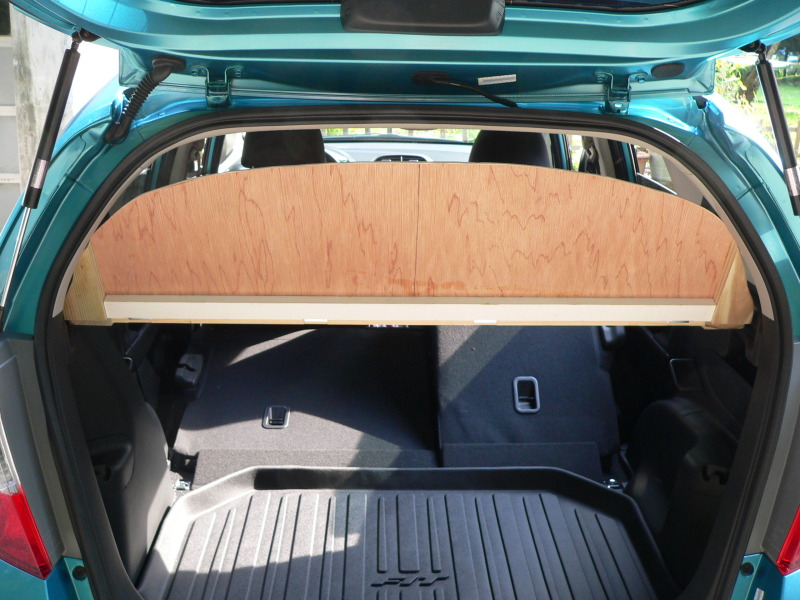
I didn’t take pictures, but next, I mortised the supports to accept 4 small hinges. The test fit after hinge installation:
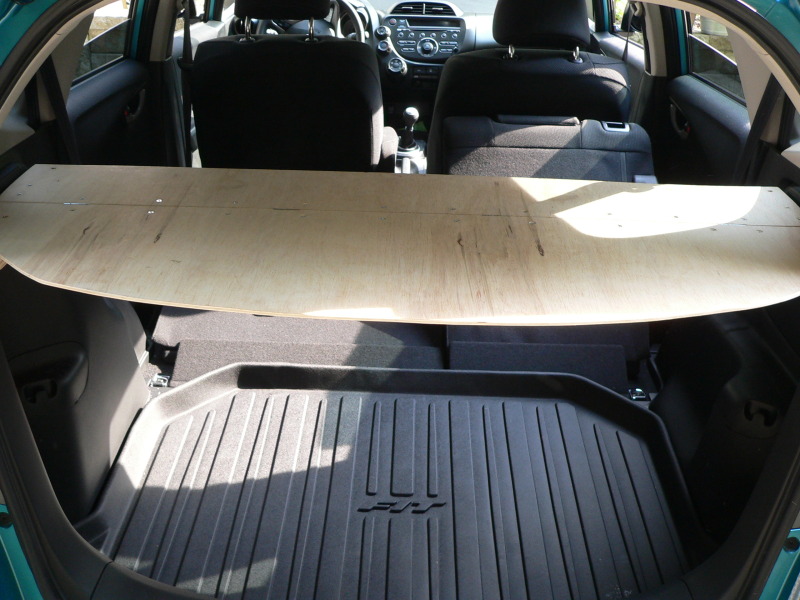
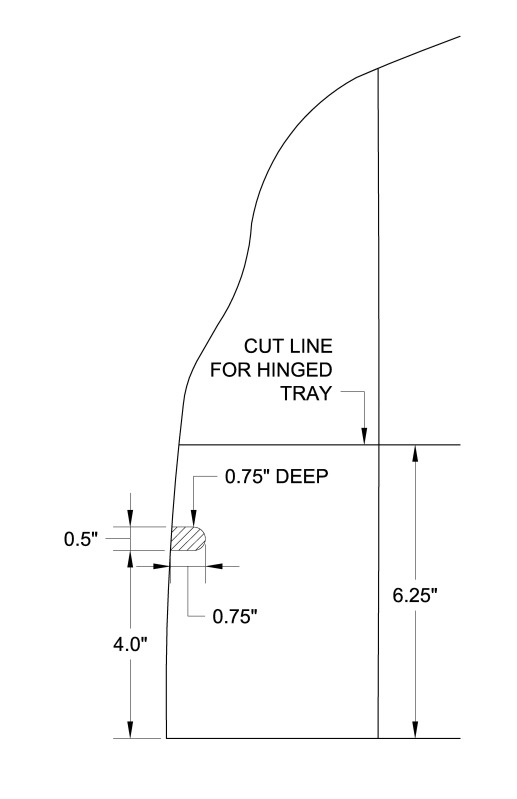
Hinge up:
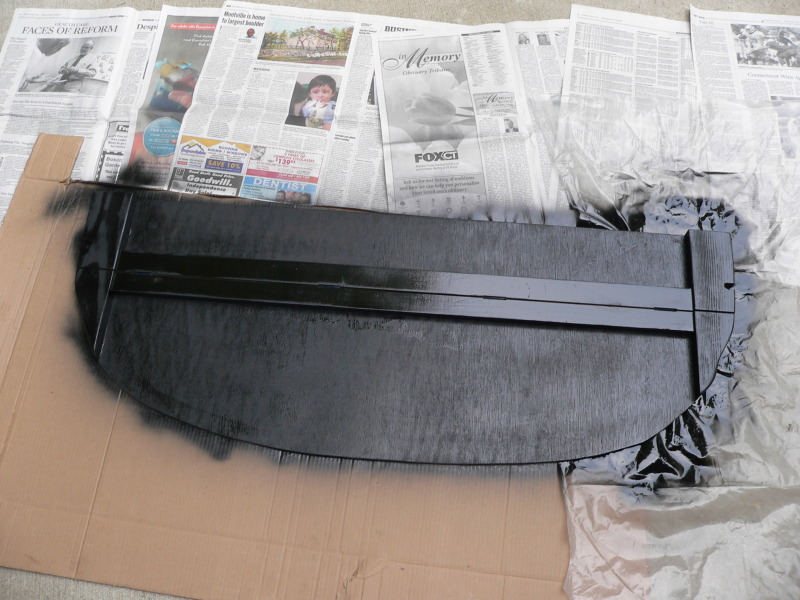
Then I painted the cover black:
I had found some dark grey fleece fabric at a discount fabric store to wrap the cover in. I stitched “FIT” into the fabric in blue thread to go with the Blue Raspberry paint (not my best work, but I can live with it) Finally, I wrapped the cover in a dark grey fleece-like material and had the final fitting:
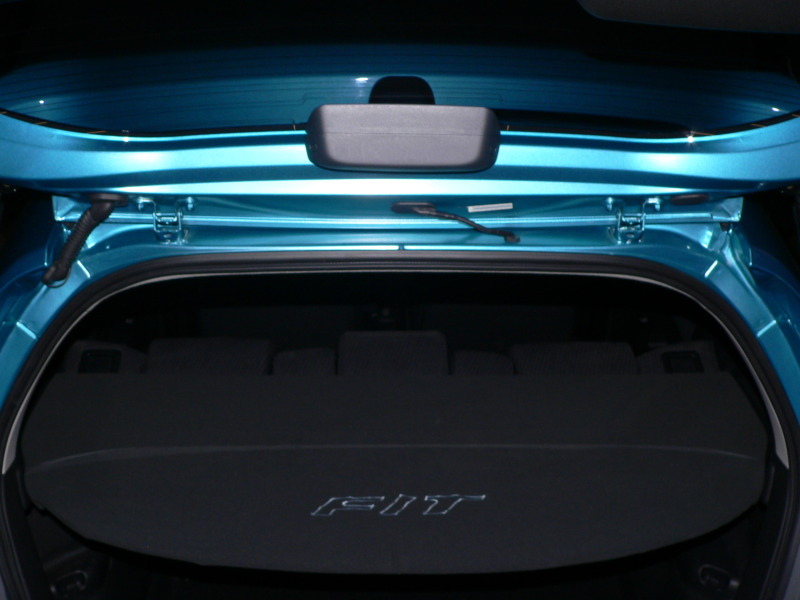
The only thing left to do is add the cords to the hatch so it’ll go up when the hatch is opened. I’m pretty happy with it, considering it cost me $6 for fabric, $8 for hinges and $2.00 for screws, the rest of the materials I already had. I’ll take <$20 over $160 for the OEM cover.
My thanks to you, fellow FitFreaks, for your inspiration!!!!!
First, I made a cardboard template of the contours of the back of the car:
Then I transferred this to a sheet of luan underlayment:
I wanted to take advantage of the pins on the shelves in the back to lock the tray in position and lift it to a height consistent with those shelves on the side. I had some 5/4 (1” thick) deck board scraps that did the trick:
Glued & screwed the side supports and luan board together and test fitted in the car:
The underside of the cover/support:
The luan alone was not strong enough, so I ripped a piece of ¾” lumber to 3” thickness for this purpose. I wanted to hinge my cover like the OEM, so I glued & screwed the board where I wanted the cover to hinge:
Next, I ripped the cover down the middle of the reinforcement board I’d just added on the tablesaw:
I didn’t take pictures, but next, I mortised the supports to accept 4 small hinges. The test fit after hinge installation:
Hinge up:
Then I painted the cover black:
I had found some dark grey fleece fabric at a discount fabric store to wrap the cover in. I stitched “FIT” into the fabric in blue thread to go with the Blue Raspberry paint (not my best work, but I can live with it) Finally, I wrapped the cover in a dark grey fleece-like material and had the final fitting:
The only thing left to do is add the cords to the hatch so it’ll go up when the hatch is opened. I’m pretty happy with it, considering it cost me $6 for fabric, $8 for hinges and $2.00 for screws, the rest of the materials I already had. I’ll take <$20 over $160 for the OEM cover.
My thanks to you, fellow FitFreaks, for your inspiration!!!!!





Thread Starter
|
New Member
Joined: Jul 2012
Posts: 9
From: Eastern CT



Member
Joined: Sep 2013
Posts: 62
From: Little Silver, NJ

That is far better than the dealer cover because there is a 3" gap between the cover and the seat. I am very disappointed with the factory stock cover gap.
I am going to make one now and return the new one.
Grunthaner
I am going to make one now and return the new one.
Grunthaner


Member
Joined: Sep 2014
Posts: 33
From: West Columbia,SC
 Homemade cargo cover using fleece covering
Quote from Brindle:I had found some dark grey fleece fabric at a discount fabric store to wrap the cover .... Finally, I wrapped the cover in a dark grey fleece-like material and had the final fitting....
Your cover looks great! How did you attach the fleece fabric to the cover? Did you cover the bottom of the cover with fleece also?
PS, I made my own cargo cover using gatorboard (a tough foamboard) and didn't use the hinge.
UPDATE: I used an air-powered staple gun; is that what you did?
Your cover looks great! How did you attach the fleece fabric to the cover? Did you cover the bottom of the cover with fleece also?
PS, I made my own cargo cover using gatorboard (a tough foamboard) and didn't use the hinge.
UPDATE: I used an air-powered staple gun; is that what you did?
Last edited by bulldogtrekker; Oct 15, 2014 at 08:36 PM. Reason: update


Thread
Thread Starter
Forum
Replies
Last Post
jcuecker
2nd Gen GE8 Specific Fit Interior Modifications Sub-Forum
6
Nov 17, 2010 08:59 AM
