
Finally! Pics of Arashi :)


Thread Starter
|
Member
Joined: Feb 2007
Posts: 143
From: Corona, CA
Finally! Pics of Arashi :)
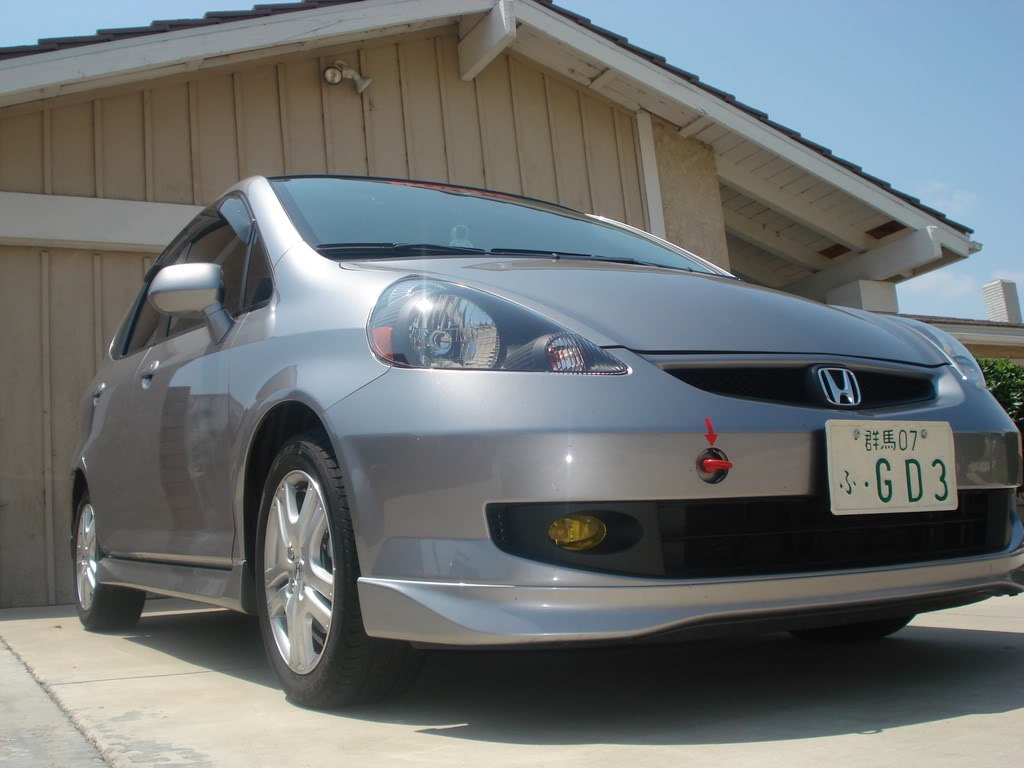
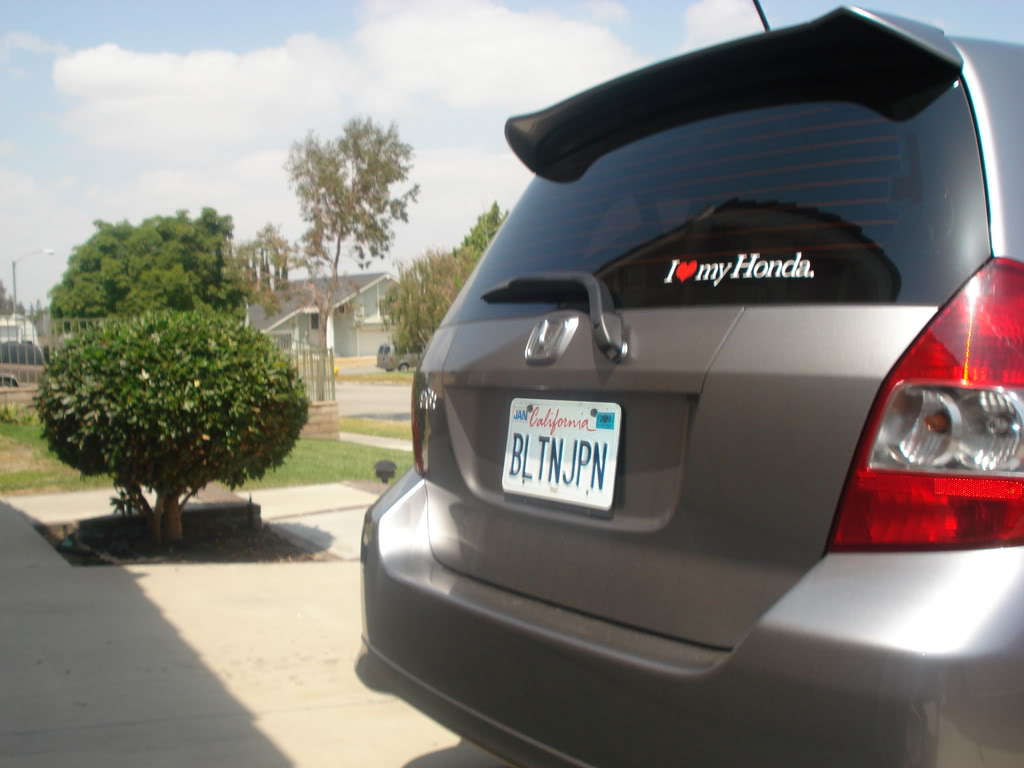
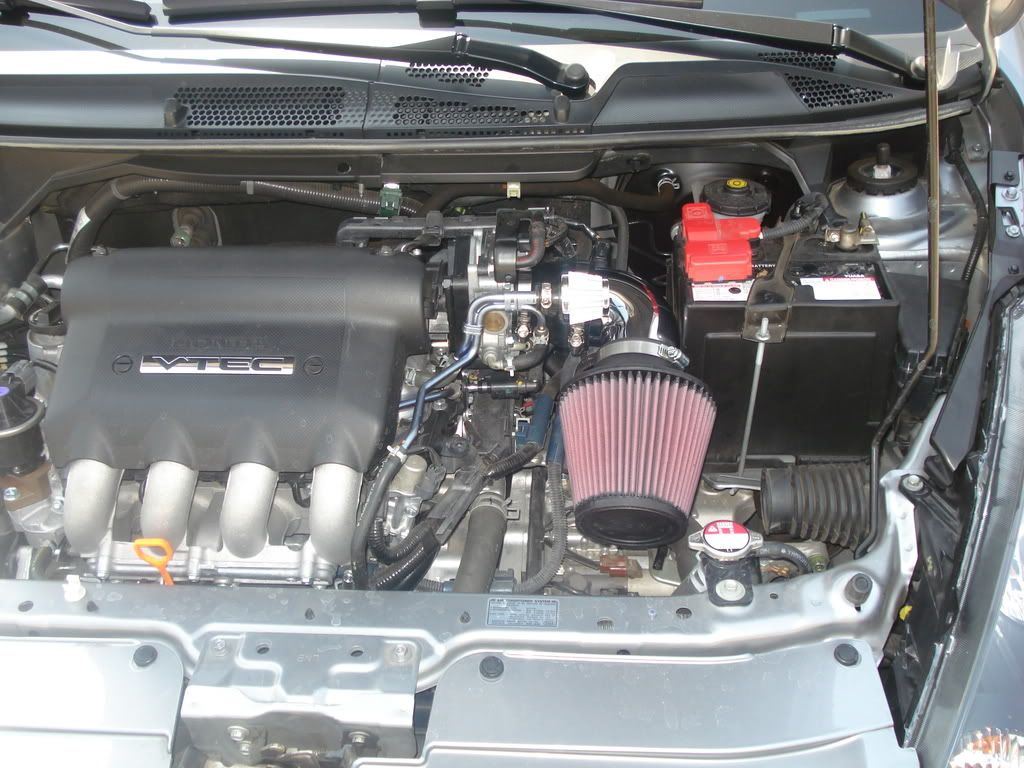
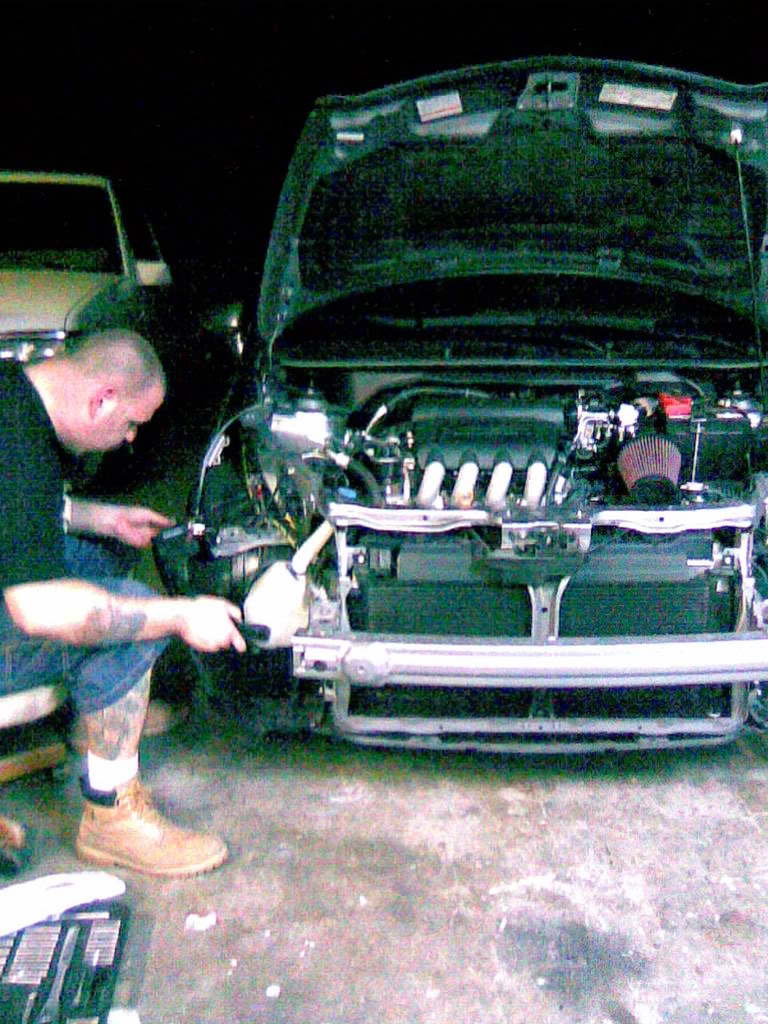
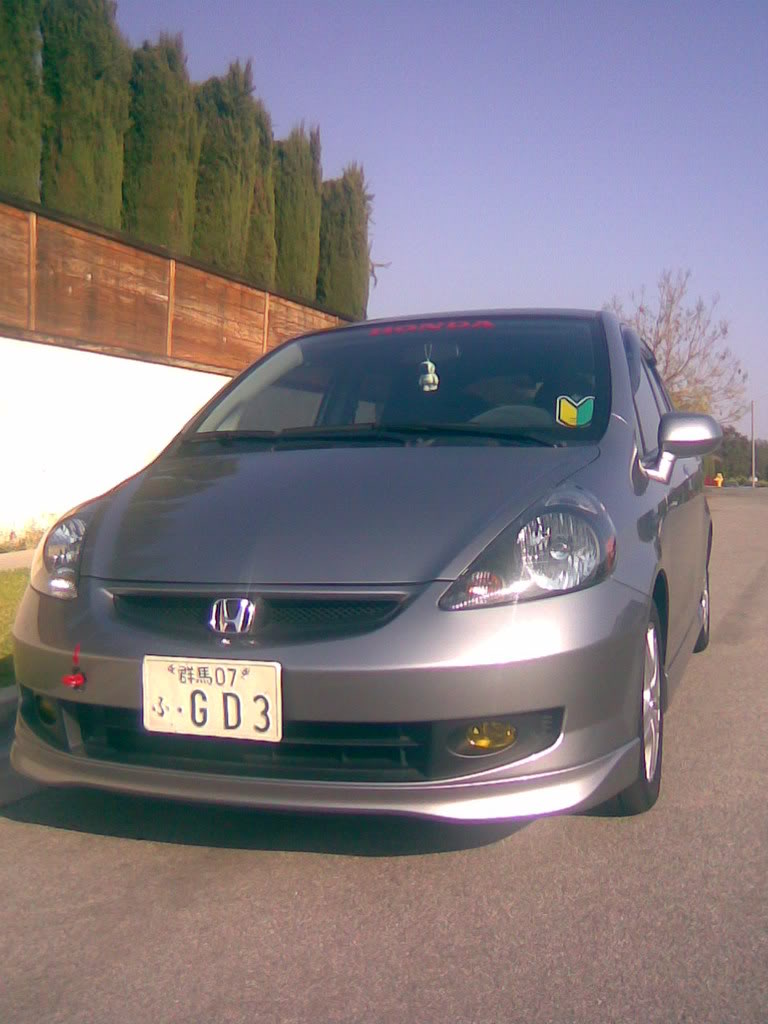
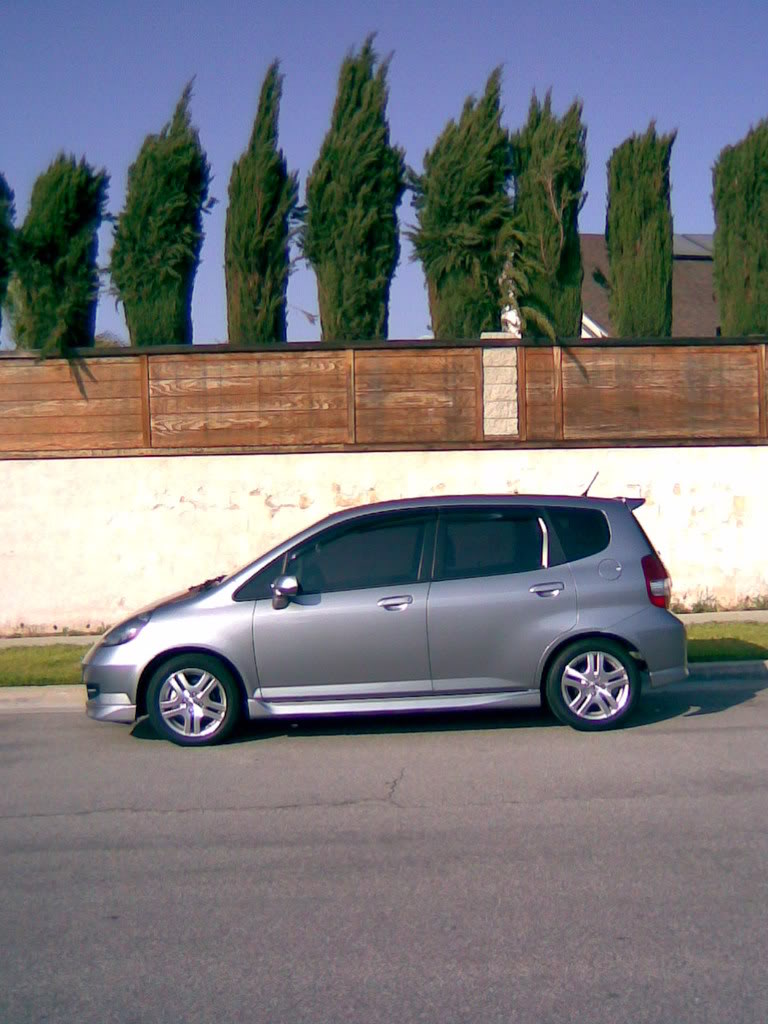
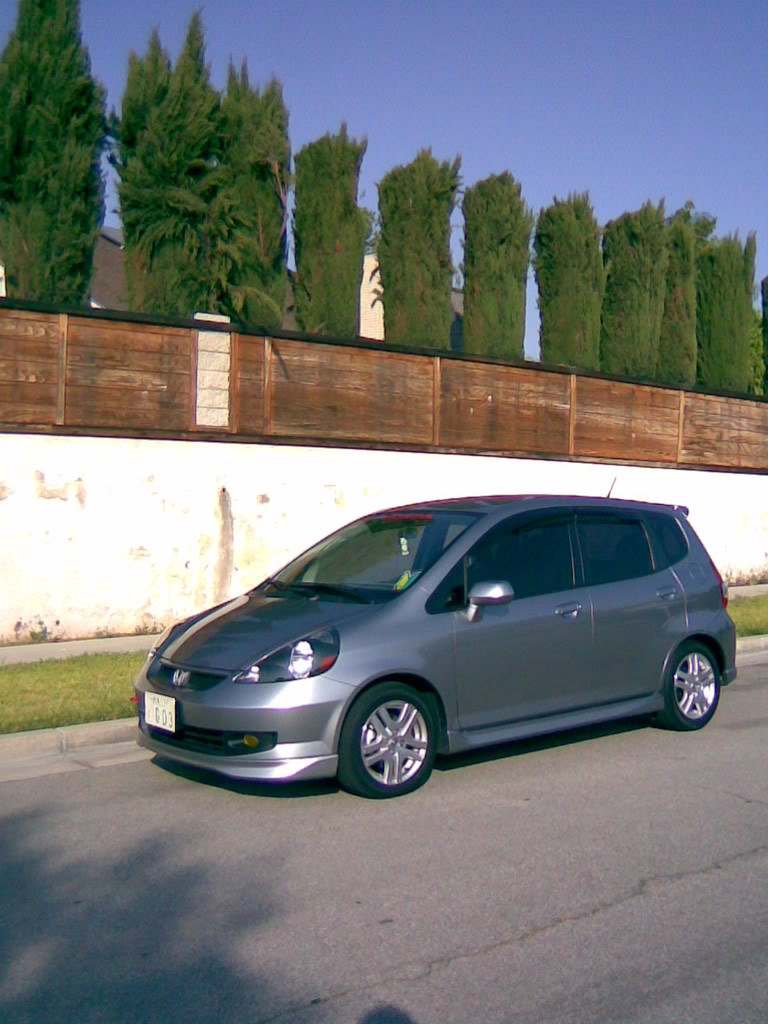
Hey guys! I've been a member of this site for quite a while, just wanted to post some pics of my 2007 SSM Sport AT. Has about 25K on it, loved every second of it. I named him Arashi, because Arashi in Japanese means Storm, and well it's SSM, so I guess that works haha. My boyfriend and I just completed the autozone intake, even though we ended up buying a K&N over the Spectre cone that Autozone had, just because I'm somewhat of a brand whore for filters. If you don't "get" my rear license plate, well then you're lame. Anyway, hope you guys enjoy it! Give me criticism, but please use the sandwich method! LOL 
-Mugen Visors
-Flat black painted headlamps and foglamp surrounds
-Yellow painted foglamp lenses (used Japanese lens paint available at most tuner shops)
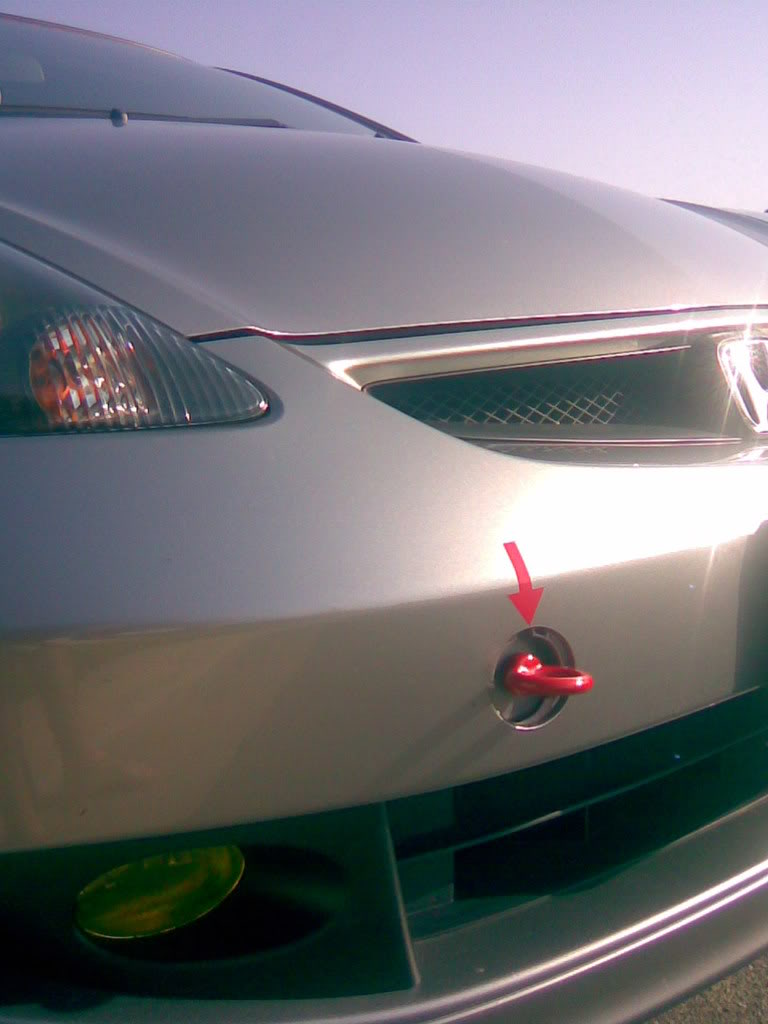
-Stock tow hook painted red in engine enamel (have the S2000 extension on order, we'll see how that looks)
-Sid Short Ram Intake (SSR) with K & N cone filter.
-Asimo doll
-Dash cover (hey i live in so cal, where it regularly tips 1,000 degrees, but at least I didn't use the sticky velcro things!)
-Mugen Visors
-Flat black painted headlamps and foglamp surrounds
-Yellow painted foglamp lenses (used Japanese lens paint available at most tuner shops)
-Stock tow hook painted red in engine enamel (have the S2000 extension on order, we'll see how that looks)
-Sid Short Ram Intake (SSR) with K & N cone filter.
-Asimo doll
-Dash cover (hey i live in so cal, where it regularly tips 1,000 degrees, but at least I didn't use the sticky velcro things!)
Last edited by Arashi; Apr 21, 2008 at 09:12 PM.
Thread Starter
|
Member
Joined: Feb 2007
Posts: 143
From: Corona, CA
Thanks guys! I know it needs a drop but seriously some of the driveways here are made only for lifted trucks... there are some I can't even make up in stock form (or won't even try) so I'm really kinda hesitant on lowering it any more than stock. Don't want the "Dachshund stuck on a speedbump" syndrome you know? lol
Thread Starter
|
Member
Joined: Feb 2007
Posts: 143
From: Corona, CA
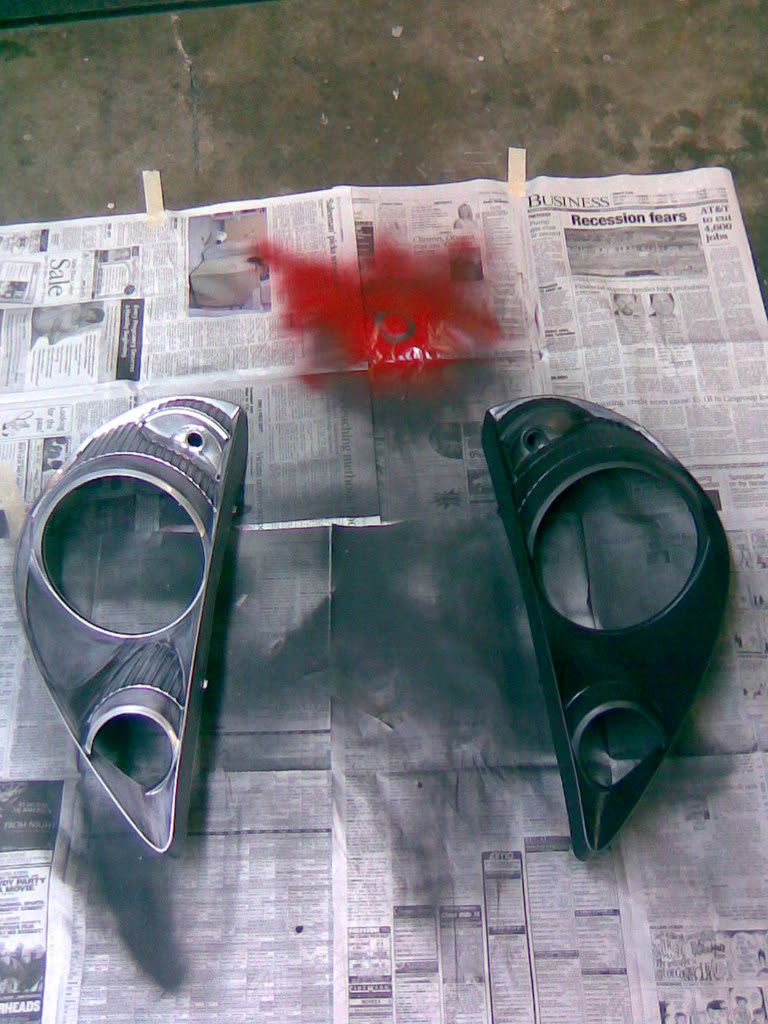
It's definitely a work in progress and I'm by no means done! Thanks for the compliments, they're really appreciated! I painted my headlights using the method described by smeister, thank you again! As far as the foglamps and the surround-things (for lack of better term) we just basically took them off, sanded them down, primered them with black primer a few times and then covered them with a few nice coats of flat black paint from autozone. It wasn't krylon, it was whatever they had and I can't remember the name lol I'll find out for you though! The lens paint is by the same company I believe that makes "nightshade" for smoking headlights, but obviously this was the yellow paint. If there are any "tune shops" in your local mall or kiosks they should surely have it, as neither pep boys or autozone carries it as far as I know. The katakana on the front of the can reads "yellow fog", but as far as kanji goes I can't read it haha. To use it, just seperate them from the surrounds, rub them with alcohol to clean them and apply a few nice coats and let dry! It's really easy 
Thread Starter
|
Member
Joined: Feb 2007
Posts: 143
From: Corona, CA
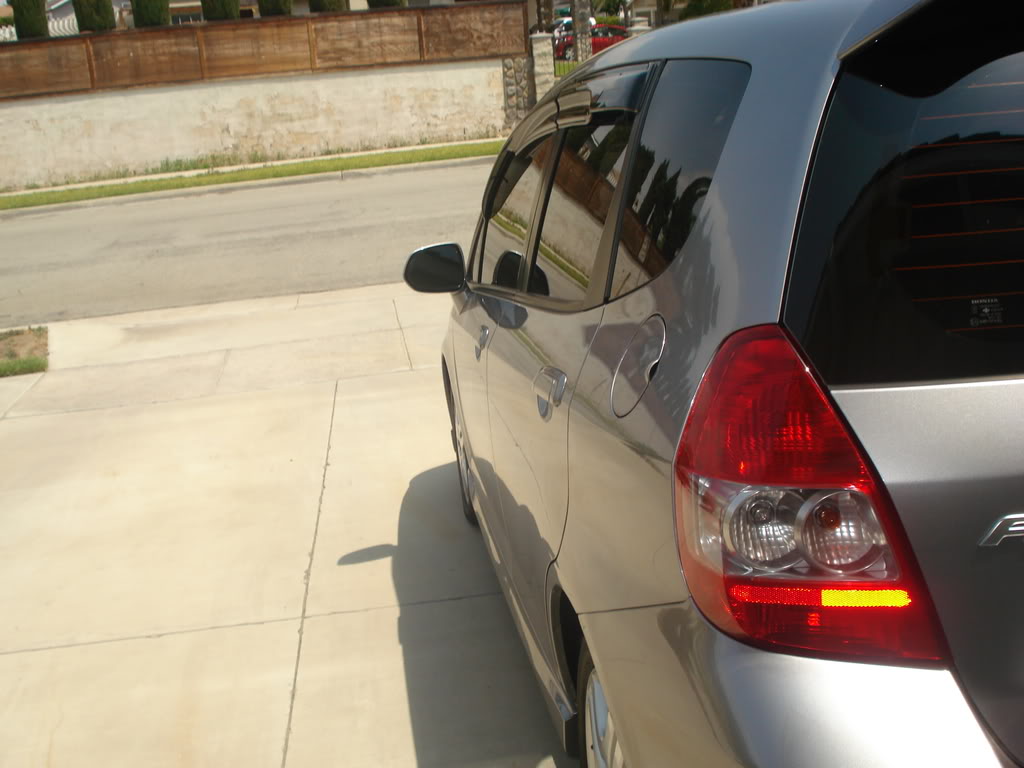
here are a few more pics...
My boyfriend with Arashi's bumper completely off...
gloomy morning

front view
side profile
The difference between the stock color and one coat of black primer...
That's it for now i'll try to post up some evening shots with the fogs on if I can!
My boyfriend with Arashi's bumper completely off...
gloomy morning
front view
side profile
The difference between the stock color and one coat of black primer...
That's it for now i'll try to post up some evening shots with the fogs on if I can!
Last edited by Arashi; Apr 20, 2008 at 08:27 PM.
Thread Starter
|
Member
Joined: Feb 2007
Posts: 143
From: Corona, CA
As far as the tow hook goes, I have an S2000 extension on order, which basically is just a short extender for the stock tow hook, it was only like 4 bucks so i'm gonna try it to see how it looks, could go either way. If it looks crap, it's gone lol. I really wanted to buy a towhook but honestly, $100 for a hanging piece of metal? My intake, along with all the paint to do this was around that! Besides, I don't wanna worry about someone stealing it, and the stock one, as you guys said too, looks fine! To paint it I just got some bright red engine enamel, primered it with the same flat black primer as we used on the headlights and foglamps and used that, took a few coats but it seems to be stuck on there pretty well.
It's definitely a work in progress and I'm by no means done! Thanks for the compliments, they're really appreciated! I painted my headlights using the method described by smeister, thank you again! As far as the foglamps and the surround-things (for lack of better term) we just basically took them off, sanded them down, primered them with black primer a few times and then covered them with a few nice coats of flat black paint from autozone. It wasn't krylon, it was whatever they had and I can't remember the name lol I'll find out for you though! The lens paint is by the same company I believe that makes "nightshade" for smoking headlights, but obviously this was the yellow paint. If there are any "tune shops" in your local mall or kiosks they should surely have it, as neither pep boys or autozone carries it as far as I know. The katakana on the front of the can reads "yellow fog", but as far as kanji goes I can't read it haha. To use it, just seperate them from the surrounds, rub them with alcohol to clean them and apply a few nice coats and let dry! It's really easy


Thread Starter
|
Member
Joined: Feb 2007
Posts: 143
From: Corona, CA
Thanks guys! You know honestly, I don't know I guess it's just how it's threaded... because it's not perfectly straight if you look closely but it's close enough. The tow hook is all the way as tight as it will go. I suppose if you got it in a certain spot you liked, you could just put a little locktite in it to hold it in place, ever thought of that? Might be perfect! 
Thread Starter
|
Member
Joined: Feb 2007
Posts: 143
From: Corona, CA
Thank you Sid, honestly your intake (it's officially called that now, I said so..) is incredible. It holds in place really well and is just all in all a really perfect design. I bow to your engineering prowess 
Member
Joined: Mar 2008
Posts: 88
From: Carson City, Nevada
As far as the tow hook goes, I have an S2000 extension on order, which basically is just a short extender for the stock tow hook, it was only like 4 bucks so i'm gonna try it to see how it looks, could go either way. If it looks crap, it's gone lol. I really wanted to buy a towhook but honestly, $100 for a hanging piece of metal? My intake, along with all the paint to do this was around that! Besides, I don't wanna worry about someone stealing it, and the stock one, as you guys said too, looks fine! To paint it I just got some bright red engine enamel, primered it with the same flat black primer as we used on the headlights and foglamps and used that, took a few coats but it seems to be stuck on there pretty well.
Man, it looks like I might have to pull out my tow hook and see what I can do to make it look as cool as yours!! Good job!!!
Thread Starter
|
Member
Joined: Feb 2007
Posts: 143
From: Corona, CA
Don't forget to post pics either!

Senior Member
Joined: Mar 2008
Posts: 442
From: Ohio
Thanks buddy! It's actually really easy, just use a pair of pliers to hold it in the air by the screw part, rather than setting it down on the ground. You'll get a much more even coat. We didn't do this until the last two coats, and I think when all was said and done my towhook had like two coats of black primer and like 6 coats of red enamel cuz we kept setting it down, LOL
Don't forget to post pics either!
Don't forget to post pics either!
