
Funkster's 08 Honda Fit Build Thread.


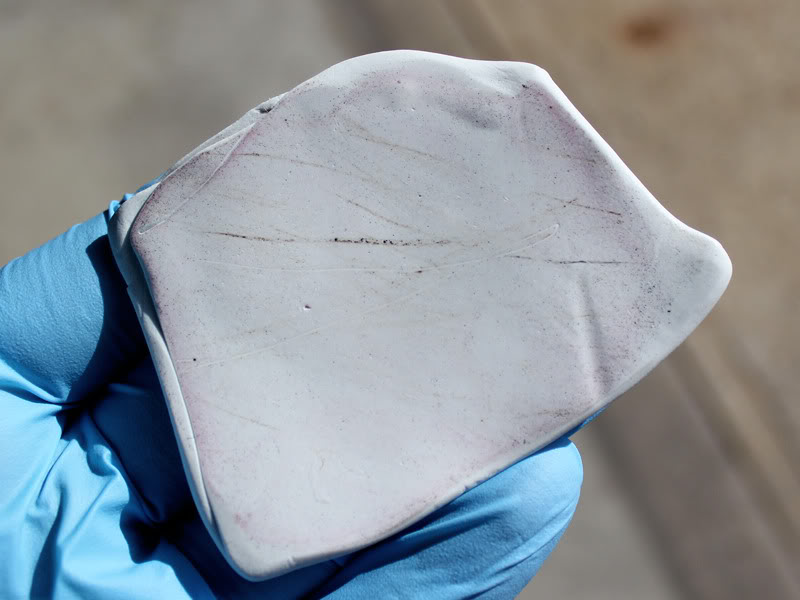
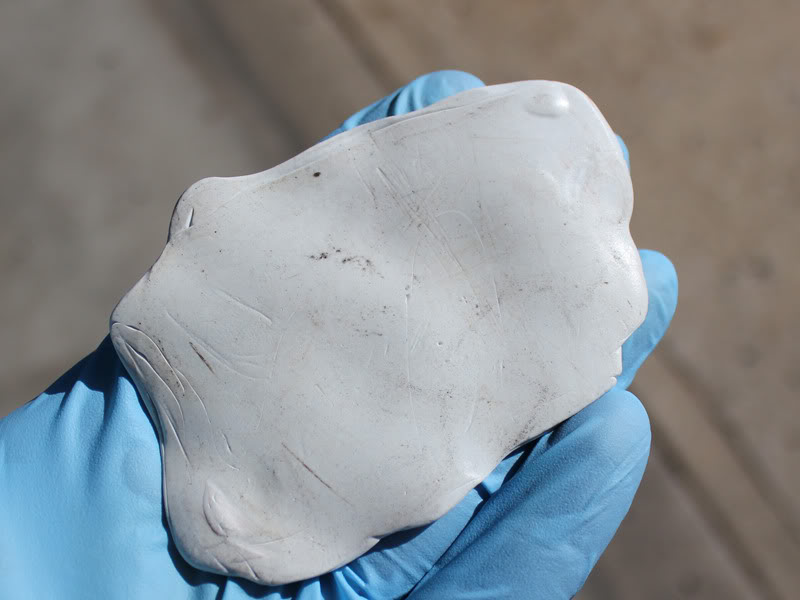
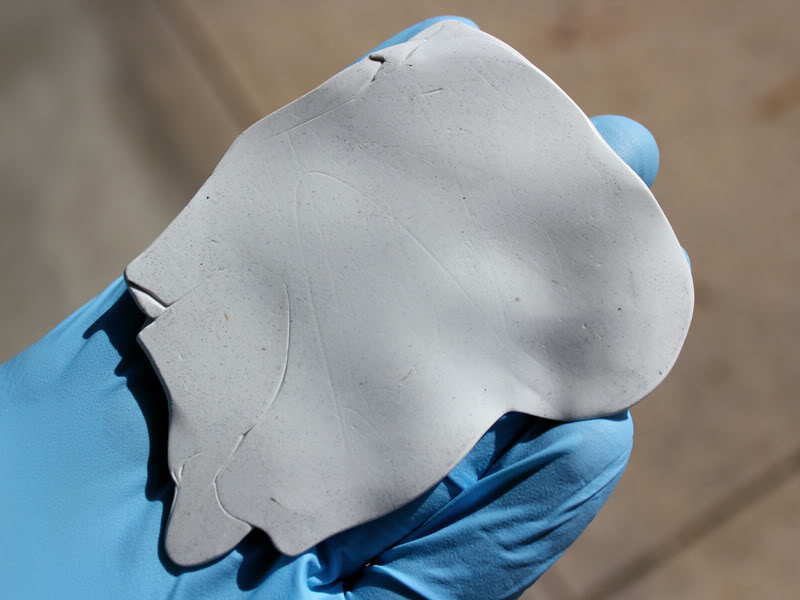
I do have a picture of the new intake manifold cover edited now. I like this cover a lot, but I really like to be unique so I will mainly only use it when I am working on new paint schemes for my stock one.
For now, here is the new one.
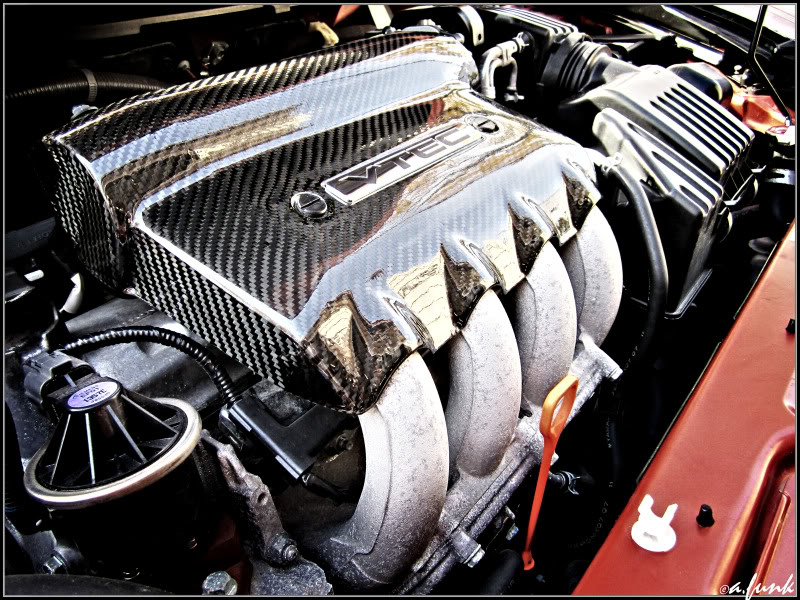
For now, here is the new one.

Alright guys, I have a few more pieces I have to coat in the near future and I finally got a larger oven so my ability to coat will increase. I am currently working on a few things, here they are:
Mixing a powder coating match to my car's color
Starting ceramic coating
I would like to remove and ceramic coat my upper intake manifold, exhaust manifold, throttle body and maybe a few other parts.
I have a good amount of things I would like to coat to match the car color as well. (valve cover, motor mounts, etc)
I also may be picking up new tires soon as I will need them for race season next year.
Long time without updates from me. Not much has happened with the Fit recently. I have been focusing my energy on my coating business as it is growing quite a bit more rapidly than I thought it would.
However, I did pick up a TON of new detailing supplies a few weeks ago and it is finally supposed to be fairly warm tomorrow so I am going to start what is always a very lengthy routine of spring cleaning for it.
Updates and photos to come.
However, I did pick up a TON of new detailing supplies a few weeks ago and it is finally supposed to be fairly warm tomorrow so I am going to start what is always a very lengthy routine of spring cleaning for it.
Updates and photos to come.

Well, got day number one of my detail work on the Fit done. I didn't get all of what I wanted to accomplished but, you can't rush detail work and there is no reason for me to since I love doing it. 
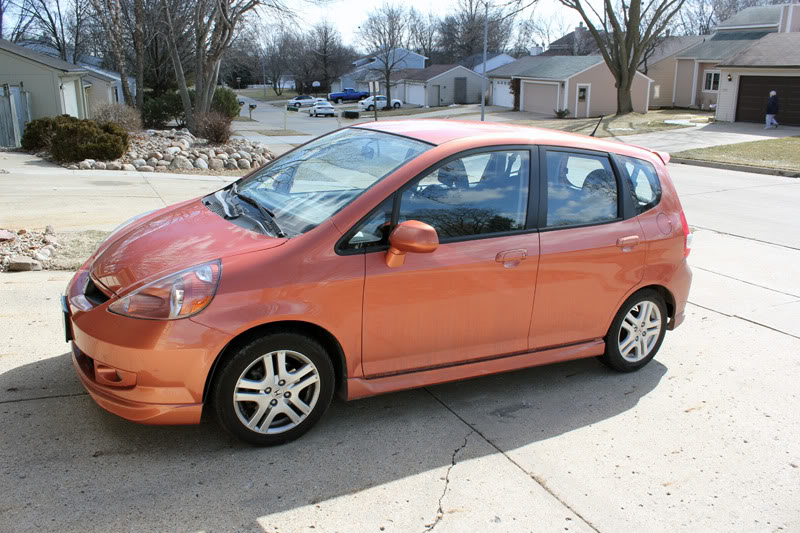
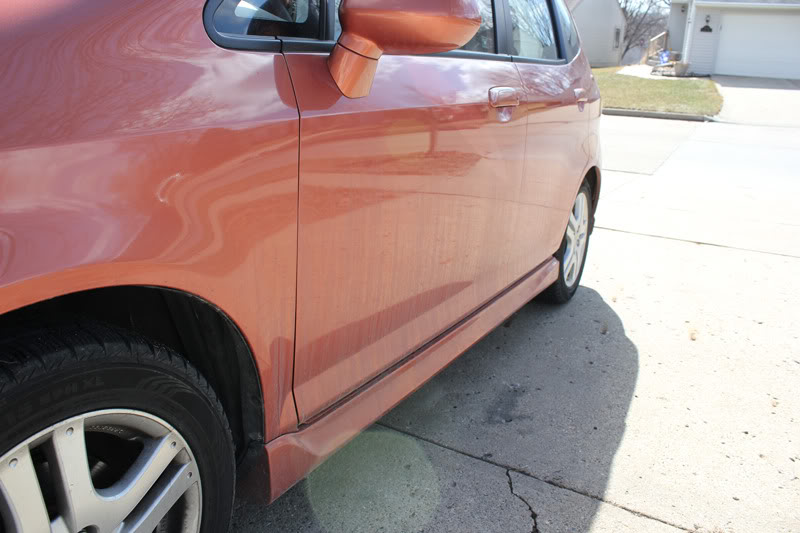
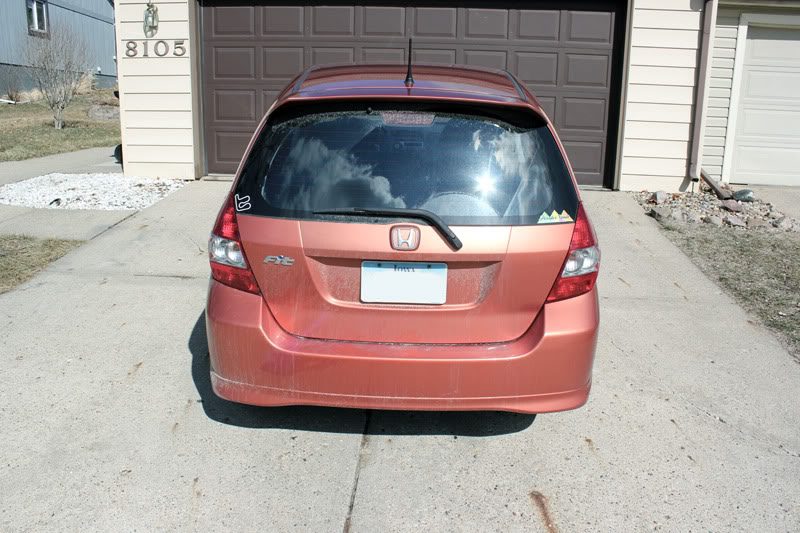
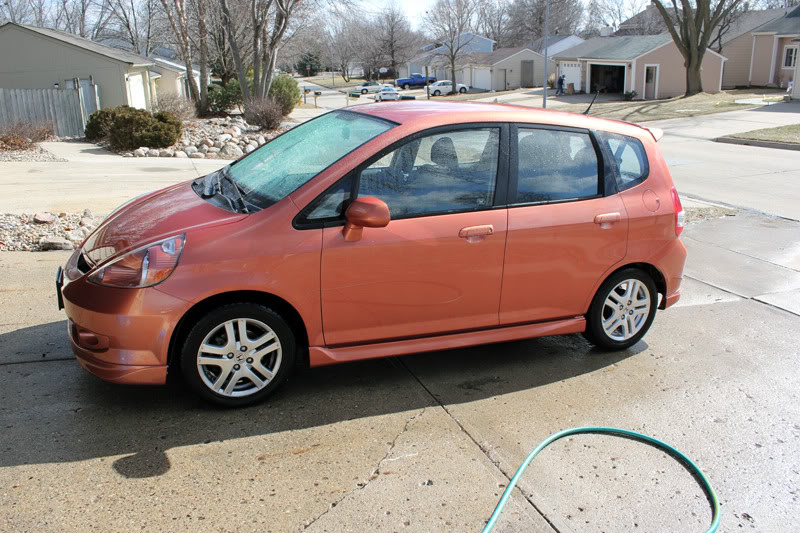
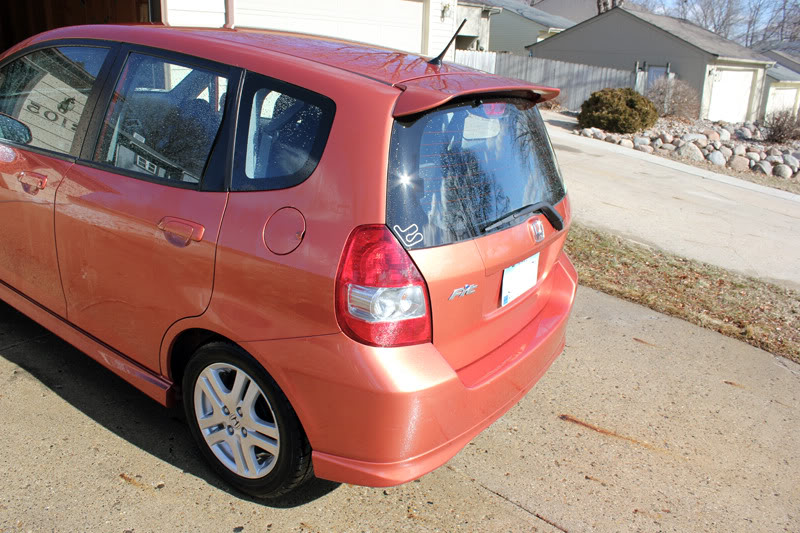
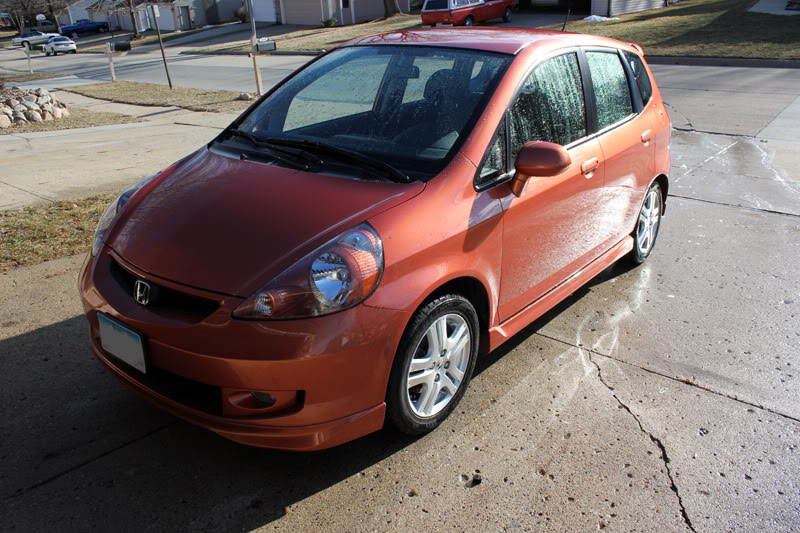
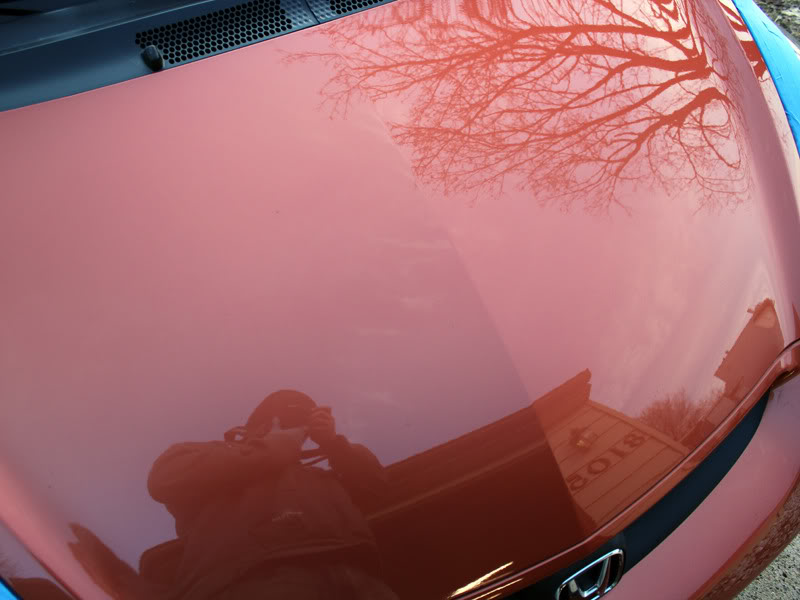
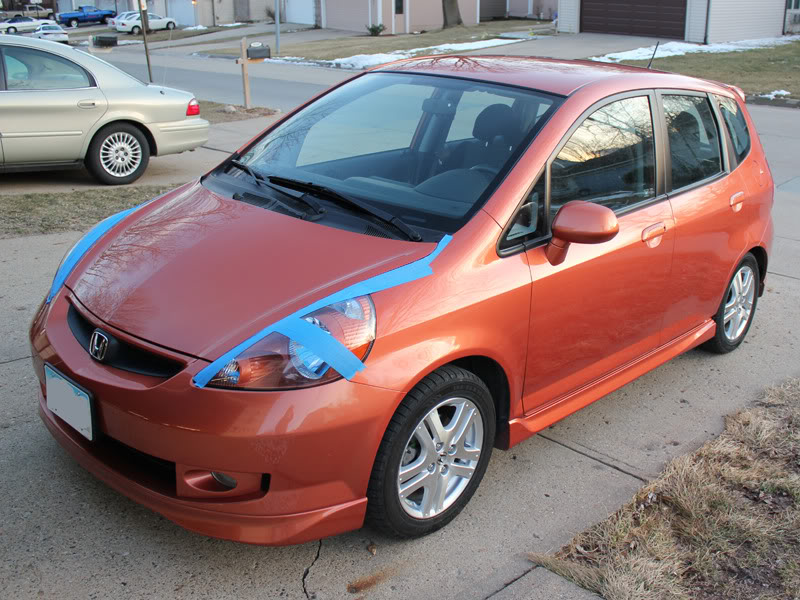
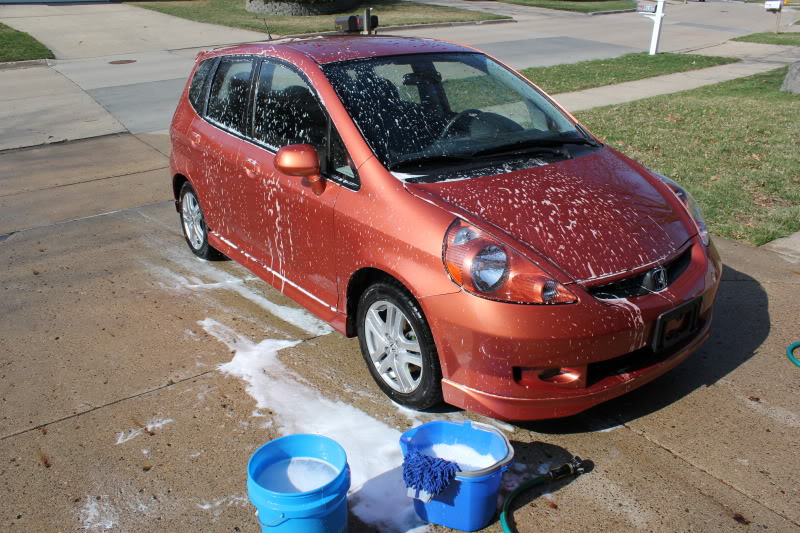
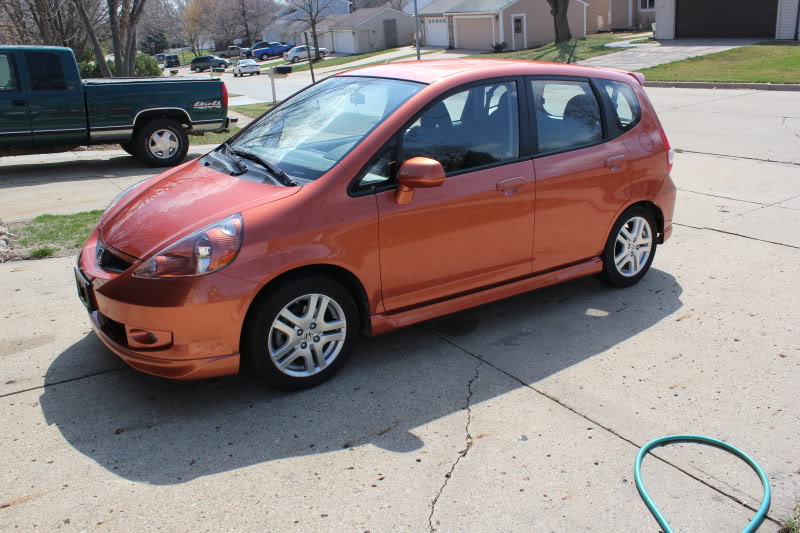
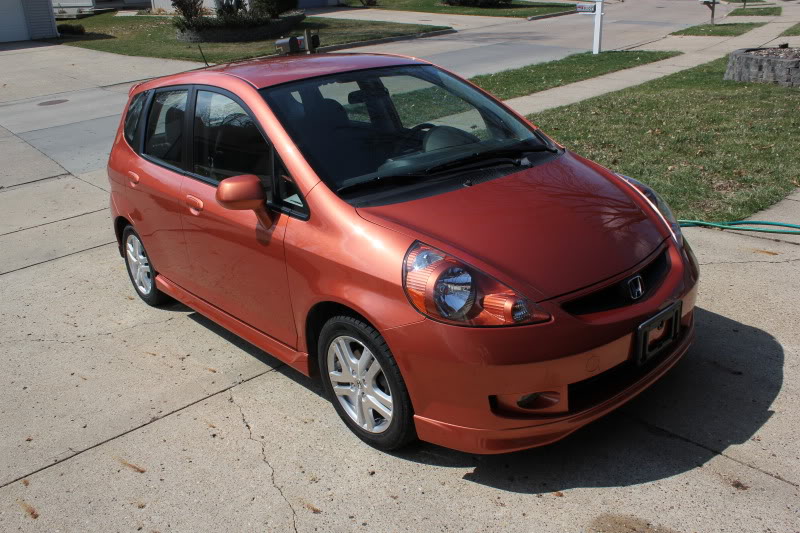
I started off the day going outside and taking a few pictures of the Fit in the condition it was in. I have kept it pretty clean, but it has not been fully restored and detailed since I have owned it.
Here is what I started with.
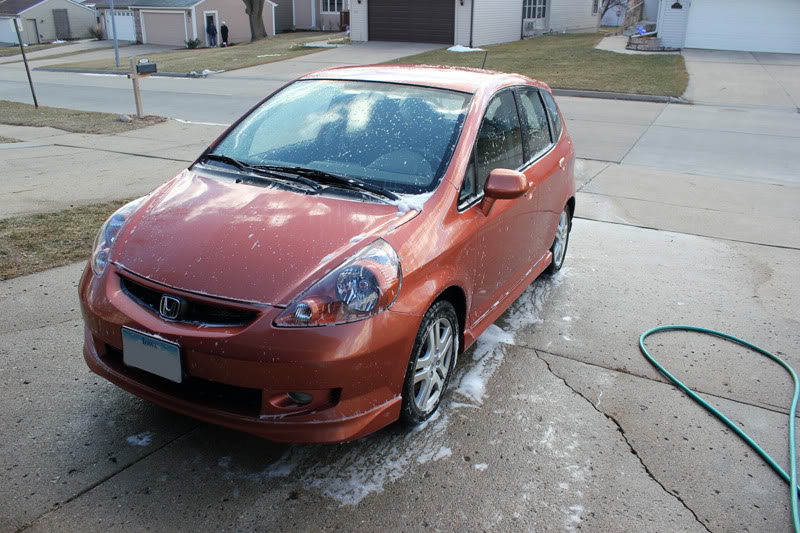
Then, I rinsed off all of the loose dirt and grime.

I washed the car by hand using a chenille microfiber was mitt and used the two bucket method with a Grit Guard in each bucket. For anyone not familiar with the two bucket method here is a video that does a great job of breaking it down.
Washing Your Vehicle Using The Two-Bucket Method - YouTube
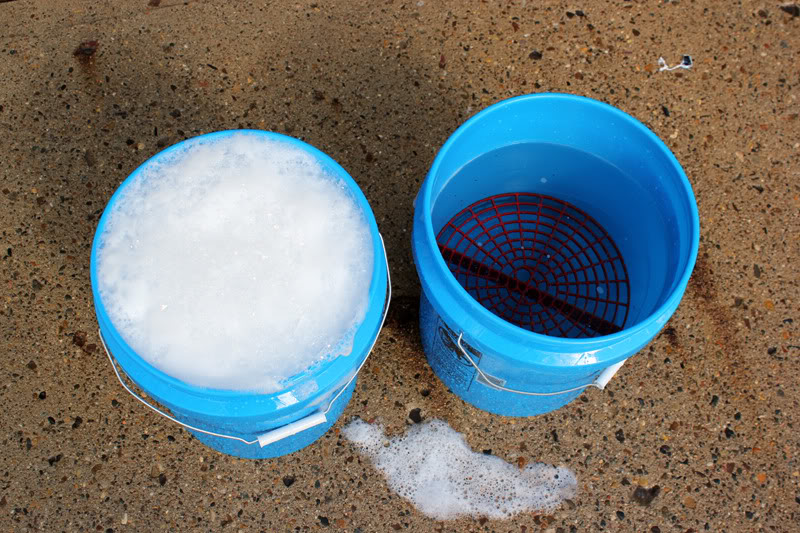
I used Meguiar's Gold Class for my wash with a small amount of Griot's Prep Agent because I was trying to strip all of the old sealants and wax off of the surface. The Gold Class is a great shampoo, but once it is gone I have a few others I want to try. In the meantime, here is a photo of my buckets ready to go with the Grit Guards in place.
The Fit was then washed from the top downward, which reduces the chance of scratching as the soapy water runs the contaminants downward.
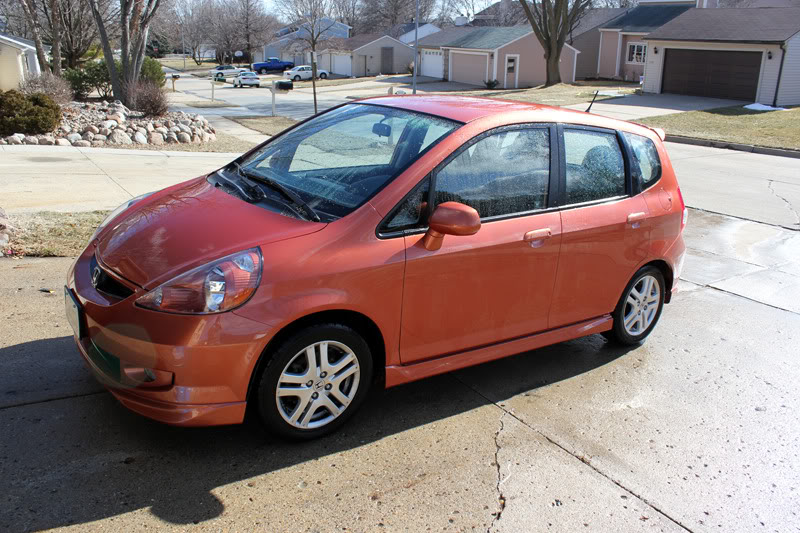
Afterwards I rinsed the car off completely and made sure the water was sheeting off, not beading. This tells me all the previous waxes and sealants have been removed.

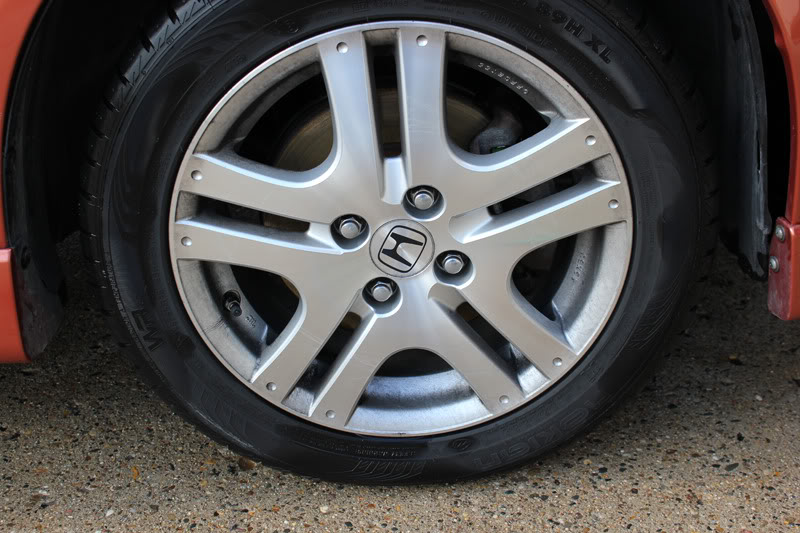
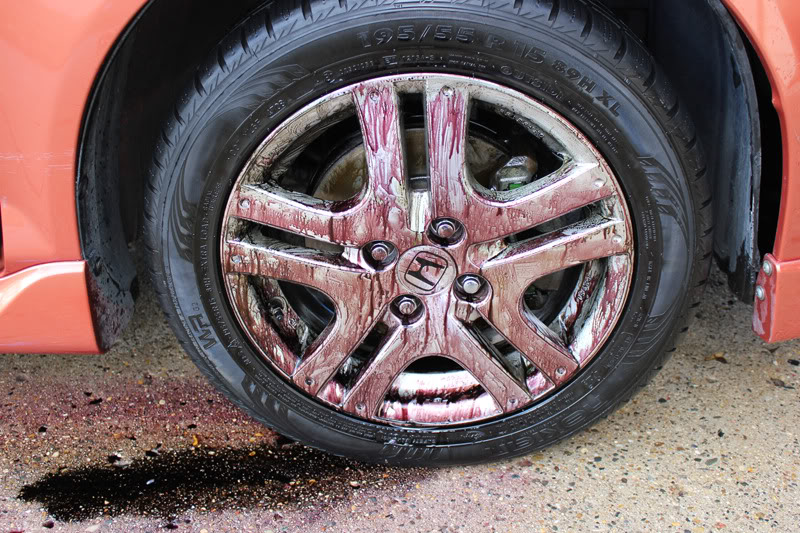
Now onto the wheels for a bit. I am only going to show the process completed on one wheel, but the same process was done for all four. I started off with a very dirty wheel. It was complete with tar, grime, brake dust and more! Here is a starting picture of the wheel.
One of the new products I picked up is a product called Iron-X. It is a product that chemically breaks down iron particles making it very effective on brake dust. It is also a fantastic overall cleaner for wheels. If it has a downside it is the smell. I mean this stuff smells literally like sewage.
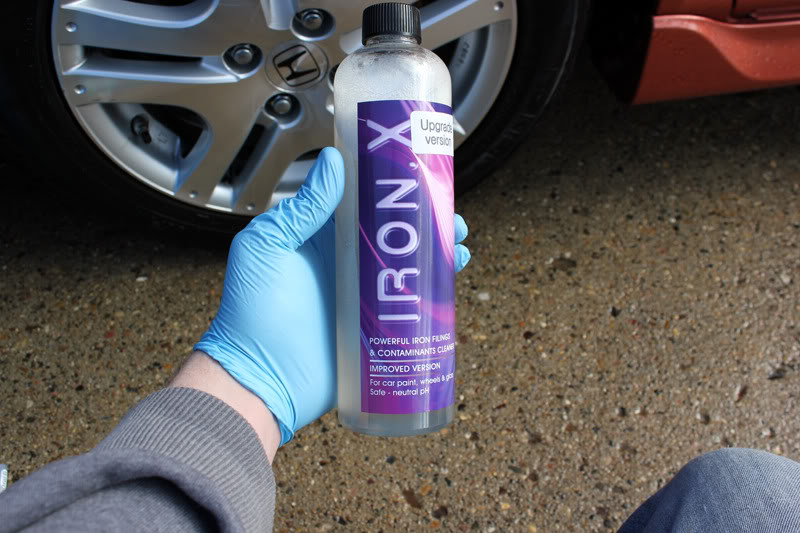
It is pretty much as simple as cleaners get. You simply spray it on and wait 2-3 minutes before you gently work the cleaner to break up any stubborn grime. One cool feature is as it breaks down the particles and cleans Iron-X changes from clear to a reddish purple color.
Here it is about a minute after being sprayed on.
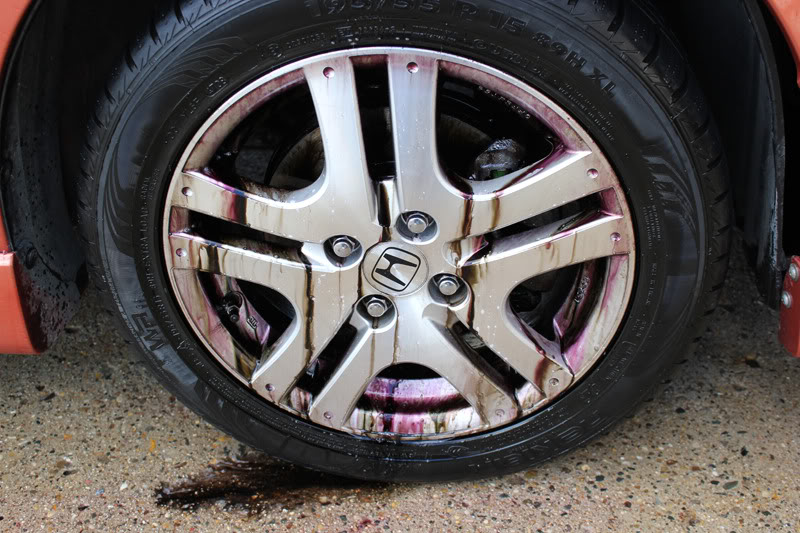
After about 3 minutes I worked the product with a soft brush.
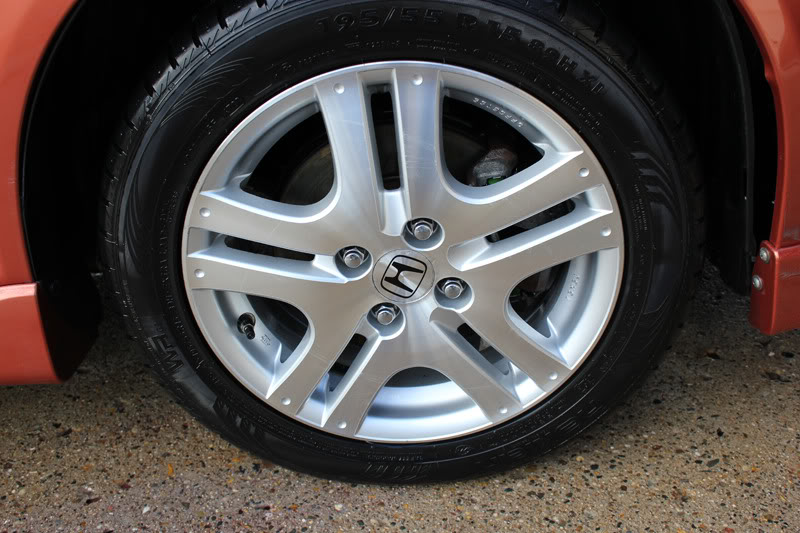
After waiting about another 30 seconds I rinsed off the wheel and here were the results.
My final step for the wheels is I always like to apply a wax to keep them beading water, looking good and most importantly, keeping brake dust from sticking to them.
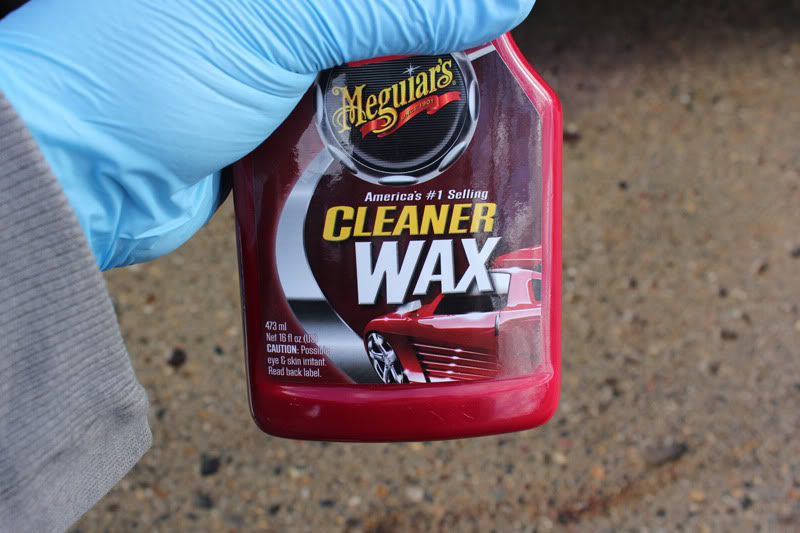
My wax of choice for this task is Meguiar's Cleaner Wax. The reason is not only is it readily available and VERY affordable it does have a small amount of polishing ability which helps bring out your wheels shine and the cleaner has a great shell time and usually lasts around 3 months per application.
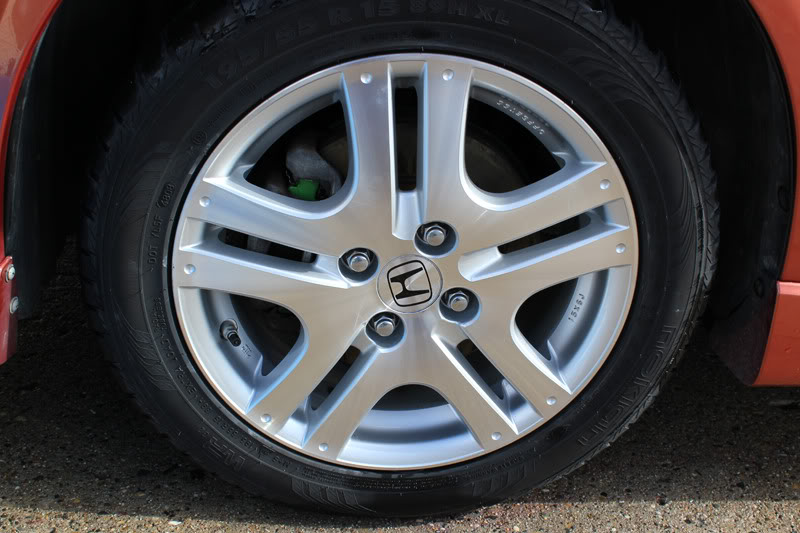
I didn't take a picture of the wheel above waxed, but for some reason took a picture of a different one, however the idea is the same.
First, I applied the wax all over the wheel surface. I applied it a little thick as I usually do for wheel applications.

Then, I waited until the wax hazed and passed the swipe test and then buffed it off with a standard microfiber towel. (Nevermind the spot I missed. I got it after the picture.)
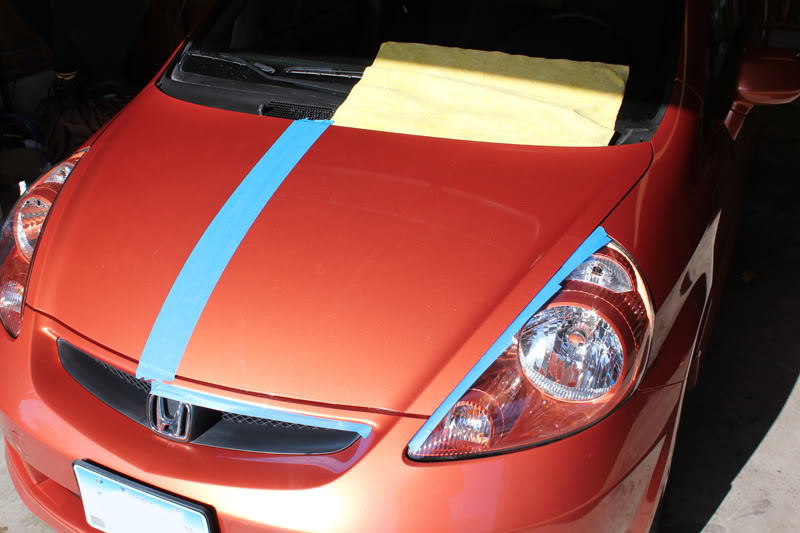
Back to the paint for the remainder of the work completed in day 1. The Iron-X used to clean the wheels above is also safe for use on paint and glass. The product does the same job on paint removing brake dust, rail dust and other contaminants. I plan on claying the entire car, but wanted to use Iron-X on a couple of the panels to see what all it would find and thought it might be able to give me a heads up on trouble areas while claying.
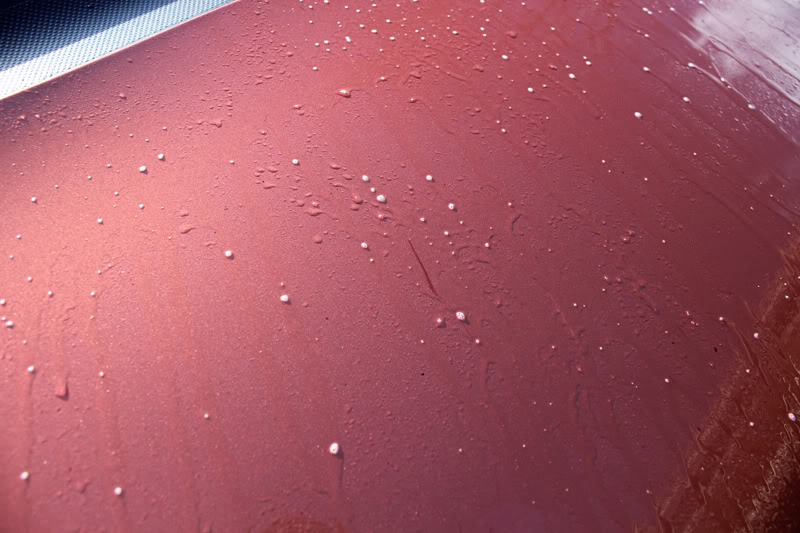
First I applied the Iron-X to the hood of the Fit.
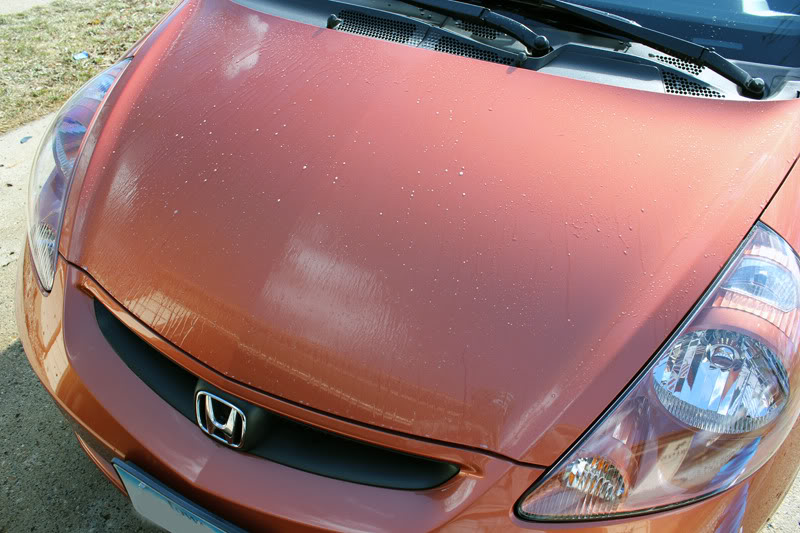
There was a couple of spots that came to light after a moment or two of soaking time.
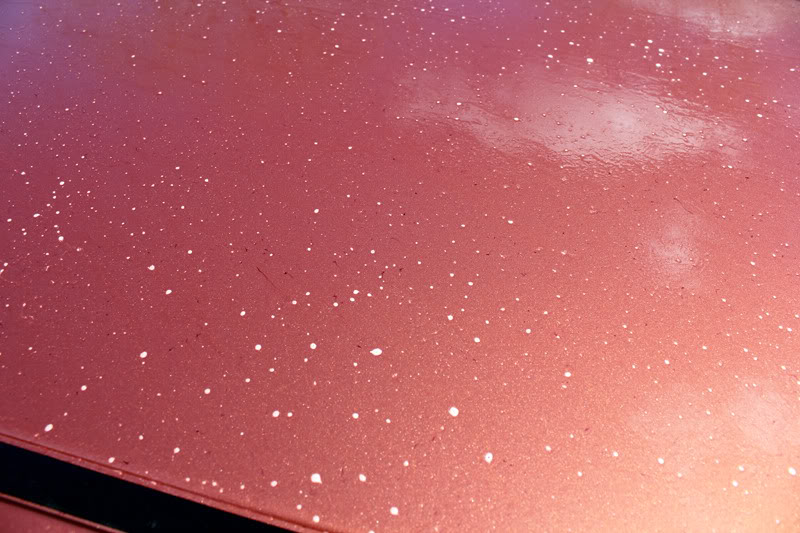
I then completed the same process on the roof of the car.
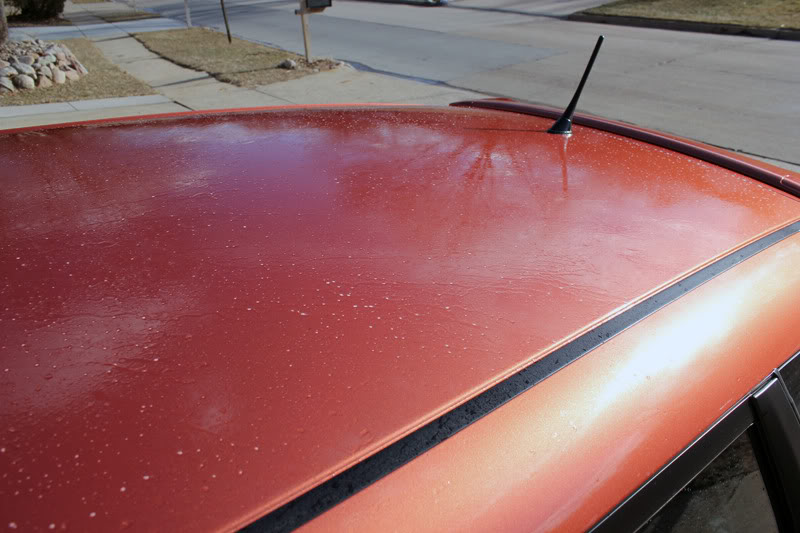
Same thing, just a few areas that seemed to be high in contamination.
All rinsed off and ready to rest for the night.
So, that wraps up the first day of the project. There is still a ton to do, but I ran out of daylight. Lots more to come including; claying, buffing, polishing, sealing and maybe even a little bit of wet sanding.
Of course, that is just the exterior.

I started off the day going outside and taking a few pictures of the Fit in the condition it was in. I have kept it pretty clean, but it has not been fully restored and detailed since I have owned it.
Here is what I started with.
Then, I rinsed off all of the loose dirt and grime.
I washed the car by hand using a chenille microfiber was mitt and used the two bucket method with a Grit Guard in each bucket. For anyone not familiar with the two bucket method here is a video that does a great job of breaking it down.
Washing Your Vehicle Using The Two-Bucket Method - YouTube
I used Meguiar's Gold Class for my wash with a small amount of Griot's Prep Agent because I was trying to strip all of the old sealants and wax off of the surface. The Gold Class is a great shampoo, but once it is gone I have a few others I want to try. In the meantime, here is a photo of my buckets ready to go with the Grit Guards in place.
The Fit was then washed from the top downward, which reduces the chance of scratching as the soapy water runs the contaminants downward.
Afterwards I rinsed the car off completely and made sure the water was sheeting off, not beading. This tells me all the previous waxes and sealants have been removed.
Now onto the wheels for a bit. I am only going to show the process completed on one wheel, but the same process was done for all four. I started off with a very dirty wheel. It was complete with tar, grime, brake dust and more! Here is a starting picture of the wheel.
One of the new products I picked up is a product called Iron-X. It is a product that chemically breaks down iron particles making it very effective on brake dust. It is also a fantastic overall cleaner for wheels. If it has a downside it is the smell. I mean this stuff smells literally like sewage.
It is pretty much as simple as cleaners get. You simply spray it on and wait 2-3 minutes before you gently work the cleaner to break up any stubborn grime. One cool feature is as it breaks down the particles and cleans Iron-X changes from clear to a reddish purple color.
Here it is about a minute after being sprayed on.
After about 3 minutes I worked the product with a soft brush.
After waiting about another 30 seconds I rinsed off the wheel and here were the results.
My final step for the wheels is I always like to apply a wax to keep them beading water, looking good and most importantly, keeping brake dust from sticking to them.
My wax of choice for this task is Meguiar's Cleaner Wax. The reason is not only is it readily available and VERY affordable it does have a small amount of polishing ability which helps bring out your wheels shine and the cleaner has a great shell time and usually lasts around 3 months per application.
I didn't take a picture of the wheel above waxed, but for some reason took a picture of a different one, however the idea is the same.
First, I applied the wax all over the wheel surface. I applied it a little thick as I usually do for wheel applications.
Then, I waited until the wax hazed and passed the swipe test and then buffed it off with a standard microfiber towel. (Nevermind the spot I missed. I got it after the picture.
)Back to the paint for the remainder of the work completed in day 1. The Iron-X used to clean the wheels above is also safe for use on paint and glass. The product does the same job on paint removing brake dust, rail dust and other contaminants. I plan on claying the entire car, but wanted to use Iron-X on a couple of the panels to see what all it would find and thought it might be able to give me a heads up on trouble areas while claying.
First I applied the Iron-X to the hood of the Fit.
There was a couple of spots that came to light after a moment or two of soaking time.
I then completed the same process on the roof of the car.
Same thing, just a few areas that seemed to be high in contamination.
All rinsed off and ready to rest for the night.
So, that wraps up the first day of the project. There is still a ton to do, but I ran out of daylight. Lots more to come including; claying, buffing, polishing, sealing and maybe even a little bit of wet sanding.
Of course, that is just the exterior.
Well detail day #2 will have to wait a few days.
Since this is Iowa it was 57 degrees on Wednesday and Thursday it snowed about 4 inches, it is still snowing and is supposed to continue until later today. Then Sunday it is supposed to be in the 50s again. So hopefully, I will continue on Sunday.
Since this is Iowa it was 57 degrees on Wednesday and Thursday it snowed about 4 inches, it is still snowing and is supposed to continue until later today. Then Sunday it is supposed to be in the 50s again. So hopefully, I will continue on Sunday.
Full Detail Day #2
Well, Sunday did end up being pretty nice so I got out for a few hours and made a little more progress.
Note: The Fit is not driven daily right now as our Forester has been able to handle our tasks. As such, this car will probably not be driven again until at least the exterior part of the project is completed.
I started off the day getting all the clay work done. For those unfamiliar with the claying of a car it is basically exactly what it sounds like. You use a lubricant spray to spray a panel and then lightly slide a section of detailing clay over the panel. The clay picks up stuck on contaminants and reside and leaves the panel smooth and clean for polishing.
I don't have any pictures of the claying process itself as it is a painfully simple task that I didn't feel justified pictures. I do however, have result pictures.
On most cars the front, roof and rear are the worst sections. My car was no exception to this standard.
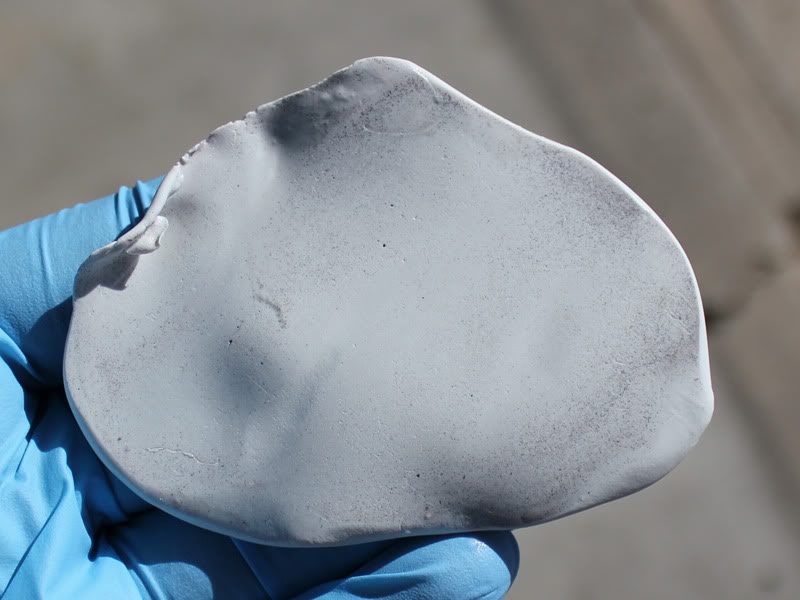
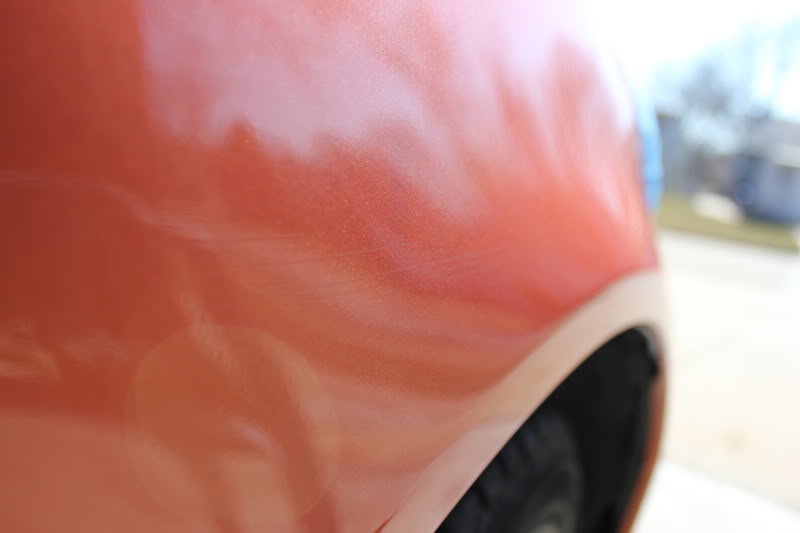
Clay from the hood, you can see some iron particles in there.
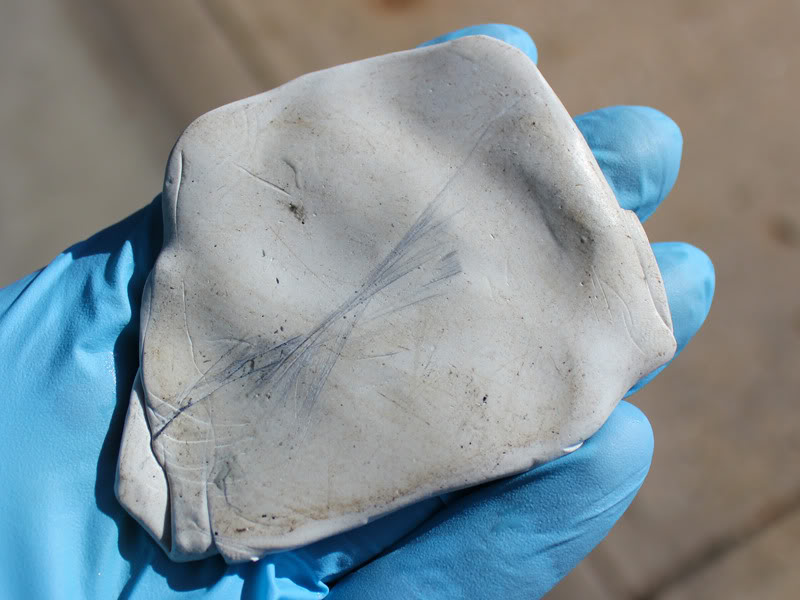
Roof clay, picking up tons of black paint overspray. I guess my car must have been sitting in a body shop at some point.
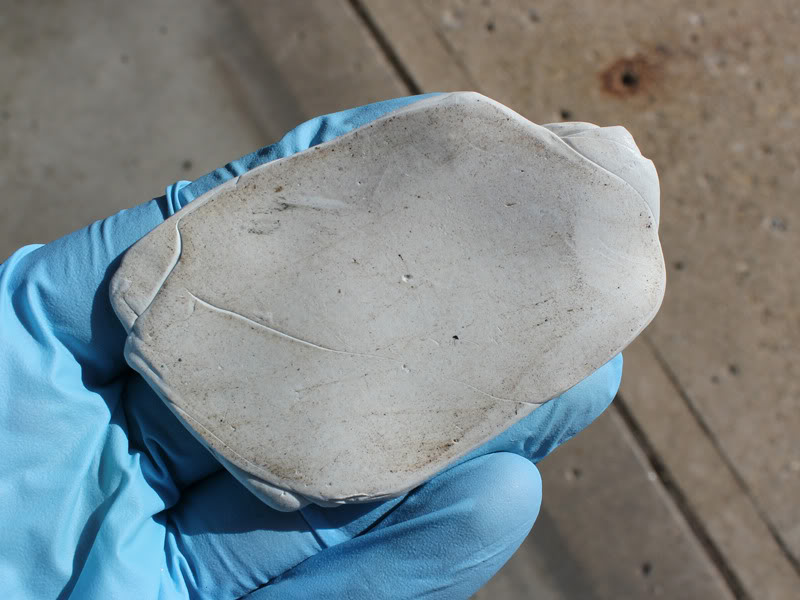
Clay from rear, swirling contaminants, exhaust, etc.
The other panels weren't quite so bad, but still not fantastic.
Each fender resulted similar to this.
Each door was similar to this.
Headlights weren't too bad.
With claying done I taped off half of my hood for testing of my buffing procedure so I can nail down an order for the entire car.
A rule in detailing is you use the least aggressive method to get your results. So, you start with the least abrasive you think may do the job and increase the aggressiveness of the pad used and then eventually the product until you achieve your desired results.
Now, my Fit doesn't have a ton of deep imperfections or swirling. Also, Honda paint is pretty notoriously soft so usually less aggressive products do fine for Honda paint. Knowing this I started with my black pad which is my second least aggressive pad. I started off using Blackfire's Finishing Polish as it can remove 2500-3000 grit defects.
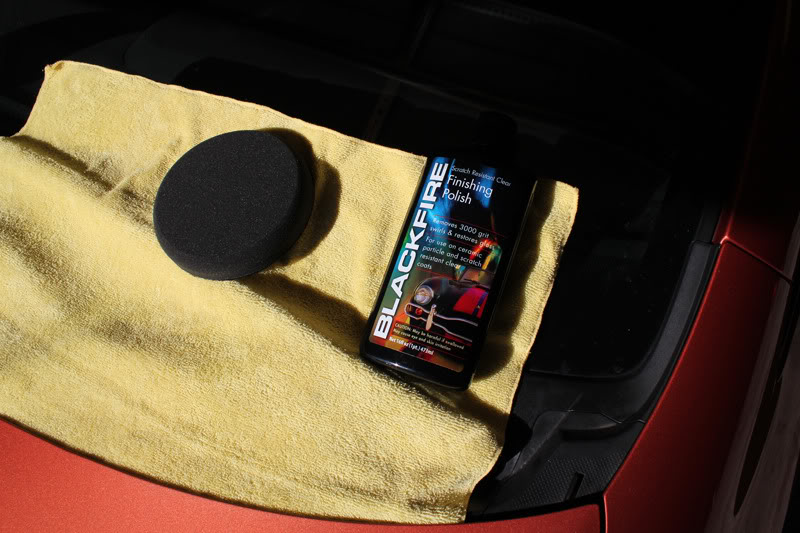
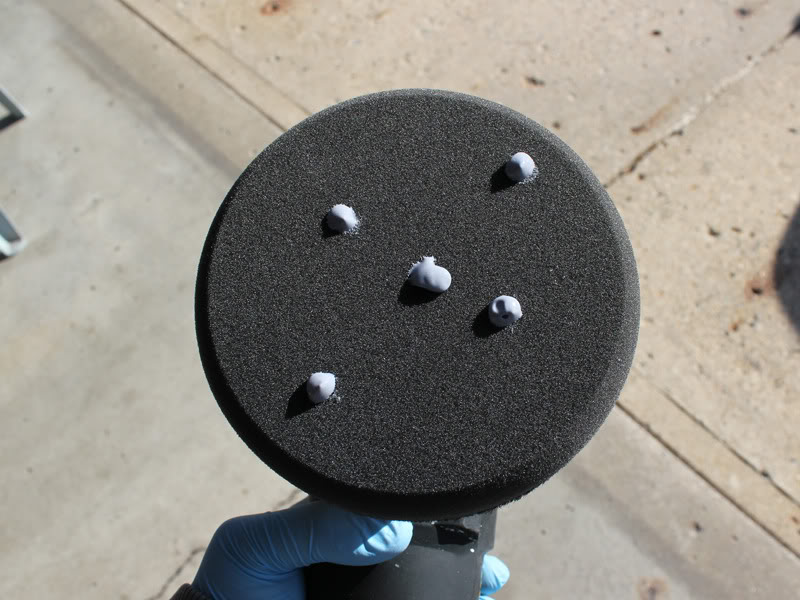
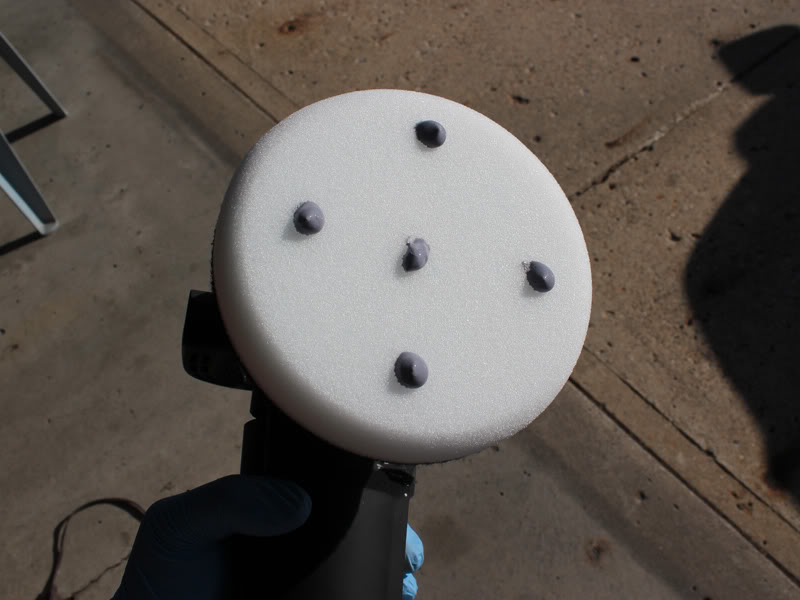
I primed the pad with detailing spray and applied a little bit of the product.
I made around four passes on the panel with this combination and then inspected my results. This combination did not even touch the imperfections which surprised me. So, I stepped up to the next most aggressive pad and the same polish.
After another four passes I still did not achieve my desired goals which had me wondering at this point if something was up with the paint. I stepped up again to my orange pad (light cutting) and with the same polish made another few passes.
Finally, this got me some results. However, the defect removal was still not as I had hoped for. While it removed some of the lighter defects it still was not touching the deeper imperfections.
At this point I decided this car had to have aftermarket paint on the front of it and that is why it is so much harder than any other Honda clear I have dealt with. Knowing this I stepped up to a more aggressive product.
I finally got all of the defect removal I wanted out of a combination of Meguiar's #83 and an Orange pad. (clean one obviously) The problem with this is that it leaves behind small defects known as micro-marring. Luckily a perfect solution for that is the product I had been using. I strapped the white pad back on and reapplied the Blackfire polish.
Two passes on the panel and the marring was gone. I had found my combination. I pulled the tape off to inspect the results and comparisons to make sure the combo did everything I wanted it to.
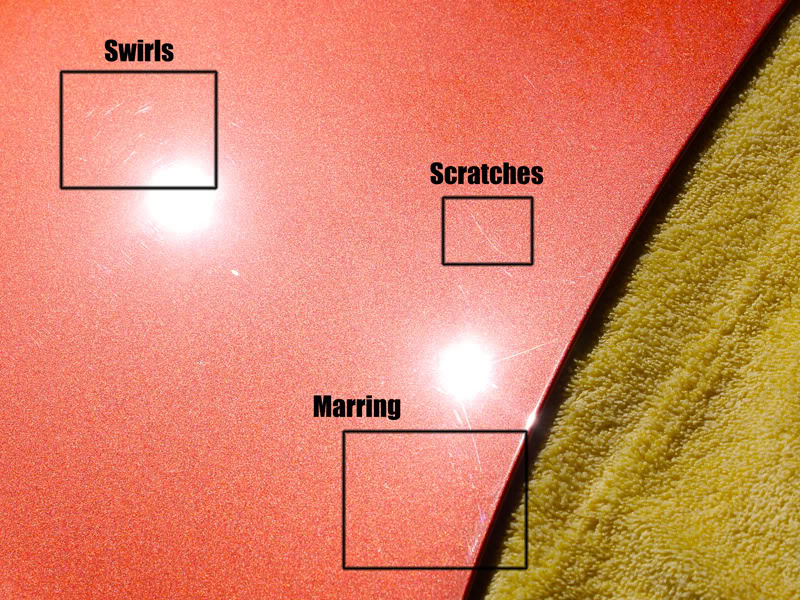
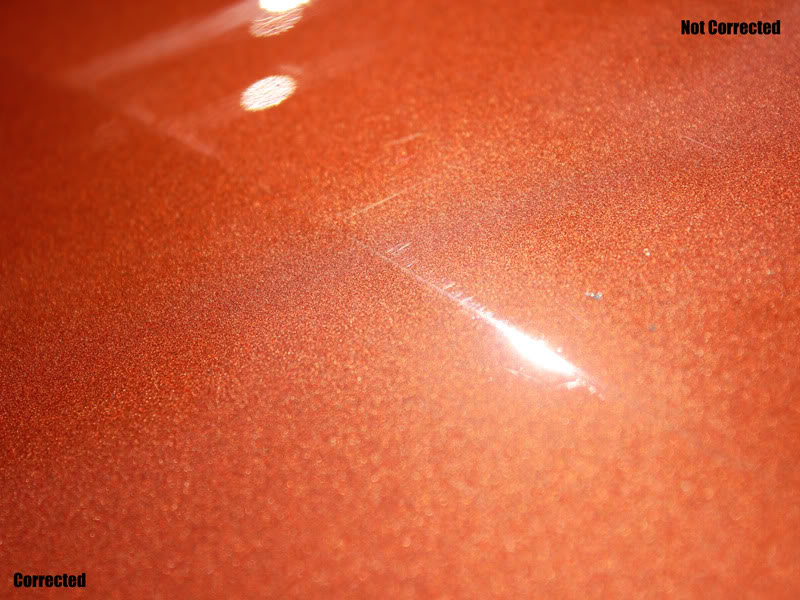
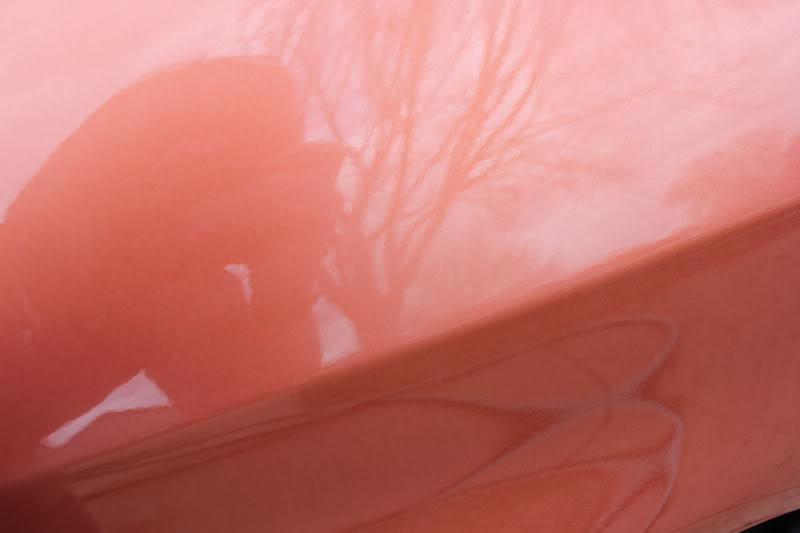
Tape removed you can see the difference in condition just by looking at the reflection of the garage door on the paint.
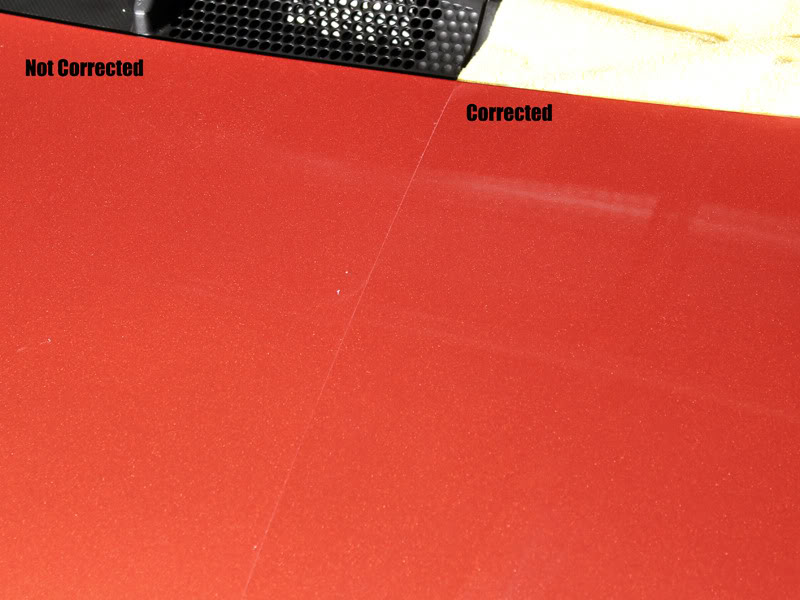
In this lighted close shot you can see the lie where the defects are gone and where they are still present.
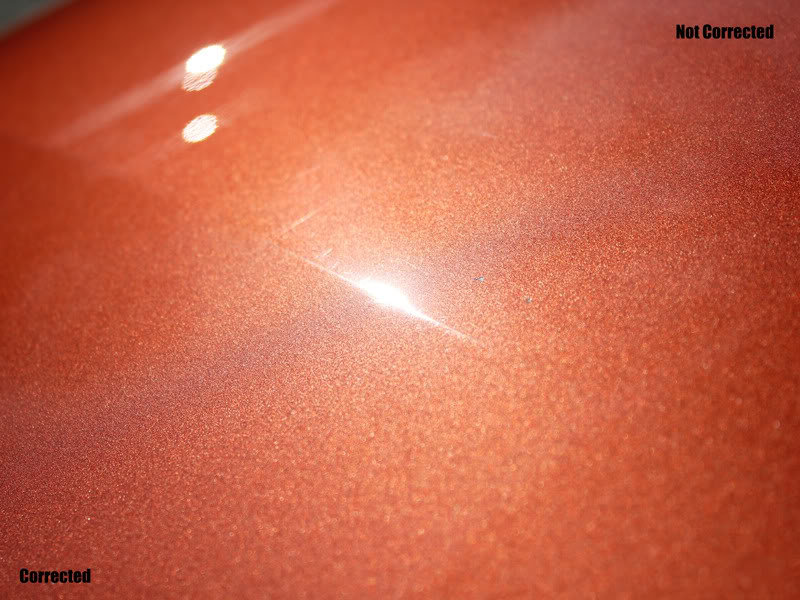
Here is an even closer shot of above.
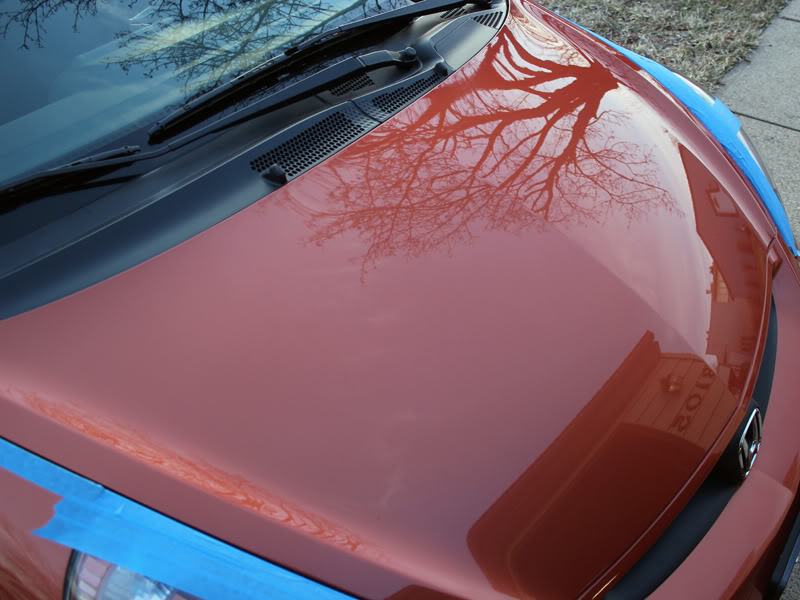
I had indeed found my combo for at least the hood. Now I will just have to find out how much of the car has been painted by testing other panels. However, for now knowing what works on the hood I finished it off with the process.
Here are some shots of the hood after I was done to show clarity and detail. Ignore the tape, it is only there to keep the headlights from getting marred. I also taped off a section of headlight to do a test spot on them as well since they have some swirling and scratching.
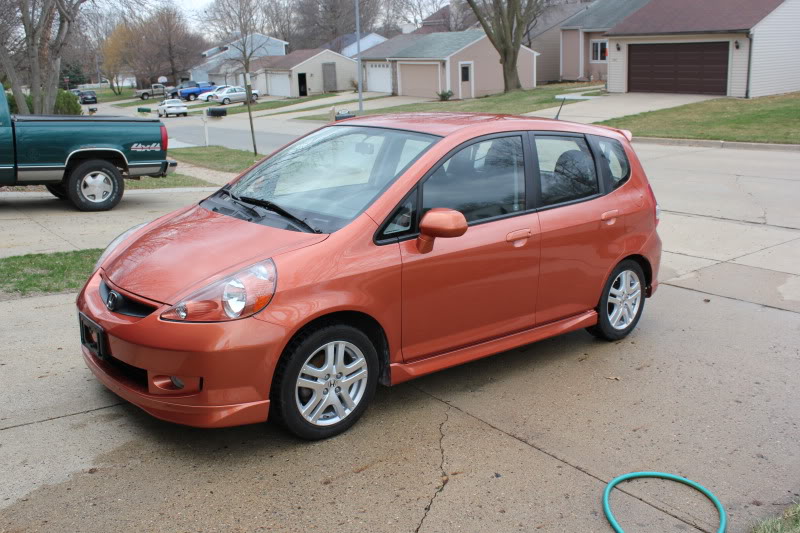
Since that was about all the daylight I had left I took a few overall pictures of the car again to show how it looked after the claying process was completed.

That will do it for day #2. Still almost an entire car to buff then apply sealant and wax to. Not to mention glass, headlights, taillights and I think badge or two to remove as well!
until next time,
Note: The Fit is not driven daily right now as our Forester has been able to handle our tasks. As such, this car will probably not be driven again until at least the exterior part of the project is completed.
I started off the day getting all the clay work done. For those unfamiliar with the claying of a car it is basically exactly what it sounds like. You use a lubricant spray to spray a panel and then lightly slide a section of detailing clay over the panel. The clay picks up stuck on contaminants and reside and leaves the panel smooth and clean for polishing.
I don't have any pictures of the claying process itself as it is a painfully simple task that I didn't feel justified pictures. I do however, have result pictures.
On most cars the front, roof and rear are the worst sections. My car was no exception to this standard.
Clay from the hood, you can see some iron particles in there.
Roof clay, picking up tons of black paint overspray. I guess my car must have been sitting in a body shop at some point.
Clay from rear, swirling contaminants, exhaust, etc.
The other panels weren't quite so bad, but still not fantastic.
Each fender resulted similar to this.
Each door was similar to this.
Headlights weren't too bad.
With claying done I taped off half of my hood for testing of my buffing procedure so I can nail down an order for the entire car.
A rule in detailing is you use the least aggressive method to get your results. So, you start with the least abrasive you think may do the job and increase the aggressiveness of the pad used and then eventually the product until you achieve your desired results.
Now, my Fit doesn't have a ton of deep imperfections or swirling. Also, Honda paint is pretty notoriously soft so usually less aggressive products do fine for Honda paint. Knowing this I started with my black pad which is my second least aggressive pad. I started off using Blackfire's Finishing Polish as it can remove 2500-3000 grit defects.
I primed the pad with detailing spray and applied a little bit of the product.
I made around four passes on the panel with this combination and then inspected my results. This combination did not even touch the imperfections which surprised me. So, I stepped up to the next most aggressive pad and the same polish.
After another four passes I still did not achieve my desired goals which had me wondering at this point if something was up with the paint. I stepped up again to my orange pad (light cutting) and with the same polish made another few passes.
Finally, this got me some results. However, the defect removal was still not as I had hoped for. While it removed some of the lighter defects it still was not touching the deeper imperfections.
At this point I decided this car had to have aftermarket paint on the front of it and that is why it is so much harder than any other Honda clear I have dealt with. Knowing this I stepped up to a more aggressive product.
I finally got all of the defect removal I wanted out of a combination of Meguiar's #83 and an Orange pad. (clean one obviously) The problem with this is that it leaves behind small defects known as micro-marring. Luckily a perfect solution for that is the product I had been using. I strapped the white pad back on and reapplied the Blackfire polish.
Two passes on the panel and the marring was gone. I had found my combination. I pulled the tape off to inspect the results and comparisons to make sure the combo did everything I wanted it to.
Tape removed you can see the difference in condition just by looking at the reflection of the garage door on the paint.
In this lighted close shot you can see the lie where the defects are gone and where they are still present.
Here is an even closer shot of above.
I had indeed found my combo for at least the hood. Now I will just have to find out how much of the car has been painted by testing other panels. However, for now knowing what works on the hood I finished it off with the process.
Here are some shots of the hood after I was done to show clarity and detail. Ignore the tape, it is only there to keep the headlights from getting marred. I also taped off a section of headlight to do a test spot on them as well since they have some swirling and scratching.
Since that was about all the daylight I had left I took a few overall pictures of the car again to show how it looked after the claying process was completed.
That will do it for day #2. Still almost an entire car to buff then apply sealant and wax to. Not to mention glass, headlights, taillights and I think badge or two to remove as well!
until next time,
Plenty more to come!
Well, after some more crappy weather I may finally be able to get some more detailing stuff done in the next couple of days. If I am not careful I might accidentally get this done sometime soon. 
Alright ladies and gents, this stuff happened a while back, but I have been busy and hadn't posted.
Day #3 of Fit Detail: Exterior Completed
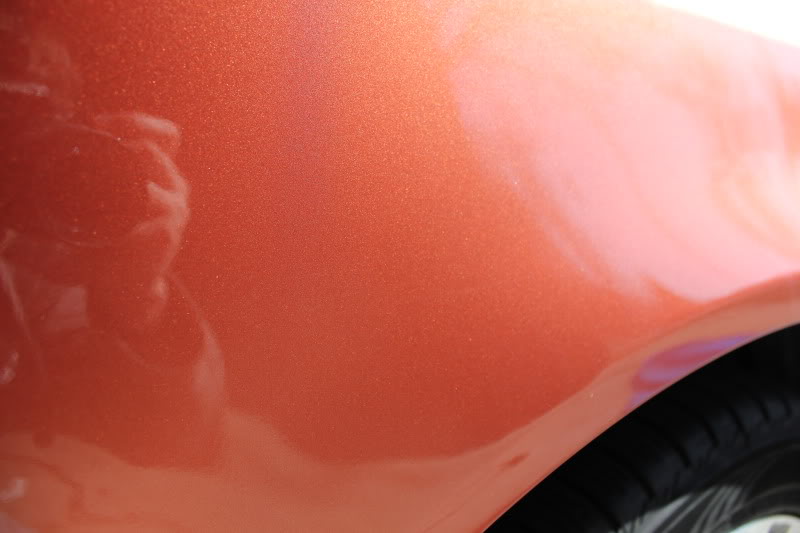
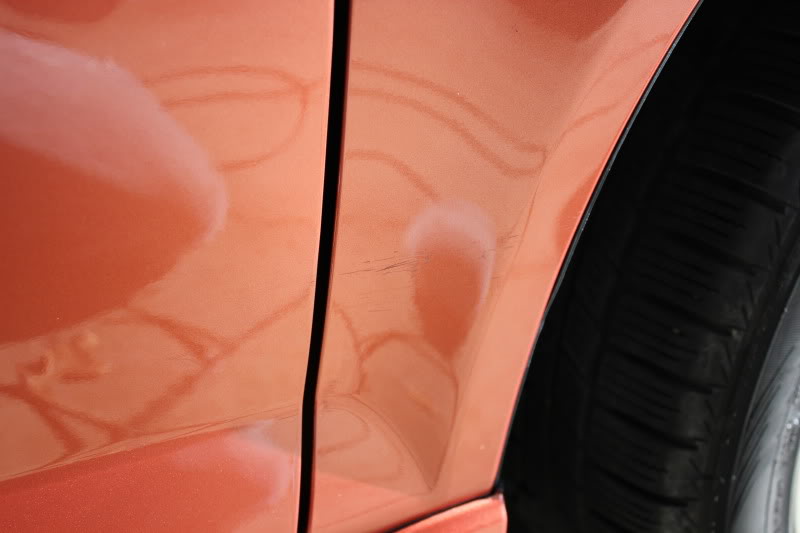
I left off having a little more buffing to do to the paint. I moved to the fenders and followed the same procedures as I outlined before. On the passenger fender I did find some unfortunate damage though. A few light scratches and what appears to have been someone running something into the bottom of the fender.
Light Scratches
Fender Rash
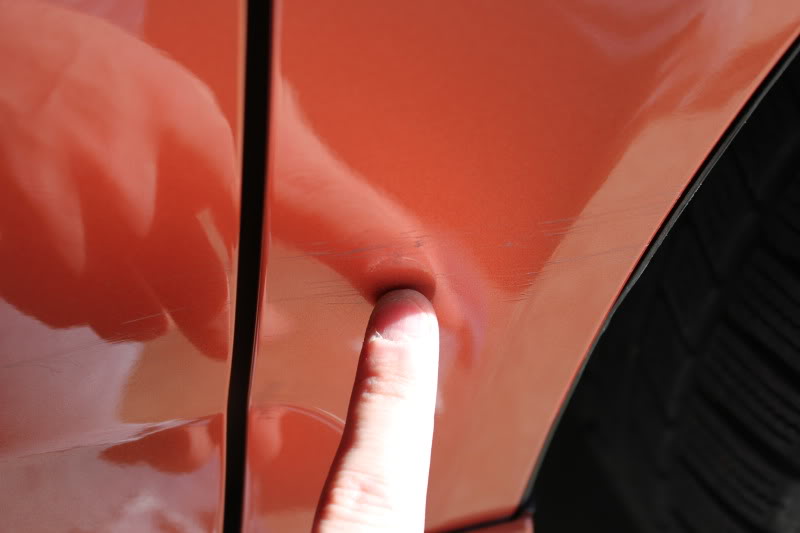
The scratches only required stepping up to a cleaner polish and a light cutting pad and they were pretty much cured.
The rash at the bottom was a bit more intense. I used Blackfire Clear Compound on a Yellow Cutting Pad followed by Blackfire Clear Polish on the Orange pad. I followed that with the white pad and normal product I had used on the rest of the car. I knew not all of it was going to come out as some is damage to the plastic. It is a lot better though.
Here is the entire right side buffed.
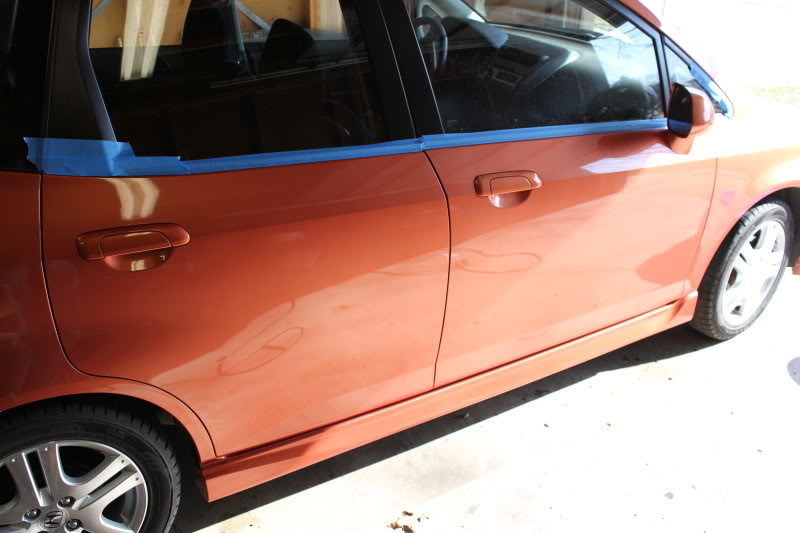
The rear all done being corrected.
Then I rewashed to get all the compunding dust and other particulates off the car.
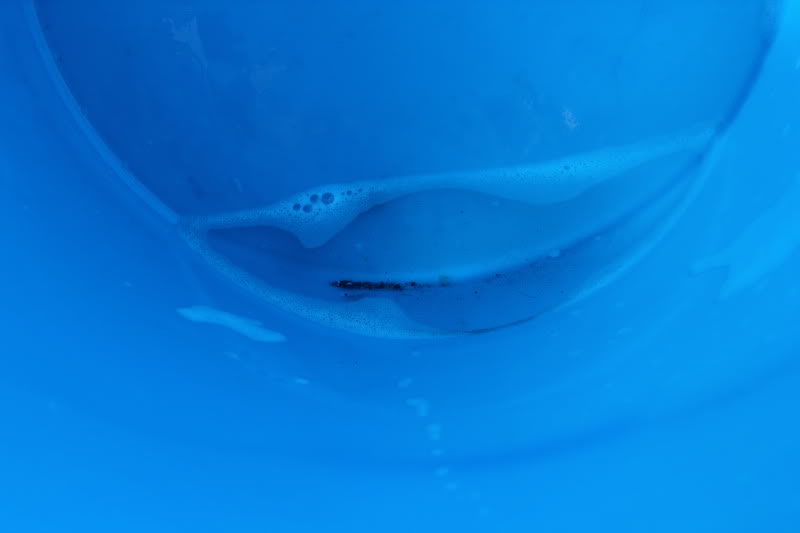
By the way this is why I recommend and use the two bucket method with Grit Guards. This was the bottom of my rinse bucket.
I dried the paint with compressed air.
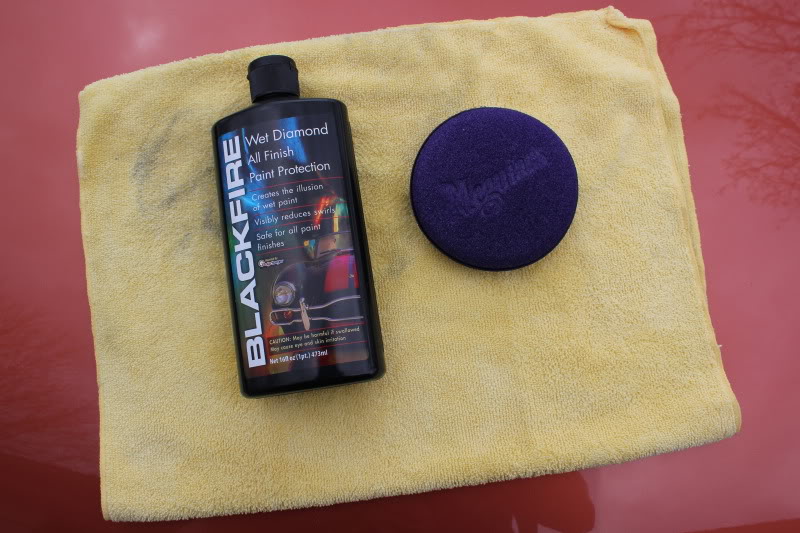
Next I applied the sealant to the car. I started using a foam applicator.
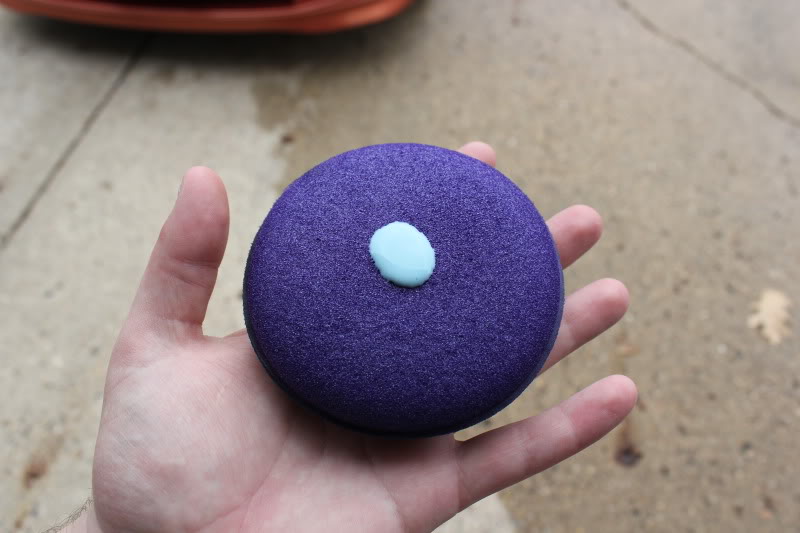
Simply apply VERY thin to the paint. By very thin I mean the amount above was good enough for about 1/3 of the car. Once applied let it dry to a haze.
For the first coat I waited about 15 minutes and wiped off. I did a second coat by machine using my blue pad on speed 4. Once agin let it haze and then wiped all of the product off.
This is the final result.
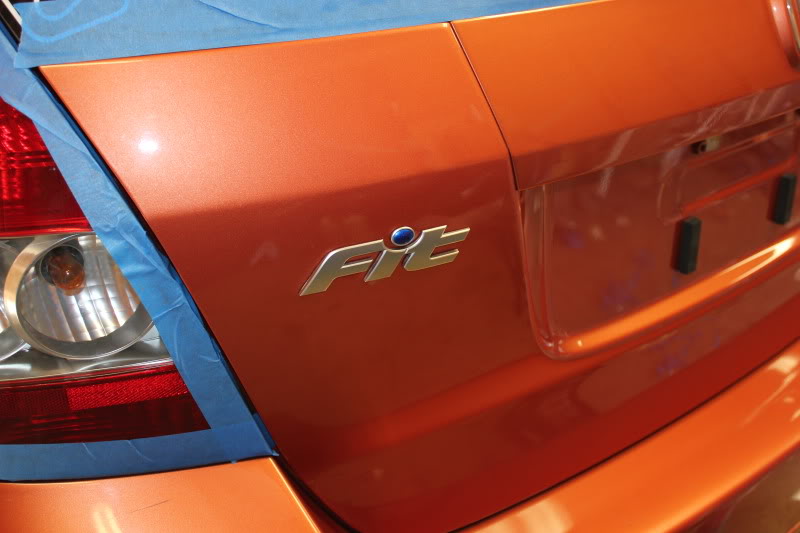
I plan to get some beading shots up soon as the sealant works amazingly. I also sealed the headlights and taillights, but will be stripping those layers off to do some correcting to them. I also plan to do a little bit of debadging work. I also obviously still have the interior, engine bay and wheel wells to go. So there will still be more to come, haha.
Thanks for viewing!
Day #3 of Fit Detail: Exterior Completed
I left off having a little more buffing to do to the paint. I moved to the fenders and followed the same procedures as I outlined before. On the passenger fender I did find some unfortunate damage though. A few light scratches and what appears to have been someone running something into the bottom of the fender.
Light Scratches
Fender Rash
The scratches only required stepping up to a cleaner polish and a light cutting pad and they were pretty much cured.
The rash at the bottom was a bit more intense. I used Blackfire Clear Compound on a Yellow Cutting Pad followed by Blackfire Clear Polish on the Orange pad. I followed that with the white pad and normal product I had used on the rest of the car. I knew not all of it was going to come out as some is damage to the plastic. It is a lot better though.
Here is the entire right side buffed.
The rear all done being corrected.
Then I rewashed to get all the compunding dust and other particulates off the car.
By the way this is why I recommend and use the two bucket method with Grit Guards. This was the bottom of my rinse bucket.
I dried the paint with compressed air.
Next I applied the sealant to the car. I started using a foam applicator.
Simply apply VERY thin to the paint. By very thin I mean the amount above was good enough for about 1/3 of the car. Once applied let it dry to a haze.
For the first coat I waited about 15 minutes and wiped off. I did a second coat by machine using my blue pad on speed 4. Once agin let it haze and then wiped all of the product off.
This is the final result.
I plan to get some beading shots up soon as the sealant works amazingly. I also sealed the headlights and taillights, but will be stripping those layers off to do some correcting to them. I also plan to do a little bit of debadging work. I also obviously still have the interior, engine bay and wheel wells to go. So there will still be more to come, haha.
Thanks for viewing!
Ordered some Dunlop Star Specs tonight. Went with 195/55R15 as required by my SCCA stock class. Should be here Tuesday and I will have them mounted shortly after.
Might be able to make the SCCA event next weekend now.
Might be able to make the SCCA event next weekend now.
