
Funkster's 08 Honda Fit Build Thread.


Funkster's 08 Honda Fit Build Thread. *Picture Packed*
This thread will document the modification and maintenance of my 08 Honda Fit Sport as well as provide a thread for me to post some pictures in. 
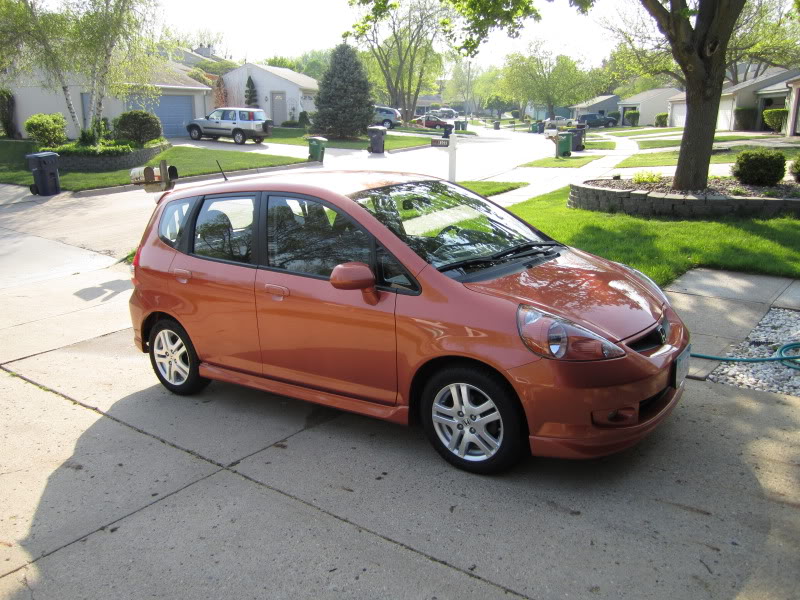
The Fit was purchased May 6th 2011 with 45,193 miles on it. The car was completely stock when I purchased it. The Fit is Blaze Orange and is a 5-speed manual.
Picture of the Fit when first purchased:
Current Sponsors
JB Autosports - JB Autosports - Parts for True Automotive Enthusiasts - Homepage
Powder Vault
Modifications
Performance
K&N Drop-in Filter
Drivetrain
Torque Solution Shifter Cable Bushings
Brakes
EBC Greenstuff Brake Pads
Brembo Blank Rotors
ATE Superblue Brake Fluid
Audio Related
RAAMmatt BXT Butyl Dampening Mat
Ensolite Closed Cell Foam
Second Skin Audio Spectrum
Exterior
Password: JDM Dry Carbon Fiber Intake Manifold Cover or "Berry Pink" Intake Manifold Cover
"Mirror Black" Powder Coated Engine Bay Brackets
"Mirror Black" Powder Coated Battery Tray & Hardware
Interior
"Tuscan Black Matte" Powder Coated Aluminum Shift Knob
Zeta Dead Pedal
Maintenance Log: (Mileage - Maintenance Performed)
46,082 - Coolant Change (Honda Brand Coolant)
48,104 - Oil & Filter Change (Royal Purple 5W-20 & Bosch Filter)
48,104 - Air Filter (Wash, Oil and Install K&N Reuseable Filter)
51,090 - Manual Transmission Fluid Change (Amsoil Synchromesh MTF)
Event Coverage: (Date - Event)
Last edited by Funkster; May 18, 2012 at 11:48 AM.
The first thing I noticed was the brakes seemed to catch ever so slightly. I assumed the pads had worn in an uneven fashion so figured I would use it as an excuse to upgrade my brakes.
I purchased:
Blank Rotors
EBC Greenstuff Brake Pads
ATE Superblue Brake Fluid
Here are the items:
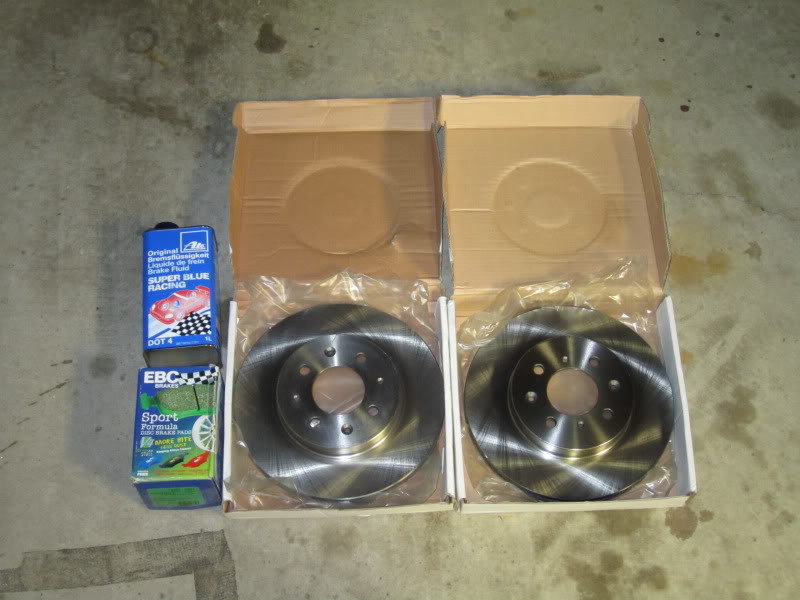
I unfortunately do not have any pictures of the items installed. However, the brake catching went away and the increase in braking force was very noticeable. The limitation is by far now the tires. The pedal is stiffer and requires less pedal travel to become effective. I found myself over braking slightly the first couple of days after the install. Overall I am very happy!
I purchased:
Blank Rotors
EBC Greenstuff Brake Pads
ATE Superblue Brake Fluid
Here are the items:
I unfortunately do not have any pictures of the items installed. However, the brake catching went away and the increase in braking force was very noticeable. The limitation is by far now the tires. The pedal is stiffer and requires less pedal travel to become effective. I found myself over braking slightly the first couple of days after the install. Overall I am very happy!
The next few posts will copied from my audio build thread. I am going to close that one out and relocate the whole project here.
The first part of the audio portion for me will be sound dampening. I believe this is the foundation of any top quality SQ or SPL vehicle. If readers feel the pictures and descriptions are adequate I may use them to post up a DIY for sound dampening. (One exists currently but, the pictures are all gone)
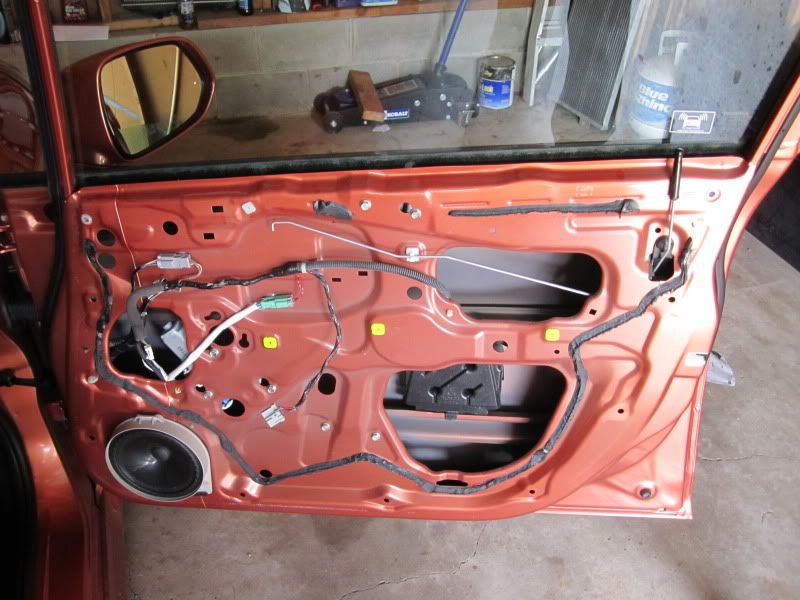
I started off with my passenger door a few days ago. So it is what I will show you in this first post. Keep in mind some may find this to be overkill, that is fine. Also keep in mind this is only the start. When I have more time this weekend I will go in and do the outer door skin completely as well as likely some on the inside of the door panel.
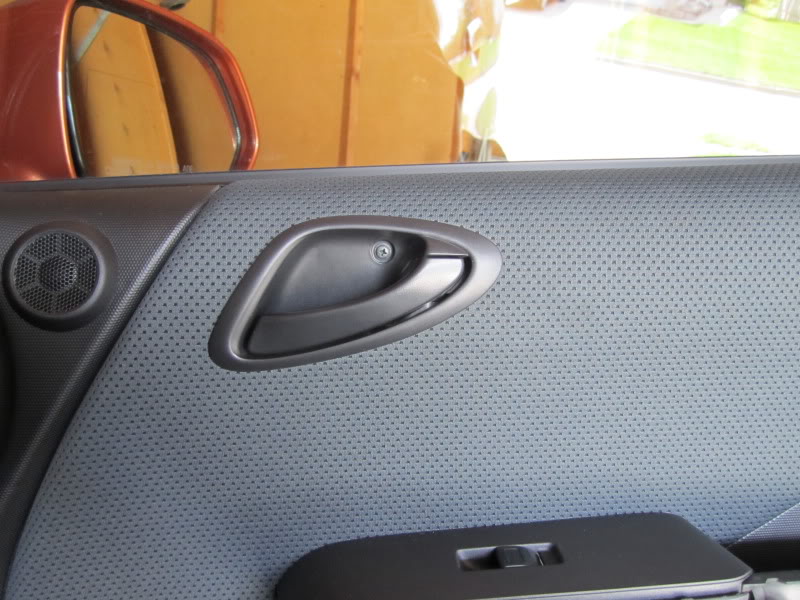
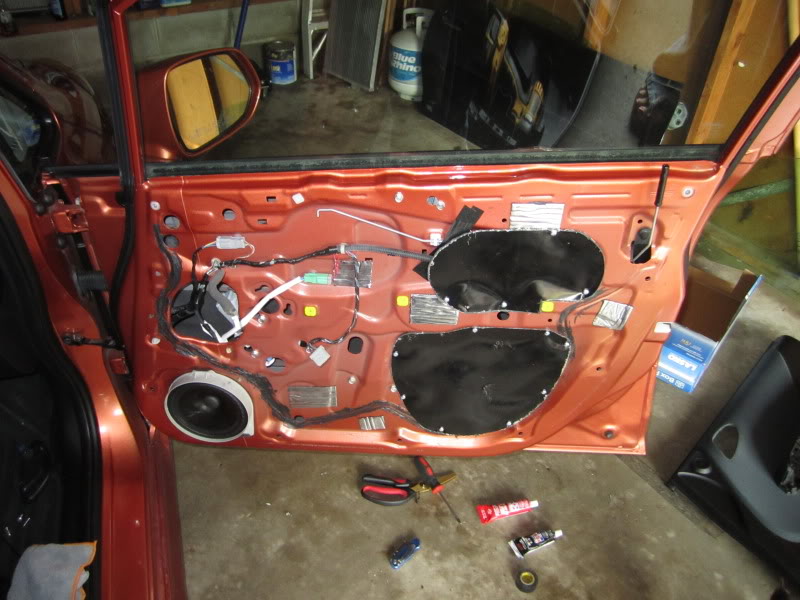
Here is the door as I started:

First one must push in these three tabs to remove the armrest from the panel:
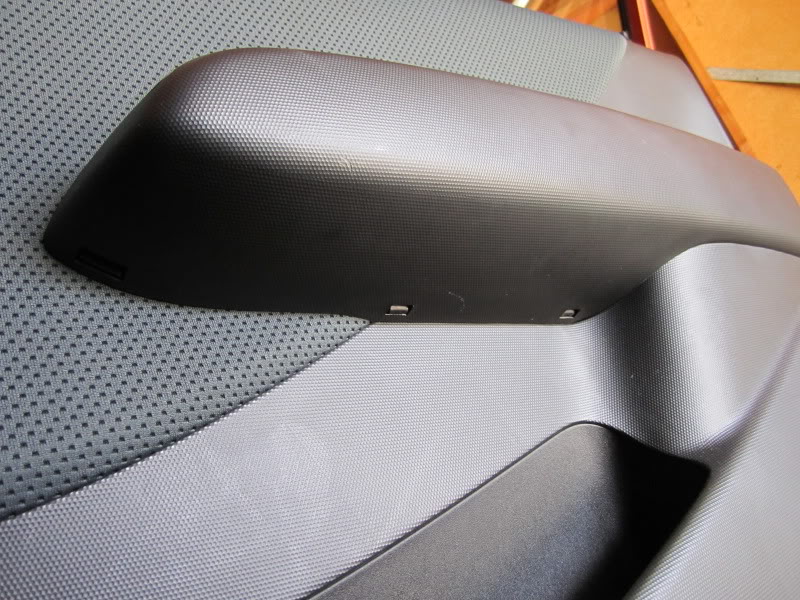
Then unplug the connector to the door controls:
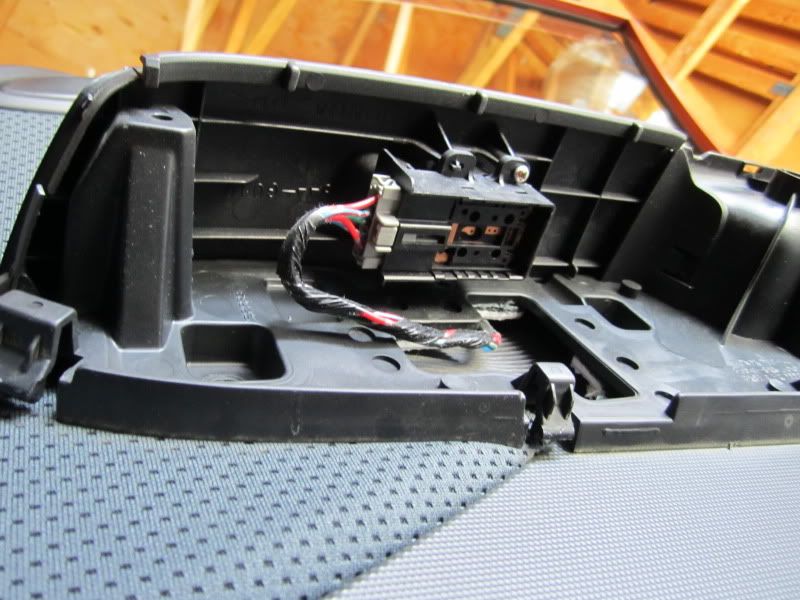
Once the armrest is removed you must remove the three stainless screws you can see in this picture:
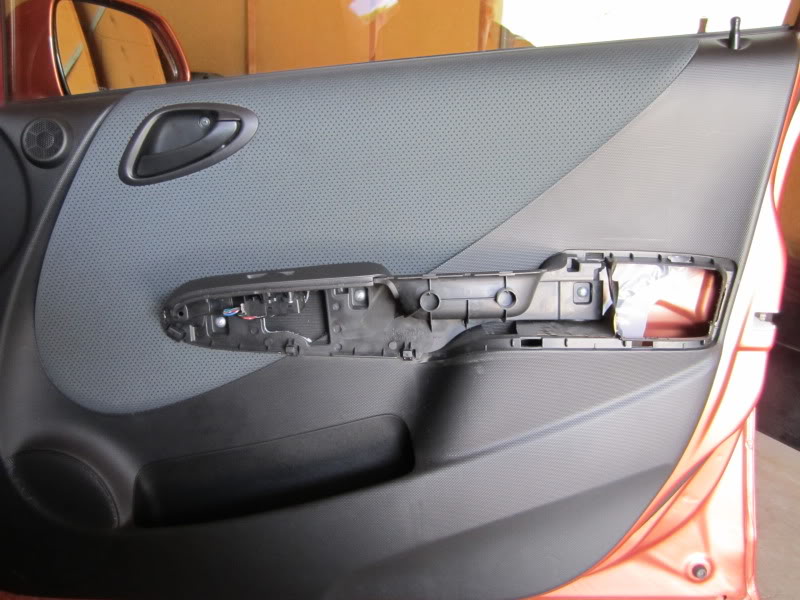
Then remove the screw in the door panel handle cup:
At this point only push clips are holding the panel tight to the door. Once the clips are out you will have to carefully unhook the tweeter connector and the door handle slider. Then you can slide the panel up and off the door itself.
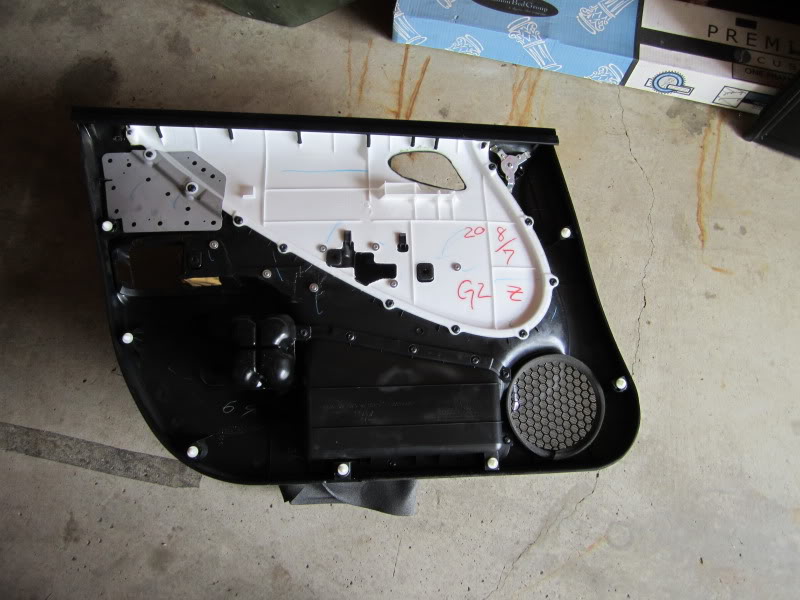
Here is a picture of the back of the panel to give you an idea where the clips are:
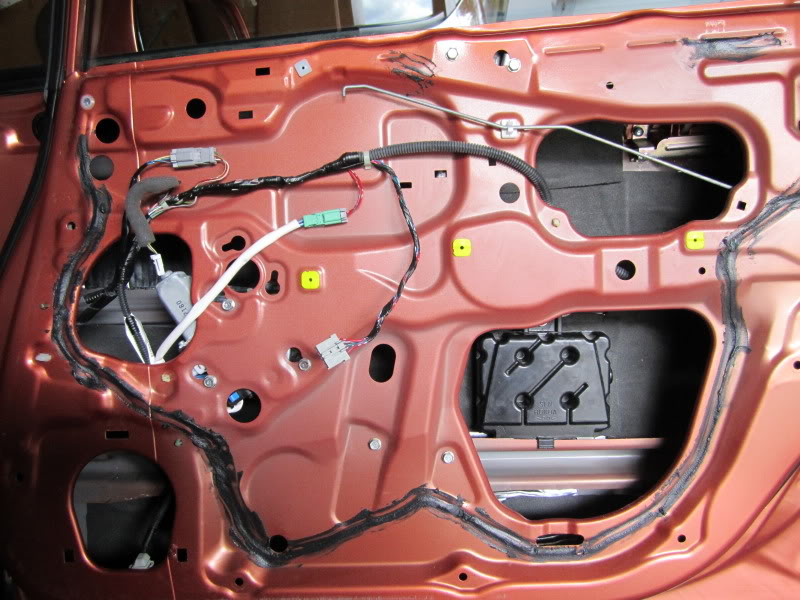
Once the door panel is off you will see the vapor barrier:
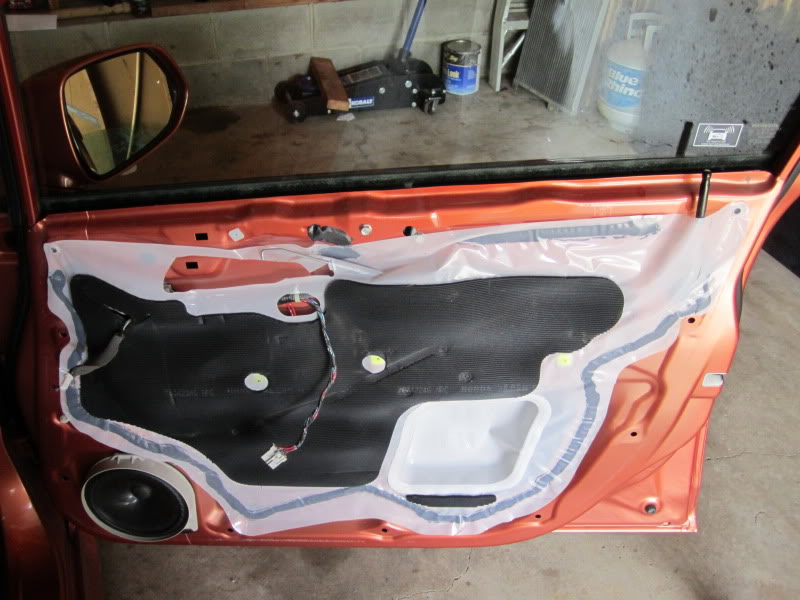
Here it is with the door panel and the vapor barrier removed:
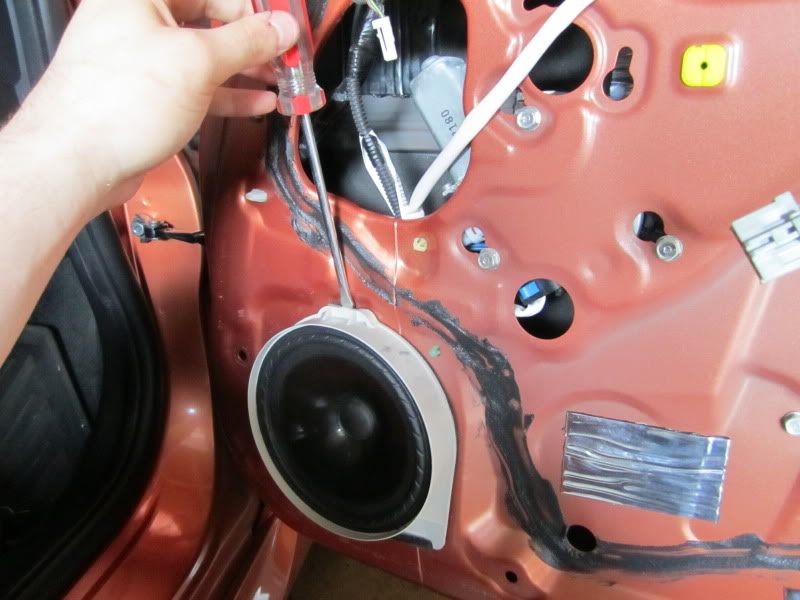
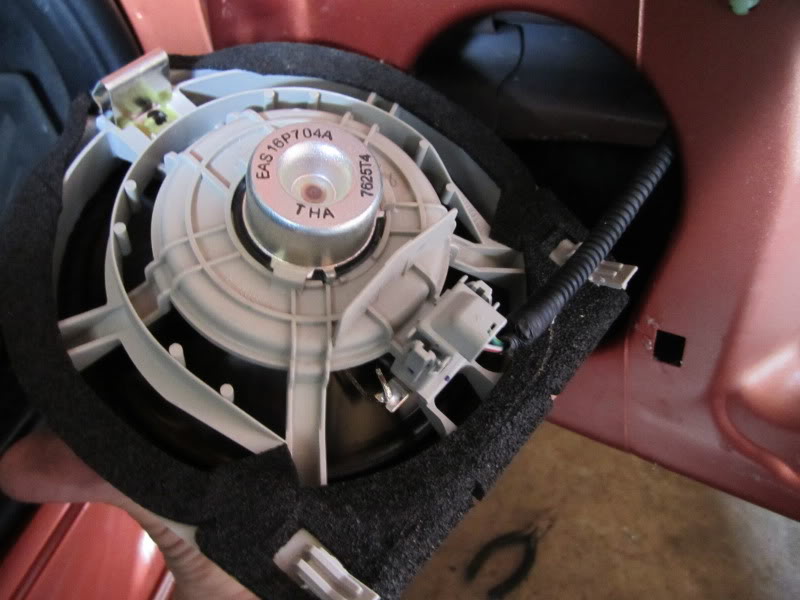
Next I removed the door speaker. I used a screwdriver push down on the metal clip that holds the speaker into place:
Then undo the connector on the speaker by pushing both sides in:
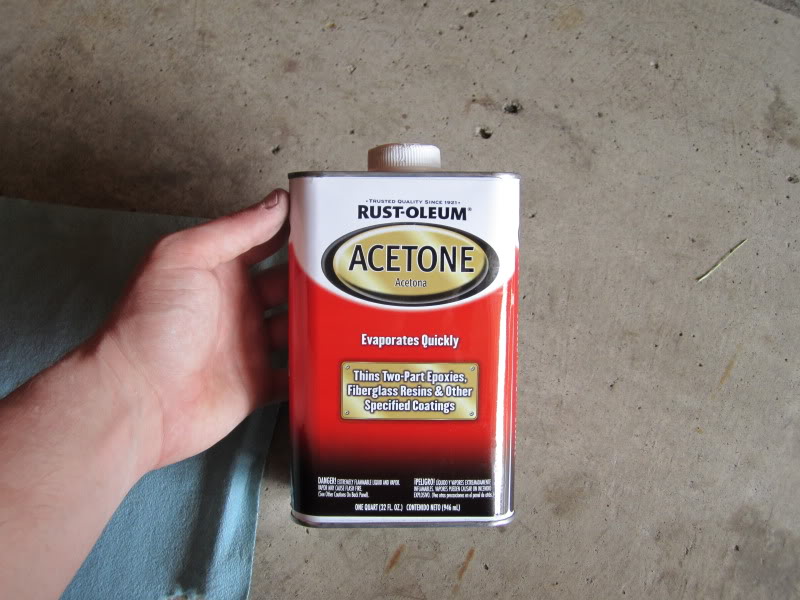
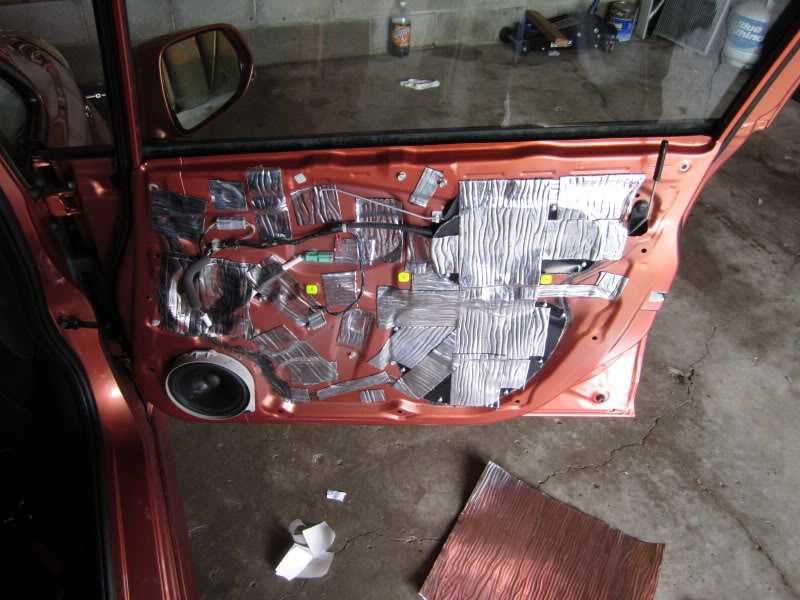
Any panel I am putting dampening on I prefer to clean with a quick wipe down with a shop towel and Acetone:
The dampening I am using is RAAMMAT BXT:
I always cut and test fit pieces before applying:
Then you simply peel the backing off of the mat:
Then I just peel and stick:
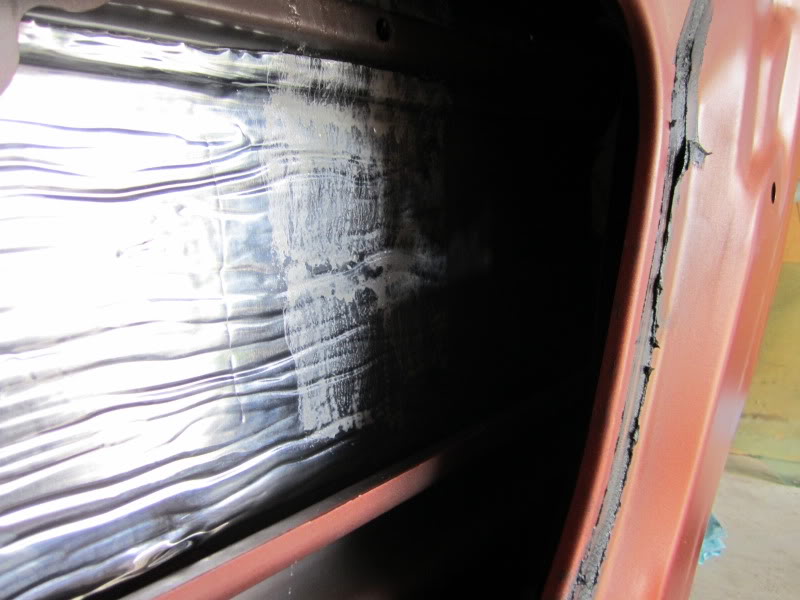
Outer door skin butyl-mat completed:

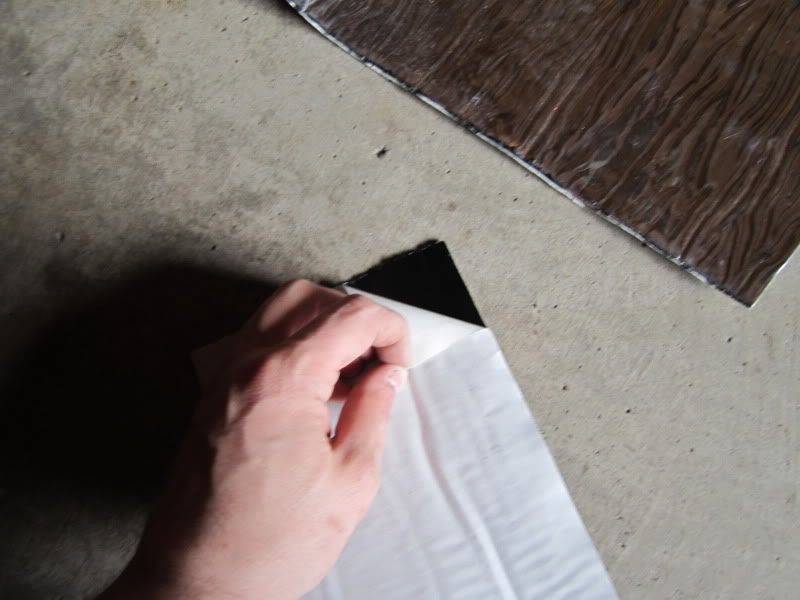
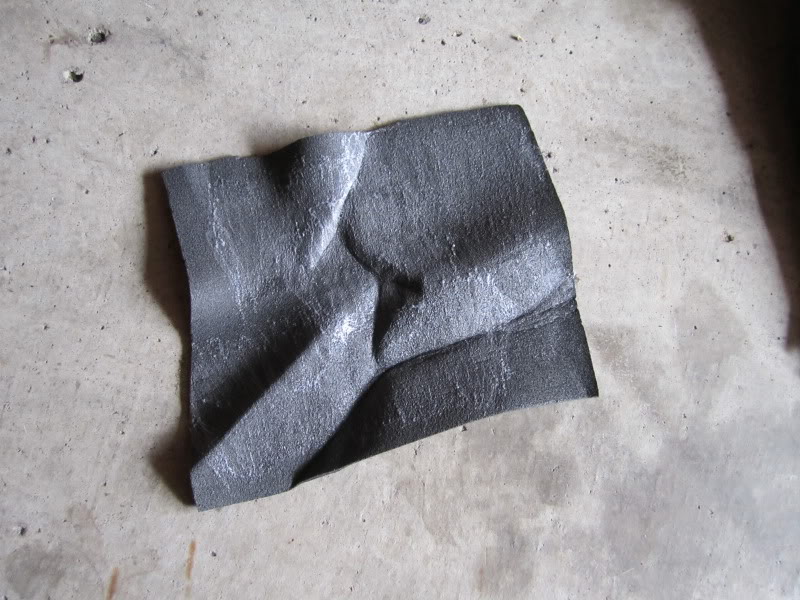
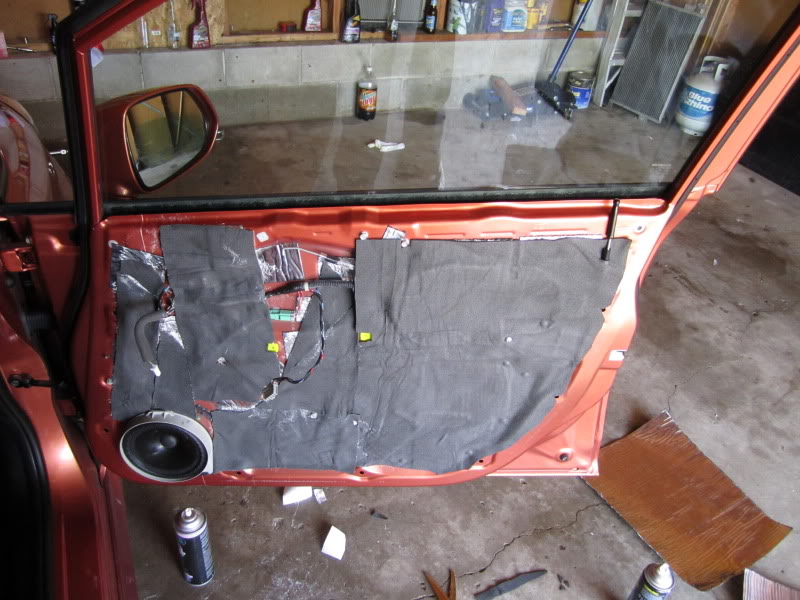
I also added a layer of Ensolite closed cell foam from RAAMAudio. Here is a picture of it:

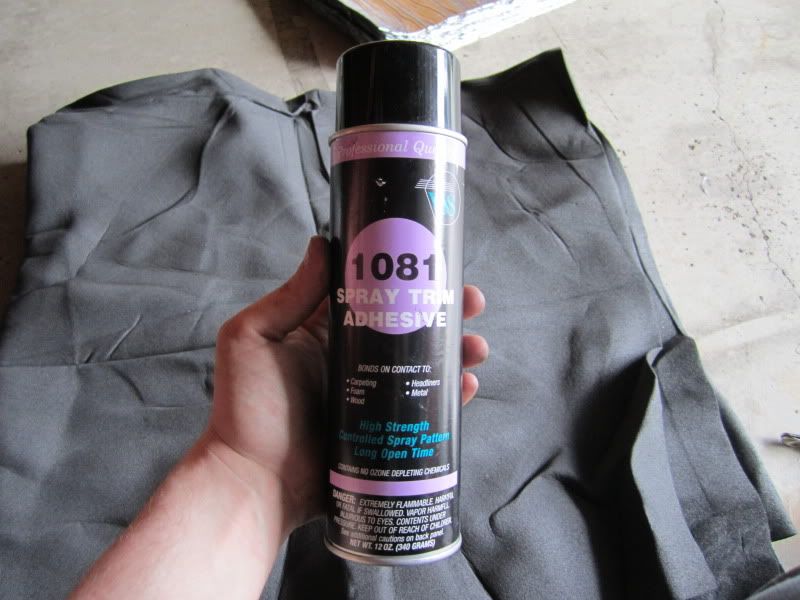
This item is not self adhesive and must be glued to the object you are applying it to. I use an adhesive sold by RAAMAudio that is the best I have ever used as far as aerosol adhesives. Here is a picture of it:
Cut your piece of Ensolite and apply adhesive to one side of it:
Then apply the adhesive to the panel as well:
Let the adhesive tack up for a minute and apply the foam to the panel. Go until you are satisfied with the coverage. Here is my Ensolite layer completed:
The first part of the audio portion for me will be sound dampening. I believe this is the foundation of any top quality SQ or SPL vehicle. If readers feel the pictures and descriptions are adequate I may use them to post up a DIY for sound dampening. (One exists currently but, the pictures are all gone)
I started off with my passenger door a few days ago. So it is what I will show you in this first post. Keep in mind some may find this to be overkill, that is fine. Also keep in mind this is only the start. When I have more time this weekend I will go in and do the outer door skin completely as well as likely some on the inside of the door panel.
Here is the door as I started:
First one must push in these three tabs to remove the armrest from the panel:
Then unplug the connector to the door controls:
Once the armrest is removed you must remove the three stainless screws you can see in this picture:
Then remove the screw in the door panel handle cup:
At this point only push clips are holding the panel tight to the door. Once the clips are out you will have to carefully unhook the tweeter connector and the door handle slider. Then you can slide the panel up and off the door itself.
Here is a picture of the back of the panel to give you an idea where the clips are:
Once the door panel is off you will see the vapor barrier:
Here it is with the door panel and the vapor barrier removed:
Next I removed the door speaker. I used a screwdriver push down on the metal clip that holds the speaker into place:
Then undo the connector on the speaker by pushing both sides in:
Any panel I am putting dampening on I prefer to clean with a quick wipe down with a shop towel and Acetone:
The dampening I am using is RAAMMAT BXT:
I always cut and test fit pieces before applying:
Then you simply peel the backing off of the mat:
Then I just peel and stick:
Outer door skin butyl-mat completed:
I also added a layer of Ensolite closed cell foam from RAAMAudio. Here is a picture of it:
This item is not self adhesive and must be glued to the object you are applying it to. I use an adhesive sold by RAAMAudio that is the best I have ever used as far as aerosol adhesives. Here is a picture of it:
Cut your piece of Ensolite and apply adhesive to one side of it:
Then apply the adhesive to the panel as well:
Let the adhesive tack up for a minute and apply the foam to the panel. Go until you are satisfied with the coverage. Here is my Ensolite layer completed:
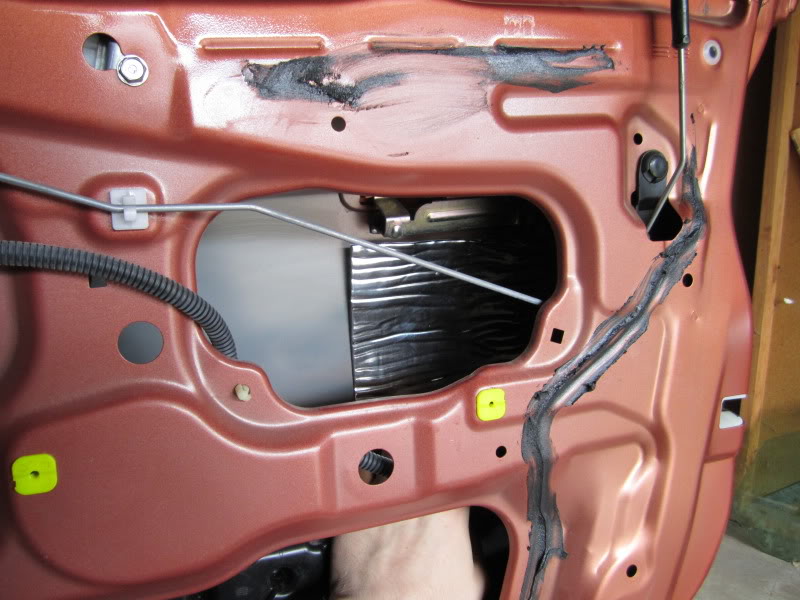
I had put a couple small pieces of dampening of the major areas of resonance at the end of the last session so here is what it looks like:
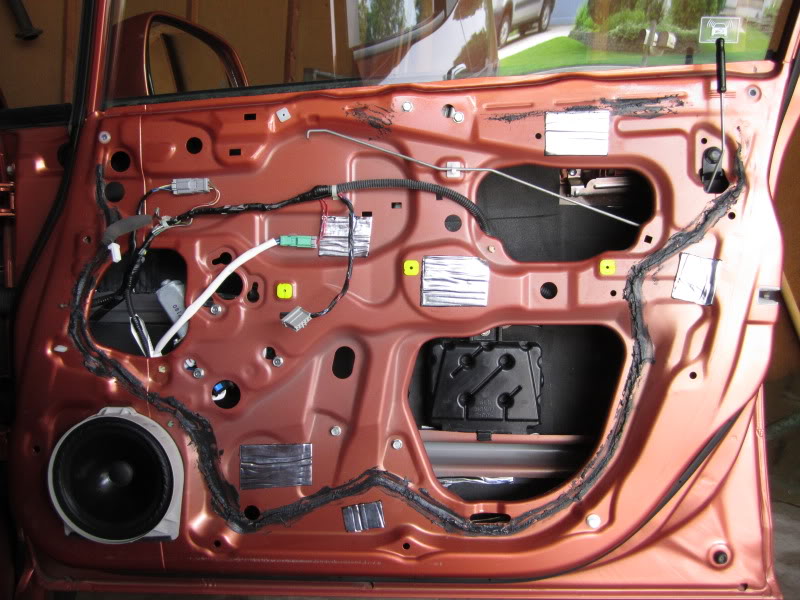
Next, I want to seal up those big holes in the door. While it isn't possible to completely seal a door without a lot of work and major problems, reducing the size of the holes can help increase mid-bass in a big way.
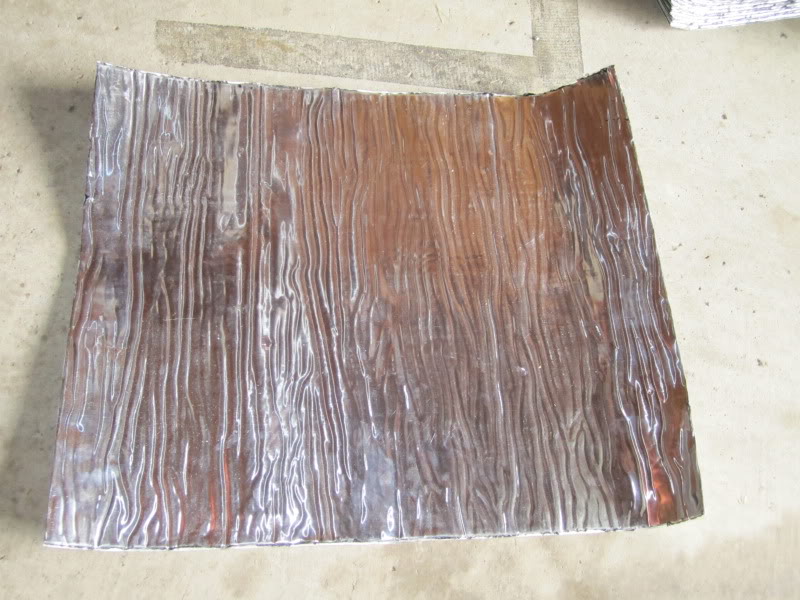
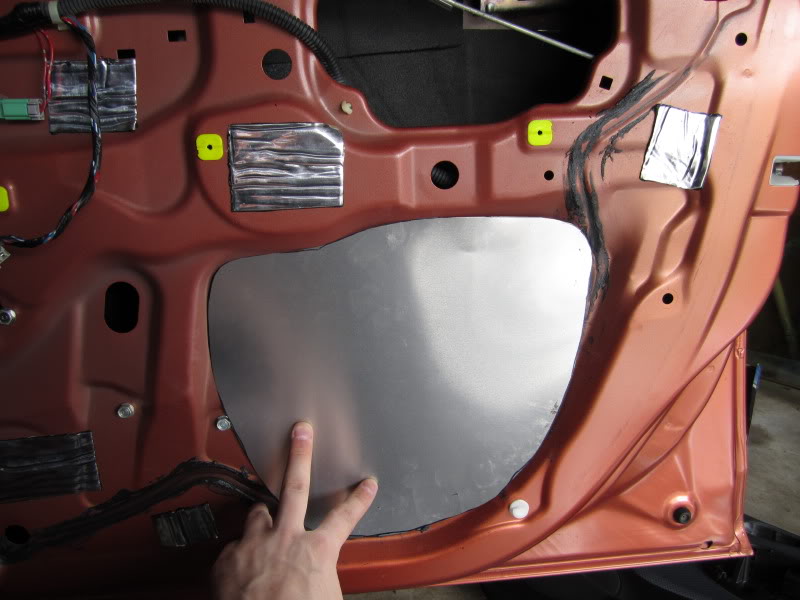
I choose to use aluminum flashing trimmed to seal my doors.
Here is the first piece being trimmed up to fit properly:
This will be another example of me going overkill. Firstly, I do not think one layer is enough so I tend to double my layers of flashing to make sure the material is stiff enough to do its job properly.
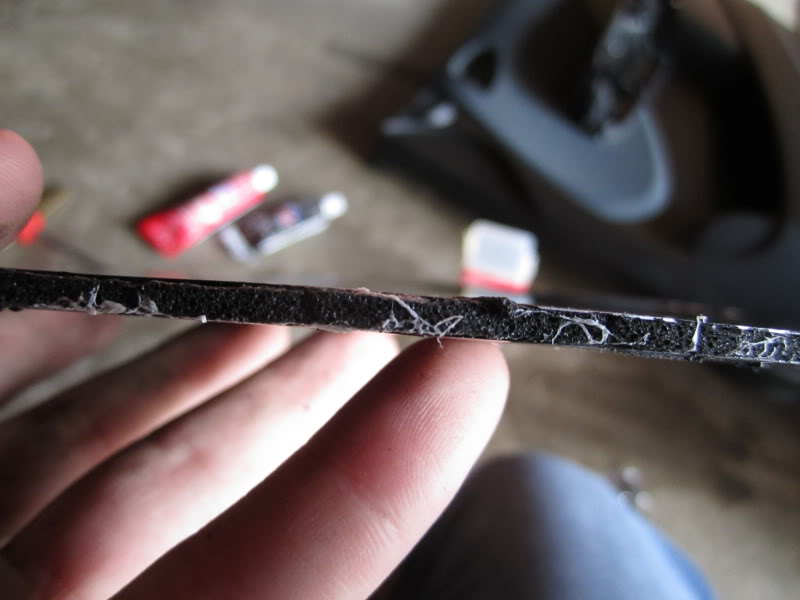
I also paint the exposed sides of both of the layers of flashing with KBS Rustseal which is similar to POR-15. Then, I glue the pieces together with a layer of Ensolite foam between the two of them. Anyone who knows dampening knows the more variance of connecting materials there are the more sound waves have a tough time breaking through.
Here is a picture of them glued up with the foam in the middle:
Here is showing you the KBS paint on the flashing:
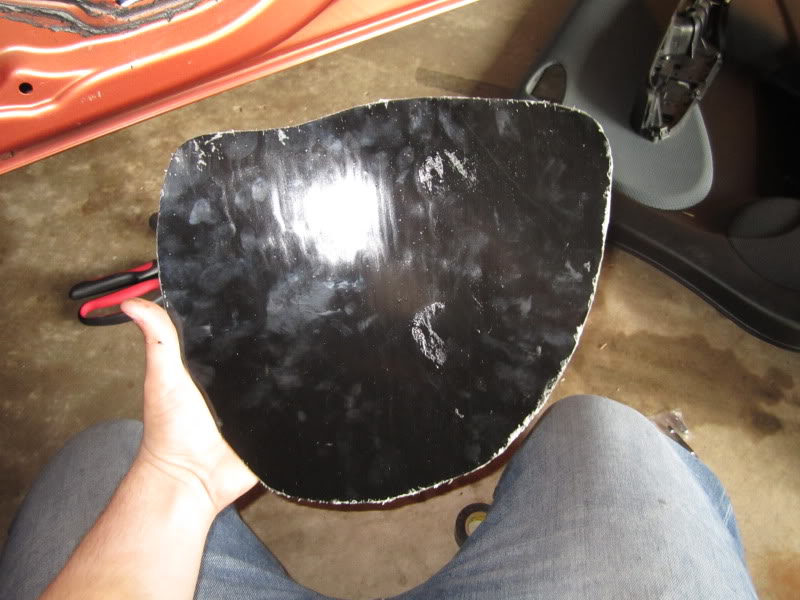
Yes I know the paint is terrible but I wasn't trying to be perfect here. All it has to do is protect.
Once the pieces were prepared I screwed them into place with stainless self-tapping screws:
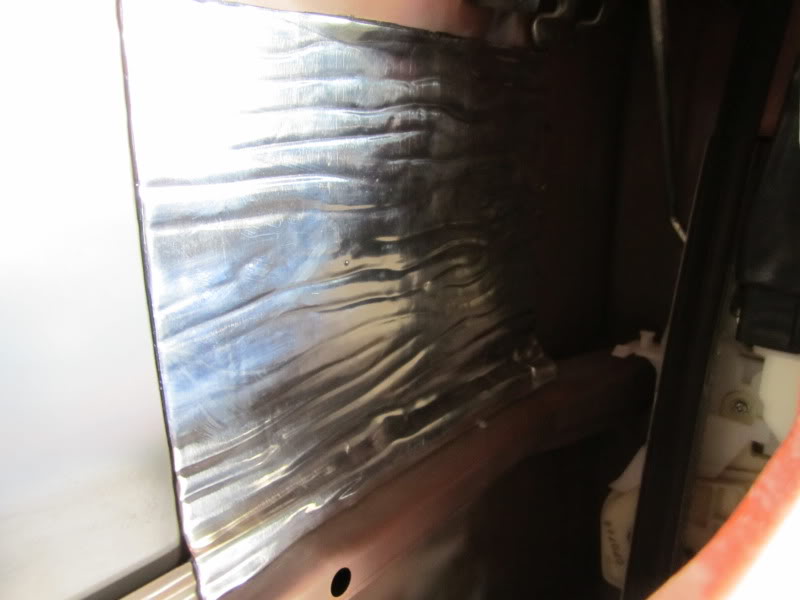
Now the basic processes from the previous post go right back into effect. I first covered the skin with the butyl dampening:
I only used the mat in the areas where I was hearing resonance. Which is why it appears semi-odd.
The same process was then done with the Ensolite foam as well:
The foam coverage is not great but it should do the job fine. I say this because the back of the door panel itself is covered with the foam as well to reduce rattles.
Unfortunately I do not have any pictures of it.
In the next update I will do the driver's front door and probably won't take nearly as many pictures since I have already documented the passenger's door. However, I will still have a few final pictures, etc.
Until next time, thanks for looking and hope you come back!
Next, I want to seal up those big holes in the door. While it isn't possible to completely seal a door without a lot of work and major problems, reducing the size of the holes can help increase mid-bass in a big way.
I choose to use aluminum flashing trimmed to seal my doors.
Here is the first piece being trimmed up to fit properly:
This will be another example of me going overkill. Firstly, I do not think one layer is enough so I tend to double my layers of flashing to make sure the material is stiff enough to do its job properly.
I also paint the exposed sides of both of the layers of flashing with KBS Rustseal which is similar to POR-15. Then, I glue the pieces together with a layer of Ensolite foam between the two of them. Anyone who knows dampening knows the more variance of connecting materials there are the more sound waves have a tough time breaking through.
Here is a picture of them glued up with the foam in the middle:
Here is showing you the KBS paint on the flashing:
Yes I know the paint is terrible but I wasn't trying to be perfect here. All it has to do is protect.
Once the pieces were prepared I screwed them into place with stainless self-tapping screws:
Now the basic processes from the previous post go right back into effect. I first covered the skin with the butyl dampening:
I only used the mat in the areas where I was hearing resonance. Which is why it appears semi-odd.
The same process was then done with the Ensolite foam as well:
The foam coverage is not great but it should do the job fine. I say this because the back of the door panel itself is covered with the foam as well to reduce rattles.
Unfortunately I do not have any pictures of it.
In the next update I will do the driver's front door and probably won't take nearly as many pictures since I have already documented the passenger's door. However, I will still have a few final pictures, etc.
Until next time, thanks for looking and hope you come back!
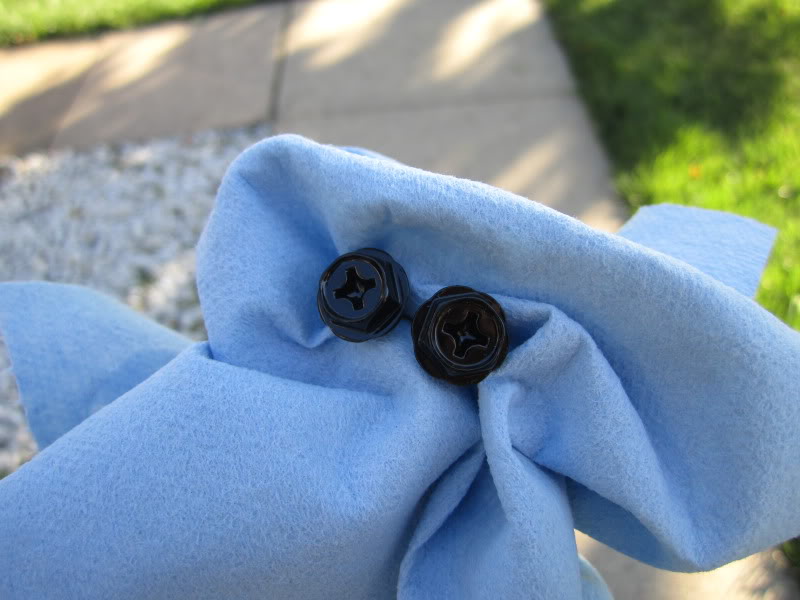
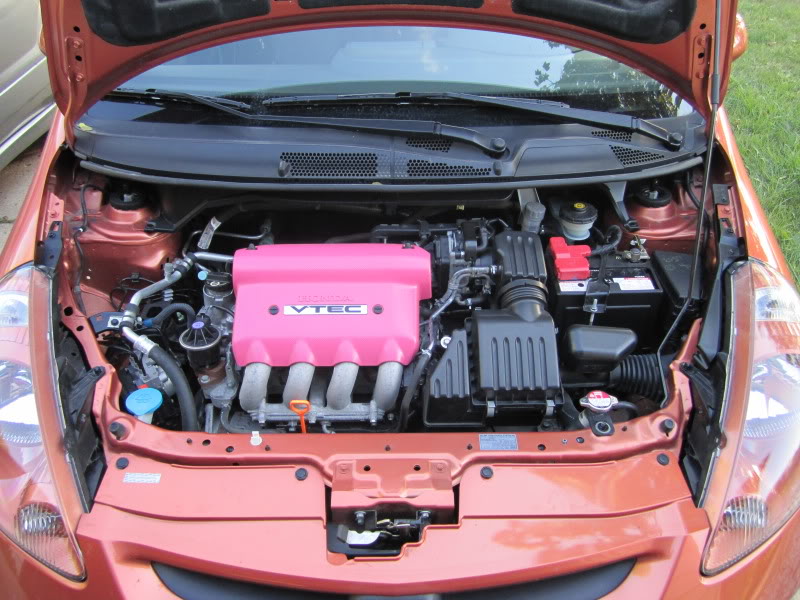
Here is a picture of my "Berry Pink" intake manifold cover. I also threw in a couple of other pictures I took and edited for fun.
The color was picked as we also have a Subaru and are going to paint a couple of small pieces. This color is a good math for Subaru "STi Pink" and I got bored one day so I sprayed the cover.

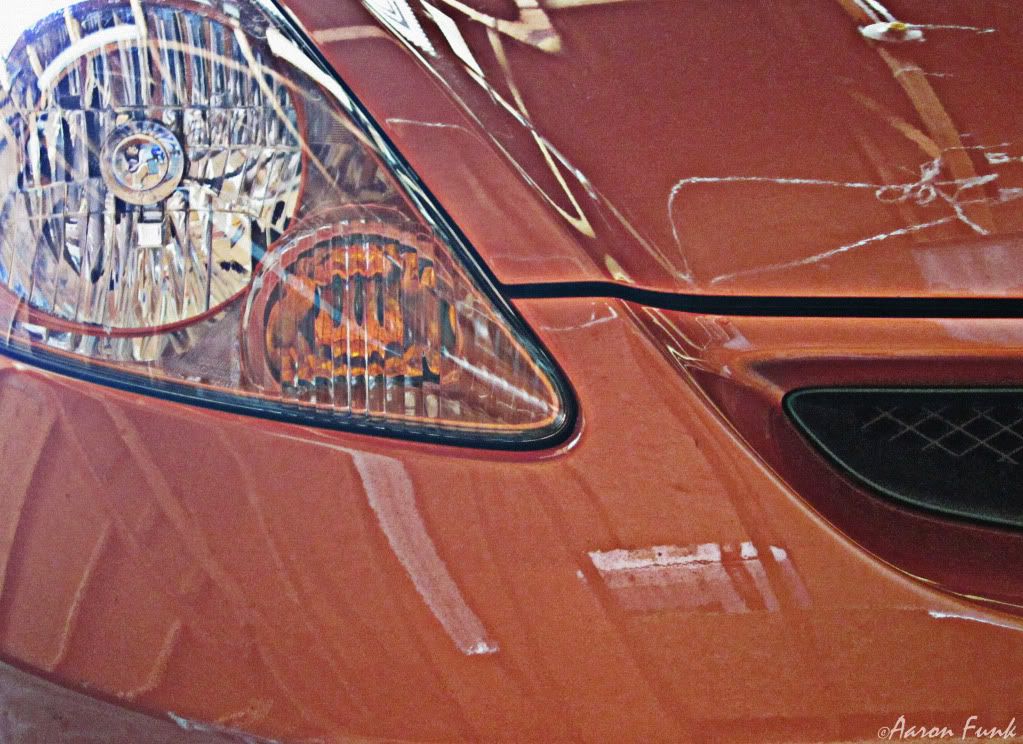
The color was picked as we also have a Subaru and are going to paint a couple of small pieces. This color is a good math for Subaru "STi Pink" and I got bored one day so I sprayed the cover.
Last edited by Funkster; Jul 20, 2011 at 08:20 PM.
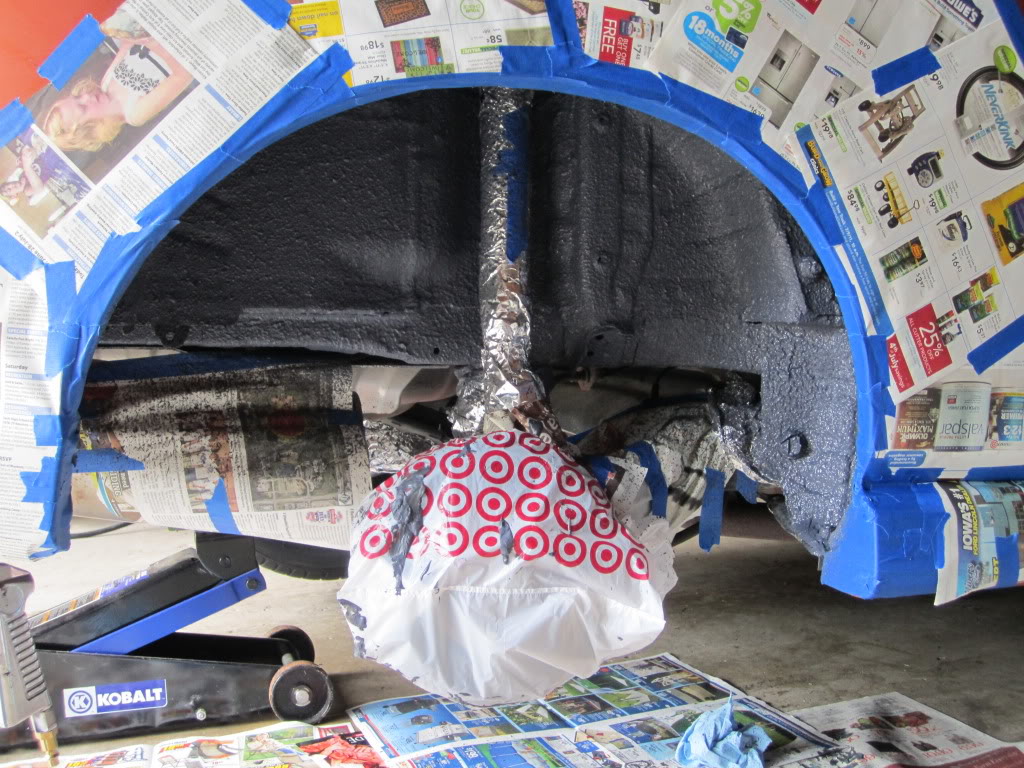
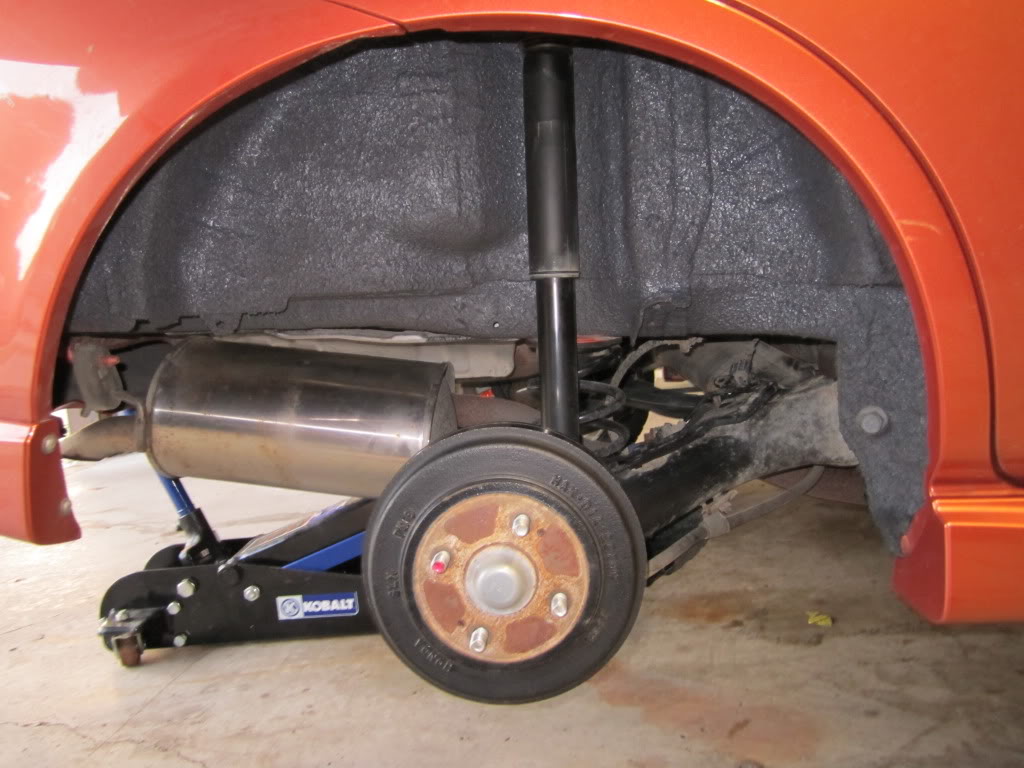
These are the pictures from the install of the Spectrum I did on the passenger's rear wheel well.
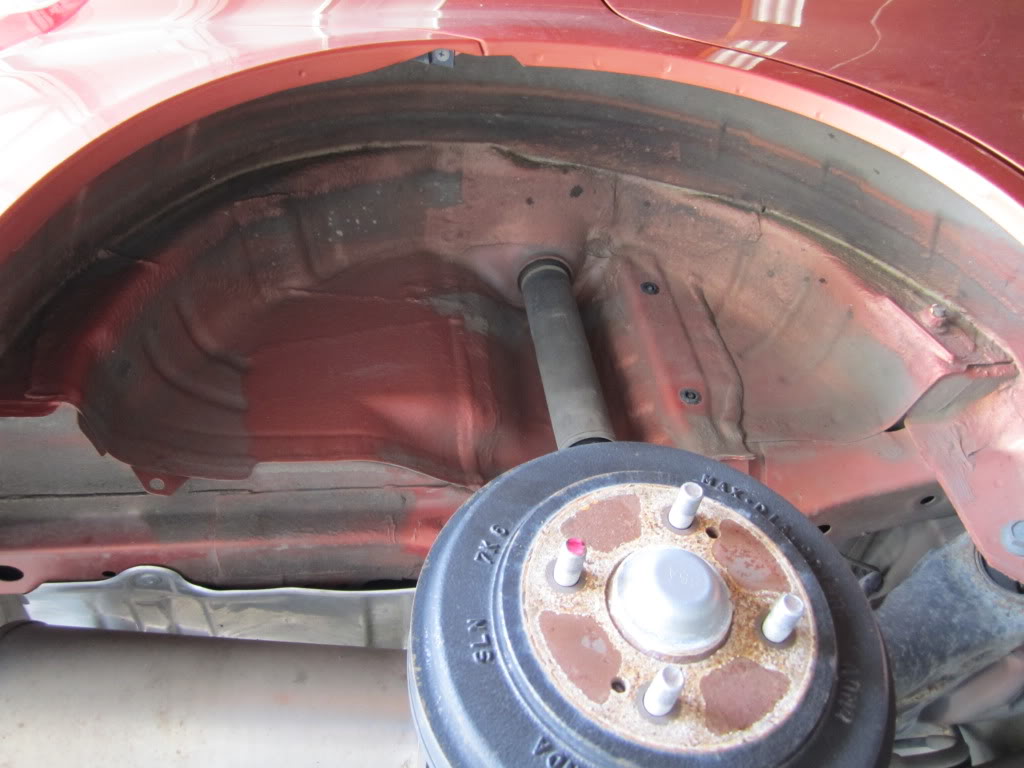
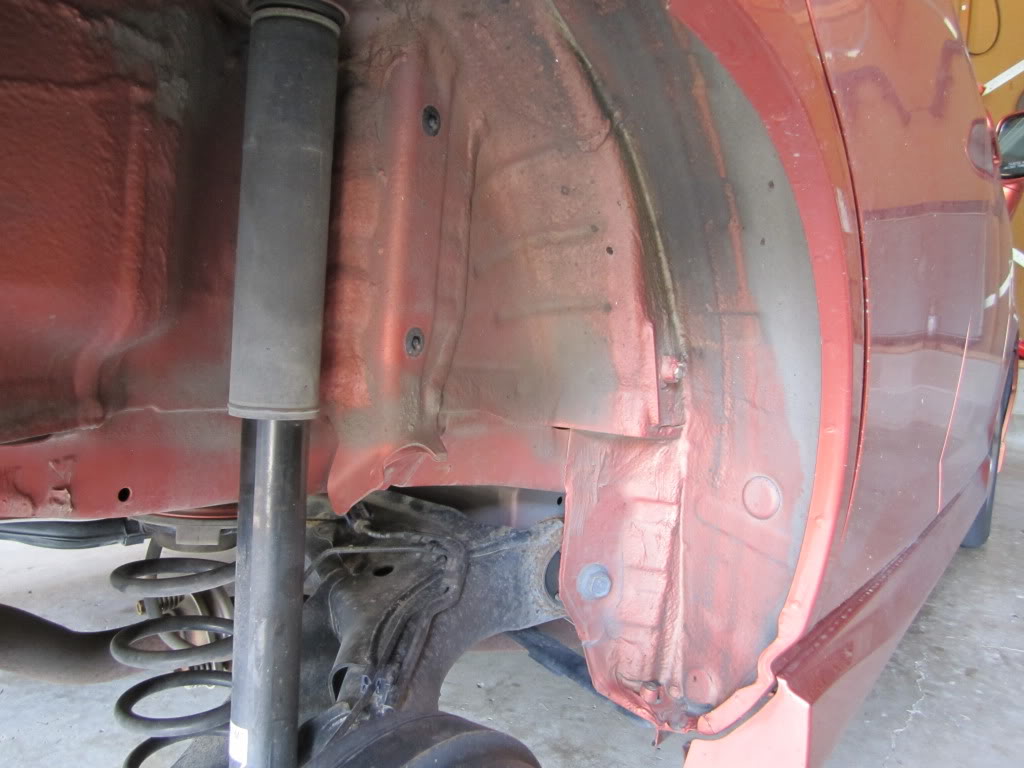
First are some pictures of the dirty wheel well before I started:

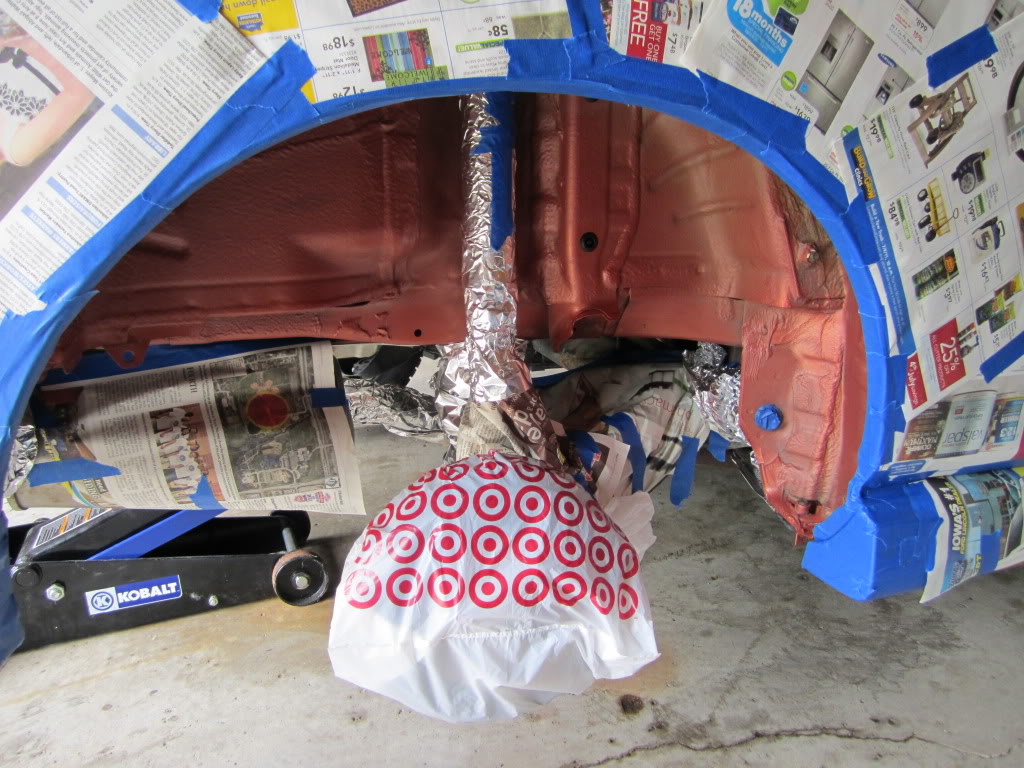
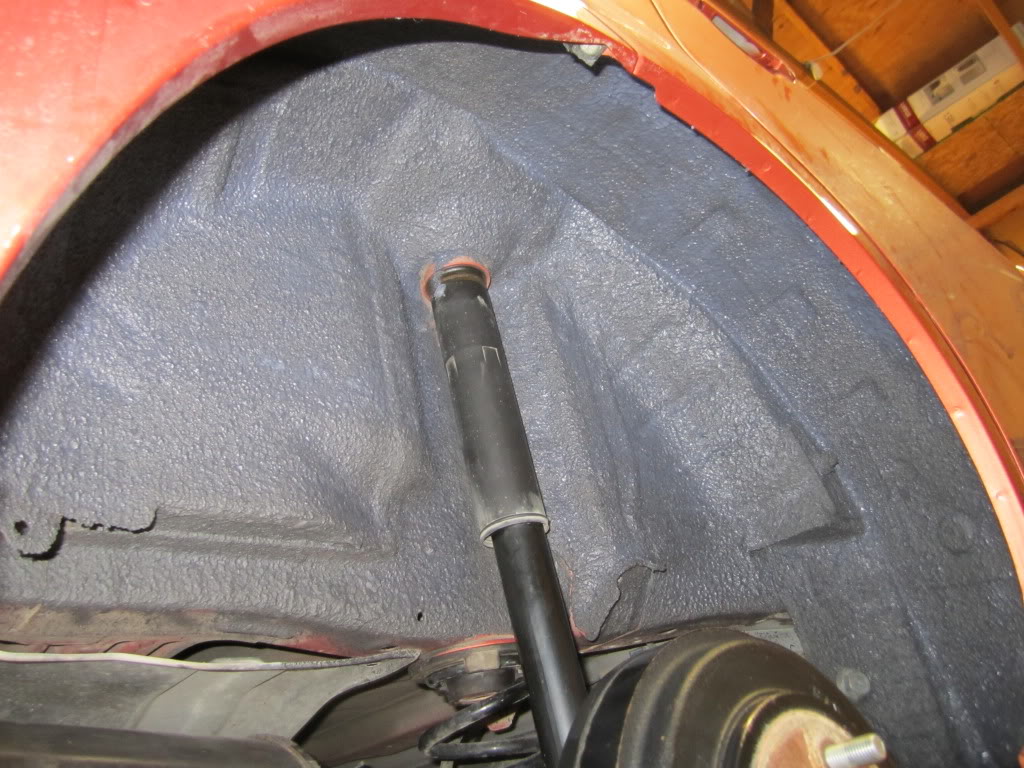
Here is after the area was cleaned, masked and ready for the spectrum to be applied.
Here is the application of the product. I sprayed the coats on with an undercoating gun at 80 PSI. Each layer was layed about 1mm thick.
First coat wet:
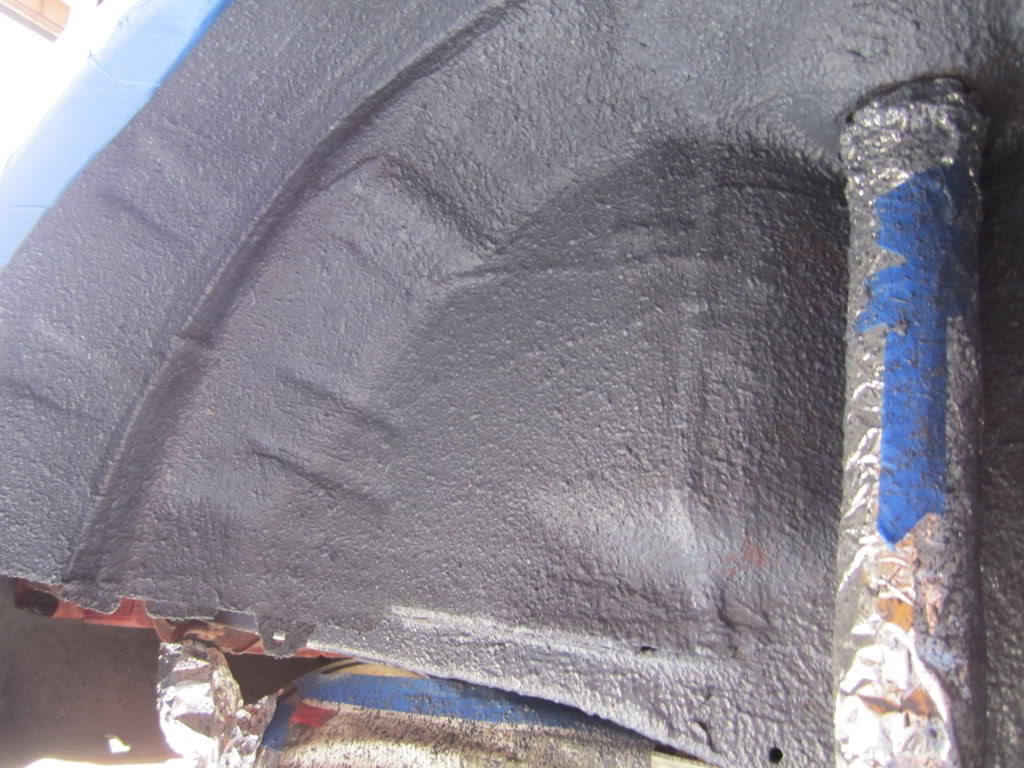
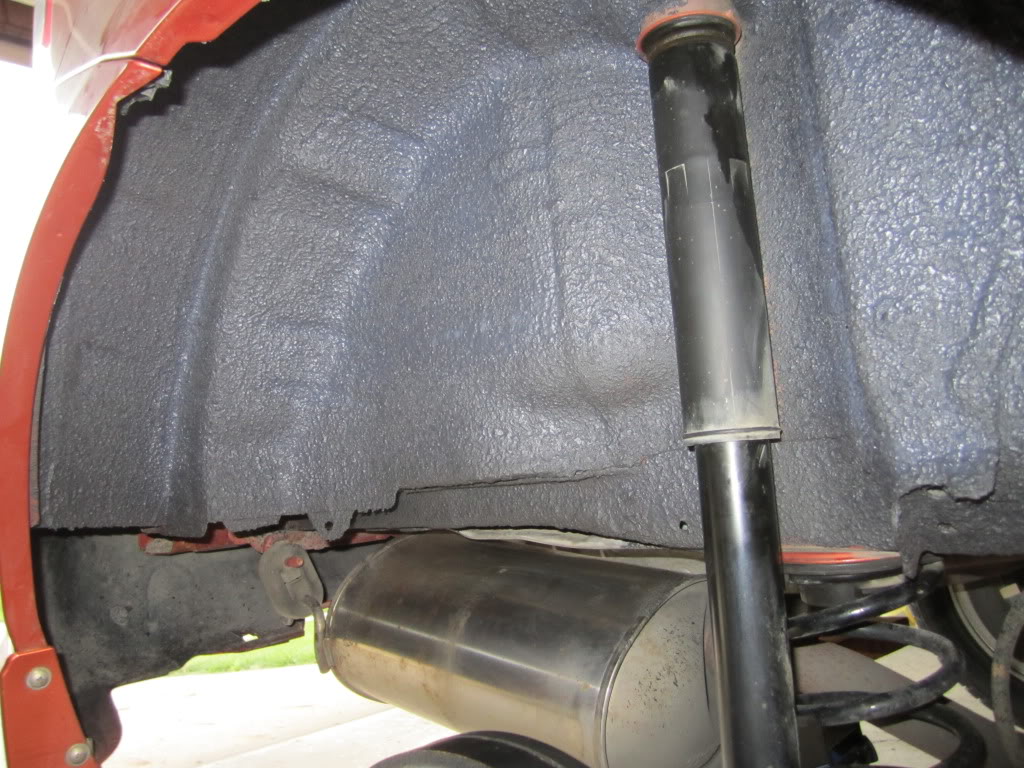
First coat mostly dry:
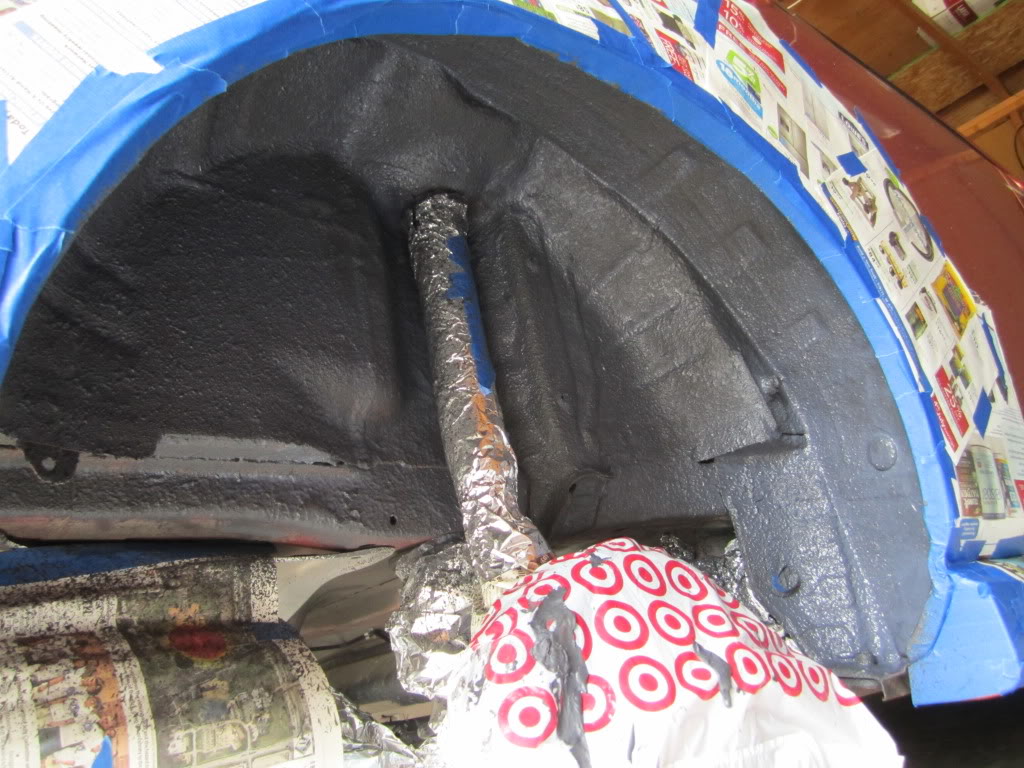
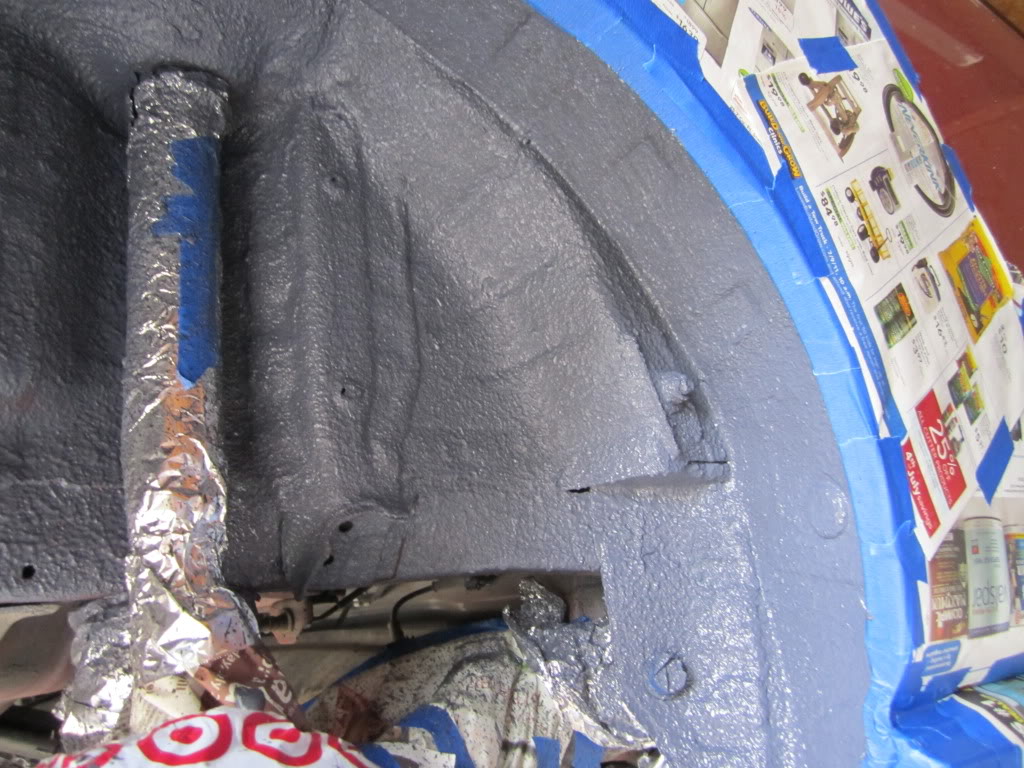
The pictures look roughly the same through all of the coats so I will just show pictures of the third coat drying and all masking removed at this point.
Overall, the product has been on for about 10 days now. The sound dampening effects start at 4-5 days and reach maximum efficiency after 30 days of cure time.
After 10 days and only doing one of the rear quarters the difference at interstate speeds is noticeable. The tire hum is reduced slightly and when driving on rocky surfaces the noises of rocks is reduced significantly. The second wheel well will be done in the near future. I spent this weekend installing suspension on my Subaru and it has been way too hot to spend hours outside painting.
More to come, feel free to ask any questions in the mean time.
First are some pictures of the dirty wheel well before I started:
Here is after the area was cleaned, masked and ready for the spectrum to be applied.
Here is the application of the product. I sprayed the coats on with an undercoating gun at 80 PSI. Each layer was layed about 1mm thick.
First coat wet:
First coat mostly dry:
The pictures look roughly the same through all of the coats so I will just show pictures of the third coat drying and all masking removed at this point.
Overall, the product has been on for about 10 days now. The sound dampening effects start at 4-5 days and reach maximum efficiency after 30 days of cure time.
After 10 days and only doing one of the rear quarters the difference at interstate speeds is noticeable. The tire hum is reduced slightly and when driving on rocky surfaces the noises of rocks is reduced significantly. The second wheel well will be done in the near future. I spent this weekend installing suspension on my Subaru and it has been way too hot to spend hours outside painting.
More to come, feel free to ask any questions in the mean time.

New Member
Joined: Jul 2011
Posts: 11
From: Rochester, NY
Good job on the doors. I'm going to end up glassing that pocket in the doors into a .4 cubic foot sealed enclosure for some Peerless HDS 6.5" mids. I got a 4" Midrange and my tweeter are going in glassed pods in the A pillar where that little useless piece of window is on the dash.
I'll keep checking back here to see your progress. I haven't decided if I want to deaden the floor/firewall; a ton of roadnoise in these 08 sports stock.
I'll keep checking back here to see your progress. I haven't decided if I want to deaden the floor/firewall; a ton of roadnoise in these 08 sports stock.
I appreciate the compliments, feel free to ask anything in the future if you need to as well!
New Member
Joined: Jul 2011
Posts: 11
From: Rochester, NY
Alas, my plans change again. Got a great deal on a pair of Scan-Speak Revelator 18w/4531g's so I'm going to use those in the doors and stick with a 2 way with Vifa D26NC55 tweets.
I'm pretty pumped about these Revs, always wanted to try a pair.
I'm pretty pumped about these Revs, always wanted to try a pair.
For good reason. Revies are a great speaker, and that is a great choice of tweeters too.
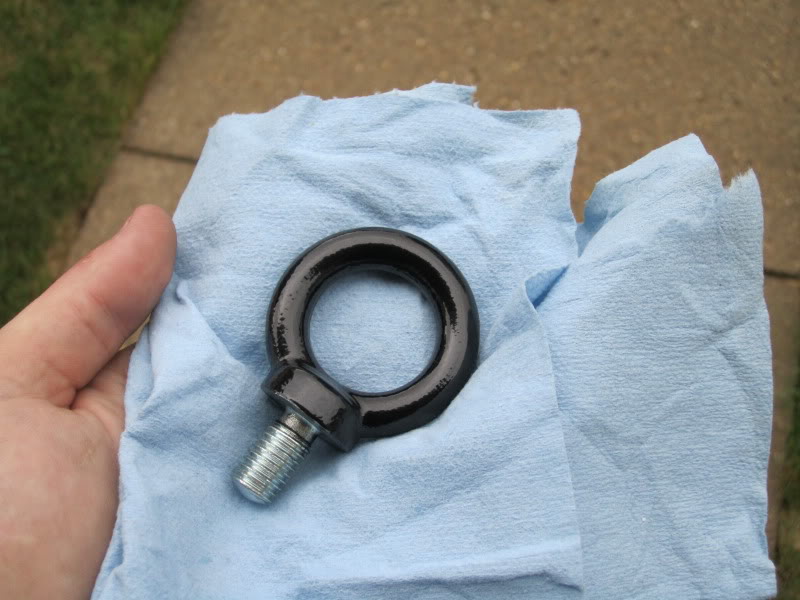
All right guys, first powder coat part done. I am pretty happy with how it came out considering it is the first part I have ever shot. It is the factory tow hook and I coated it with "Mirror Black" powder.
A few more parts done today. I did the A/C line holding bracket attached to the front left of the engine bay as well as a few miscellaneous bolts in the engine bay.
Here are the parts as pulled off:
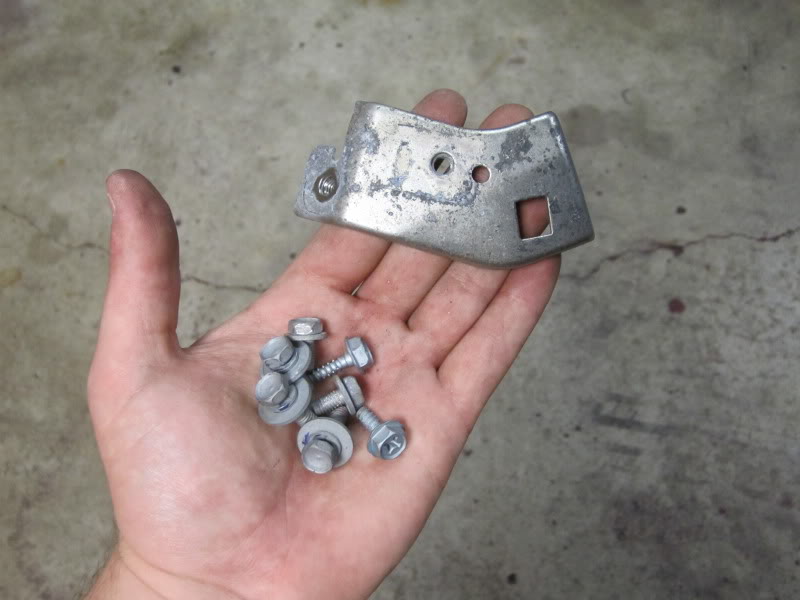
I then sanded the bracket down smooth as well as the bolts and wiped everything with cleaning agent. Preheated the parts to outgas them and then shot them in the same Mirror Black.
Here are the final pictures:
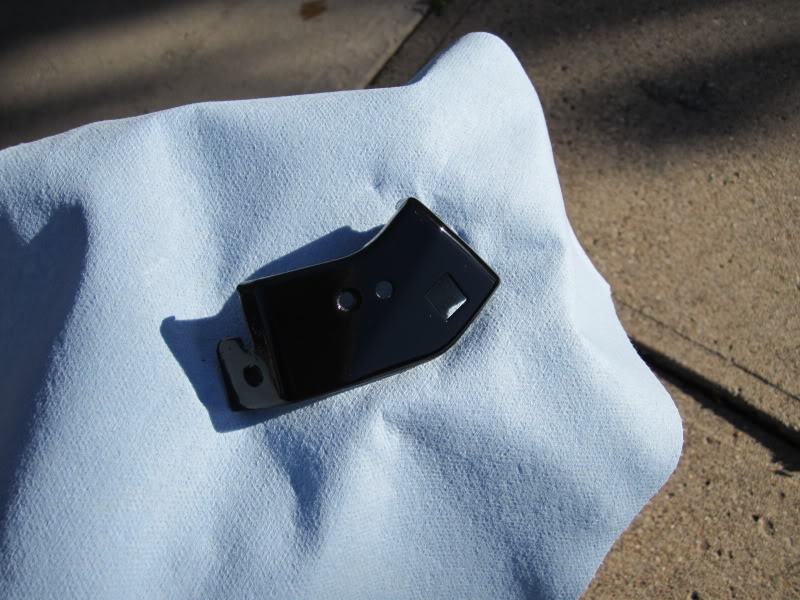
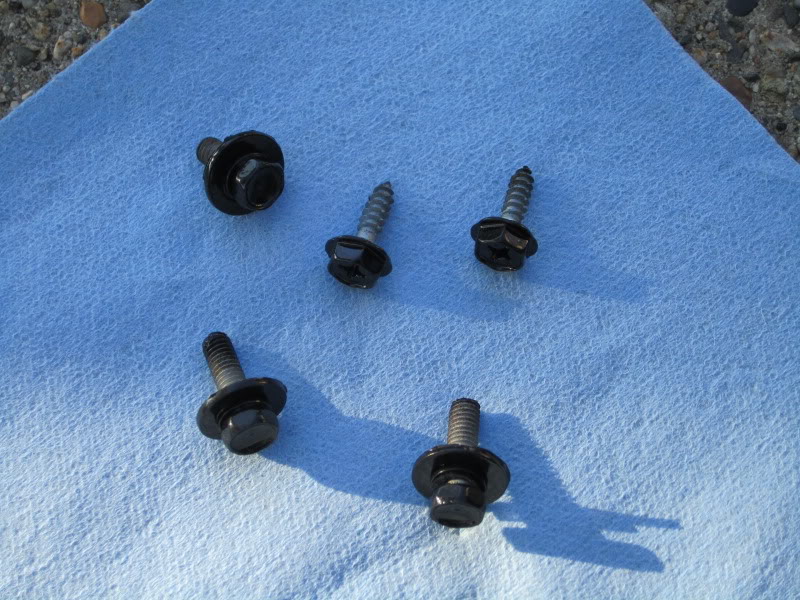
Here are the parts back installed:
Here are the parts as pulled off:
I then sanded the bracket down smooth as well as the bolts and wiped everything with cleaning agent. Preheated the parts to outgas them and then shot them in the same Mirror Black.
Here are the final pictures:
Here are the parts back installed:
Got a little bit bored today so I powder coated a couple pieces. I am not sure if I will use this deck in my Fit or not but, I wanted to do something different anyway.
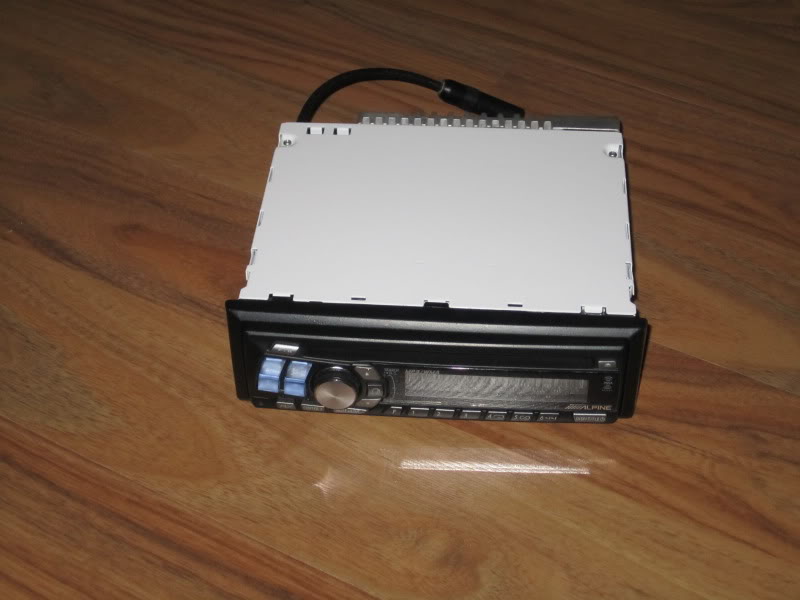
Shot my Alpine chassis in "Glacier White"
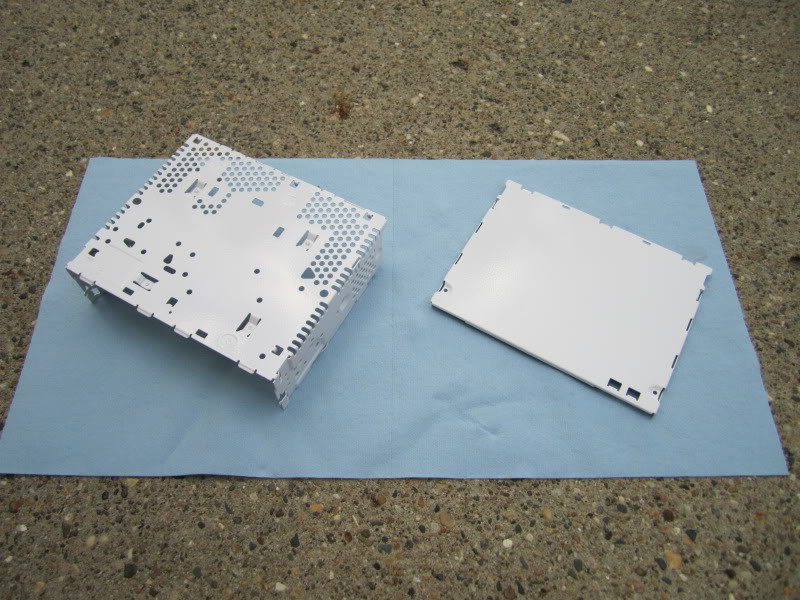
Here it is reassembled (Already had painted the face and trim piece Black)
Shot my Alpine chassis in "Glacier White"
Here it is reassembled (Already had painted the face and trim piece Black)
I am currently using a mid-level hobby gun. It is the Eastwood Dual Voltage gun.
I blast the parts with media and then clean them with a prep agent. Pre-heat them a little and then shoot and clear. All in all it isn't too bad. Being a perfectionist gets me a little frustrated sometimes. Some colors go down a LOT easier than others.
I blast the parts with media and then clean them with a prep agent. Pre-heat them a little and then shoot and clear. All in all it isn't too bad. Being a perfectionist gets me a little frustrated sometimes. Some colors go down a LOT easier than others.
All of it has been worth it so far. I actually did the back a few weeks ago and have been too busy/lazy to post it up. I should probably get on that.