
Zach rebuilds a 350 CSB with pictures

Thread Starter
|
Member
Joined: Nov 2010
Posts: 89
From: Dallastown PA
Zach rebuilds a 350 CSB with pictures
This thread will document my teardown and rebuild of a Chevy 350 small block engine.
This may be old hat to many of you, but I have never done it before and figured some of you may be interested.
The engine that I am starting with is a 4 bolt main block truck engine out of a 1985 Chevy K20 3/4 ton pickup. I am not yet sure what the engine will be when I am done with it. I want to build a 383 stroker engine. But, the parts for this engine are so nice that I may stick with stock displacement and just go with better heads and intake. The heads and intake have all the smog stuff on them, so they are not going to be used.
Enough with words. Time for pictures.
First, lay out your tools on the rear trunk of your old Porsche. Only the finest work jacket will do to keep the paint scratches to a minimum.
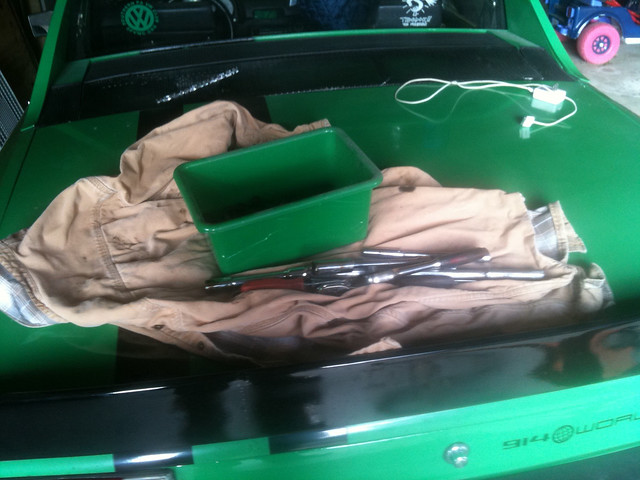
For tear down you need 4 wrench sizes (all inch sizes). 3/8, 7/16, 9/16, and 5/8th. You will want to have these sizes in deep sockets and wrenches. You will want to have at least one breaker bar to break torque on most of the 9/16 and 5/8 bolts. Also a rubber hammer, pry bar, and scraper will be needed.
The beast:
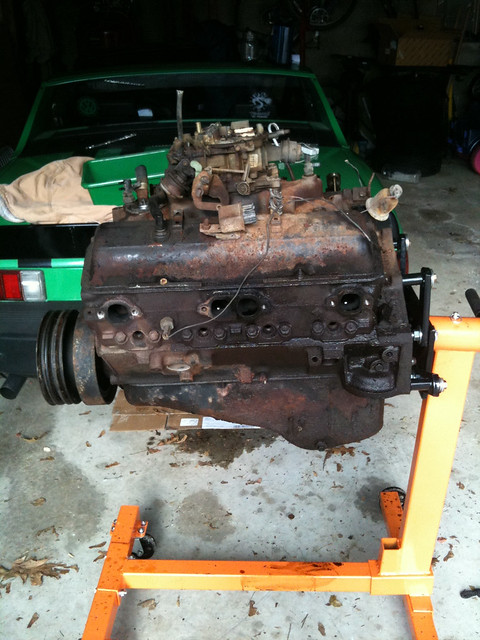
This is the engine that I am going to be tearing down. It was pulled out of the donor truck Dec 10th and mounted on the engine stand the next day. Don't even think of trying to do this without an engine stand. This 1000 pound stand only cost $50, and it is money well spent. Fair bet my 914 has a little bit of engine envy right now....
Valve covers first.
Valve covers need to come off first, as they impinge removing the intake. One off in the picture above. You need a 7/16 deep socket to take off the nuts that hold the valve covers on. Lots of sealant was used here.
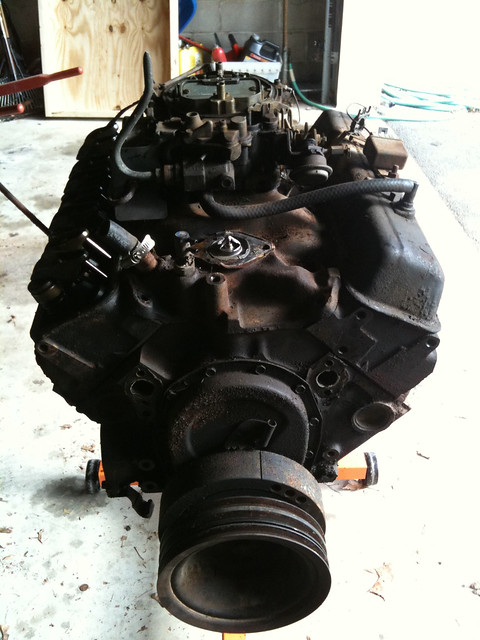
Valve covers, carb and intake are off.
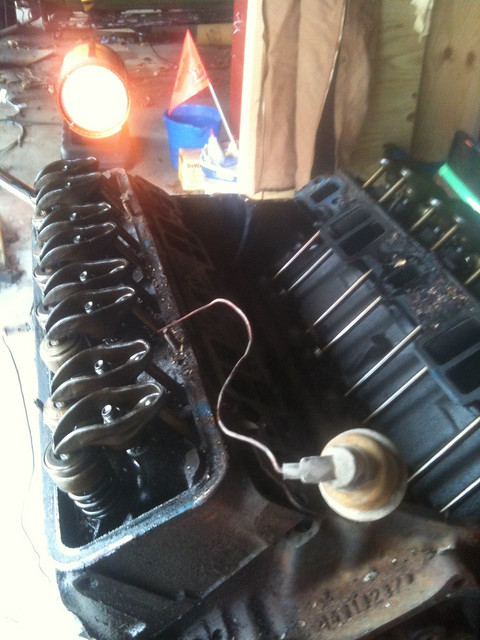
Pretty easy so far. Time to go for the heads. The rods going into the block are all the push rods. They come up from the cam and operate the valves. The orange ball of fire is my heater. 70K BTU of warmth to stave off the cold, even with the garage door open. I even had to take off my warm overalls, as I started sweating with the heater and the overalls both. The intake was attached with 9/16th bolts. There was considerable sealant used, and getting the intake off was difficult. I ended up using a pry bar to get it started, and hold it up enough to get my fingers in there to pull the rest off.
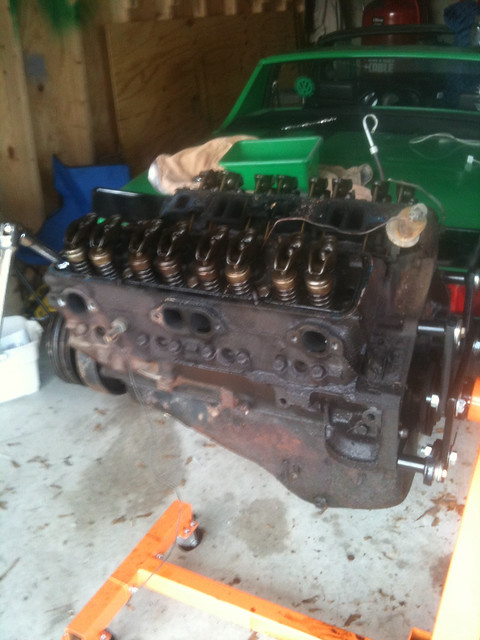
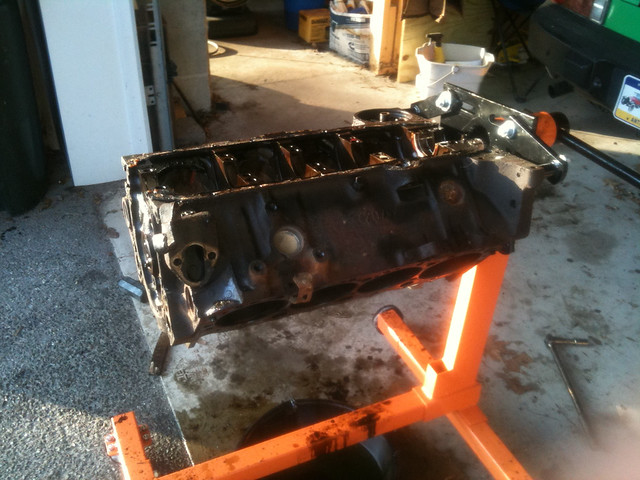
First head is off.
This is the point where I had to do some soul searching. It was pristine! The cylinder walls look like they were just done. There was no carbon ring at the top of the cylinders, which is common for an engine with miles on it. The PO of the donor truck said the engine had been rebuilt 4000 miles ago. But given the condition of the truck and the electrical system (the spark plugs were rusted and fell apart on removal) I had my doubts. Now, though... it took a fair deal of will power to not just button the engine back up again and put new heads and intakes on it. But, I am a stubborn man at times... I am going to rebuild this engine, darn it! This is how I learn. The heads bolts were 5/8s and were heavily torqued. I needed a breaker bar to get them started.
With the heads off I took off the pulley and damper. The damper was a PAIN to get off. Lots of prying with the pry bar all over to keep it from cocking. One of those things where I probably should have used a puller, but I did not have one the right size or the desire to go and get one.
This may be old hat to many of you, but I have never done it before and figured some of you may be interested.
The engine that I am starting with is a 4 bolt main block truck engine out of a 1985 Chevy K20 3/4 ton pickup. I am not yet sure what the engine will be when I am done with it. I want to build a 383 stroker engine. But, the parts for this engine are so nice that I may stick with stock displacement and just go with better heads and intake. The heads and intake have all the smog stuff on them, so they are not going to be used.
Enough with words. Time for pictures.
First, lay out your tools on the rear trunk of your old Porsche. Only the finest work jacket will do to keep the paint scratches to a minimum.
For tear down you need 4 wrench sizes (all inch sizes). 3/8, 7/16, 9/16, and 5/8th. You will want to have these sizes in deep sockets and wrenches. You will want to have at least one breaker bar to break torque on most of the 9/16 and 5/8 bolts. Also a rubber hammer, pry bar, and scraper will be needed.
The beast:
This is the engine that I am going to be tearing down. It was pulled out of the donor truck Dec 10th and mounted on the engine stand the next day. Don't even think of trying to do this without an engine stand. This 1000 pound stand only cost $50, and it is money well spent. Fair bet my 914 has a little bit of engine envy right now....
Valve covers first.
Valve covers need to come off first, as they impinge removing the intake. One off in the picture above. You need a 7/16 deep socket to take off the nuts that hold the valve covers on. Lots of sealant was used here.
Valve covers, carb and intake are off.
Pretty easy so far. Time to go for the heads. The rods going into the block are all the push rods. They come up from the cam and operate the valves. The orange ball of fire is my heater. 70K BTU of warmth to stave off the cold, even with the garage door open. I even had to take off my warm overalls, as I started sweating with the heater and the overalls both. The intake was attached with 9/16th bolts. There was considerable sealant used, and getting the intake off was difficult. I ended up using a pry bar to get it started, and hold it up enough to get my fingers in there to pull the rest off.
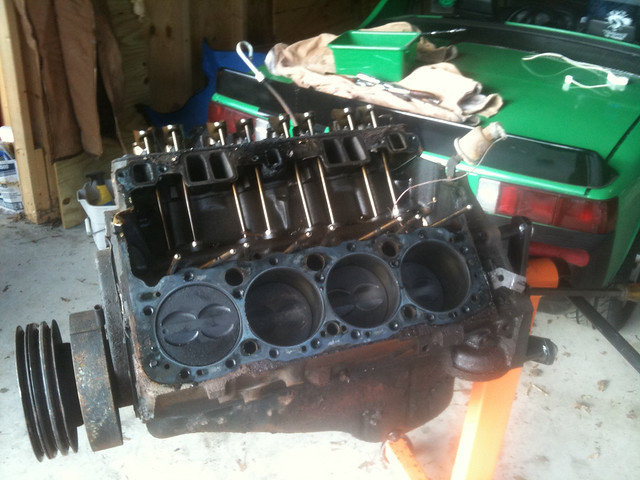
First head is off.
This is the point where I had to do some soul searching. It was pristine! The cylinder walls look like they were just done. There was no carbon ring at the top of the cylinders, which is common for an engine with miles on it. The PO of the donor truck said the engine had been rebuilt 4000 miles ago. But given the condition of the truck and the electrical system (the spark plugs were rusted and fell apart on removal) I had my doubts. Now, though... it took a fair deal of will power to not just button the engine back up again and put new heads and intakes on it. But, I am a stubborn man at times... I am going to rebuild this engine, darn it! This is how I learn. The heads bolts were 5/8s and were heavily torqued. I needed a breaker bar to get them started.
With the heads off I took off the pulley and damper. The damper was a PAIN to get off. Lots of prying with the pry bar all over to keep it from cocking. One of those things where I probably should have used a puller, but I did not have one the right size or the desire to go and get one.
Thread Starter
|
Member
Joined: Nov 2010
Posts: 89
From: Dallastown PA
Heads are off, and it’s time to remove the oil pan. Remember to drain the oil BEFORE turning the block upside down!
When the block is turned over, all the coolant still in the block will drain out. This took me by surprise...
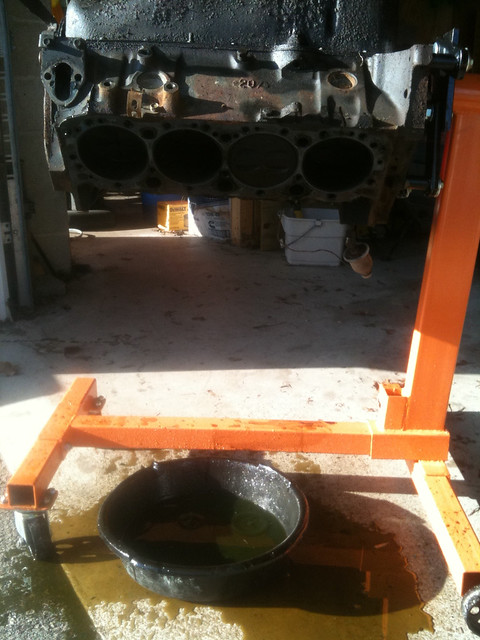
By the time I got a catch pan under the block, it was a bit late.... Live and learn. Lesson, just because the block is on your stand and you think it’s fully drained - it isn't.
The oil pan was held on by 3/8 nuts (I think it may have been 7/16...) with 9/16 bolts at the ends. Once the bolts are free, and the keepers removed, it still took a few good whacks with the rubber mallet to get the pan to come loose.
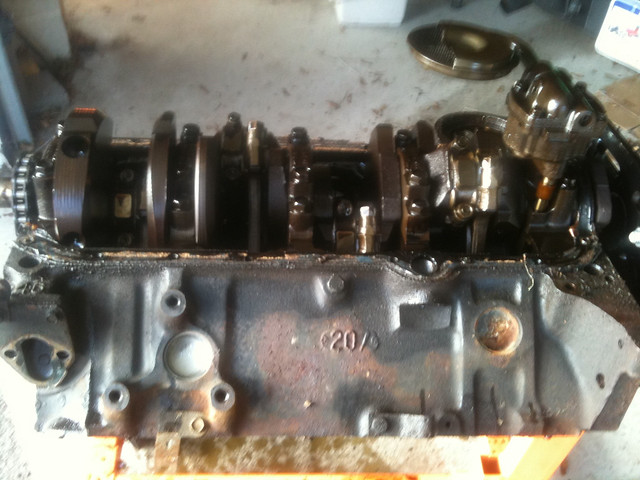
Oil pan is off. Now you can see the oil pump, crank assembly, and the tip of the timing chain.
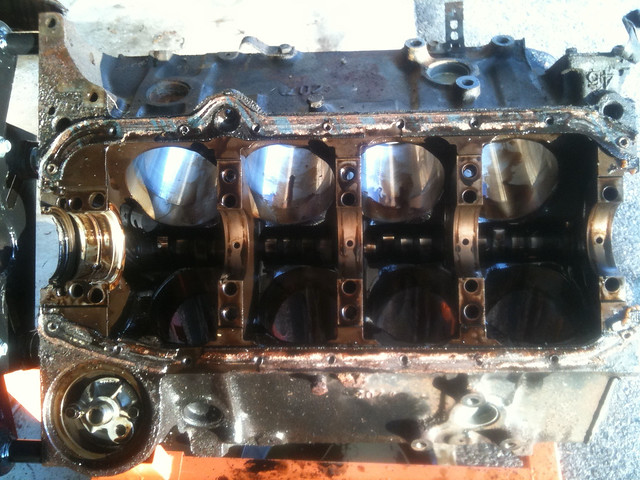
Time to start removing pistons.

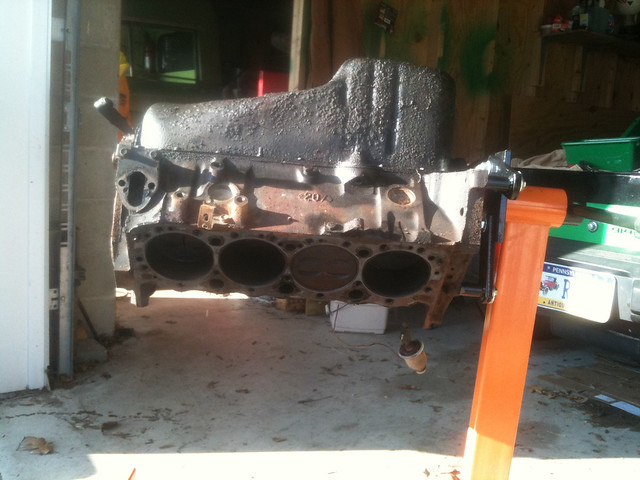
In this picture you can see what makes a "4 bolt main" block. On most Chevy small blocks the crank is held in place with 2 bolts on the keepers. As you can see, these keepers have 4 bolts each. Looking down into the bore you can see the honing in the cylinder. Rods were fixed with 9/16 nuts, and I needed a breaker bar to get them loose.
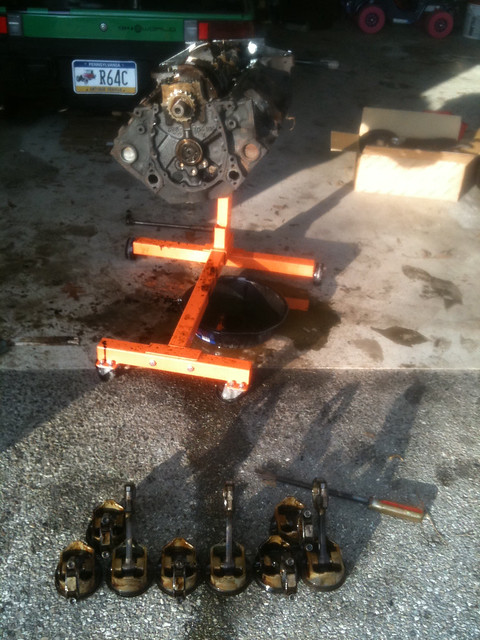
8 pistons and rods ready to be moved upstairs for cleaning and possible re-use.
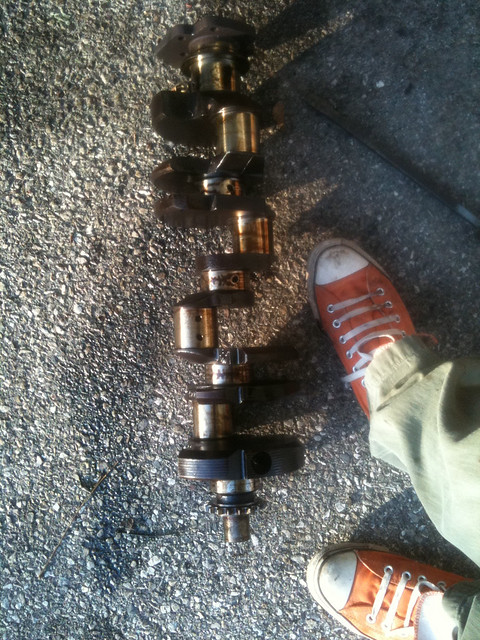
Crank is now out. They call these engines "mouse motors." There is very little small about them. My size tens for reference. The crank may get reused, or it may not. One of the bearings was very worn, which was troubling. Only one of the bearings was worn, the rest looked great. But one of them was through all the babbit material and almost looked like it had not been changed when the engine was rebuilt. Or it could mean that the crank is bent slightly - which can happen.
When the block is turned over, all the coolant still in the block will drain out. This took me by surprise...
By the time I got a catch pan under the block, it was a bit late.... Live and learn. Lesson, just because the block is on your stand and you think it’s fully drained - it isn't.
The oil pan was held on by 3/8 nuts (I think it may have been 7/16...) with 9/16 bolts at the ends. Once the bolts are free, and the keepers removed, it still took a few good whacks with the rubber mallet to get the pan to come loose.
Oil pan is off. Now you can see the oil pump, crank assembly, and the tip of the timing chain.
Time to start removing pistons.
In this picture you can see what makes a "4 bolt main" block. On most Chevy small blocks the crank is held in place with 2 bolts on the keepers. As you can see, these keepers have 4 bolts each. Looking down into the bore you can see the honing in the cylinder. Rods were fixed with 9/16 nuts, and I needed a breaker bar to get them loose.
8 pistons and rods ready to be moved upstairs for cleaning and possible re-use.
Crank is now out. They call these engines "mouse motors." There is very little small about them. My size tens for reference. The crank may get reused, or it may not. One of the bearings was very worn, which was troubling. Only one of the bearings was worn, the rest looked great. But one of them was through all the babbit material and almost looked like it had not been changed when the engine was rebuilt. Or it could mean that the crank is bent slightly - which can happen.
Thread Starter
|
Member
Joined: Nov 2010
Posts: 89
From: Dallastown PA
The cam is still in the block. I have not yet figured out how to remove it. Pretty sure I need to pull the freeze plug at the back of the engine and slide out the cam. But aside from that and a few bits and bobs, the engine is now totally torn down, and I am ready to start cleaning the block.
So, what’s next?
Well, obviously, the cam needs to come out. However that works.
Then I am going to pull all the freeze plugs and start cleaning out the galleries. Oil and sludge build up in the galleries and that can hurt the engine over time. CLEAN CLEAN CLEAN.
Also, I am going to do some dressing on the block. Open up some oil drain holes, take off rough edges, and do other things to improve the qualities of the block. Then the block will go to my local machinist. I need to find out what size everything is, and let him run it through the hot tank. I am pretty sure the cylinders were cut to 30 over, and I do not think that they will need to be recut. I do want to see if the crank needs to be standard or over. That will affect bearings and what parts I get. I'll do the hone job when it gets back. Then clean it some more, and paint it.
Then, I will need to order parts. I WANT to stroke this out. But funding is tight. So I am going to see what everything mics out to, and evaluate what I have for fun money at that time. Hopefully this engine can be back together for spring - not that the truck will be ready, but at least I am making progress.... :)
Even on the engine stand that engine is heavy. I am sore....
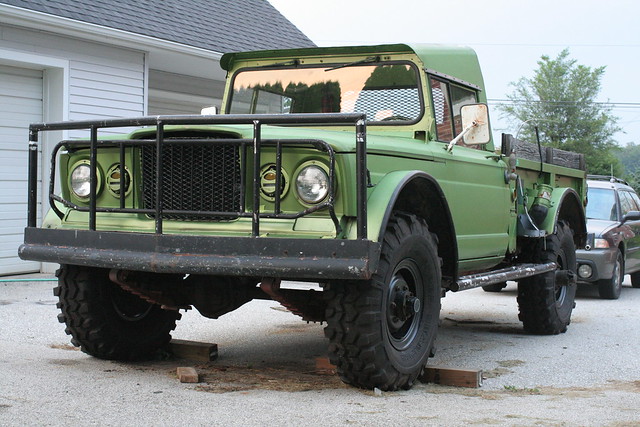


Nice write-up! Call your local machine shop and see what they will charge you to clearance the block for the 400 crank. The 383 stroker is worth every cent you will spend on it, especially in that big-ol Jeep! The additional torque will come in very handy lugging around all that weight. I just installed a 383 in my 85 K10 this past summer and it moves that monster without breaking a sweat. My suggestion is get the GM performance Vortec heads from Scoggin-Dickey and pair them with an air gap manifold from Edelbrock. Even conservatively tuned thet should net you about 400hp and 450 lb ft of torque. Of course you could put the small block in the 914 as well LOL


Thread Starter
|
Member
Joined: Nov 2010
Posts: 89
From: Dallastown PA
Thanks guys. Sorry for the lack of updates.
Holidays, I got the flu, kid got brochitis, then I had to go back to work. I got little done after I stripped the engine block.
The engine is going to have to be a strict economy build. All money that can be spent is going to be spent on heads and cam. I was going to build this thing into a 383 monster, but funds dried up unexpectedly. Life happens.
I am hoping to get out to the garage sometime soon. Its been a few weeks since I have even poked my head in... :(
Zach
I know the feeling believe me. I had a 40 Cadillac resto-mod in progress when the truck motor let go. The Caddy got sold and the truck got a new heart. I would still recommend the Vortec heads, go cast iron to save some money, and get a Comp Cams Extreme Energy 268/280 cam. Those two together will do the trick!
