Unofficial Honda FIT Forums
  • LOG IN
  • REGISTER
  • Forums
    • Welcome To FitFreak
      • Fit Freak Newbie / FAQs
      • Site Feedback and Suggestions
    • The Honda Fit and Jazz Forums
      • General Fit Talk
      • 1st Generation (GD 01-08)
      • 2nd Generation (GE 08-13)
      • 3rd Generation (2015+)
      • Fit Photos & Videos
      • Car Shows, Events, and Racing
      • Other Car Related Discussions
      • Off Topic Discussion
    • Buy, Sell, Trade, Product Market Research and Group Buys
      • For Sale / Want To Buy / Classified Ads for USED Fit Items
      • FIT-Vendor Sponsored Group Buys and Sales
      • Gauge Interest in a Fit Product or Group Buy
      • Merchant Group Buys and New Product Sales
      • General For Sale Section
    • Fit Modifications
      • General Fit Modifications Discussion
      • Fit DIY: Repair & Maintenance
      • Fit Engine Modifications, Motor Swaps, ECU Tuning
      • Fit Exterior Modifications & JDM Styling
      • Fit Interior Modifications
      • Fit I.C.E.
      • Fit Wheels & Tires
      • Fit Suspension & Brake Modifications
      • Fit Interior & Exterior Illumination
    • Honda Dealer and Honda USA Discussions
      • Honda Fit Dealer Representatives
      • Honda Fit Dealer Reviews
    • Vendor Marketplace Forums
      • FIT Vendor General Discussion Area
      • FIT-Vendor Sponsored Group Buys
      • Tire, Wheel, Brake & Suspension
    • Fit Forums & Clubs
      • America East
      • America Central
      • America West
      • Canada Fit Forums & Clubs
      • Mexico Fit Forums & Clubs
      • European Fit Forums & Clubs
      • Asia Fit Forums & Clubs
  • Marketplace
    • Vendor Directory
    • Become a Vendor
  • New Posts
  • Tools
    • Car Payment Calculator
    • Tire Rim Calculator
    • Recalls
    • Technical Service Bulletins (TSBs)
    • Members List
    • Live Feed
  • Gallery
  • View Dark Mode
    • Please register or login to enable Dark Mode.
  • Log In
  • Register
Unofficial Honda FIT Forums
    • Threads
      • Advanced
Dark Mode

Please register or login to enable Dark Mode.

Log In

Forgot your Password?

By logging into your account, you agree to our Terms of Use and Privacy Policy, and to the use of cookies as described therein.
  • Recent
  • Commented
  • Albums
  • My Pictures

Cordizzle4life's Photos

View Profile
Sort:
Most Recent
  • Most Recent
  • Most Comments
  • Albums
  • Photos
This is them at night. I had floor LEDs already, so I wired the ceiling LEDs to the floor ones so they all lit up together. You can put in a separate switch if you so choose.
0 2016/04/02 07:20:04 Cordizzle4
This is the headliner in the day. I chose to not pain the visors and "Oh-Shit" handles. I liked the silver-on blue look. That color scheme is kind of a theme for my whole car.
0 2016/04/02 07:20:02 Cordizzle4
This is the testing phase. Everything looks great! If you notice, I made it look like a starry night sky. I have the constellations Orion (my favorite) and Virgo (My zodiac sign) mixed in near the front of the car.
0 2016/04/02 07:19:59 Cordizzle4
As you can see, this is how it should look for each "series" of LED groupings. The resistor goes BEFORE the first positive of the series. SO, follow this formula: 

Source Positive wire-resistor-positive of 1st LED
1st LED Negative-2nd LED positive
2nd LED negative, 3rd LED positive
Wrap the Source negative around the 3rd LED negative. 

Do this for ALL of the 96-99 LEDs. 

If you need better instruction than that, use this site: http://led.linear1.org/led.wiz
As you can see, this is how it should look for each "series" of LED groupings. The resistor goes BEFORE the first positive of the series. SO, follow this formula: Source Positive wire-resistor-positive of 1st LED 1st LED Negative-2nd LED positive 2nd LED negative, 3rd LED positive Wrap the Source negative around the 3rd LED negative. Do this for ALL of the 96-99 LEDs. If you need better instruction than that, use this site: http://led.linear1.org/led.wiz
0 2016/04/02 07:19:55 Cordizzle4
This is everything wired together. This will get messy, but here is the best way to wire this setup. You're going to be doing what's called a "parallel-series" arrangement. Google it if you need more guidance. Basically, you're going to be making a ladder. Two long wires running down the side of each LED series, with three LEDs as the rungs of the ladders. The next picture shows this better.
0 2016/04/02 07:19:52 Cordizzle4
LEDs are in place. I used a hot glue gun to keep them all in place. Note: KEEP TRACK OF WHICH SIDE IS NEGATIVE AND POSITIVE. 
What I did was this: After I drilled the holes, I used a marker on the left side of each hole to mark where the negative was going to be. This made it super easy to remember where the negative sides of the LEDs were.
LEDs are in place. I used a hot glue gun to keep them all in place. Note: KEEP TRACK OF WHICH SIDE IS NEGATIVE AND POSITIVE. What I did was this: After I drilled the holes, I used a marker on the left side of each hole to mark where the negative was going to be. This made it super easy to remember where the negative sides of the LEDs were.
0 2016/04/02 07:19:49 Cordizzle4
Now, I needed to put holes into the back of the headliner that was juuuust big enough to fit the LEDs. I used a Dremel because their bits are tiny, and it made the work much easier than say a bulky drill.
0 2016/04/02 07:19:47 Cordizzle4
This is the finished headliner. Everything went WAAAYYY better than I expected. It looked very professional to me and I was happy with it.
0 2016/04/02 07:19:45 Cordizzle4
This is the progress half-way through the gluing. USE CONTACT CEMENT!!!! SPRAY ADHESIVE SUCKS MONKEY BALLS! Work from the middle in small strips. Cover both the headliner AND the fabric. Let them get tacky, and then adhere.
0 2016/04/02 07:19:42 Cordizzle4
This is a comparison between my new and old fabrics. The old is on the right, new on the left. The fabric I used had a suede-like feeling and feels awesome to touch.
0 2016/04/02 07:19:38 Cordizzle4
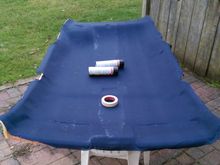
Trial one. I learned that MOST fabrics will be too thin to use for this. You have to find a balance between looks and thickness. On some fabrics, like this one, the glue will just seep right through.
0 2016/04/02 07:19:35 Cordizzle4
Here's the headliner all removed. I don't know if other people have removed the brown stuff, but I didn't and so far my headliner adhered perfectly fine.
0 2016/04/02 07:19:31 Cordizzle4
It's pretty easy to remove the headliner. Just work from the sides and yank on it until you get it off. Don't bend the headliner though, as you may warp it.
0 2016/04/02 07:19:27 Cordizzle4
0 2016/04/02 07:18:12 Cordizzle4
0 2016/04/02 07:18:07 Cordizzle4
I did SID's air-intake, and I painted my manifold cover like this. It took about 2 days to pain fully, but I REALLY love the result. Contact me if you want a design/want me to paint it for you. It's one of my strong suits.
0 2012/11/26 21:10:37 Cordizzle4
A new shift knob.  Simple, cheap, not one I'm keeping for long. However, my stock knob's rubber shit fell off, so I replaced it with this.  I like the lights :)
A new shift knob. Simple, cheap, not one I'm keeping for long. However, my stock knob's rubber shit fell off, so I replaced it with this. I like the lights :)
0 2012/11/26 21:10:37 Cordizzle4
At night, with a light on it.
0 2012/11/26 21:08:25 Cordizzle4
Again, it's the little things that count.  You can't see it, but they also provided a cover for the glove box opener.
Again, it's the little things that count. You can't see it, but they also provided a cover for the glove box opener.
0 2012/11/26 21:08:25 Cordizzle4
The radio looks amazing.  Best part of the kit in my opinion.
The radio looks amazing. Best part of the kit in my opinion.
0 2012/11/26 21:08:25 Cordizzle4
Passenger side door.  Both the front and rear doors have these accents.
Passenger side door. Both the front and rear doors have these accents.
0 2012/11/26 21:06:57 Cordizzle4
It's the little touches that make this upgrade better :)
0 2012/11/26 21:06:57 Cordizzle4
Driver Side door.  Looks great!
Driver Side door. Looks great!
0 2012/11/26 21:06:57 Cordizzle4
 

Top
Unofficial Honda FIT Forums
  • Contact Us
  • FAQ
  • Archive
  • Advertising
  • Cookie Policy
  • Privacy Statement
  • Terms of Service
  • Your Privacy Choices
  • Manage Preferences

© 2026 MH Sub I, LLC dba Internet Brands


When you click on links to various merchants on this site and make a purchase, this can result in this site earning a commission. Affiliate programs and affiliations include, but are not limited to, the eBay Partner Network.