DIY blacked out steering wheel emblem. Lots of pics.
#1
 06-14-2009, 12:06 AM

DIY blacked out steering wheel emblem. Lots of pics.
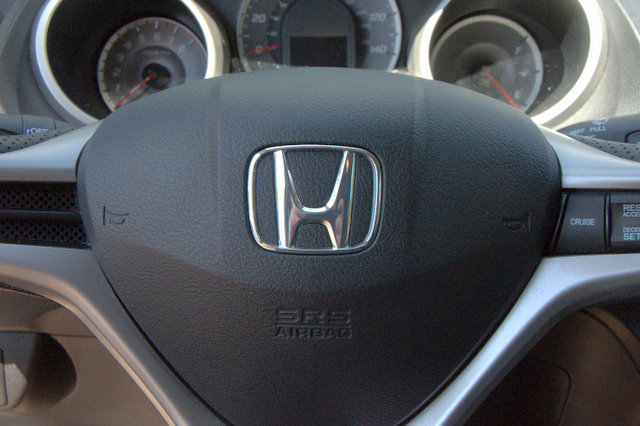
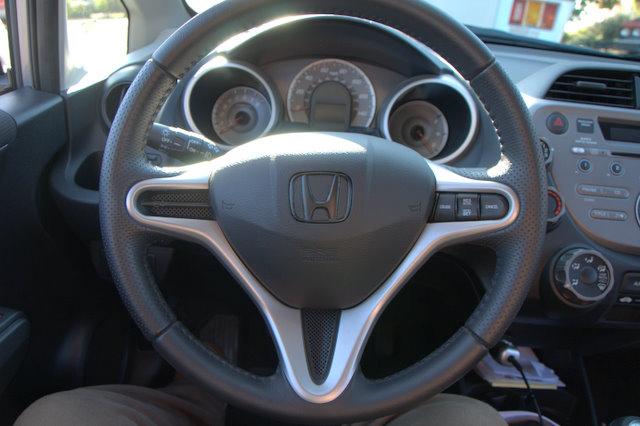
I don't know about you guys, but I absolutely hate the chrome Honda emblem on the steering wheel. I always seem to be driving in just the right direction at the right time of day to get massive glare in my eyes... So I decided to black it out.
I wasn't able to find anything like this on the forum, so here's a step by step photo journey on how I did it.
Step 1: Say goodbye to that shiney chrome!
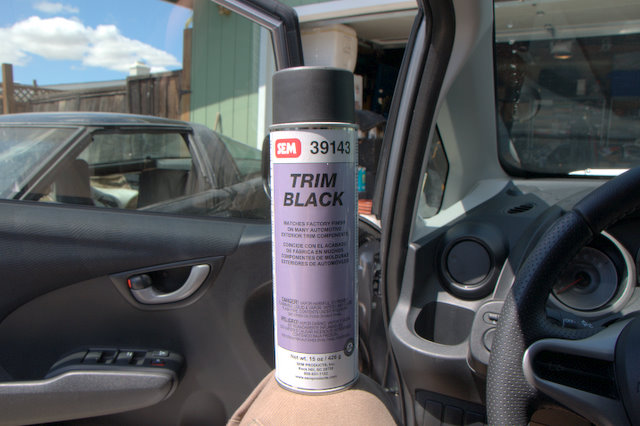
2: Make sure you've got the right paint. I used this stuff called Trim Black. Not sure what company it is (SEM?), my dad had some in his shop that he gave to me.
3: Get yourself some lacquer thinner. You'll need this to clean up the area around the emblem. It also helps to take off the clear coat on top of the chrome. Take a clean rag and put a little bit of the laquer thinner on it. Not too much now, you don't want to melt your steering wheel, just clean it. Rub all over the emblem, make sure you get it nice and clean.

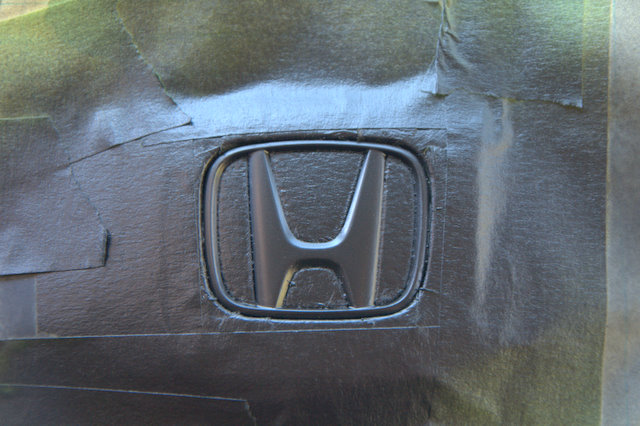
4: Start masking. I used green painter's masking tape because it leaves no residue behind when you peel it off and it comes off very easily. I started off by masking the four "straight" edges of the emblem. Use a very small screwdriver or your fingernail to push the masking tape between the emblem and the EZ-scratch plastic. If you use a screwdriver, make sure you have a steady hand, you don't want to put a gash in your steering wheel.
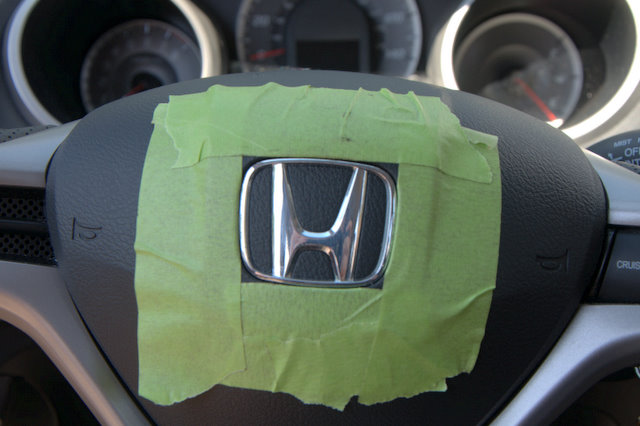
5: Keep masking. Masking is the most important part of any painting job. If you mess up the masking process, you mess up the entire job. Take four small pieces of tape and mask off the corners where the four larger parts missed. After you do that, lay a piece of take across one of the gaps in the H.
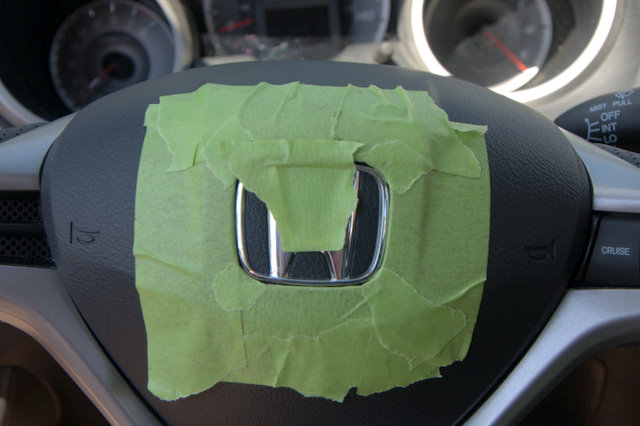
6: Guess what, more masking! Take your small screwdriver (or any other small flat tool) and push the tape into the plastic of the emblem. Make sure it's flat and snug all around. Then take an exacto or hobby knife and cut along the edges of the plastic. After you've cut around the whole gap, grab the excess tape and peel it off. You should be left with a near perfect mask of the gaps in the H.

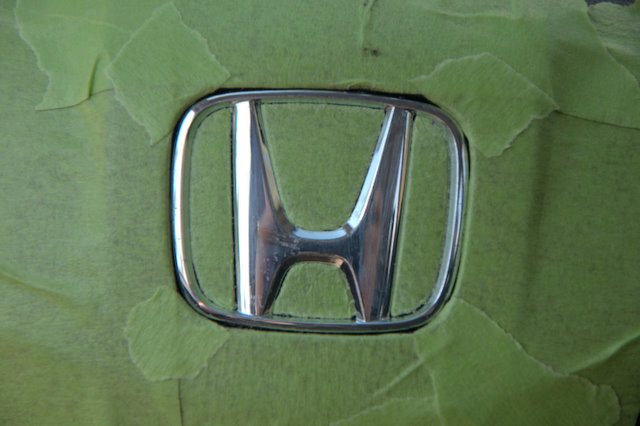
7: Start working on the emblem. Now that you've got most of the masking out of the way, it's time to start prepping the emblem for painting. Get yourself some 440 grit sandpaper, real fine stuff, you don't want to put big grooves in the plastic. Just start rubbing all over the chrome, and make sure you hit every surface. Fold the sandpaper in half to get the little crevices between the emblem and the horn. When you're done, it should look something like this.

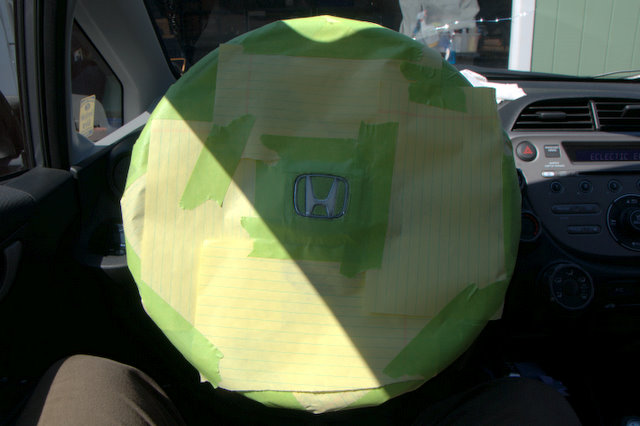
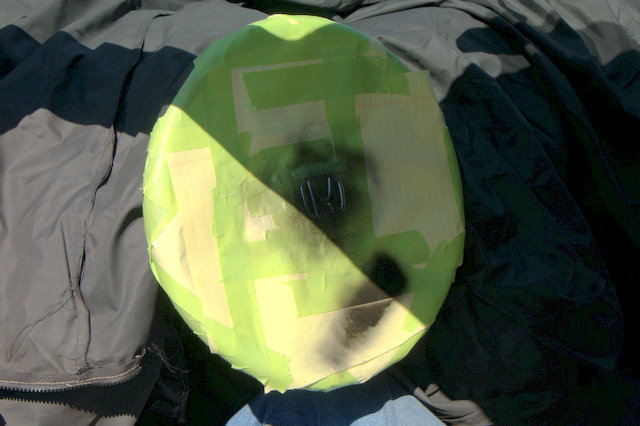
8: Finish masking the rest of the steering wheel. Take some paper and tape it to the steering wheel, then fill in any gaps with tape and more paper. Make sure there are no gaps in your mask here, you don't want to end up with a flat black gauge cluster. You'll also want to throw something over the dashboard so you don't paint that as well.
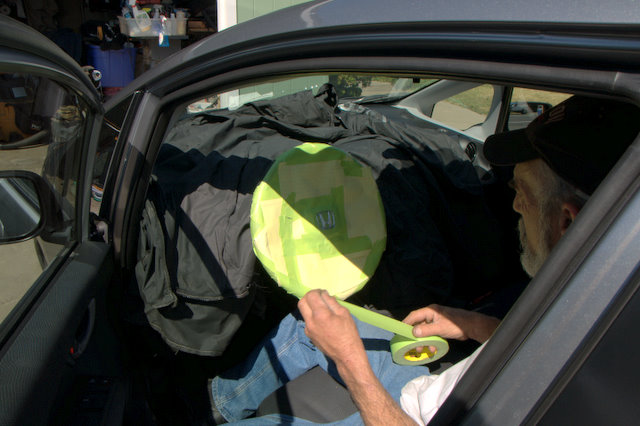
9: Have your dad take over. I'm not terribly experienced with painting, especially with a rattle can, so I let my dad take over at this point. As you can see, my masking job was insufficient, so he closed up a couple openings with some tape.
How the hell do you use this stuff?
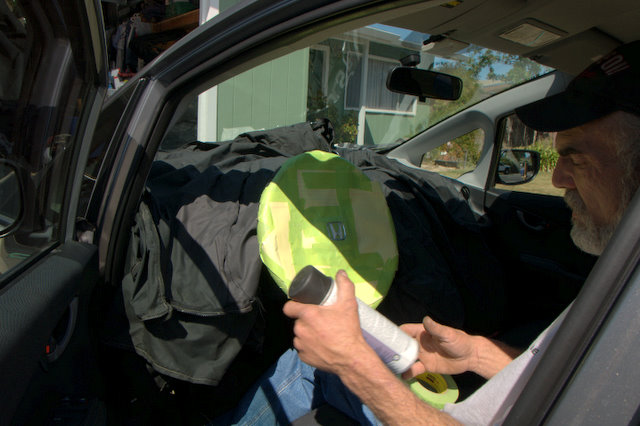
10: Commence painting! Start off by doing a single light coat, then let it dry for a bit before doing another. The stuff we used said to wait 3-5 minutes between coats, so we waited 30 seconds. >.>
11: Almost done. We applied 3 coats, then let it sit to dry for a bit before we peeled the mask off. I would recommend waiting an hour or two at least. We got impatient and peeled it prematurely and ended up taking some of the paint off with the mask... so we did the whole process all over again, yay!
12: Admire your work. After waiting the proper amount of time ^_^; go ahead and peel off your mask and admire your work.
Hope you guys enjoyed this. I had a blast doing it.
Edit: I had some Primus playing while I was doing this, and the song "Lacquerhead" came on as I was getting blasted in the face with lacquer thinner fumes. I thought that was pretty funny...
I wasn't able to find anything like this on the forum, so here's a step by step photo journey on how I did it.
Step 1: Say goodbye to that shiney chrome!
2: Make sure you've got the right paint. I used this stuff called Trim Black. Not sure what company it is (SEM?), my dad had some in his shop that he gave to me.
3: Get yourself some lacquer thinner. You'll need this to clean up the area around the emblem. It also helps to take off the clear coat on top of the chrome. Take a clean rag and put a little bit of the laquer thinner on it. Not too much now, you don't want to melt your steering wheel, just clean it. Rub all over the emblem, make sure you get it nice and clean.
4: Start masking. I used green painter's masking tape because it leaves no residue behind when you peel it off and it comes off very easily. I started off by masking the four "straight" edges of the emblem. Use a very small screwdriver or your fingernail to push the masking tape between the emblem and the EZ-scratch plastic. If you use a screwdriver, make sure you have a steady hand, you don't want to put a gash in your steering wheel.
5: Keep masking. Masking is the most important part of any painting job. If you mess up the masking process, you mess up the entire job. Take four small pieces of tape and mask off the corners where the four larger parts missed. After you do that, lay a piece of take across one of the gaps in the H.
6: Guess what, more masking! Take your small screwdriver (or any other small flat tool) and push the tape into the plastic of the emblem. Make sure it's flat and snug all around. Then take an exacto or hobby knife and cut along the edges of the plastic. After you've cut around the whole gap, grab the excess tape and peel it off. You should be left with a near perfect mask of the gaps in the H.
7: Start working on the emblem. Now that you've got most of the masking out of the way, it's time to start prepping the emblem for painting. Get yourself some 440 grit sandpaper, real fine stuff, you don't want to put big grooves in the plastic. Just start rubbing all over the chrome, and make sure you hit every surface. Fold the sandpaper in half to get the little crevices between the emblem and the horn. When you're done, it should look something like this.
8: Finish masking the rest of the steering wheel. Take some paper and tape it to the steering wheel, then fill in any gaps with tape and more paper. Make sure there are no gaps in your mask here, you don't want to end up with a flat black gauge cluster. You'll also want to throw something over the dashboard so you don't paint that as well.
9: Have your dad take over. I'm not terribly experienced with painting, especially with a rattle can, so I let my dad take over at this point. As you can see, my masking job was insufficient, so he closed up a couple openings with some tape.
How the hell do you use this stuff?
10: Commence painting! Start off by doing a single light coat, then let it dry for a bit before doing another. The stuff we used said to wait 3-5 minutes between coats, so we waited 30 seconds. >.>
11: Almost done. We applied 3 coats, then let it sit to dry for a bit before we peeled the mask off. I would recommend waiting an hour or two at least. We got impatient and peeled it prematurely and ended up taking some of the paint off with the mask... so we did the whole process all over again, yay!
12: Admire your work. After waiting the proper amount of time ^_^; go ahead and peel off your mask and admire your work.
Hope you guys enjoyed this. I had a blast doing it.
Edit: I had some Primus playing while I was doing this, and the song "Lacquerhead" came on as I was getting blasted in the face with lacquer thinner fumes. I thought that was pretty funny...
Last edited by SumYunGai; 06-14-2009 at 12:08 AM.
#2
06-14-2009, 12:44 AM

I assume it is just glued/taped on, wouldnt it be easier to just remove it to paint it. I never like masking stuff like that, it never turns out good around the edges.
Although, from your pics it looks like you did a quality job.
The black definitely looks better.
Although, from your pics it looks like you did a quality job.
The black definitely looks better.
#3
06-14-2009, 12:55 AM
I thought it would be as well. I tried tooling around with it a bit, but I couldn't manage to peel it off. I didn't want to try too hard, just in case it wasn't glued on and it snapped.


#8
06-29-2009, 06:28 AM
Really nice job!
Sweet and detailed DIY to!
Does look so much better with the black! I'm defiantly doing this later today haha
BGS
Sweet and detailed DIY to!
Does look so much better with the black! I'm defiantly doing this later today haha
BGS
#10
07-03-2009, 12:29 PM

Huh. I've been driving my '07 for half a year now, and this has never happened to me - even before I tinted the windows. Is the GE8 emblem more reflective or something?
#11
07-03-2009, 03:20 PM
I think you have some serious balls to have done that painting inside of your car. I don't think I could go through with it. I just know I'd **** it up and spray paint half my interior. It looks good, too!

#14
07-25-2012, 05:26 PM

Almost positive I wouldn't paint inside my car toooo sketch. I think floss and maybe a hair dryer could help with the removal of the emblem. Could be wrong. Looks good
#16
02-15-2021, 08:37 AM

H emblem cover

Found on e-bay
Happy with the results.

Thread
Thread Starter
Forum
Replies
Last Post
rpdupre
Fit Interior Modifications
4
11-26-2021 01:37 AM