DIY pics: Painting rear valence/diffuser (2nd day with the Fit and i painted it!)


Nice writeup. I saw a few other people do this, and the RS looks good with that portion black which made me want to do it, but this thread finally motivated me. I spray painted that area today, used the same masking painters tape. I removed the black plastic stuff under the bumper, the muffler tip and the visible clips and wrapped everything in newspaper like you did. I sanded with what I had (800 grit) but used Rustoleum high-heat BBQ paint, its pretty much flat black. I probably spent about an hour on the masking portion, trying to get the lines perfect was a pain but the black pin-striping idea sounds great to finish it off.
Thanks for the ideas and motivaton
Thanks for the ideas and motivaton
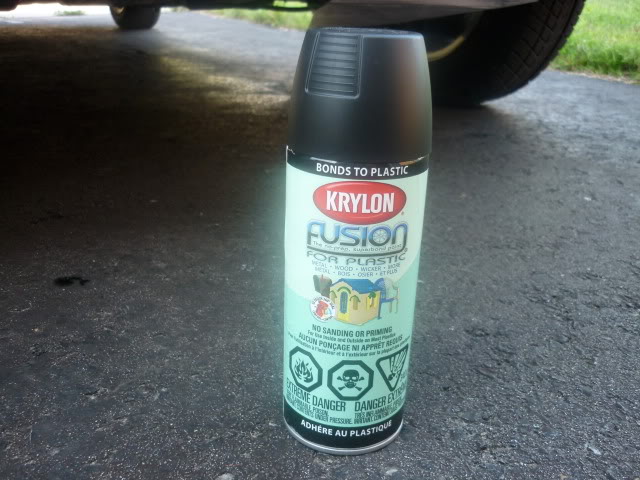
My friend did his whole bumper with Krylon Fusion, and it looked great as well. Because Krylon Fusion's are designed to stick on plastics

your the TRUE master spray painter =P
if i recall recorrectly.. i think i learned all my tricks from you xD
Most of what I did was with an HVLP gun.

I am looking at Fits, Cubes, and Mach 1s. Those are my three contenders right now.


I think that looks really good, but I don't have the nerve to paint it myself, I'd chicken out and have it done at a body shop. Its kinda wierd because my first new car, a 2000 Contour SVT had its rear valance panel black from the factory and everyone wanted it painted body color, now I want my Fit done in black, go figure
After helping my buddy prep his Mazdaspeed 6 wheels on his Mazdaspeed 3 we were talking about this on my car and I think I'm going to pull the trigger on this mod, thanks for the great close-ups, I think we now know where to place the tape, gotta get that part of it right for sure. I know it will look good on my car, but not as good as it does on white, damn I love this car in white, it just takes to mods so well
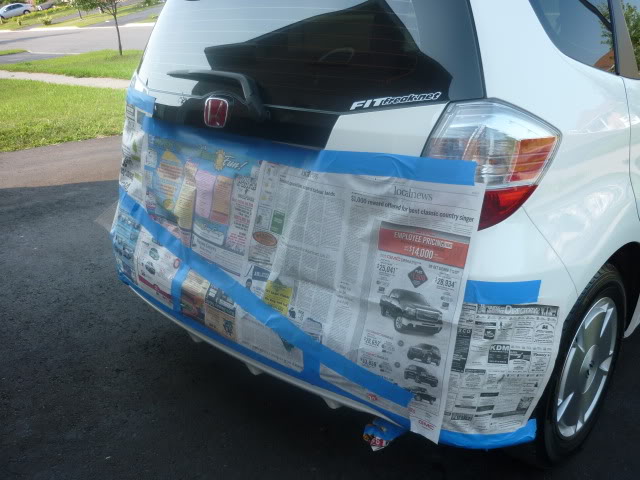
just painted mines. wish i spent more time taping it up cuz it came out crooked. lol. oh well. here's a pic before i removed the blue tape. i used that krylon fusion paint that apparently adheres to plastic well. ....and just cleaned real good. didn't sand it down. got some good advice on these boards.


I painted my rear lower valance/diffuser about 4-5 weeks ago! Washed/clayed/waxed the car today and noticed a few chips in the paint! I used the Krylon fusion for plastic spray paint! I applied about 5-6 coats giving 10 or so minutes between each coat! No big deal, I just touched it up with a magic marker and it looks good now! I also sprayed the exhaust satin black to make it disappear!
Pics:


Pics:


Last edited by ej96hatch; May 14, 2010 at 08:10 PM.
wow new replys =P this makes me so happy.
wow nice what was the prep work for painting your muffler and tip!? i wanna do that!
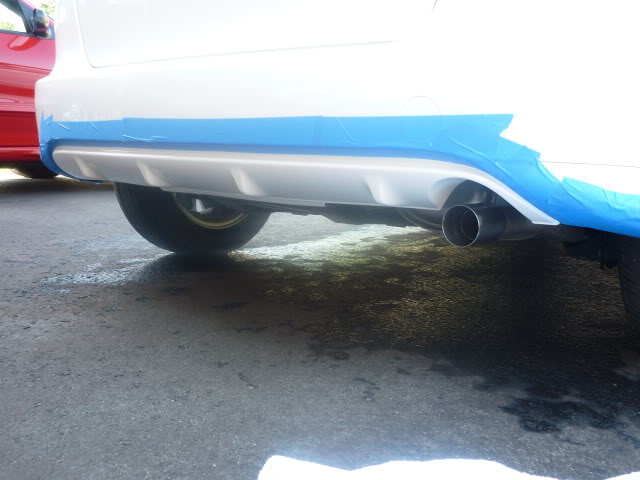
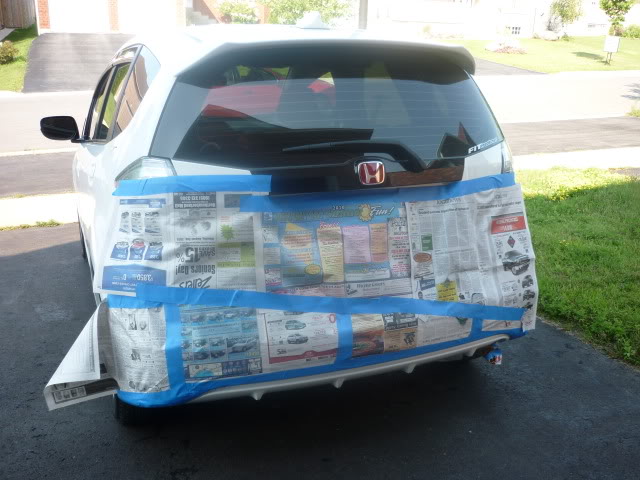
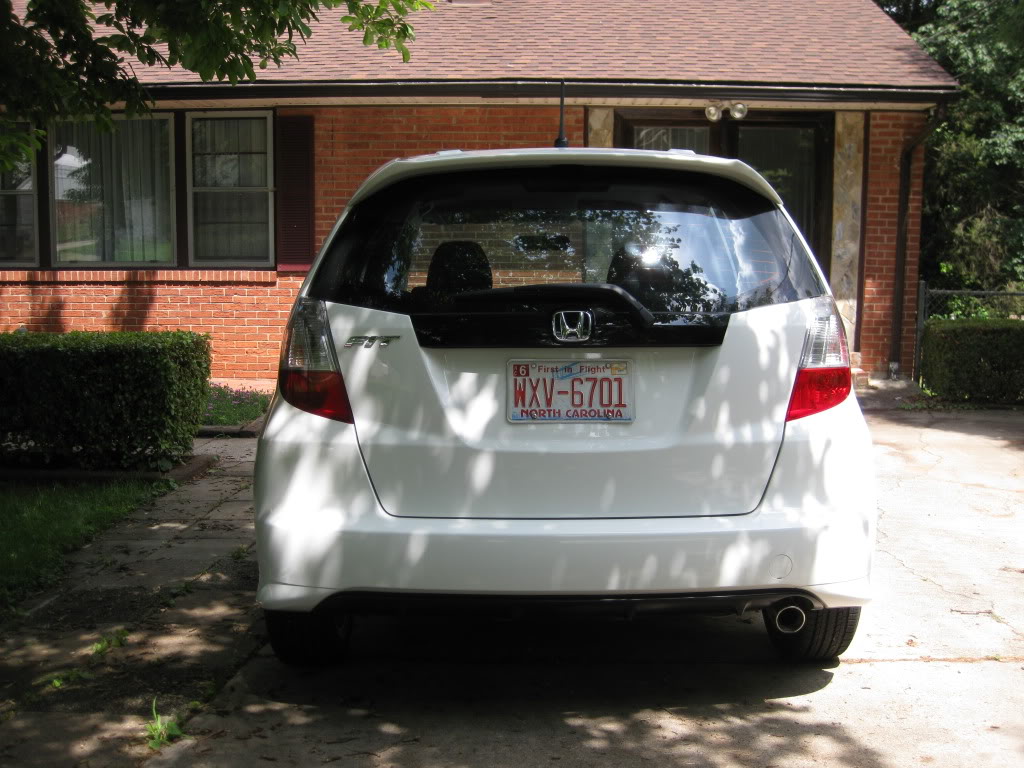
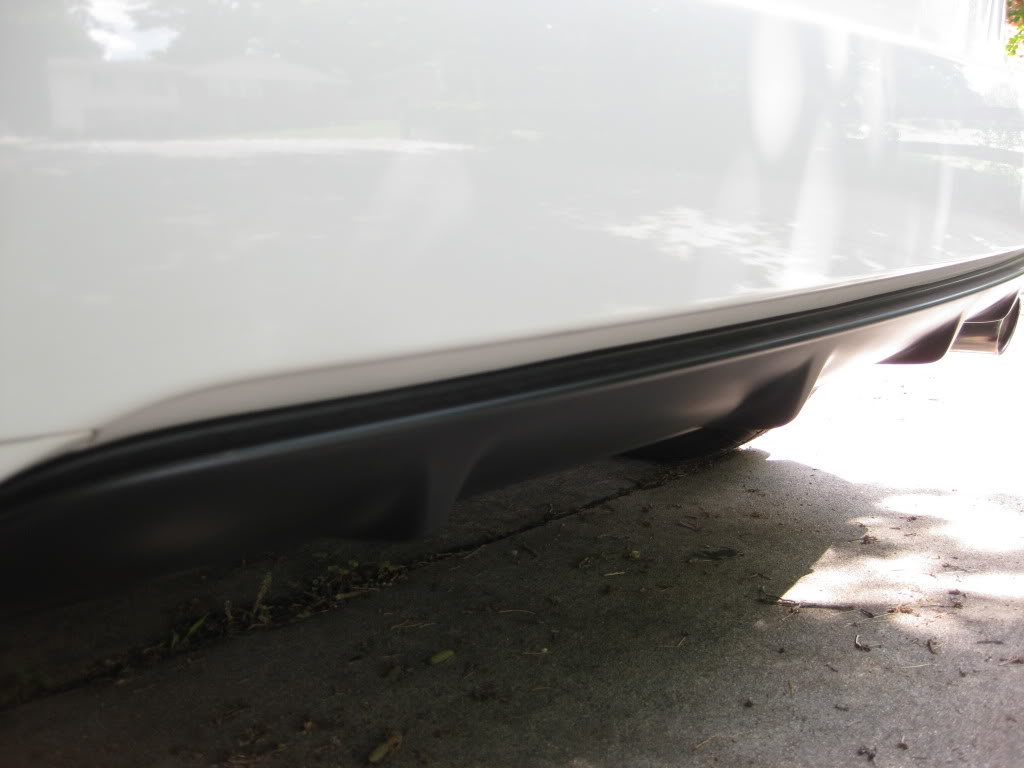
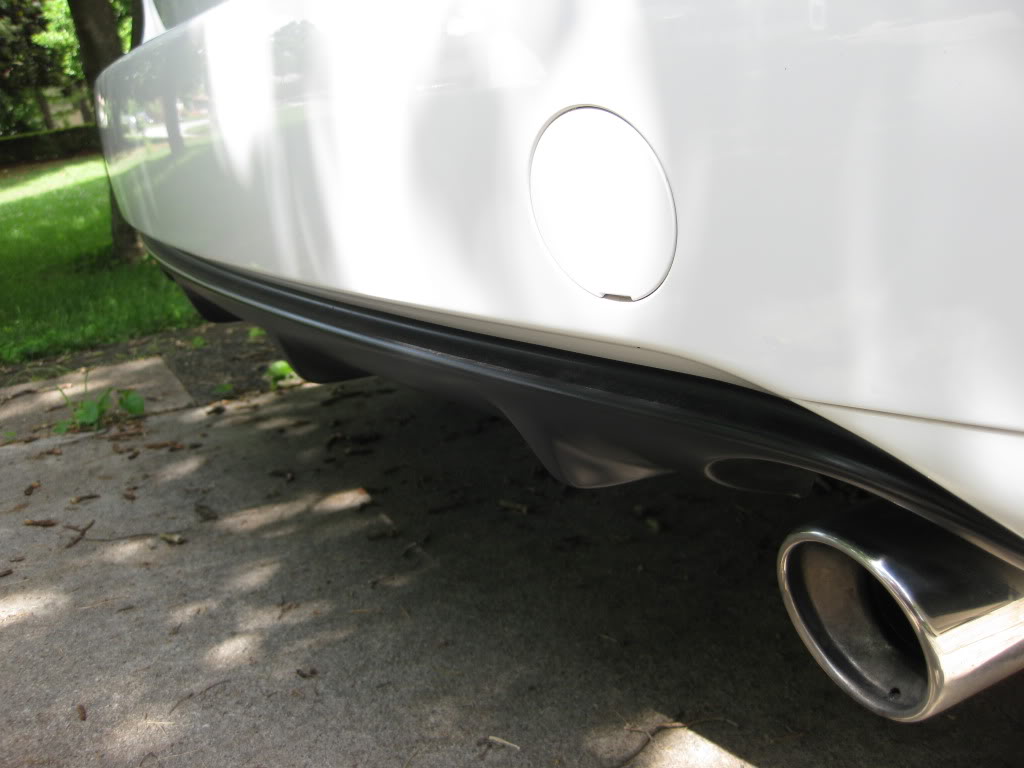
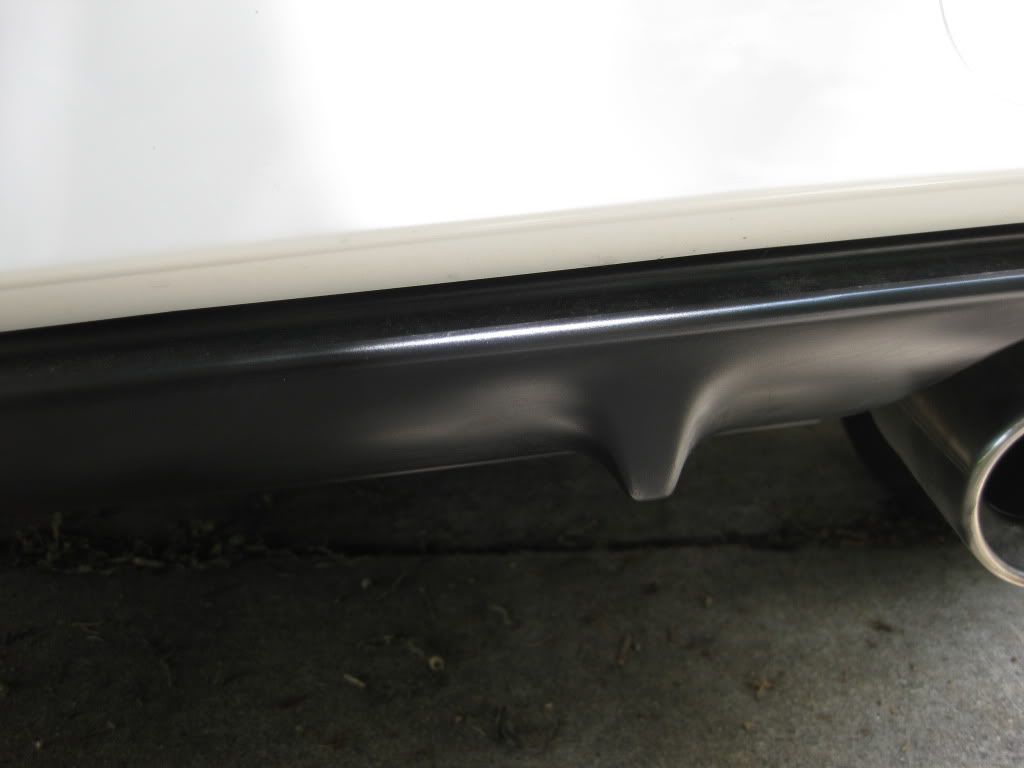
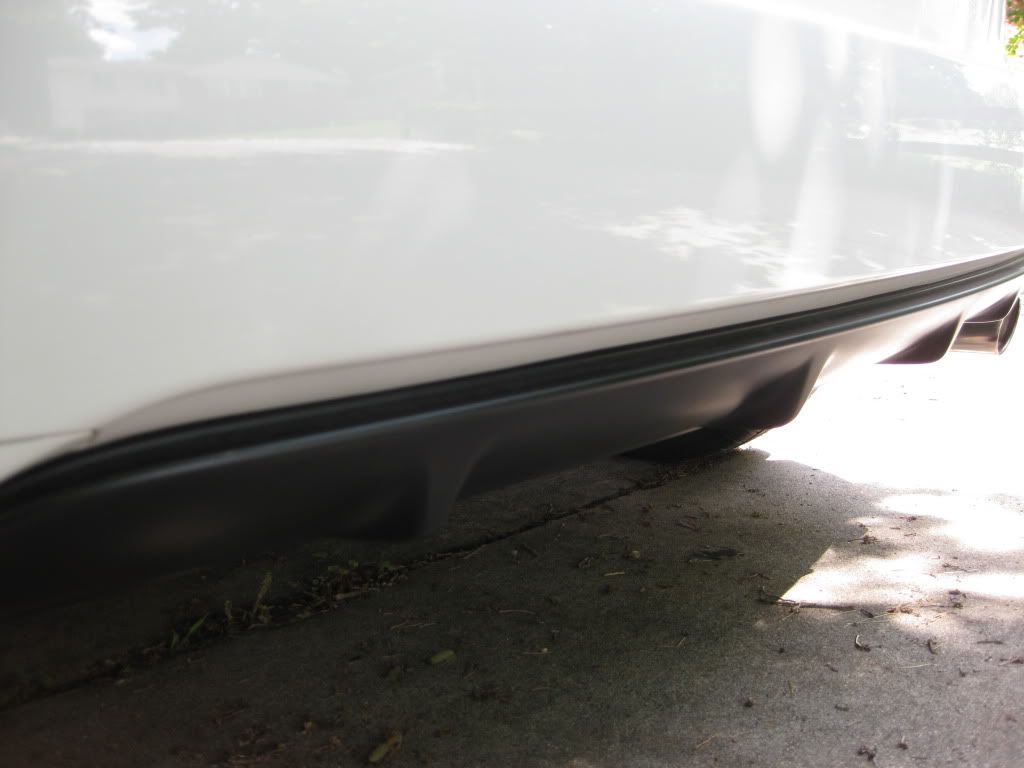
heres some updated pics and close up pics of mine, i know it took me forever to get new pics up (winter pics on the first post, and now its summer in this post), haha, but this is so people can tape up theirs like mine if they chose too, i got some better angles to where its curved on mine, you just gotta make it flow from that curve, so it all looks like 1 peice, i made it flow to that curve.
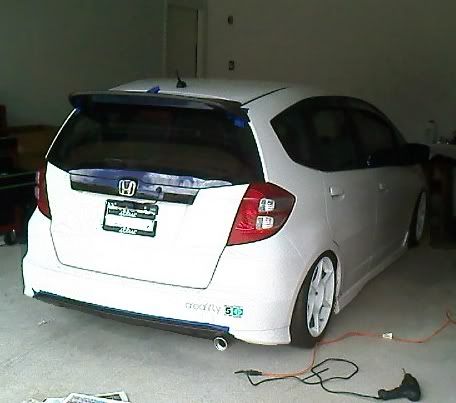
.............................so i did the paint job the second day i had the car... and now its been several months and the car has 9k miles on it now:

ohhh i wouldn't worry about that to much man, when the summer heat comes in, it might naturally fix the crookedness. But yeah i had mistakes before like that to, where i didn't spend enough time taping, but if its small enough it will probly fix it self when the heat comes.
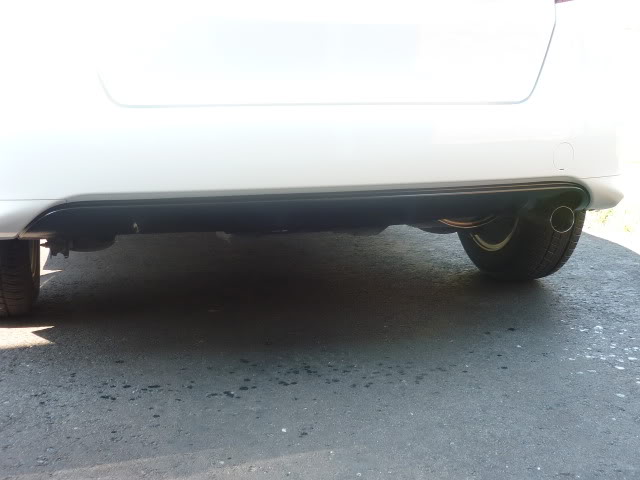
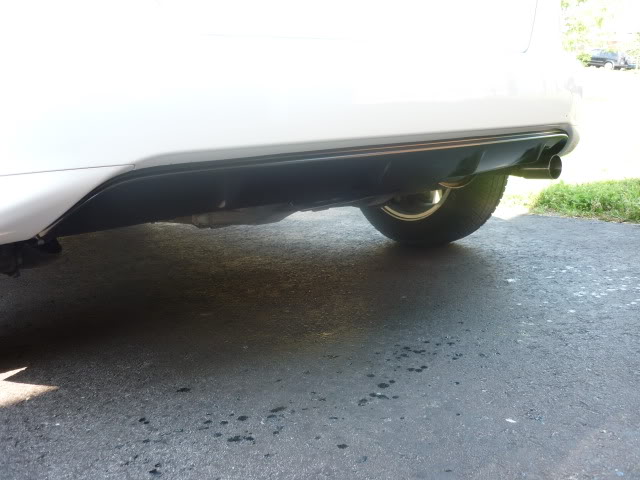
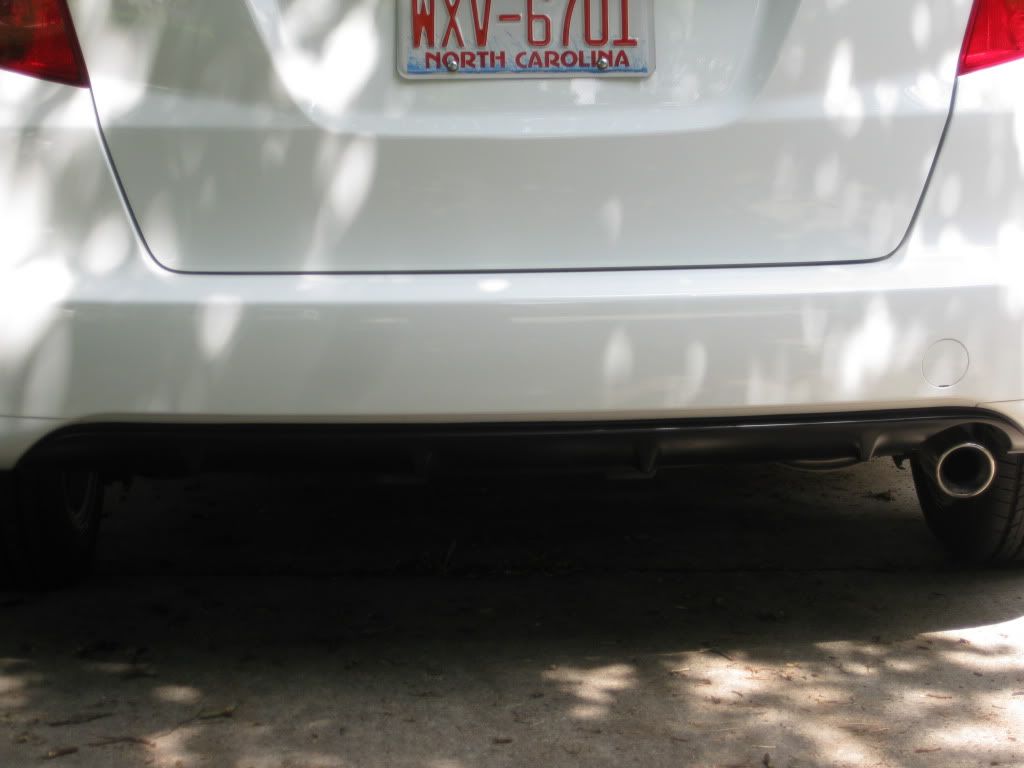
Mine was crooked on a few cars, but after the summer heat beats on it for about a month it turns out ok. As you can see on mine It was KINDA crooked in the first post, but now its all perfect after the summer came and really beat on it. And also if you noticed mine is more flat black now instead of the "Satin" finish because i used Rustoleum Satin Black, I already knew in advance on how this paint ages turns flat black later in its life, so thats why i chose it. The hardest part to make straight on the honda fit is just that long straight line.
(this is current/now picture after like 7 months or so)
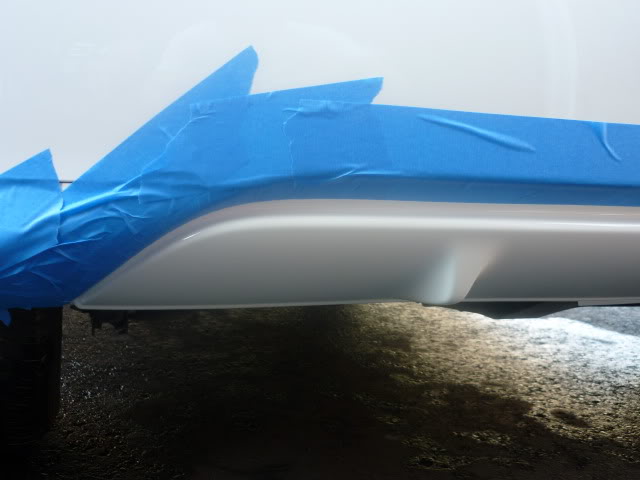
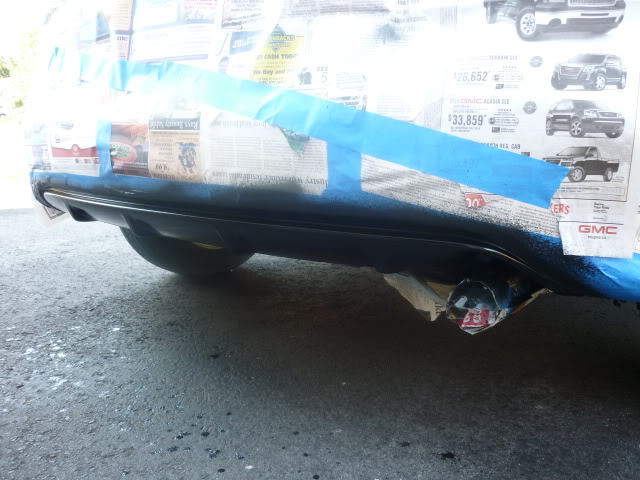
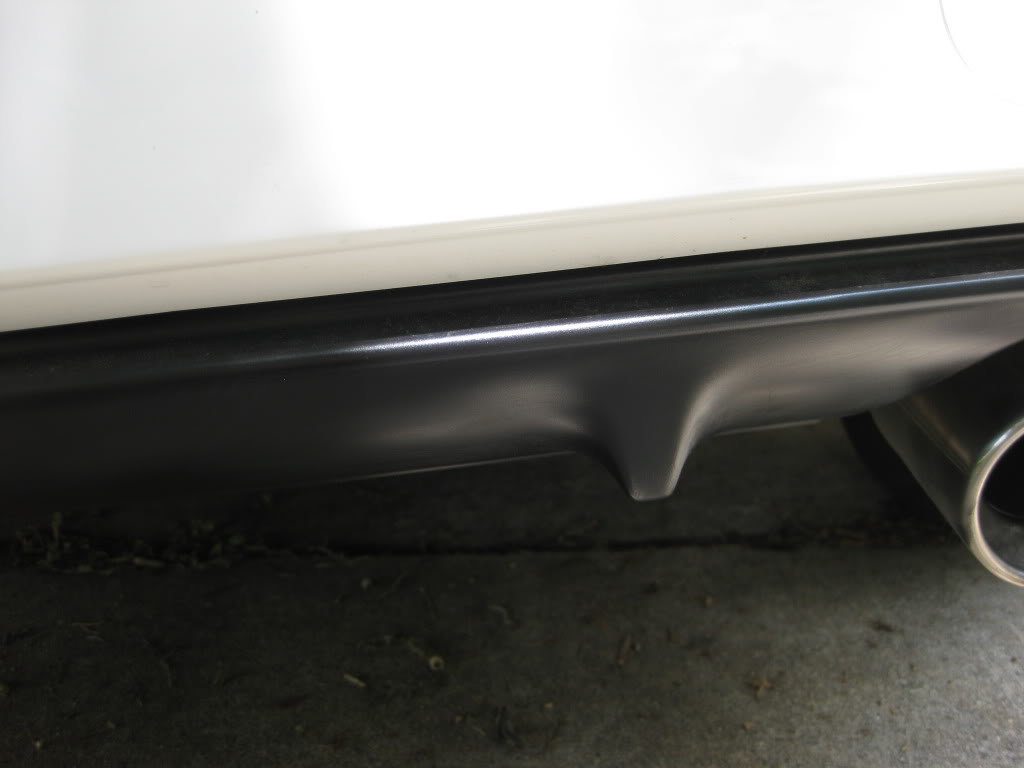
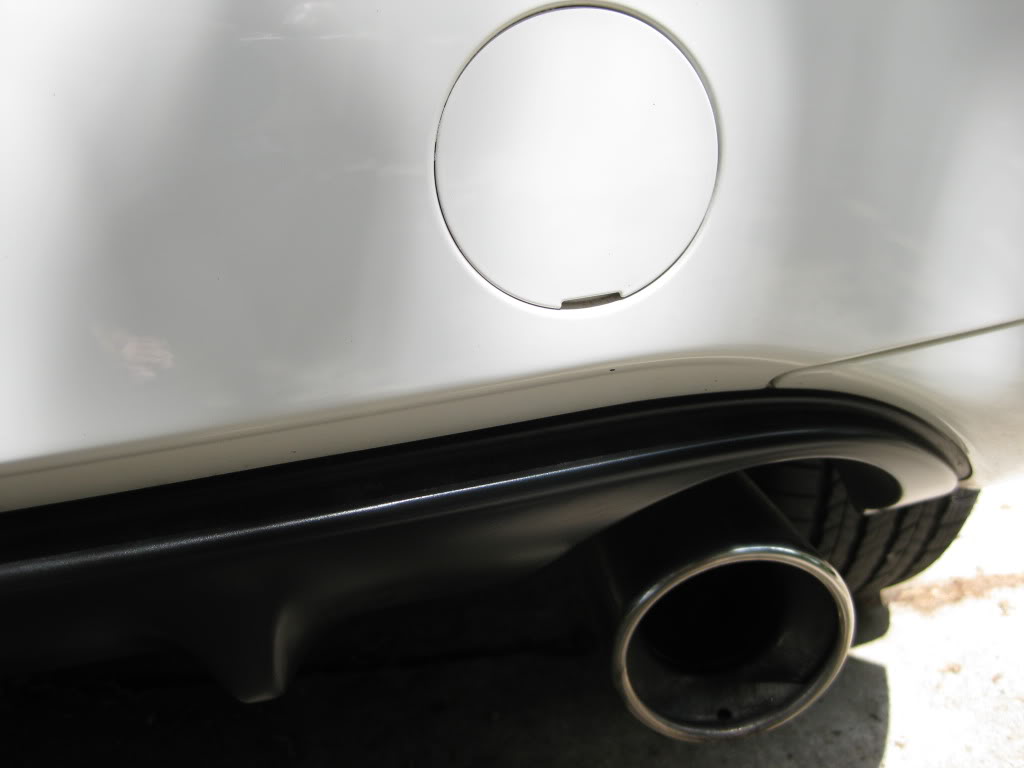
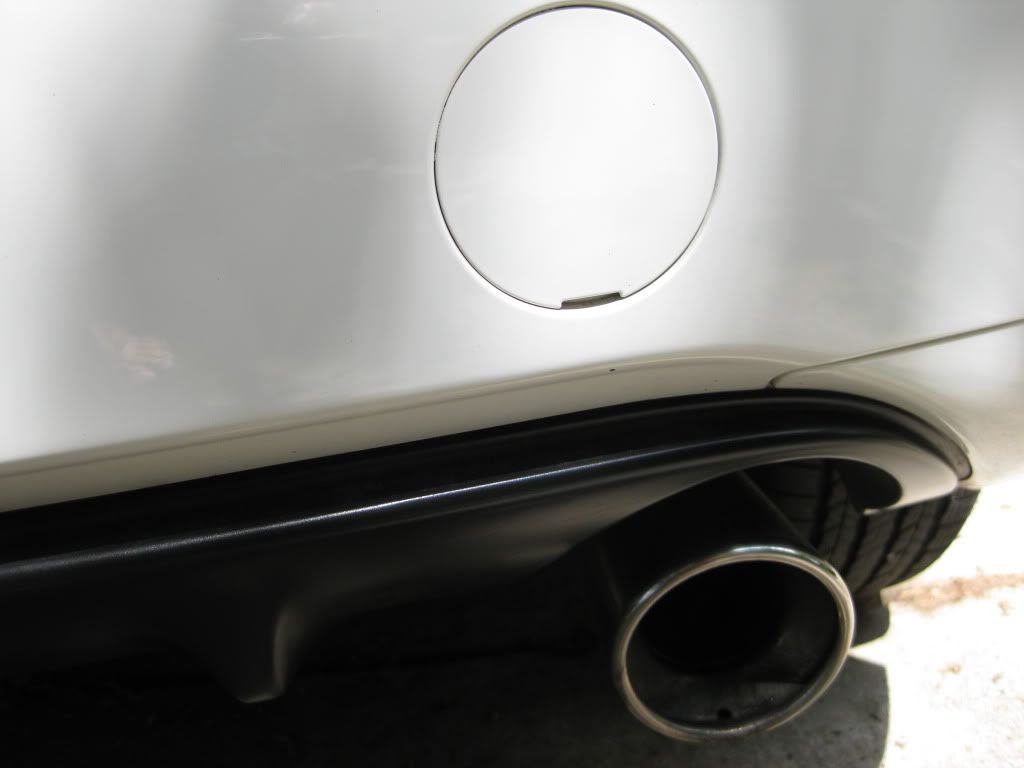
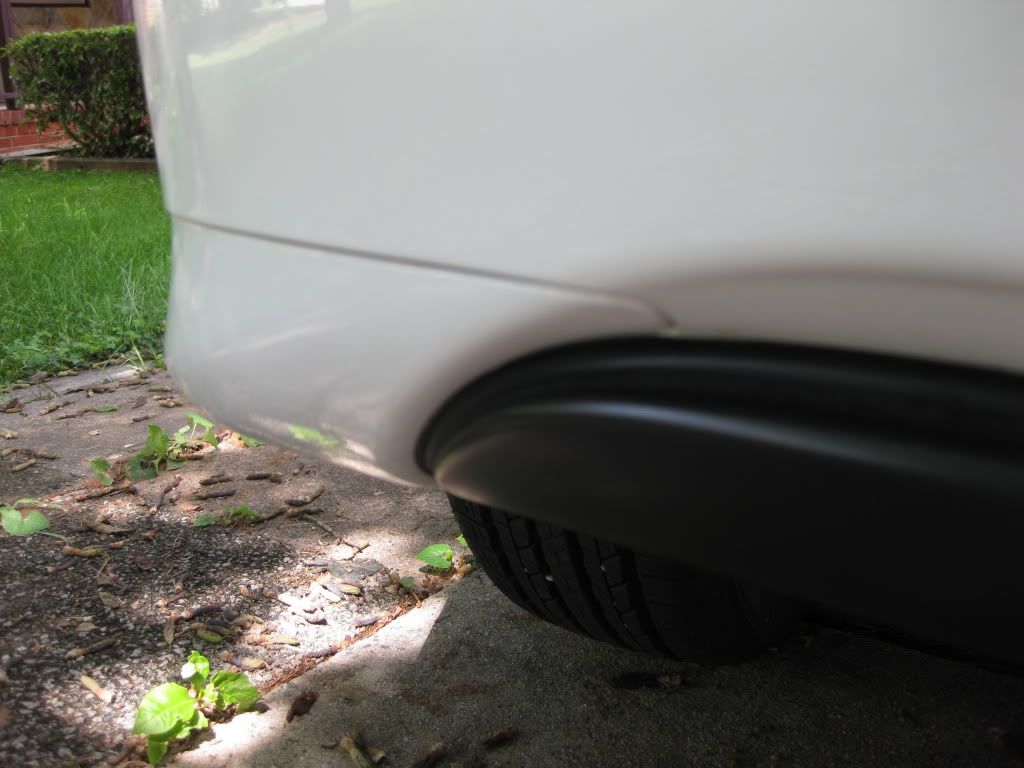
I didn't post this angle/part of the paint job with my first post because it was actually crooked, but now that its summer and its 90+ degrees all the time now, it seems to have fixed it self... so now here it is.. it was once crooked but now its perfect.. and heres the pic at where it WAS crooked:
(Iam surprised i didn't delete this photo already.. just grabbed it off the camera, so this pic was taken the same day i painted)
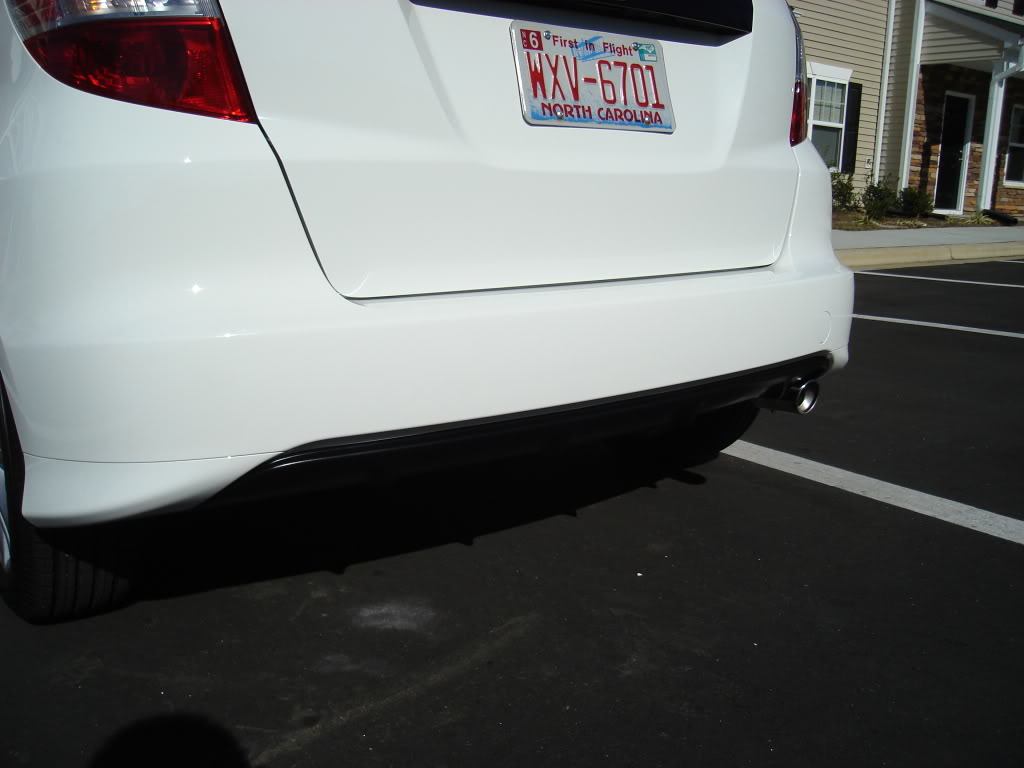
you can also see how dark and glossy it was when i first did it, which was cool.. but after a few months it will fade like all paint... although the color was called "Satin Black". I just feel that if you use Flat black, a few months down the road it will look more like Primer.. instead of Flat black. So that was the key reason I used Satin Black because down the road it will turn into that ideal finish of a flat black that had just been freshly sprayed on.
wow nice what was the prep work for painting your muffler and tip!? i wanna do that!
heres some updated pics and close up pics of mine, i know it took me forever to get new pics up (winter pics on the first post, and now its summer in this post), haha, but this is so people can tape up theirs like mine if they chose too, i got some better angles to where its curved on mine, you just gotta make it flow from that curve, so it all looks like 1 peice, i made it flow to that curve.
.............................so i did the paint job the second day i had the car... and now its been several months and the car has 9k miles on it now:
just painted mines. wish i spent more time taping it up cuz it came out crooked. lol. oh well. here's a pic before i removed the blue tape. i used that krylon fusion paint that apparently adheres to plastic well. ....and just cleaned real good. didn't sand it down. got some good advice on these boards.
Mine was crooked on a few cars, but after the summer heat beats on it for about a month it turns out ok. As you can see on mine It was KINDA crooked in the first post, but now its all perfect after the summer came and really beat on it. And also if you noticed mine is more flat black now instead of the "Satin" finish because i used Rustoleum Satin Black, I already knew in advance on how this paint ages turns flat black later in its life, so thats why i chose it. The hardest part to make straight on the honda fit is just that long straight line.
(this is current/now picture after like 7 months or so)
I didn't post this angle/part of the paint job with my first post because it was actually crooked, but now that its summer and its 90+ degrees all the time now, it seems to have fixed it self... so now here it is.. it was once crooked but now its perfect.. and heres the pic at where it WAS crooked:
(Iam surprised i didn't delete this photo already.. just grabbed it off the camera, so this pic was taken the same day i painted)
you can also see how dark and glossy it was when i first did it, which was cool.. but after a few months it will fade like all paint... although the color was called "Satin Black". I just feel that if you use Flat black, a few months down the road it will look more like Primer.. instead of Flat black. So that was the key reason I used Satin Black because down the road it will turn into that ideal finish of a flat black that had just been freshly sprayed on.
Last edited by Vash; May 28, 2010 at 04:46 PM.
wow new replys =P this makes me so happy.
wow nice what was the prep work for painting your muffler and tip!? i wanna do that!
heres some updated pics and close up pics of mine, i know it took me forever to get new pics up (winter pics on the first post, and now its summer in this post), haha, but this is so people can tape up theirs like mine if they chose too, i got some better angles to where its curved on mine, you just gotta make it flow from that curve, so it all looks like 1 peice, i made it flow to that curve.
.............................so i did the paint job the second day i had the car... and now its been several months and the car has 9k miles on it now:


ohhh i wouldn't worry about that to much man, when the summer heat comes in, it might naturally fix the crookedness. But yeah i had mistakes before like that to, where i didn't spend enough time taping, but if its small enough it will probly fix it self when the heat comes.
Mine was crooked on a few cars, but after the summer heat beats on it for about a month it turns out ok. As you can see on mine It was KINDA crooked in the first post, but now its all perfect after the summer came and really beat on it. And also if you noticed mine is more flat black now instead of the "Satin" finish because i used Rustoleum Satin Black, I already knew in advance on how this paint ages turns flat black later in its life, so thats why i chose it. The hardest part to make straight on the honda fit is just that long straight line.
(this is current/now picture after like 7 months or so)
I didn't post this angle/part of the paint job with my first post because it was actually crooked, but now that its summer and its 90+ degrees all the time now, it seems to have fixed it self... so now here it is.. it was once crooked but now its perfect.. and heres the pic at where it WAS crooked:
(Iam surprised i didn't delete this photo already.. just grabbed it off the camera, so this pic was taken the same day i painted)

you can also see how dark and glossy it was when i first did it, which was cool.. but after a few months it will fade like all paint... although the color was called "Satin Black". I just feel that if you use Flat black, a few months down the road it will look more like Primer.. instead of Flat black. So that was the key reason I used Satin Black because down the road it will turn into that ideal finish of a flat black that had just been freshly sprayed on.
wow nice what was the prep work for painting your muffler and tip!? i wanna do that!
heres some updated pics and close up pics of mine, i know it took me forever to get new pics up (winter pics on the first post, and now its summer in this post), haha, but this is so people can tape up theirs like mine if they chose too, i got some better angles to where its curved on mine, you just gotta make it flow from that curve, so it all looks like 1 peice, i made it flow to that curve.
.............................so i did the paint job the second day i had the car... and now its been several months and the car has 9k miles on it now:
ohhh i wouldn't worry about that to much man, when the summer heat comes in, it might naturally fix the crookedness. But yeah i had mistakes before like that to, where i didn't spend enough time taping, but if its small enough it will probly fix it self when the heat comes.
Mine was crooked on a few cars, but after the summer heat beats on it for about a month it turns out ok. As you can see on mine It was KINDA crooked in the first post, but now its all perfect after the summer came and really beat on it. And also if you noticed mine is more flat black now instead of the "Satin" finish because i used Rustoleum Satin Black, I already knew in advance on how this paint ages turns flat black later in its life, so thats why i chose it. The hardest part to make straight on the honda fit is just that long straight line.
(this is current/now picture after like 7 months or so)
I didn't post this angle/part of the paint job with my first post because it was actually crooked, but now that its summer and its 90+ degrees all the time now, it seems to have fixed it self... so now here it is.. it was once crooked but now its perfect.. and heres the pic at where it WAS crooked:
(Iam surprised i didn't delete this photo already.. just grabbed it off the camera, so this pic was taken the same day i painted)
you can also see how dark and glossy it was when i first did it, which was cool.. but after a few months it will fade like all paint... although the color was called "Satin Black". I just feel that if you use Flat black, a few months down the road it will look more like Primer.. instead of Flat black. So that was the key reason I used Satin Black because down the road it will turn into that ideal finish of a flat black that had just been freshly sprayed on.
I have noticed the paint fading a little bit on the rear valance/diffuser but it doesn't bother me! As far as painting the tip/muffler! I sanded the tip with 2000 grit sand paper and then applied thin even coats I think I did 5-6 coats and I sprayed the muffler with satin black engine enamel with ceramic!