When you click on links to various merchants on this site and make a purchase, this can result in this site earning a commission. Affiliate programs and affiliations include, but are not limited to, the eBay Partner Network.
Detailing my Milano Red to avoid Milano Pink and headlight restore
2nd Gen GE8 Specific Fit Exterior Modifications & JDM Styling Sub-ForumThreads discussing exterior modifications and JDM styling for the 2nd Gen GE8 Honda Fit
Detailing my Milano Red to avoid Milano Pink and headlight restore
Figured this was the "best" place for a detailing post.
Long story short, bought my 2013 Milano Red fit in December 2015. Previous owner did not wax or take care of the car and it sat outside in the desert sun. Not to mention he drove 60+ miles one-way to work thru the desert...so the front end is sandblasted. Rock chips, headlights were pitted/hazy/yellow, oxidation throughout the car.
When the car is clean it looks amazing (from a few feet to not see the rock chips).
Anyhow first thing I did was want to take care of the headlights.
After researching various restoration "kits" I ended up picking the Sylvania Kit. Nearly 5-stars on amazon and over 2500 reviews. Not to mention, you figure the auto lighting experts would know a thing or two about the headlight housings themselves. http://a.co/2YKjLE5
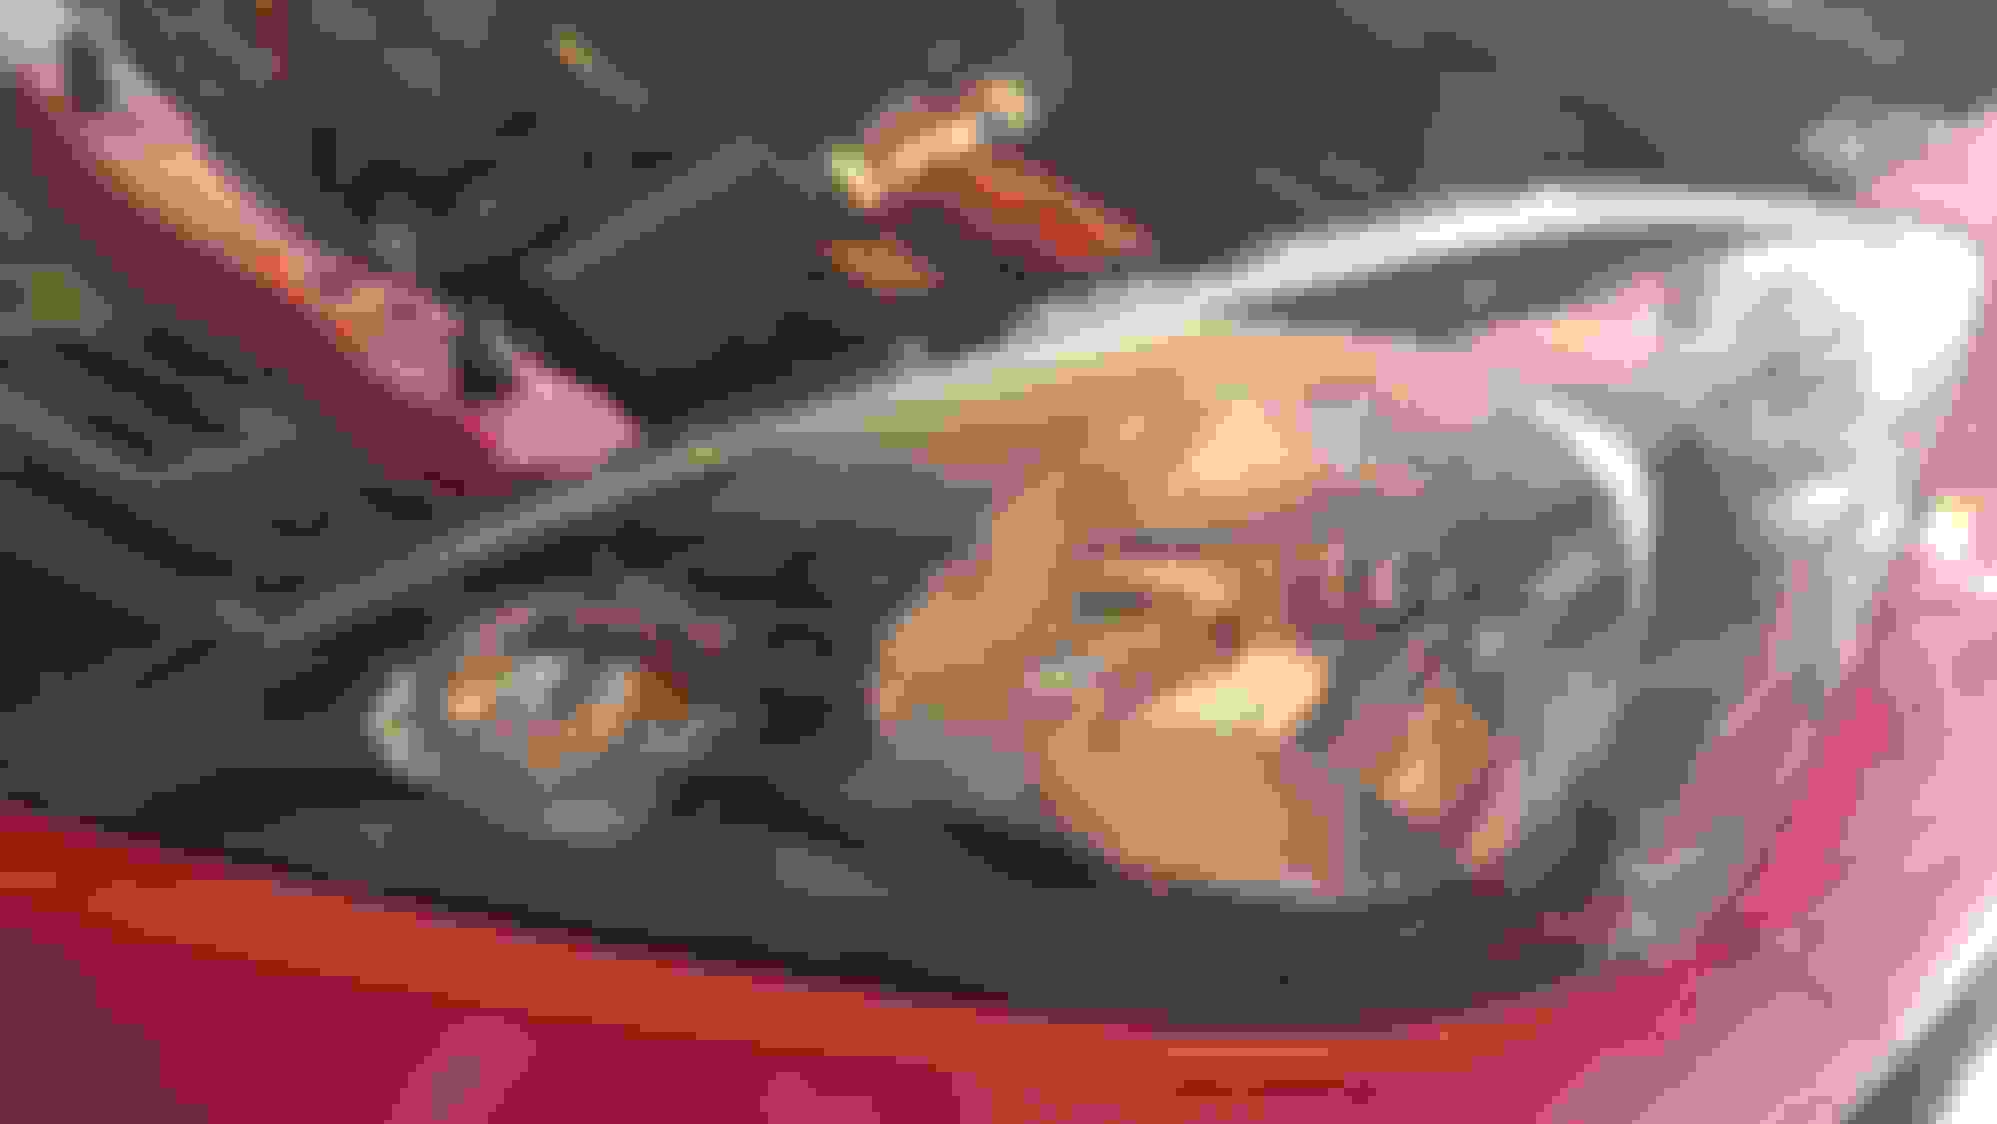
Here are some before shots.
Now the kit is a 6-7 step process. Step 1 is to clean the headlight. Step 2, is to use the cleaner/stripper the kit provides. Step 3, 4 & 5 are wet sanding with 400/1000/2000 sand paper. Step 6 is clean headlight with cleaner stripper again. Step 7 is to apply the clear coat.
Here are pics during the sanding process. As you can see the head light gets real hazy. You want this haze to be relatively uniform across the headlight. Also the housing becomes glassy smooth after removing all that oxidation.
After you sand and clean it, it is time to apply the UV clear coat protector solvent.
Put on the provided glove, use the provided cloth and wipe on the solvent from top to bottom with a slight overlap between coats. If you miss a spot, hurry and touch it up as this stuff dries in minutes.
Here is the end result. Crystal clear headlight housings!
The thing I like about this kit, is its all done by hand and the clear coat is wiped on. No need to worry about aerosols or anything. Sure by hand takes longer, but provides more control while sanding. Also not everyone has a power drill. Not to mention Sylvania has a lifetime warranty if you register. Basically they claim the clear will last as long as you own the car or your money back. Now most people keep a car for a few years so this may not be a big deal, but to those who keep cars FOREVER this is enticing.
The whole process took about an hour and a half. That's with me taking my time. Plus the GE8 Headlights are HUGE. The box claims you can do this in 30 minutes...I guess if you got popeye forearms/stamina you could sand these down in no time....but I spent the suggested (5) minutes PER headlight PER sand paper grit level...so (5) minutes * (3) levels * (2) headlights = 30 minutes minimum if you go nonstop.
Wow -- great work! I wonder if there's a product that helps to maintain clear headlights? Our used 2013 headlights look great and I'd like to keep them that way.
So now that the headlights were done I wanted to tackle the paint.
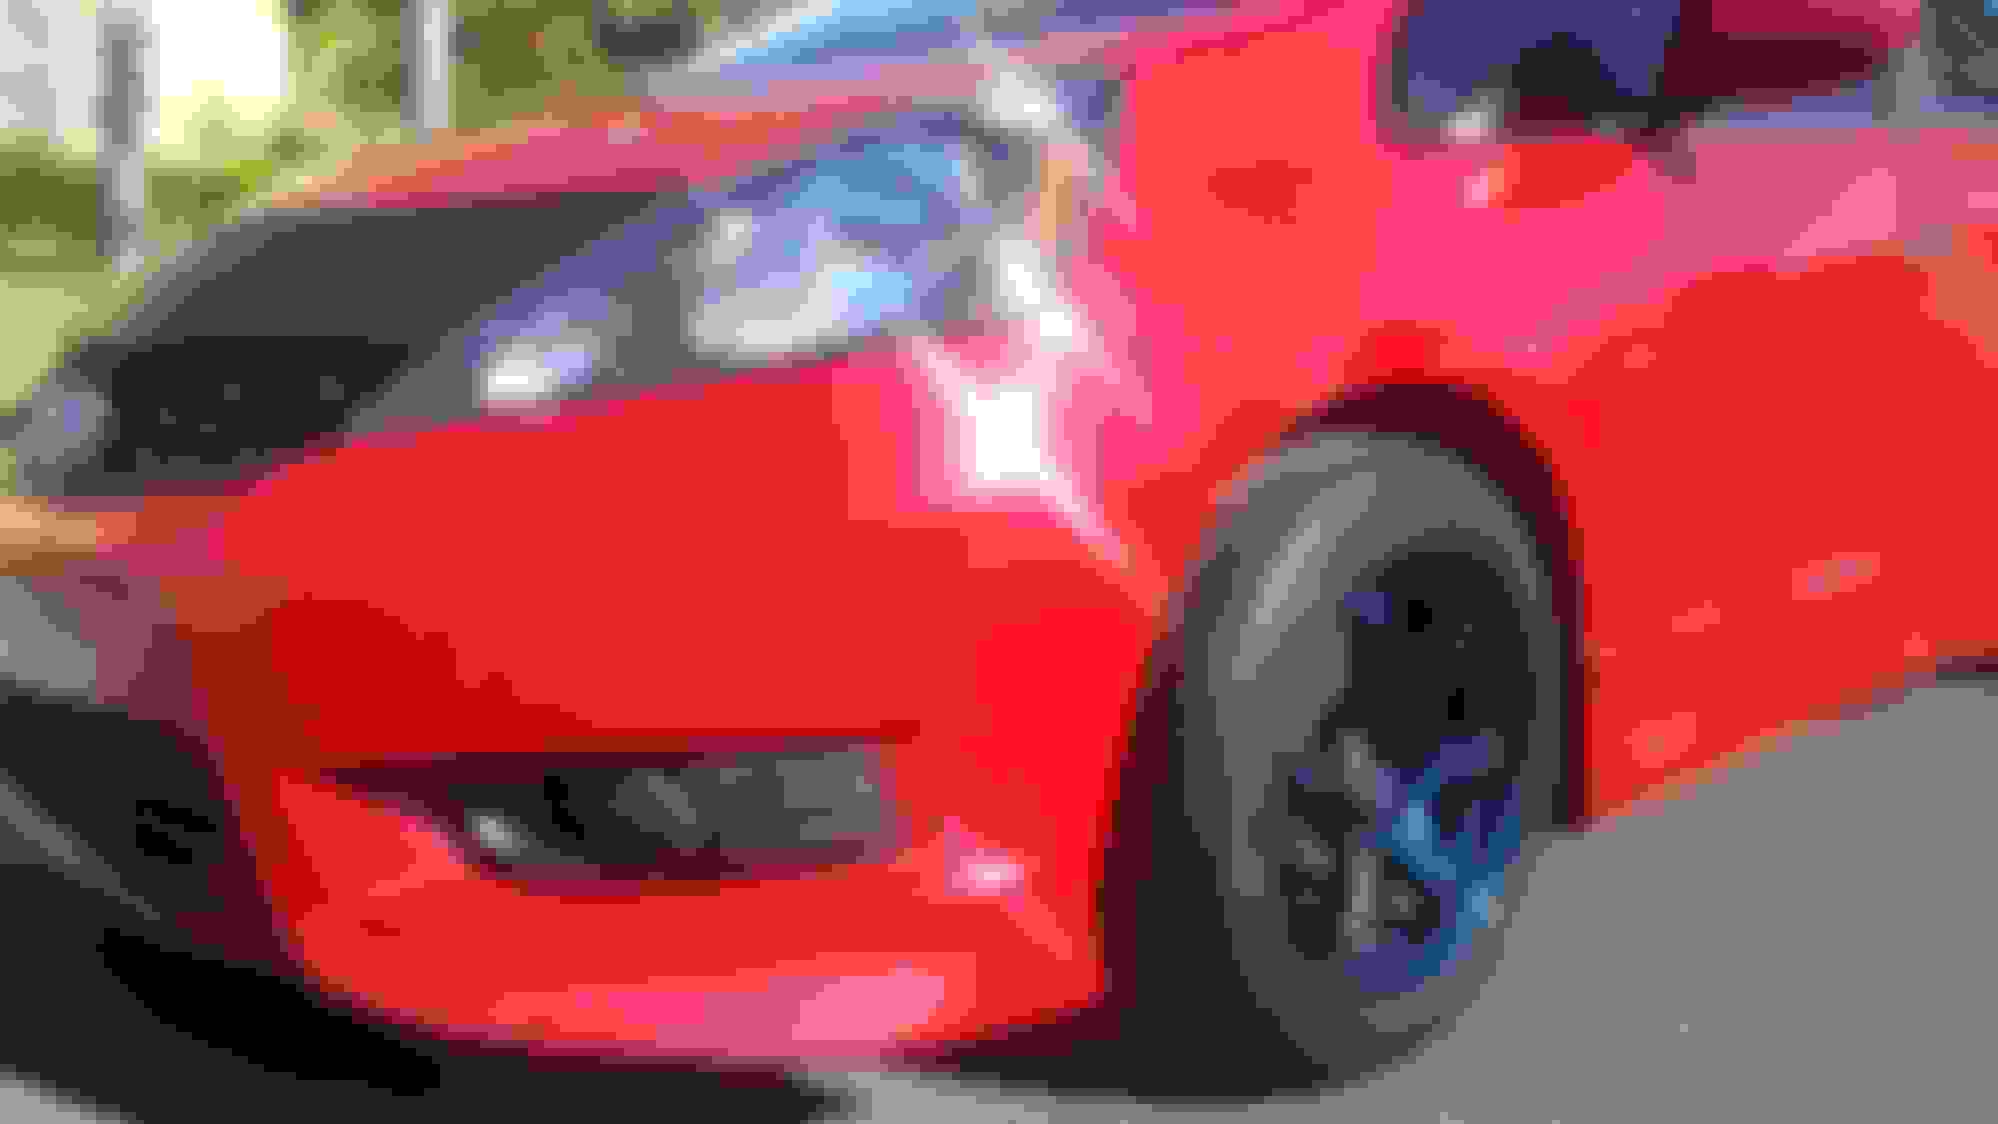
As previously mentioned the paint is in pretty rough shape (guy showed me the car while it was dirty so it hid 99% of the flaws...my fault for not being thorough....let my excitement blind me). Front end is the worst. Lower half of bumper is pitted/hazy from lack of care on the clear coat. Hood has an obvious oxidation line where the hood bra is placed. Top pillars above the doors and the spoiler area have oxidation. It is extremely difficult for me to capture the shades of red...I don't have professional camera equipment...but I tried my best.
This is the car the day I test drove it. You can see swirls/spider webbing in the clear coat. The bottom lips under the fog lights were dull/hazy and the area where the spoiler attaches to the roof is a completely different shade.
Asked if he ever waxed/detailed the car. "No, just washed it". Asked about the hazy lips on the bumper "Oh that's from the lower part of the car bra buffeting against it. So I removed it and threw it away". Well it was a good price, had all the OEM accessories I would've spent a pretty penny on, lowered with swifts, Progress RSB, Mugen short shifter and Ray's gram lights.
Plus I'd been searching for a 5spd for months before this one popped up.
Needless to say....I obviously still bought the car....despite the paint flaws. Figured I could fix them...didn't see the all the chips until I washed the darn thing.
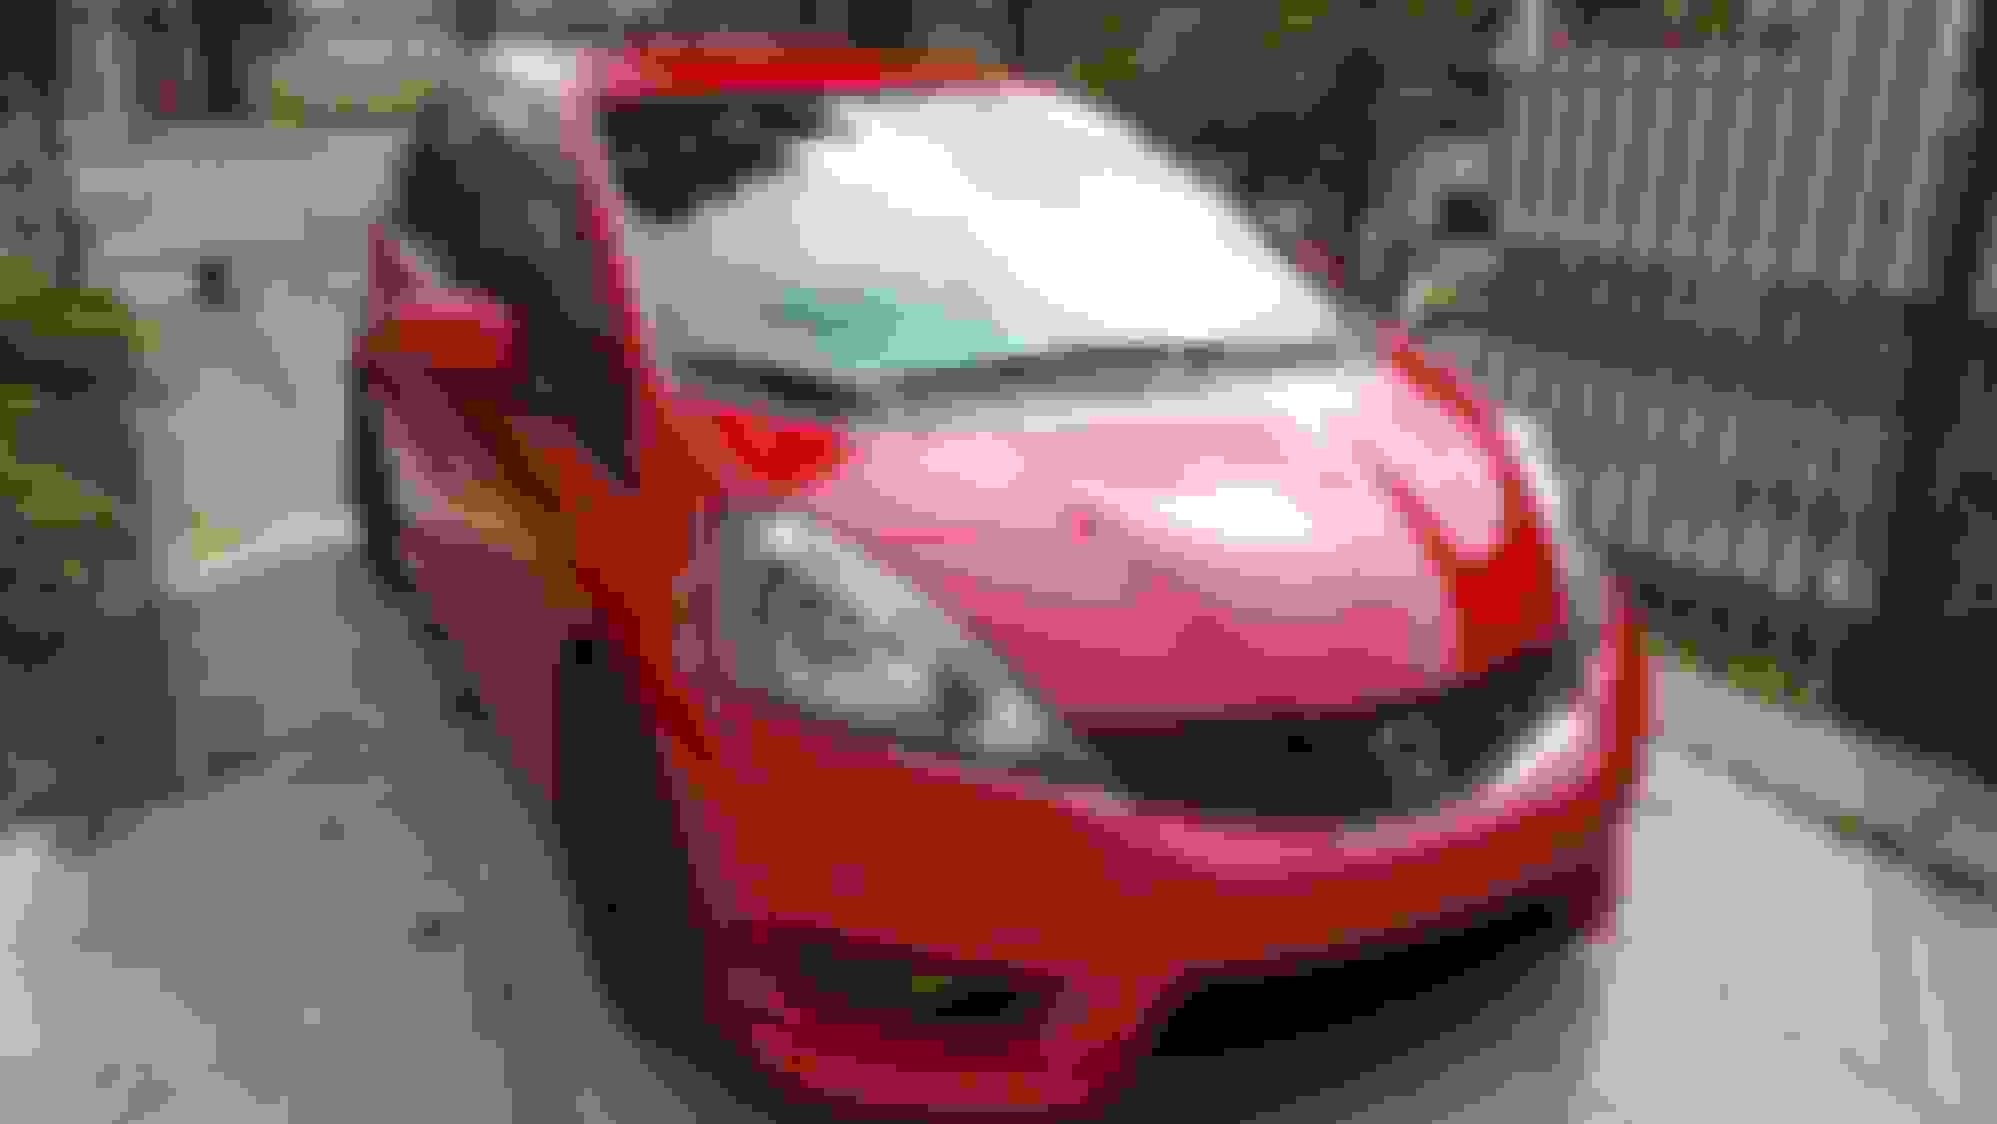
So fast forward a year and a half later. I had gotten the car detailed in October and while it looked great...it still wasn't "perfect".
Here are the pics after picking it up from the detailer. NOTE: this was before the headlight restore.
Fast forward again 5 months and my paint is looking dull/terrible again despite washes and occasional wax.
Onto my research. I live in sunny San Diego and in California we are in a drought so washing cars at home is frowned upon unless you do it at the crack of dawn or right before dusk. So I searched and found a waterless wash and wax. My coworkers had mentioned Chemical Guys Waterless wash and wax before so I looked into it. However, upon searching waterless wash...I came across the AeroCosmetics Wash and Wax ALL waterless solution. Both had impressive reviews, were eco-friendly and easy to use. But the thing that caught my eye was that the AeroCosmetics meets Boeing Aircraft (D6-17487P, D6-7127M) & AirBus Industries (09-00-002) and McDonnell Douglass CDS #1 cleaning specifications. Being an engineer by trade, meeting specs is a huge + in my book. I investigated the spec was pleased with what I found. So I bought it. http://a.co/gm7ZOcv
Now this was just the beginning. I began looking at various threads on how to restore Milano red. Seems the go-to was I needed to do a COMPLETE detail. Wash, Clay, Compound, Polish and wax. Well I had wash and wax. Now to find claybar, compound and polish. Lots of reviews led to me to Meguiars. So I purchased their Claybar kit http://a.co/1MA6xAa(to get the surface glassy smooth by removing all surface contaminants), Ultimate Compound http://a.co/iY1GU3G(to "cut" the oxidation, remove large imperfections/swirls), and Ultimate Polish http://a.co/f9nXAEK (to remove remaining "fine" swirls and to make the color "POP" again) as well as some foam applicators http://a.co/f9nXAEK. Nice thing about these products is they are all usable by hand OR a random orbital. Being this was the first time I was doing this, I opted to do it by hand. As previously mentioned I like the control doing by hand gives (more on this later). Also purchased a huge pack of microfiber clothes at Costco.
So previously mentioned, it is a PAIN to get decent pics of the condition of the paint, but I tried. SO yesterday was an overcast day which was perfect day to do the detail. I dont have a very good shaded area and my garage is full of wood working projects at the moment.
Washing the car is straight forward, mist the area with the waterless wash. It lifts the dirt from the surface and you wipe it dry with a microfiber.
After the car was clean, it was time to clay. I've NEVER done a car detail to this....detail....so I've never clay barred anything in my life. So this was a learning experience all around. Opened up the clay bar packet, cut the clay bar in half just to see how much I'd really need for such a small car, kneaded it into a small disc shape, misted the area I wanted to clean and went to town. Insane how this stuff works. If you run your hand over the surface BEFORE the clay...despite being "clean"...it is rough. Running your hand over it you actually hear the roughness, its like running your hand over sand paper. However after removing all the contaminants...when you run your hand over the clayed section, its like glass and silent...no more sandpaper sound. Here is a pic of the clay after doing a section. Broke the car into sections by panel size, so front fender, driver door, passenger door, rear quarter panel, 1/2 the hatch, 1/2 the bumper(s), 1/2 the hood, 1/4 roof sections and the spoiler. After each section I pulled/folded the clay to get a clean surface to use.
NOTE: IF you drop the clay on the ground, do NOT use it anymore. THROW it away. It will pick up grains/dirt which will scratch your finish.
Look at how dirty each section was...
After claying the whole car, 1/2 a bar was enough. Time to compound. Shake the bottle well and apply a small amount to the foam applicator. Do small sections at a time with a circular, overlapping motion. Wipe it off before it dries with a microfiber cloth. If it dries and you cant wipe it off, apply a fresh layer of compound and it will come off. This is the same process for both Compound and Polish.
Here is the hood. You can see significant swirls/spiderwebbing in the clear. Also you MIGHT be able to see the oxidation on the hood. Basically where i'd put my hand the oil from my hands would leave a "clean" spot in the oxidation.
Well, after compound and polish here is the same area on the corner of the hood. As you can see the swirls are practically gone and the red is uniform and vibrant again. I couldn't get a picture of the hood...or forgot...lol
So as you can see the products are doing their job. Here is the end result after 4-5 hours of work. The haze is more or less gone from the areas under the fog lights, the oxidation line on the hood is gone so its a uniform color again, spoiler area is no longer 3 shades of red, glassy smooth, super shiny and extremely happy with the results. Even a shot of my other honda...my CBR600rr.
4-5 hours is a long time...lot of this was due to me being new, but MOSTLY due to the fact I was using my left arm the entire time. I'm right handed...BUT I had just gotten some significant work done on my sleeve tattoo on my right arm the day before so I am not supposed to stretch/use it excessively over the next few days. Weather was too perfect to miss so I struggled using my left arm haha. Needless to say it could've been faster, maybe even better results if I was using my dominant hand/arm. I did get progressively better at making circles with my useless arm though so thats nice
Wow -- great work! I wonder if there's a product that helps to maintain clear headlights? Our used 2013 headlights look great and I'd like to keep them that way.
Think you'd have to get a clear bra/vinyl...or maybe you could get this kit, do/skip some of the steps and just apply the UV clear coat protector at the end.