
Project lighter, faster, stronger...

finally installed the new H-fit adapter and maybe it's just me but the shortness of the throw is pretty much unnoticeable...anyone else feel differently...I would say If I had to guess at the most it's 10% shorter...no where near the feel of my Integra's short shifter which is 30%!

Member
Joined: Jul 2009
Posts: 85
From: CA

I've considered light wheels like those Volks for fuel economy, but 205s are a bit wide for just fuel economy. With such light wheels and wide tires I'd be too inclined to accelerate through the wolf packs which usually prevent passing.
Last edited by mkchiu; Aug 16, 2010 at 09:11 PM. Reason: ^which (usually prevent) passing
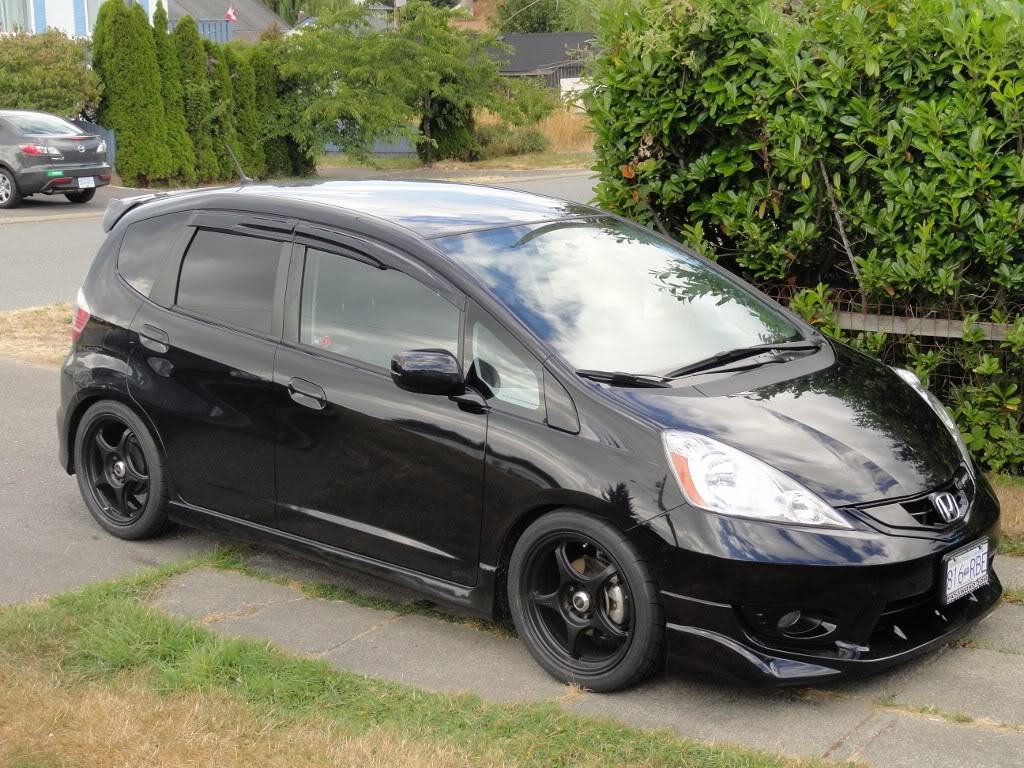
Here's a pic I took right after we arrived in the states. Took the spoiler off to save gas 
Total km's from Van Island to Hayward, Ca.
Total avg ltr. per km.

All of my JDP parts just arrived so I should have pics up soon
Total km's from Van Island to Hayward, Ca.
Total avg ltr. per km.
All of my JDP parts just arrived so I should have pics up soon
Last edited by bmxman; Aug 22, 2010 at 05:10 PM.


Member

Joined: Aug 2009
Posts: 2,462
From: Vermont
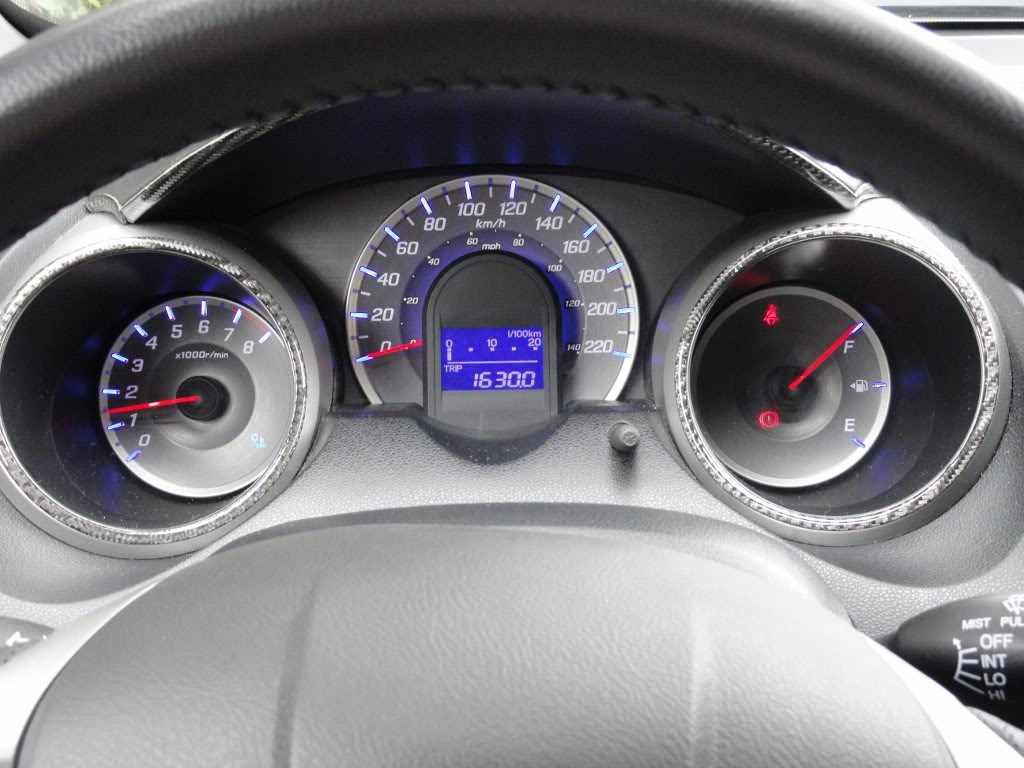
BMX... IIRC, you have a 2009. did you have the program update to fix the readout? (was Canada affected by this?)
42MPG over 1600km is pretty good. As for the wing, I believe it actually helps with fuel economy as most wings on vehicles are designed to generate turbulence behind the vehicle (which breaks up the vacuum caused by the flat rear of a car) That's why alot of SUV's have that wing at the back of the roof rack.
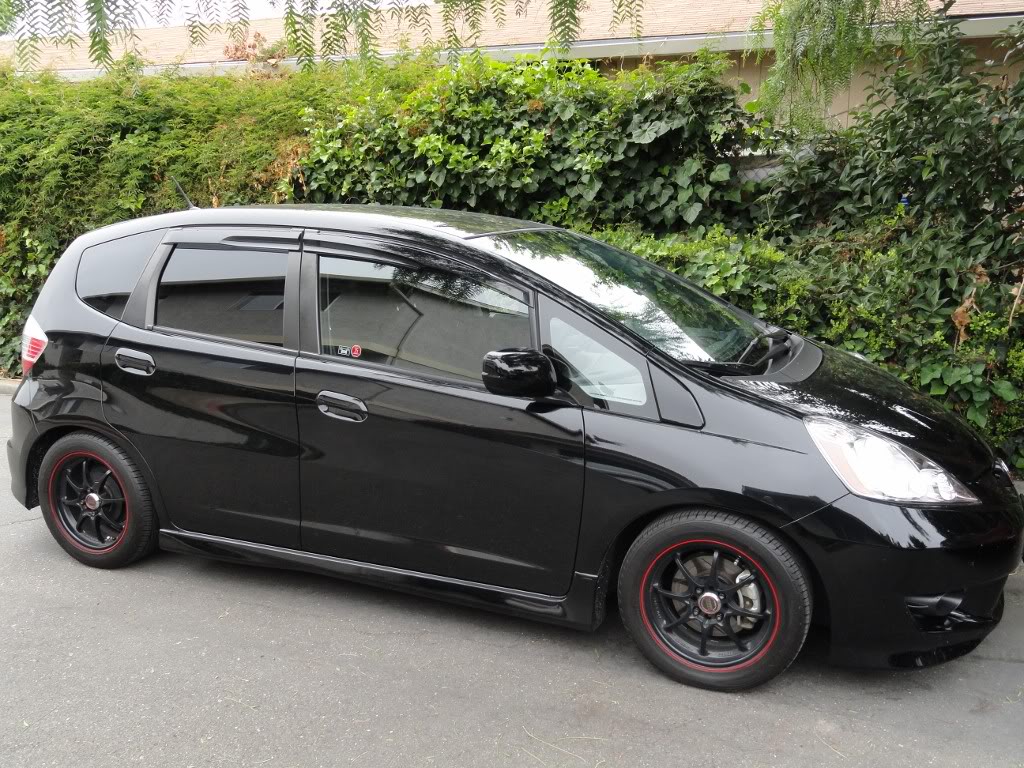
I have to say that while i'm not a fan of the black wheels, there's something about those wheels you have which seems to work. Maybe it's because they aren't a shiny black but whatever it is, IMO, it's not bad.
enjoy the trip.
~SB
42MPG over 1600km is pretty good. As for the wing, I believe it actually helps with fuel economy as most wings on vehicles are designed to generate turbulence behind the vehicle (which breaks up the vacuum caused by the flat rear of a car) That's why alot of SUV's have that wing at the back of the roof rack.
I have to say that while i'm not a fan of the black wheels, there's something about those wheels you have which seems to work. Maybe it's because they aren't a shiny black but whatever it is, IMO, it's not bad.
enjoy the trip.
~SB
BMX... IIRC, you have a 2009. did you have the program update to fix the readout? (was Canada affected by this?)
42MPG over 1600km is pretty good. As for the wing, I believe it actually helps with fuel economy as most wings on vehicles are designed to generate turbulence behind the vehicle (which breaks up the vacuum caused by the flat rear of a car) That's why alot of SUV's have that wing at the back of the roof rack.
I have to say that while i'm not a fan of the black wheels, there's something about those wheels you have which seems to work. Maybe it's because they aren't a shiny black but whatever it is, IMO, it's not bad.
enjoy the trip.
~SB


I just have one question, I thought you where trying to make your fit lighter, faster, stronger but yet you install products that only add weight. I'm aware that you did put lighter wheels though. Not sure about the Drags but the posted figures for the CE28s where very light including tires.
You made some attempts to lessen your car's weight but you've gained some of it it back by putting the front bumper and then your other proposed future add-ons. They may not be that heavy but if you tally their weight, it probably adds up. Just my 2 cents.
You made some attempts to lessen your car's weight but you've gained some of it it back by putting the front bumper and then your other proposed future add-ons. They may not be that heavy but if you tally their weight, it probably adds up. Just my 2 cents.
Last edited by onemiglandicho; Aug 24, 2010 at 01:02 AM.
well things change...the Volks are being sold to baylorbro and I went with the FN01RC'S they're not the lightest 17" rims but weight to dollar ratio puts them very high on the list not to mention finding wheels that have more than 40 offset in the first place. All the new parts I recently installed may add an additional 10lbs at the most and that's being generous. I'm still trying to save weight just trying to balance it all out.
Theoretically all the carbon stuff as well as the Mugen front bumper cover should reduce drag and turbulence...but since I don't have access to a wind tunnel I can only rely upon my own results!
Theoretically all the carbon stuff as well as the Mugen front bumper cover should reduce drag and turbulence...but since I don't have access to a wind tunnel I can only rely upon my own results!
I see.
Yeah I was thinking that the Mugen Body Kit, front bumper at least might/should provide better aerodynamics because the front splitter/cunnard (the ones on both outter sides of the front bumper) has the same look as the one on the Mugen Body Kit for the Insight which was demonstrated to direct air around the car and minimize air going underneath the chassis.
Yeah I was thinking that the Mugen Body Kit, front bumper at least might/should provide better aerodynamics because the front splitter/cunnard (the ones on both outter sides of the front bumper) has the same look as the one on the Mugen Body Kit for the Insight which was demonstrated to direct air around the car and minimize air going underneath the chassis.
I see.
Yeah I was thinking that the Mugen Body Kit, front bumper at least might/should provide better aerodynamics because the front spliter/cunnard (the ones on both outter sides of the front bumper) has the same look as the one on the Mugen Body Kit for the Insight which was demonstrated to direct air around the car and minimize air going underneath the chassis.
Yeah I was thinking that the Mugen Body Kit, front bumper at least might/should provide better aerodynamics because the front spliter/cunnard (the ones on both outter sides of the front bumper) has the same look as the one on the Mugen Body Kit for the Insight which was demonstrated to direct air around the car and minimize air going underneath the chassis.

lol...exact opposite for me I read that it helped with aero so I was all over it. I thought there was a lens integrated into the bumper though that would cover the fog lights. I'm going to have to figure something out myself though because the recessed fog lights just act like mini parachutes trapping all the air!
LOL!!! I'm sure you're one happy family man though so all is good!!!!
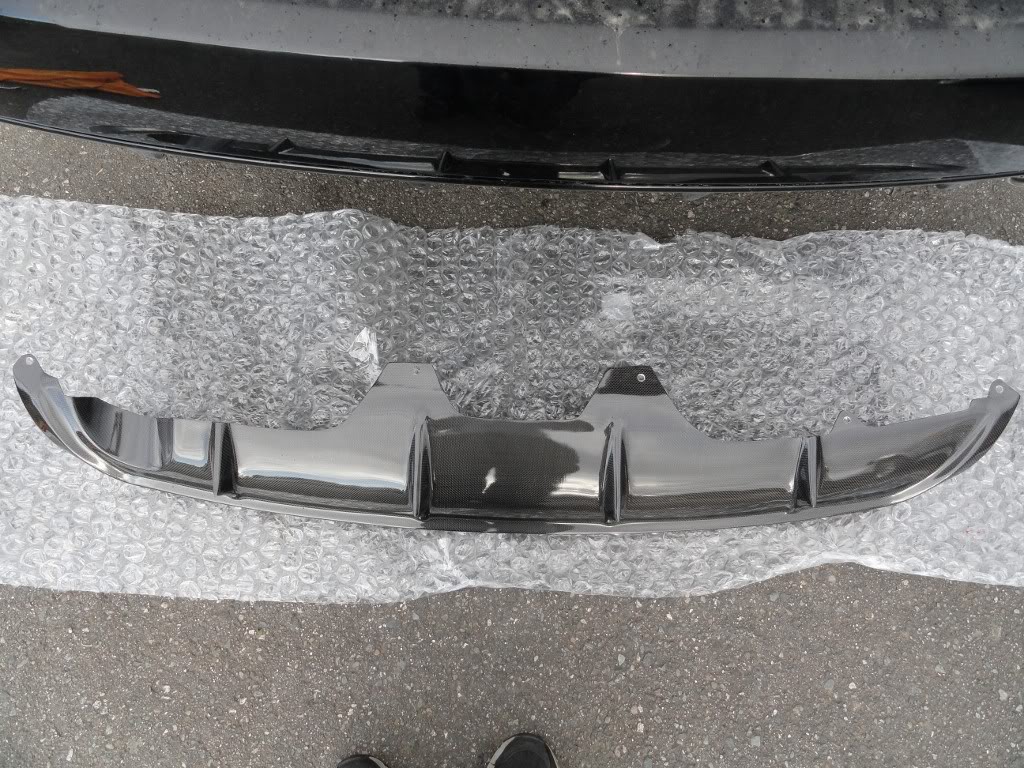
ok here's a mini write up of my JDP rear carbon diffuser install. There are many ways to install parts so my way is by no means the only way! This is the way I did it.
1. Open box and stand back and listen to the CF angels singing (aaaaahhhhhh)
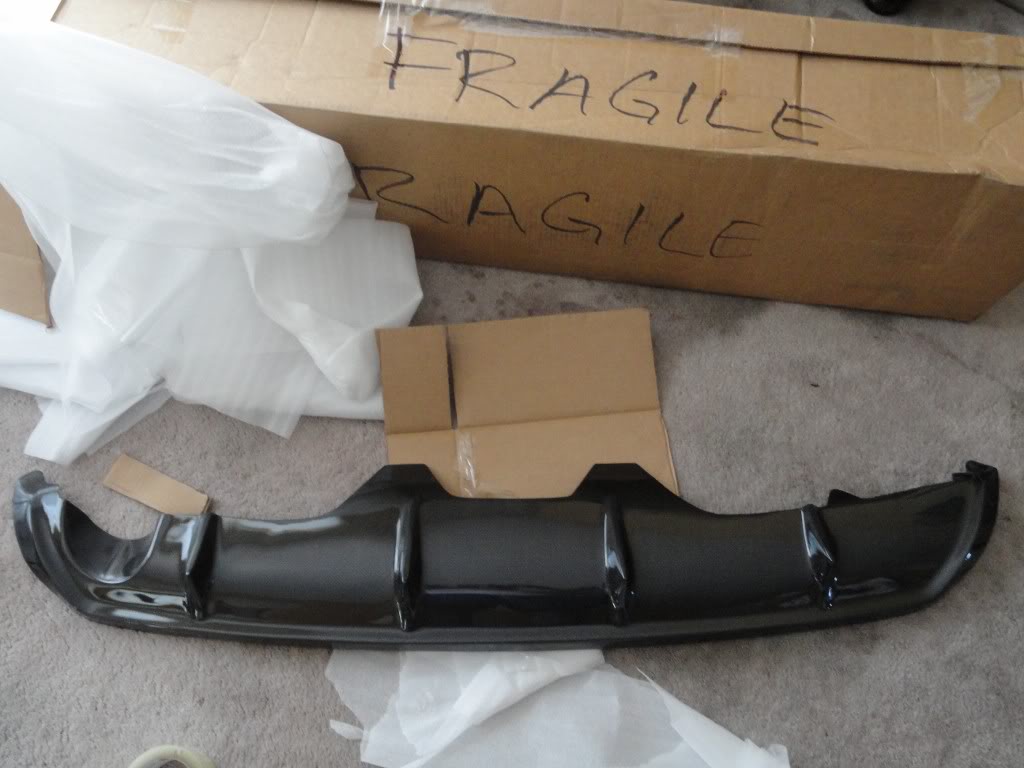
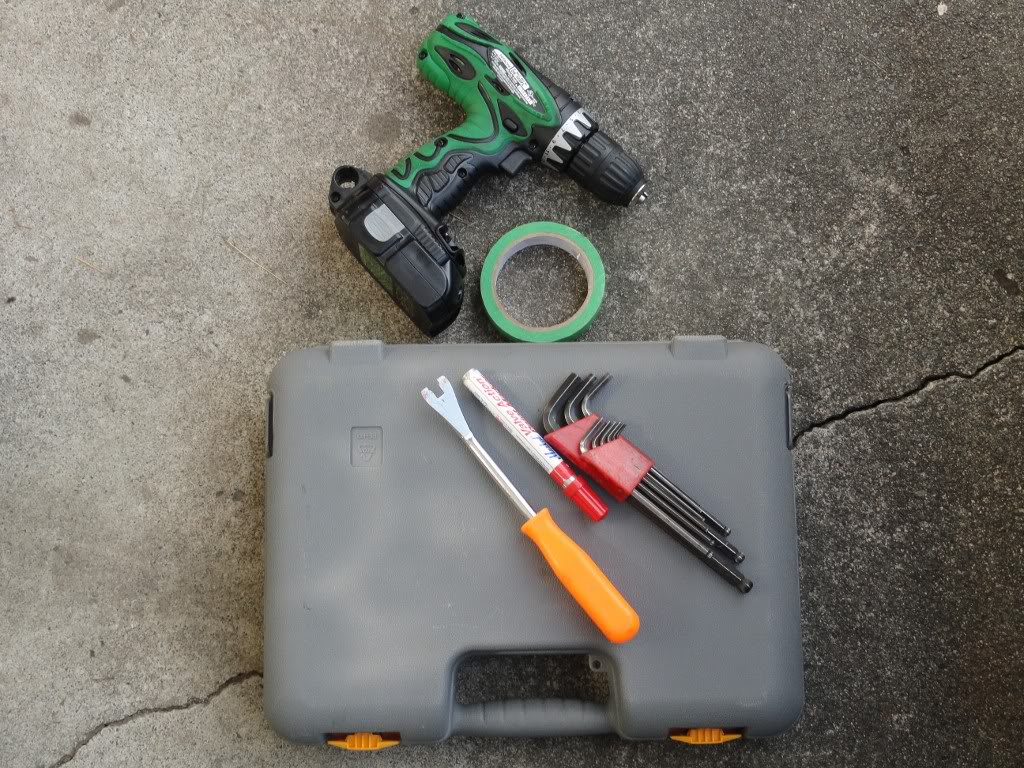
2. Grab everything you need for the install and try not to piss your pants as you walk out to the car!
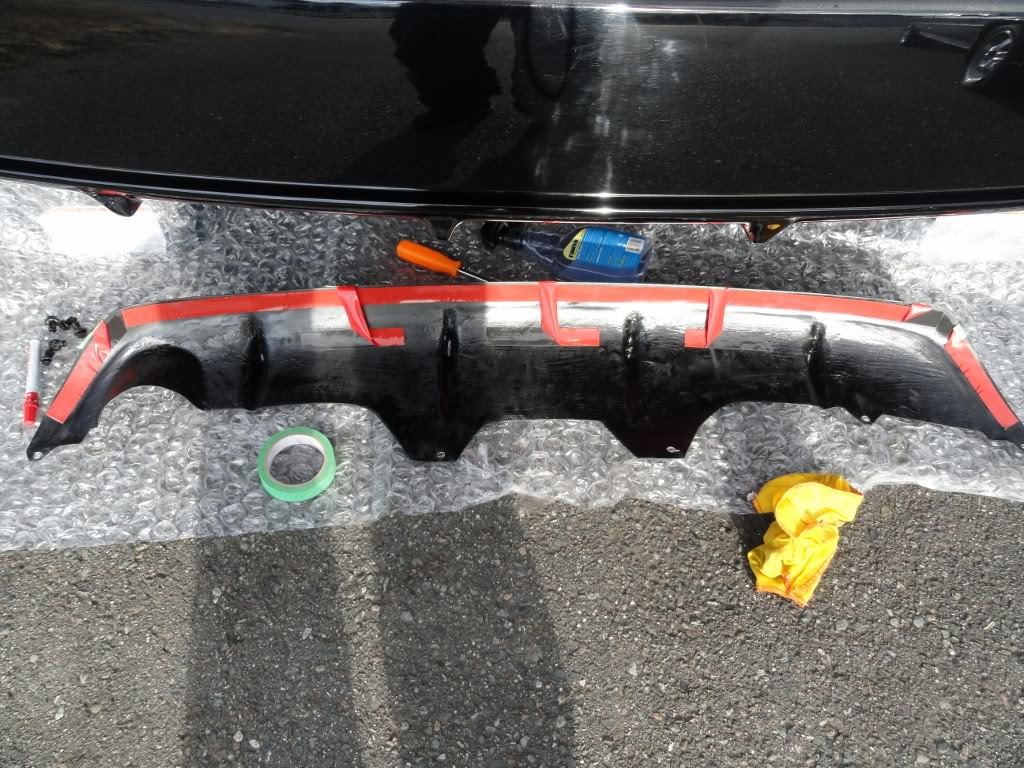
You will need:
a. Painters tape
b. A drill
c. Drill bits
d. Marking pen
e. Panel removal tool
f. Allen Keys and screwdriver (optional if you want to remove the entire bumper)
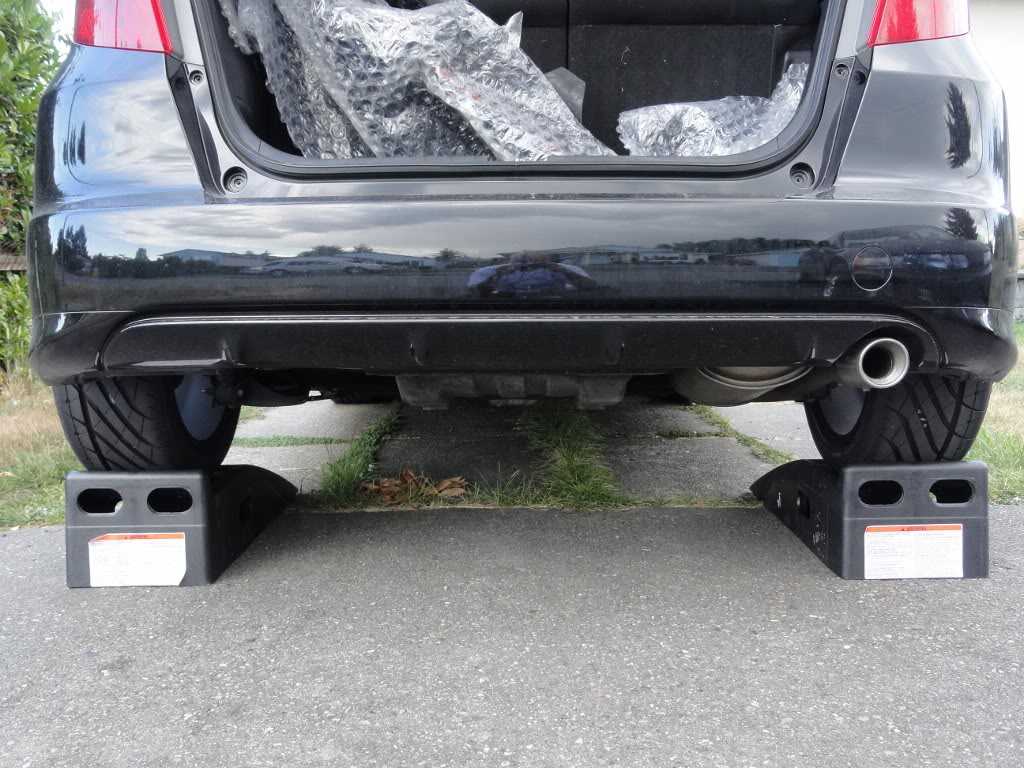
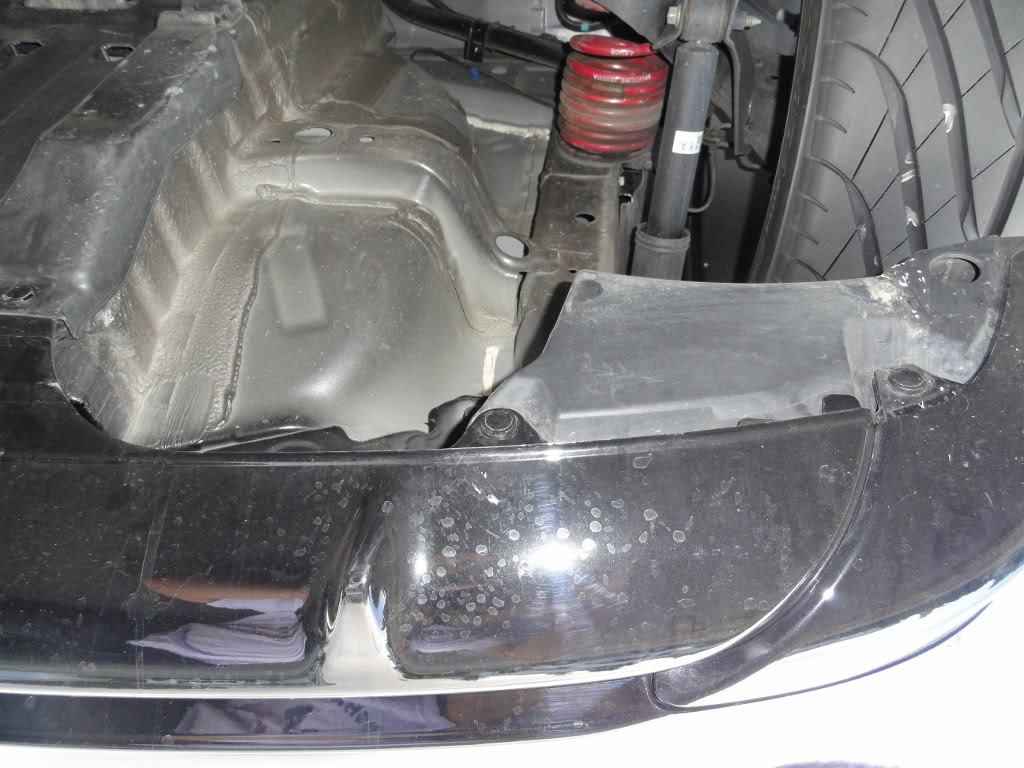
3. Get the rear of the car higher off the ground safely! You can use a lift, jack stands, ramps or whatever you have.
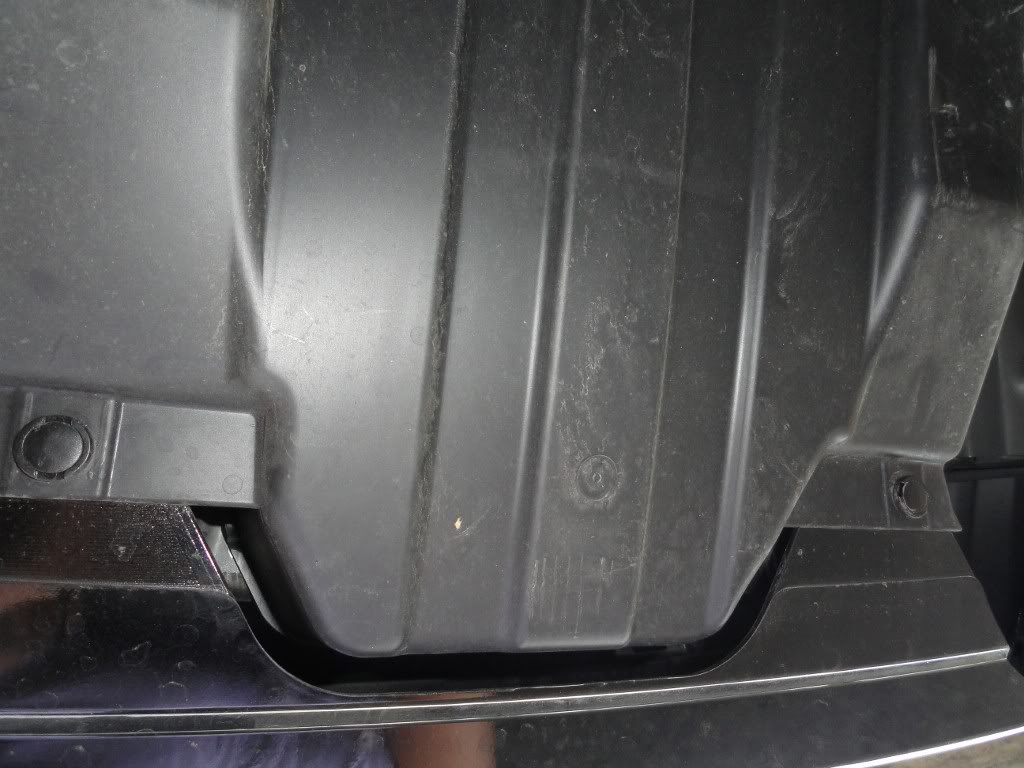
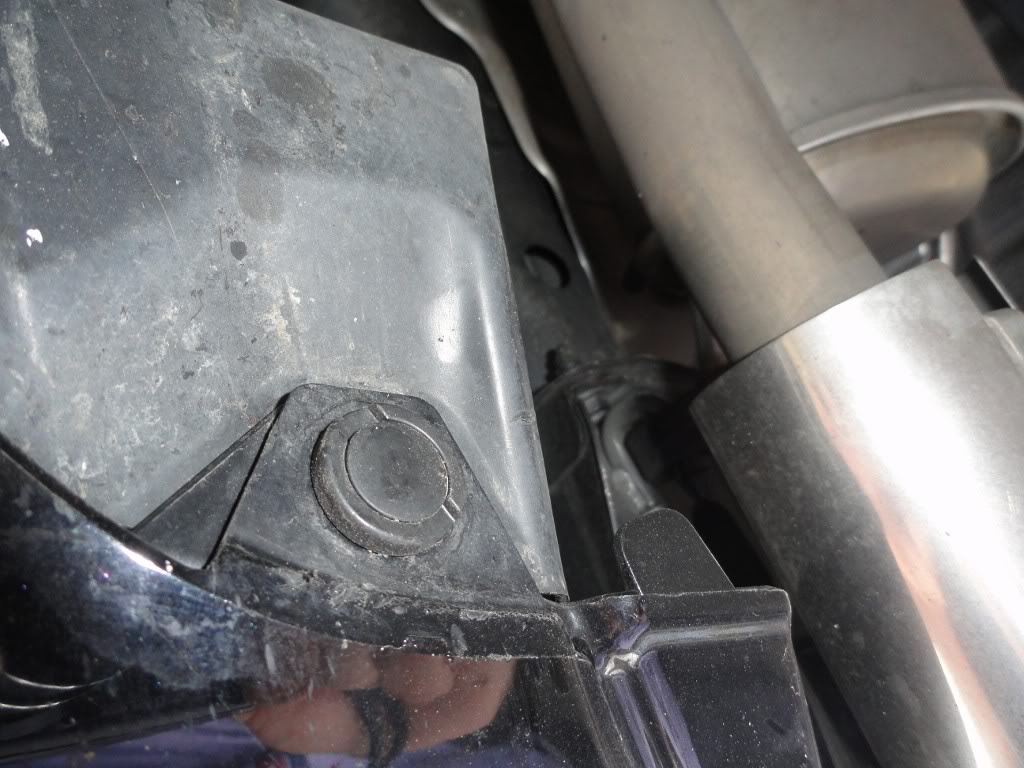
4. Grab your panel removal tool. These are all the plugs you will have to remove.
1. Open box and stand back and listen to the CF angels singing (aaaaahhhhhh)
2. Grab everything you need for the install and try not to piss your pants as you walk out to the car!
You will need:
a. Painters tape
b. A drill
c. Drill bits
d. Marking pen
e. Panel removal tool
f. Allen Keys and screwdriver (optional if you want to remove the entire bumper)
3. Get the rear of the car higher off the ground safely! You can use a lift, jack stands, ramps or whatever you have.
4. Grab your panel removal tool. These are all the plugs you will have to remove.
Last edited by bmxman; Aug 24, 2010 at 07:19 PM.
5. Slide the diffuser in place and make markings where you're going to drill the holes. I recommend something on the ground to catch the diffuser in case it falls or you drop it.
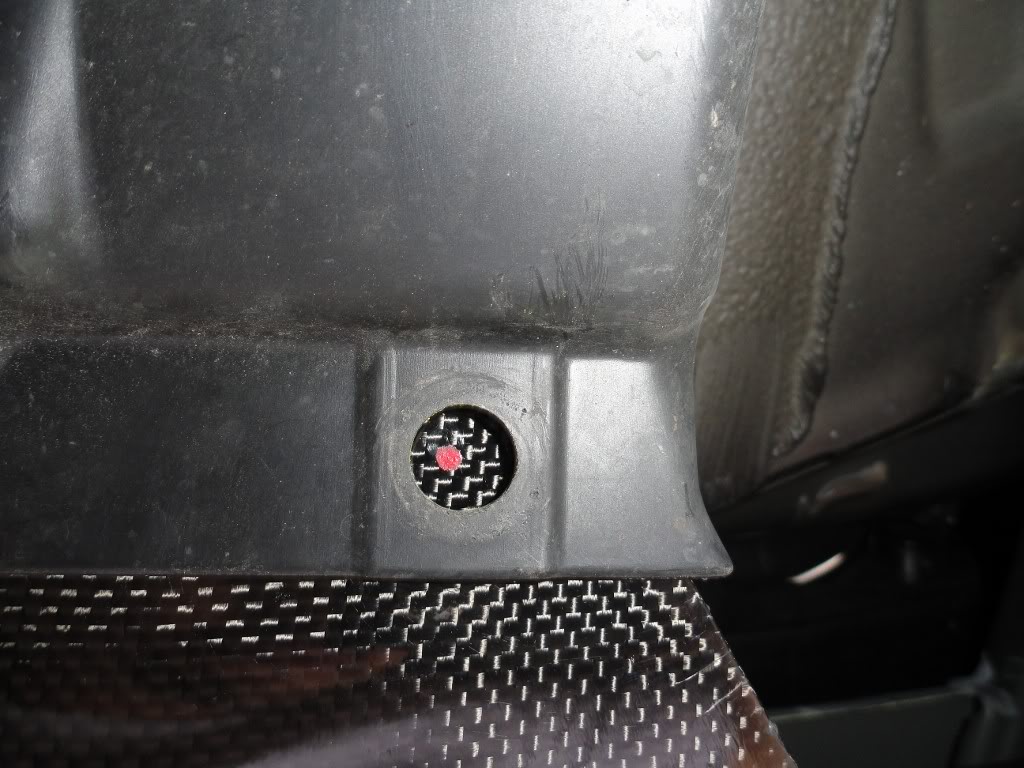
6. Once all your holes are marked you can start drilling. I used a 3/8 bit and the plugs fit tightly. Make sure you put something under the diffuser to support it while you're drilling.
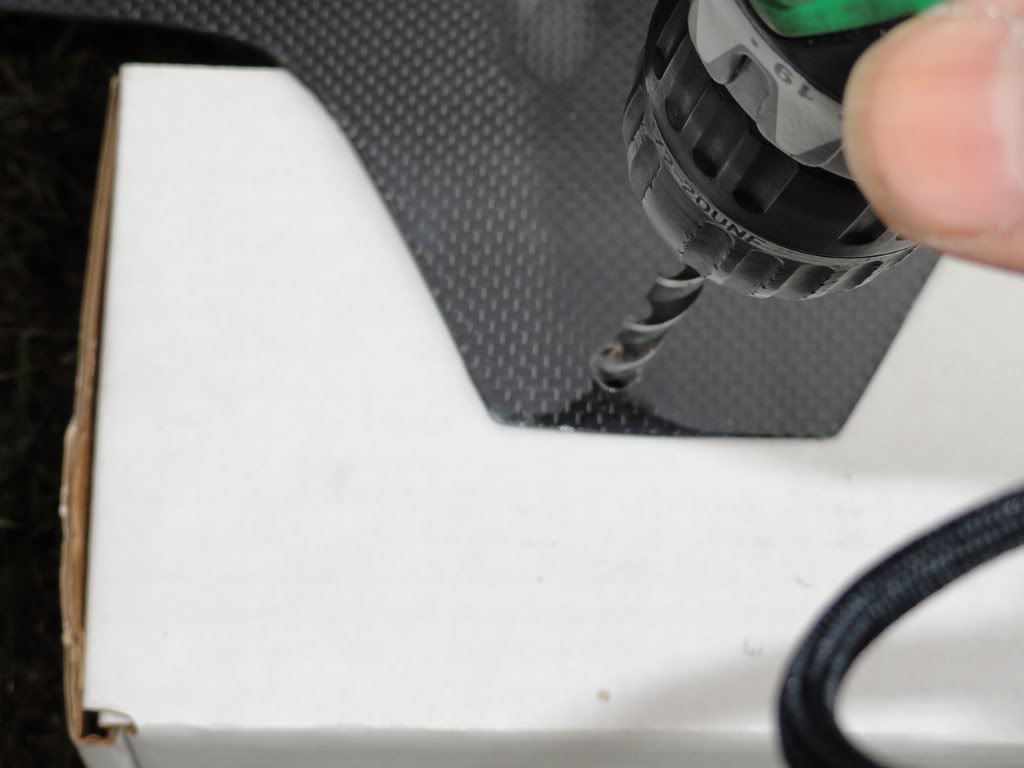
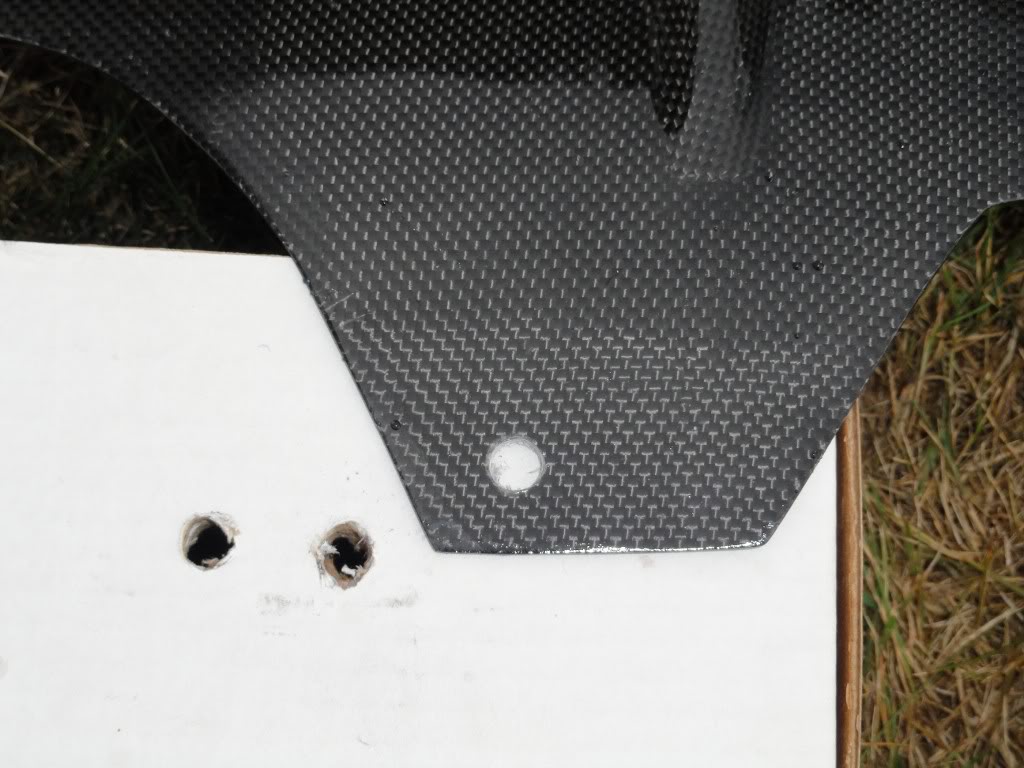
7. Once all your holes are made it shoud look something like this. I drilled my holes from the carbon side inward. Make sure your drill bit is sharp and you drill slowly!
8. Flip the diffuser over and peel back small portions of the double stick tape and secure them to the opposite side with the painters tape.
6. Once all your holes are marked you can start drilling. I used a 3/8 bit and the plugs fit tightly. Make sure you put something under the diffuser to support it while you're drilling.
7. Once all your holes are made it shoud look something like this. I drilled my holes from the carbon side inward. Make sure your drill bit is sharp and you drill slowly!
8. Flip the diffuser over and peel back small portions of the double stick tape and secure them to the opposite side with the painters tape.