
Brand New Fit Sport First 10 Upgrades Top Ten


Thread Starter
|
Member
Joined: Jan 2013
Posts: 125
From: Ca
Brand New Fit Sport First 10 Upgrades Top Ten
This started as a top 10 of what I was going to get but it has become a place to find pictures and detailed, yet easy to understand, descriptions of some basic upgrades. If you are a new car owner or are just now taking a serious interest in your vehicle, there is great basic info in this thread. The first list is 10 quality upgrades and the reasons that users like them, and the rest of the thread has lots of information and pictures on different things. If you are a new owner and you have a question concerning an upgrade, it's likely you can find some useful info here. Thanks and please leave feedback in the comments. And I also certainly wouldn't be upset if you gave me some Rep points, if you found something useful.
Quick Jump
•Intro and Top Ten List
•Car Care
•Fuel
•Oil
•DIY Modifications
•Lighting (LED, Halgogen, HID)
•Engine/Performance
Intro
I'm hoping this can be a quick reference thread for new buyers who want to do some upgrades and don't know where to begin. I just got a new Sport and it is a blank canvas. I don't have all the money up front to do what I want but as it comes in, I will be making upgrades. I've been doing some research and I think I have the first 10 things, in order of importance to the longevity of the car/making the car the most functional possible. Let me know if there is something that would be better to have and I will put it on the list.
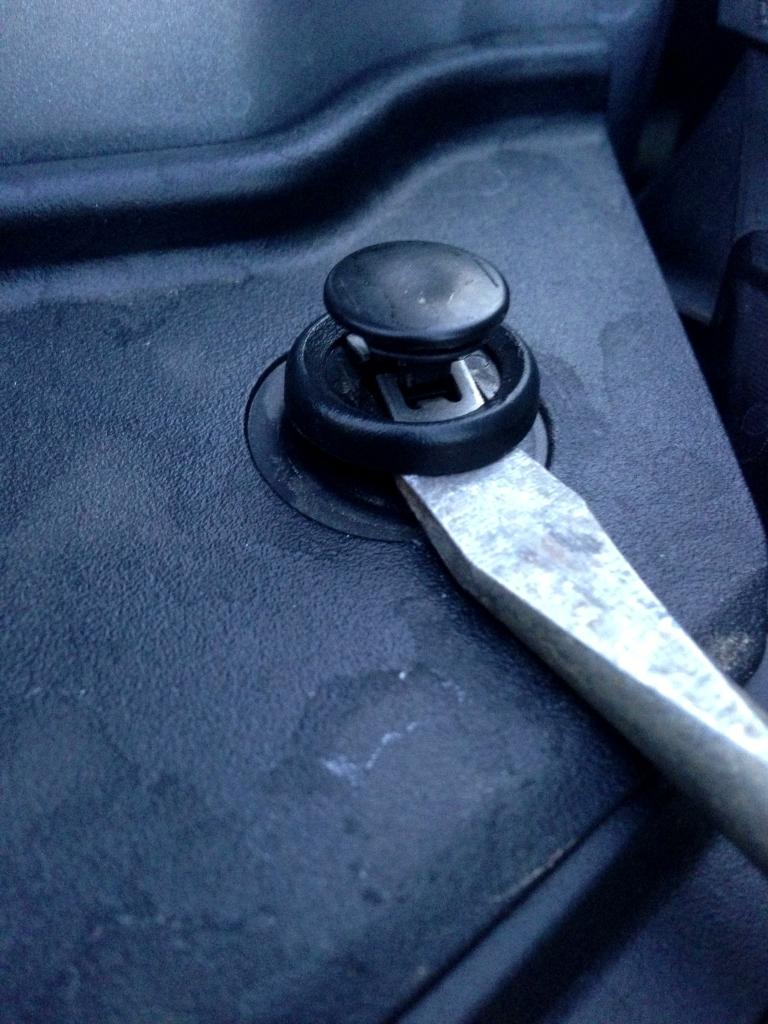
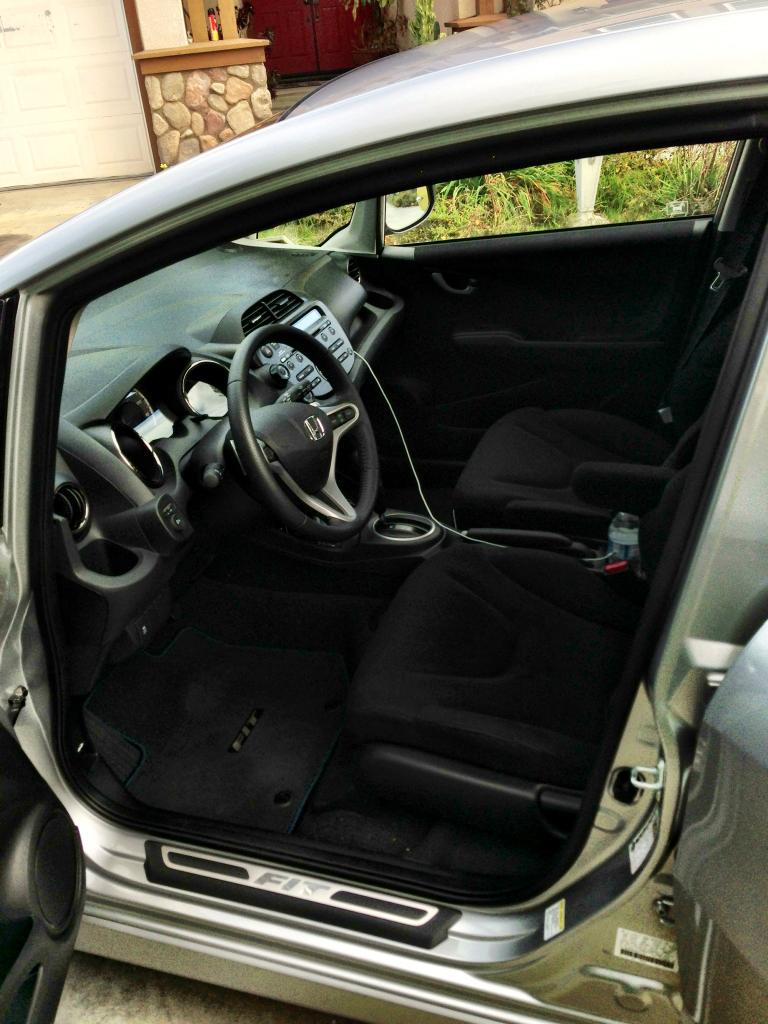
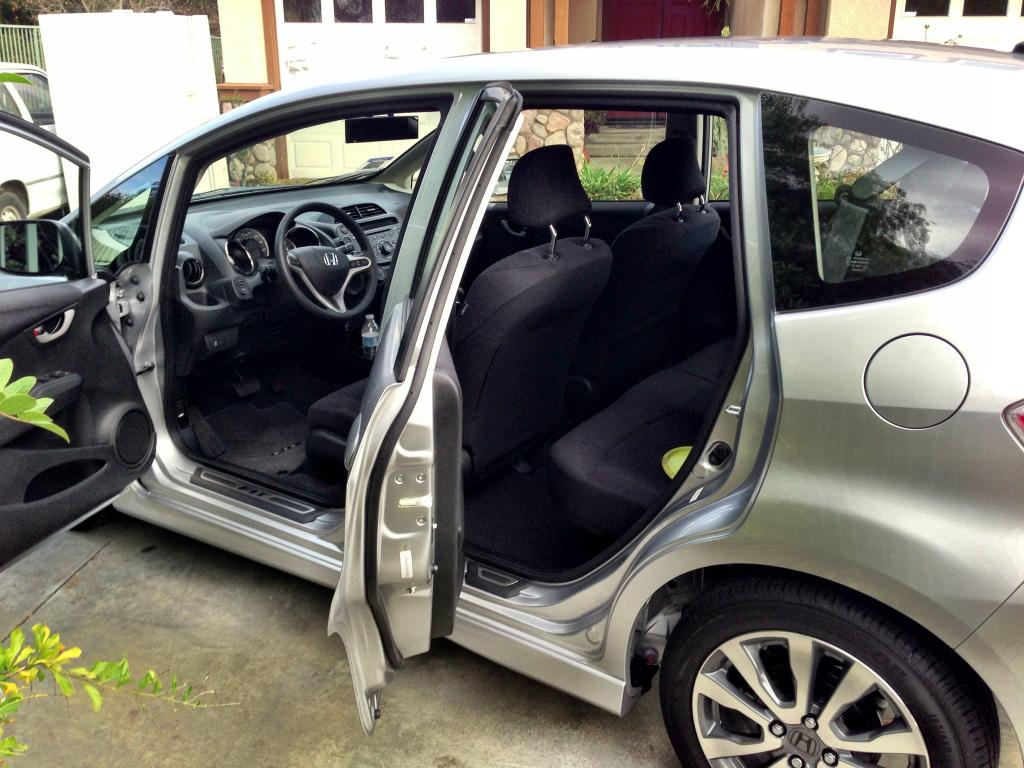
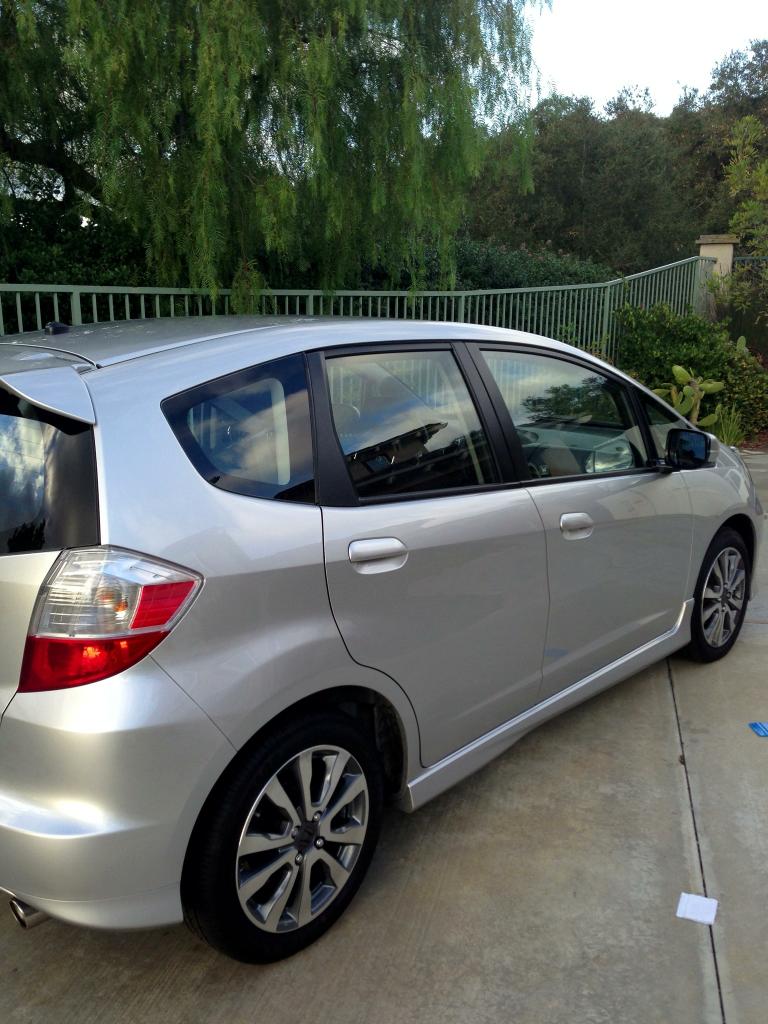
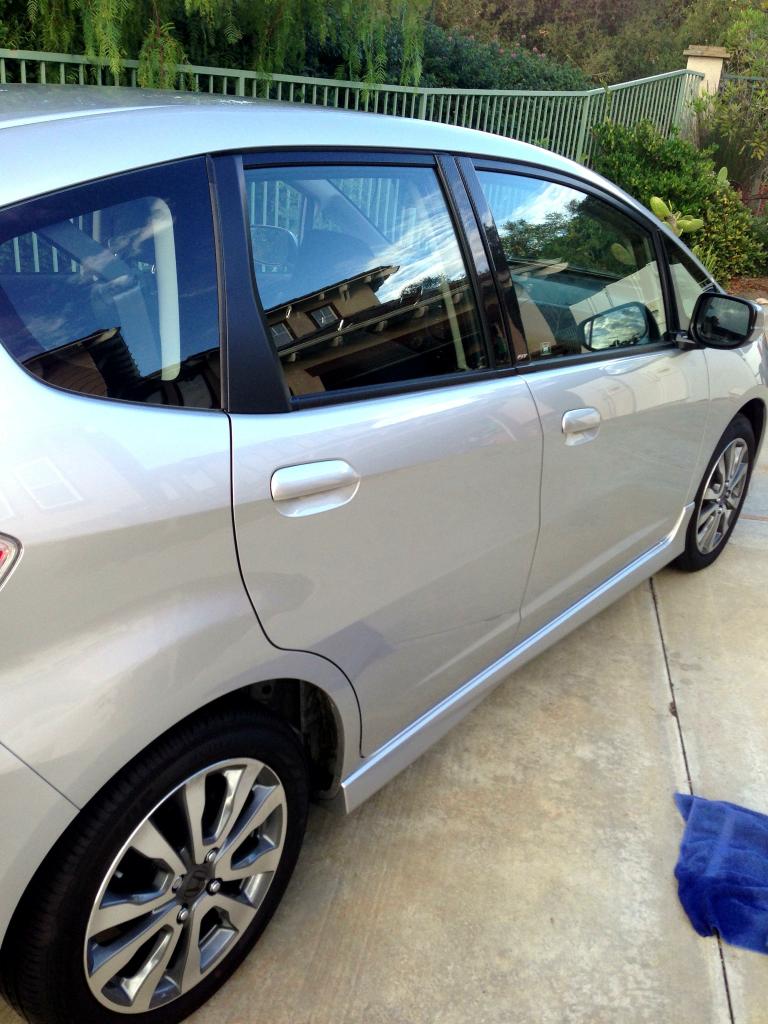
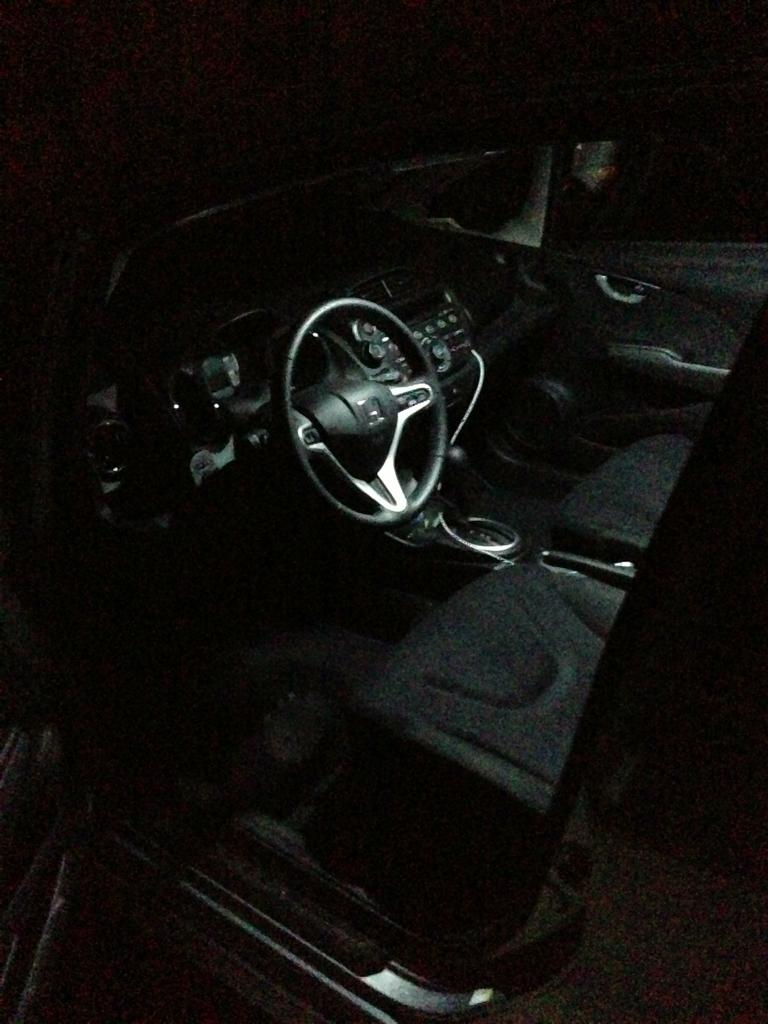
In my initial purchase I got the cargo tray (pictures below), door sill trim (installation guide and pictures below), rear bumper appliqu� (installation guide and pictures below), body side molding, and carbon fiber b-pillar trim (installation guide and pictures below), so I will not be counting those among the initial list (though I think all are smart purchases for the longevity of the car, except the B-Pillar Trim which just looks nice.
1. Wash/Wax/Sealant - The absolute first thing that should be done when you buy a brand new car is get a good wax and sealant on the body. This will help seal the vibrant color in the paint. A coat of quality wax will help protect the paint from nicks and scratches as well as bugs and dirt. A quality wash/wax/sealant will set you back $200-$300 but will last 12 months.
2. Clear Bra - After having my Fit for only 2 months, I regret not applying a clear bra to the hood and front bumper. The hood slants upward pretty dramatically so it is prone to getting hit by all sorts of stuff. My car already has several nicks on the hood that will have to be touched up. I will be getting a clear bra as soon as possible so I can prevent any more damage from being done.
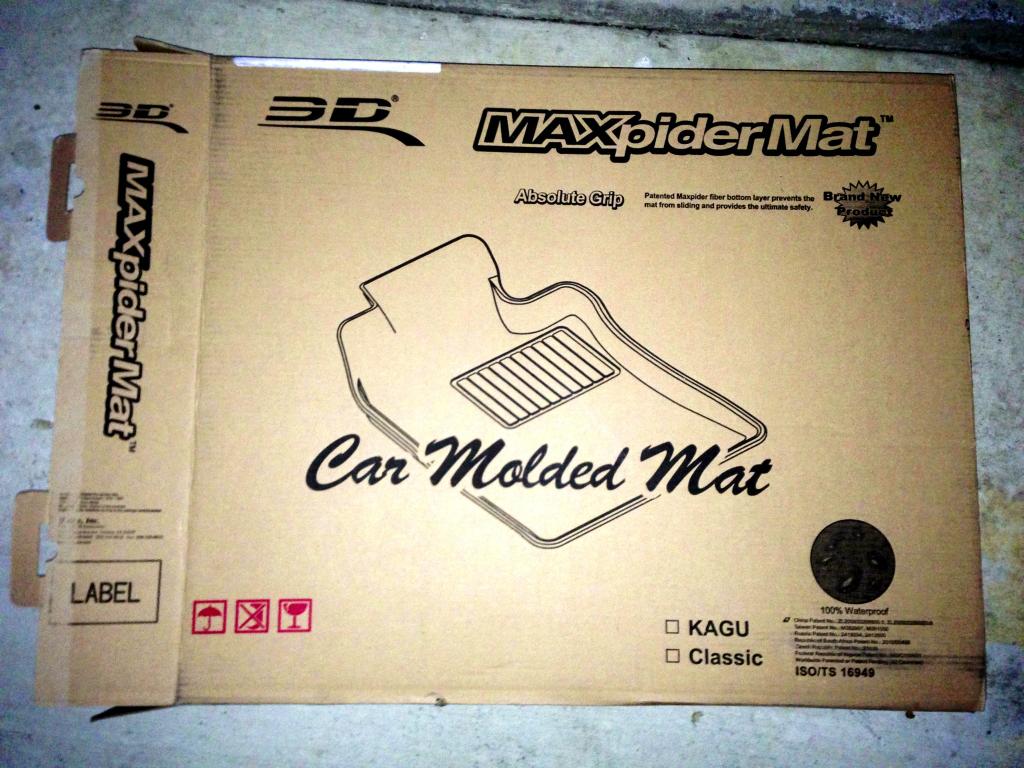
3. Floor Liners - Protecting the carpet is important. Weathertech is said to shift too much and be too expensive among other things, the OEM Honda mats require DIY cuts into the carpet fabric, and the material is not of high quality, driver's foot will wear a hole. Husky Liners are extremely popular among FF users. People like the price, the quality and the coverage. But there is a new competitor that I personally think might be the best of all. They are the U-ace 3D Floor Liners. They are the same liners as the Aries 3D Liners just without the Aries branding and Aries price increase. On Amazon Aries is $165 for front and rear while the U-ace Liners are $135 for front and rear. The link provided is to a thread by Fitfan2012 concerning his U-ace discoveries. There is a link to where you can buy in his OP. Pictures of the U-Ace Liners below.
https://www.fitfreak.net/forums/2nd-...ners-kagu.html
Husky Liners� - Floor Liners | Floor Mats | Car Floor Mats | Cargo Liners | Mud Flaps | Huskyliners.com
4. Seat Covers - Keeping the seats like new is important, especially if you plan to sell your car down the line. Clazzio makes the best that I have seen. Clazzio Seat Covers, Seat Covers
https://www.fitfreak.net/forums/fit-...t-there-3.html
5. Protective Headlight/Tail Light/Fog Light Film - Whatever color you'd like, clear, light smoke, dark smoke, HID Blue, or Racing Yellow (yellow is considered the most effective color for fog lights). Definitely protect at least on the fog lights, they are very close to the ground and at high speeds, a small rock can force you to replace a light)
HeadlightArmor Clear, HID Blue, Racing Yellow, and Smoke Light kits - Home
Lamin-x Protective Films Mobile
Headlight Protection
6. Tint - Check your state's tint laws for how dark you can go. Most people go with a 3M scotchtint at a good shop, for about $250. 3M also has a much higher quality film called 3M Crystalline that is $400+. Huper Optik is the best IMO but pricey at $500.
Window tint & window tinting for your car or auto - 3M US
Car Window Tint and Auto Window Tinting Film
7. OEM Cargo Organizer - Users say it really helps things from sliding around. The Cargo Tray will not keep grocery items and small things from sliding if you take a corner hard. I took some books to donate to the library and the box slid back and forth, spilling a few books along the way. The cargo organizer is $60 shipped on Amazon, read the reviews.
8. Rear Sway Bar (RSB) - Many users praise the Progress RSB for about $170. If you don't drive aggressively or track your car, this may not benefit your driving style. This is for those who are looking for less body roll in the corners. Progress Technology: Anti-roll bars, sport springs, coil-overs, camber kits and more since 1995!
9. Sport Springs - Swift and Eibach are two popular springs. They lower the car, stiffen the ride, and will greatly increase handling. Just like the RSB, if your not an aggressive driver and you dont care about lowering your car, then there is no need for these.
Swift Springs USA
performance-suspension.eibach.com
10. Sport Pedals - After you've worn the OEM ones a bit, try Zeta, Mugen or Honda Sport.
09 + Honda Fit Racing Pedals w/Dead Pedal Cover
2009-2013 Honda Fit Mugen Accessories - Genuine Mugen Parts
11. Good Tires - Tirerack.com and FF users like 205-215 and 50-55 on 16" wheels) Some tires that FF users have given positive reviews of: [B]Yokohama S-Drive (warm, dry weather), Yokohama AVID ENvigor (all season),
12. Lighter Rims - I bought a brand new vehicle so I personally want to hold off on purchasing lighter wheels until I have fully worn out my OEM tires, plus the set of quality tires I plan on purchasing. That way, not only do I get some life out of my rims (which I like the look of) but I will also be able to see the performance increase that upgrading the wheels would bring (having already driven a set of quality tires on the old rims). This is a personal decision for me but MANY USERS consider lighter wheels and stickier tires to be one of the most noticeable upgrades available for the Fit.
13. Brake Pads - By this time you might be needing new pads, Hawk HPS and EBC Greenstuff are going to make a difference.
Hawk Performance Brake Pads: High Performance Street
Greenstuff Brake Pads Products Index
Car Care:
There is a fantastic section on car care here on fitfreak. Check out the stickys at the top for essential information.
Fit Care - Unofficial Honda FIT Forums
Fuel:
Wondering about different gas octane levels (87, 89, 91, 93)? There's a thread for that.
https://www.fitfreak.net/forums/1st-...m-gas-mpg.html
Many users believe that the car's internal computer will use slightly more aggressive throttling on high octane gas. Less throttle response time. From personal experience, I agree with this. When running 91 in my Fit, I felt like it was jumpier off the line. Users believe the MPG will either be slightly worse on octane or will be basically unaffected. It will also not keep your engine running cleaner. Use Chevron with Techron every time if you are concerned with engine cleanliness, and fuels that actually make a difference. The reason I say this is, from what I've heard (can't find source atm) the major auto companies get Chevron shipped from 500 miles away when they do their MPG testing, as there are no Chevron gas stations in Michigan. I wouldn't completely quote me on that but I bet if you used Chevron every time it would do nothing but good.
There is some great information from the EPA concerning fuel additives here:
http://www.epa.gov/otaq/consumer/420f11036.pdf
And a good test done with 4 leading fuel additives:
Oil:
Wondering whether it is worth it or not to go Full Synthetic on your first oil change? There's a thread for that.
https://www.fitfreak.net/forums/2nd-...neral-oil.html
DIY Section
*Disclaimer: The following is provided as a GUIDE ONLY, and neither myself, nor FITFREAK.NET endorse, recommend, encourage nor take any responsibility for the outcome of someone else doing the following. You follow these steps at your own risk!*
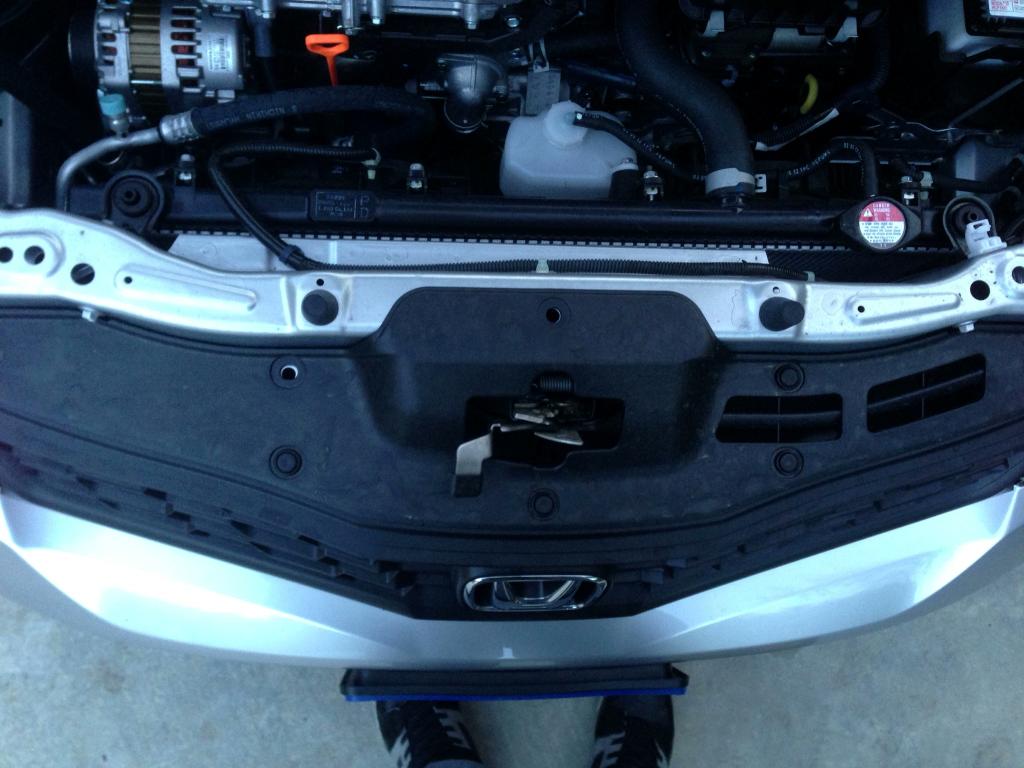
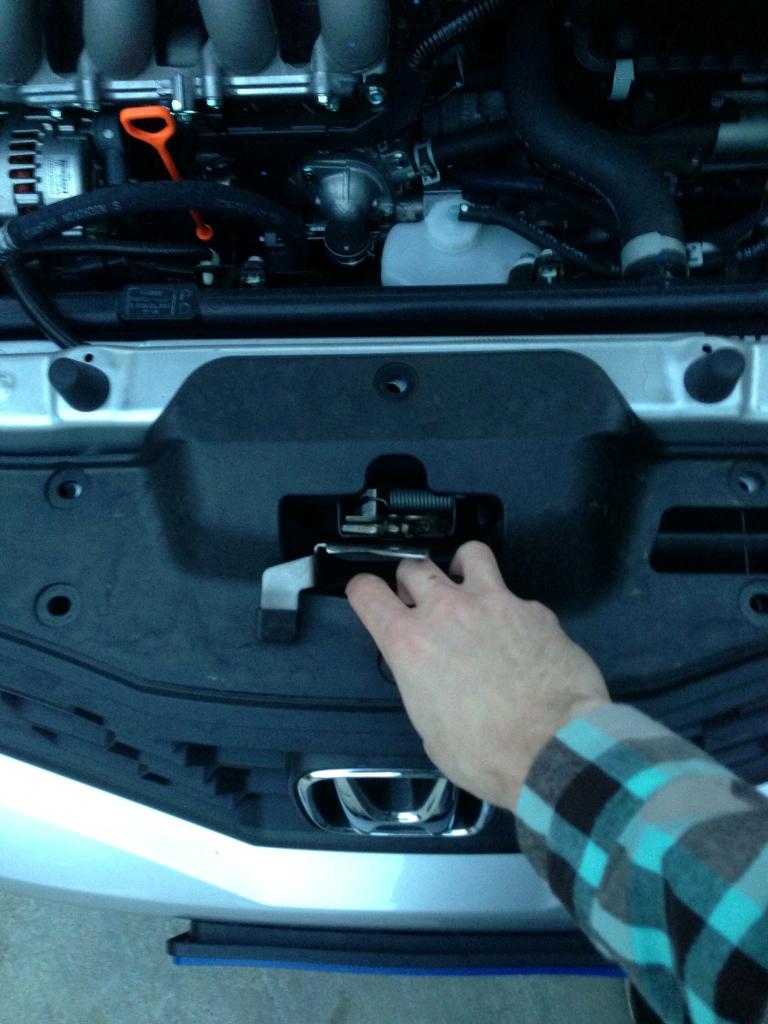
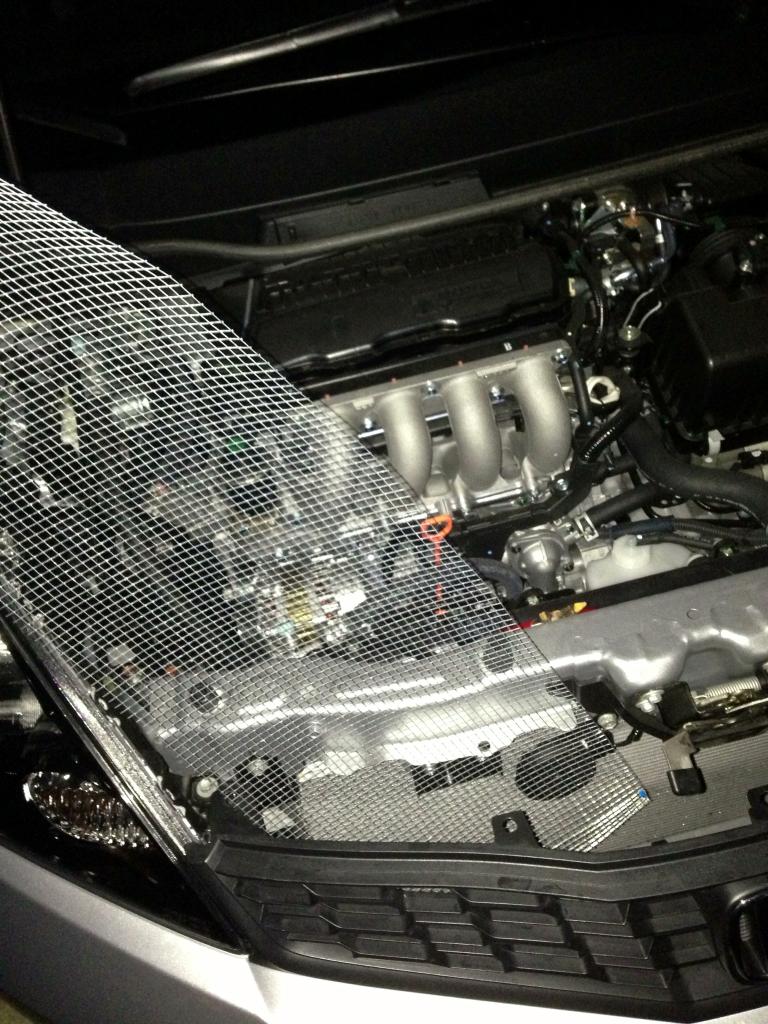
DIY Lower Grill Mesh Protection - I recommend doing this in your top 3 modifications. I only put it down here because the DIY is sort of long to explain. Basically, as you drive, there is a chance that rocks can get through the front grill and damage the AC condenser. There are threads dedicated to this https://www.fitfreak.net/forums/2nd-...replacing.html. Here is the DIY as described by Firefox91:
I thought I'd also point out details about getting the cover off, if you don't already know.
That black cover is coming off. See those 8 little circles? They are clips:
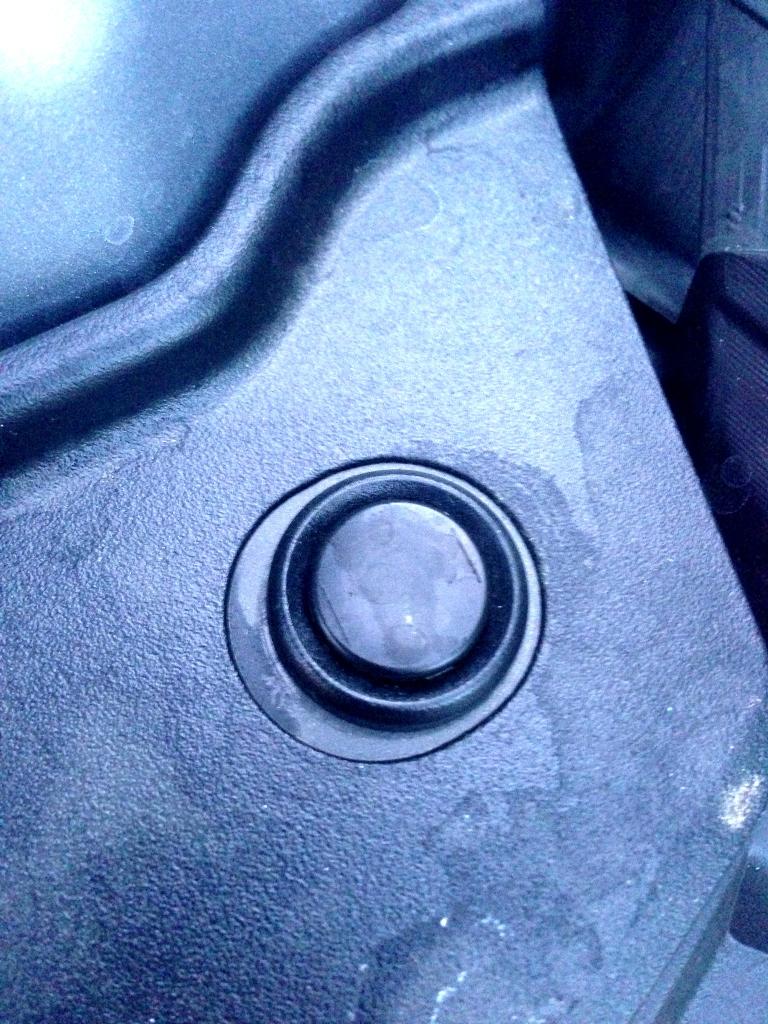
Get your flathead and pop the center up:
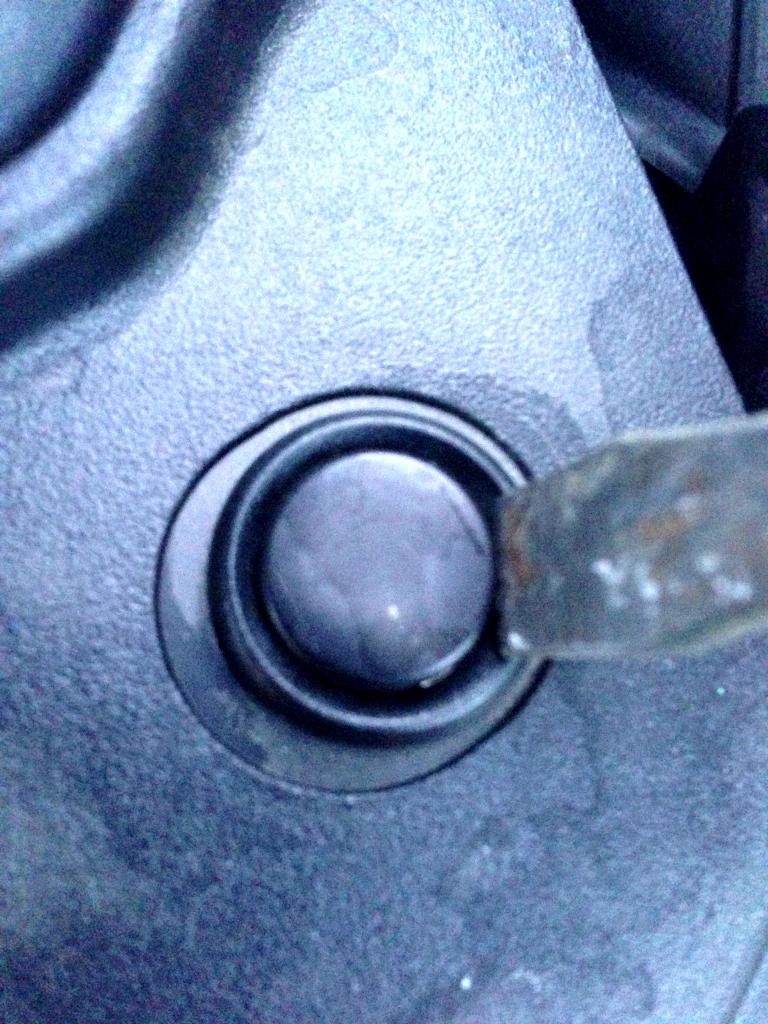
You can see that it's a little clip now. Pry the rest of it up:
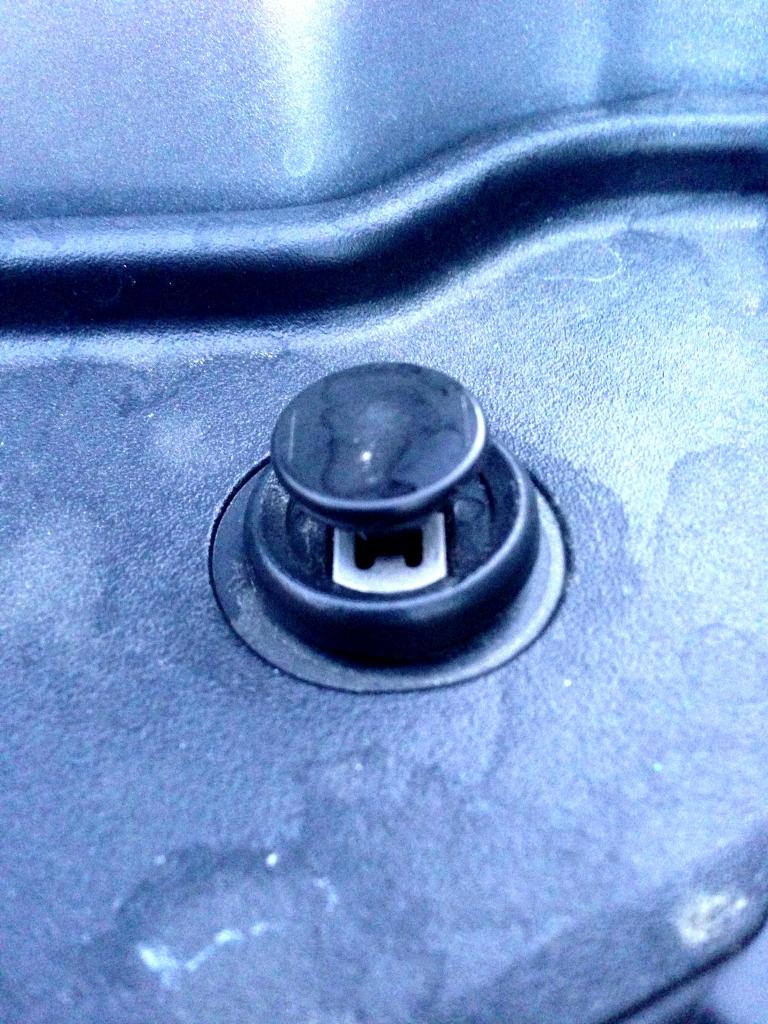
Take them all out:
Pull the cover out:
Slide your cut piece of mesh down in:
This is the first tie to hold it in place for me:
Note* When you put the clips back in, they have to be in the "popped open" position, and then gently slide it into the hole before pushing down on the top. If you push down on the top before its all the way in the hole, the clip will pop closed and it won't fit through the hole.
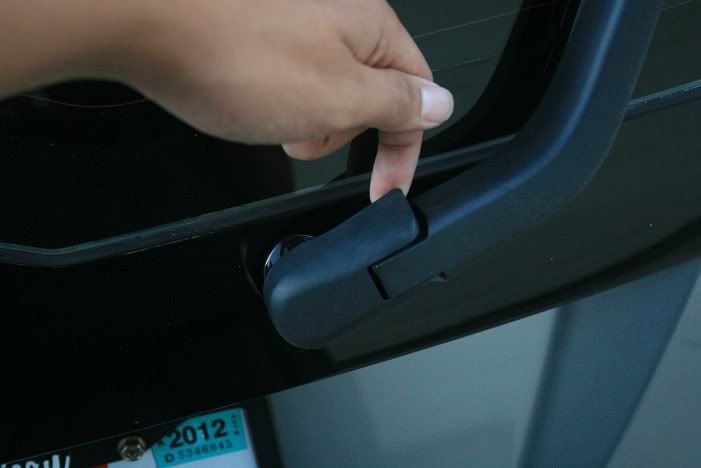
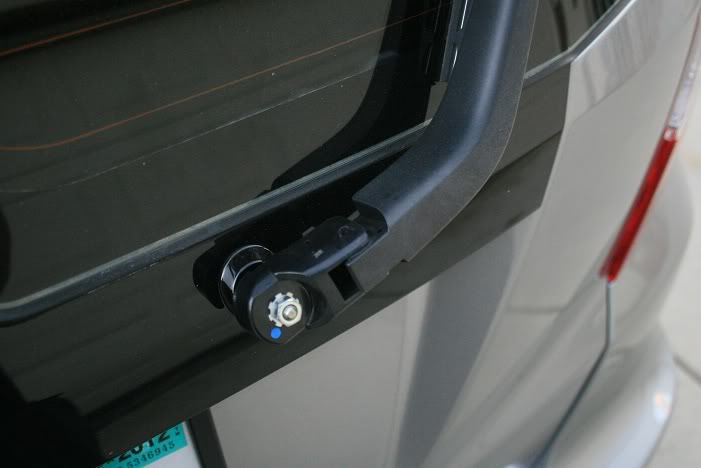
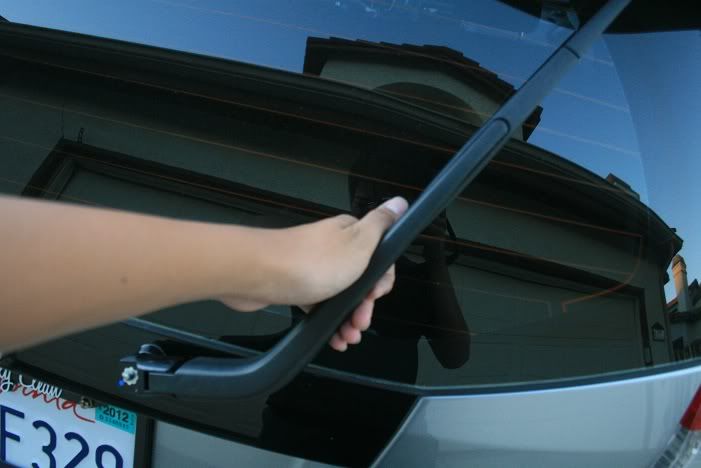
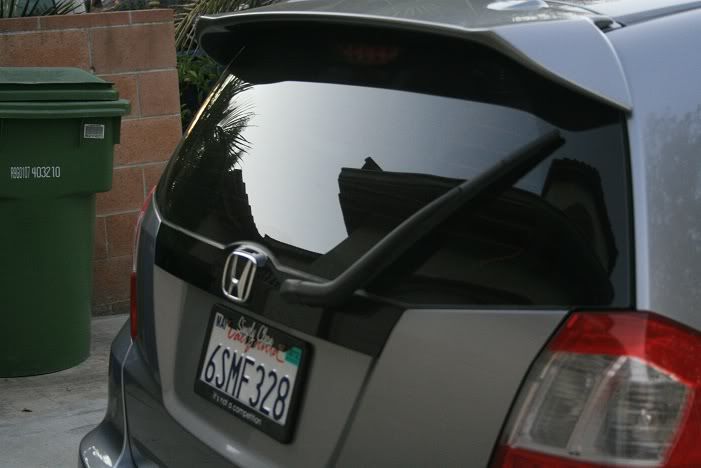
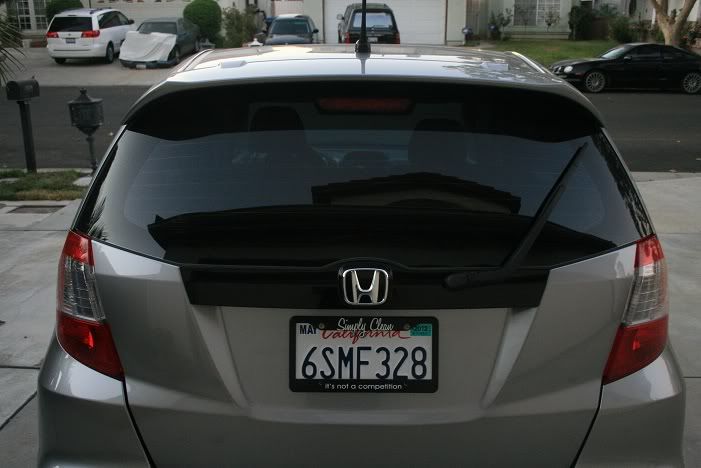
Rear Wiper Adjustment -If you live in the snow then this is a must mod for you. With this adjustment, the rear wiper hangs at different starting place. If you notice the stock position is horizontal at the bottom with the end facing the driver's side. This mod makes it so the wiper is angled the other direction (the end is facing more towards the passenger side). This allows the wiper to push snow off the rear windshield much easier, as it is not fighting gravity. An added bonus is that leaves don't accumulate as easy on the wiper blade. And of course, some prefer the look that it gives.
And if you think you're extra cool maybe you can do it without taking the wiper off. This is going to be more difficult and watch out for that little white wheel. It will want to fall out, don't let it.
If you have any problems, check this forum out.
https://www.fitfreak.net/forums/2nd-...wiper-mod.html
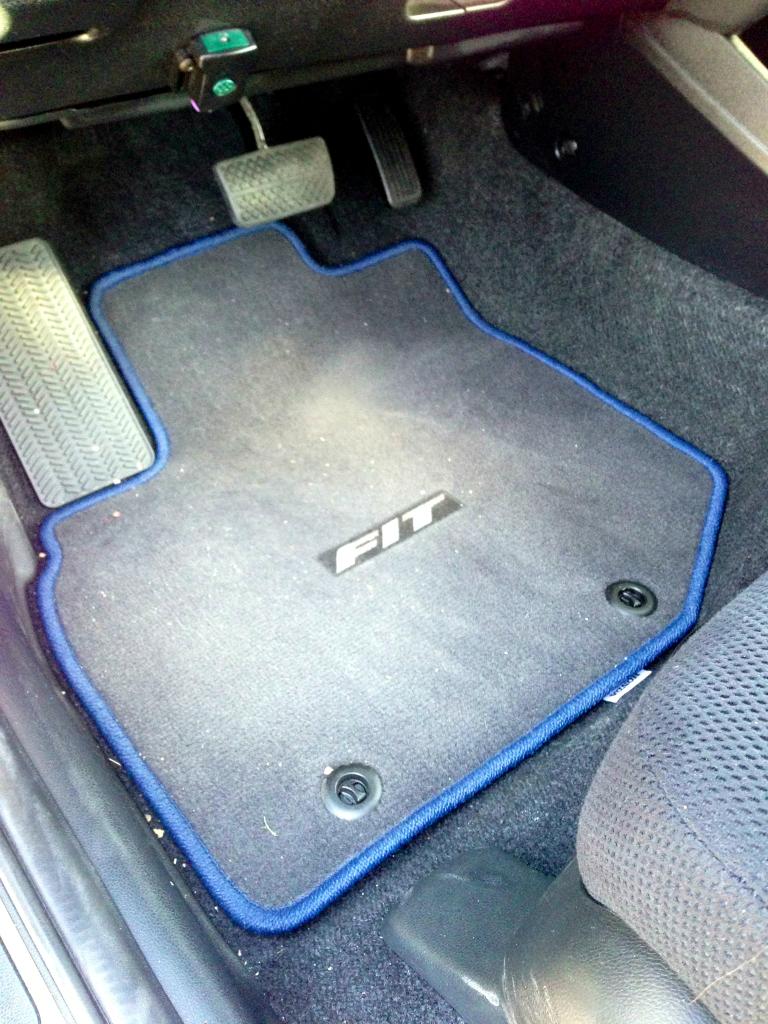
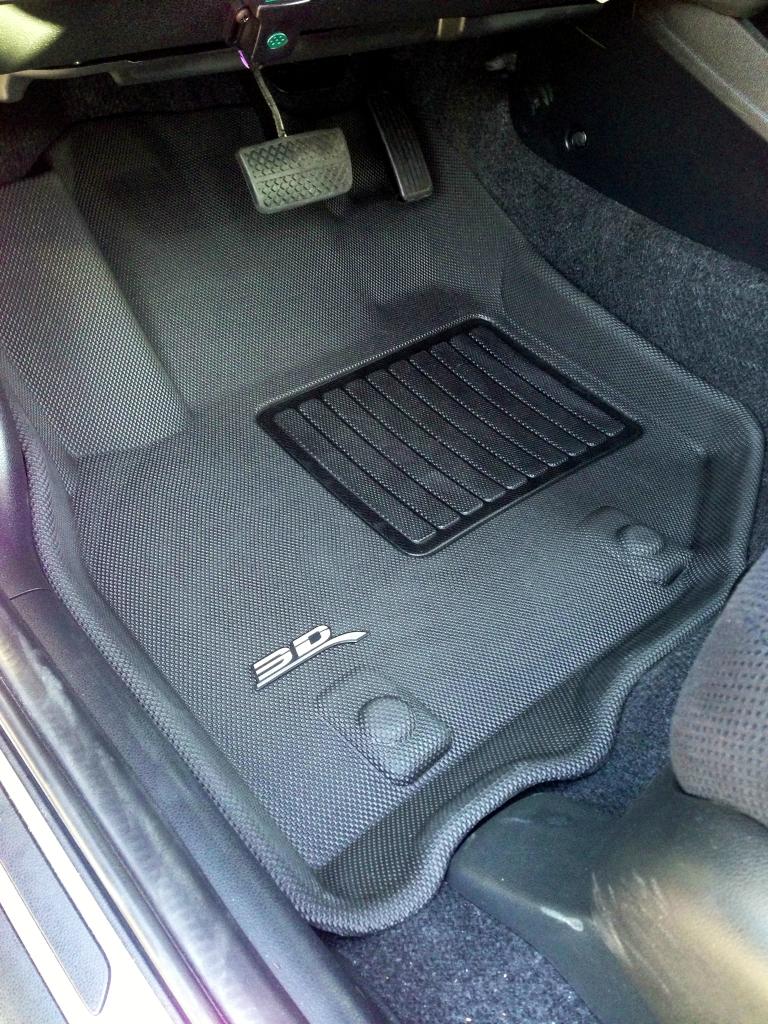
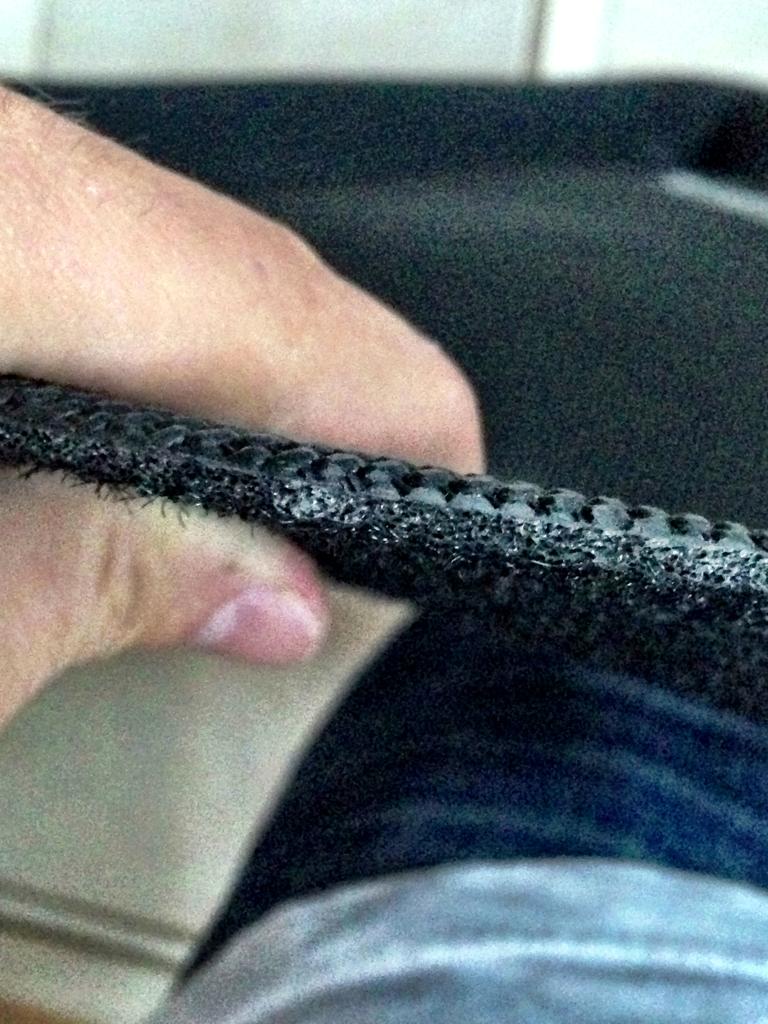
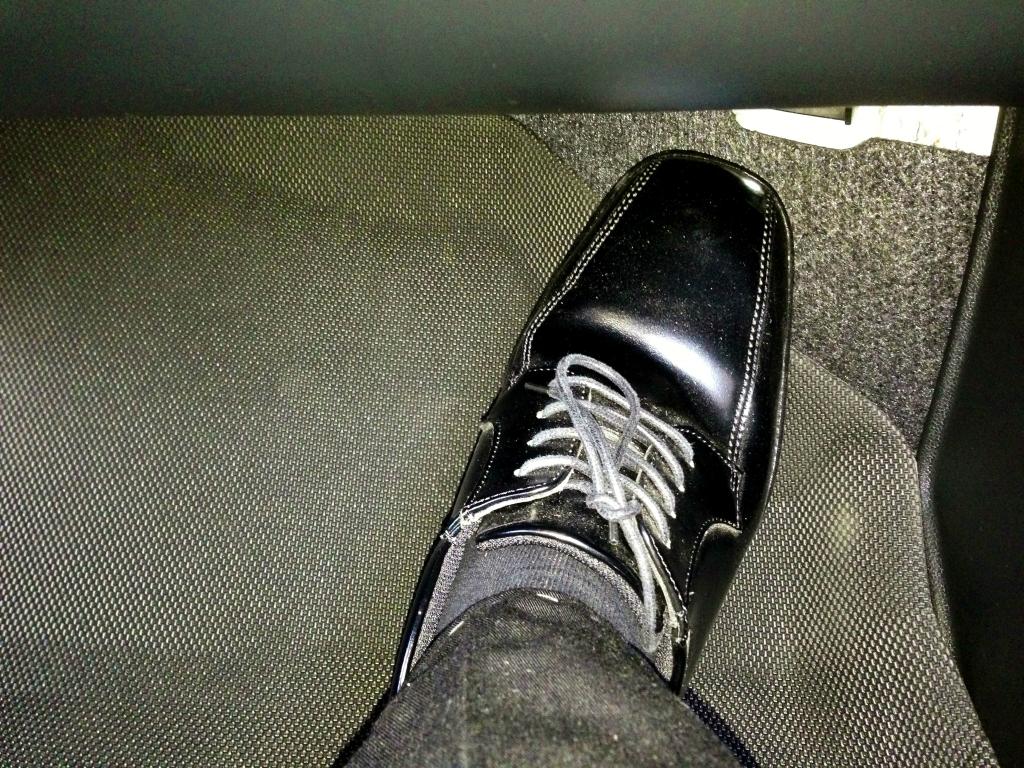
Floor Liners: I got the U-Ace Floor Liners (details and where to buy are in the top 10 list at the top of the thread) I think these are fantastic. The material on the top layer looks great in the Fit. It matches the material of the Sport seats very well. It is also quite grippy without being sticky. My feet do not slide while driving, yet it doesnt feel like the rubber on my shoes are sticky when I change my feet position. They have three layers, the bottom spidermax grip that works great, a middle foam core, and the top rubberized foam layer. There is also the thick rubber-plastic area for your feet. They were $142 with free shipping from auto distributors direct.
Driver's Side:
No Mats:
OEM Sport Mats:
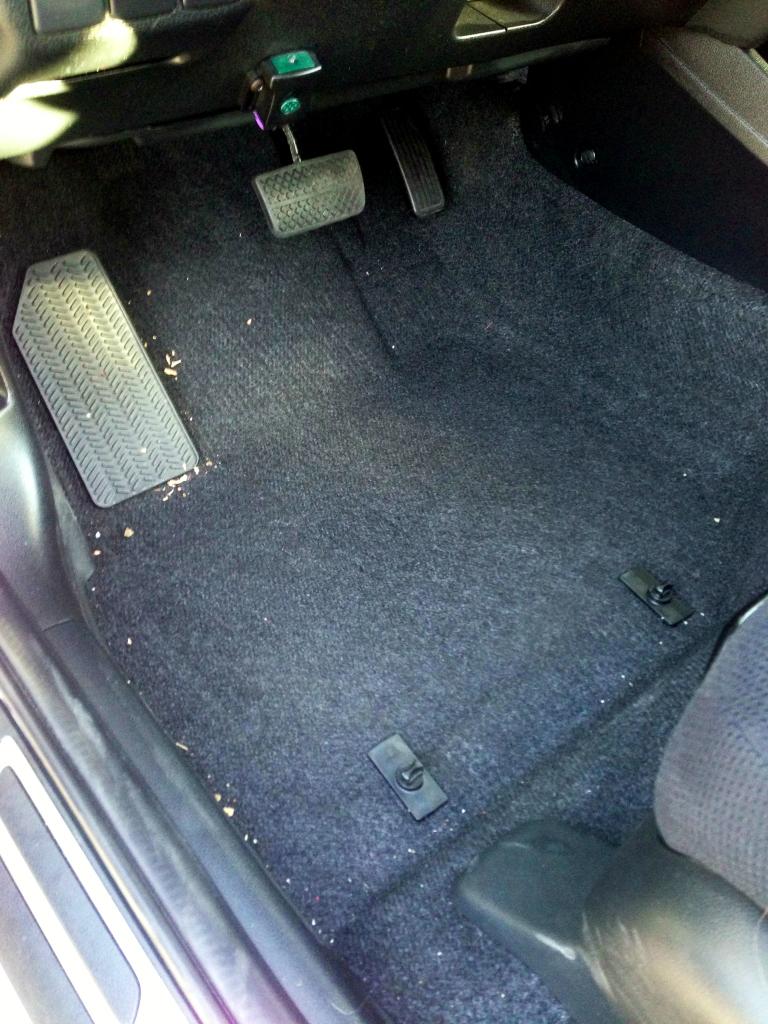
Worn Spot On The Driver Mat In Only 2 Months:
New U-Ace Liner:
Box
Where The Door Meets The Liner:
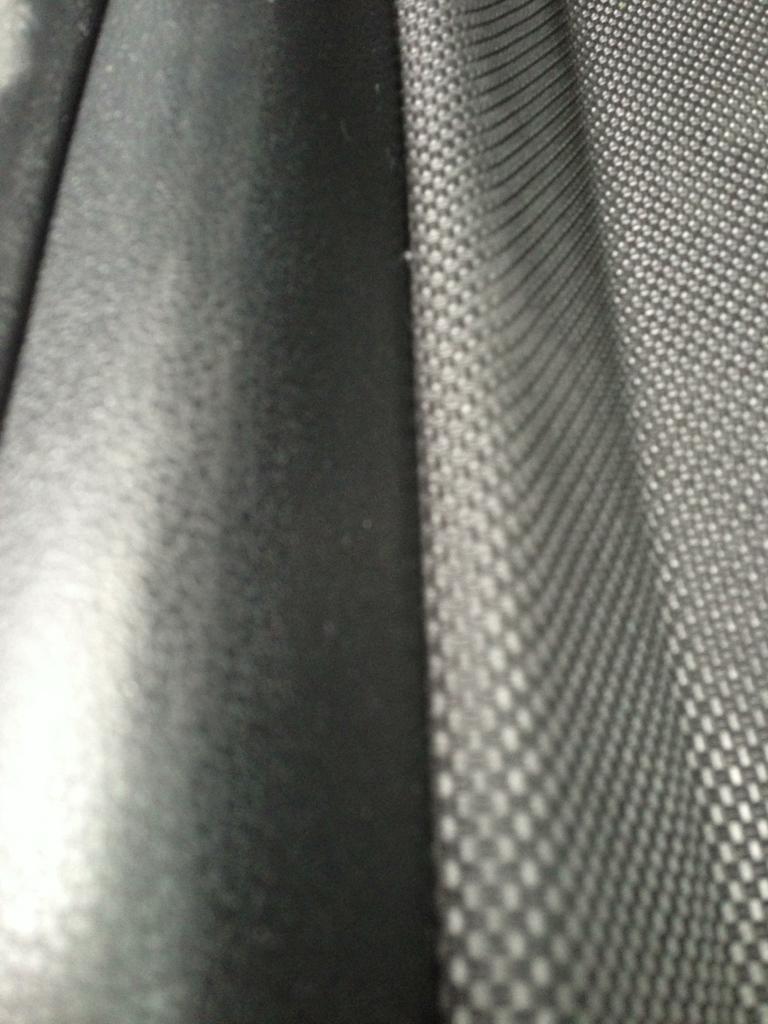
The Layers Of The U-Ace Liner:
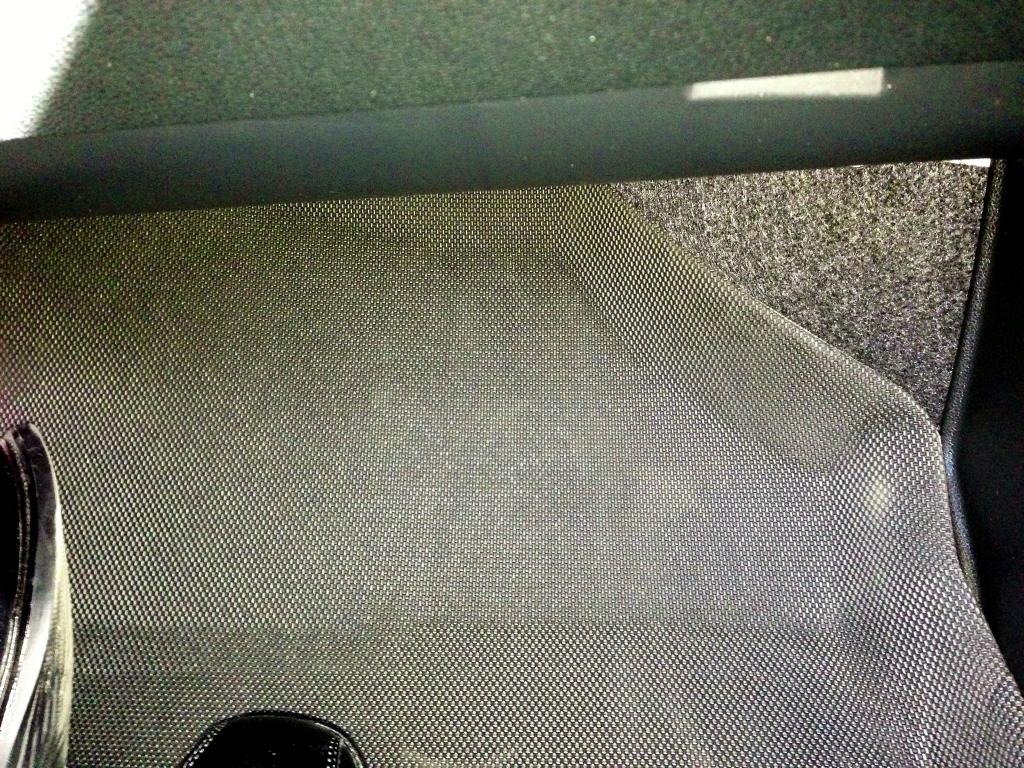
Rear Coverage:
Under the rear magic seat, the coverage is nearly perfect:
[B]With the front seat slid all the way forward, the coverage is quite good:[\B]
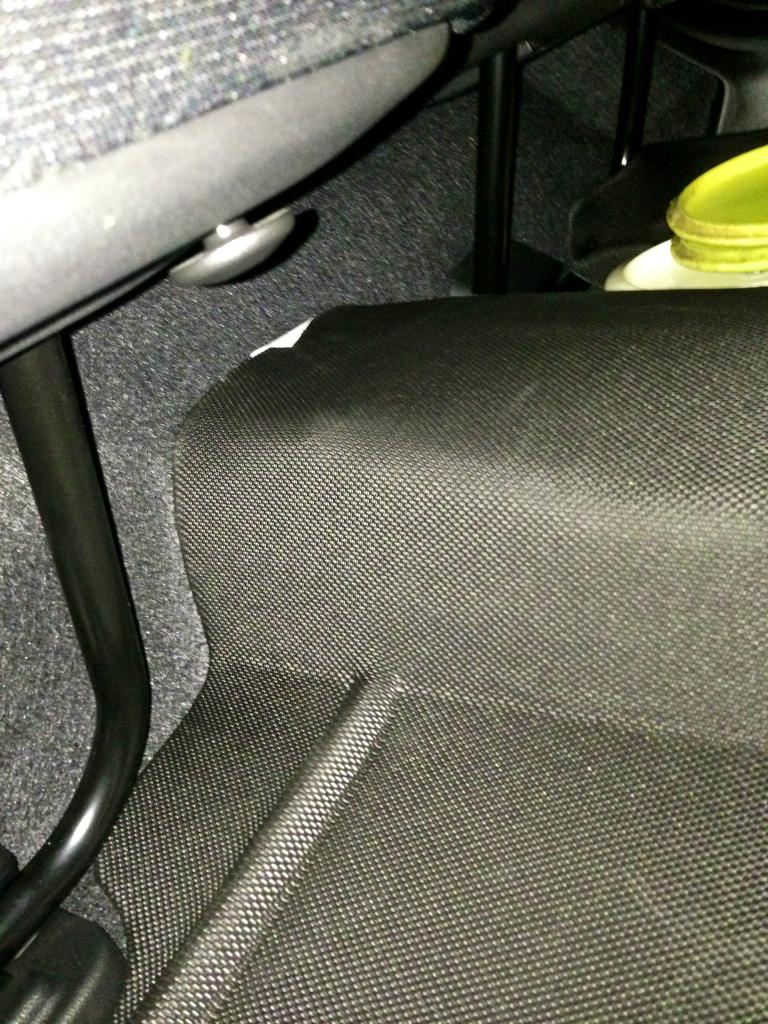
Problem Areas Of The Liners:
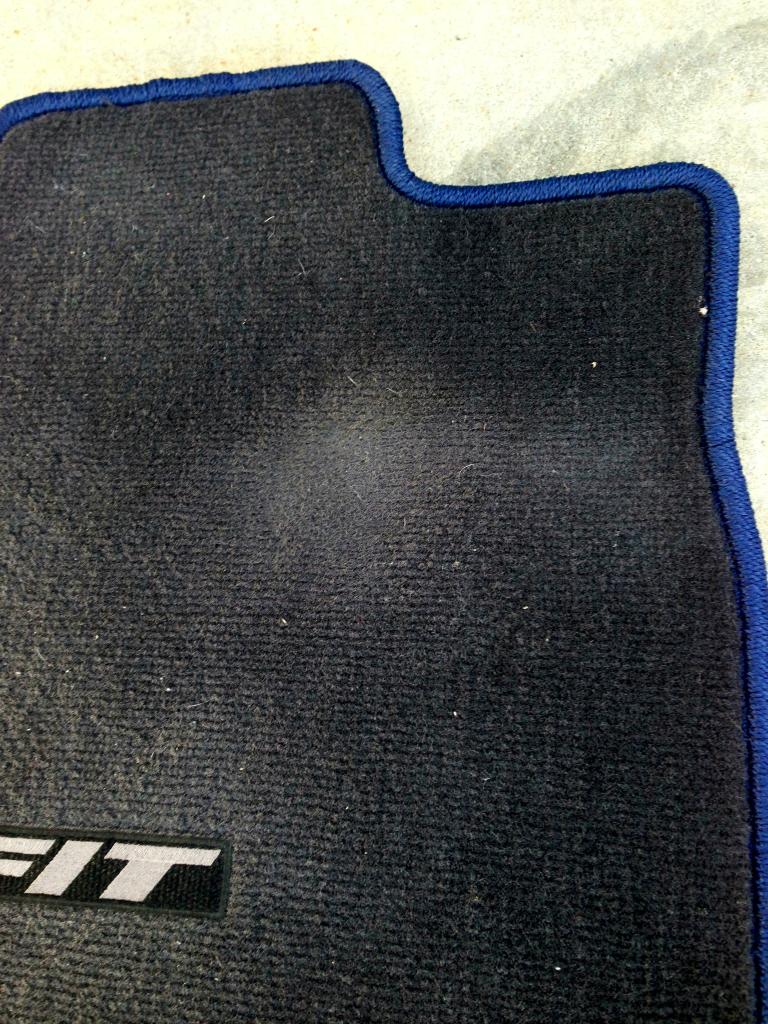
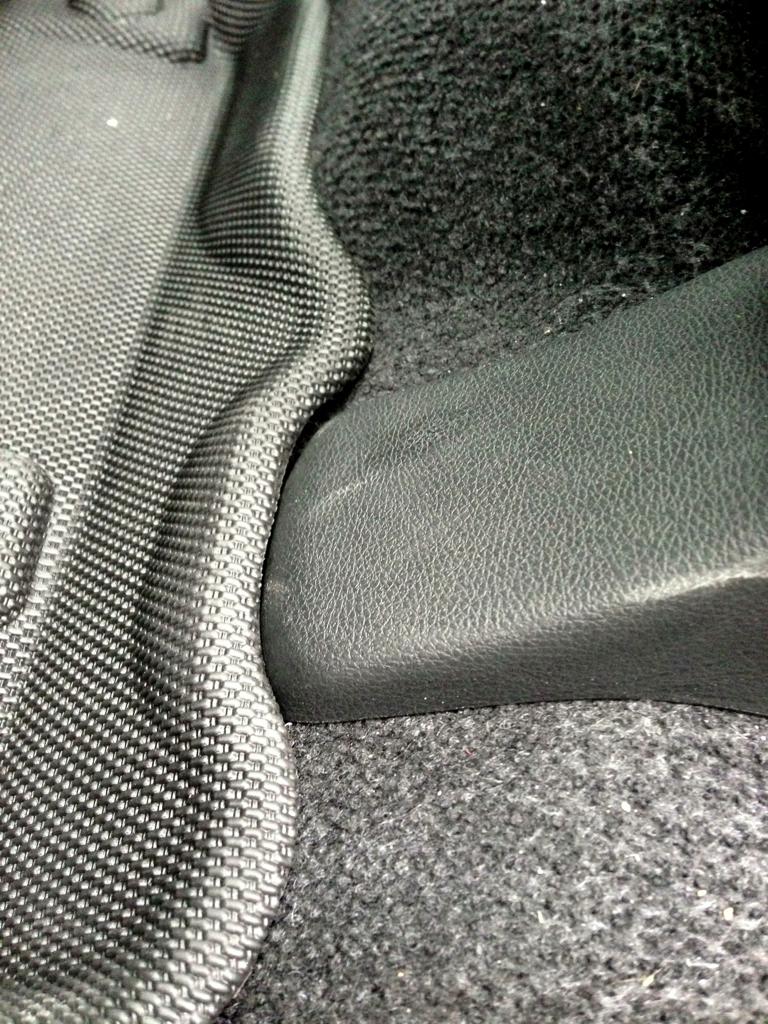
There is a small gap at the right side of the driver's mat that is a problem with the mold. It was just molded incorrectly here and there's nothing to be done. I don't think it's even close to a deal breaker and it is by far the biggest problem:
At the top of the dead pedal there is another gap that is a result of a slightly incorrect molding. Again, unless you have really big feet, covered with mud or ice, you probably won't have an issue with it:
If you press down at the bottom of the dead pedal, a gap will form to the left. This may be a problem if you were to step in (pressure) and your other foot slid in causing debris to fall in. Again, very, very minimal chance since the gap is virtually tiny:
There is a tiny little gap right at the bottom of the drivers seat. It is nearly unnoticeable:
On the passenger's side, there is a gap at the top left of the liner:
This could definitely be a problem if your passenger were to straighten their legs out and angle their right foot a bit:
DIY Rear Bumper Appliqu� - This is a great addition. It will protect a vulnerable area of the car. This is the Honda OEM installation video. Don't let them charge you $30, for 6 minutes of labor, if you think you can do it yourself. Pay attention to his technique in the video. Be careful to only stick it down as you slide the air bubbles out. If you go nice and slow and do it the correct way, you won't get air bubbles.
This is before installation:
And after installation. I know I got it a little off, whatever, it's not the biggest issue to me.
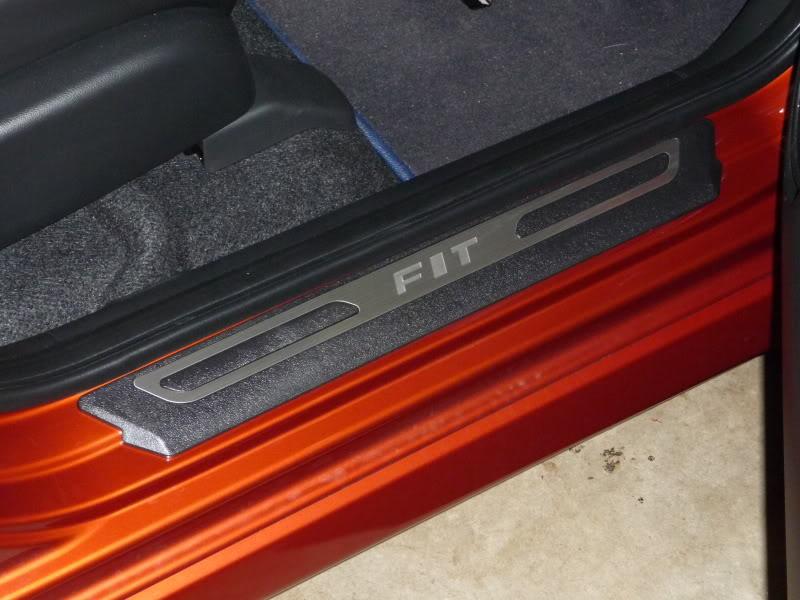
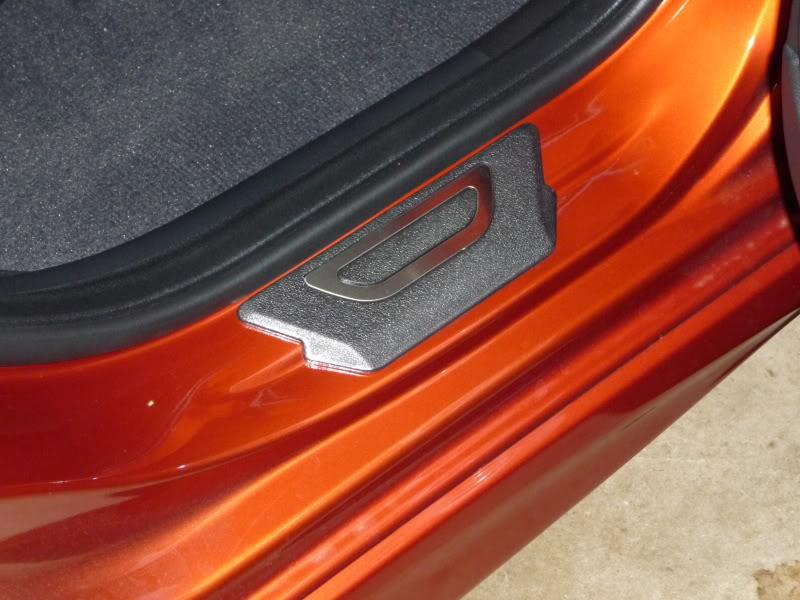
Door Sill Trim - OEM Door Sill Trim installation guide can be found here http://www.hondapartssuperstore.com/...-sill-trim.pdf. I did a very simple version.
Zeta makes a great looking set as well. They are less expensive than the OEM ones but still look good.
https://www.fitfreak.net/forums/zeta...ml#post1101450
1. Use a cloth to wipe the top two layers of the sill.
2. Use the provided alcohol swab to clean the top two layers of the sill.
3. Tear a piece of tape in half (long wase) and barely attach it to the top of the sill and attach like a hinge.
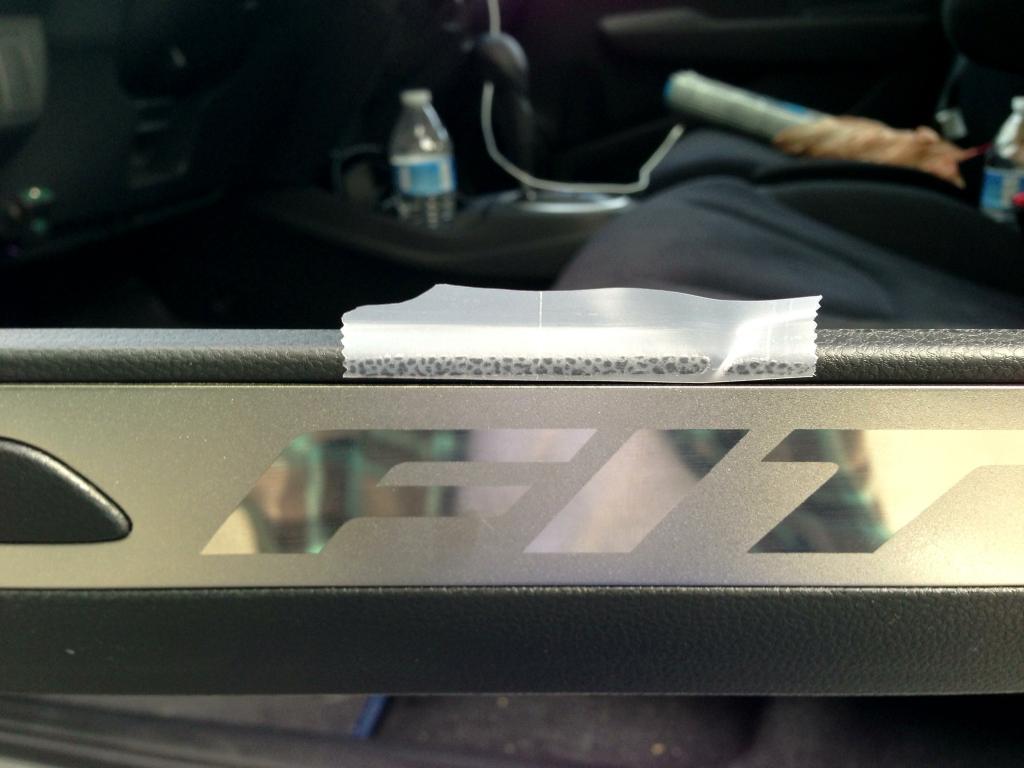
4. Look just into the car and there is a line in the plastic sill to the far left and one to the far right. These are where you line up the ends of the sill.
5. Hold up the sill and peel off the backings.
6. Carefully lower to desired spot.
Before:
OEM
After:
Zeta
After:
Carbon Fiber B-Pillar Trim - this should be the same installation process as for most B-Pillar Trim pieces that are just stick on.
1. Use an alcohol pad or soap and water to clean the B-Pillar.
2. Peel the bottom half of the backing off of the adhesive side.
3. Line up the bottom, directly in the middle of the B-Pillar.
4. Press from bottom upwardsuntil you get to the middle of the piece.
5. Take off the rest of the backing and continue slowly pressing upward to the top.
6. Use a rubber roller or some cylinder rolled in a towel, roll along trim piece from bottom to top, making it stick.
Before:
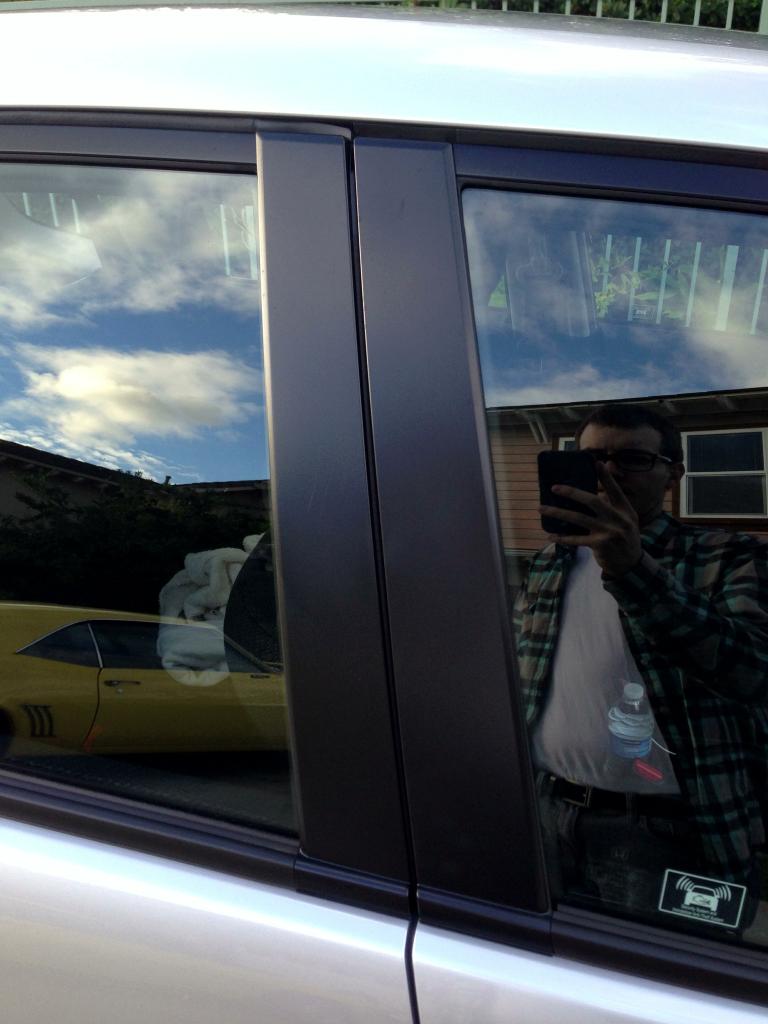
Comparison:
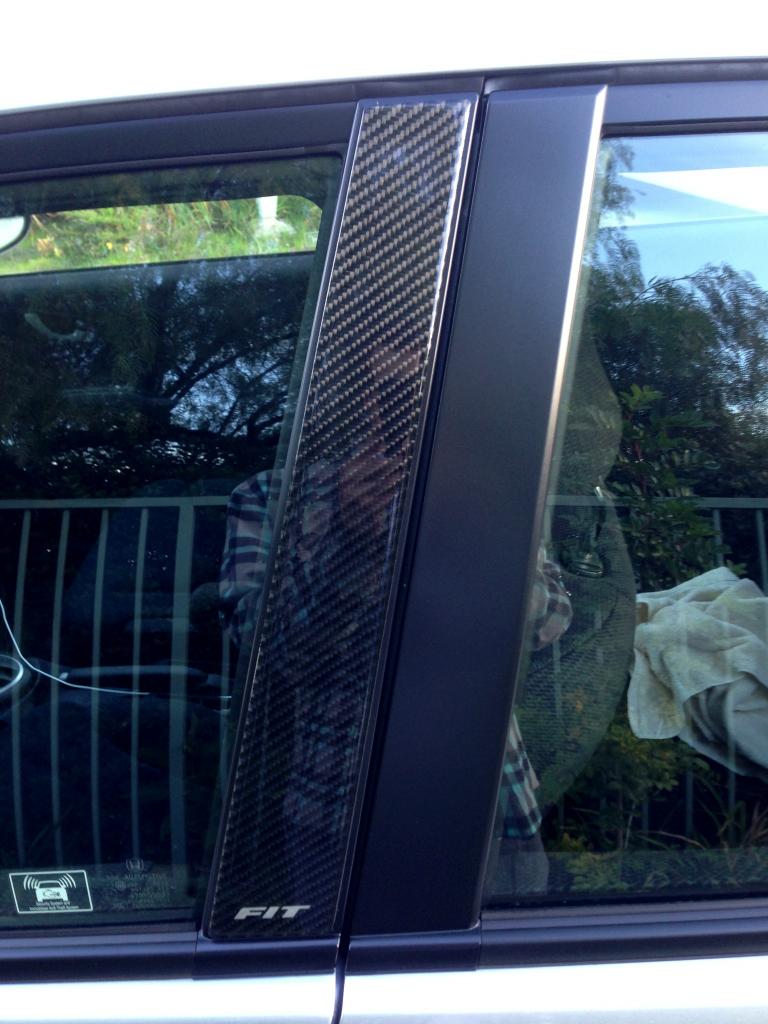
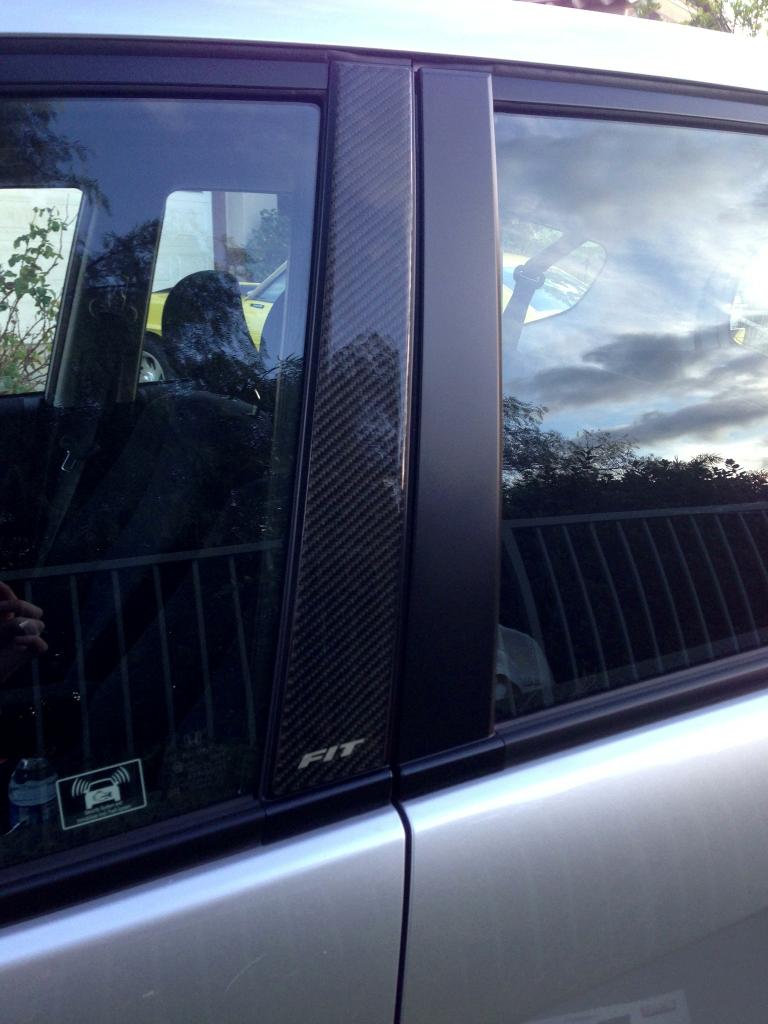
After:

As long as you're careful and you make sure that when it's time to stick, you go nice and slow, you'll save yourself quite a bit of money.
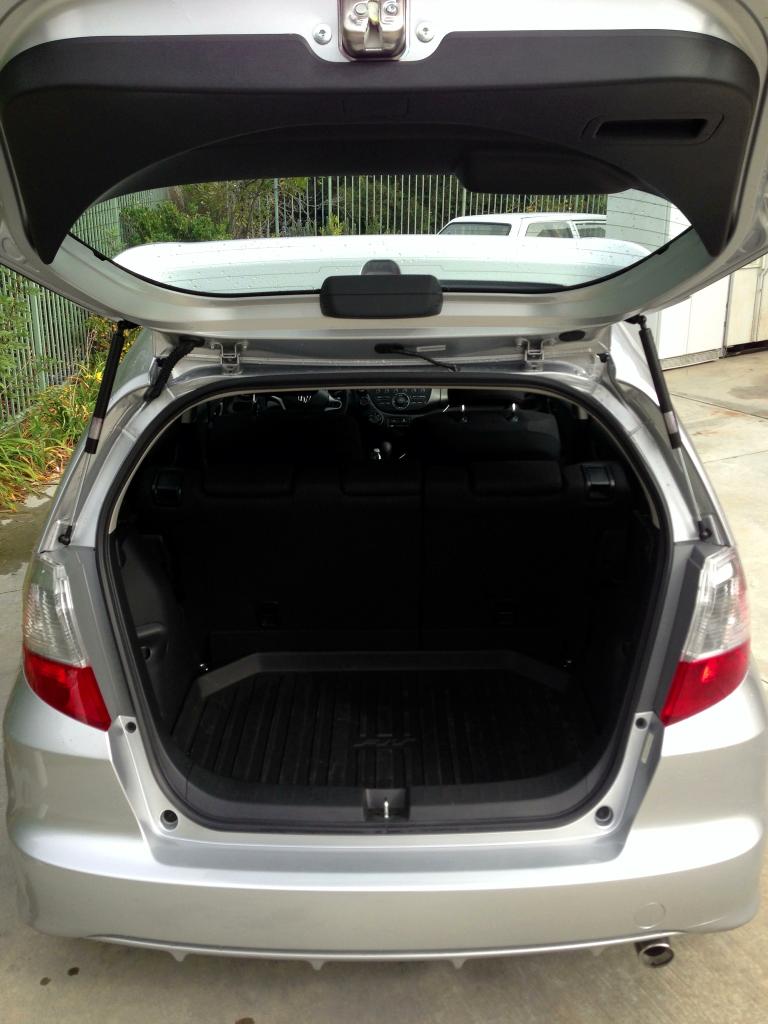
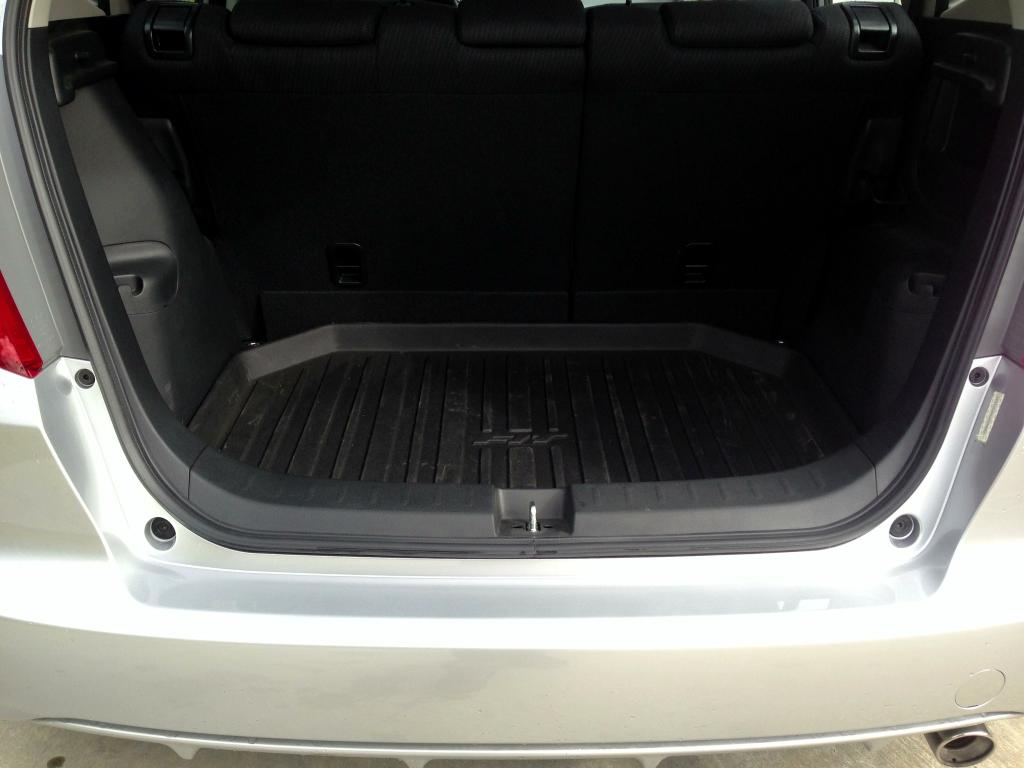
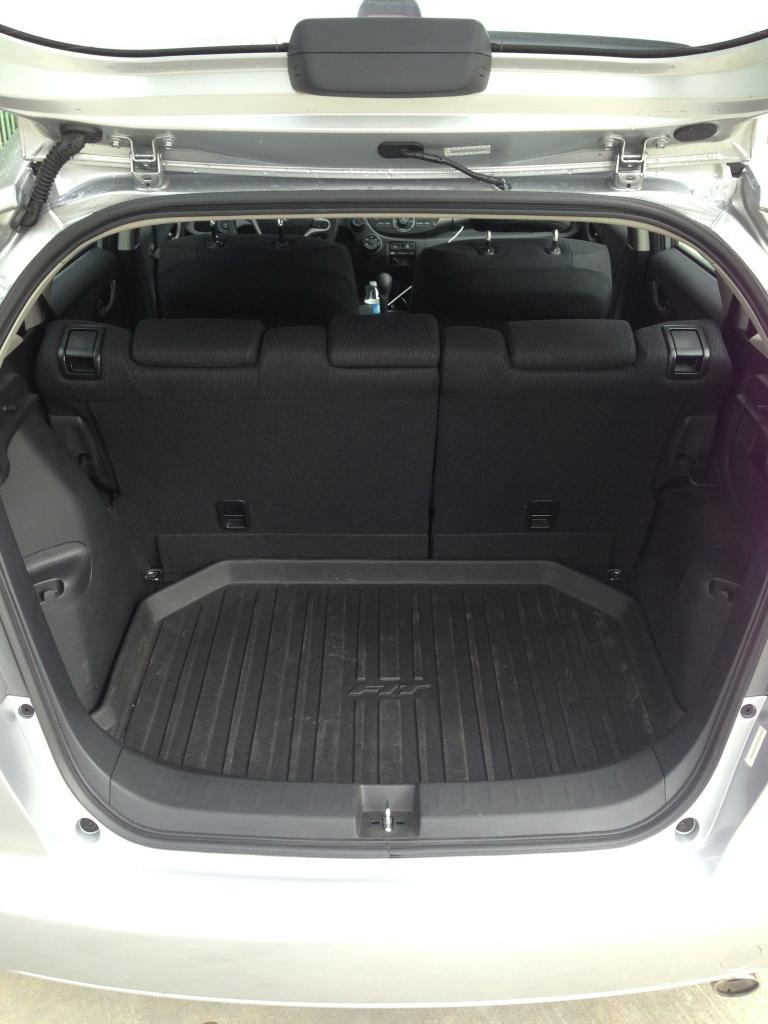
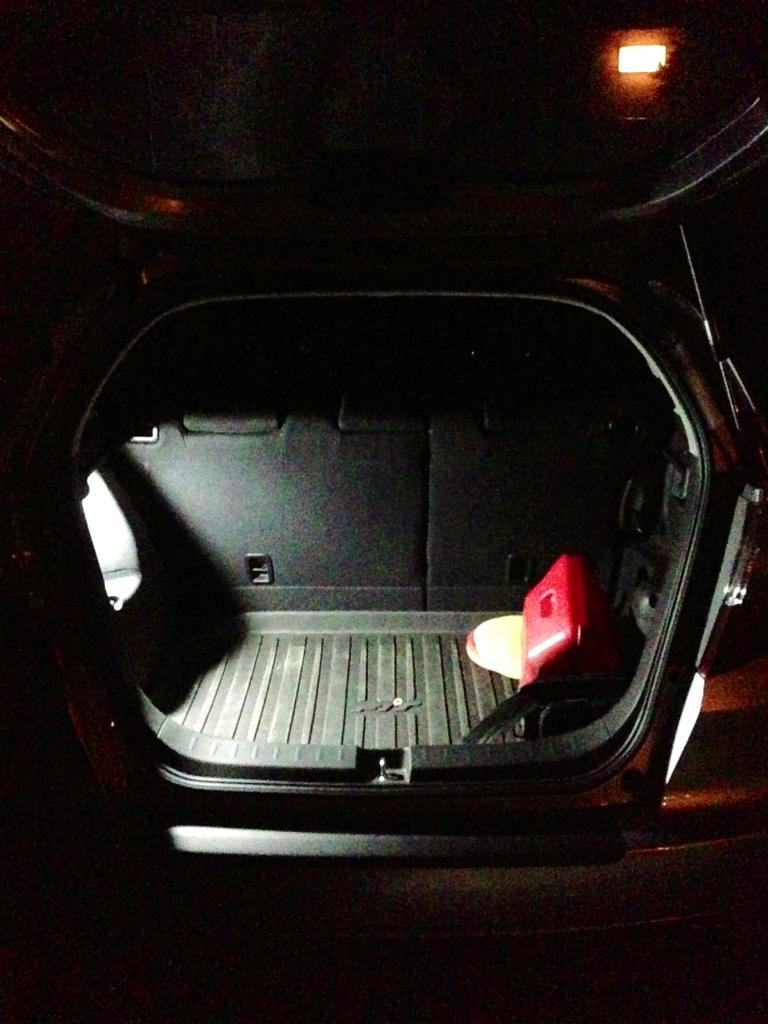
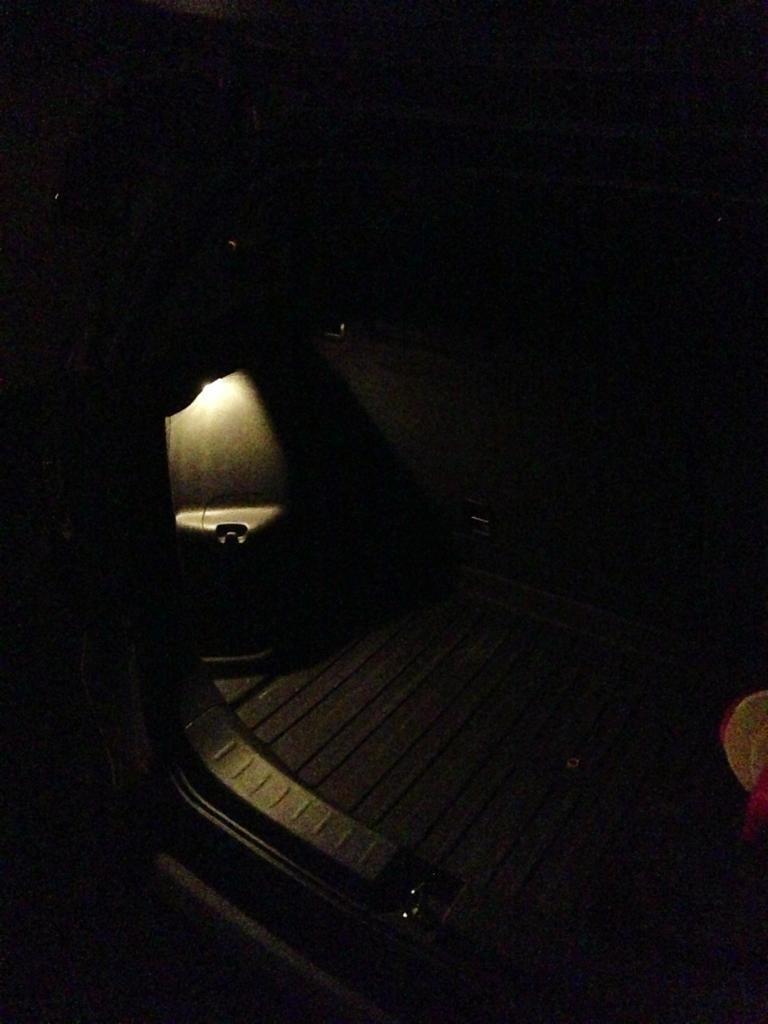
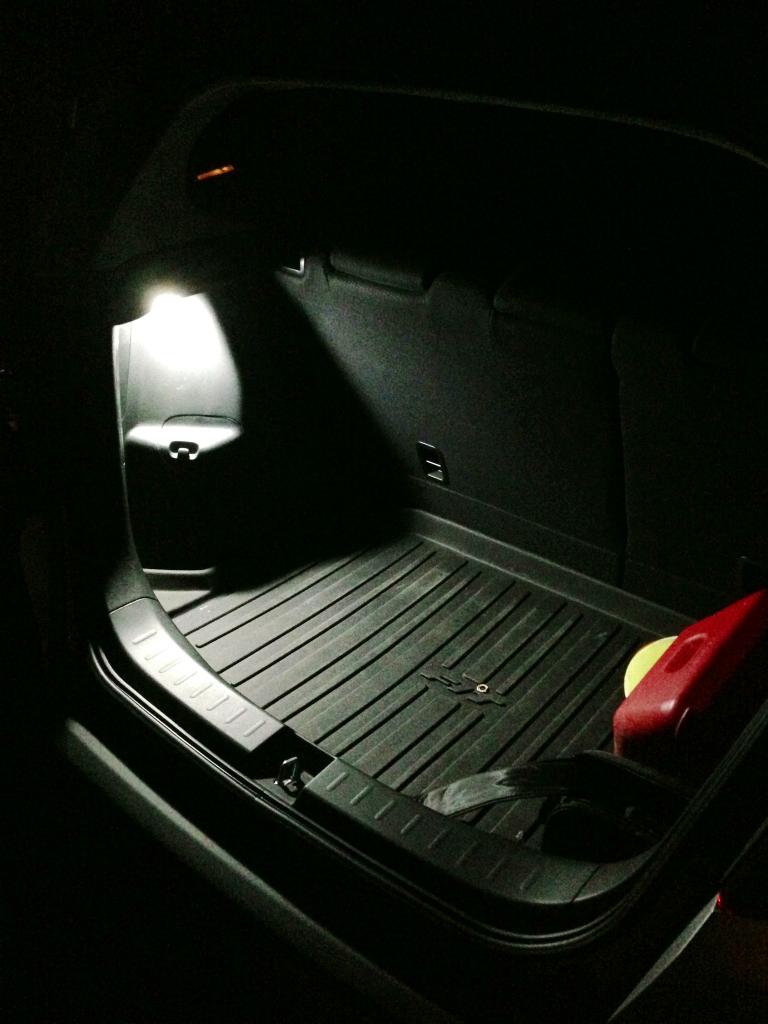
Rear Cargo Tray - There is no installation except to set it in. Here are some pictures of without it and with it.
Not Installed:
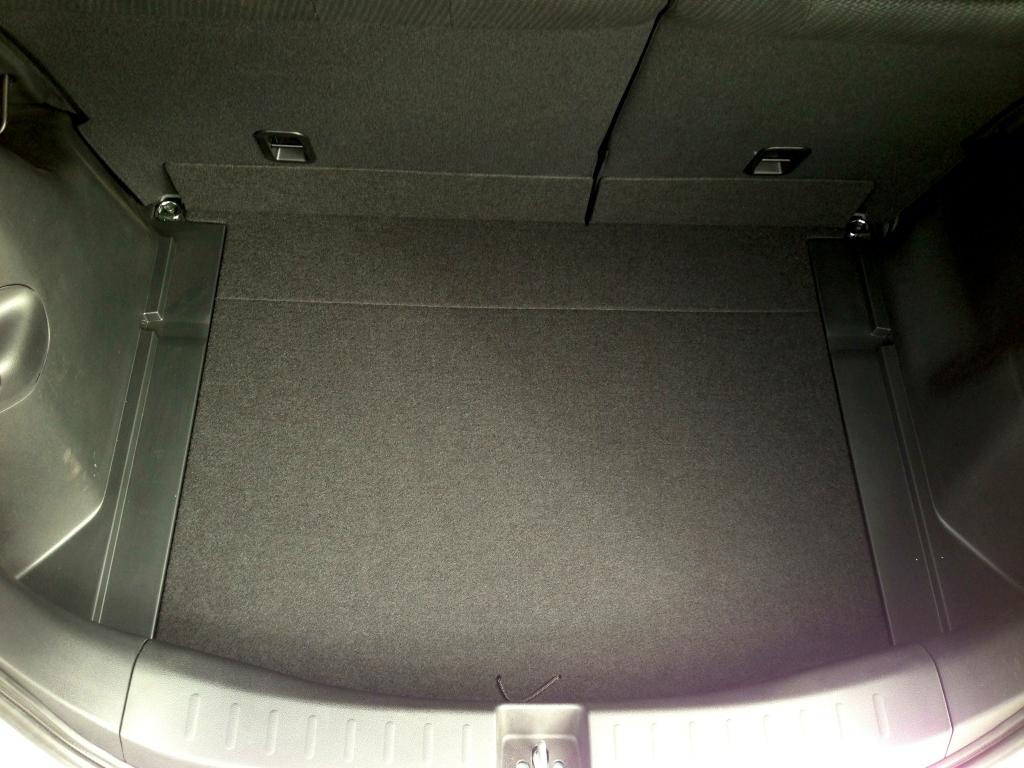
Installed:
Replacing Stock Lighting With LED
*I do not promote changing the brake lights or turn signals to LEDs. This post over at Red filter (tail light lens) - red or white LED? makes a lot of good points that I did not know. Below is a question and response I copied from the middle of the thread.
Question:
"So, with respect, how can people generalize that LED's don't work? Is it just the bulb-replacement types, or are you talking about LEDs in general? I ask b/c tons of vehicles have LEDs now ( I assume, therefore, that you're speaking of aftermarket parts). Also, how can these be illegal?"
Answer:
"LEDs work very well as most of us design around them almost exclusively now instead of filament, halogen, or HID (personally I guess). We are referring to these LED drop-ins that fit directly into your existing housing. They don't work because they rely on your existing halogen or HID reflector, while requieing their own optics/reflectors to meet the same codes and design characteristics as the originals. The vehicles that have factory stock LED lights have the optics/reflectors, heatsinks, etc. that meet the required codes and produce the correct standards of light.
When we say illegal we mean that they are not illegal to sell or even own. Just illegal if you install them as they don't produce the correct required image, or intensity. Also, vehicle codes specify that on road use is illegal. Off road use is not illegal (i.e. true offloading, track cars, and show cars)"
The short version of the thread is basically that LEDs shine in one direction while filament bulbs shine all around. Reflector systems made for filaments will not reflect LED light in an adequate fashion. Turn signals are designed to be seen from many angles, not just directly behind the vehicle. Dropping LEDs in won't cast the correct glow for legal visibility. I believe the "third brake" can be changed to LEDs as long as the regular brake lights are filaments (or legal full LED brake light replacements with reflectors that pass vehicle code).
*However, after reading this thread over on The Acura boards Received my VLED Triton V3 LED park and turn bulbs! A few pics inside! - AcuraZine Community, I believe that these V-LED V3 Triton bulbs might be the first extremely high quality (and brighter lumen output than OEM) LED bulb capable of handling turn signal and brake light duties.
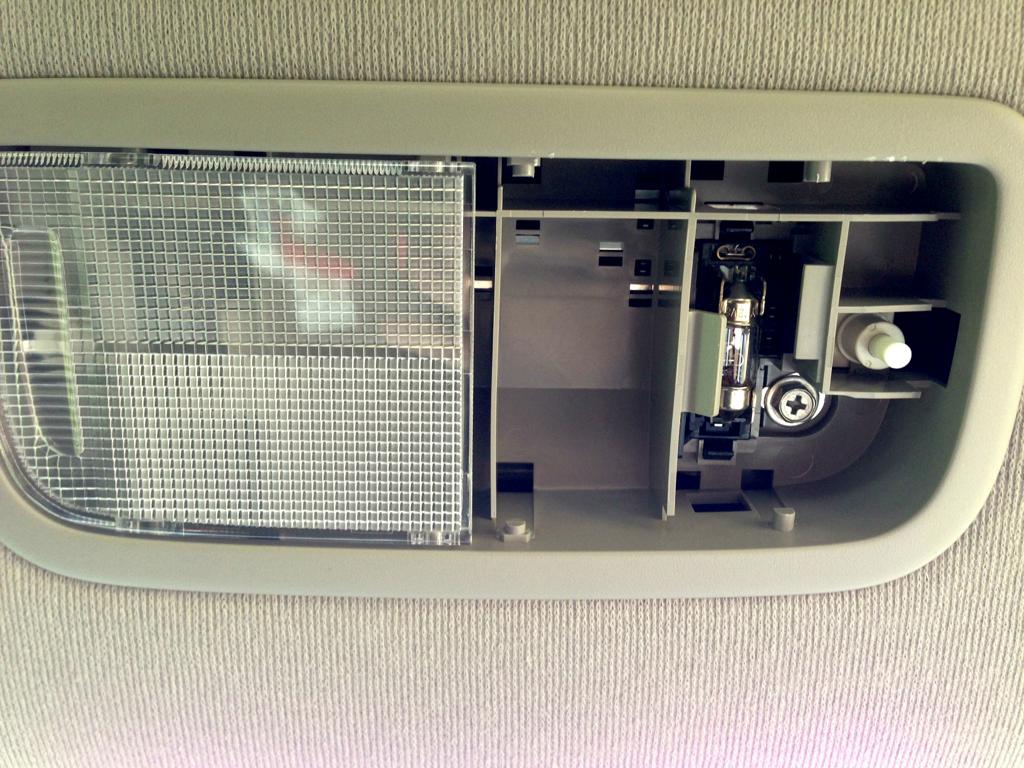
Panel Popper:
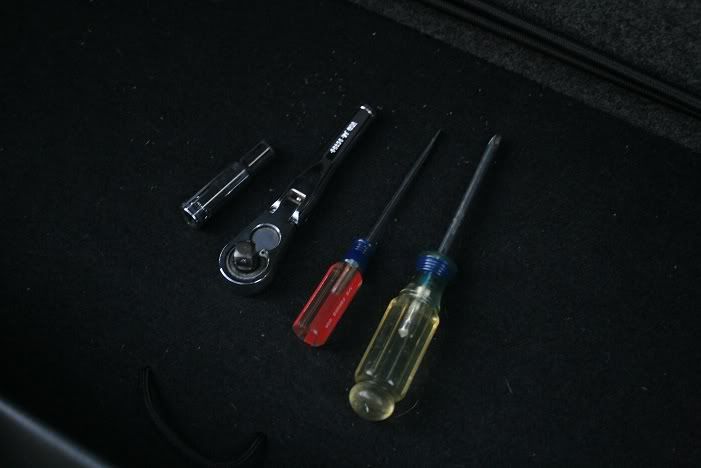
Before you buy any bulbs, I highly recommend purchasing a panel removal tool (panel popper). It makes the job incredibly easy and will minimize any scratches or scuffs. You can find many available at amazon Amazon.com: Panel removal. I purchased the cheap 2 pc orange plastic set and it has worked great. All the interior paneling came off with relative ease. Grip the tool as close to the prying end as possible so you don't put too much force on the middle of the tool and snap the plastic.
Here is a Bulb Replacement Chart:
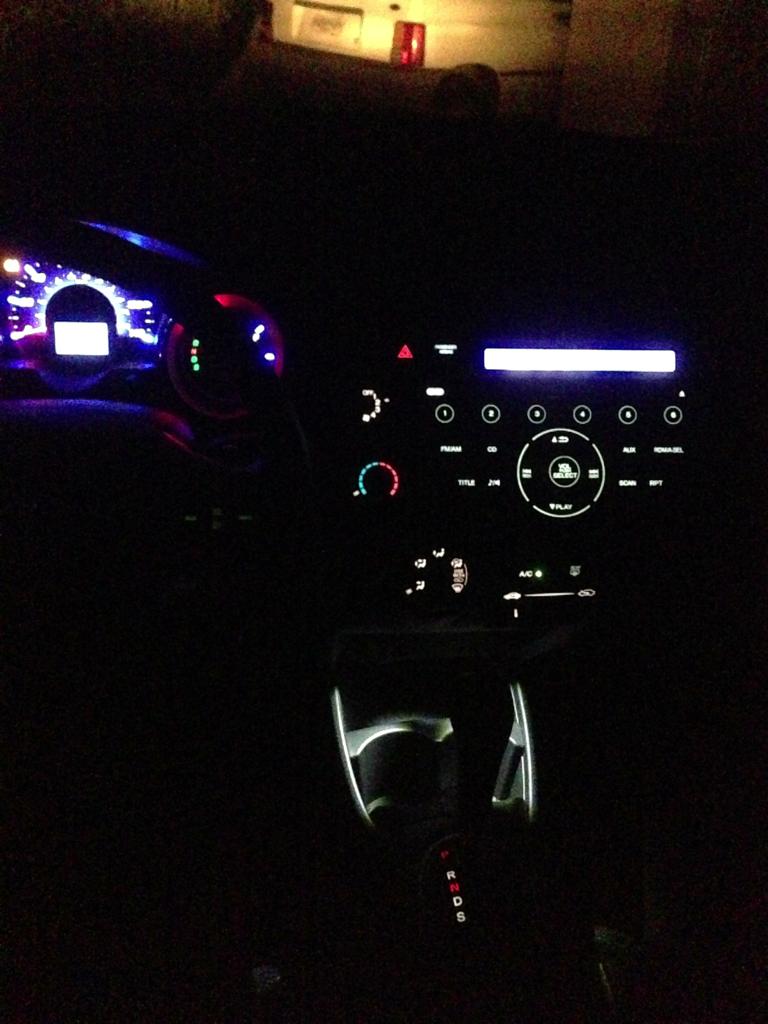
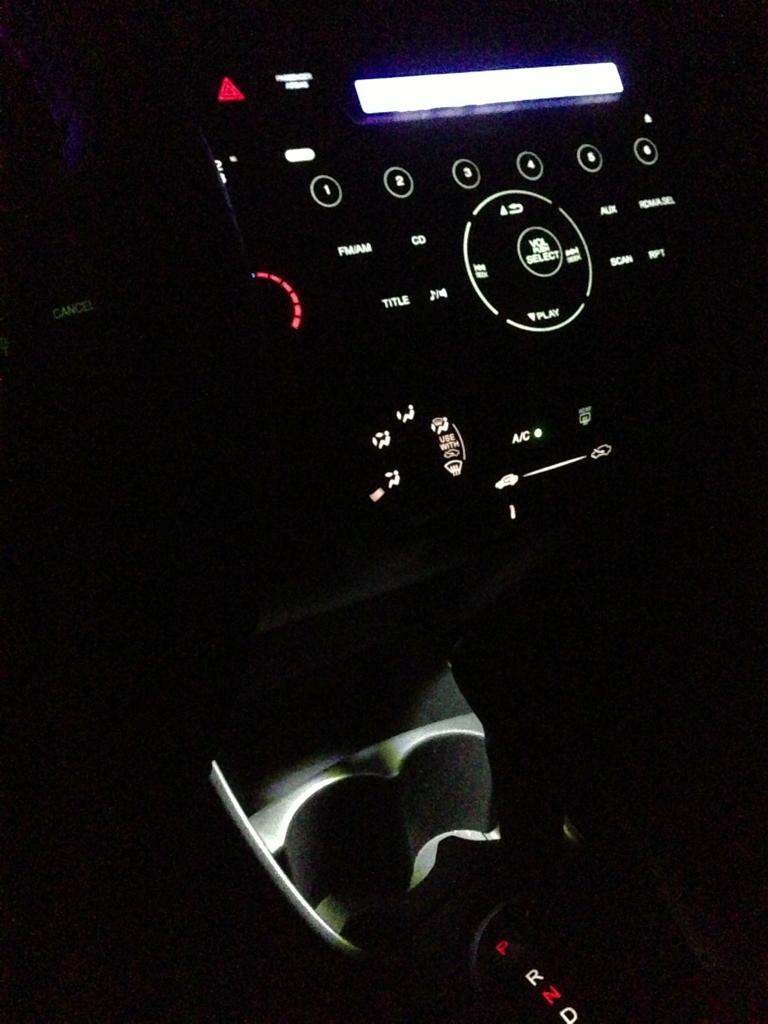
Interior:
Dome light/Map light: DE3022/DE3175
Cargo light: t10 wedge
Cup holder light: 74 LED/t5 flat 12V - DO NOT USE 14V or you will pop a fuse
Exterior
Headlights: 9003/H4
Fog lights: H11
Parking lights: 194
Front turn signals: 7440
Rear turn signals: 992
Brake lights: 7443
Top Center "Third" Brake light: Some are 7440 halogen and some are LED
Reverse lights: 921
License Plate light: t10 wedge
When purchasing the LEDs, the really cheap ones probably aren't as bright as some of the more expensive ones, even if they have the same number of bulbs. Look for Plug and Play versions made for the Fit. IJdmtoy.com and SuperBrightLEDs.com have good ones as well as t1r racing. Users think it may be the best option to do a DIY install in the cargo area for extra lighting as replacing the existing light with LED, may not be enough for some.
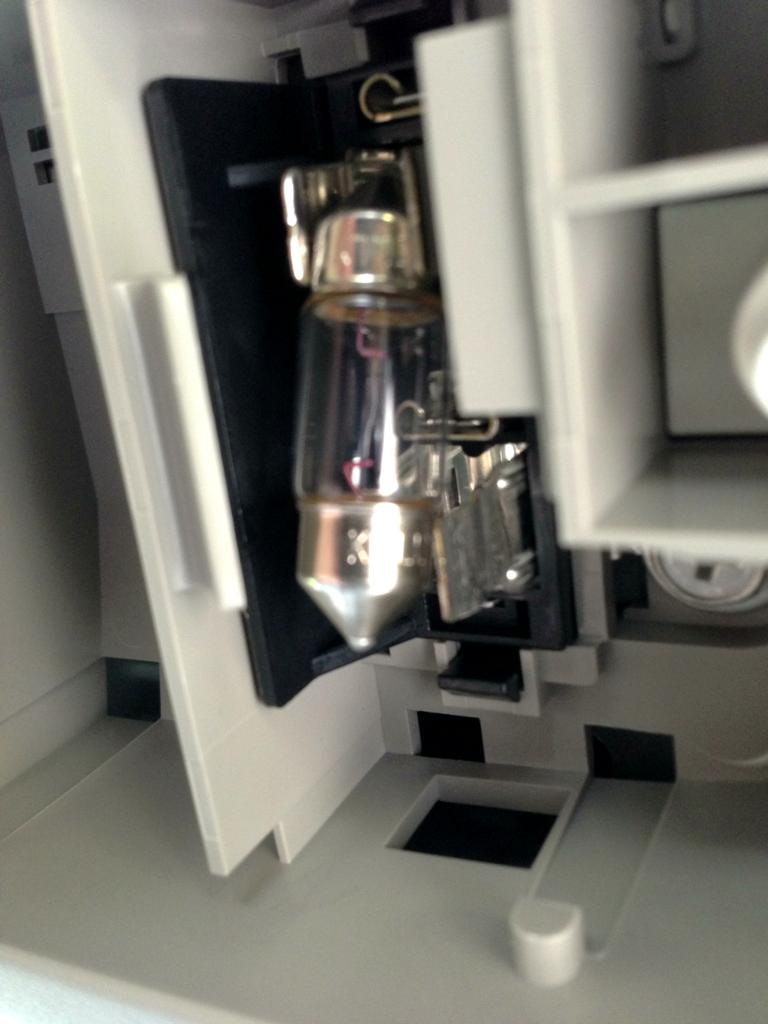
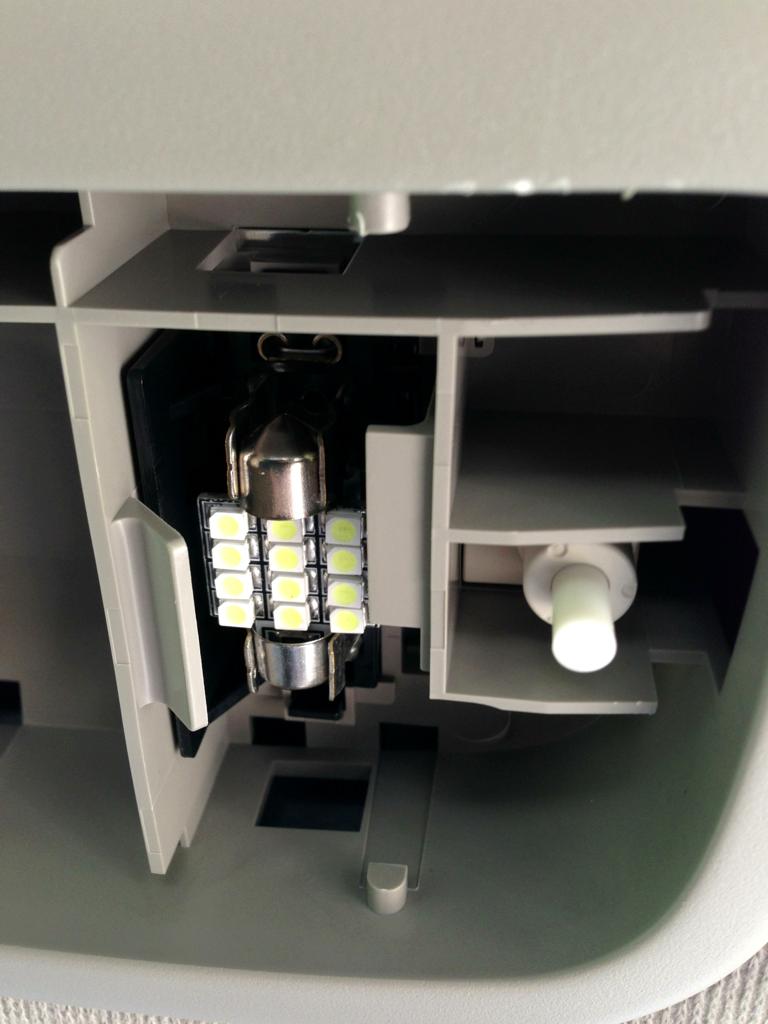
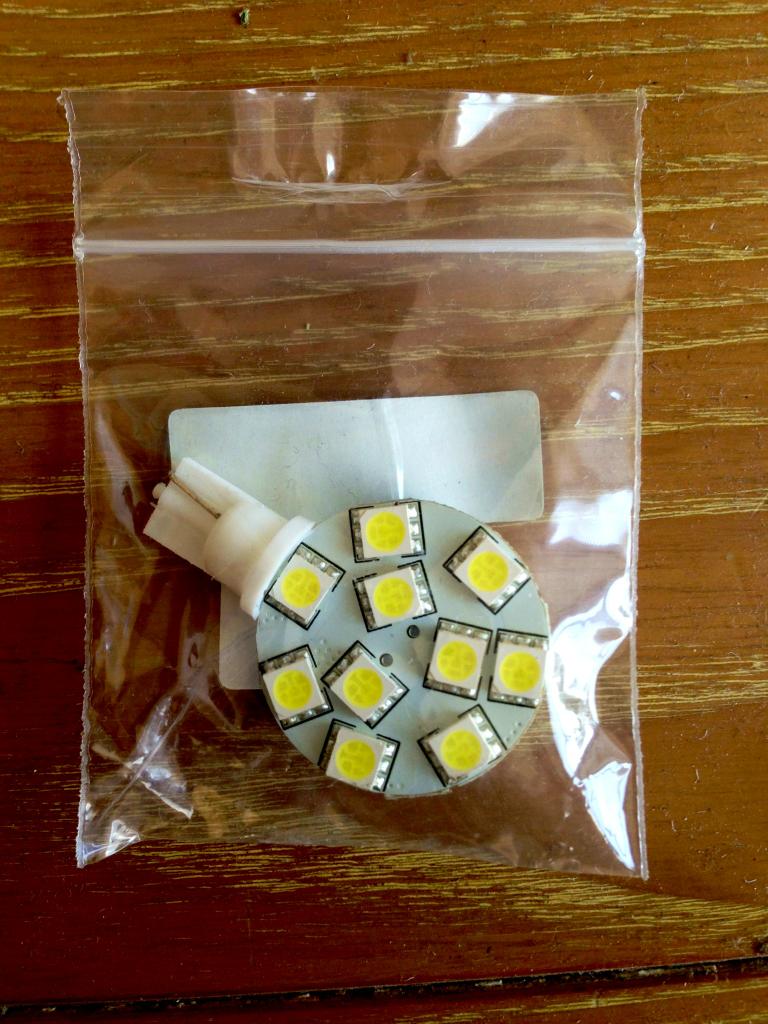
LED Interior Dome Light/Map Light Swap (video also shows installation for License plate light) - This is much higher on my personal list, more like 1 or 2 since it isn't too expensive or difficult to install. Many users agree that the bulbs that come stock in the fit are dim at best. When turning on the dome light or opening the trunk at night, do you find it difficult to see what your doing? If so, then you might want to get an LED Bulb kit. JKID over on another forum posted, what I feel to be, some handy info. $40-$55 for some decent bulbs. Lots of users like the 12 SMD bulbs (12 bulb LED board)
Here is a YouTube video for the install
Here are some pics from my personal install. I purchased these particular LEDs at https://store.ijdmtoy.com/ProductDet...2SMD_D31_SKU91. I like SuperBrightLEDs.com the best because their prices are lowest, the quality is highest, the selection is much, much better than other sites, and they list valuable information about the bulbs such as the lumen amount and the bulb color in kelvin. But ijdmtoy has an ok reputation and they are located less than 50 miles from me so I decided to go with them.
I did not need a towel or soft cloth when prying the covers off. I just went slow and careful. If you pry slowly at the 4 clips, you will not break anything.
Just get your finger under one end of the bulb and pop it out. Then do the other, voila!
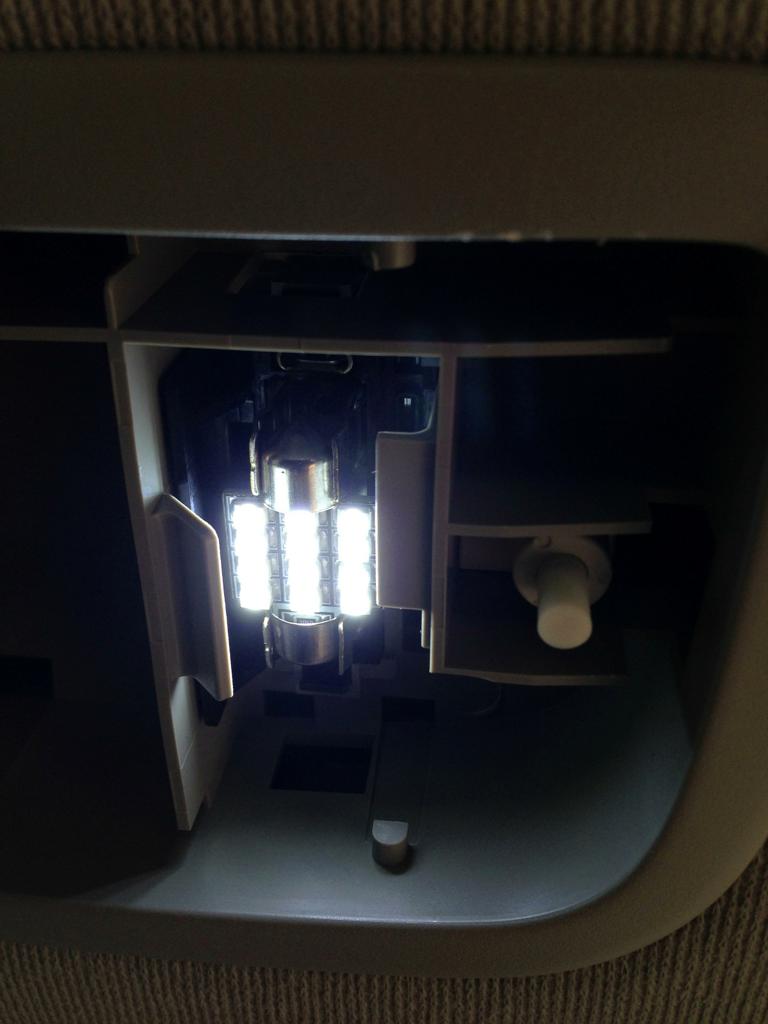
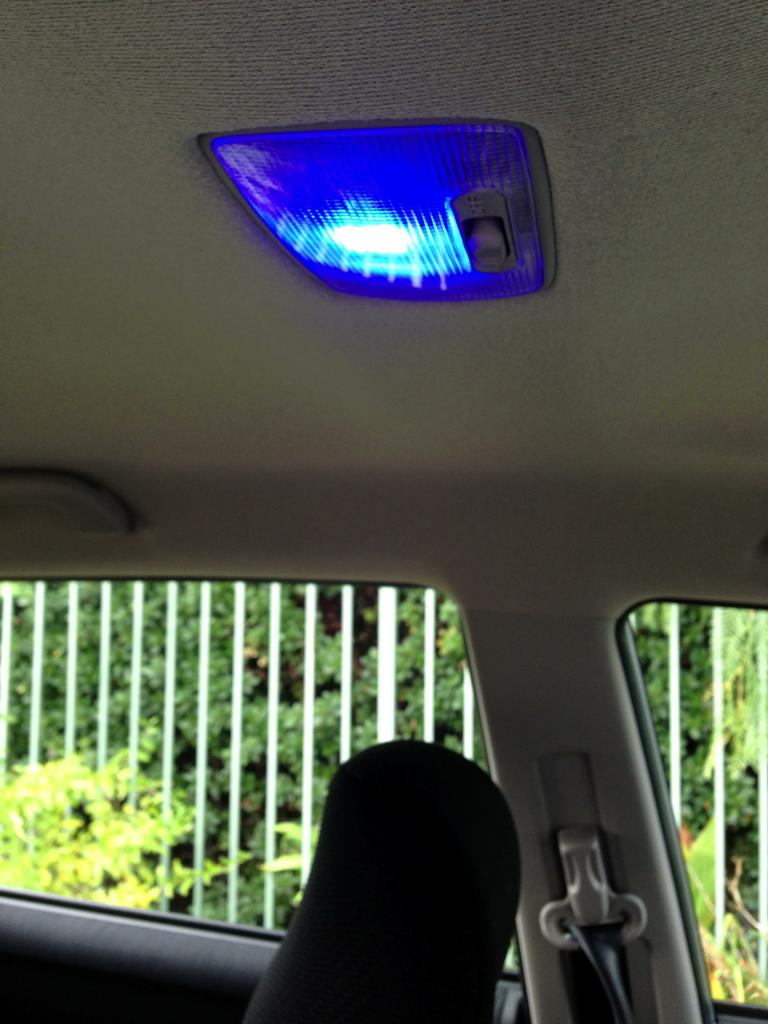
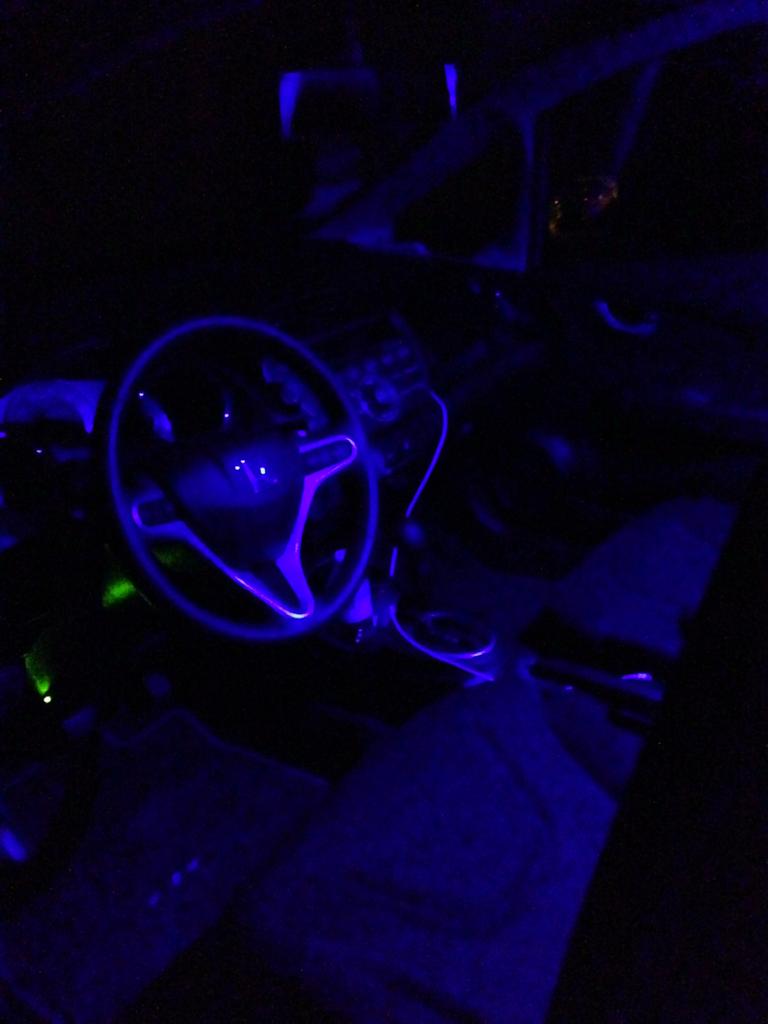
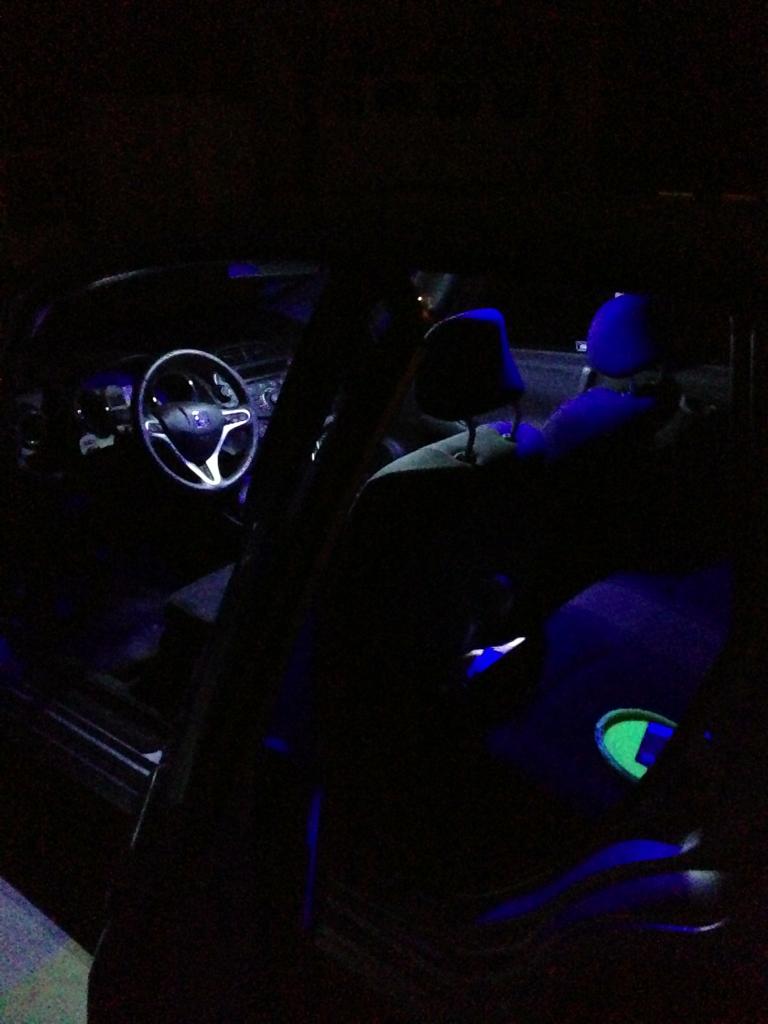
Since I changed my dome light to blue, this is what it looks like when I unlock my car
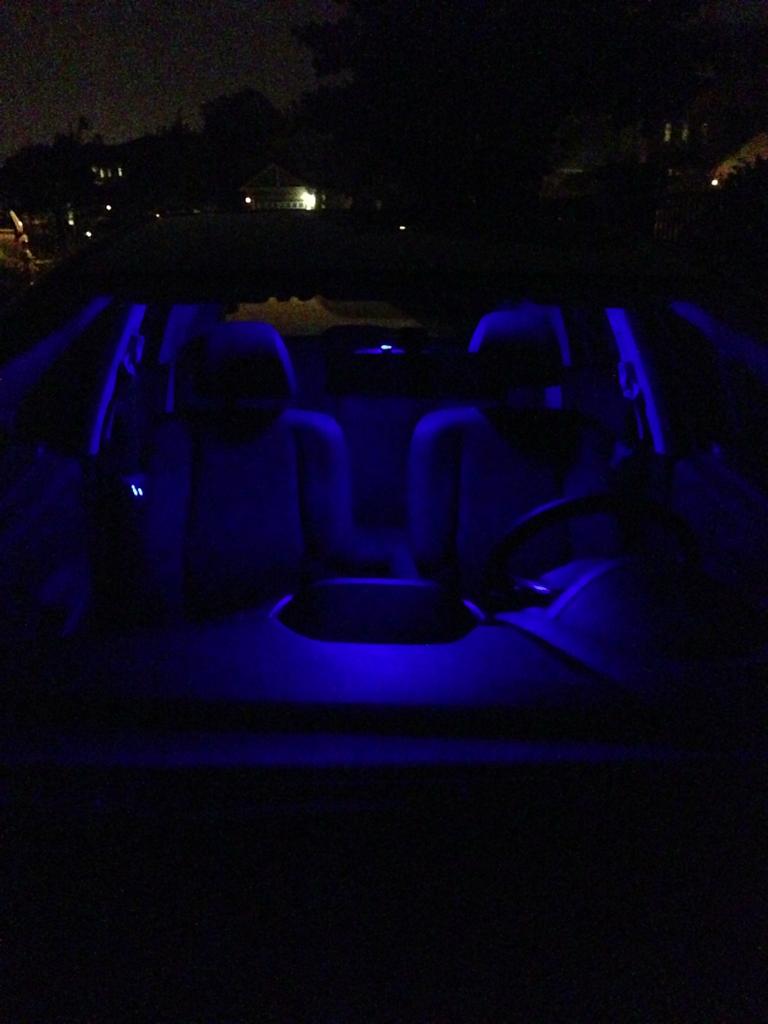
This is what it looks like when I step into my car at night. Just the dome light on.
When I need to search for something in my dark car I can push the new LED map lights.
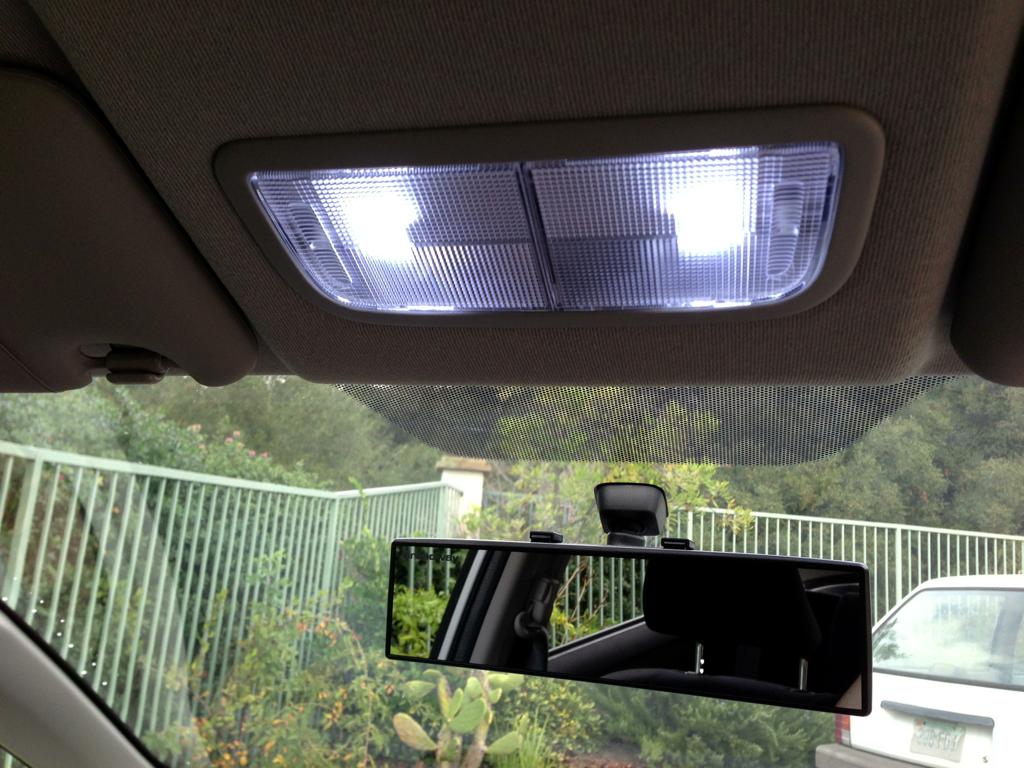
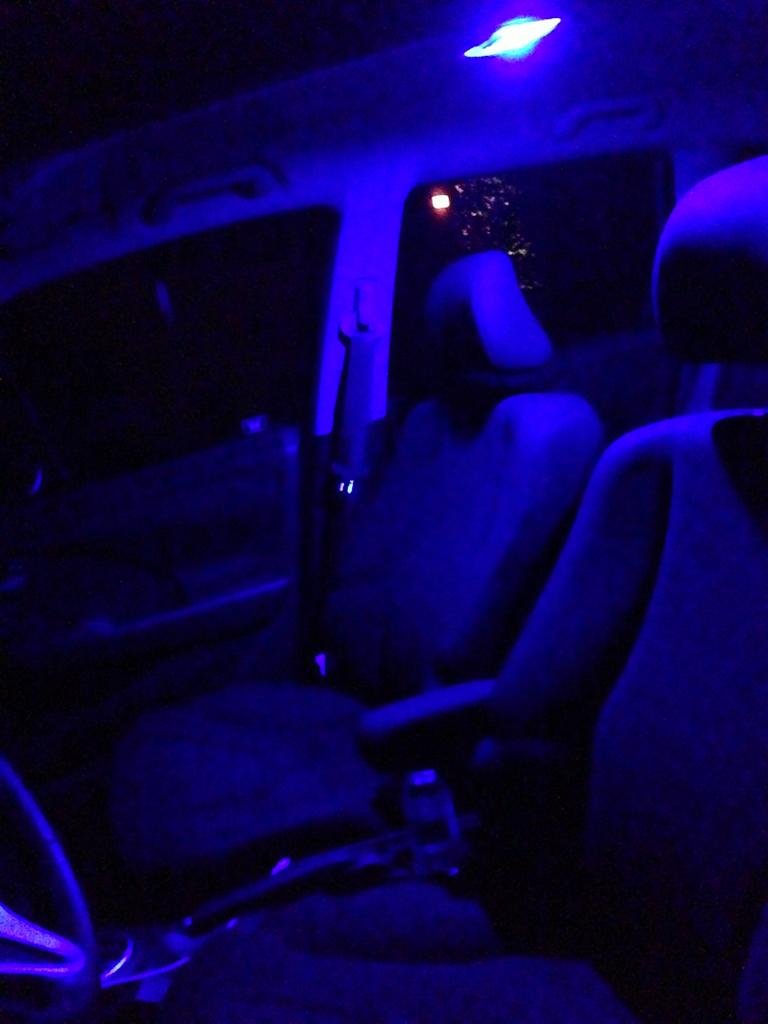
And this is the view from outside the car with both driver's side doors open and the map and dome lights on.
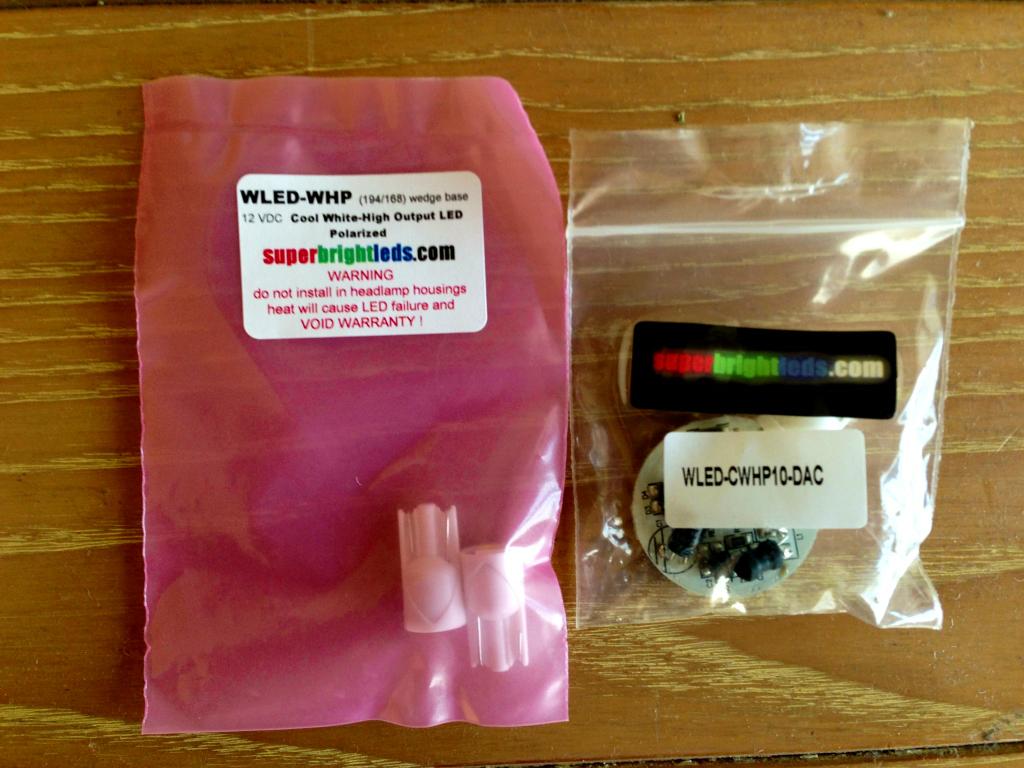
LED License Plate Bulb Swap - The license plate bulbs I purchased are from SuperBrightLEDs.com and they are the WLED-WHP 12 V 194/168 wedge base bulb. 194 LED Bulb - 1 SMD LED Wedge Base | Miniature Wedge Base LEDs | LED Car Bulbs | Super Bright LEDs I think these are absolutely the perfect license plate bulb. I wanted the bulbs to be as close to the same brightness as stock just in the white LED color. That's exactly what these bulbs do. Not super bright like some of those guys you see that are like 2 spotlights on either side of the plate. Way too attention grabbing for me (not to mention idiotic looking). These bulbs require a bit of force to get them in. I had to turn one of them around before it worked.
*Pink Bag*
Before Installation:
After Installation:

Comparison:
Cargo Light Swap: The stock cargo light is weak. Straight up. You probably already know this if you've had to access your cargo trunk at night. Swapping for LED is a great idea. The bulb I purchased is from SuperBrightLEDs.com and is the WLED-CWHP10-DAC. 194 LED Bulb - 10 SMD LED Wedge Base | Miniature Wedge Base LEDs | LED Car Bulbs | Super Bright LEDs It was the strongest side facing light I could find. 165 Lumens at a 180 degree angle. No wasted light like the stock bulbs 360 degree angle. When getting the light cover off, be sure to pry in the top-middle of the cover. It's pretty tough and will definitely pop off with a bit of force. Don't go after the corners, the middle is easiest. This bulb is large. It would barely fit into the housing. In fact I had to bend the 2 little pieces of metal out that used to hold the stock bulb steady. With those pieces out, the new light slipped in much easier. As you can see in the photos, this light is awesome. Much, much brighter than stock, and brighter than any pictures I've seen online. Great bulb.
Before Installation:
After Installation:
Before Installation:
After Installation:
LED Cupholder Light Swap - Want to see your drinks? Perhaps bathe them in a cool blue light? Here's how and then thank Dwalbert:
•After you pop off the bulb housing, just pull the bulb straight out
•If your having difficulty getting a grip on the bulb, hold the little square, where the wires connect to the housing, and twist the housing to the right about a half turn. The housing should come away from the bulb leaving it exposed for a good grip.
The 74 LED 3 SMD (74 LED Bulb - 3 SMD LED Wide Angle Wedge Base | Miniature Wedge Base LEDs | LED Car Bulbs | Super Bright LEDs) bulb I bought would not fit in when I first tried it. If you look in the photo, you can see there's a bit of an edge on both sides of the base. Those little parts that stick out, won't allow the bulb to slide in. I used a metal file to very carefully grind the edges down. Just watch for the 2 little metal strips near the edges. I filed just a bit of a round edge on the corners and it fit right in.
Here's an Install Video
• Just as a side note, I wasn't happy with how much light was getting to the little tray behind the cupholders, so I widened the little triangle to get some more light through. I used a Dremel tool to make a larger hole in the triangle and then used a tiny screw to file the hole back into a triangle shape. I did get one nice scratch on the front of the panel, but I was careful after that. Now everything is much brighter in that region, even if the picture doesn't do it justice.
The New Hole:
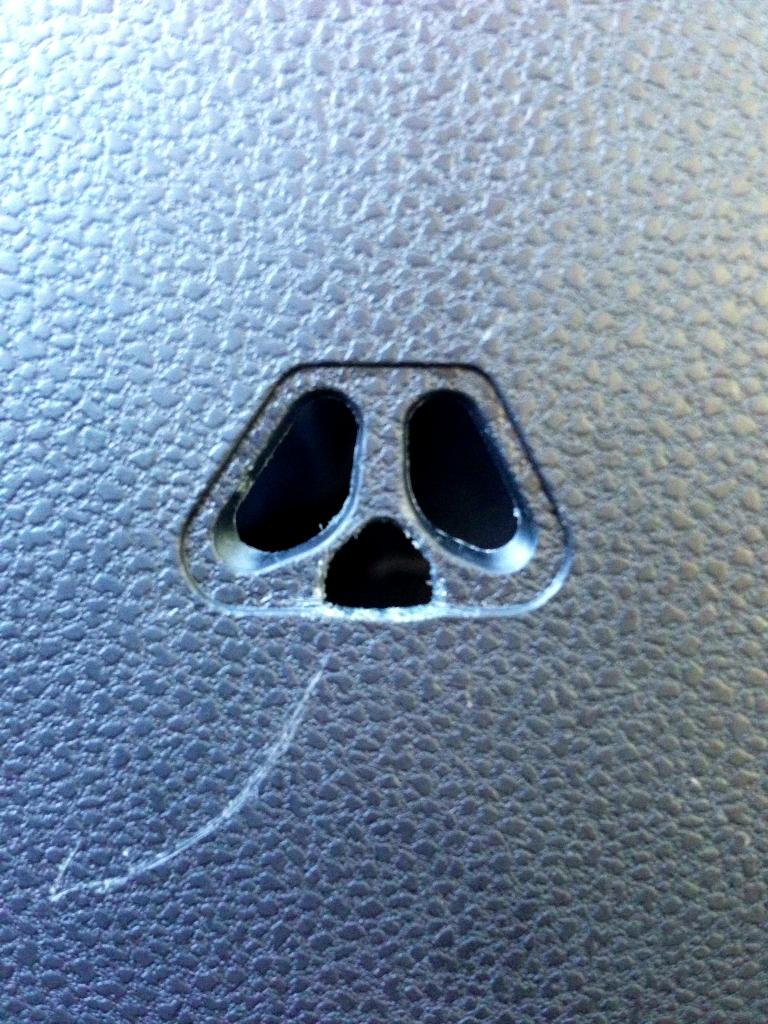
After Widening:
Performance Engine Modifications
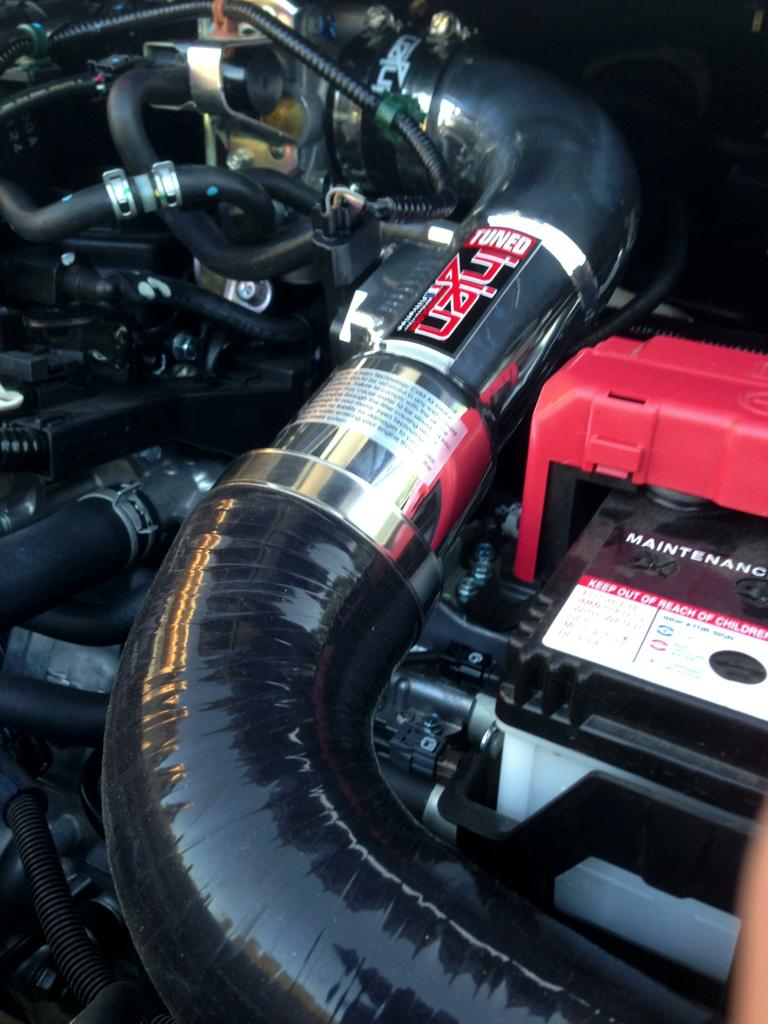
*There are many different things that tuners may advise as your first performance engine upgrade. I will let you decide, based on what goals you have for your car. I got lucky and received a free Cold Air Intake (CAI) so that will be the first thing I cover here.
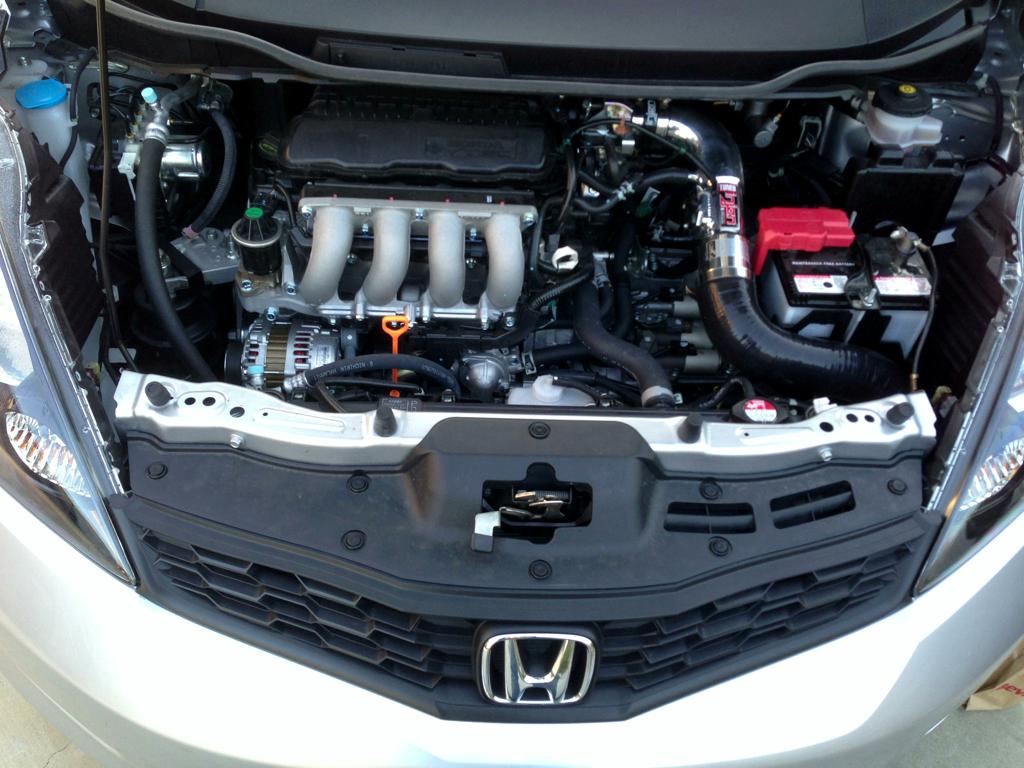
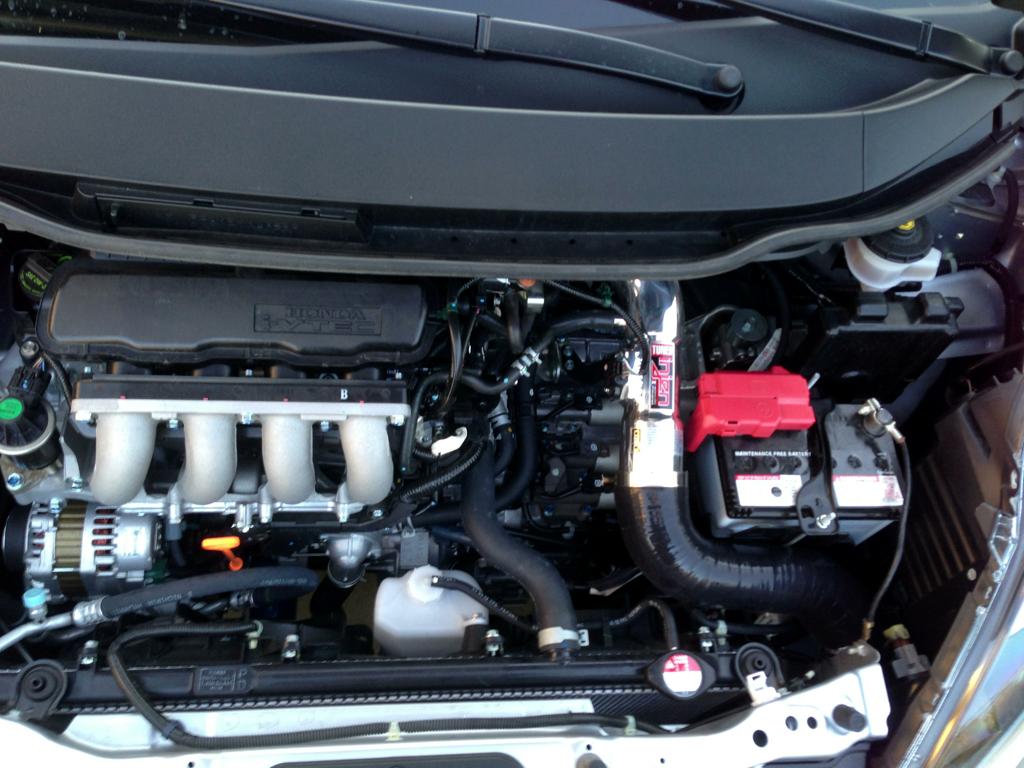
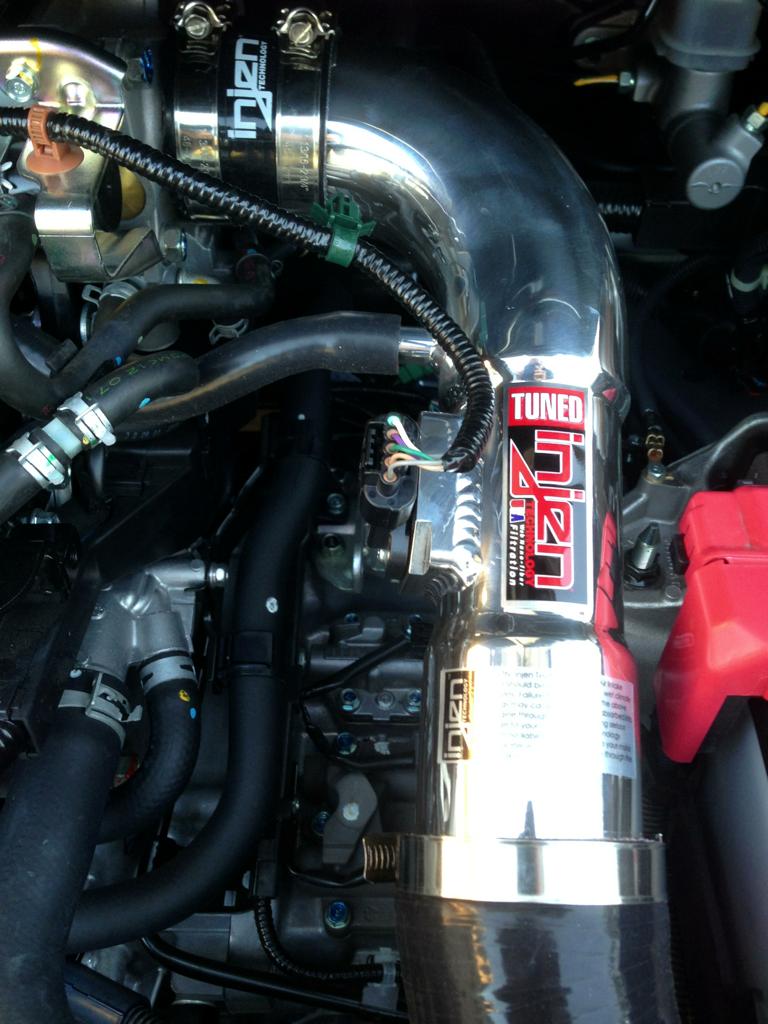
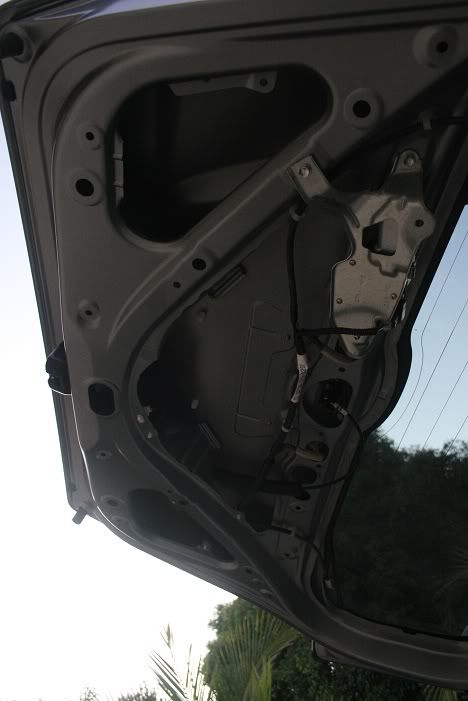
Performance Air Intake - There are 2 main kinds of performance air intake upgrades. The Short Ram Intakes (SRI) and Cold Air Intakes (CAI). I got a free CAI so the pictures and video will be of my Injen CAI installed on my 2013 Fit Sport. I love the sound my car makes with this intake installed. It sounds much more powerful and performance oriented. There is a very noticeable increase in power as well. It has more pull in 2000-5000 RPMs. This is especially evident if you use the paddle shifters. The thing about CAIs is that it relocates the air filter to an area further away from the engine, this receiving colder air. The problem with this is if you live in a perpetually wet environment, or an area with lots of standing water that you must drive through, the air filter can become saturated with water and can lead to hydrolock on your engine. The good thing about the Injen Intake is that it relocates the air filter behind the front bumper, not in the wheel well like most others. Therefore the Injen is far less likely to hydrolock. Another good thing about the Injen intake is that is is legal in California. Many intakes are not.
Quick Jump
•Intro and Top Ten List
•Car Care
•Fuel
•Oil
•DIY Modifications
•Lighting (LED, Halgogen, HID)
•Engine/Performance
Intro
I'm hoping this can be a quick reference thread for new buyers who want to do some upgrades and don't know where to begin. I just got a new Sport and it is a blank canvas. I don't have all the money up front to do what I want but as it comes in, I will be making upgrades. I've been doing some research and I think I have the first 10 things, in order of importance to the longevity of the car/making the car the most functional possible. Let me know if there is something that would be better to have and I will put it on the list.
In my initial purchase I got the cargo tray (pictures below), door sill trim (installation guide and pictures below), rear bumper appliqu� (installation guide and pictures below), body side molding, and carbon fiber b-pillar trim (installation guide and pictures below), so I will not be counting those among the initial list (though I think all are smart purchases for the longevity of the car, except the B-Pillar Trim which just looks nice.
1. Wash/Wax/Sealant - The absolute first thing that should be done when you buy a brand new car is get a good wax and sealant on the body. This will help seal the vibrant color in the paint. A coat of quality wax will help protect the paint from nicks and scratches as well as bugs and dirt. A quality wash/wax/sealant will set you back $200-$300 but will last 12 months.
2. Clear Bra - After having my Fit for only 2 months, I regret not applying a clear bra to the hood and front bumper. The hood slants upward pretty dramatically so it is prone to getting hit by all sorts of stuff. My car already has several nicks on the hood that will have to be touched up. I will be getting a clear bra as soon as possible so I can prevent any more damage from being done.
3. Floor Liners - Protecting the carpet is important. Weathertech is said to shift too much and be too expensive among other things, the OEM Honda mats require DIY cuts into the carpet fabric, and the material is not of high quality, driver's foot will wear a hole. Husky Liners are extremely popular among FF users. People like the price, the quality and the coverage. But there is a new competitor that I personally think might be the best of all. They are the U-ace 3D Floor Liners. They are the same liners as the Aries 3D Liners just without the Aries branding and Aries price increase. On Amazon Aries is $165 for front and rear while the U-ace Liners are $135 for front and rear. The link provided is to a thread by Fitfan2012 concerning his U-ace discoveries. There is a link to where you can buy in his OP. Pictures of the U-Ace Liners below.
https://www.fitfreak.net/forums/2nd-...ners-kagu.html
Husky Liners� - Floor Liners | Floor Mats | Car Floor Mats | Cargo Liners | Mud Flaps | Huskyliners.com
4. Seat Covers - Keeping the seats like new is important, especially if you plan to sell your car down the line. Clazzio makes the best that I have seen. Clazzio Seat Covers, Seat Covers
https://www.fitfreak.net/forums/fit-...t-there-3.html
5. Protective Headlight/Tail Light/Fog Light Film - Whatever color you'd like, clear, light smoke, dark smoke, HID Blue, or Racing Yellow (yellow is considered the most effective color for fog lights). Definitely protect at least on the fog lights, they are very close to the ground and at high speeds, a small rock can force you to replace a light)
HeadlightArmor Clear, HID Blue, Racing Yellow, and Smoke Light kits - Home
Lamin-x Protective Films Mobile
Headlight Protection
6. Tint - Check your state's tint laws for how dark you can go. Most people go with a 3M scotchtint at a good shop, for about $250. 3M also has a much higher quality film called 3M Crystalline that is $400+. Huper Optik is the best IMO but pricey at $500.
Window tint & window tinting for your car or auto - 3M US
Car Window Tint and Auto Window Tinting Film
7. OEM Cargo Organizer - Users say it really helps things from sliding around. The Cargo Tray will not keep grocery items and small things from sliding if you take a corner hard. I took some books to donate to the library and the box slid back and forth, spilling a few books along the way. The cargo organizer is $60 shipped on Amazon, read the reviews.
8. Rear Sway Bar (RSB) - Many users praise the Progress RSB for about $170. If you don't drive aggressively or track your car, this may not benefit your driving style. This is for those who are looking for less body roll in the corners. Progress Technology: Anti-roll bars, sport springs, coil-overs, camber kits and more since 1995!
9. Sport Springs - Swift and Eibach are two popular springs. They lower the car, stiffen the ride, and will greatly increase handling. Just like the RSB, if your not an aggressive driver and you dont care about lowering your car, then there is no need for these.
Swift Springs USA
performance-suspension.eibach.com
10. Sport Pedals - After you've worn the OEM ones a bit, try Zeta, Mugen or Honda Sport.
09 + Honda Fit Racing Pedals w/Dead Pedal Cover
2009-2013 Honda Fit Mugen Accessories - Genuine Mugen Parts
11. Good Tires - Tirerack.com and FF users like 205-215 and 50-55 on 16" wheels) Some tires that FF users have given positive reviews of: [B]Yokohama S-Drive (warm, dry weather), Yokohama AVID ENvigor (all season),
12. Lighter Rims - I bought a brand new vehicle so I personally want to hold off on purchasing lighter wheels until I have fully worn out my OEM tires, plus the set of quality tires I plan on purchasing. That way, not only do I get some life out of my rims (which I like the look of) but I will also be able to see the performance increase that upgrading the wheels would bring (having already driven a set of quality tires on the old rims). This is a personal decision for me but MANY USERS consider lighter wheels and stickier tires to be one of the most noticeable upgrades available for the Fit.
13. Brake Pads - By this time you might be needing new pads, Hawk HPS and EBC Greenstuff are going to make a difference.
Hawk Performance Brake Pads: High Performance Street
Greenstuff Brake Pads Products Index
Car Care:
There is a fantastic section on car care here on fitfreak. Check out the stickys at the top for essential information.
Fit Care - Unofficial Honda FIT Forums
Fuel:
Wondering about different gas octane levels (87, 89, 91, 93)? There's a thread for that.
https://www.fitfreak.net/forums/1st-...m-gas-mpg.html
Many users believe that the car's internal computer will use slightly more aggressive throttling on high octane gas. Less throttle response time. From personal experience, I agree with this. When running 91 in my Fit, I felt like it was jumpier off the line. Users believe the MPG will either be slightly worse on octane or will be basically unaffected. It will also not keep your engine running cleaner. Use Chevron with Techron every time if you are concerned with engine cleanliness, and fuels that actually make a difference. The reason I say this is, from what I've heard (can't find source atm) the major auto companies get Chevron shipped from 500 miles away when they do their MPG testing, as there are no Chevron gas stations in Michigan. I wouldn't completely quote me on that but I bet if you used Chevron every time it would do nothing but good.
There is some great information from the EPA concerning fuel additives here:
http://www.epa.gov/otaq/consumer/420f11036.pdf
And a good test done with 4 leading fuel additives:
Oil:
Wondering whether it is worth it or not to go Full Synthetic on your first oil change? There's a thread for that.
https://www.fitfreak.net/forums/2nd-...neral-oil.html
DIY Section
*Disclaimer: The following is provided as a GUIDE ONLY, and neither myself, nor FITFREAK.NET endorse, recommend, encourage nor take any responsibility for the outcome of someone else doing the following. You follow these steps at your own risk!*
DIY Lower Grill Mesh Protection - I recommend doing this in your top 3 modifications. I only put it down here because the DIY is sort of long to explain. Basically, as you drive, there is a chance that rocks can get through the front grill and damage the AC condenser. There are threads dedicated to this https://www.fitfreak.net/forums/2nd-...replacing.html. Here is the DIY as described by Firefox91:
I thought I'd also point out details about getting the cover off, if you don't already know.
That black cover is coming off. See those 8 little circles? They are clips:
Get your flathead and pop the center up:
You can see that it's a little clip now. Pry the rest of it up:
Take them all out:
Pull the cover out:
Slide your cut piece of mesh down in:
This is the first tie to hold it in place for me:
Note* When you put the clips back in, they have to be in the "popped open" position, and then gently slide it into the hole before pushing down on the top. If you push down on the top before its all the way in the hole, the clip will pop closed and it won't fit through the hole.
Here is my grille. I have a base model so the opening is different. The openings appear to be larger than the sport model!  Oh well, it is fixed now.
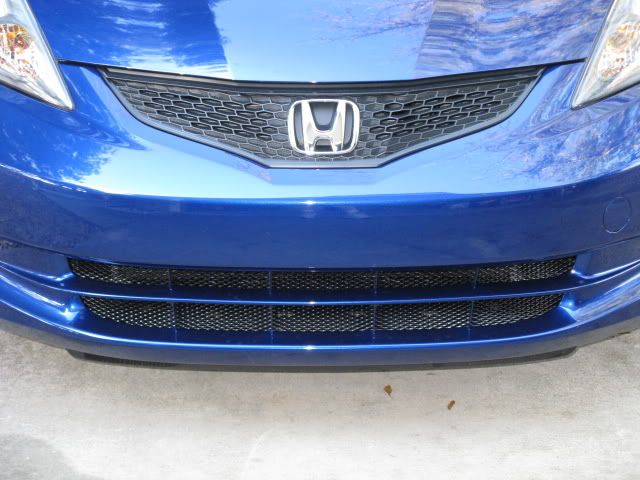
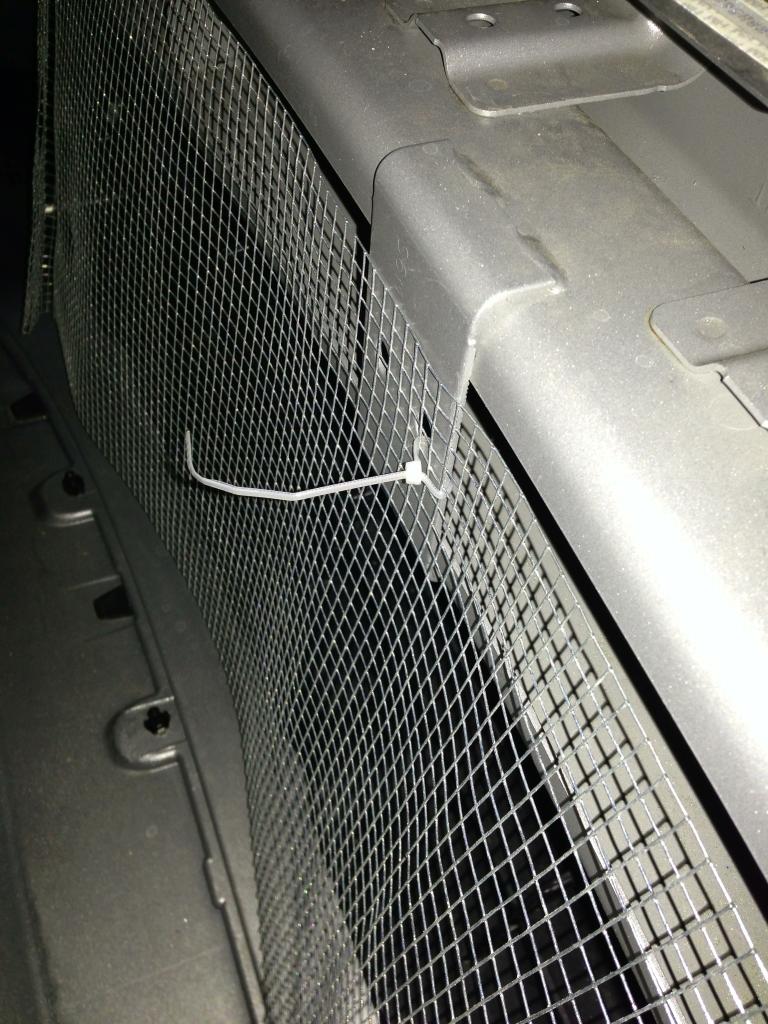
See the zip ties? No?
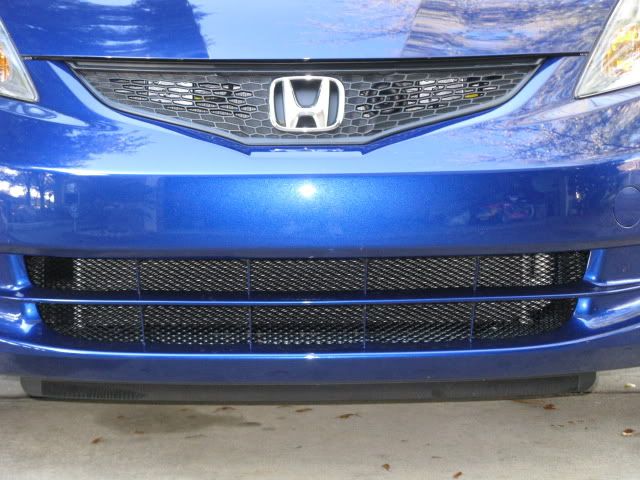
How about now? You can't see them when standing in front of the car because of their position. You can't even see that that well when looking right at them.
This is the mesh that I bought... eBay Motors: UNIVERSAL BLACK ALUMINUM MESH GRILLE GRILL 12" X 48" (item 270345393847 end time Mar-17-09 21:11:22 PDT)
Installation was not bad at all as I did not have to remove the bumper.
1. Open hood.
2. Remove the clips holding the top cover on.
3. Use a piece of cardboard to make a template.
4. Insert cardboard down into the grill and press forward.
5. Trim areas needed and refit.
6. Trace cardboard template onto mesh by scratching the mesh with a screwdriver or some other sharp tool.
7. Cut mesh.
8. Slide down into bumper. Will only have to bend it slightly.
9. Push forward as far as you can.
10. Find the tabs that are on the back of the stock grill. (Rectangles in pic below.)
11. Cut holes in mesh around those tabs with wire snips and push over them.
12. Use zip ties to secure in locations on pic below. (Circles in pic below.)
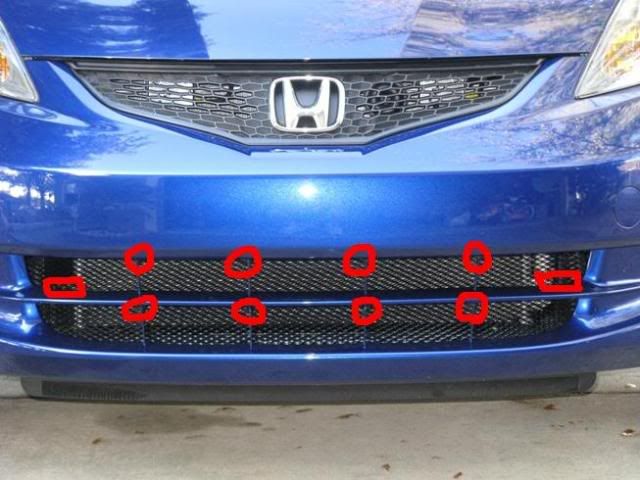
Sorry about the 3rd grade photoshop. I'm lazy but you get the idea.
Oh well, it is fixed now. See the zip ties? No?
How about now? You can't see them when standing in front of the car because of their position. You can't even see that that well when looking right at them.
This is the mesh that I bought... eBay Motors: UNIVERSAL BLACK ALUMINUM MESH GRILLE GRILL 12" X 48" (item 270345393847 end time Mar-17-09 21:11:22 PDT)
Installation was not bad at all as I did not have to remove the bumper.
1. Open hood.
2. Remove the clips holding the top cover on.
3. Use a piece of cardboard to make a template.
4. Insert cardboard down into the grill and press forward.
5. Trim areas needed and refit.
6. Trace cardboard template onto mesh by scratching the mesh with a screwdriver or some other sharp tool.
7. Cut mesh.
8. Slide down into bumper. Will only have to bend it slightly.
9. Push forward as far as you can.
10. Find the tabs that are on the back of the stock grill. (Rectangles in pic below.)
11. Cut holes in mesh around those tabs with wire snips and push over them.
12. Use zip ties to secure in locations on pic below. (Circles in pic below.)
Sorry about the 3rd grade photoshop. I'm lazy but you get the idea.
Rear Wiper Adjustment -If you live in the snow then this is a must mod for you. With this adjustment, the rear wiper hangs at different starting place. If you notice the stock position is horizontal at the bottom with the end facing the driver's side. This mod makes it so the wiper is angled the other direction (the end is facing more towards the passenger side). This allows the wiper to push snow off the rear windshield much easier, as it is not fighting gravity. An added bonus is that leaves don't accumulate as easy on the wiper blade. And of course, some prefer the look that it gives.
i don't get why it's JDM if all fits come with the wiper in the "down" position
anyways, moving onto the diy
i am not responsible for any damages you do to your car. do at your own risk
ignore the position of my wiper, i was sure to switch the gear back before i took pics of where to move it.
now thats all taken care of, you'll need the following:
1- small flat head screwdriver
1- philip head screwdriver
1- 10mm socket / wrench
1: remove the interior panel. i'm not sure if there are any screws holding it on (took mine off awhile ago cause of my sub), but you need to pull HARD on it to get the clips to come out.
2: remove the cap covering the bolt on the wiper. pull on the two ends and itll pop right off.
3: remove the 10mm nut holding the wiper on.
4: remove the wiper. you need to wiggle it and pull upwards to remove it.
i held it there and by the motor.
5: remove the plug using a flat head screwdriver to lift the black plastic.
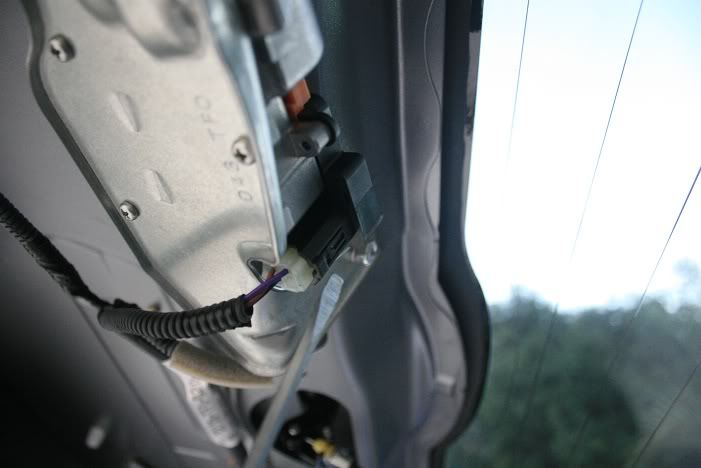
6: remove the three 10mm bolts holding the motor in place.
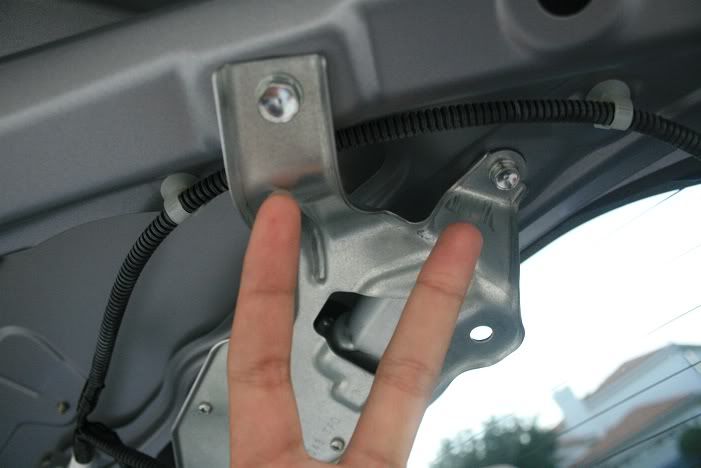
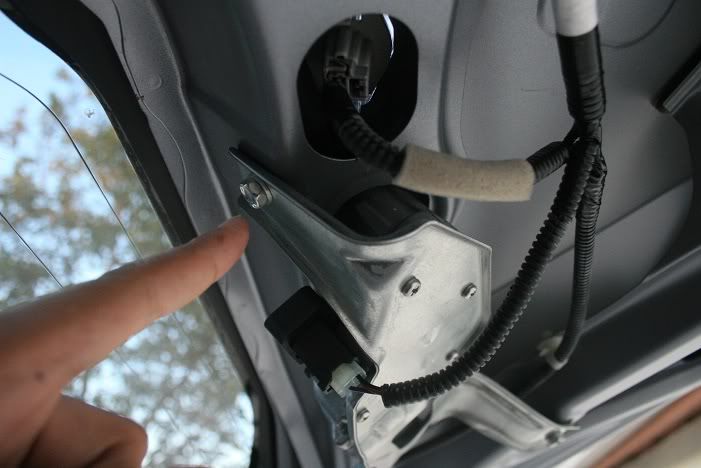
7: take down the motor assembly and remove these 4 screws.

8: when you open it, you'll find this.
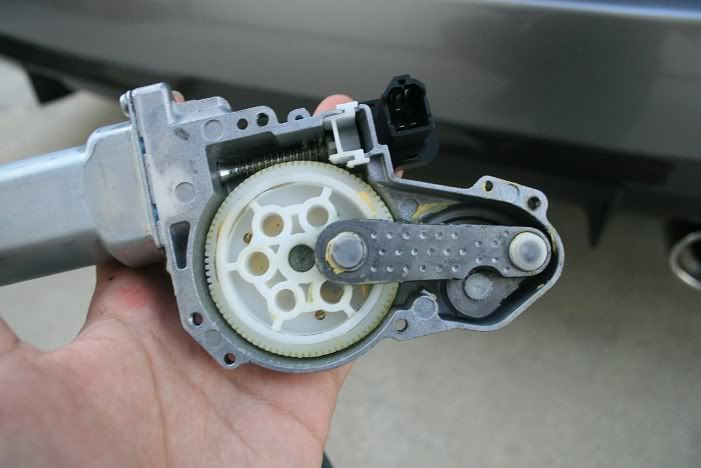
9: remove the arm attached to the white gear and the small metal piece by lifting it straight up.
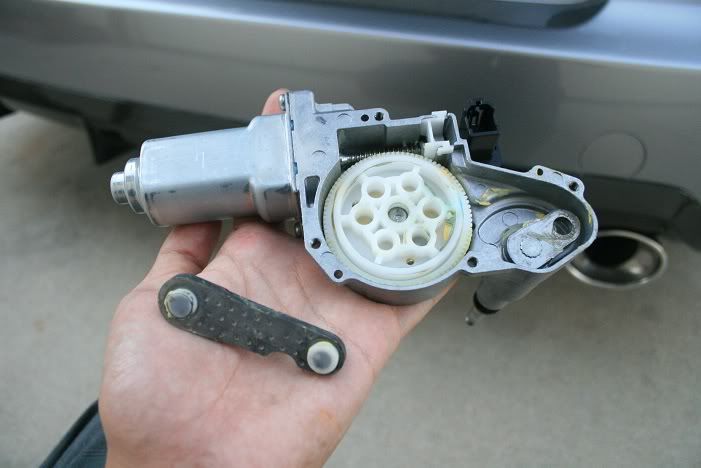
10: swing the small metal piece to the opposite side.
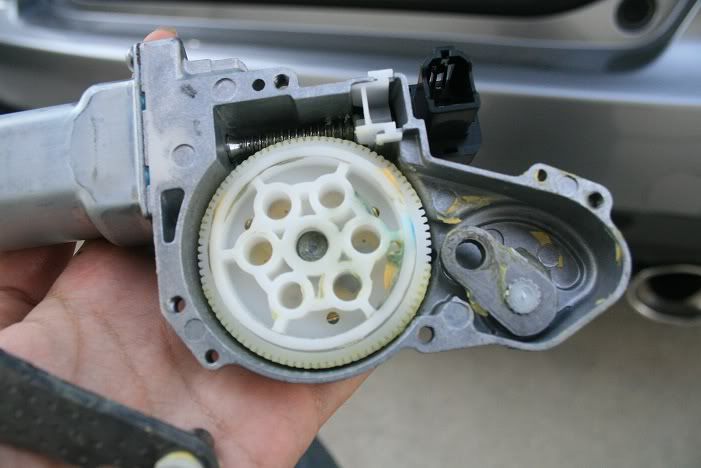
11: reattach the metal arm, inserting the peg into the hole on the opposite side of the white gear. (basically, be sure you didn't turn the white gear and you'll be fine).
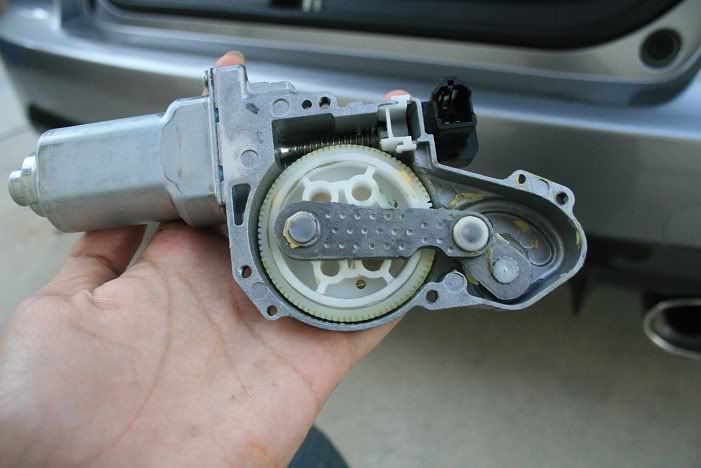
12: be sure this black cap is pushed back in place.
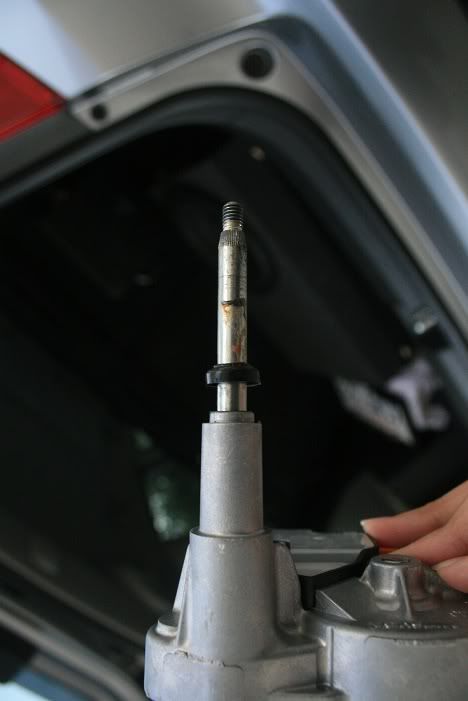
13: line up back plate to the motor and rescrew the 4 phillip head screws
14: put the motor back in the car and tighten the 3 10mm bolts
15: put the wiper back on along with the cover.
16: test be sure everything works
17: if it's all good then reinstall the interior panel (if you have a sub just leave it off, thats where almost all the rattles are coming from).
note: you can adjust the angle the wiper sits at to your preference, just be sure to test it so it stays on the glass. i personally have it the furthest back it can go.
as you can see it's almost identical to the gd's diy. hope this helped some of you out!
anyways, moving onto the diy
i am not responsible for any damages you do to your car. do at your own risk
ignore the position of my wiper, i was sure to switch the gear back before i took pics of where to move it.
now thats all taken care of, you'll need the following:
1- small flat head screwdriver
1- philip head screwdriver
1- 10mm socket / wrench
1: remove the interior panel. i'm not sure if there are any screws holding it on (took mine off awhile ago cause of my sub), but you need to pull HARD on it to get the clips to come out.
2: remove the cap covering the bolt on the wiper. pull on the two ends and itll pop right off.
3: remove the 10mm nut holding the wiper on.
4: remove the wiper. you need to wiggle it and pull upwards to remove it.
i held it there and by the motor.
5: remove the plug using a flat head screwdriver to lift the black plastic.
6: remove the three 10mm bolts holding the motor in place.
7: take down the motor assembly and remove these 4 screws.
8: when you open it, you'll find this.
9: remove the arm attached to the white gear and the small metal piece by lifting it straight up.
10: swing the small metal piece to the opposite side.
11: reattach the metal arm, inserting the peg into the hole on the opposite side of the white gear. (basically, be sure you didn't turn the white gear and you'll be fine).
12: be sure this black cap is pushed back in place.
13: line up back plate to the motor and rescrew the 4 phillip head screws
14: put the motor back in the car and tighten the 3 10mm bolts
15: put the wiper back on along with the cover.
16: test be sure everything works
17: if it's all good then reinstall the interior panel (if you have a sub just leave it off, thats where almost all the rattles are coming from).
note: you can adjust the angle the wiper sits at to your preference, just be sure to test it so it stays on the glass. i personally have it the furthest back it can go.
as you can see it's almost identical to the gd's diy. hope this helped some of you out!
And if you think you're extra cool maybe you can do it without taking the wiper off. This is going to be more difficult and watch out for that little white wheel. It will want to fall out, don't let it.
Thanks for the DIY. Just did this on my 2011. I did not have to take the wiper off or unplug the wiring clips to do this. Here's what I did:
1) pull hatch interior cover off.
2) remove the three 10mm bolts on the metal bracket holding the motor in place to expose the motor wheel assembly.
3) pull the two white plastic caps off pins and remove bracket linking pins.
4) rotate pin to position closest to the white wheel. (See Fitted's pic for step 10. The wiper moves as you do this.)
5) put pin in place on far side of wheel and link pins with the plate, putting white caps back on. (See Fitted's step 11 pic for position.)
6) Screw metal bracket back in place and bolt it to the hatch.*
7) Test then pop hatch cover back.*
Free mod that took a half and hour, should reduce crap build-up on the back glass AND looks better. Nice!
If you have any problems, check this forum out.
https://www.fitfreak.net/forums/2nd-...wiper-mod.html
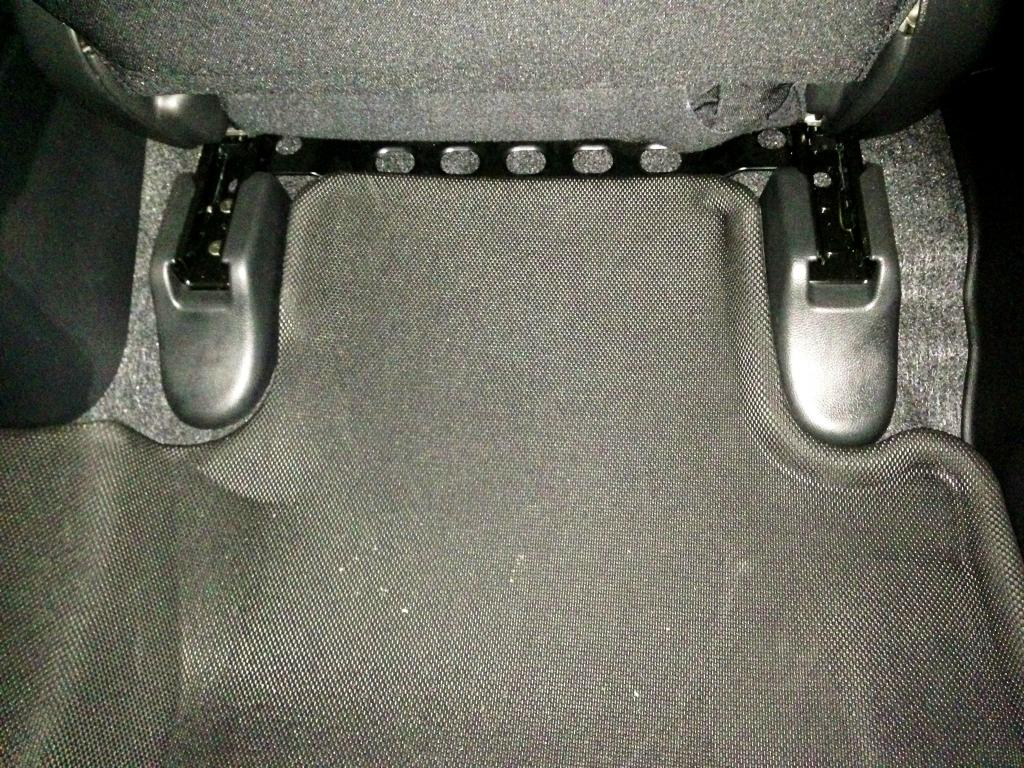
Floor Liners: I got the U-Ace Floor Liners (details and where to buy are in the top 10 list at the top of the thread) I think these are fantastic. The material on the top layer looks great in the Fit. It matches the material of the Sport seats very well. It is also quite grippy without being sticky. My feet do not slide while driving, yet it doesnt feel like the rubber on my shoes are sticky when I change my feet position. They have three layers, the bottom spidermax grip that works great, a middle foam core, and the top rubberized foam layer. There is also the thick rubber-plastic area for your feet. They were $142 with free shipping from auto distributors direct.
Driver's Side:
No Mats:
OEM Sport Mats:
Worn Spot On The Driver Mat In Only 2 Months:
New U-Ace Liner:
Box
Where The Door Meets The Liner:
The Layers Of The U-Ace Liner:
Rear Coverage:
Under the rear magic seat, the coverage is nearly perfect:
[B]With the front seat slid all the way forward, the coverage is quite good:[\B]
Problem Areas Of The Liners:
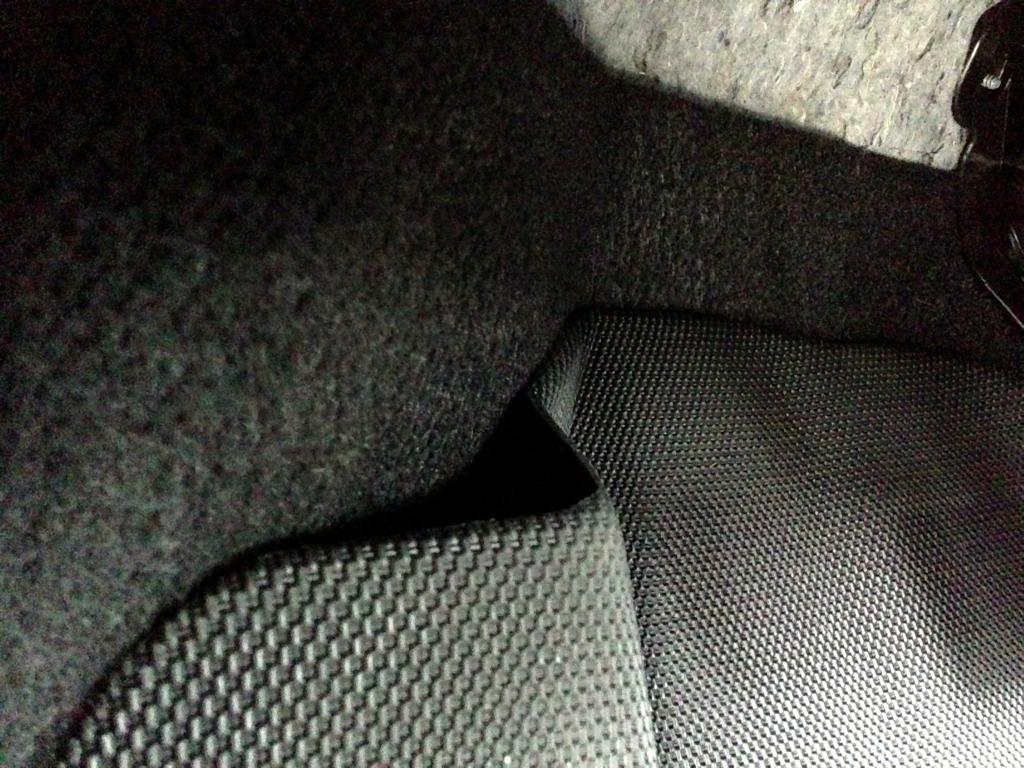
There is a small gap at the right side of the driver's mat that is a problem with the mold. It was just molded incorrectly here and there's nothing to be done. I don't think it's even close to a deal breaker and it is by far the biggest problem:
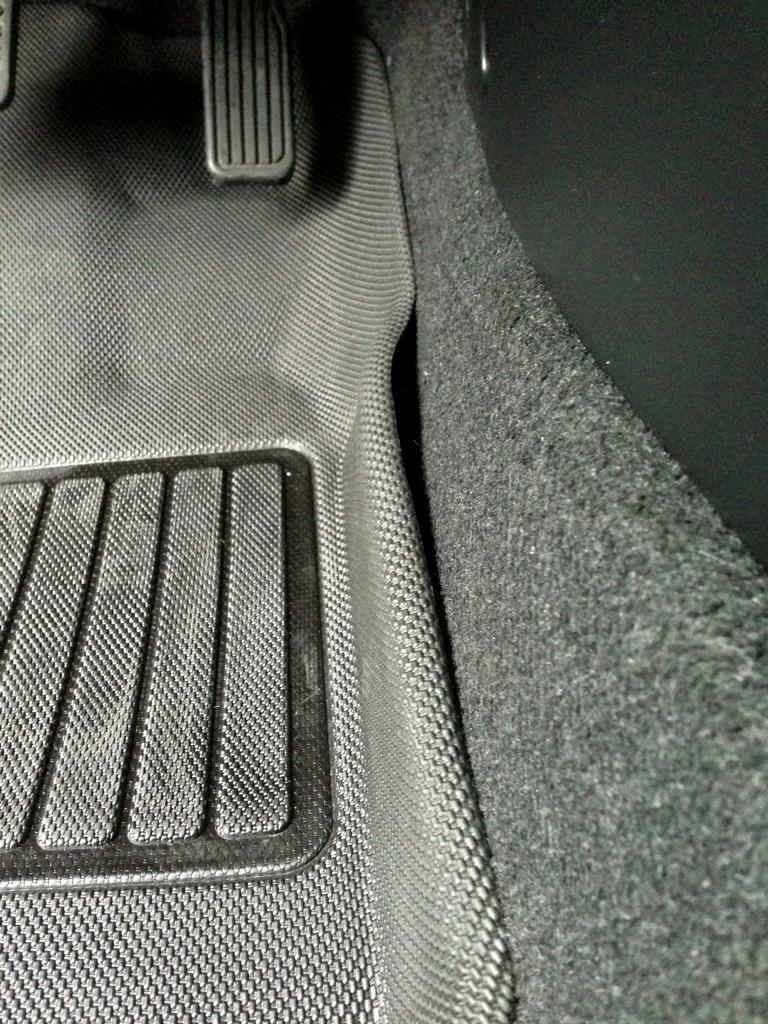
At the top of the dead pedal there is another gap that is a result of a slightly incorrect molding. Again, unless you have really big feet, covered with mud or ice, you probably won't have an issue with it:
If you press down at the bottom of the dead pedal, a gap will form to the left. This may be a problem if you were to step in (pressure) and your other foot slid in causing debris to fall in. Again, very, very minimal chance since the gap is virtually tiny:
There is a tiny little gap right at the bottom of the drivers seat. It is nearly unnoticeable:
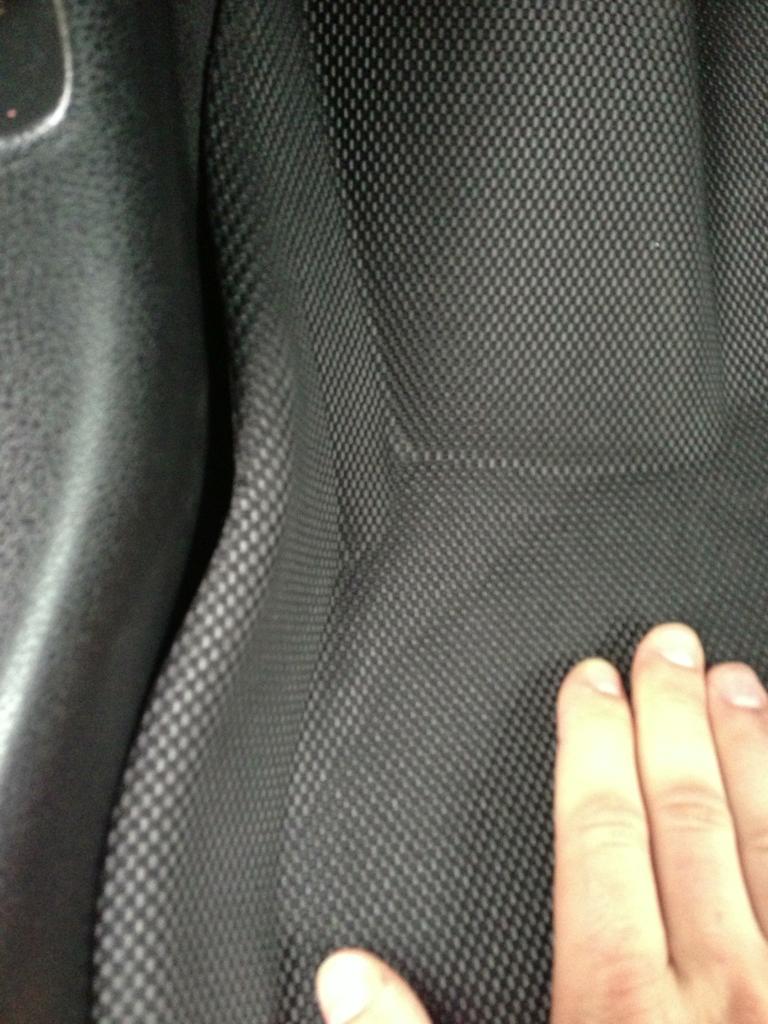
On the passenger's side, there is a gap at the top left of the liner:
This could definitely be a problem if your passenger were to straighten their legs out and angle their right foot a bit:
DIY Rear Bumper Appliqu� - This is a great addition. It will protect a vulnerable area of the car. This is the Honda OEM installation video. Don't let them charge you $30, for 6 minutes of labor, if you think you can do it yourself. Pay attention to his technique in the video. Be careful to only stick it down as you slide the air bubbles out. If you go nice and slow and do it the correct way, you won't get air bubbles.
This is before installation:
And after installation. I know I got it a little off, whatever, it's not the biggest issue to me.
Door Sill Trim - OEM Door Sill Trim installation guide can be found here http://www.hondapartssuperstore.com/...-sill-trim.pdf. I did a very simple version.
Zeta makes a great looking set as well. They are less expensive than the OEM ones but still look good.
https://www.fitfreak.net/forums/zeta...ml#post1101450
1. Use a cloth to wipe the top two layers of the sill.
2. Use the provided alcohol swab to clean the top two layers of the sill.
3. Tear a piece of tape in half (long wase) and barely attach it to the top of the sill and attach like a hinge.
4. Look just into the car and there is a line in the plastic sill to the far left and one to the far right. These are where you line up the ends of the sill.
5. Hold up the sill and peel off the backings.
6. Carefully lower to desired spot.
Before:
OEM
After:
Zeta
After:
Carbon Fiber B-Pillar Trim - this should be the same installation process as for most B-Pillar Trim pieces that are just stick on.
1. Use an alcohol pad or soap and water to clean the B-Pillar.
2. Peel the bottom half of the backing off of the adhesive side.
3. Line up the bottom, directly in the middle of the B-Pillar.
4. Press from bottom upwardsuntil you get to the middle of the piece.
5. Take off the rest of the backing and continue slowly pressing upward to the top.
6. Use a rubber roller or some cylinder rolled in a towel, roll along trim piece from bottom to top, making it stick.
Before:
Comparison:
After:
As long as you're careful and you make sure that when it's time to stick, you go nice and slow, you'll save yourself quite a bit of money.
Rear Cargo Tray - There is no installation except to set it in. Here are some pictures of without it and with it.
Not Installed:
Installed:
Replacing Stock Lighting With LED
*I do not promote changing the brake lights or turn signals to LEDs. This post over at Red filter (tail light lens) - red or white LED? makes a lot of good points that I did not know. Below is a question and response I copied from the middle of the thread.
Question:
"So, with respect, how can people generalize that LED's don't work? Is it just the bulb-replacement types, or are you talking about LEDs in general? I ask b/c tons of vehicles have LEDs now ( I assume, therefore, that you're speaking of aftermarket parts). Also, how can these be illegal?"
Answer:
"LEDs work very well as most of us design around them almost exclusively now instead of filament, halogen, or HID (personally I guess). We are referring to these LED drop-ins that fit directly into your existing housing. They don't work because they rely on your existing halogen or HID reflector, while requieing their own optics/reflectors to meet the same codes and design characteristics as the originals. The vehicles that have factory stock LED lights have the optics/reflectors, heatsinks, etc. that meet the required codes and produce the correct standards of light.
When we say illegal we mean that they are not illegal to sell or even own. Just illegal if you install them as they don't produce the correct required image, or intensity. Also, vehicle codes specify that on road use is illegal. Off road use is not illegal (i.e. true offloading, track cars, and show cars)"
The short version of the thread is basically that LEDs shine in one direction while filament bulbs shine all around. Reflector systems made for filaments will not reflect LED light in an adequate fashion. Turn signals are designed to be seen from many angles, not just directly behind the vehicle. Dropping LEDs in won't cast the correct glow for legal visibility. I believe the "third brake" can be changed to LEDs as long as the regular brake lights are filaments (or legal full LED brake light replacements with reflectors that pass vehicle code).
*However, after reading this thread over on The Acura boards Received my VLED Triton V3 LED park and turn bulbs! A few pics inside! - AcuraZine Community, I believe that these V-LED V3 Triton bulbs might be the first extremely high quality (and brighter lumen output than OEM) LED bulb capable of handling turn signal and brake light duties.
Panel Popper:
Before you buy any bulbs, I highly recommend purchasing a panel removal tool (panel popper). It makes the job incredibly easy and will minimize any scratches or scuffs. You can find many available at amazon Amazon.com: Panel removal. I purchased the cheap 2 pc orange plastic set and it has worked great. All the interior paneling came off with relative ease. Grip the tool as close to the prying end as possible so you don't put too much force on the middle of the tool and snap the plastic.
Here is a Bulb Replacement Chart:
Interior:
Dome light/Map light: DE3022/DE3175
Cargo light: t10 wedge
Cup holder light: 74 LED/t5 flat 12V - DO NOT USE 14V or you will pop a fuse
Exterior
Headlights: 9003/H4
Fog lights: H11
Parking lights: 194
Front turn signals: 7440
Rear turn signals: 992
Brake lights: 7443
Top Center "Third" Brake light: Some are 7440 halogen and some are LED
Reverse lights: 921
License Plate light: t10 wedge
When purchasing the LEDs, the really cheap ones probably aren't as bright as some of the more expensive ones, even if they have the same number of bulbs. Look for Plug and Play versions made for the Fit. IJdmtoy.com and SuperBrightLEDs.com have good ones as well as t1r racing. Users think it may be the best option to do a DIY install in the cargo area for extra lighting as replacing the existing light with LED, may not be enough for some.
LED Interior Dome Light/Map Light Swap (video also shows installation for License plate light) - This is much higher on my personal list, more like 1 or 2 since it isn't too expensive or difficult to install. Many users agree that the bulbs that come stock in the fit are dim at best. When turning on the dome light or opening the trunk at night, do you find it difficult to see what your doing? If so, then you might want to get an LED Bulb kit. JKID over on another forum posted, what I feel to be, some handy info. $40-$55 for some decent bulbs. Lots of users like the 12 SMD bulbs (12 bulb LED board)
Dome and map light same bulb so you will need 3 of DE3175 trunk is t10. I saw a YouTube video that showed the steps to change the bulbs. It's not hard the bulbs only work one way if It does not light up on first try flip it around. Ebay search bulbs by number t10 led bulbs. It's really easy hope this helps a lot of people.
Here are some pics from my personal install. I purchased these particular LEDs at https://store.ijdmtoy.com/ProductDet...2SMD_D31_SKU91. I like SuperBrightLEDs.com the best because their prices are lowest, the quality is highest, the selection is much, much better than other sites, and they list valuable information about the bulbs such as the lumen amount and the bulb color in kelvin. But ijdmtoy has an ok reputation and they are located less than 50 miles from me so I decided to go with them.
I did not need a towel or soft cloth when prying the covers off. I just went slow and careful. If you pry slowly at the 4 clips, you will not break anything.
Just get your finger under one end of the bulb and pop it out. Then do the other, voila!
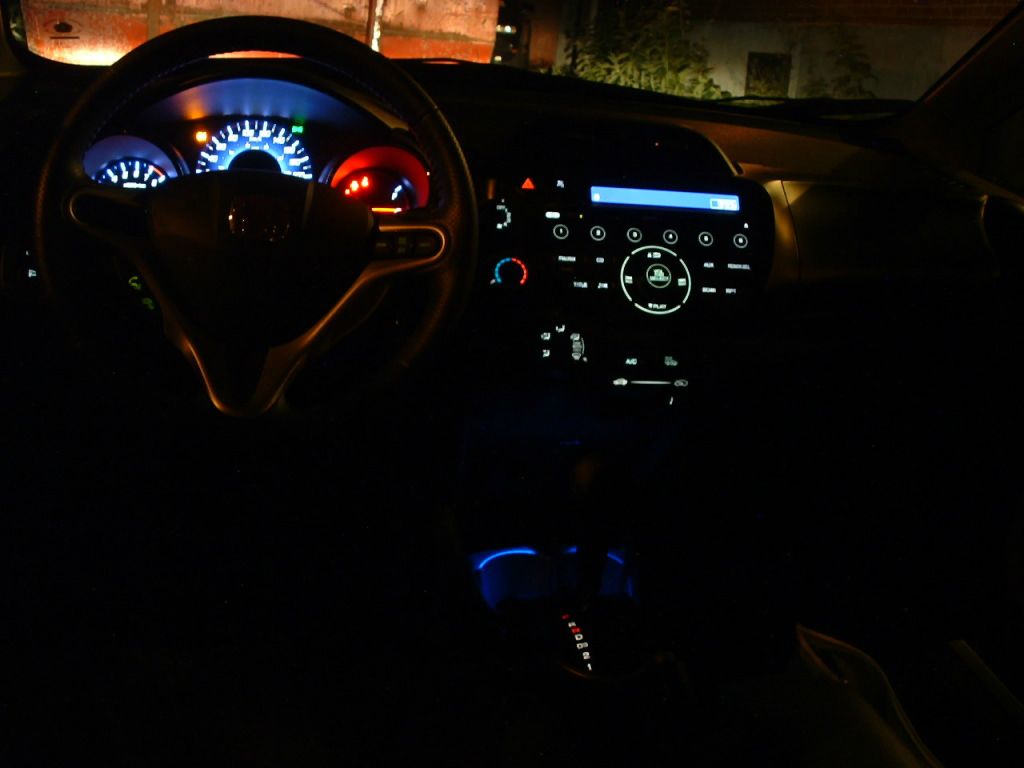
Since I changed my dome light to blue, this is what it looks like when I unlock my car
This is what it looks like when I step into my car at night. Just the dome light on.
When I need to search for something in my dark car I can push the new LED map lights.
And this is the view from outside the car with both driver's side doors open and the map and dome lights on.
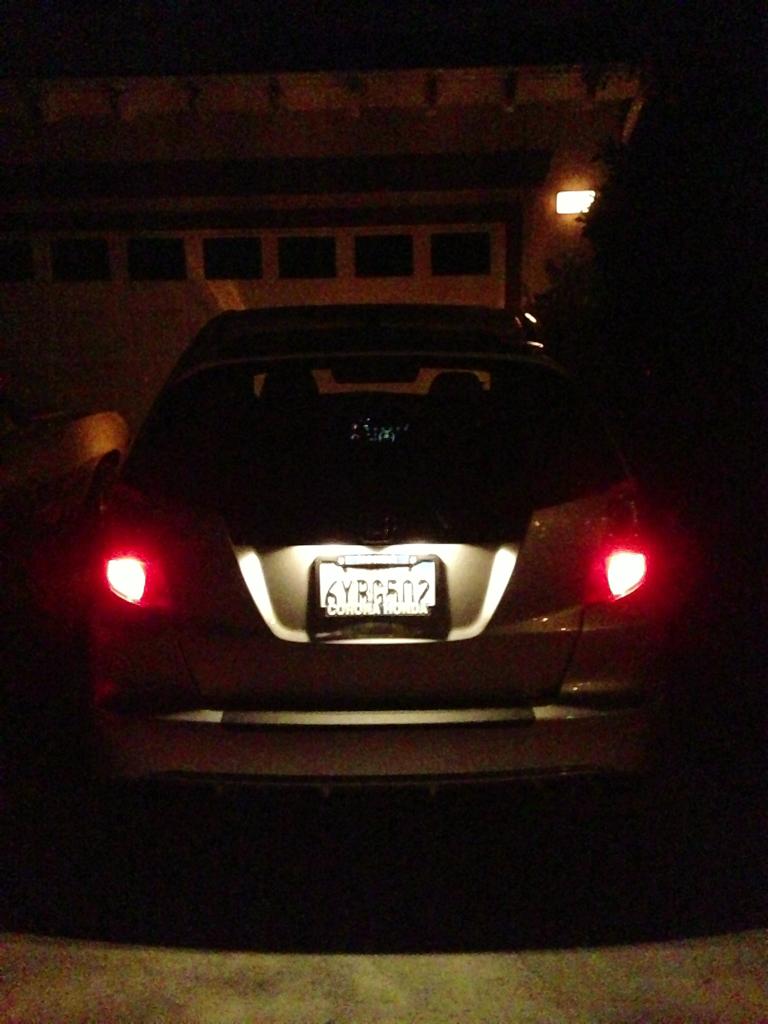
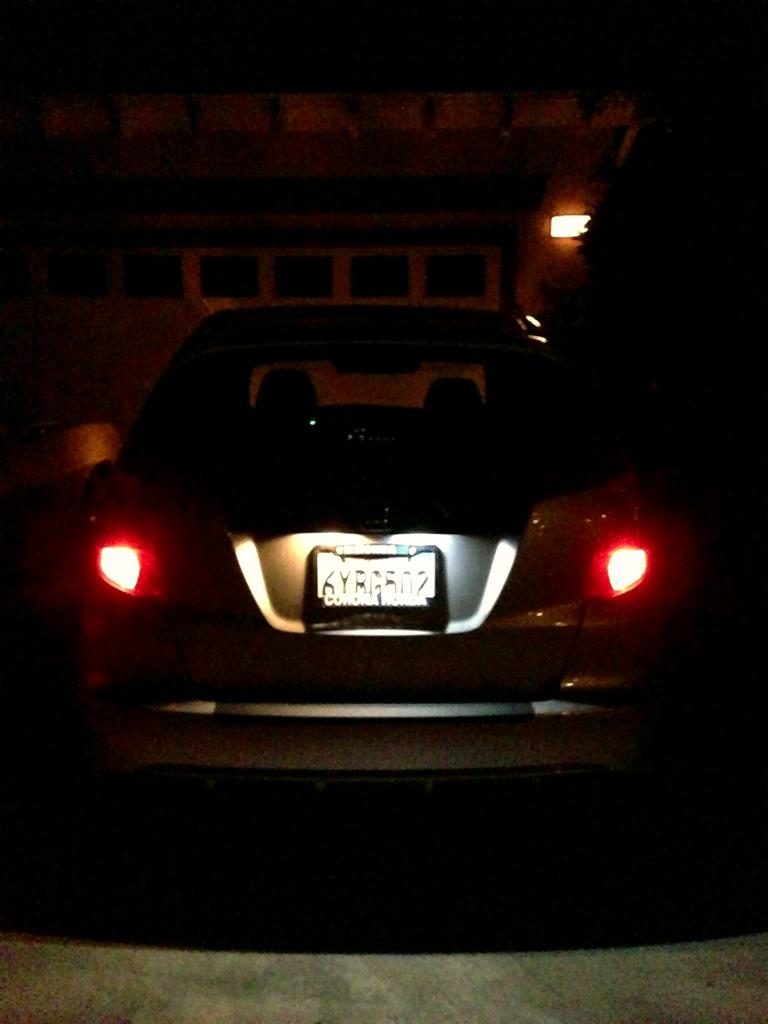
LED License Plate Bulb Swap - The license plate bulbs I purchased are from SuperBrightLEDs.com and they are the WLED-WHP 12 V 194/168 wedge base bulb. 194 LED Bulb - 1 SMD LED Wedge Base | Miniature Wedge Base LEDs | LED Car Bulbs | Super Bright LEDs I think these are absolutely the perfect license plate bulb. I wanted the bulbs to be as close to the same brightness as stock just in the white LED color. That's exactly what these bulbs do. Not super bright like some of those guys you see that are like 2 spotlights on either side of the plate. Way too attention grabbing for me (not to mention idiotic looking). These bulbs require a bit of force to get them in. I had to turn one of them around before it worked.
*Pink Bag*
Before Installation:
After Installation:
Comparison:
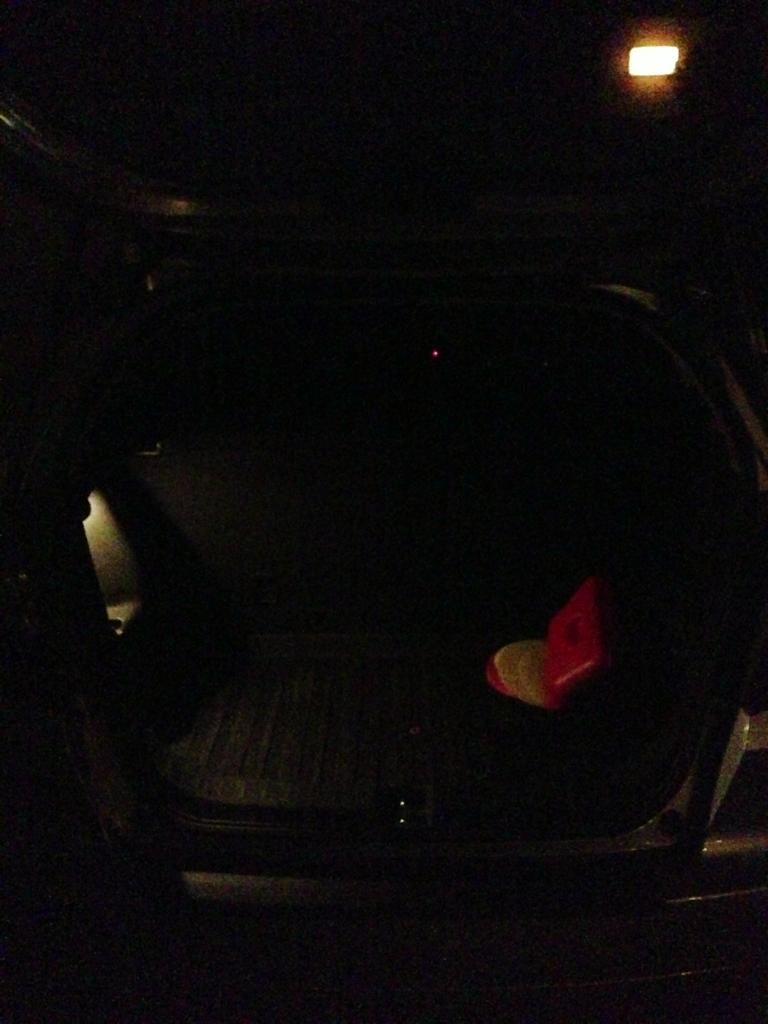
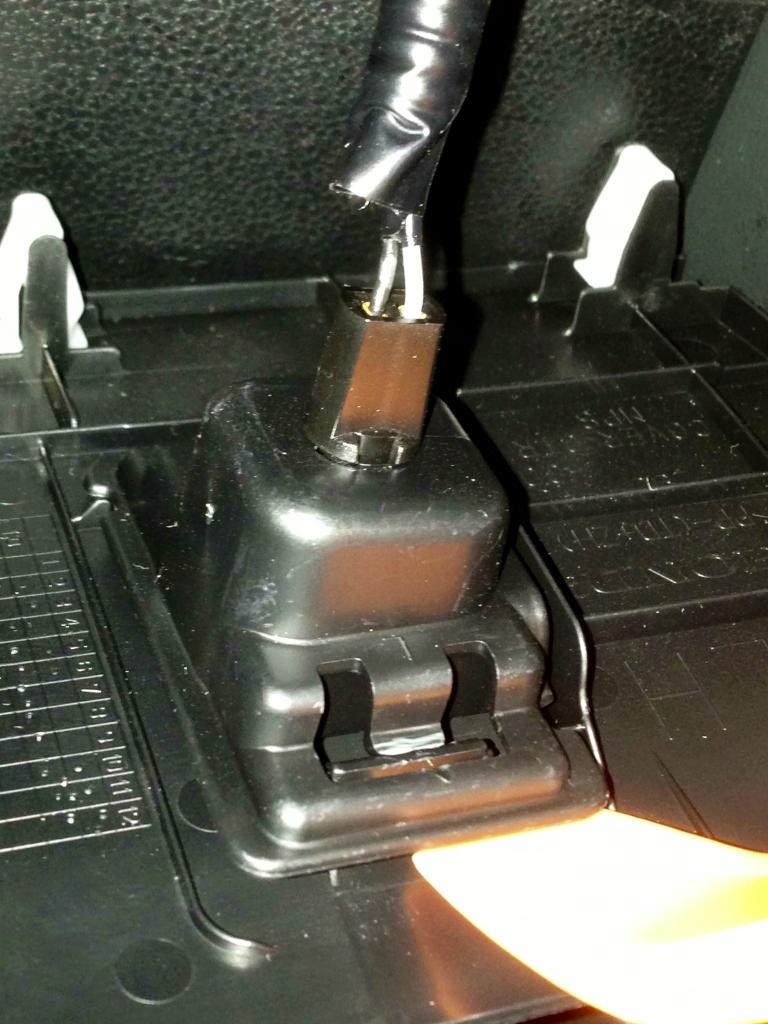
Cargo Light Swap: The stock cargo light is weak. Straight up. You probably already know this if you've had to access your cargo trunk at night. Swapping for LED is a great idea. The bulb I purchased is from SuperBrightLEDs.com and is the WLED-CWHP10-DAC. 194 LED Bulb - 10 SMD LED Wedge Base | Miniature Wedge Base LEDs | LED Car Bulbs | Super Bright LEDs It was the strongest side facing light I could find. 165 Lumens at a 180 degree angle. No wasted light like the stock bulbs 360 degree angle. When getting the light cover off, be sure to pry in the top-middle of the cover. It's pretty tough and will definitely pop off with a bit of force. Don't go after the corners, the middle is easiest. This bulb is large. It would barely fit into the housing. In fact I had to bend the 2 little pieces of metal out that used to hold the stock bulb steady. With those pieces out, the new light slipped in much easier. As you can see in the photos, this light is awesome. Much, much brighter than stock, and brighter than any pictures I've seen online. Great bulb.
Before Installation:
After Installation:
Before Installation:
After Installation:
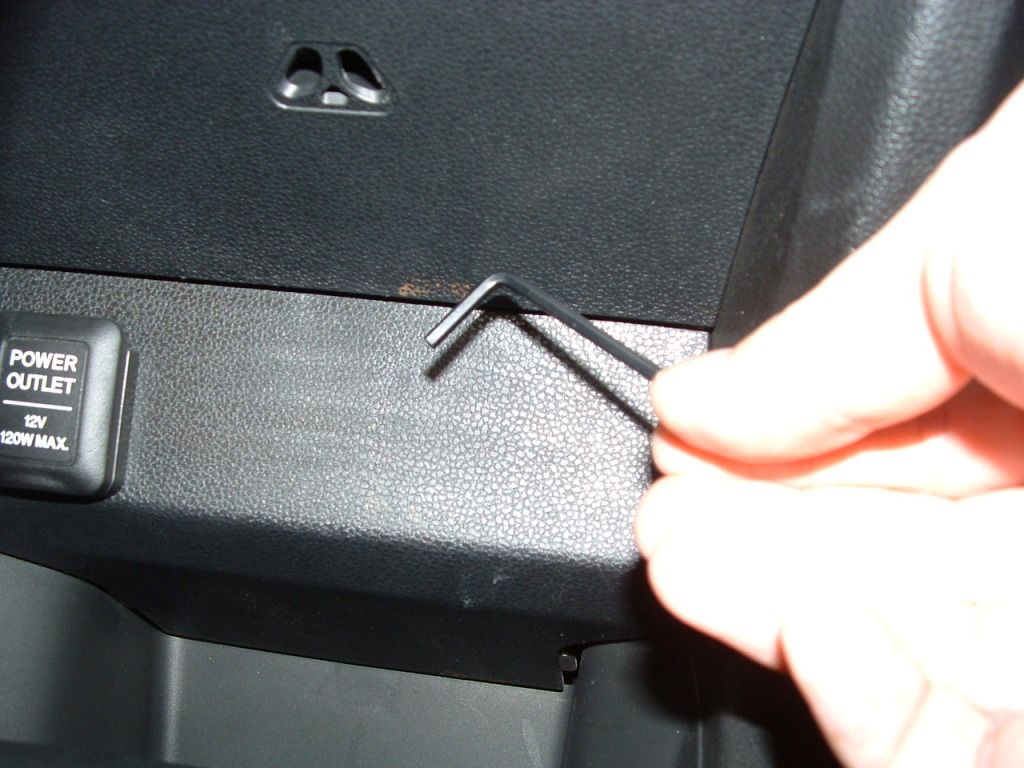
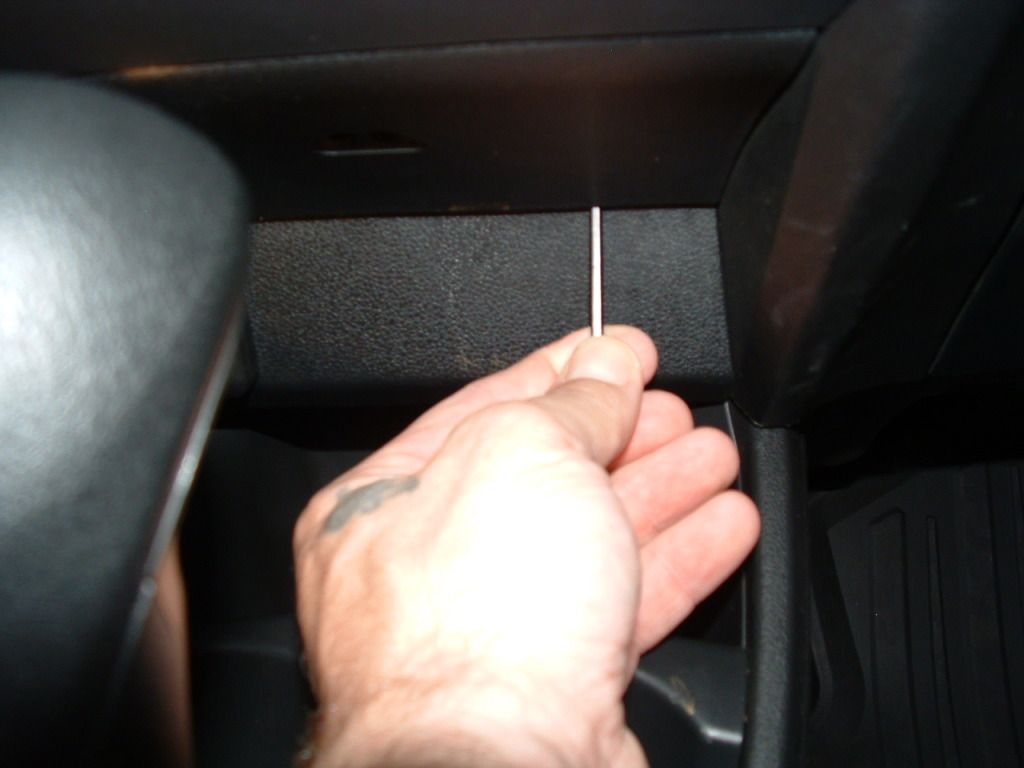
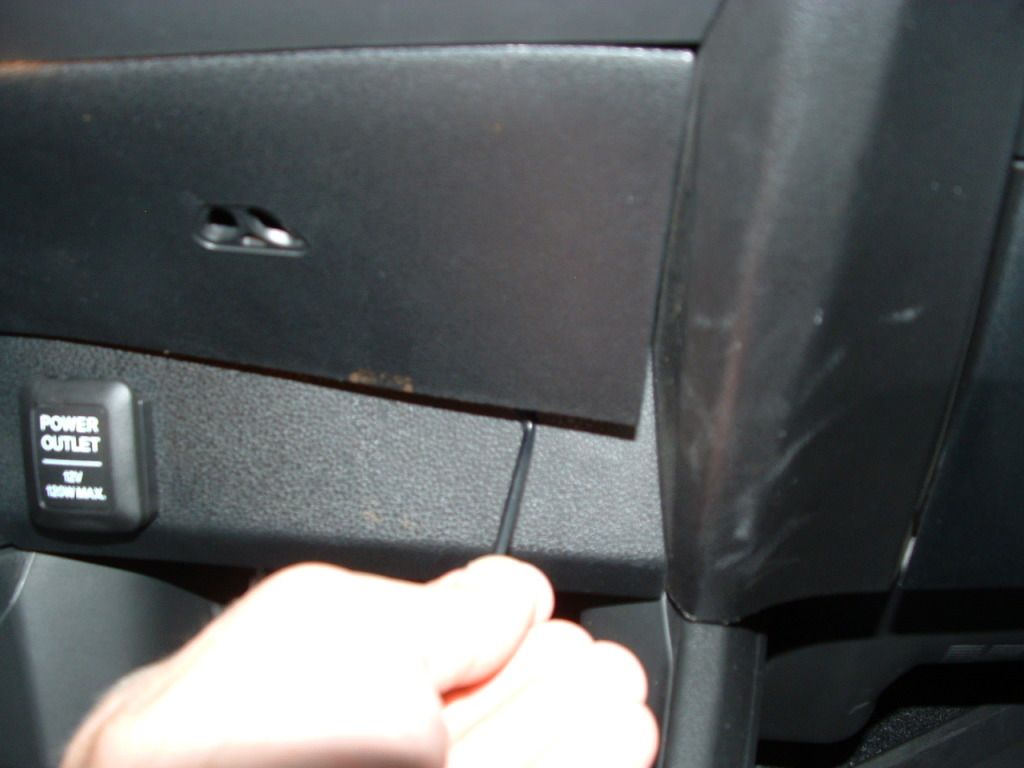
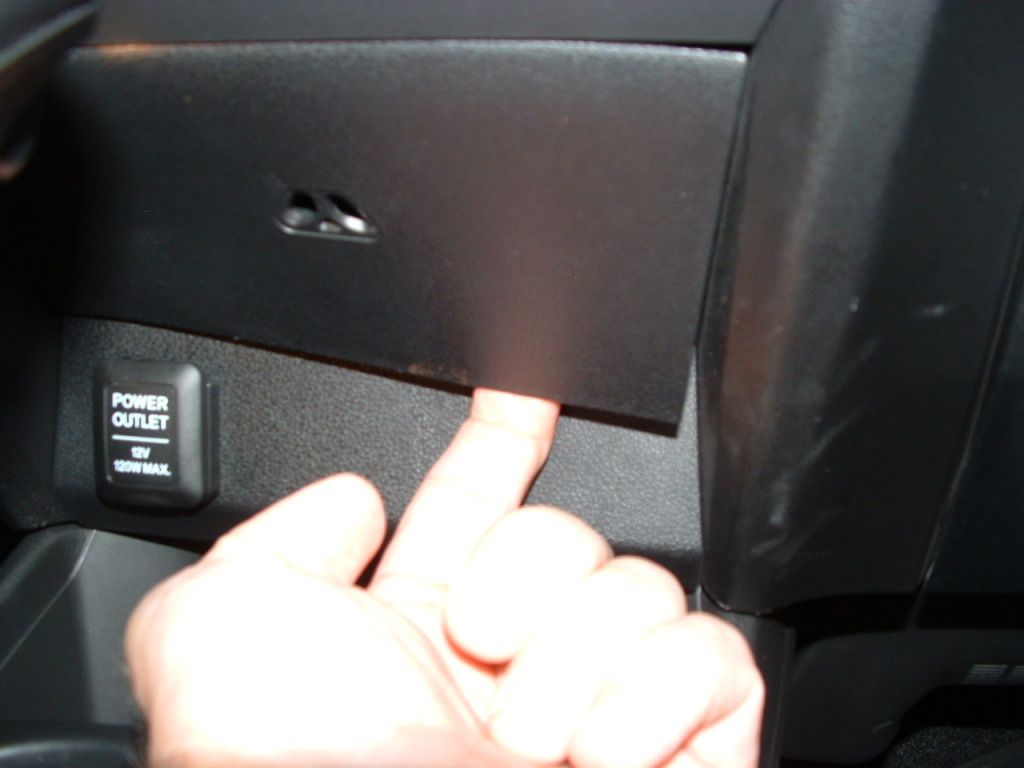
LED Cupholder Light Swap - Want to see your drinks? Perhaps bathe them in a cool blue light? Here's how and then thank Dwalbert:
Ok I looked for the DIY and I couldn't find it so I will walk you through it best I can.
The panel comes out. The hinges (the part you should not pull) are located at the long side of the panel closest to you.
The long side farthest is the one you pull on. There are 3 clips that hold it in.
It's gonna be scary. Fair warning.
Take an Allen key. A nice fat one that you can jimmy between the the panel and the rest of the dash. Rotate the Allen key so that it grabs the panel and YANK HARD. Start with the right side away from the 120V plug. The plug will be in the way so you have to push it in to remove the panel. Be mindful of the hinges and remember how it goes in for re install.
Once one clip comes loose (they are pretty tough!) you can slip a finger in there and yank the other two out. Don"t worry you will not break any of them.
Then its only a matter of using a flat tip screw driver to remove the light housing from the panel. Change your bulb and reverse the install.
If you got a bulb that is too high in wattage it will blow your fuse. that's what happen to me. your bulb should be a 14v 1.2w blue bulb. It might be a very tight fit for the new bulb depending on the manufacturer.
Dwayne
Ok here we go
This is the small you tube video I made.
DSCF0008 - YouTube
These are the pictures
And I want a picture when you are done!
This is the small you tube video I made.
DSCF0008 - YouTube
These are the pictures
And I want a picture when you are done!
•After you pop off the bulb housing, just pull the bulb straight out
•If your having difficulty getting a grip on the bulb, hold the little square, where the wires connect to the housing, and twist the housing to the right about a half turn. The housing should come away from the bulb leaving it exposed for a good grip.
The 74 LED 3 SMD (74 LED Bulb - 3 SMD LED Wide Angle Wedge Base | Miniature Wedge Base LEDs | LED Car Bulbs | Super Bright LEDs) bulb I bought would not fit in when I first tried it. If you look in the photo, you can see there's a bit of an edge on both sides of the base. Those little parts that stick out, won't allow the bulb to slide in. I used a metal file to very carefully grind the edges down. Just watch for the 2 little metal strips near the edges. I filed just a bit of a round edge on the corners and it fit right in.
Here's an Install Video
• Just as a side note, I wasn't happy with how much light was getting to the little tray behind the cupholders, so I widened the little triangle to get some more light through. I used a Dremel tool to make a larger hole in the triangle and then used a tiny screw to file the hole back into a triangle shape. I did get one nice scratch on the front of the panel, but I was careful after that. Now everything is much brighter in that region, even if the picture doesn't do it justice.
The New Hole:
After Widening:
Performance Engine Modifications
*There are many different things that tuners may advise as your first performance engine upgrade. I will let you decide, based on what goals you have for your car. I got lucky and received a free Cold Air Intake (CAI) so that will be the first thing I cover here.
Performance Air Intake - There are 2 main kinds of performance air intake upgrades. The Short Ram Intakes (SRI) and Cold Air Intakes (CAI). I got a free CAI so the pictures and video will be of my Injen CAI installed on my 2013 Fit Sport. I love the sound my car makes with this intake installed. It sounds much more powerful and performance oriented. There is a very noticeable increase in power as well. It has more pull in 2000-5000 RPMs. This is especially evident if you use the paddle shifters. The thing about CAIs is that it relocates the air filter to an area further away from the engine, this receiving colder air. The problem with this is if you live in a perpetually wet environment, or an area with lots of standing water that you must drive through, the air filter can become saturated with water and can lead to hydrolock on your engine. The good thing about the Injen Intake is that it relocates the air filter behind the front bumper, not in the wheel well like most others. Therefore the Injen is far less likely to hydrolock. Another good thing about the Injen intake is that is is legal in California. Many intakes are not.
Last edited by Mikeyk12; Jun 3, 2013 at 02:24 PM.
1- the weather techs are the most costly option out there and they do not fit that great. They are not the end all be all. There are several other companies out there that make these and for a much better price. Further they are made to feel like hard plastic. They slide all over the place and do not feel that great under foot. Plasticky instead of rubbery. (Full disclosure I have a set) I use piece of Velcro to hold mine down so they do not slip all over the place and get jammed up in my pedals. After a mere two months of winter use the Velcro is failing even after scuffing the plastic mats before installation.
2- You must mean the rear cargo tray. Because the rear cargo organizer is a very expensive and cumbersome plastic bin. I mean do you really have that much loose stuff in the cargo area? And besides the nice rear cargo tray is made to fit perfectly and offers protection to the carpet in the rear as well as reinforces the weak cardboard piece that covers the spare tire area.
5 - 500$ for tints? Please do not pay that. You can get a really good quality 3M job for a third of that. Tints are one of those things that are not better simply because they are more expensive. Some installers will go to Walmart and get the cheapest stuff out there and pass it as the good stuff. Do some research and ask around.
6- RSB (I have one) Before buying any upgrade that is not cosmetic everyone should be asking themselves a simple question. What am I trying to fix? Very spirited driving in the city or the burbs doesn't constitute a need for a rear sway bar. It'll be there but you'll never use it.
A few worthwhile mods you completely overlooked and are very useful is a DIY mesh lower grill protector and you can JDM the rear wiper.
Further before you spend one red cent on anything I recommend you save all this money and buy rims and wheels. They are by far the best upgrade and will make the biggest impact on your Fit.
PS if you intend for your page to be a reference for new Fit owners you are going to have to provide pictures of everything, links to reputable dealers where to buy these items, a write up of actual experience using these items....and installation notes tips and tricks and a good DIY install with pics is always appreciated.
1. Husky Custom Floor Liners (Auto Anything)
2. OEM Visors
3. Protective Fog Light Film (Yellow)
4. Seat Covers (keeping the seats like new is important and Clazzio is the best)
5. Tint ($285 here and ilegal)
6. Rear Sway Bar (many users praise the Progress RSB for about $145)
7. Eibach Springs ( greatly increase handling)
8. Hood Protector - OEM (Zeta mine car is picture)
9. OEM Bumper protector
10. Accord horn


I got the Husky Weatherbeater Liners for my Fit and my Wife's Camry. I like them a lot a matter of fact I am thinking of keeping them in the car after winter. The back covers the entire floor. $124 at Auto Anything I got 15% off that price because my order was over $150.
Thread Starter
|
Member
Joined: Jan 2013
Posts: 125
From: Ca
Good to know about the weathertech liners. I will replace with Husky. I definitely plan on fleshing this thread out a bit more. I will add pictures as I get the items. I hope to have a before and after shot of each part on my vehicle.
The Huper Optik tint is not just a tint, it's THE tint for nicer vehicles. It's a ceramic based tint method that is much better than 3M in every way possible. It lasts longer, is much more durable, looks better, and lets in 15-20% less light and heat. I'm not sure if all this is worth the 500 but look it up, owners love it.
I didn't really consider any DIY projects like the grill mesh. I understand that it is an awesome idea that is very beneficial but I know there are quite a few people in here that aren't going to be taking the bumper off themselves. I know I certainly won't be.
I can't see myself taking off brand new wheels and tires and replacing them with something that is going to cost me $1000. I'm goin to replace the tires when the OEMs wear out. That only seems logical not to waste what I was given. Also, I like the wheels on the Sport. From what I understand the weight difference is pretty minor unless I was going to upgrade to incredibly expensive rims which I never plan on doing.
I think a sway bar would benefit anyone who is thinking of putting one on. If your thinking about a sway bar, then your definitely interested in the handling. I drive pretty quick on the streets of California so I know I would benefit from less body roll.
Just because I put what is the best doesn't mean you should go get it. It's just there as w way of letting people know that there is a high end option available along with the standard.
The Huper Optik tint is not just a tint, it's THE tint for nicer vehicles. It's a ceramic based tint method that is much better than 3M in every way possible. It lasts longer, is much more durable, looks better, and lets in 15-20% less light and heat. I'm not sure if all this is worth the 500 but look it up, owners love it.
I can't see myself taking off brand new wheels and tires and replacing them with something that is going to cost me $1000. I'm goin to replace the tires when the OEMs wear out. That only seems logical not to waste what I was given. Also, I like the wheels on the Sport. From what I understand the weight difference is pretty minor unless I was going to upgrade to incredibly expensive rims which I never plan on doing.
I can't see myself taking off brand new wheels and tires and replacing them with something that is going to cost me $1000. I'm goin to replace the tires when the OEMs wear out. That only seems logical not to waste what I was given. Also, I like the wheels on the Sport. From what I understand the weight difference is pretty minor unless I was going to upgrade to incredibly expensive rims which I never plan on doing.
Doing the same right now with my Sport wheels (2012) but thinking of spacers to move the wheels outward especially the rear.

went straight to the tint place the day after i bought it. 3m tint all the way around $275 35% front 5% in the rear. haven't done much dont think i will. too much attention brings the wrong kind. i did put lojack just in case. changed out third brake light. put a 10in flip down dvd player.
Last edited by JKID; Jan 22, 2013 at 01:29 PM.

Member
Joined: Jul 2009
Posts: 670
From: SF Bay Area

I second the front mesh.
You don't need to take off the bumper or actually any part-at least I didn't, just have smaller hands and some zipties. Search on mcmaster-carr for the plastic mesh that works well.
I suppose really first thing I did was aquapel (or rainx) the front glass as well as wax the car with a polymer sealant "wax" while it is perfectly clean-but that was not really an upgrade exactly.
For the cargo mat, I also did a DIY with some homedepot door/area mats, stick on velcro on the backside, and some stapled on strap material to go around the seat headrest for the flip up sections. The rough carpet-texture of the mat is less slippy then other options. Of course you can choose whatever material you like.
While you mentioned brake pads, I would recommend when you do get around to changing those, change your rotors at the same time. I haven't had experience with your specific pads, but I personally would go for a ceramic pad more to decrease dusting rather than street "performance".
Last edited by raytseng; Jan 22, 2013 at 02:42 PM.
Thread Starter
|
Member
Joined: Jan 2013
Posts: 125
From: Ca
From what I understand, the Hawk HPS brake pads are made of a metal composite but it produces very little dust while maintaining good bite. I have seen some good slotted rotors that people have enjoyed, that's probably a decent idea, I'm just not sure how much upgrading the brakes really need. As someone said in another thread, "Fits aren't fast or heavy," so there's not too much of a reason to get new rotors unless you track.
Last edited by Mikeyk12; Jan 22, 2013 at 04:06 PM.

Member
Joined: May 2006
Posts: 1,899
From: tx
6- RSB (I have one) Before buying any upgrade that is not cosmetic everyone should be asking themselves a simple question. What am I trying to fix? Very spirited driving in the city or the burbs doesn't constitute a need for a rear sway bar. It'll be there but you'll never use it.
Also a side note. People say the swifts are SO awesome, and while I can't disagree, especially concerning ride quality, I'm not sure my cornering speed went up any, or in fact, was hurt by the roll center change on the McPherson strut design. Tires and wheels made a huge difference.
What? In my opinion, on of the greatest benefits the bar offers is below 20 mph, going around 90 turns at intersections and especially when getting back on the gas, even lightly, the rear stays put and the car rotates around the corner. It's easier to drive around town, and its more stable on the highway, and bonkers at speed. This plus tires way eclipses the Swifts.
Also a side note. People say the swifts are SO awesome, and while I can't disagree, especially concerning ride quality, I'm not sure my cornering speed went up any, or in fact, was hurt by the roll center change on the McPherson strut design. Tires and wheels made a huge difference.
Also a side note. People say the swifts are SO awesome, and while I can't disagree, especially concerning ride quality, I'm not sure my cornering speed went up any, or in fact, was hurt by the roll center change on the McPherson strut design. Tires and wheels made a huge difference.
Here in Montreal the driving is downright crazy. Drivers fight for every square inch of pavement and speed limits are at best a guideline. There's is no enforcement to speak of. Having said this I like to participate in this madness.
There is a stretch of road I travel daily that is meant to be travelled at 50 mph. In the right lane, drivers commonly go 80-90 mph. In the curves my Fit could have never followed the BMWs but since I have installed my RSB I have no problem pushing them out of the way!!!
Sometimes I forget that this is FitFreak and that on this site most are like me and drive their Fits hard! The point of all this is to squeeze out every inch of potential...
I wish now that I would have heeded the voices of the few who pleaded with me when I first bough my Fit to invest in lighter rims, better tires in order to maximize the full potential of my Fit instead of being sucked in to investing money in cheaper cosmetic changes espoused by the majority on FitFreak. Even now this is what it looks like to me.
So now over the winter months I am saving every penny I can to get some wicked rims and rubber just in time for the summer season.
Drive fast drive hard and take care!
Last edited by Dwalbert320; Jan 23, 2013 at 12:57 PM.
I have been looking to do the LED but was looking for the cargo light to swap out have not found as of yet. Did the mesh when I did the Accord horn swap. Been looking for tail lights did not realized how difficult it was to find for a GE.
Tinting here is illegal so I am doing the back windows, and small windows forward of the driver and passenger and 6 inch strip on the windshield. $285 just in case I get ticketed and have to remove.
Doing the same right now with my Sport wheels (2012) but thinking of spacers to move the wheels outward especially the rear.
Doing the same right now with my Sport wheels (2012) but thinking of spacers to move the wheels outward especially the rear.
New York Window Tint Law - TintCenter.com
New York with 70% light on the front and back of sedans which the fit is classified means a tint of approximately 17% the factory windows are usually 13%. No metal or colors. So not worth it. I was going to do 35 to 50% on the back the installers will tell you it is illegal and you have to sign a acknowledgement of this fact.