
DIY: Install Hatch LEDs

Thread Starter
|
Member

Joined: Aug 2008
Posts: 98
From: Northrdge, Socal
DIY: Install Hatch LEDs
hey everybody i just got my fit 2 weeks ago and found that the interior lighting is really really sub par. so after spending two weeks of my life on this forum i found ratedz's thread on
https://www.fitfreak.net/forums/fit-...ch-w-pics.html
So all credit for the idea goes to him! but since everyone on that thread was wondering how he did it, i thought i might give it a try. so enuf chit chat, here goes (my first diy so lol sorry if its not thorough)
***DISCLAIMER*** FIT FREAK NOR AM I NOT RESPONSIBLE FOR ANY MODIFICATIONS DONE TO YOUR CAR. THIS THREAD IS HERE ONLY TO ASSIST YOU IN YOUR INSTALLATION OF THE LED's in the hatch.
First off is parts list
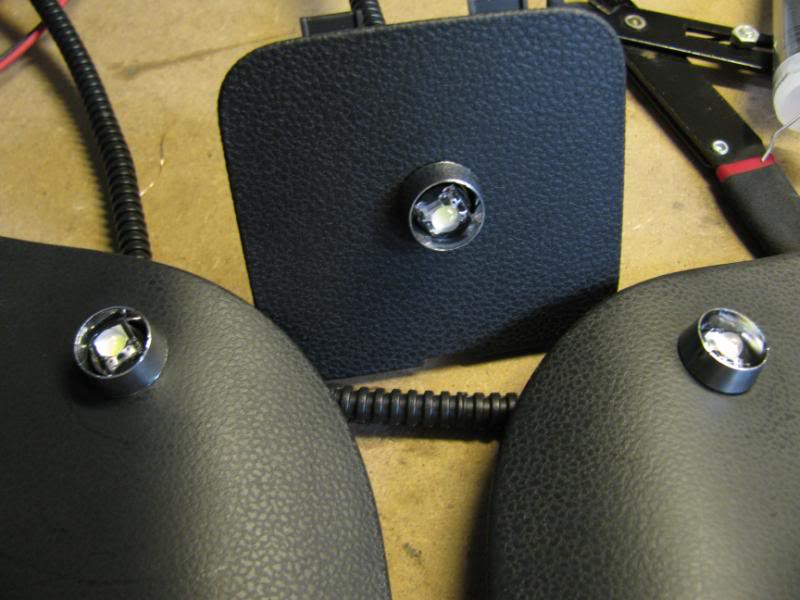
1. Head over to http://www.oznium.com and pick up three WHITE superflux LED's and pick up three 10MM Chrome plastic holders
2. A drill with a couple of sizes of drill bits all the way up to 1/2"
3. Wire stripper and some 20 gauge wire (red/black)
4. Soldering tool and solder
5. Heat Shrink and heat gun
6. Wire Loom (optional)
1. First take off the tail light access covers on both driver and passenger sides
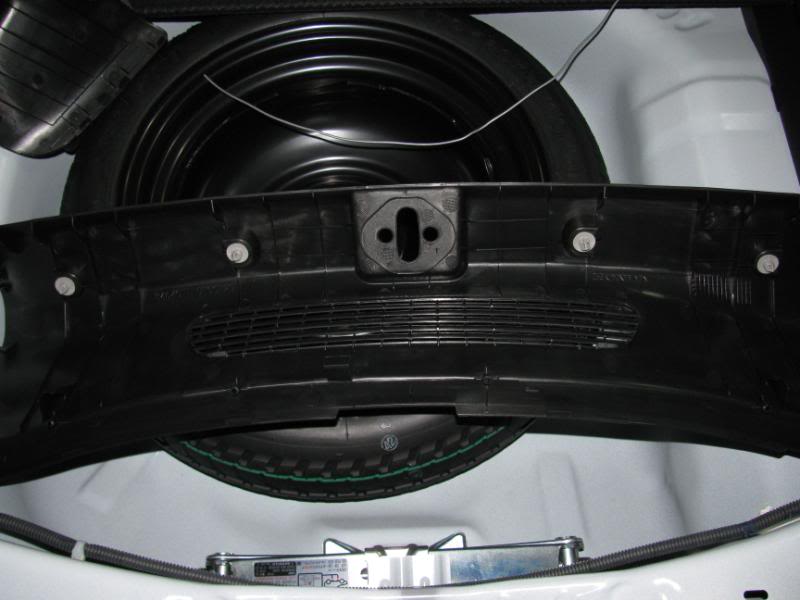
2. Use some force to pull out the trim piece on the bottom of the hatch (note the plastic clips)
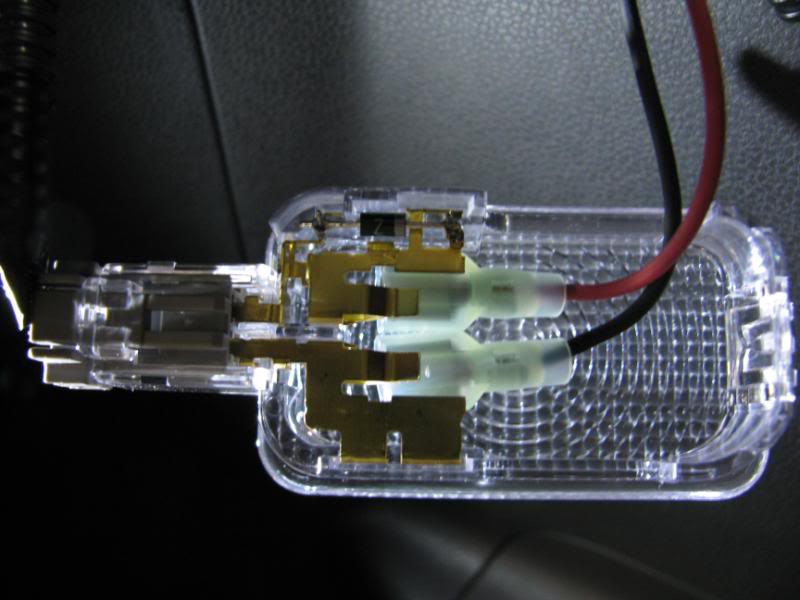
3. take out the stock wimpy little hatch light on the driver side with a flathead screwdriver and a towel (sorry no pic)
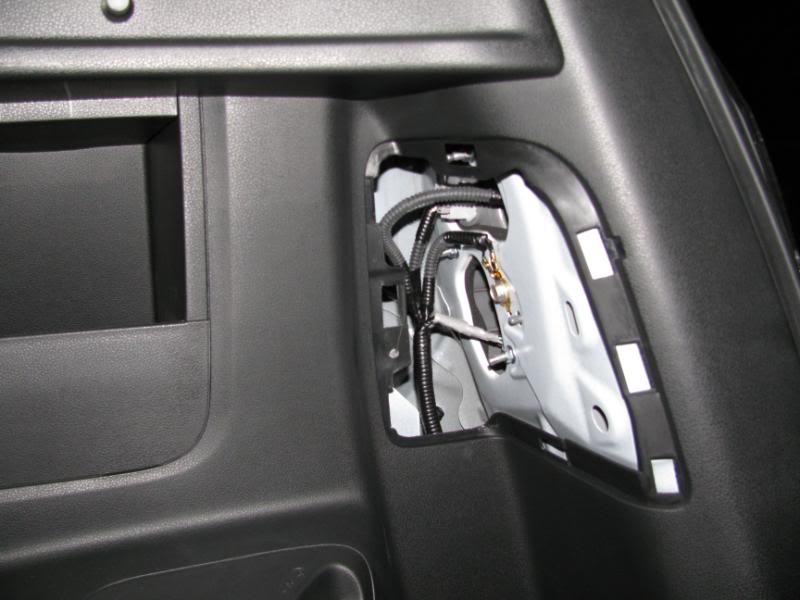
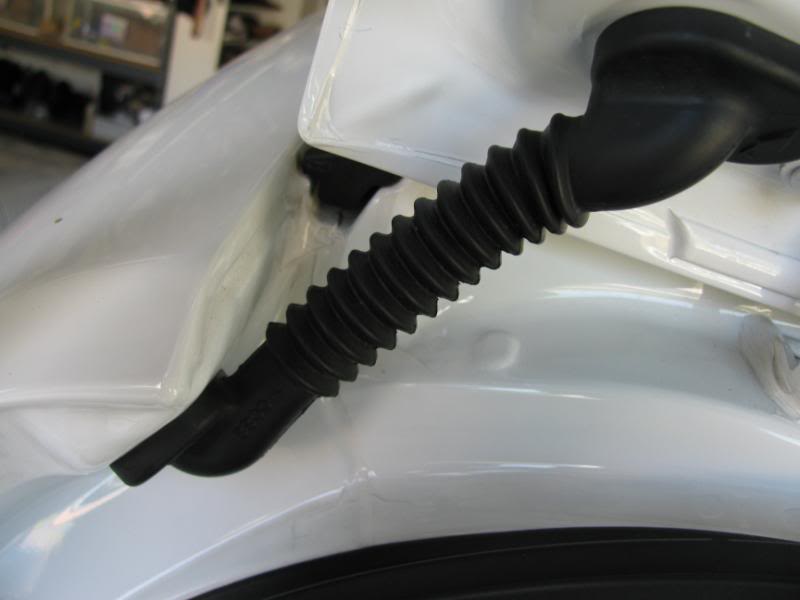
4. take a look at the hole where the stock hatch light used to be. way up in there is a small hole and a little notch. that is where you will be running the power wires down to the taillight access area.
5. I used a pretty stiff wire and stuffed it through. then i took the red power wire and tied it to the stiff wire.
6. Now at this time, you know where the power wire is gonna be running. So take your tail light plastic covers and find a place to drill a hole. that part is entirely up to you. this'll give you an idea of roughly where i put the LED holders
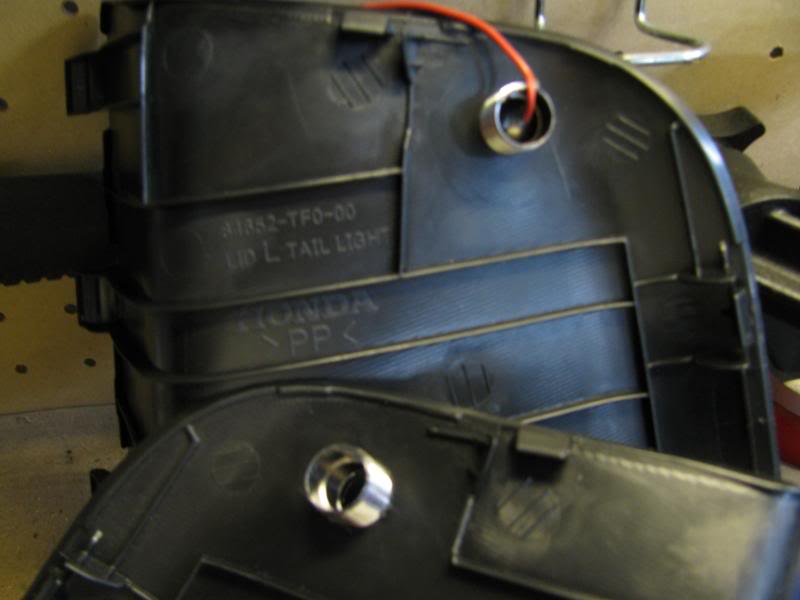
7. pretty symmetrical i think
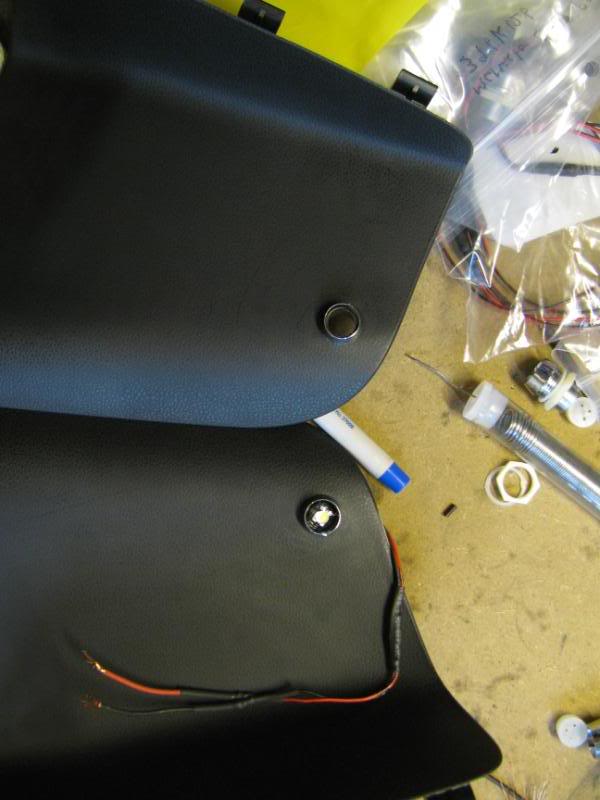
8. In the above picture you can see two separate heat shrinks and one heat shrink close to the LED itself. The one close to the LED is already there where oznium provided prewired LEDs with resistors. The two separate ones were made by me because i wanted to lengthen the wires. I also went "all out" and got some connectors, pins, and sockets from work, so instead of soldering or just simply wire tapping, i can disconnect these easily. You dont have to use connectors though.
male and female end:
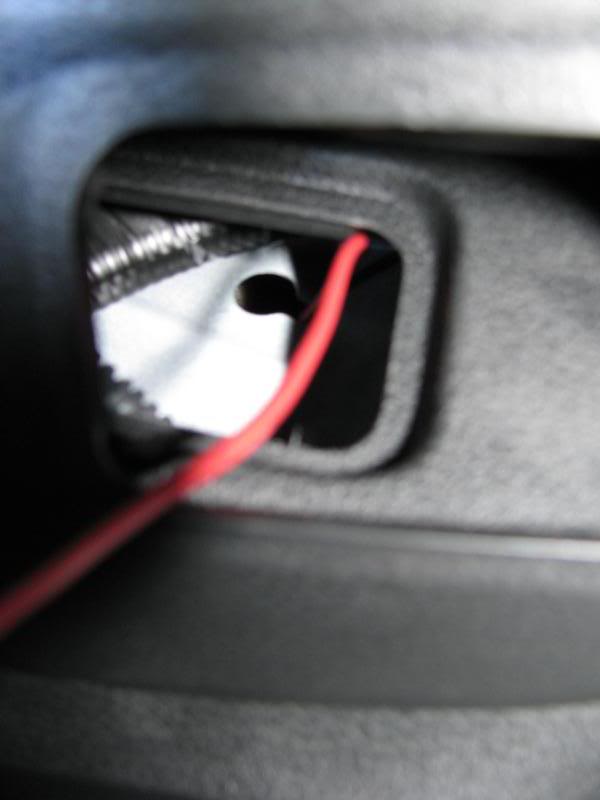
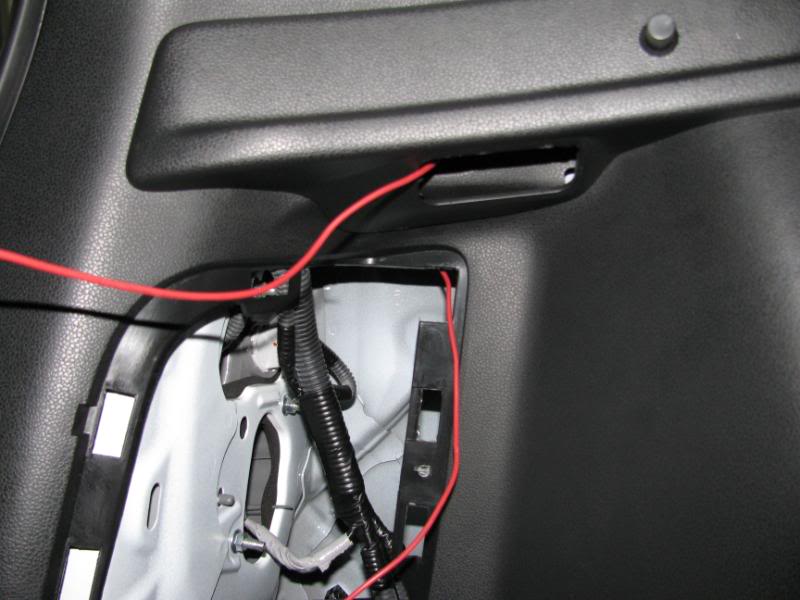
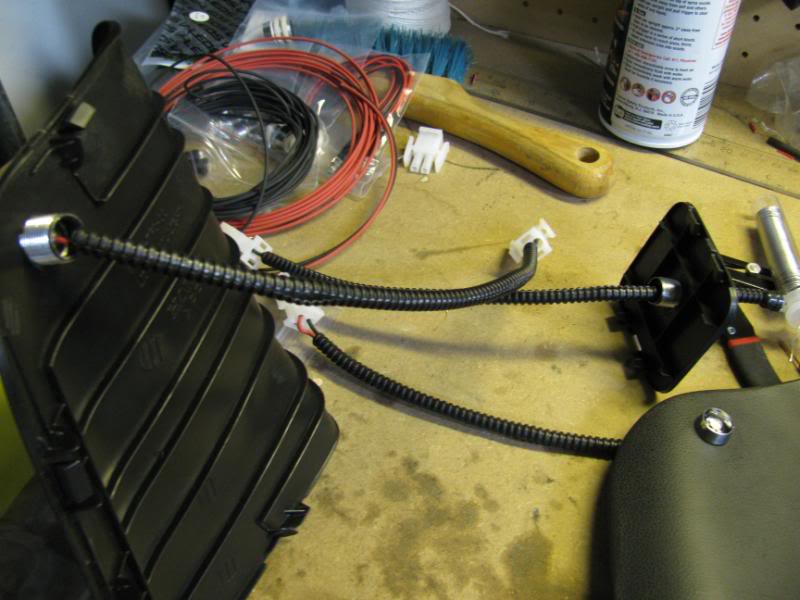
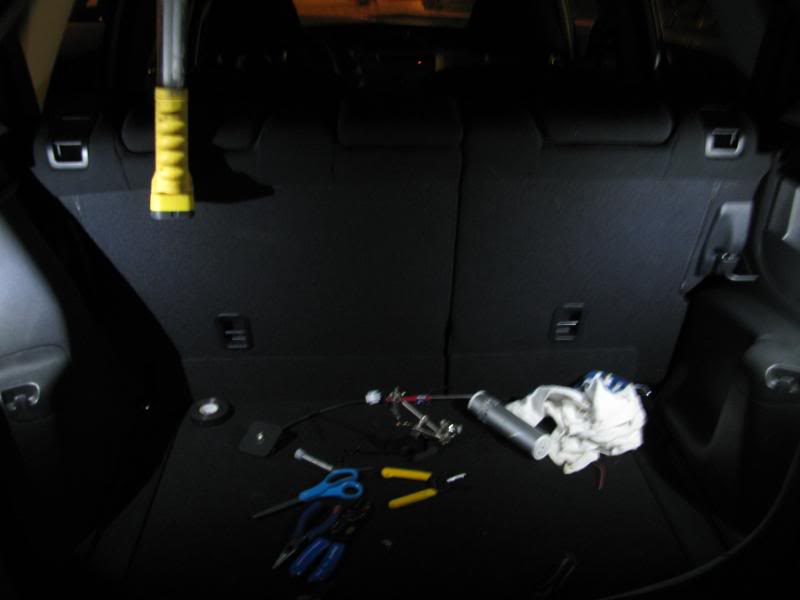
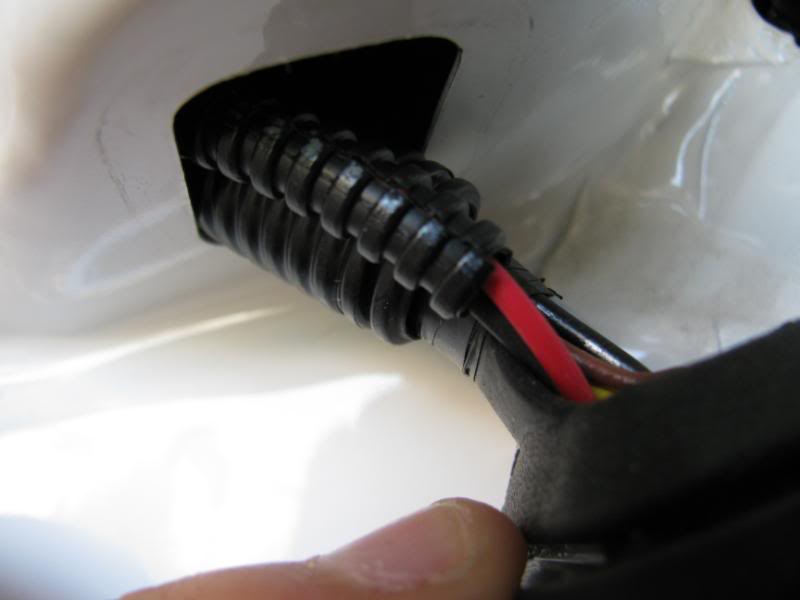
9. Now that you have your LED's installed in the taillight covers, its time to really wire up the hatch with postive and negative wires. in the picture below, you can see a set of + - wires coming from above, remember, thats the wire we routed though that tiny little hole where the stock hatch light was. the second set of + - wires that come from below go through the plastic panel and the bottom trim piece that we took off earlier. then it goes through the passenger side panel piece up the to the taillight access area. (I had a pic of it but cant find it now)
note: the two unstripped wires that hang from above are going to tapped into the stock hatch light connector.
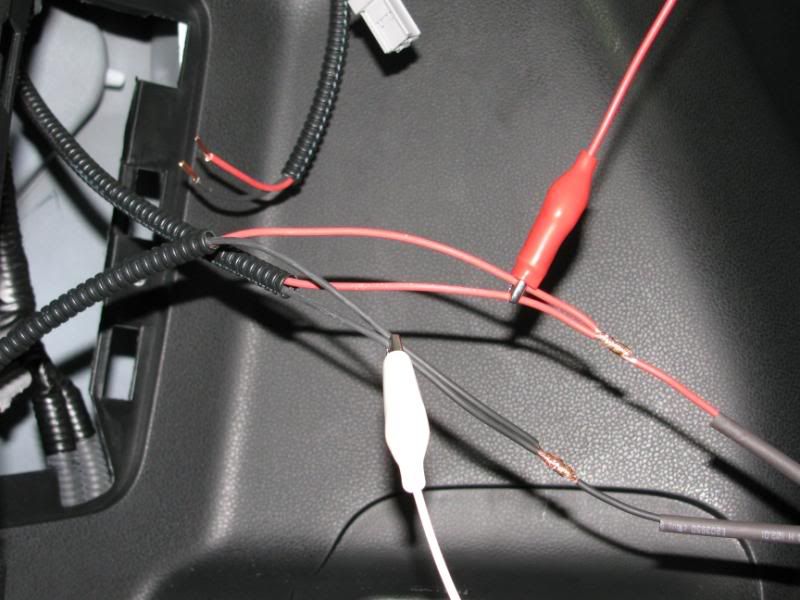
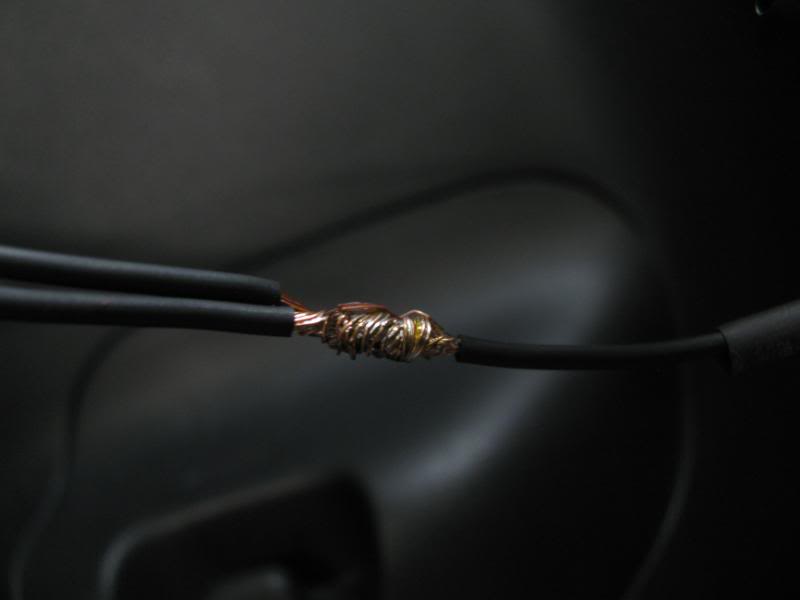
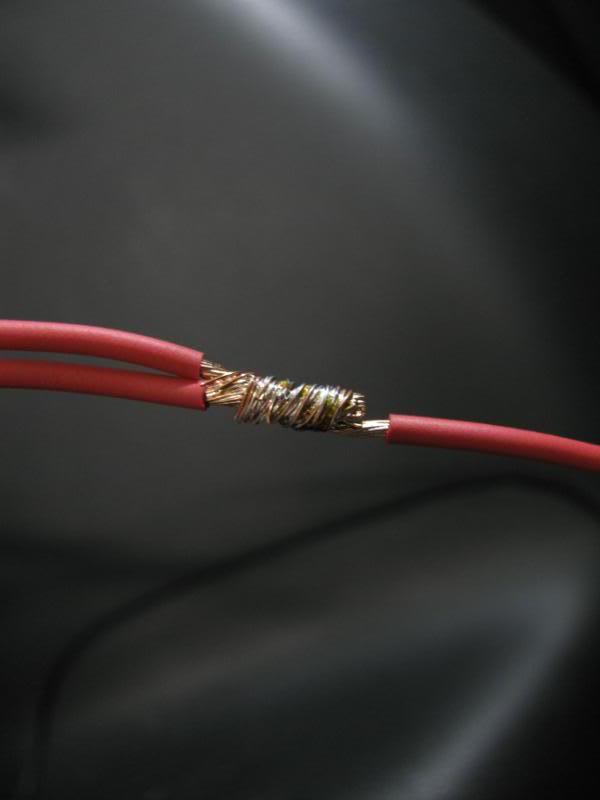
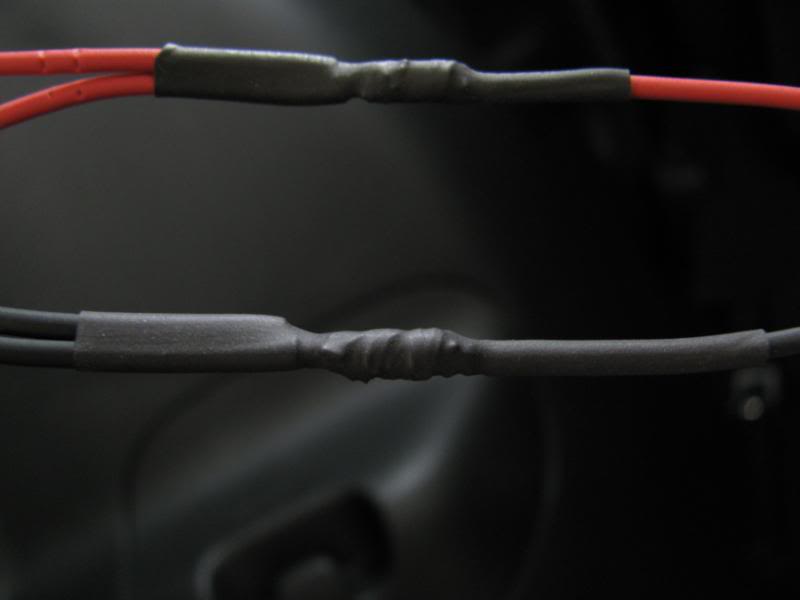
10. In the picture above: take the a short length of wire and solder it to the two sets of wire coming from the taillight access area. these + - leads are going to be connected to the drivers side LED.
note: remember heat shrink! or electricians tape
 '
'
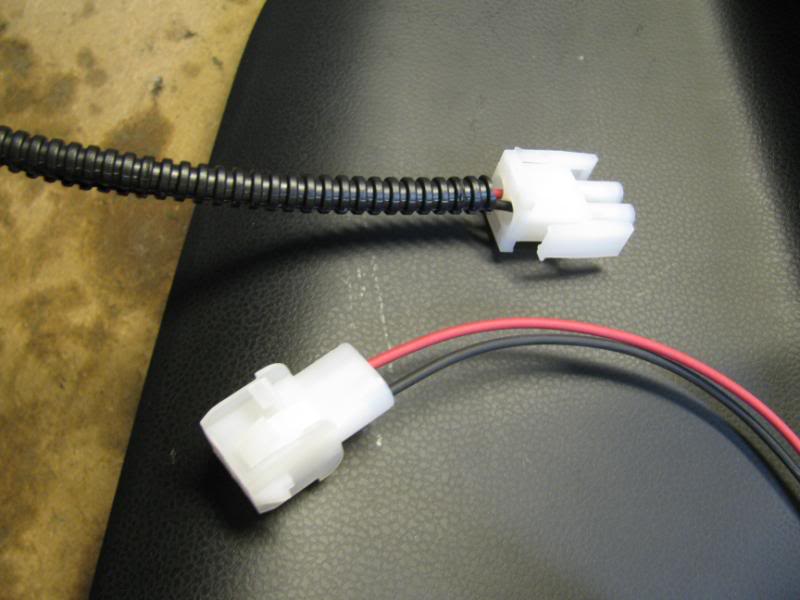
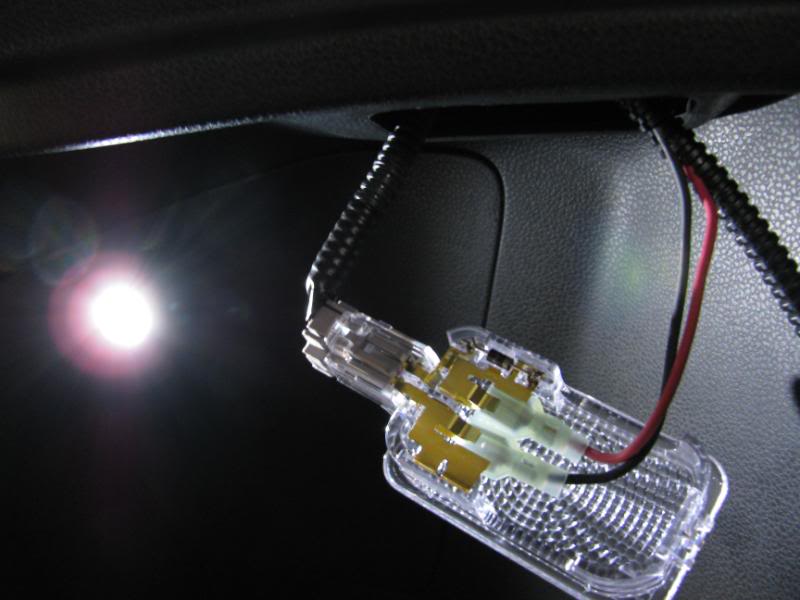
11. The drivers side is now done. head on over to the passenger side and connect your LED to the + - wires that you previously routed. Now its time to actually connect up the + - wires to get power! Remember those two stripped wires that were just dangling in a picture above? take those and crimp on female spade connectors. because these LED's are going to light up my hatch, i dont need the stock light bulb anymore. also i didnt want to directly tape into a stock wiring harness because you cant really replace it. instead i decided to hack up the light fixture itself because that is easy to buy at honda and replace. take a look:
12. ENJOY! your new hatch leds!
So there you have it 2 hatch LED's to light up your ride at night. Now you dont have to stumble around to put your 6 pack in the trunk at night now!
Note: I will have a second installment to install a LED into the hatch door itself like fellow fit freaker ratedz. Props to him for giving the idea for this DIY.
https://www.fitfreak.net/forums/fit-...ch-w-pics.html
So all credit for the idea goes to him! but since everyone on that thread was wondering how he did it, i thought i might give it a try. so enuf chit chat, here goes (my first diy so lol sorry if its not thorough)
***DISCLAIMER*** FIT FREAK NOR AM I NOT RESPONSIBLE FOR ANY MODIFICATIONS DONE TO YOUR CAR. THIS THREAD IS HERE ONLY TO ASSIST YOU IN YOUR INSTALLATION OF THE LED's in the hatch.
First off is parts list
1. Head over to http://www.oznium.com and pick up three WHITE superflux LED's and pick up three 10MM Chrome plastic holders
2. A drill with a couple of sizes of drill bits all the way up to 1/2"
3. Wire stripper and some 20 gauge wire (red/black)
4. Soldering tool and solder
5. Heat Shrink and heat gun
6. Wire Loom (optional)
1. First take off the tail light access covers on both driver and passenger sides
2. Use some force to pull out the trim piece on the bottom of the hatch (note the plastic clips)
3. take out the stock wimpy little hatch light on the driver side with a flathead screwdriver and a towel (sorry no pic)
4. take a look at the hole where the stock hatch light used to be. way up in there is a small hole and a little notch. that is where you will be running the power wires down to the taillight access area.
5. I used a pretty stiff wire and stuffed it through. then i took the red power wire and tied it to the stiff wire.
6. Now at this time, you know where the power wire is gonna be running. So take your tail light plastic covers and find a place to drill a hole. that part is entirely up to you. this'll give you an idea of roughly where i put the LED holders
7. pretty symmetrical i think
8. In the above picture you can see two separate heat shrinks and one heat shrink close to the LED itself. The one close to the LED is already there where oznium provided prewired LEDs with resistors. The two separate ones were made by me because i wanted to lengthen the wires. I also went "all out" and got some connectors, pins, and sockets from work, so instead of soldering or just simply wire tapping, i can disconnect these easily. You dont have to use connectors though.
male and female end:
9. Now that you have your LED's installed in the taillight covers, its time to really wire up the hatch with postive and negative wires. in the picture below, you can see a set of + - wires coming from above, remember, thats the wire we routed though that tiny little hole where the stock hatch light was. the second set of + - wires that come from below go through the plastic panel and the bottom trim piece that we took off earlier. then it goes through the passenger side panel piece up the to the taillight access area. (I had a pic of it but cant find it now)
note: the two unstripped wires that hang from above are going to tapped into the stock hatch light connector.
10. In the picture above: take the a short length of wire and solder it to the two sets of wire coming from the taillight access area. these + - leads are going to be connected to the drivers side LED.
note: remember heat shrink! or electricians tape
'11. The drivers side is now done. head on over to the passenger side and connect your LED to the + - wires that you previously routed. Now its time to actually connect up the + - wires to get power! Remember those two stripped wires that were just dangling in a picture above? take those and crimp on female spade connectors. because these LED's are going to light up my hatch, i dont need the stock light bulb anymore. also i didnt want to directly tape into a stock wiring harness because you cant really replace it. instead i decided to hack up the light fixture itself because that is easy to buy at honda and replace. take a look:
12. ENJOY! your new hatch leds!
So there you have it 2 hatch LED's to light up your ride at night. Now you dont have to stumble around to put your 6 pack in the trunk at night now!
Note: I will have a second installment to install a LED into the hatch door itself like fellow fit freaker ratedz. Props to him for giving the idea for this DIY.

Member
Joined: Mar 2008
Posts: 37
From: London, UK
I did our original jazz slightly differently, I took power in the same way but ran a parallel circuit keeping the original light lit whilst lighting an LED strip mounted on the underside of the pull-out-boot-curtain/shelf-bar-thing! 30min job and works a treat and very very bright!
Thread Starter
|
Member
Joined: Aug 2008
Posts: 98
From: Northrdge, Socal
here we go again...lol
for those of you who want to install the LED in the hatch door itself, its really quite simple.
1. remove the hatch panel (NOTE: there are many clips, see the tape marks)
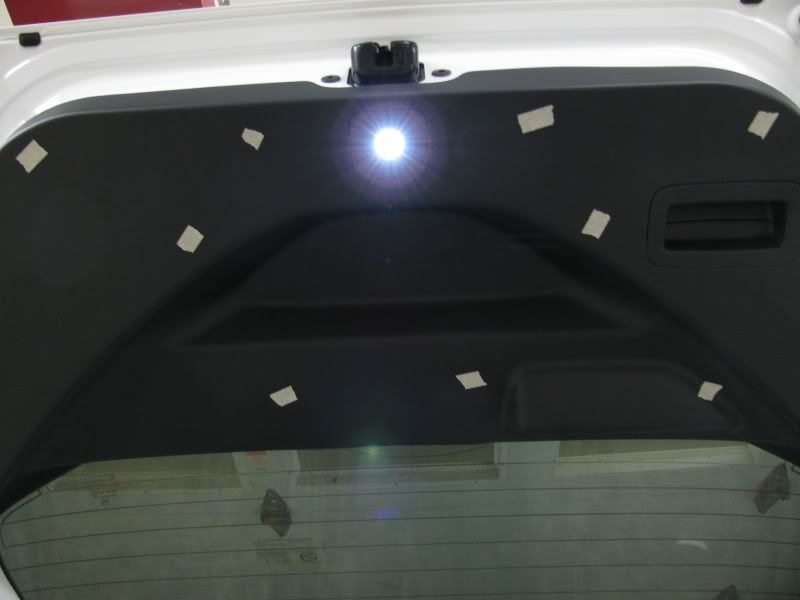
2. take out the square piece where you will be installing the LED and drill a 1/2" hole
3. now its time to route the wires... take a look at the rubber grommet at the top left of the hatch. that is where the + and - wires are gonna be routed. The thick black and red wires are the ones i just routed and the 2nd thinner wireloom in the other pic is also the one i just routed. I suggest using wire loom because its easier to feed through the hatch door
4. after routing it through all you need to do is tap into the wires from the leds in the tailight access panel that you just installed. and voila:

sorry for the lack of details. didnt take as many pictures as i thought i did. if there are any questions feel free to ask!
for those of you who want to install the LED in the hatch door itself, its really quite simple.
1. remove the hatch panel (NOTE: there are many clips, see the tape marks)
2. take out the square piece where you will be installing the LED and drill a 1/2" hole
3. now its time to route the wires... take a look at the rubber grommet at the top left of the hatch. that is where the + and - wires are gonna be routed. The thick black and red wires are the ones i just routed and the 2nd thinner wireloom in the other pic is also the one i just routed. I suggest using wire loom because its easier to feed through the hatch door
4. after routing it through all you need to do is tap into the wires from the leds in the tailight access panel that you just installed. and voila:
sorry for the lack of details. didnt take as many pictures as i thought i did. if there are any questions feel free to ask!


Member
Joined: Dec 2009
Posts: 41
From: Kansas City
I did our original jazz slightly differently, I took power in the same way but ran a parallel circuit keeping the original light lit whilst lighting an LED strip mounted on the underside of the pull-out-boot-curtain/shelf-bar-thing! 30min job and works a treat and very very bright!
CTR- How did you route the wires to your cargo cover? I'm wondering how to make it a relatively clean-looking install. Do you have any pics?
Thanks,
Matt


Thread
Thread Starter
Forum
Replies
Last Post
JDMchris.com
2nd Generation GE8 Specific DIY: Repair & Maintenance Sub-Forum
0
Jul 2, 2010 11:05 PM
robcollins5
Fit DIY: Repair & Maintenance
5
Apr 8, 2009 03:20 PM