
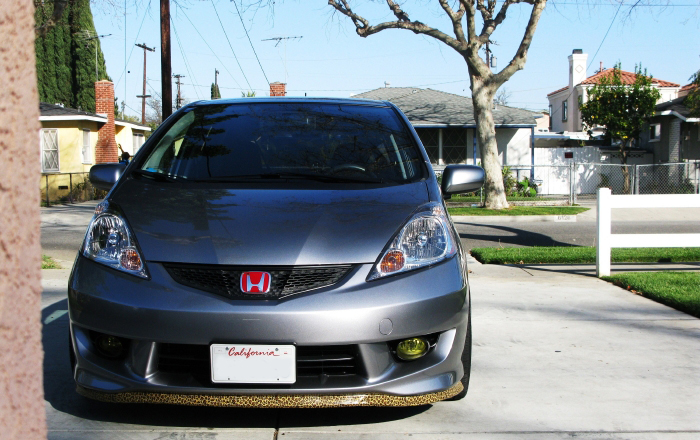
DIY front lip


Kind of reminds me of my R lip on my Miata. Looks great. I wonder if you could do something similar to the side skirts outward or downward. Anyone have a problem jacking up the car from the front or service getting on a lift? I have to drive my Miata on 2x4s to get jack under.
This would be cheaper to replace then a expensive carbon fiber lip that will get beaten by the winters up here. Does anyone know if there is duct tape that comes in a carbon fiber look?
This would be cheaper to replace then a expensive carbon fiber lip that will get beaten by the winters up here. Does anyone know if there is duct tape that comes in a carbon fiber look?
Last edited by cjecpa; Jun 24, 2012 at 03:51 PM.


Member
Joined: Jul 2012
Posts: 370
From: Riverside
Ok so the front kinda sticks out but not really. This is what I did. I used 70% Isopropyl Alcohol on both the bottom of the bumper AND on the rubber lip. I did this so that the adhesive would stick better to both the body and the lip. I used the 3M Outdoor Heavy Duty Adhesive, and it was the 1 inch wide one. And as far as the rubber used, it was the exact one used that was used by the OP. I had to install the lip in short sections if that makes since. I started at one end and used a little adhesive and applied it to the widest part of the lip. (See figure below)

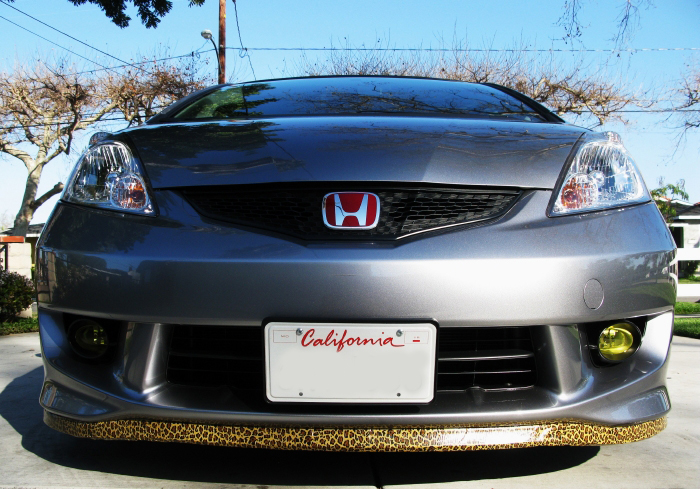
If you are looking at the rubber it has three sides to it. One side will be somewhat noticeably larger than the other. This is the side that was attached to the adhesive and bumper.
Once the adhesive was applied I put it on the bumper. But I did it slowly so that it can form around the edges of the bumper. Once I got to the middle I did find it harder to keep the lip pointing down and not out. It is not perfectly down but whatever. I do not remember if I had to work the rubber to stay pointing down or not. After doing it piece by piece (meaning I applied the adhesives in sections not all at once). I began screwing it into the bumper. I did find it difficult to get the screw both through the rubber, and the adhesive, and the bumper without twisting the rubber around. And since I did not have my car jacked up to do this I had very little room to apply upward pressure to the screwdriver. I used the palm of my hand under the screwdriver with my arm resting on my leg to push upward as I screwed it in. The rubber would twist but eventually go back to normal. I used quite a few screws, mostly in areas that needed the lip to be held closer to the bumper. Like I said I cannot remember if I did anything tricky to make it work. All I can recommend is using Isopropyl Alcohol (will help bond better with adhesive), and using 3M outdoor, wide adhesives (the roll kind). O and patience. I got inpatient since it was getting cold and starting to drizzle so I hurried on the last end a little bit.
I hope that helps. If you have anymore questions let me know.
O and my better idea was not using the screws, that was just a tip. My better idea is something I am keeping hush hush right now cause I want to make sure it can work and stuff before putting it up on here, but to give you an idea of what it is, it is a non-bendable but flexible rubber lip that is made specifically for our cars that has holes made for the screws already and is ready to install.
Is that the tape you bought?


Can't accept until we see the pics.