
DIY C-Pillar Bar (Advanced Speed Shop Type)


Thread Starter
|
Member

Joined: Jul 2010
Posts: 208
From: Arkansas
DIY C-Pillar Bar (Advanced Speed Shop Type)
I ordered one of the 30 dollar Advanced Speed Shop Bars, because I'm a cheapo like that and fail to see how a metal bar posted between two metal parts of the frame of the car that are linked together couldn't be supported by an aluminum bar. This DIY install will re-use your factory bolts for the seat belt brackets and all the washers.
You'll need the bar, a 14 millimeter open-end wrench, a 14 millimeter socket with a good length extension (Mine was probably about 5 inches in length), ratcheting wrench (Mine was a 3/8th's drive.), and a 24 millimeter open ended wrench.
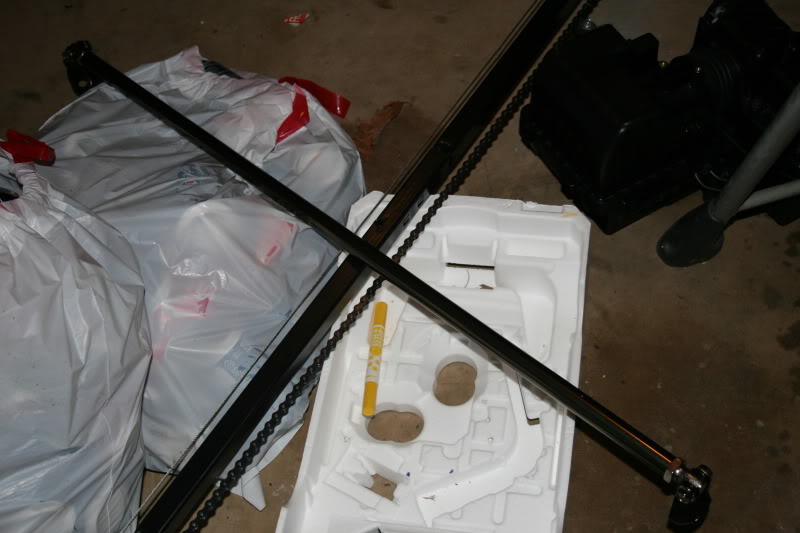
Here's the bar:
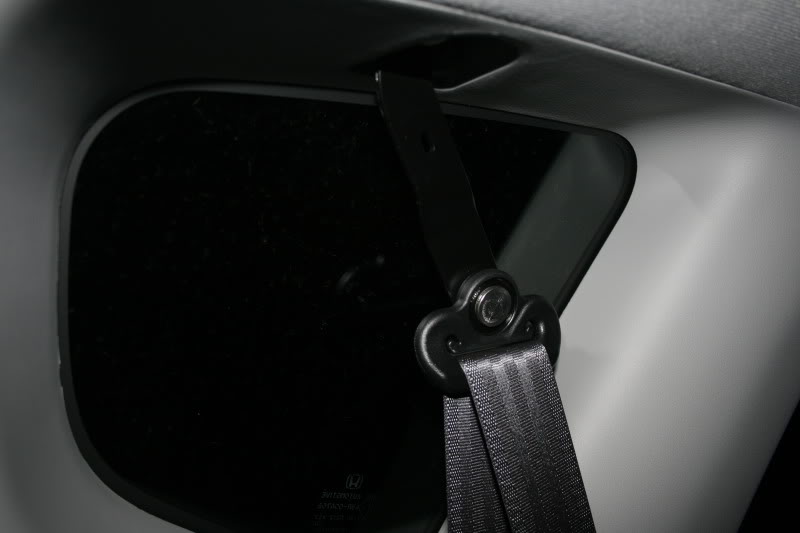
So, to start off, you'll want to pop off the plastic covers of the seat belt brackets. It's easy as popping a flat head screwdriver in between where the two sides meet together, and just twist until they pop. (When mine popped loose, one shot off and smacked me in the cheek. So watch out!) Once that's done, it should look like this:
Now, you're going to choose whichever side you want to start with, and you're going to have to loosen the bolt holding in the seat belt bracket and take it out. (I started on the right.)
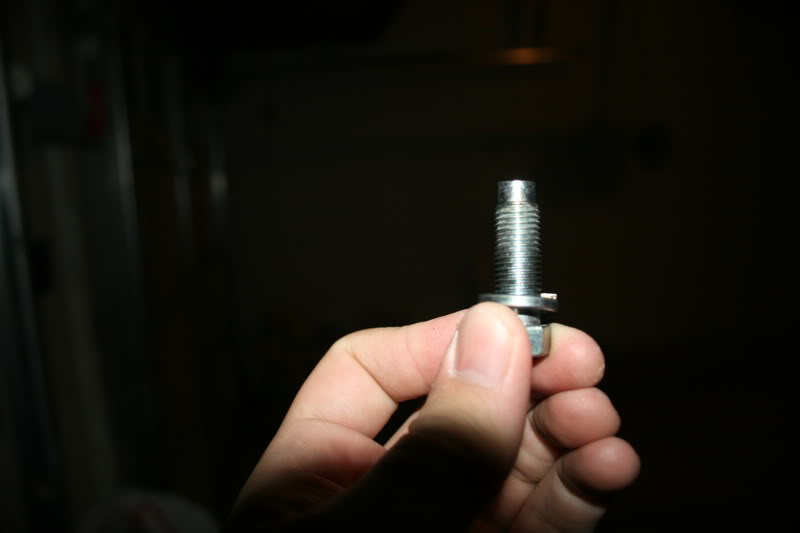
Once the bolt is out, take off the washer and the small plastic disc used to keep the washer on top of the bracket when being assembled. Take note of where it's at! You're going to put it back there later when you try to get the bracket back in. But for right now, your bolt should look like this:
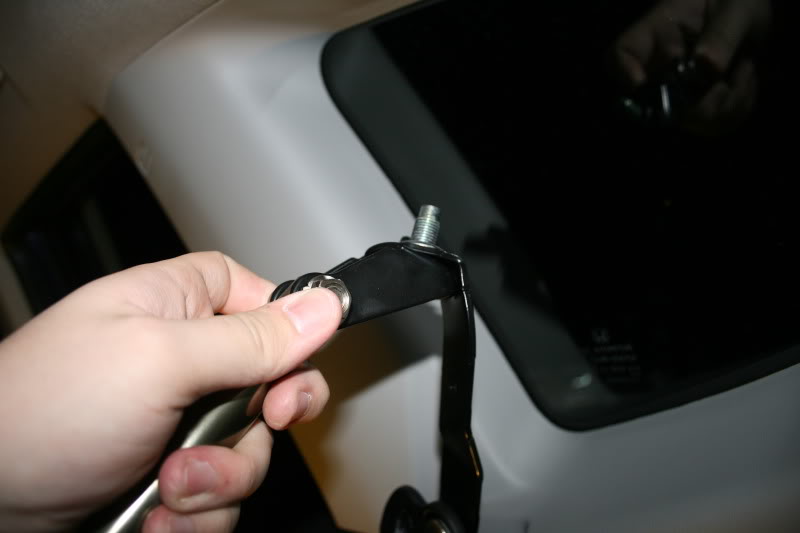
The lock washer is on there for good, so don't worry about taking it off. Now, to make things easier on myself, I unscrewed the end link from the bar, so I didn't have to deal with moving the bar around. Sorry, I lack pictures at this point, but I'll try my best to be descriptive.
So, you're going to slide the bolt through both the end link AND the seat belt bracket, and have the lock washer on the outside, and the washer that came out back where it was, with the plastic disc above it to keep it from slipping off. Told you you needed it for later!
Now what to do is, to slide the bracket back into the place it was (There's a metal tab that has a slot next to the threaded hole. It will slide in there.
Your end link should be like this, over the seat belt bracket. You're going to push up on the bracket and put it into place, and HOLD IT. Now, using just the extension and 14mm socket, you're going to hand-start the bolt. Be sure you get it about halfway so it doesn't pop back out, and be careful not to crossthread. Once that's done, throw the ratchet on and just get it hand tight. Don't hand torque yet. You need to be able to twist the end link around to reach the other side. Now, unbolt the other side's seat belt bracket.
Now, screw the bar back onto that end link, and put it on all the way. Now, here's where it gets tricky again.
You're going to need to use the threads on both sides of the bar to adjust the length between the two links, so the end link on the new side will reach the threaded hole. Try to center it was best you can. Once that's done, just repeat what you did on the other side to put the end link in.
Congrats! You now have the bar installed.
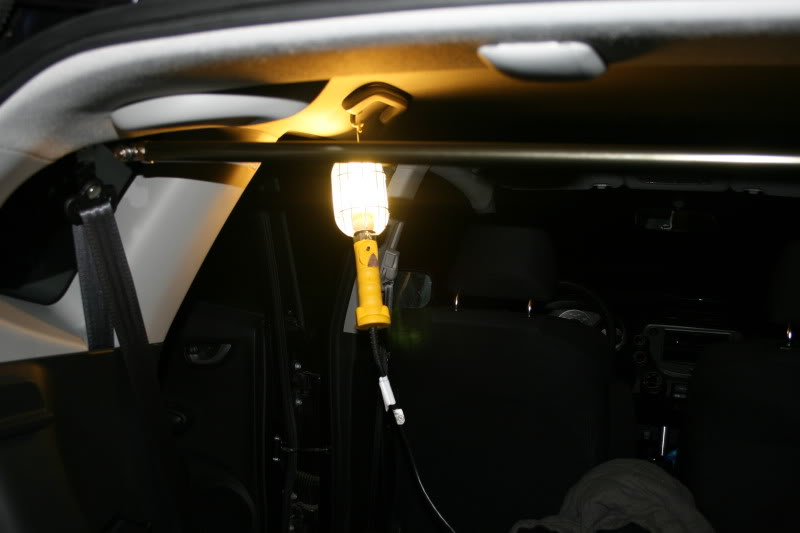
It should look something like this.
Now, here's where you needed the two open ended wrenches. On the end links, where the joint is, there's a nut on one side and a bolt head on the other. Both are fourteen millimeters. You need to double wrench, and on the nut side, hold the open ended wrench. On the bolt side, use the ratchet and tighten it. Get it good and tight, to where the wrench hardly turns (But don't snap the bolt heads!)
Repeat for both sides of the bar. Be sure it's good and tight.
After, there's one last thing you have to tighten. On either side of the bar, are two large nuts that will move on the threaded parts of the end links. move them toward the middle, till you can't hand tighten them anymore. Now, use the 24mm open end, and get them good and hand tight.
Now, go back and double check all your bolts and nuts and be sure they're all good and tight, and the bar doesn't shake or rattle. It will flex a little if you pull on it, because it's aluminum. Hand torqued is fine, as long as you don't snap the heads off or crossthread.
Enjoy!
You'll need the bar, a 14 millimeter open-end wrench, a 14 millimeter socket with a good length extension (Mine was probably about 5 inches in length), ratcheting wrench (Mine was a 3/8th's drive.), and a 24 millimeter open ended wrench.
Here's the bar:
So, to start off, you'll want to pop off the plastic covers of the seat belt brackets. It's easy as popping a flat head screwdriver in between where the two sides meet together, and just twist until they pop. (When mine popped loose, one shot off and smacked me in the cheek. So watch out!) Once that's done, it should look like this:
Now, you're going to choose whichever side you want to start with, and you're going to have to loosen the bolt holding in the seat belt bracket and take it out. (I started on the right.)
Once the bolt is out, take off the washer and the small plastic disc used to keep the washer on top of the bracket when being assembled. Take note of where it's at! You're going to put it back there later when you try to get the bracket back in. But for right now, your bolt should look like this:
The lock washer is on there for good, so don't worry about taking it off. Now, to make things easier on myself, I unscrewed the end link from the bar, so I didn't have to deal with moving the bar around. Sorry, I lack pictures at this point, but I'll try my best to be descriptive.
So, you're going to slide the bolt through both the end link AND the seat belt bracket, and have the lock washer on the outside, and the washer that came out back where it was, with the plastic disc above it to keep it from slipping off. Told you you needed it for later!
Now what to do is, to slide the bracket back into the place it was (There's a metal tab that has a slot next to the threaded hole. It will slide in there.
Your end link should be like this, over the seat belt bracket. You're going to push up on the bracket and put it into place, and HOLD IT. Now, using just the extension and 14mm socket, you're going to hand-start the bolt. Be sure you get it about halfway so it doesn't pop back out, and be careful not to crossthread. Once that's done, throw the ratchet on and just get it hand tight. Don't hand torque yet. You need to be able to twist the end link around to reach the other side. Now, unbolt the other side's seat belt bracket.
Now, screw the bar back onto that end link, and put it on all the way. Now, here's where it gets tricky again.
You're going to need to use the threads on both sides of the bar to adjust the length between the two links, so the end link on the new side will reach the threaded hole. Try to center it was best you can. Once that's done, just repeat what you did on the other side to put the end link in.
Congrats! You now have the bar installed.
It should look something like this.
Now, here's where you needed the two open ended wrenches. On the end links, where the joint is, there's a nut on one side and a bolt head on the other. Both are fourteen millimeters. You need to double wrench, and on the nut side, hold the open ended wrench. On the bolt side, use the ratchet and tighten it. Get it good and tight, to where the wrench hardly turns (But don't snap the bolt heads!)
Repeat for both sides of the bar. Be sure it's good and tight.
After, there's one last thing you have to tighten. On either side of the bar, are two large nuts that will move on the threaded parts of the end links. move them toward the middle, till you can't hand tighten them anymore. Now, use the 24mm open end, and get them good and hand tight.
Now, go back and double check all your bolts and nuts and be sure they're all good and tight, and the bar doesn't shake or rattle. It will flex a little if you pull on it, because it's aluminum. Hand torqued is fine, as long as you don't snap the heads off or crossthread.
Enjoy!

Thread Starter
|
Member
Joined: Jul 2010
Posts: 208
From: Arkansas
I haven't had the chance to formally test it yet. All I did was try and shake the car last night on the back end, and it didn't seem to want to rock from side to side as much, feeling like the two ends were "together"
Thread Starter
|
Member
Joined: Jul 2010
Posts: 208
From: Arkansas
The bar flexes a little when I pull on it, but it wouldn't be hard to find the right diameter stainless steel pipe, find the thread pitch of the end links and just thread the ends of the pipe if you wanted a firmer pipe.
Member
Joined: Jan 2011
Posts: 118
From: MA

Nice writeup 
"But.."
From a mechanical standpoint, I can't imagine how this would possibly stiffen anything up... unless the roof is stretching/compressing (tip: it's not).
To prevent a square from deforming, you need to add a diagonal (see every steel bridge ever made).
Adding a second 'top' to the square 5% below the original top? hmmmm... just don't see how it'd do anything... You could have a 8" steal I-beam across the top, and if you don't have any triangles, you can still deform the square.
Last edited by WhiskeySix; Feb 22, 2011 at 09:38 AM.
Nice writeup
"But.."
From a mechanical standpoint, I can't imagine how this would possibly stiffen anything up... unless the roof is stretching/compressing (tip: it's not).
To prevent a square from deforming, you need to add a diagonal (see every steel bridge ever made).
Adding a second 'top' to the square 5% below the original top? hmmmm... just don't see how it'd do anything... You could have a 8" steal I-beam across the top, and if you don't have any triangles, you can still deform the square.

Thread
Thread Starter
Forum
Replies
Last Post
Carbuff2
Fit Suspension & Brake Modifications
31
Jul 24, 2022 01:26 PM
mole177
2nd Generation GE8 Specific DIY: Repair & Maintenance Sub-Forum
137
Sep 23, 2021 05:07 PM
JoelR
2nd Generation GE8 Specific Suspension & Brakes Sub-Forum
1
Mar 23, 2011 12:24 AM
F'it_ImFromTx
Fit Suspension & Brake Modifications
27
Aug 25, 2008 12:43 AM