3rd Gen GK Specific Fit Exterior Modifications & JDM Styling Sub-Forum Threads discussing exterior modifications and JDM styling for the 3rd Gen GK Honda Fit

Has anyone painted the rear, upper tail light/reflectors?

Thread Tools
 
Search this Thread
 
  #21  
Old 03-07-2018, 10:16 AM
ercdvs's Avatar
Member
Join Date: Jan 2018
Location: Springfield. PA
Posts: 58
That is an option, but now I am reconsidering the light replacement there as well.
 
  #22  
Old 03-08-2018, 02:53 AM
Amabento's Avatar
Member
Join Date: Jan 2018
Location: MKEWI
Posts: 83
Originally Posted by Eddiev8
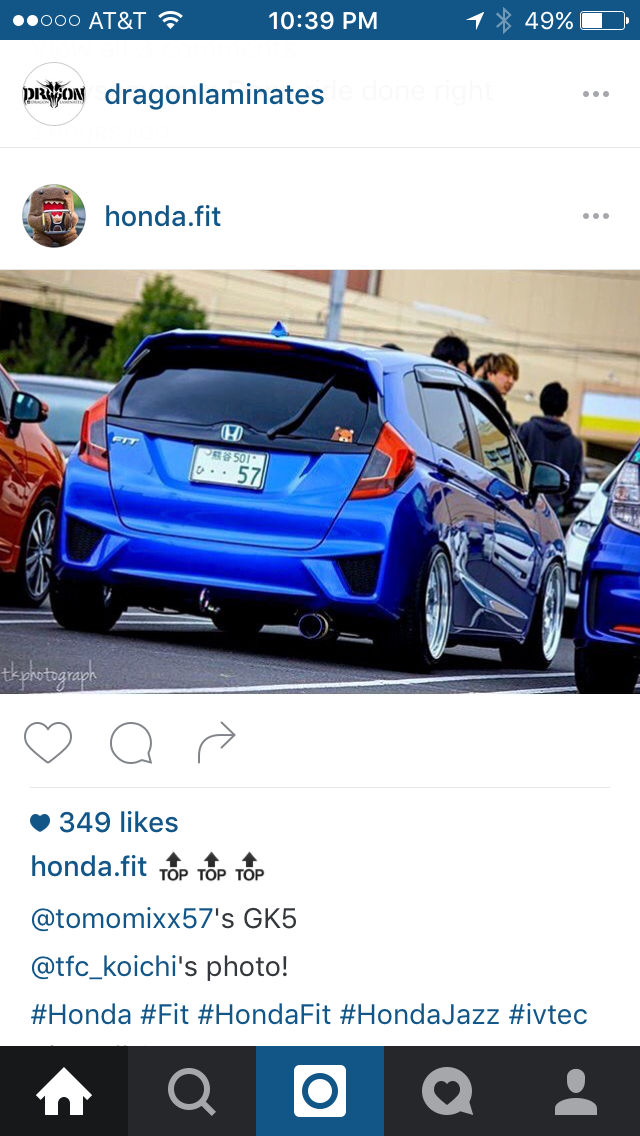
Saw this pic on insta literally before i saw this post and i was like perfect! It looks good in my opinion and you can probably take them off and use some VHT night shades or plastidip
Up to you.


Pic by tfc_koichi<br/>And tomomixx57's gk5
Thanks for posting this... it answers the question of whether going with a black wrap to match the black pillars around other windows would work. Even the front windshield has the black on either side... this is encouraging. I dig the added touch of tinted film on the reverse center light, but mine is an EX (The chrome is designed to line up with it). I’d tint the lights all around or none.
 
  #23  
Old 03-08-2018, 03:30 PM
wasserball's Avatar
Member
5 Year Member
Join Date: Nov 2016
Location: Friendswood, TX
Posts: 1,054
Originally Posted by nisco
I removed both pieces (two 8mm nuts on each side,) washed with dish detergent, let dry, wipe with rubbing alcohol, laid the vinyl, and heat treated with heat gun. Heat gun should be used for setting the shape at the end not during in order to prevent excessive stretch in when laying down the vinyl. Make sure to cover all the clear red plastic, when you open the hatch side portions of the reflector are visible and look bad if not covered with vinyl.
I released the two 8mm nuts, but there seem to be some interference that prevents the reflector from coming out. I don't want to force and crack the reflectors if I use brute force. What is the technique to get the reflectors out?
 
  #24  
Old 03-08-2018, 08:33 PM
Fuelish's Avatar
Member
5 Year Member
Join Date: Jun 2016
Location: Foothills of the Smokies, east Tennessee
Posts: 943
Originally Posted by wasserball
I released the two 8mm nuts, but there seem to be some interference that prevents the reflector from coming out. I don't want to force and crack the reflectors if I use brute force. What is the technique to get the reflectors out?
There's the 2 nuts, and there's a "pin" "clip" kinda thing (for lack of better words) into the hatch...gentle upwards wiggling should free it easily...I gently tapped up on the threaded shafts with a small wrench and wiggled a bit. It's easy enough to get 'em off
 
  #25  
Old 03-09-2018, 12:38 AM
wasserball's Avatar
Member
5 Year Member
Join Date: Nov 2016
Location: Friendswood, TX
Posts: 1,054
Originally Posted by Fuelish
There's the 2 nuts, and there's a "pin" "clip" kinda thing (for lack of better words) into the hatch...gentle upwards wiggling should free it easily...I gently tapped up on the threaded shafts with a small wrench and wiggled a bit. It's easy enough to get 'em off
Thanks. So, there is some alignment dojigger that is keeping the reflectors in place.
 
  #26  
Old 03-09-2018, 07:21 AM
Fuelish's Avatar
Member
5 Year Member
Join Date: Jun 2016
Location: Foothills of the Smokies, east Tennessee
Posts: 943
Originally Posted by wasserball
Thanks. So, there is some alignment dojigger that is keeping the reflectors in place.
Correct....it does seem more for alignment than actually clipping in. I thought it was gonna be troublesome when I did an initial test-run of removing them, as it didn't seem like they would come off. Put 'em back on after that, took 'em off again a few days later when I actually had the time and the PlastiDip, and it's really quite easy, in the scheme of things once you take into accout those "pins" - one per side. This was my first experience with PlastiDip, and dunno if it's the nature of the product or my shoddy spraying, but it came out with a slight textured appearance, almost mimicking the plastic dashboard texture subtlely. Definitely worth the $7.99 can and a bit of time if those red trim pieces annoy you as much as they did me
 
  #27  
Old 02-09-2019, 12:39 PM
Spyke's Avatar
Member
5 Year Member
Join Date: Nov 2017
Location: NorCal
Posts: 80
Not painted, but I did remove them and wrap with gloss black, I like it and I can spot ours very easy that way.
 
  #28  
Old 03-23-2019, 05:20 PM
kanadary's Avatar
Member
5 Year Member
Join Date: May 2016
Location: seattle, WA
Posts: 26
vinyl wrap

What vinyl wrap do you use?
 
  #29  
Old 03-27-2019, 05:53 PM
ramos's Avatar
New Member
Join Date: Oct 2018
Location: Los Angeles
Posts: 7
Originally Posted by kanadary
What vinyl wrap do you use?
try 3M Black Vinyl wrap on Amazon, lots of options
 
  #30  
Old 05-23-2019, 08:22 PM
Spyke's Avatar
Member
5 Year Member
Join Date: Nov 2017
Location: NorCal
Posts: 80
Yep, 3M 1080 series is usually preferred
 
  #31  
Old 06-08-2019, 05:36 PM
dantheman1689's Avatar
Member
Join Date: May 2019
Location: O'side,CA
Posts: 120
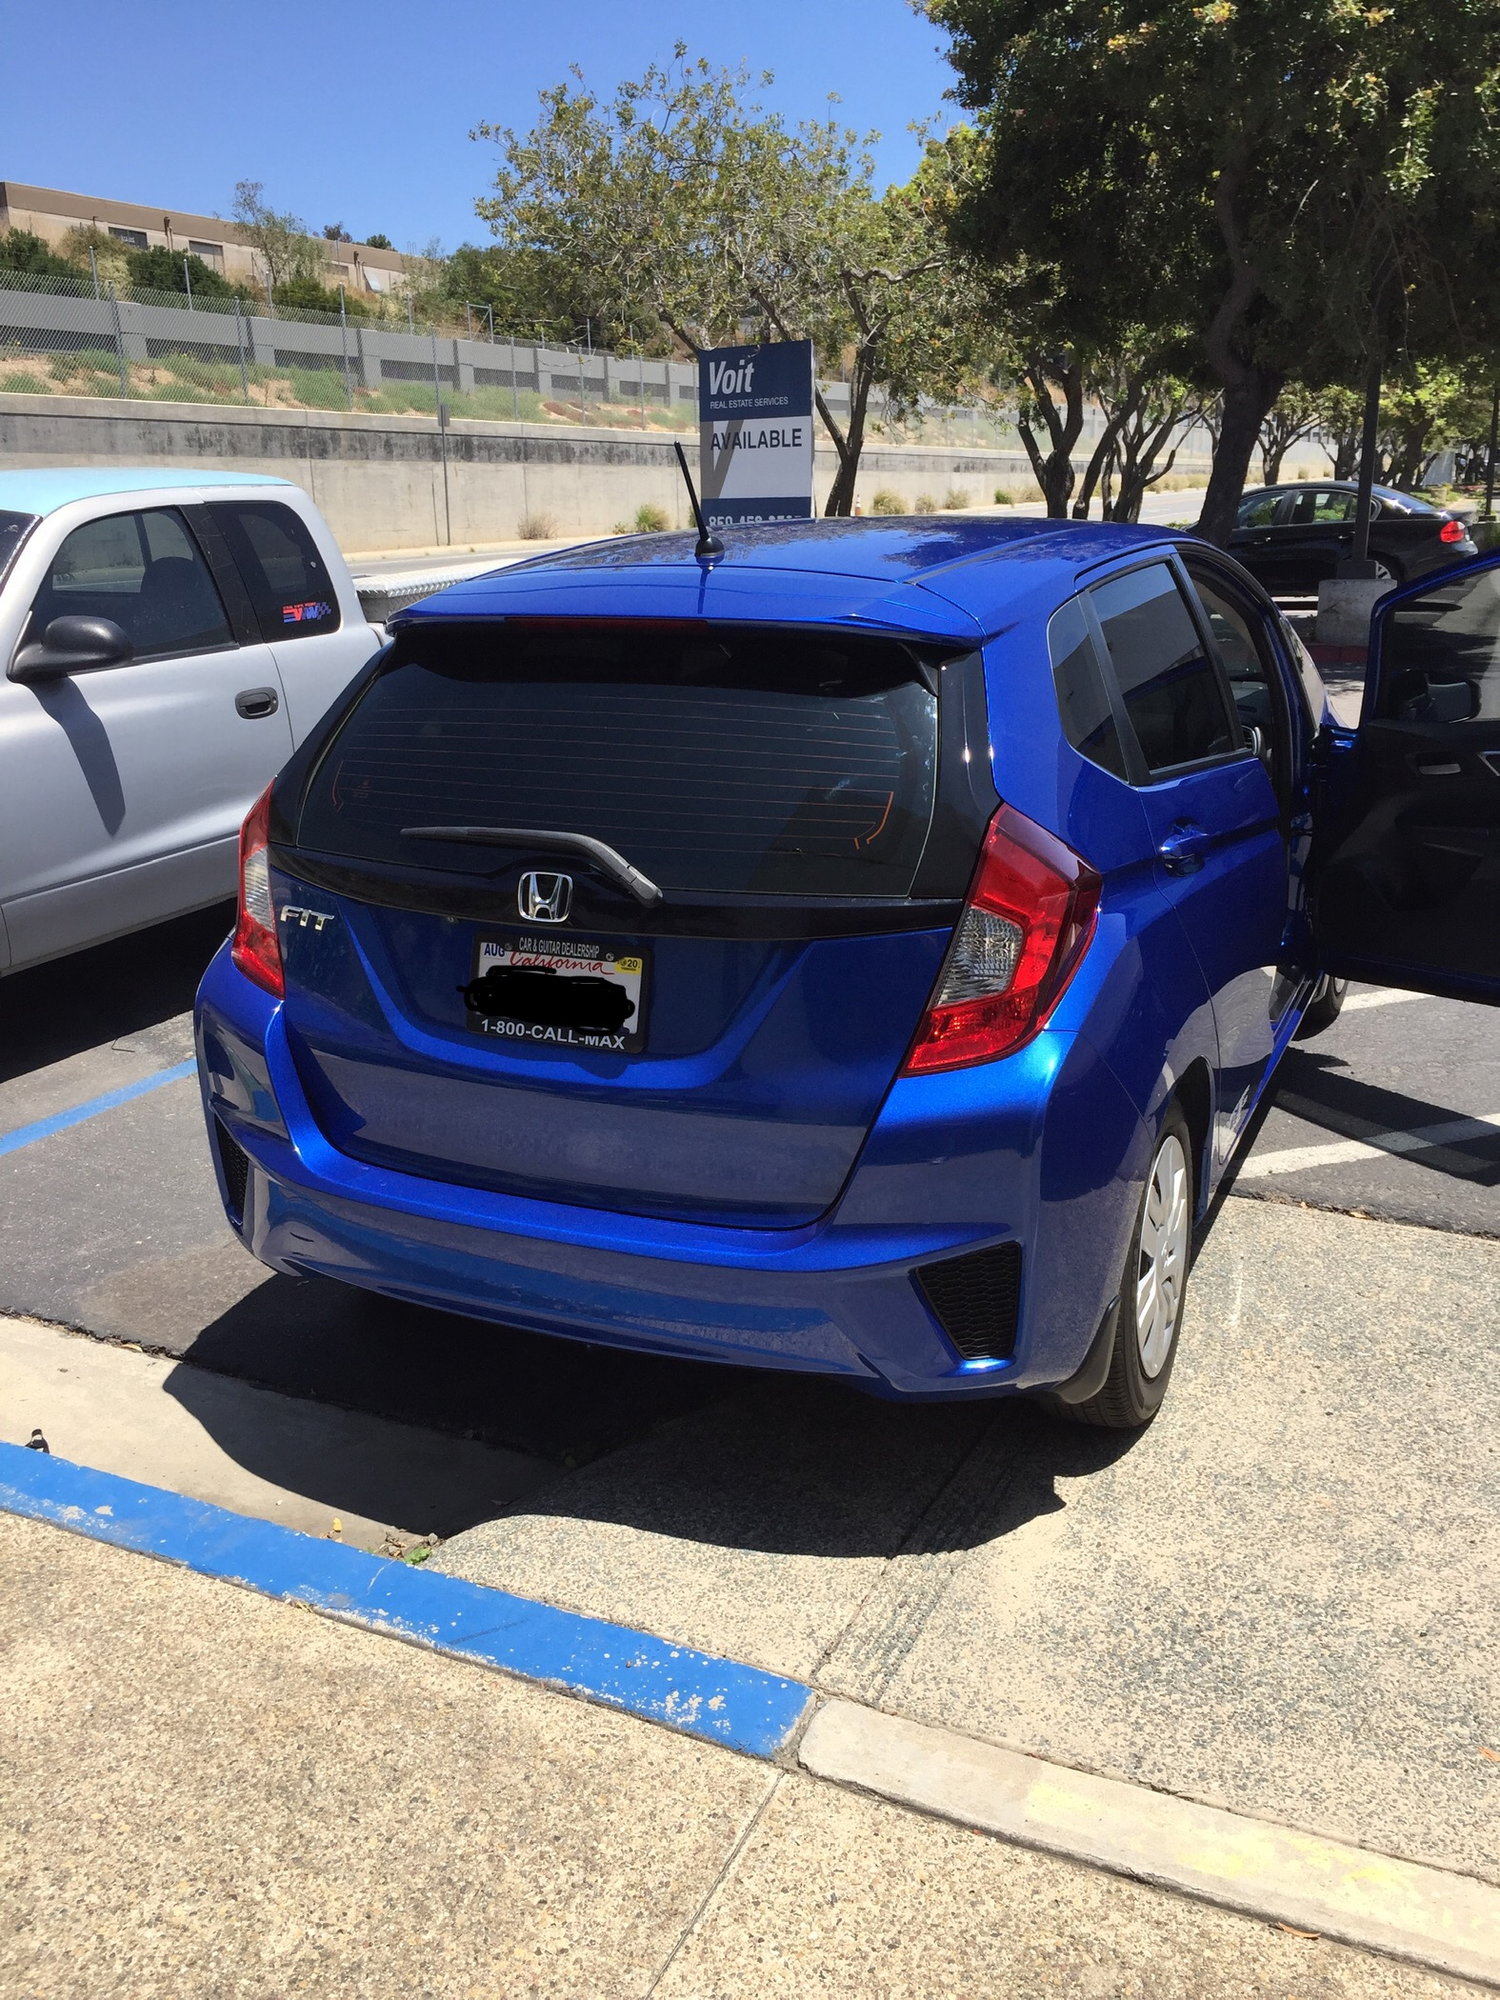
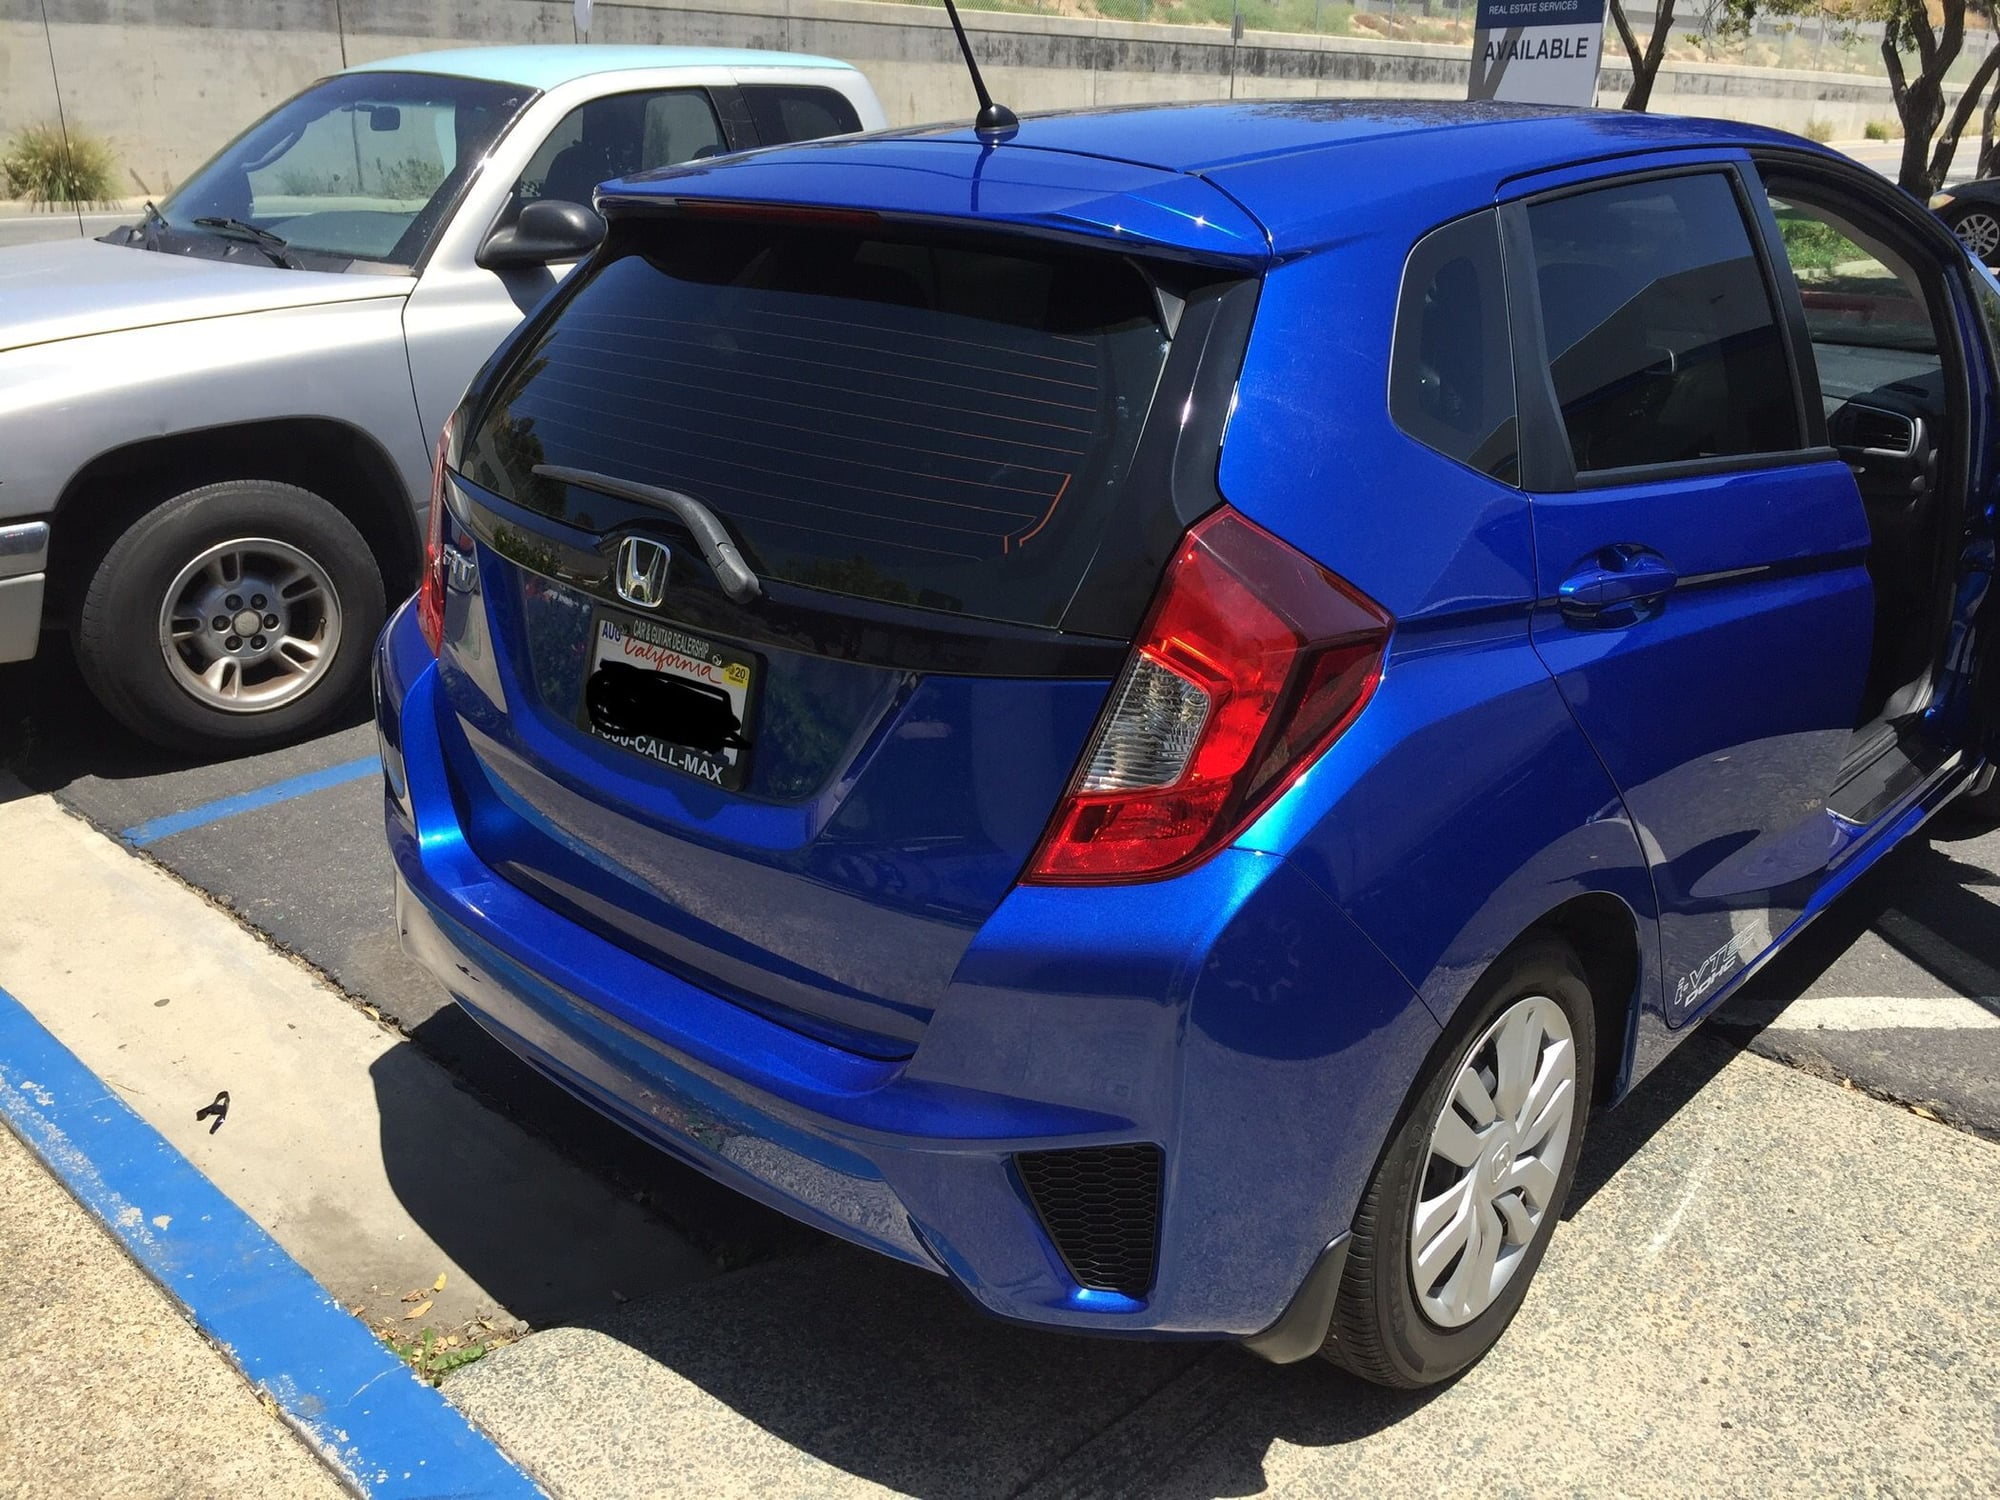
Just got mine done


  #32  
Old 01-03-2022, 11:29 PM
j_b's Avatar
j_b
j_b is offline
New Member
Join Date: Oct 2021
Location: East Coast
Posts: 7
Originally Posted by dantheman1689


Couldnt help but bump this-- this looks incredible. Mine is the same color and i'm looking into doing this. Yours convinced me.
 
Related Topics
Thread
Thread Starter
Forum
Replies
Last Post
Syed Yusuf Usoppy
1st Generation (GD 01-08)
3
11-13-2014 04:04 AM
ONEDVSMOFO
2nd Generation (GE 08-13)
1
08-31-2012 01:49 AM
hondafitblue
For Sale / Want To Buy / Classified Ads for USED Fit Items
1
01-12-2011 01:45 AM
mole177
2nd Generation (GE 08-13)
7
01-05-2011 11:34 PM
herbalteebag
For Sale / Want To Buy / Classified Ads for USED Fit Items
3
06-05-2009 04:34 PM


Quick Reply: Has anyone painted the rear, upper tail light/reflectors?


All times are GMT -4. The time now is 05:34 AM.