
View Poll Results: Was this post helpful
Yes


17
73.91%
No


6
26.09%
Voters: 23. You may not vote on this poll
Claying the Can Do Tool (info article)


Thread Starter
|
Banned
Joined: Mar 2009
Posts: 39
From: USA
Claying the Can Do Tool (info article)
Hey everyone this is the first of a series of articles that I will post by Kevin Farrell.
Permission was granted to post this up by Kevin Farrell.
Please visit his website for his classes and more info:
Kleen Car | professional detailing training | auto detailing steamers, products, equipment
CLAY CAN TURN A GOOD JOB INTO A GREAT JOB
Depending on whom you speak to, clay can either be one of the most useful �tools� in your shop, or just an expensive piece of play-dough. It�s been around for quite a few years now. Some detailers have embraced it, while some have no use for it. I believe that clay can be a valuable tool with many uses.
OVER SPRAY REMOVAL
The most obvious and popular use for clay is over spray removal. For this, it has been a godsend. Before clay, detailers had to use other methods for the removal of over spray. Compounding, which involves friction, heat, and heavy cleaners, is one such method. However, along with the over spray, this friction and heat could also remove some of the paint.
Another method for over spray removal involves dissolving the over spray with solvents, such as lacquer thinner, and rubbing it off. However, if a vehicle has a single stage paint system (e.g., lacquer, enamel) some of the paint, including possibly a painted pinstripe, will dissolve along with the over spray. In addition, this method can be hazardous to other parts of the vehicle, as well as to the detailer.
A third method for over spray removal is wet-sanding the finish. Potential problems with this method include rubbing through the finish, and putting sand scratch-marks in the finish, which would later need to be buffed out.
ATMOSPHERIC POLLUTANTS
The beauty of clay is that it can be used for more than just over spray removal. Foreign particles often cannot be washed off a vehicle�s surface. The clay bar is designed to pull these particles off the paint finish, without harming the paint, by releasing the bond between the foreign particles and the paint surface.
Today�s paint systems are mostly polyurethane base coat/clear coat, which actually is a form of plastic. When plastic heats up, it gets softer. This is what happens when a vehicle is left out in the hot sun all day. The heat generated by the engine, sun, and color of the paint can cause the surface temperature to reach over 200 degrees. This will soften the clear coat and allow foreign particles to embed themselves in the surface and bond to it. This is the major reason why particles remain even after the car has been washed.
The mistake many detailers make is thinking that these particles can be easily buffed or waxed off the surface during the normal polishing procedure. However, the problem is that the contaminant material is often quite durable and has a strong adhesive bond to the painted surface. Trying to buff or wet-sand the contaminant off the finish may do irreparable paint damage.
MANY ADVANTAGES
In addition to the removal of over spray, clay has many advantages:
- Clay will pull unwanted contaminants off any hard, non-porous surface faster than wet-sanding, compounding, or using solvents, with no damage to the vehicle�s finish.
- Clay will save a huge amount of time compared with other methods such as compounding, wet-sanding or the use of solvents.
- Clay will leave you with a surface that is as smooth as glass, making that surface easier to buff.
- Clay will work on any hard surface (e.g., glass, hard moldings, chrome, wheels, and other trim) where solvents can be dangerous and buffers cannot reach or may cause damage.
- Clay will work on most types of over spray, regardless of its composition.
- Clay will not harm the vehicle�s finish.
The use of clay can turn a good job into a great job. Have you ever polished a car and it looked great? No swirls, no streaks and a great shine but, when you rubbed the palm of your hand over the surface, it felt gritty or like sandpaper? This indicates that foreign materials, not removed by buffing or waxing, have been left on the surface. Customers always want to touch their newly detailed vehicle. Feeling grit on the surface will diminish their satisfaction. Claying will remove foreign materials and grit and will leave the customer completely satisfied.
Have you ever buffed a car and the buffer would not glide along, or would bounce, or drag? Have you spent a lot of extra time and effort on certain spots that you could still see sitting on the surface? In order to remedy these problems an unskilled detailer may try to buff off contamination by turning up the speed of the buffer, use a harsh compound or stay on the spot too long with the buffer. Employing these methods may result in paint damage. Using clay will avoid these difficulties and save time.
CLAY EVERY CAR
I clay almost every car I work on. This may sound extreme, but I don�t want a customer to feel anything except smooth sheet metal when he runs his hand over the surface of his vehicle.
The surface isn�t totally clean if there is any grit left behind. By claying every car before you put a buffer to it, you are assured of a few things:
- The surface will be clean;
- The entire buffing process will be easier;
- You will use less material because the buffing pad will glide along the surface better, and cover a greater area;
- You will have a better guide to exactly what has to be done to the finish.
Claying may seem like extra work, but you can actually save time by employing this extra step. That�s right, you can actually save time and produce a finer finish.
Consider the following:
- Buffing out all those little spots that remain on the surface wastes time;
- Using a more aggressive pad (which is necessary to remove little spots from the vehicle�s surface) leaves behind swirl marks and creates the extra step of swirl-mark removal;
- On a contaminated surface, the buffer drags and slows you down;
- A contaminated surface requires more cleaning product. This increases the chance of flinging the product which produces more mess and greater clean up time. Claying saves time by avoiding these issues.
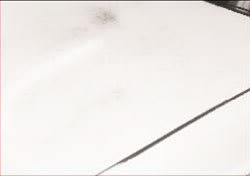
Before clay.
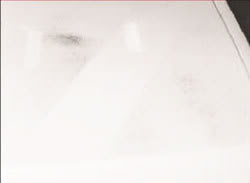
During the procedure.
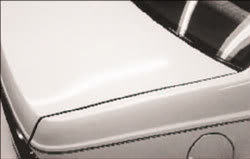
After clay
You may not be convinced. You may still be thinking that the extra time taken to clay the vehicle is counterproductive. It may seem as though you will spend as much time with the clay as you would with the buffer. And the amount of elbow grease required to clay the vehicle may give you a workout that you don�t want. Let�s look closer.
By claying the vehicle first, you will pull off any contamination that remains on the surface of the vehicle after it�s been washed. What you are left with is a super-smooth finish. Now you have a true idea as to exactly what that finish needs in order to look its very best. You may be able to use a less aggressive polish or cleaner, or a foam pad instead of a wool pad. The chances of leaving swirl marks are also greatly decreased because you can now run the buffer at a slower speed with a less aggressive polish and pad. Also, the buffer should glide smoothly across the surface with little or no drag, and you will not need to concentrate on particular problem areas that may still have spots left behind. Believe it or not, this will save a great deal of time.
It should take approximately 25 minutes to clay a mid-size car from the door moldings on up. However, Above: After clay. by claying the vehicle first, you will save time on the entire buffing procedure because of the things I just mentioned. Also, you will save time during the final step, be it waxing or paint sealant, because of the glass-like surface that is left behind and the ease of removal of the wax or sealant. In addition to time saved, other benefits include:
* A surface that feels awesome to the touch, like a brand new car;
* Greater depth and clarity, because of the truly clean finish;
* A faster rate of buffing for the foam-pad user;
* An almost zero chance of swirl marks and paint damage.
HOW TO USE CLAY
As with any other �tool� in your shop, there is a correct way to use clay for optimum benefits. A clay bar must be kept clean at all times because it is being rubbed over the paint surface. If dropped on the floor, the clay bar should be thrown away because it will pick up contaminants that could damage the paint. Some companies are now supplying a few thinner bars in one container. This allows easy access to another bar without having to buy a new piece.
Before claying, the vehicle should be thoroughly washed. This is a crucial step that cannot be skipped. Washing will get most of the dirt and contamination off the car, but you will be surprised at what is left behind � even on brand new vehicles. The clay must be used in conjunction with a lubricant. You may use spray wax, or a soap-and-water solution in a spray bottle.
Work a small 2-foot-by-2-foot area and keep the clay flat to the surface while rubbing it through the lubricant. Knead the clay frequently to bring fresh material to the surface. Pass over the surface a number of times to release the contaminants from the surface. Wipe the area clean with a soft towel, being careful not to put scratches in the finish. The contamination will be suspended in the lubricant and captured on the towel, leaving the finish clean and smooth. You can see what a great job the clay does by looking at how dirty the towel becomes after completing only a few small areas. You may need to replace the towel every so often as it becomes dirty. You will notice how clean, smooth and shiny the area becomes. It may look like it has just been polished. When claying, you will pick up all the contaminants that washing the car did not get off. Remember, be very careful not to pick up abrasives that can be dragged across the finish and leave scratches. Now, without the extra contamination on the surface, the entire car will be easier to polish and wax.
WHAT CLAY CAN�T DO
Clay cannot...
- Remove scratches. A scratch is a scratch and corrective measures must be taken;
- Take the place of compounding, polishing, or waxing. This is a tool for cleaning the surface. It will not buff the surface. Even though the finish will feel as if it�s been waxed, there is no protection whatsoever on the finish;
- Remove over spray or contamination from soft, porous trim and moldings. If the over spray has penetrated the surface, the clay will not work. As you gain experience, you will be able to tell what parts of the vehicle will need another type - Remove acid rain. If the vehicle has an acid-rain problem, a neutralization wash must be employed to neutralize the finish, or the acid-rain spots will come back;
- Remove rail dust. If there is a rail-dust problem and metal particles are embedded in the surface, a neutralization wash, again, must be used first. If all the particles still have not been released, you may have to repeat the neutralization wash.
Some problems exist in the paint, as well as on the surface. A clay procedure will only take care of problems that exist on the surface, not underneath the surface. As you become more experienced with all paint-finish problems, you will be able to determine correctly which methods to use.
Even with its limitations, I consider clay to be an invaluable tool in the detailing process. Clay can increase business by enhancing the overall appearance of a vehicle and heightening customer satisfaction. It can replace harmful procedures, and is safer for both you, and your customer�s car.
Published in "The Auto Laundry News" in May 1998
A little on the author:
Kevin Farrell - Owner of Kleen Car Auto Appearance is one of the leaders in the detailing industry. He has owned and operated a full service detailing center for 15 years and has written dozens of technical, and business related detailing article for major auto publications.
He created and implemented the detail training program for BMW of North America and now uses that same program to train detailers nationwide at the Kleen Car detail training facility in NJ.
In addition he has partnered to create a line of buffing products that are state of the art in the field. He tests and does research for different equipment and product manufacturers to develop the best possible products. He has spoken and presented at industry events and lends his skill, knowledge, and expertise whenever possible. His involvement in the International Car wash Association will hopefully lead to more awareness and better training and education in the detail industry.
Permission was granted to post this up by Kevin Farrell.
Please visit his website for his classes and more info:
Kleen Car | professional detailing training | auto detailing steamers, products, equipment
CLAY CAN TURN A GOOD JOB INTO A GREAT JOB
Depending on whom you speak to, clay can either be one of the most useful �tools� in your shop, or just an expensive piece of play-dough. It�s been around for quite a few years now. Some detailers have embraced it, while some have no use for it. I believe that clay can be a valuable tool with many uses.
OVER SPRAY REMOVAL
The most obvious and popular use for clay is over spray removal. For this, it has been a godsend. Before clay, detailers had to use other methods for the removal of over spray. Compounding, which involves friction, heat, and heavy cleaners, is one such method. However, along with the over spray, this friction and heat could also remove some of the paint.
Another method for over spray removal involves dissolving the over spray with solvents, such as lacquer thinner, and rubbing it off. However, if a vehicle has a single stage paint system (e.g., lacquer, enamel) some of the paint, including possibly a painted pinstripe, will dissolve along with the over spray. In addition, this method can be hazardous to other parts of the vehicle, as well as to the detailer.
A third method for over spray removal is wet-sanding the finish. Potential problems with this method include rubbing through the finish, and putting sand scratch-marks in the finish, which would later need to be buffed out.
ATMOSPHERIC POLLUTANTS
The beauty of clay is that it can be used for more than just over spray removal. Foreign particles often cannot be washed off a vehicle�s surface. The clay bar is designed to pull these particles off the paint finish, without harming the paint, by releasing the bond between the foreign particles and the paint surface.
Today�s paint systems are mostly polyurethane base coat/clear coat, which actually is a form of plastic. When plastic heats up, it gets softer. This is what happens when a vehicle is left out in the hot sun all day. The heat generated by the engine, sun, and color of the paint can cause the surface temperature to reach over 200 degrees. This will soften the clear coat and allow foreign particles to embed themselves in the surface and bond to it. This is the major reason why particles remain even after the car has been washed.
The mistake many detailers make is thinking that these particles can be easily buffed or waxed off the surface during the normal polishing procedure. However, the problem is that the contaminant material is often quite durable and has a strong adhesive bond to the painted surface. Trying to buff or wet-sand the contaminant off the finish may do irreparable paint damage.
MANY ADVANTAGES
In addition to the removal of over spray, clay has many advantages:
- Clay will pull unwanted contaminants off any hard, non-porous surface faster than wet-sanding, compounding, or using solvents, with no damage to the vehicle�s finish.
- Clay will save a huge amount of time compared with other methods such as compounding, wet-sanding or the use of solvents.
- Clay will leave you with a surface that is as smooth as glass, making that surface easier to buff.
- Clay will work on any hard surface (e.g., glass, hard moldings, chrome, wheels, and other trim) where solvents can be dangerous and buffers cannot reach or may cause damage.
- Clay will work on most types of over spray, regardless of its composition.
- Clay will not harm the vehicle�s finish.
The use of clay can turn a good job into a great job. Have you ever polished a car and it looked great? No swirls, no streaks and a great shine but, when you rubbed the palm of your hand over the surface, it felt gritty or like sandpaper? This indicates that foreign materials, not removed by buffing or waxing, have been left on the surface. Customers always want to touch their newly detailed vehicle. Feeling grit on the surface will diminish their satisfaction. Claying will remove foreign materials and grit and will leave the customer completely satisfied.
Have you ever buffed a car and the buffer would not glide along, or would bounce, or drag? Have you spent a lot of extra time and effort on certain spots that you could still see sitting on the surface? In order to remedy these problems an unskilled detailer may try to buff off contamination by turning up the speed of the buffer, use a harsh compound or stay on the spot too long with the buffer. Employing these methods may result in paint damage. Using clay will avoid these difficulties and save time.
CLAY EVERY CAR
I clay almost every car I work on. This may sound extreme, but I don�t want a customer to feel anything except smooth sheet metal when he runs his hand over the surface of his vehicle.
The surface isn�t totally clean if there is any grit left behind. By claying every car before you put a buffer to it, you are assured of a few things:
- The surface will be clean;
- The entire buffing process will be easier;
- You will use less material because the buffing pad will glide along the surface better, and cover a greater area;
- You will have a better guide to exactly what has to be done to the finish.
Claying may seem like extra work, but you can actually save time by employing this extra step. That�s right, you can actually save time and produce a finer finish.
Consider the following:
- Buffing out all those little spots that remain on the surface wastes time;
- Using a more aggressive pad (which is necessary to remove little spots from the vehicle�s surface) leaves behind swirl marks and creates the extra step of swirl-mark removal;
- On a contaminated surface, the buffer drags and slows you down;
- A contaminated surface requires more cleaning product. This increases the chance of flinging the product which produces more mess and greater clean up time. Claying saves time by avoiding these issues.
Before clay.
During the procedure.
After clay
You may not be convinced. You may still be thinking that the extra time taken to clay the vehicle is counterproductive. It may seem as though you will spend as much time with the clay as you would with the buffer. And the amount of elbow grease required to clay the vehicle may give you a workout that you don�t want. Let�s look closer.
By claying the vehicle first, you will pull off any contamination that remains on the surface of the vehicle after it�s been washed. What you are left with is a super-smooth finish. Now you have a true idea as to exactly what that finish needs in order to look its very best. You may be able to use a less aggressive polish or cleaner, or a foam pad instead of a wool pad. The chances of leaving swirl marks are also greatly decreased because you can now run the buffer at a slower speed with a less aggressive polish and pad. Also, the buffer should glide smoothly across the surface with little or no drag, and you will not need to concentrate on particular problem areas that may still have spots left behind. Believe it or not, this will save a great deal of time.
It should take approximately 25 minutes to clay a mid-size car from the door moldings on up. However, Above: After clay. by claying the vehicle first, you will save time on the entire buffing procedure because of the things I just mentioned. Also, you will save time during the final step, be it waxing or paint sealant, because of the glass-like surface that is left behind and the ease of removal of the wax or sealant. In addition to time saved, other benefits include:
* A surface that feels awesome to the touch, like a brand new car;
* Greater depth and clarity, because of the truly clean finish;
* A faster rate of buffing for the foam-pad user;
* An almost zero chance of swirl marks and paint damage.
HOW TO USE CLAY
As with any other �tool� in your shop, there is a correct way to use clay for optimum benefits. A clay bar must be kept clean at all times because it is being rubbed over the paint surface. If dropped on the floor, the clay bar should be thrown away because it will pick up contaminants that could damage the paint. Some companies are now supplying a few thinner bars in one container. This allows easy access to another bar without having to buy a new piece.
Before claying, the vehicle should be thoroughly washed. This is a crucial step that cannot be skipped. Washing will get most of the dirt and contamination off the car, but you will be surprised at what is left behind � even on brand new vehicles. The clay must be used in conjunction with a lubricant. You may use spray wax, or a soap-and-water solution in a spray bottle.
Work a small 2-foot-by-2-foot area and keep the clay flat to the surface while rubbing it through the lubricant. Knead the clay frequently to bring fresh material to the surface. Pass over the surface a number of times to release the contaminants from the surface. Wipe the area clean with a soft towel, being careful not to put scratches in the finish. The contamination will be suspended in the lubricant and captured on the towel, leaving the finish clean and smooth. You can see what a great job the clay does by looking at how dirty the towel becomes after completing only a few small areas. You may need to replace the towel every so often as it becomes dirty. You will notice how clean, smooth and shiny the area becomes. It may look like it has just been polished. When claying, you will pick up all the contaminants that washing the car did not get off. Remember, be very careful not to pick up abrasives that can be dragged across the finish and leave scratches. Now, without the extra contamination on the surface, the entire car will be easier to polish and wax.
WHAT CLAY CAN�T DO
Clay cannot...
- Remove scratches. A scratch is a scratch and corrective measures must be taken;
- Take the place of compounding, polishing, or waxing. This is a tool for cleaning the surface. It will not buff the surface. Even though the finish will feel as if it�s been waxed, there is no protection whatsoever on the finish;
- Remove over spray or contamination from soft, porous trim and moldings. If the over spray has penetrated the surface, the clay will not work. As you gain experience, you will be able to tell what parts of the vehicle will need another type - Remove acid rain. If the vehicle has an acid-rain problem, a neutralization wash must be employed to neutralize the finish, or the acid-rain spots will come back;
- Remove rail dust. If there is a rail-dust problem and metal particles are embedded in the surface, a neutralization wash, again, must be used first. If all the particles still have not been released, you may have to repeat the neutralization wash.
Some problems exist in the paint, as well as on the surface. A clay procedure will only take care of problems that exist on the surface, not underneath the surface. As you become more experienced with all paint-finish problems, you will be able to determine correctly which methods to use.
Even with its limitations, I consider clay to be an invaluable tool in the detailing process. Clay can increase business by enhancing the overall appearance of a vehicle and heightening customer satisfaction. It can replace harmful procedures, and is safer for both you, and your customer�s car.
Published in "The Auto Laundry News" in May 1998
A little on the author:
Kevin Farrell - Owner of Kleen Car Auto Appearance is one of the leaders in the detailing industry. He has owned and operated a full service detailing center for 15 years and has written dozens of technical, and business related detailing article for major auto publications.
He created and implemented the detail training program for BMW of North America and now uses that same program to train detailers nationwide at the Kleen Car detail training facility in NJ.
In addition he has partnered to create a line of buffing products that are state of the art in the field. He tests and does research for different equipment and product manufacturers to develop the best possible products. He has spoken and presented at industry events and lends his skill, knowledge, and expertise whenever possible. His involvement in the International Car wash Association will hopefully lead to more awareness and better training and education in the detail industry.

Thanks again for the info. I'll try to contribute too. Here's a little write up I did for Howcast.com
How To Remove Scratch on Your Car
You do everything that you can to protect your baby, but sometimes scratch happens. Before you pay hundreds of dollars for a detail, learn what you can do to fix the problem.
You Will Need
Spray Detailer
Detailing Clay
Microfiber Towels
Meguiar's ScratchX
Foam Applicator Pad
Wax
Step 1: Clean The Area
Wash the car. Or spray detailing lubricant on the scratch and wipe the area clean with a microfiber towel.
Step 2: Lubricate The Scratch
Spray a decent amount of detailing lubricant onto the area around the scratch.
Step 3: Clean The Scratch
As the area of the scratch is lubricated, use a clay bar to strip any wax or contaminants on the paint. Rub the flat surface of the clay bar onto the lubricated area until the area is smooth and free of contaminants.
Step 4: Wipe The Area
Wipe off the remaining lubricant using a microfiber towel.
Step 5: Apply ScratchX to Foam
Squeeze ScratchX onto your Foam Applicator Pad. Make sure that you have enough to cover the area of the scratch.
Step 6: Apply ScratchX to Scratch
Place Foam Applicator Pad onto the scratch and rub it in. Unlike wax, ScratchX does not need time to dry. Instead, ScratchX requires you to “push” the liquid into the scratch. Using pressure and elbow grease, work the liquid into the scratch using the Applicator Pad with an up-down, side-side, or swirling motion.
Step 7: Remove ScratchX
Using a microfiber towel, wipe away any remaining ScratchX from the working area.
Step 8: Repeat Step 6 If Needed
Depending on how deep the scratch is, you should be seeing some improvement. If not, repeat steps 6 and 7 if needed, until scratch is gone.
Step 9: Protect The Paint
Apply wax of your choice onto the working area. Let the wax settle before wiping off.
Step 10: Remove The Wax
Using a microfiber towel, remove the wax from the paint.
Step 11: Enjoy
Sit back, relax, and enjoy looking at your scratch free car!

Thread
Thread Starter
Forum
Replies
Last Post
Da�iel
Fit DIY: Repair & Maintenance
326
May 13, 2016 03:02 AM
Gbaby2089
Fit DIY: Repair & Maintenance
9
Jul 21, 2009 11:31 AM