Fit DIY: Repair & Maintenance Threads discussing repairs and maintenance you can do yourself

*Warning! No diving!* paint appears very deep! *No life guard on Duty*

Thread Tools
 
Search this Thread
 
  #1  
Old 10-20-2010, 04:18 PM
Fallen_Rock's Avatar
Member
Thread Starter
iTrader: (2)
Join Date: Jun 2009
Location: Knoxville TN
Posts: 365
*Warning! No diving!* paint appears very deep! *No life guard on Duty*


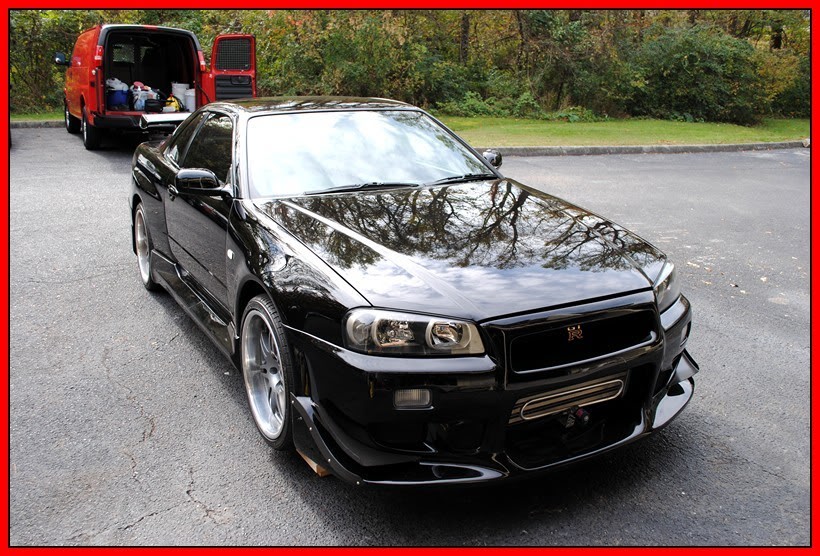
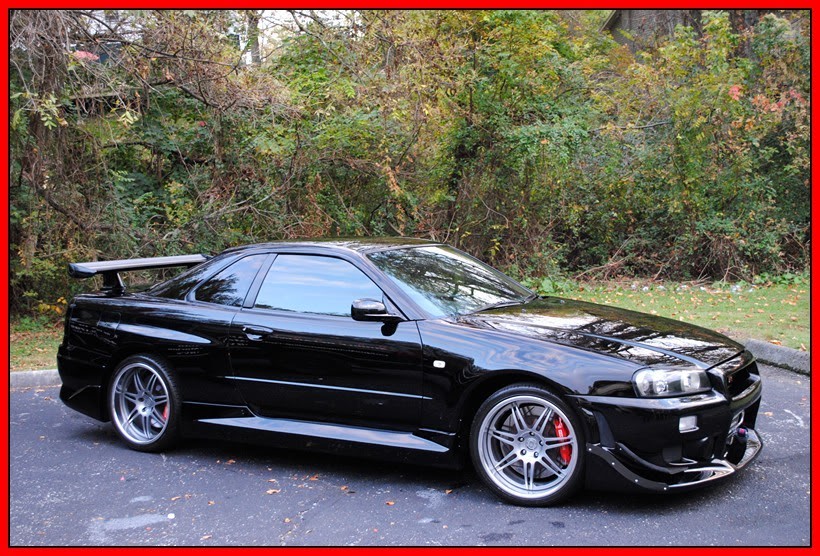
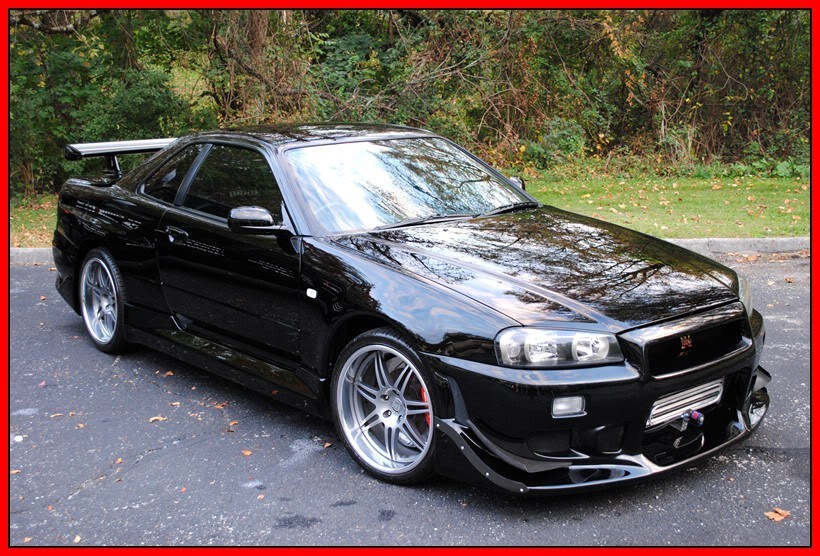
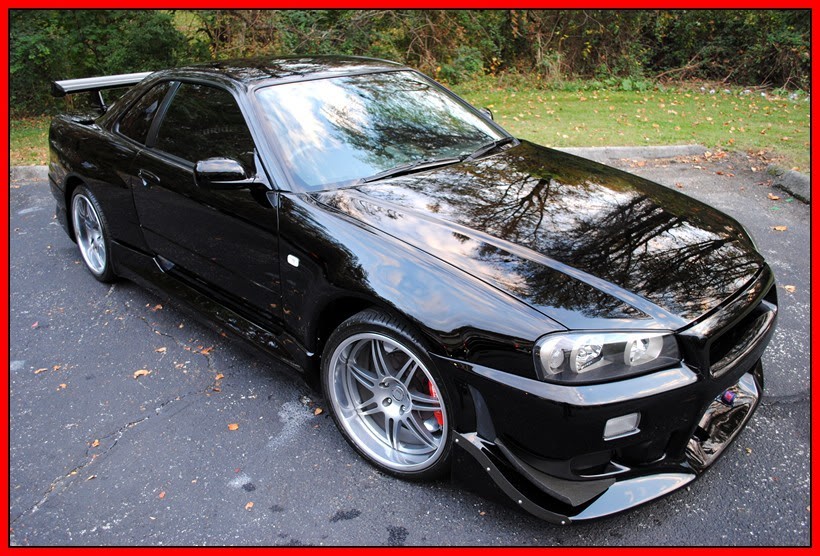
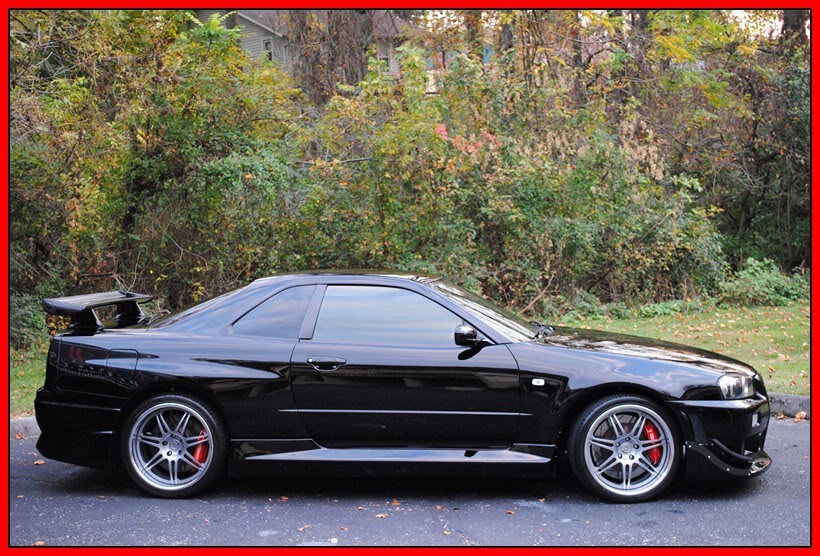
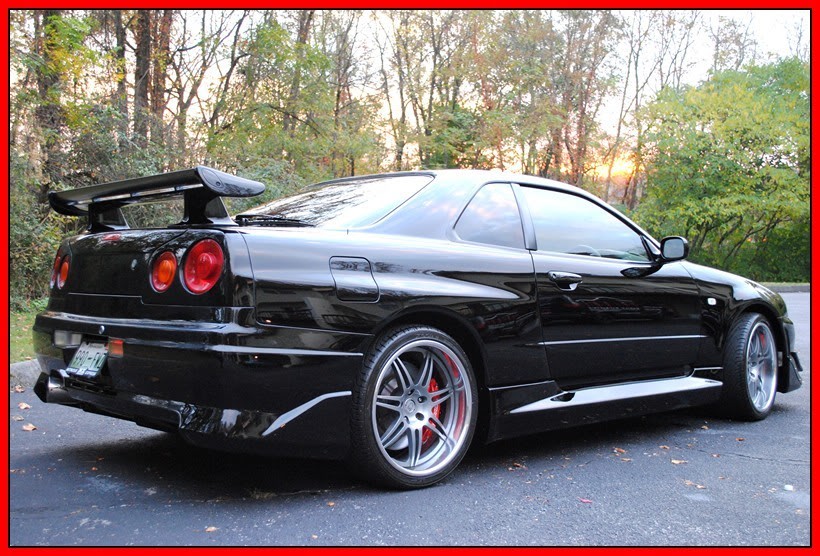
So I had one of my detailing buddies up in Bristol VA give me a ringer about this huge detail job that he had coming up on a 1999 Nissan Skyline GTR V-Spec. The car was used as a promotional car for the Fast and furious movies back in the day, and has since been repainted black. Here is what the car used to look like. 1999 Import Cars featured - Nissan Skyline R34 GT-R V-Spec - Super Street Magazine

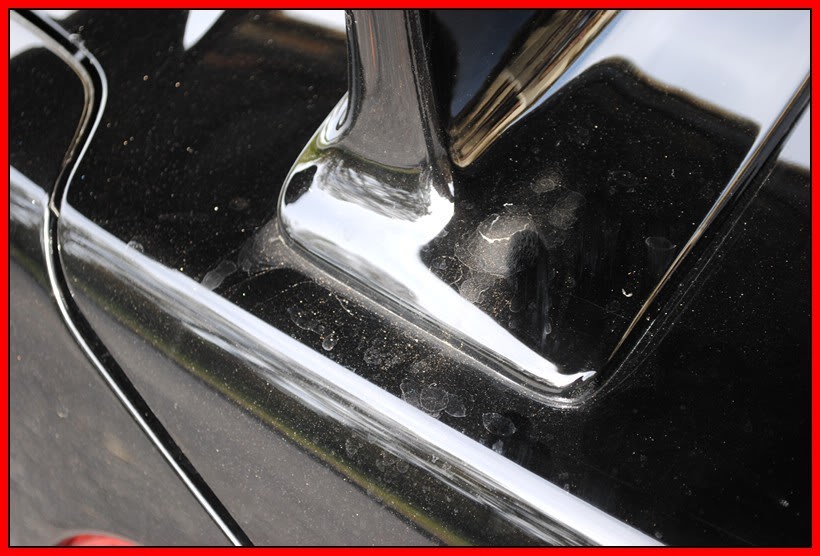
and now the current owner has changed some things around, such as wheels,wing, and other little things to her preference.


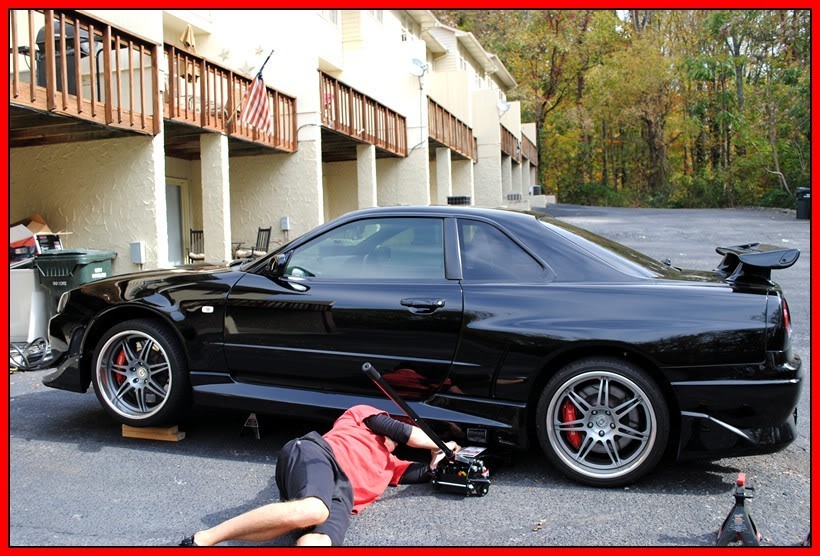
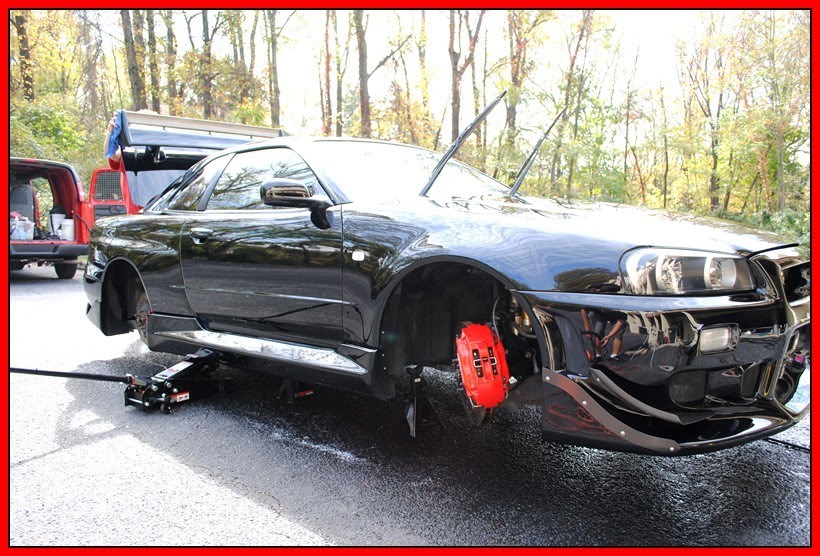
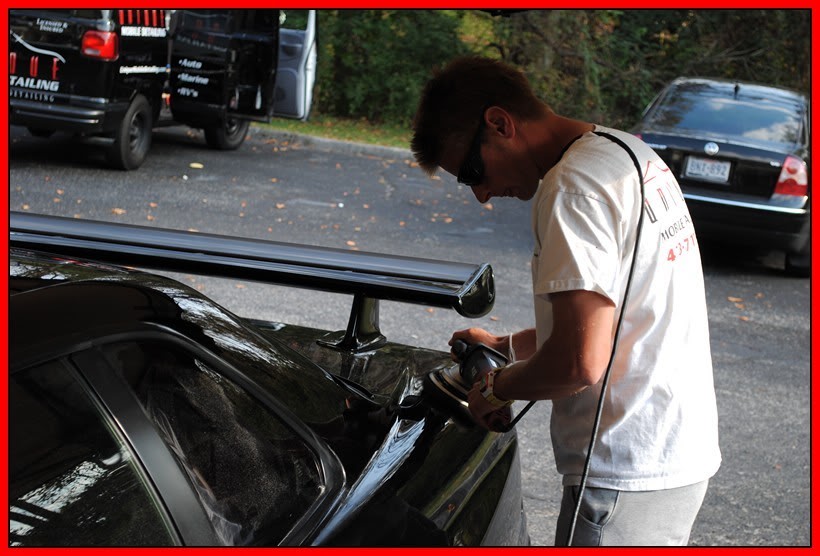
So When I arrived we got started right away with jacking the car up and started removing the wheels.

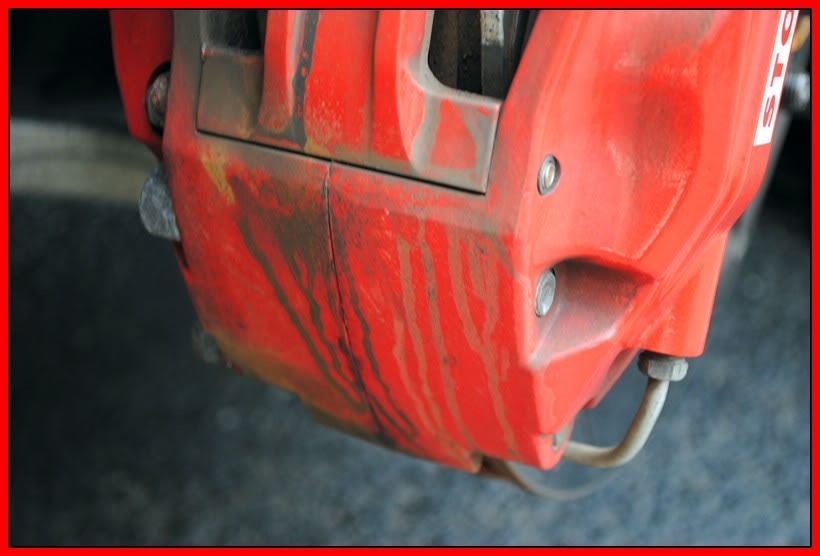
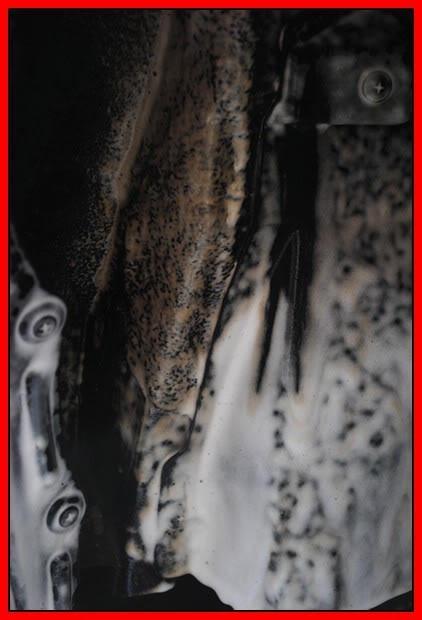
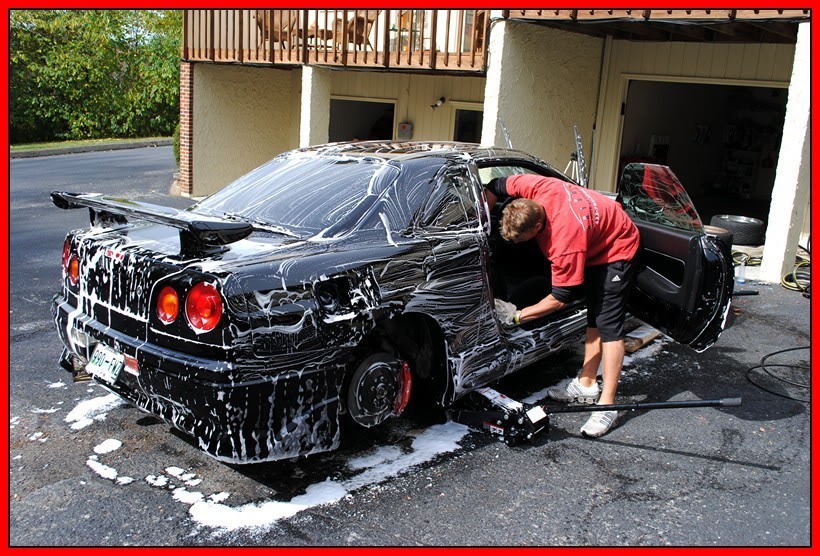
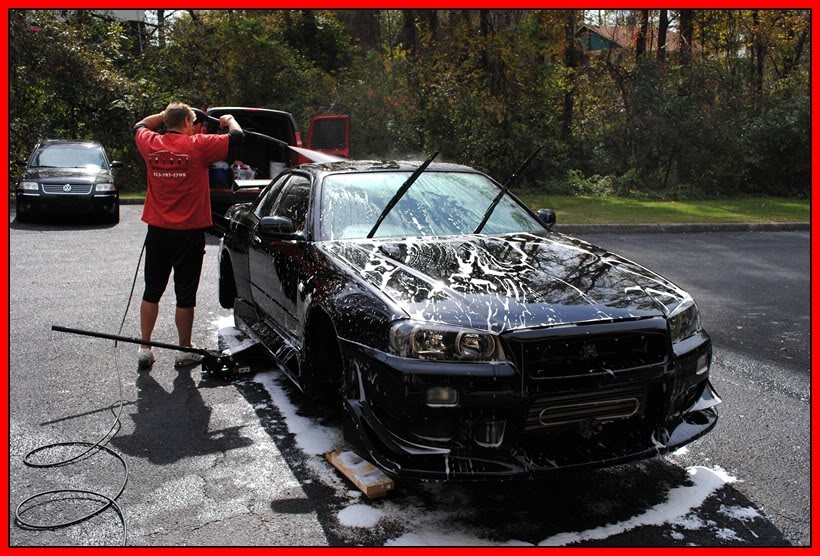
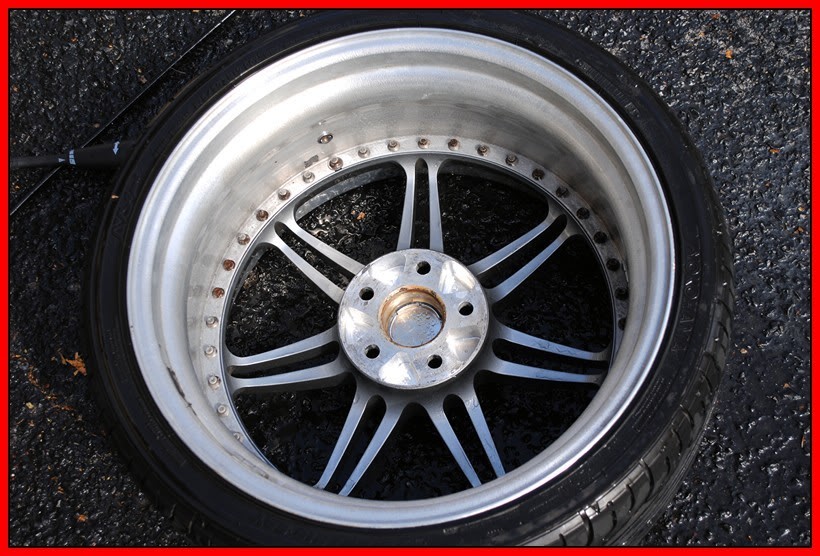
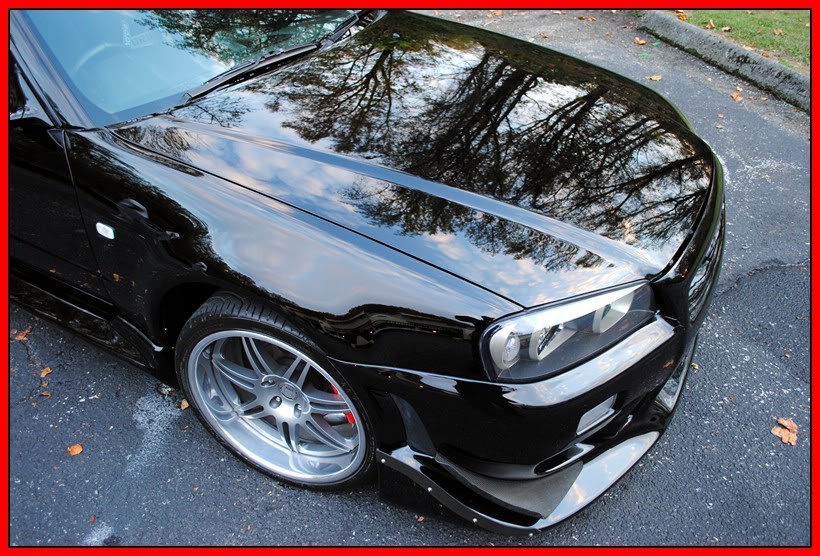
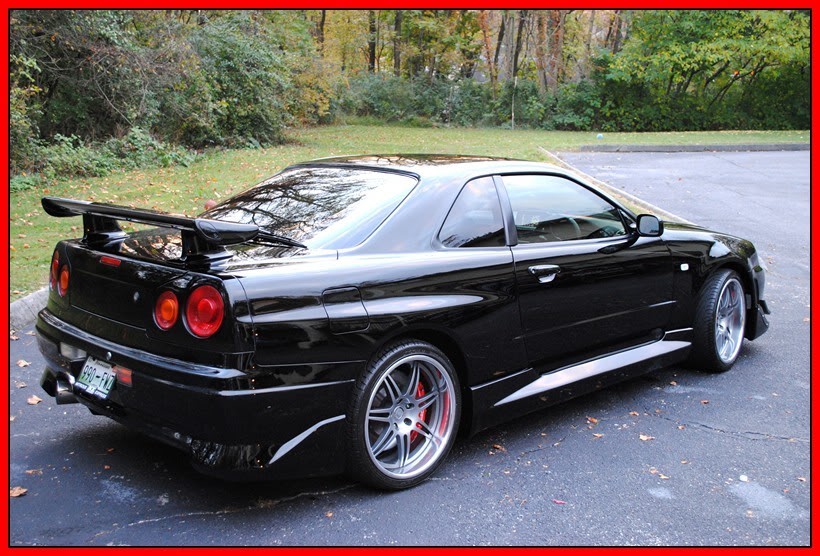
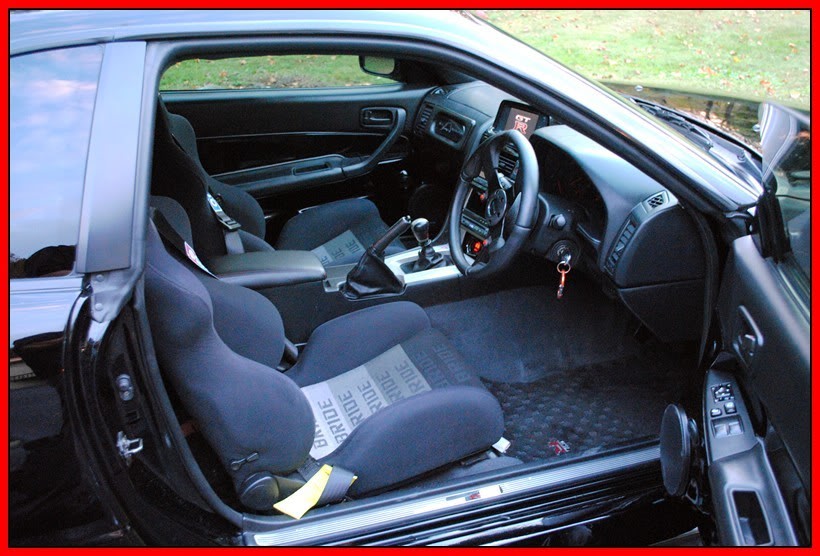
here are some before pics of what we were working with.


Name:  SkylineGTR258.jpg
Views: 779
Size:  143.9 KB

Name:  SkylineGTR257.jpg
Views: 664
Size:  105.0 KB

Name:  SkylineGTR255.jpg
Views: 695
Size:  41.7 KB

Name:  SkylineGTR254.jpg
Views: 636
Size:  56.4 KB

Name:  SkylineGTR250.jpg
Views: 646
Size:  81.7 KB

Name:  SkylineGTR249.jpg
Views: 664
Size:  65.8 KB

Name:  SkylineGTR247.jpg
Views: 634
Size:  64.0 KB

Name:  SkylineGTR245.jpg
Views: 638
Size:  39.5 KB

Name:  SkylineGTR243.jpg
Views: 685
Size:  88.6 KB

Name:  SkylineGTR241.jpg
Views: 629
Size:  50.9 KB

Name:  SkylineGTR240.jpg
Views: 625
Size:  87.3 KB

Name:  SkylineGTR244.jpg
Views: 688
Size:  129.8 KB

Name:  SkylineGTR237.jpg
Views: 634
Size:  167.7 KB


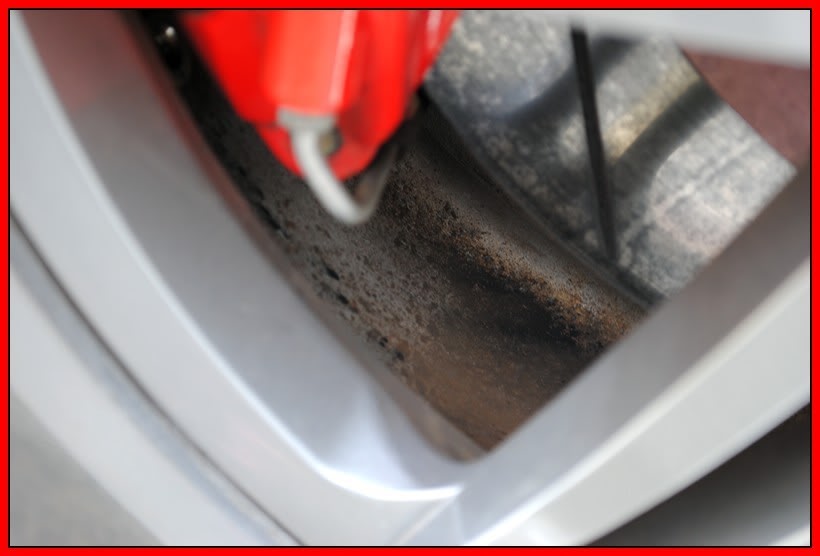
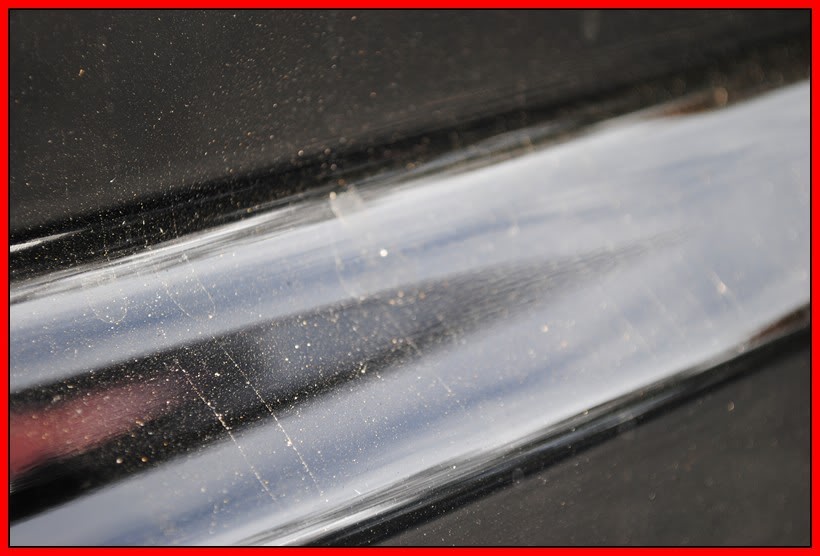
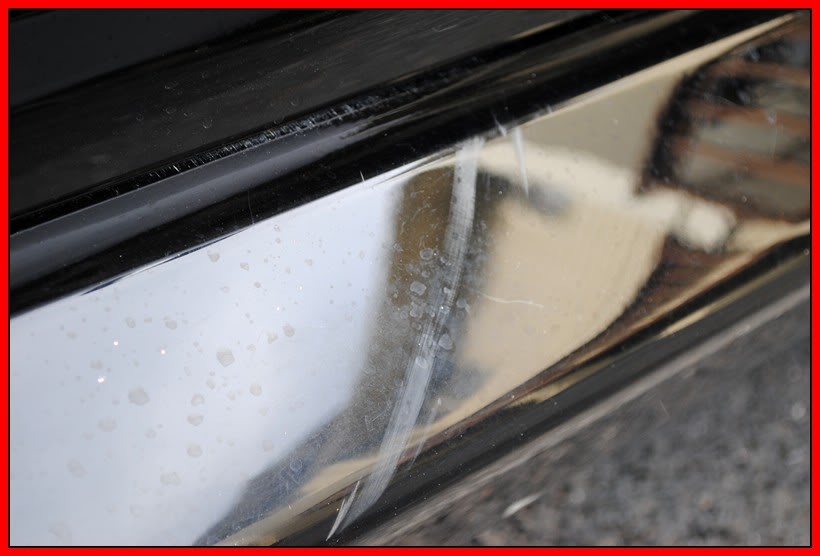
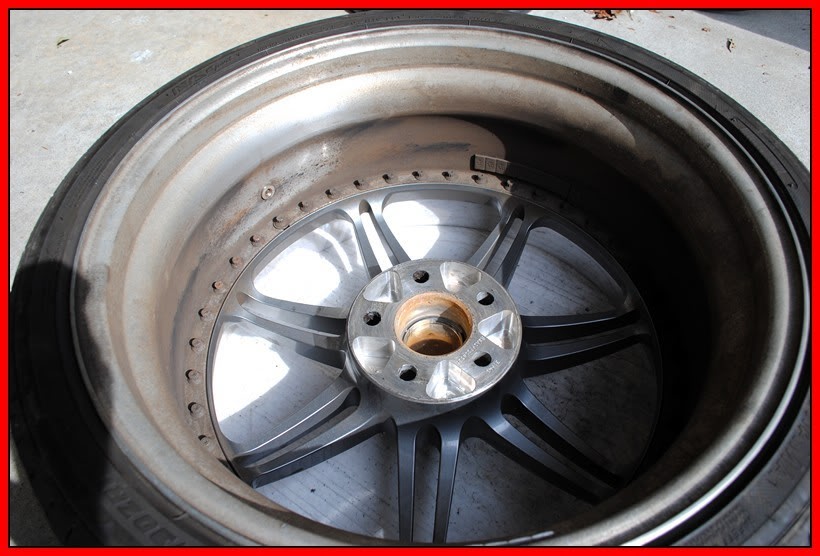
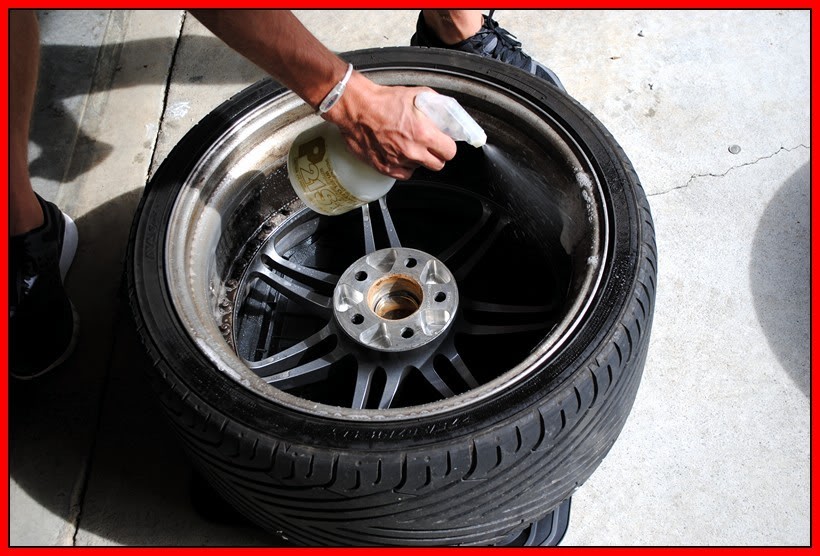
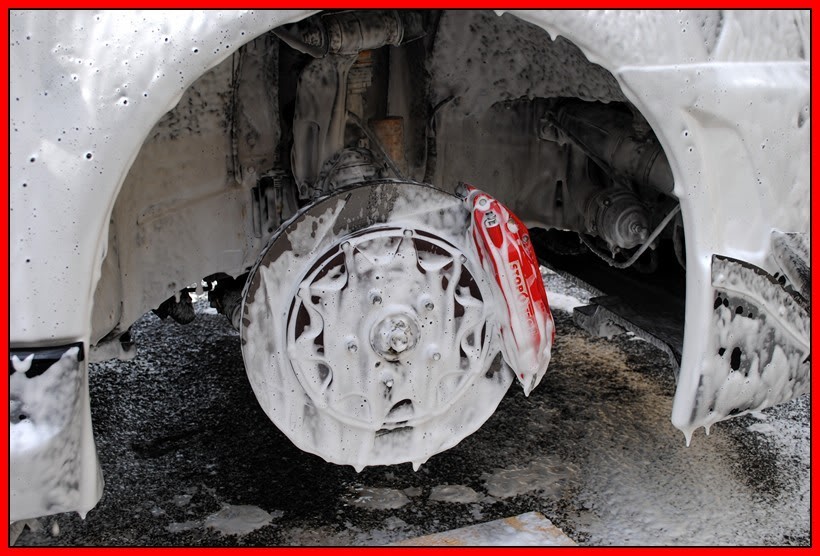
The wheels were super caked with brake dust.

Name:  SkylineGTR235.jpg
Views: 667
Size:  83.7 KB

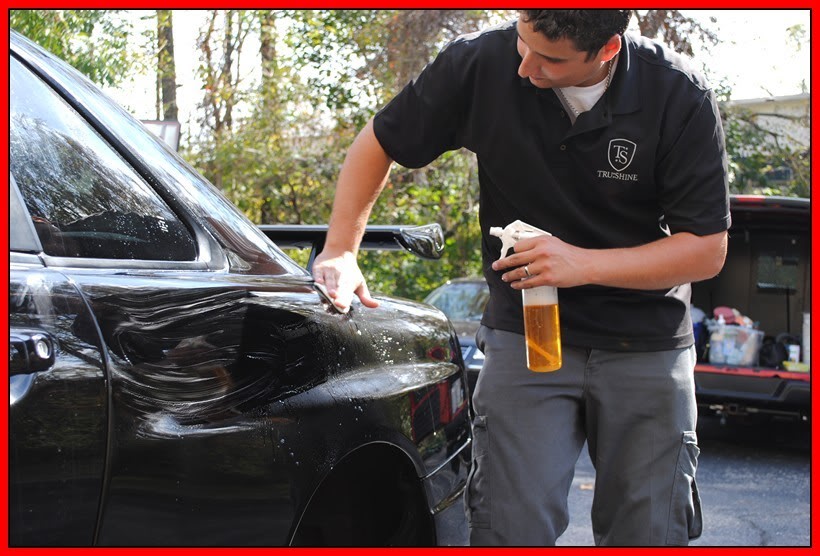
we presoaked them with P21s wheel gel while we washed the car.

Name:  SkylineGTR234.jpg
Views: 618
Size:  102.7 KB

Name:  SkylineGTR233.jpg
Views: 625
Size:  78.9 KB

Name:  SkylineGTR232.jpg
Views: 641
Size:  83.0 KB

Name:  SkylineGTR231.jpg
Views: 649
Size:  59.1 KB

Name:  SkylineGTR230.jpg
Views: 631
Size:  51.3 KB

Name:  SkylineGTR226.jpg
Views: 633
Size:  100.3 KB

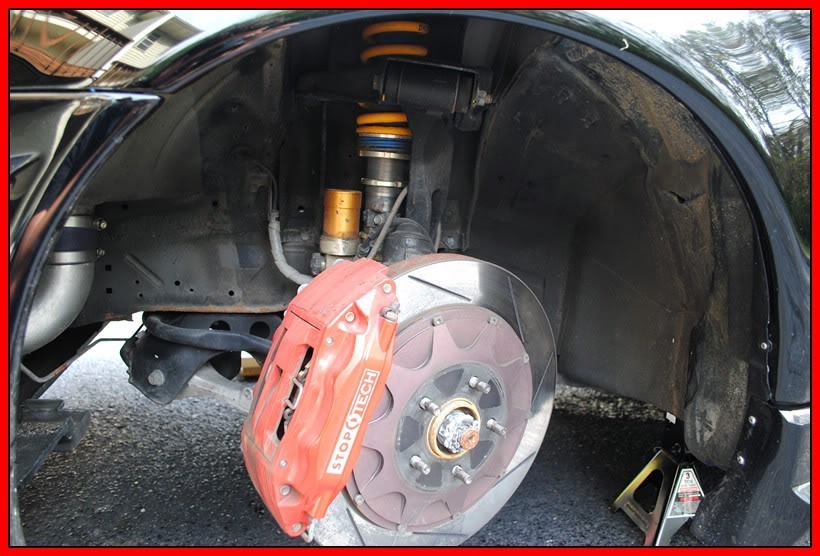
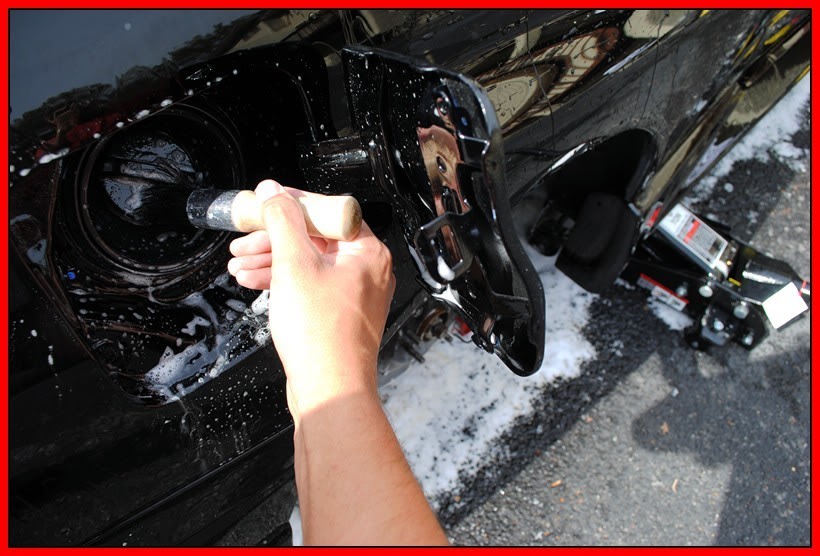
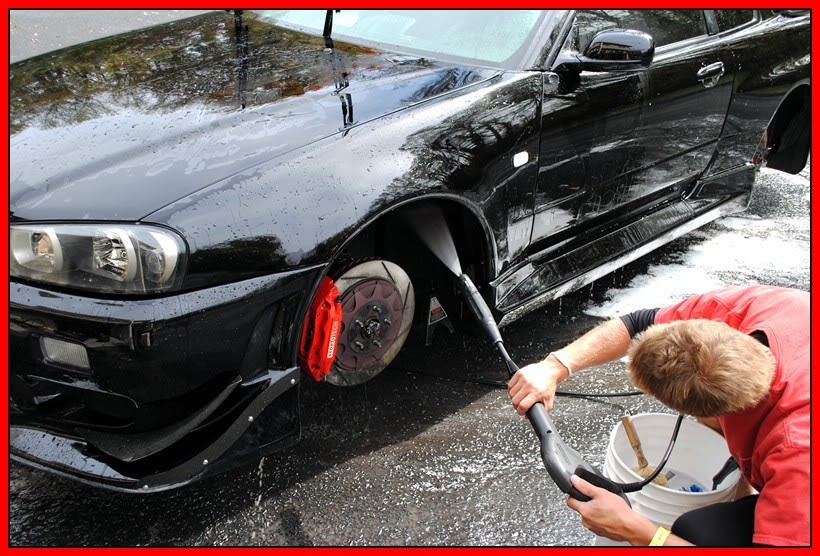
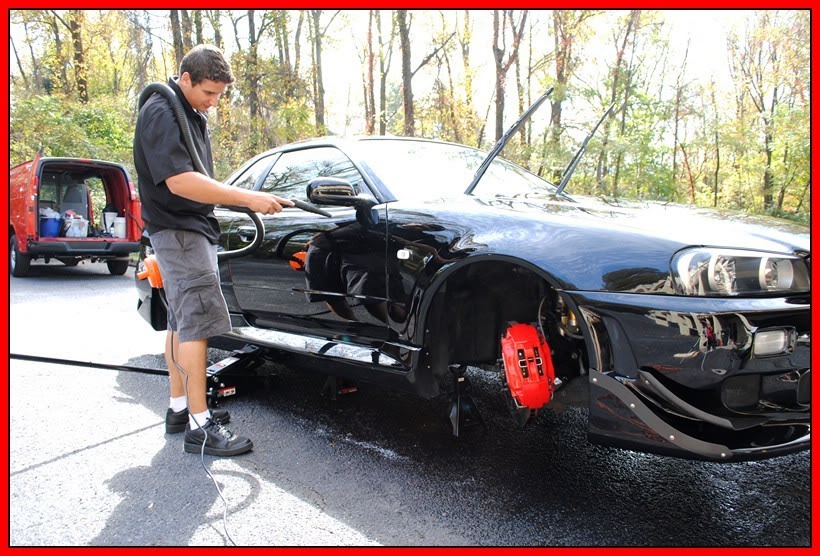
We degreased the wheel wells with some Chemical Guys Grime Reaper

Name:  SkylineGTR223.jpg
Views: 621
Size:  110.2 KB

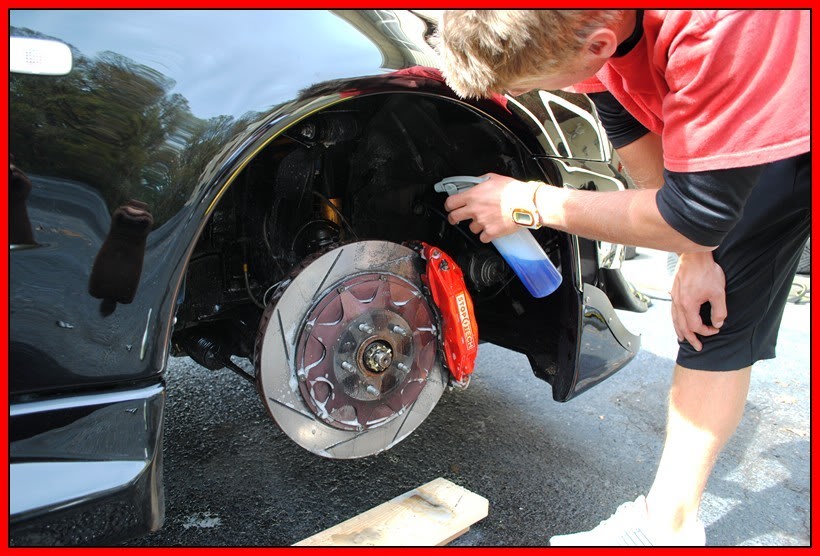
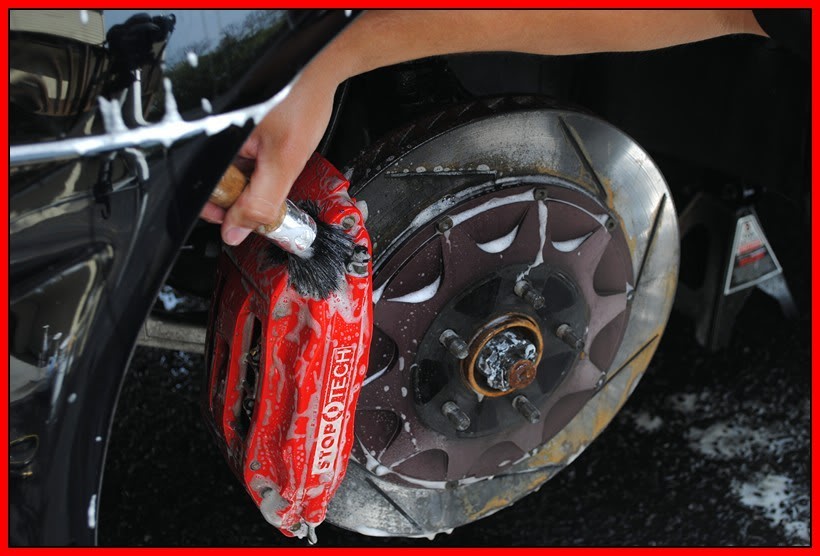
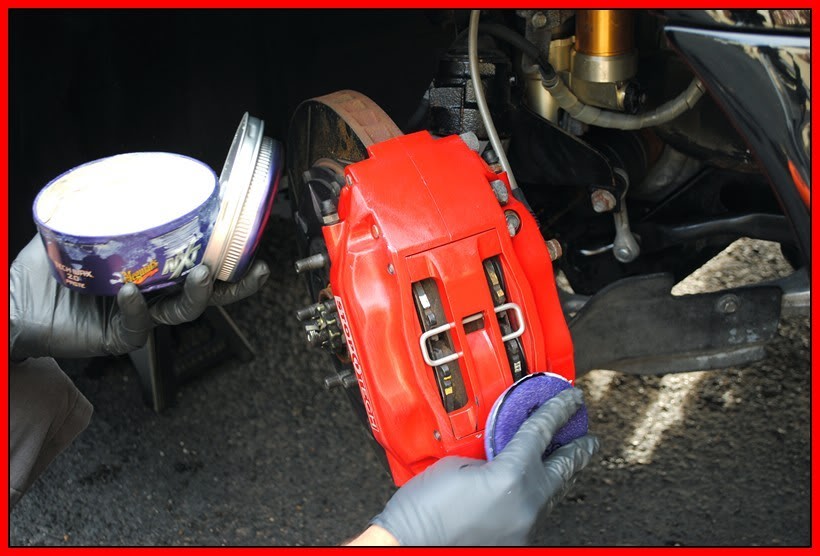
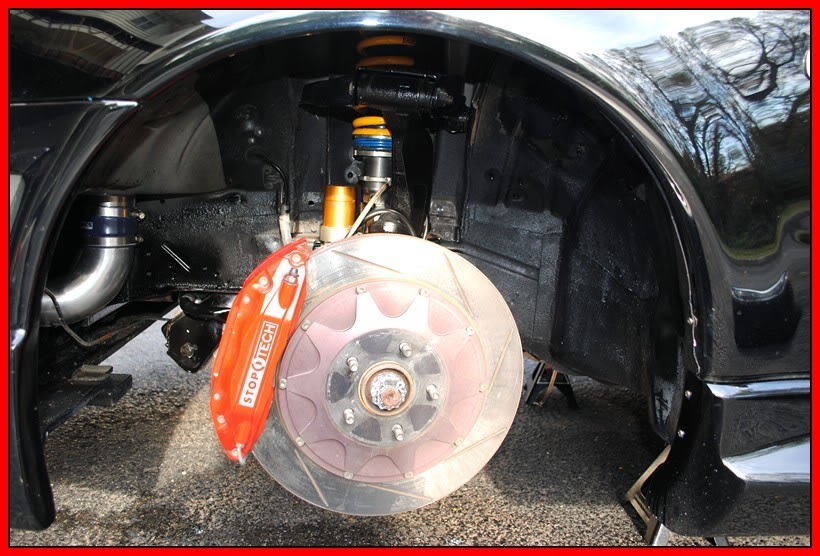
and used P21s on the brakes
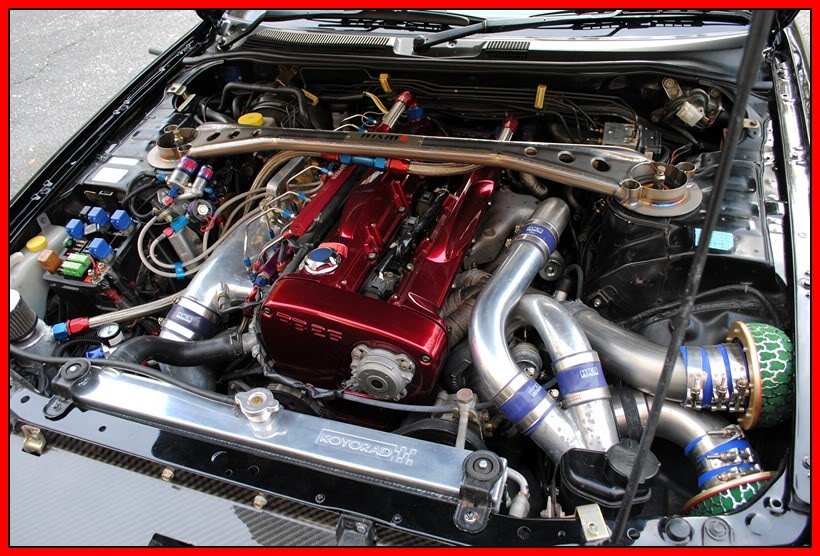
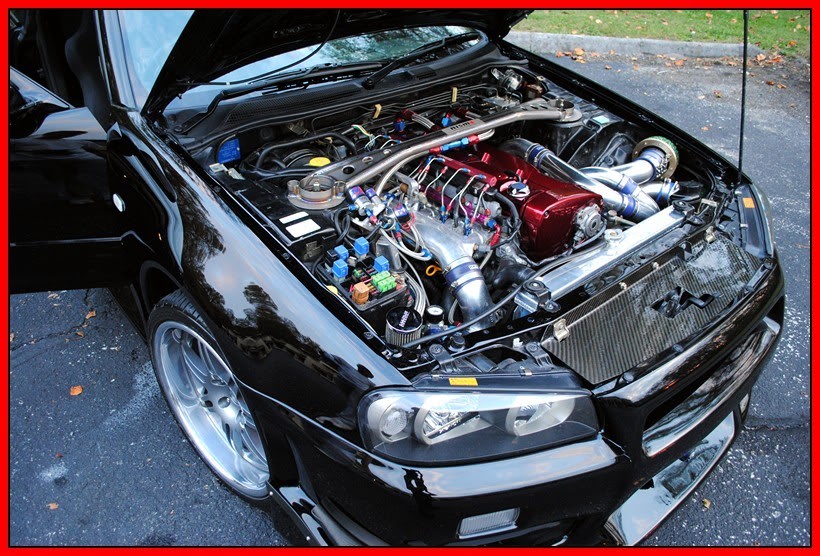
Name:  SkylineGTR222.jpg
Views: 630
Size:  104.6 KB

here is the motor

Name:  SkylineGTR221.jpg
Views: 639
Size:  143.1 KB

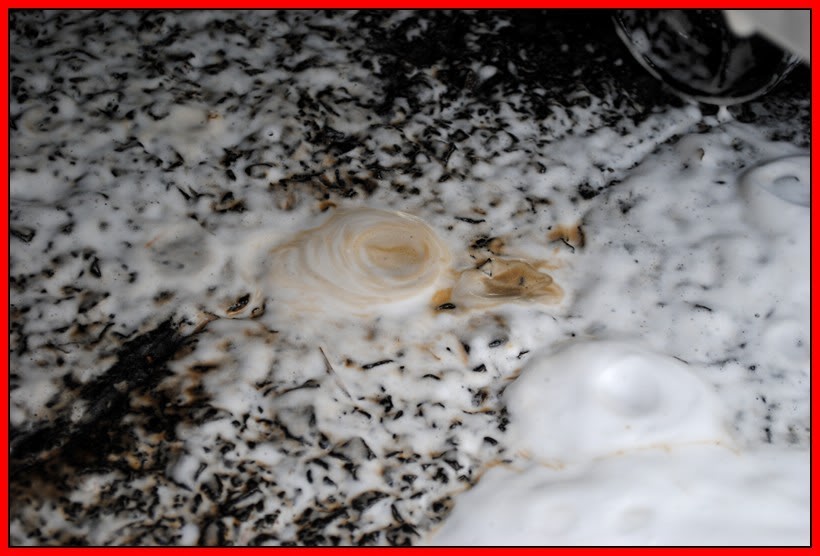
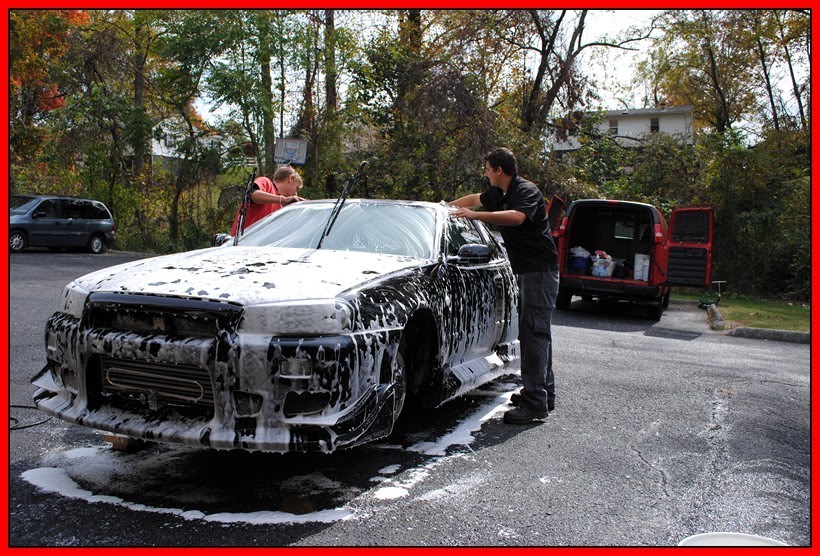
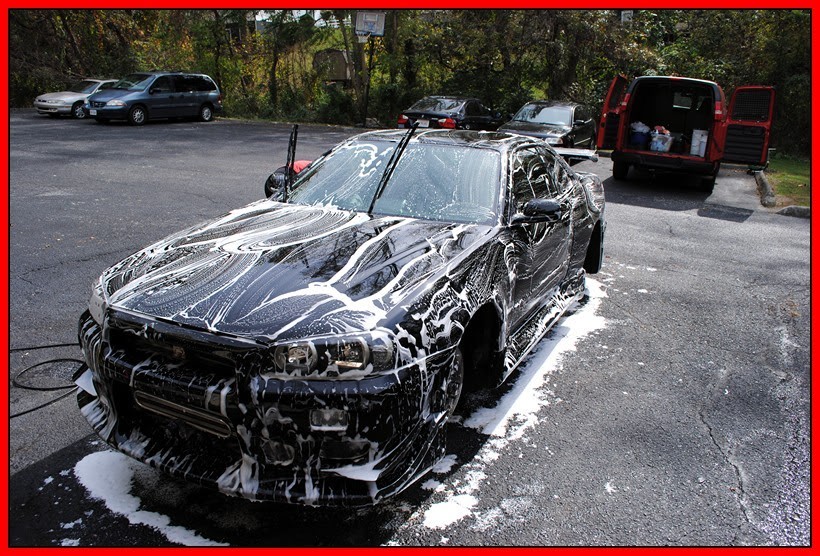
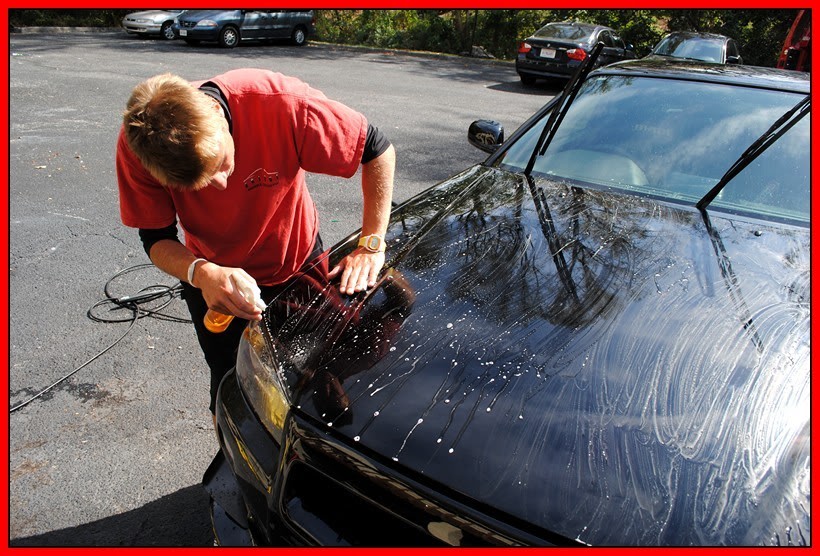
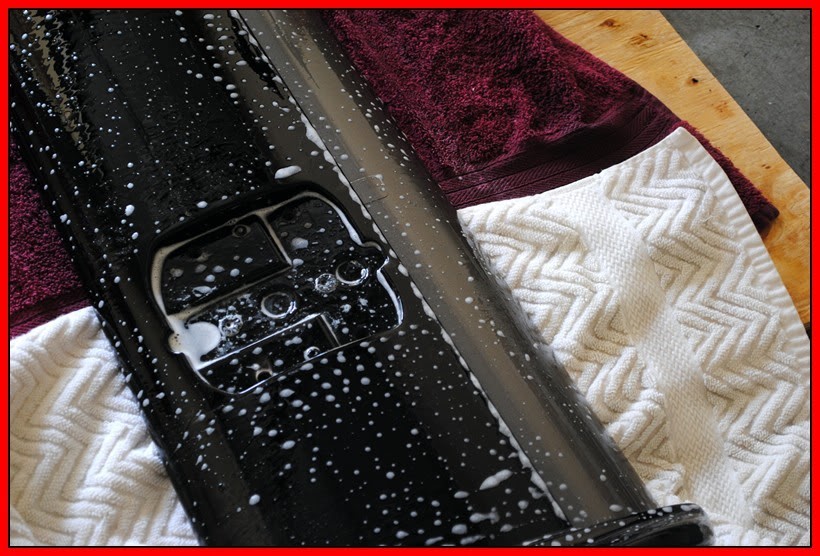
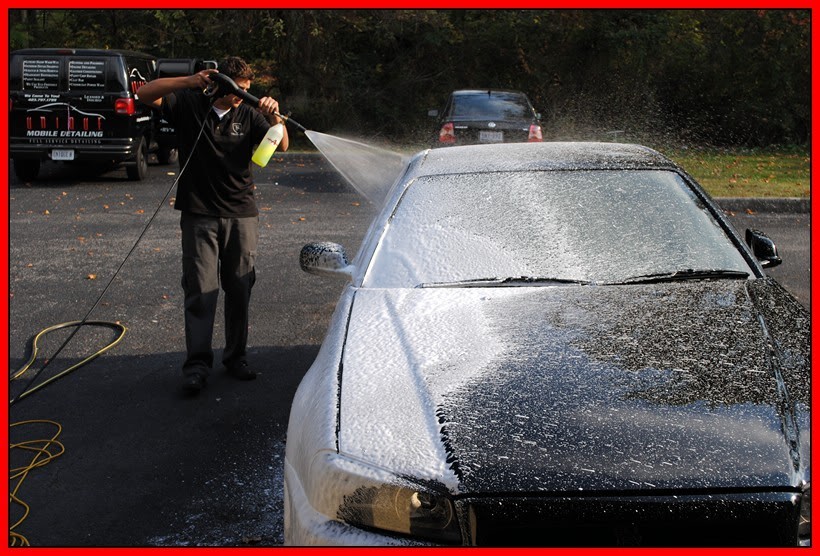
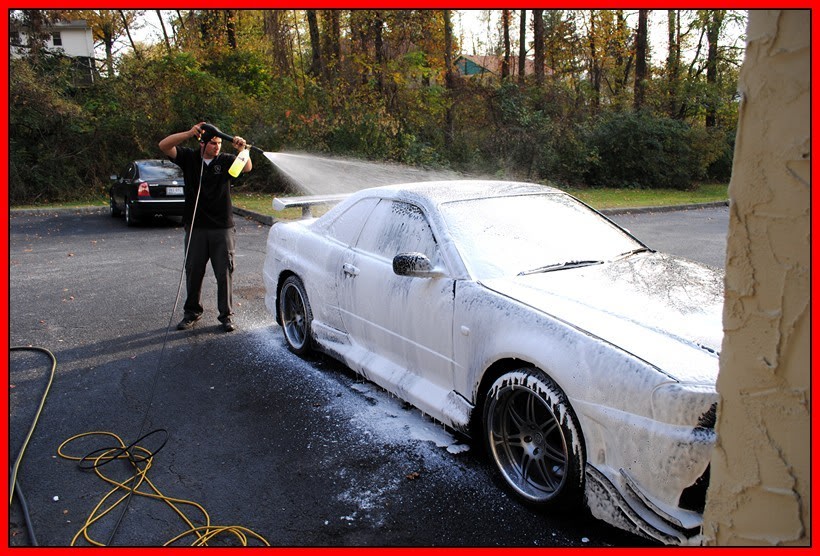
Next we sprayed the car down with the Foam canon mixed with Dawn soap and CG Grime Reaper

Name:  SkylineGTR213.jpg
Views: 621
Size:  98.0 KB

Name:  SkylineGTR211.jpg
Views: 694
Size:  127.6 KB

Name:  SkylineGTR210.jpg
Views: 686
Size:  105.5 KB

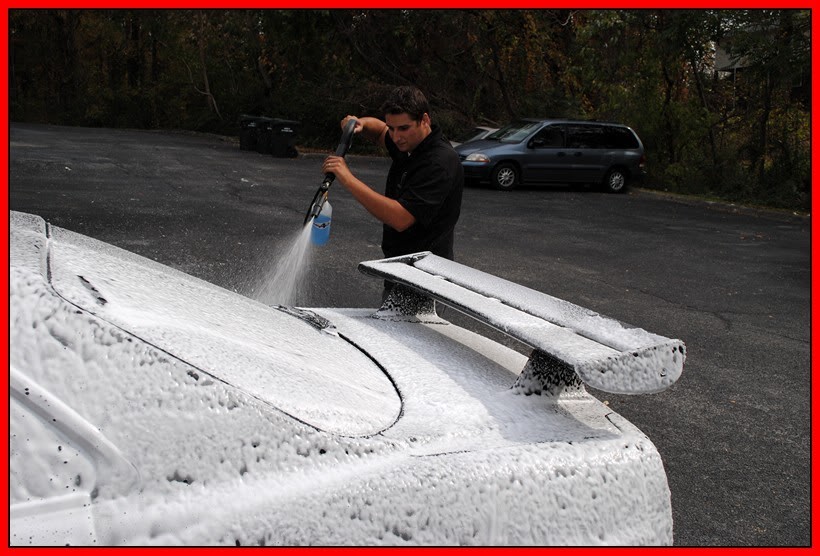
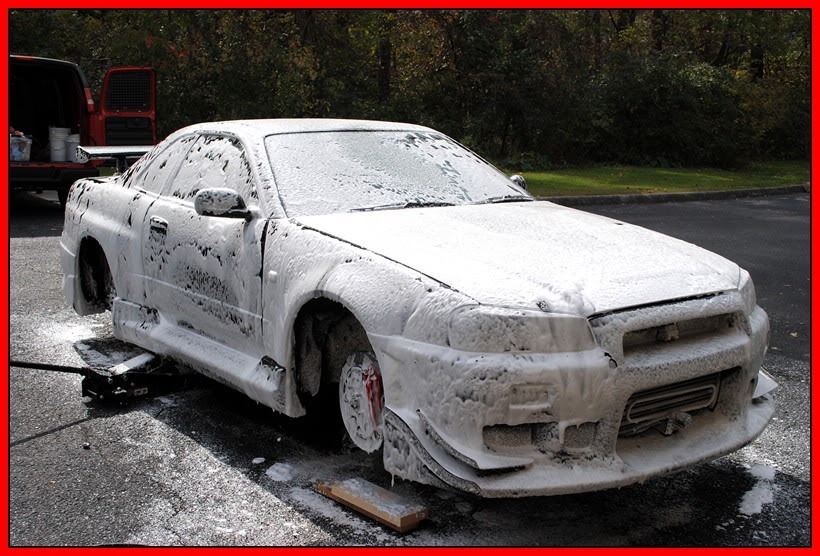
the grime just rolls off.

Name:  SkylineGTR208.jpg
Views: 659
Size:  51.5 KB

Name:  SkylineGTR206.jpg
Views: 626
Size:  37.2 KB

Name:  SkylineGTR205.jpg
Views: 634
Size:  75.6 KB

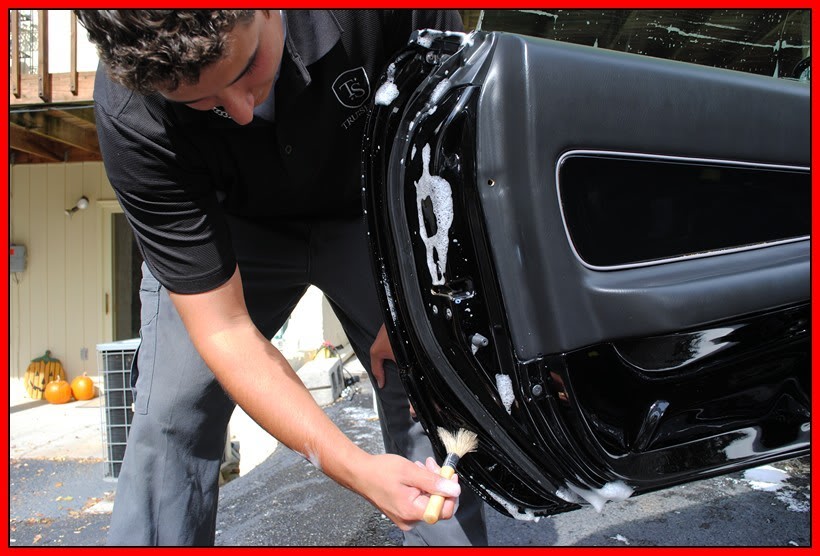
Next we both Washed it with 100 percent sheep skin wash mitts and two bucket method

Name:  SkylineGTR203.jpg
Views: 645
Size:  172.3 KB

Name:  SkylineGTR202.jpg
Views: 633
Size:  169.2 KB

Name:  SkylineGTR201.jpg
Views: 630
Size:  165.7 KB

Name:  SkylineGTR197.jpg
Views: 636
Size:  95.4 KB

Name:  SkylineGTR195.jpg
Views: 678
Size:  95.9 KB

Name:  SkylineGTR193.jpg
Views: 664
Size:  81.2 KB

Then the rinse.

Name:  SkylineGTR196.jpg
Views: 637
Size:  150.1 KB

Name:  SkylineGTR192.jpg
Views: 634
Size:  138.1 KB

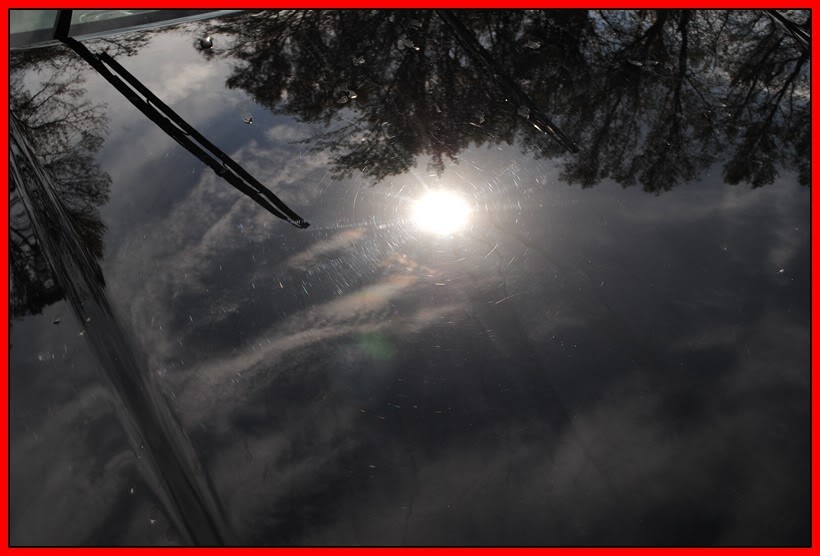
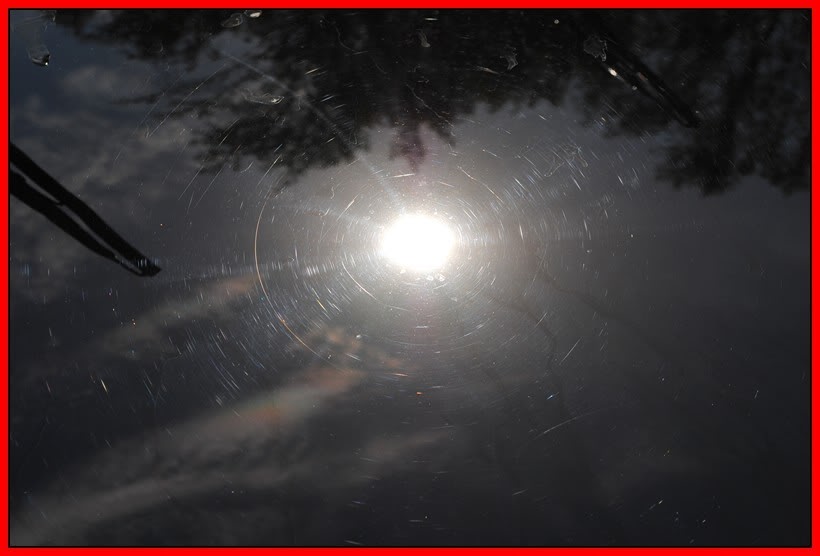
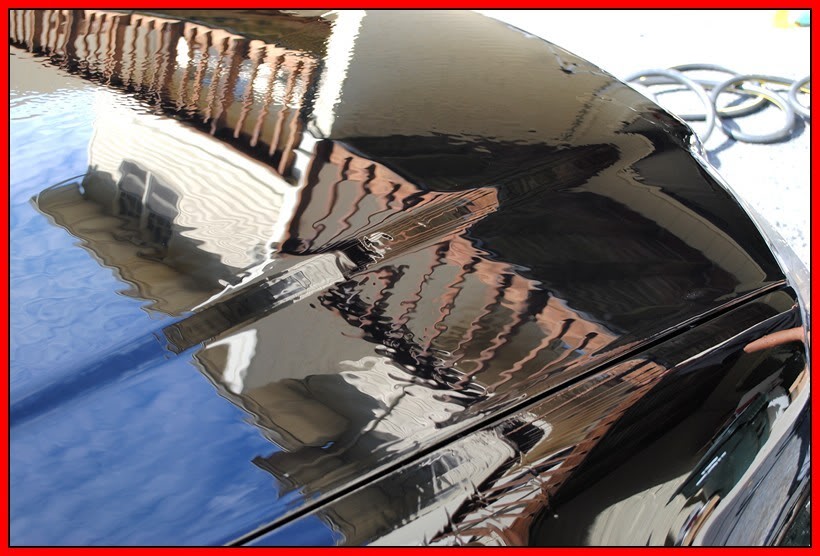
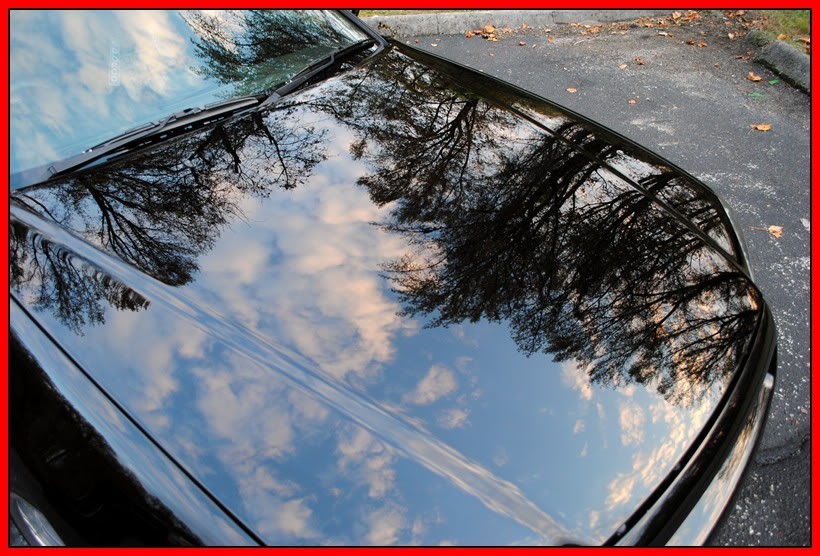
Now that all the wax has been removed the Tru surface is revealed

Name:  SkylineGTR189.jpg
Views: 617
Size:  59.1 KB

Name:  SkylineGTR188.jpg
Views: 612
Size:  42.9 KB

Name:  SkylineGTR152.jpg
Views: 605
Size:  39.9 KB

Name:  SkylineGTR148.jpg
Views: 613
Size:  53.6 KB

Name:  SkylineGTR147.jpg
Views: 634
Size:  37.0 KB

Name:  SkylineGTR146.jpg
Views: 609
Size:  55.0 KB


Next we clayed the car using a fine grade claybar and Dodo juice Born Slippy lube concentrate

Name:  SkylineGTR187.jpg
Views: 626
Size:  128.6 KB

Name:  SkylineGTR186.jpg
Views: 633
Size:  141.4 KB

Name:  SkylineGTR183.jpg
Views: 660
Size:  104.0 KB

Look how the water just sets on the sureface now. no more beading, no more rolling off.

Name:  SkylineGTR181.jpg
Views: 630
Size:  95.6 KB

Name:  SkylineGTR178.jpg
Views: 616
Size:  88.9 KB

here is David drying off the car with a ReThickulous towel.

Name:  SkylineGTR177.jpg
Views: 618
Size:  118.3 KB

Name:  SkylineGTR176.jpg
Views: 634
Size:  149.7 KB

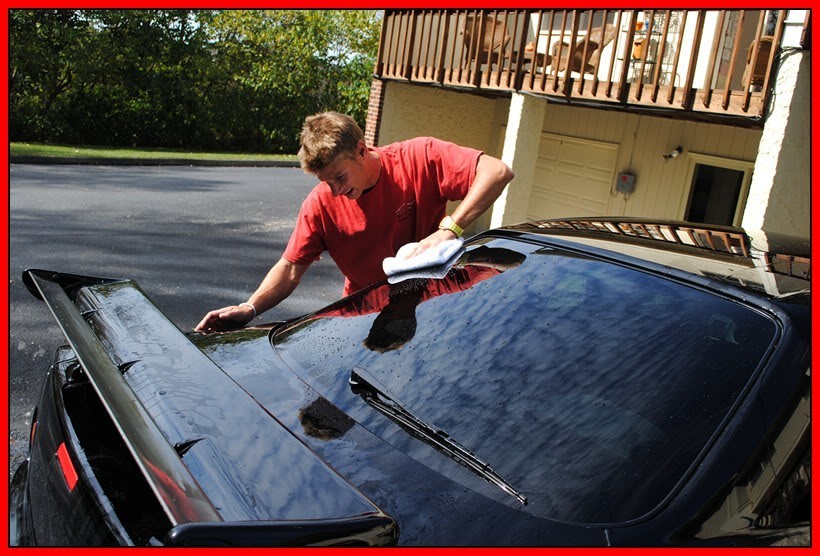
we dried all the jams and crevices with a Metro Magic air.

Name:  SkylineGTR175.jpg
Views: 628
Size:  147.7 KB

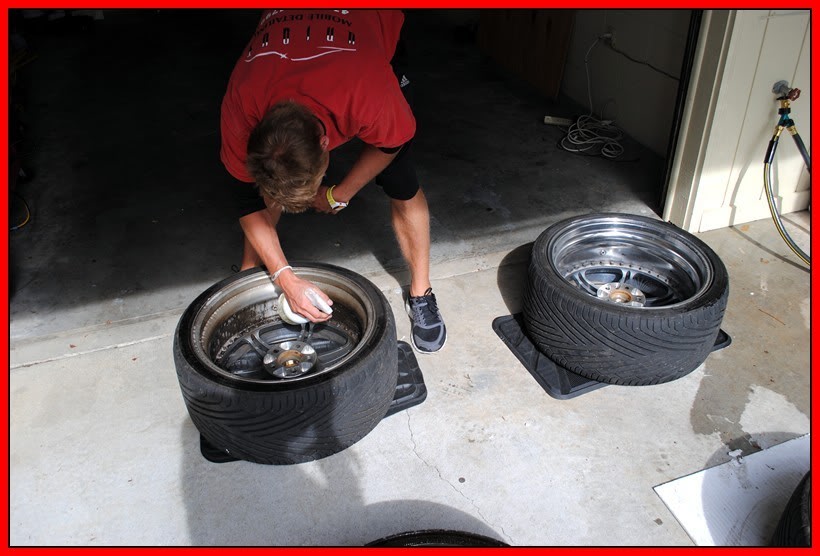
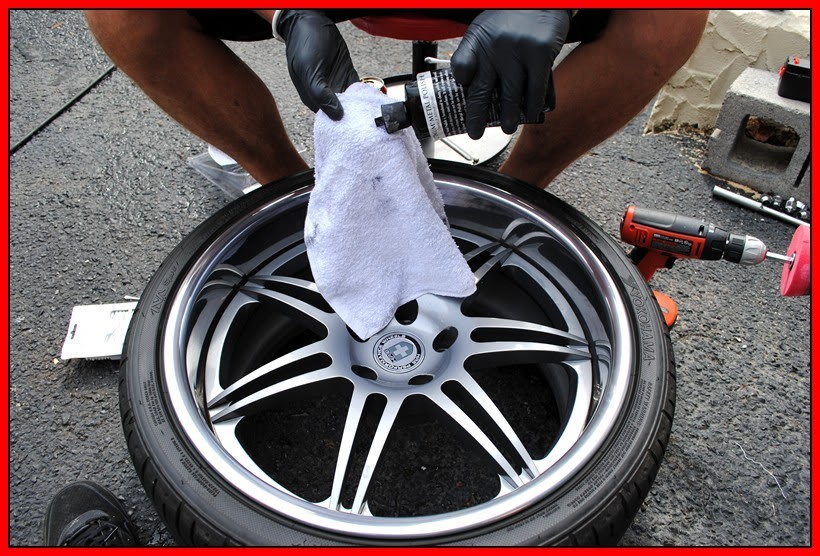
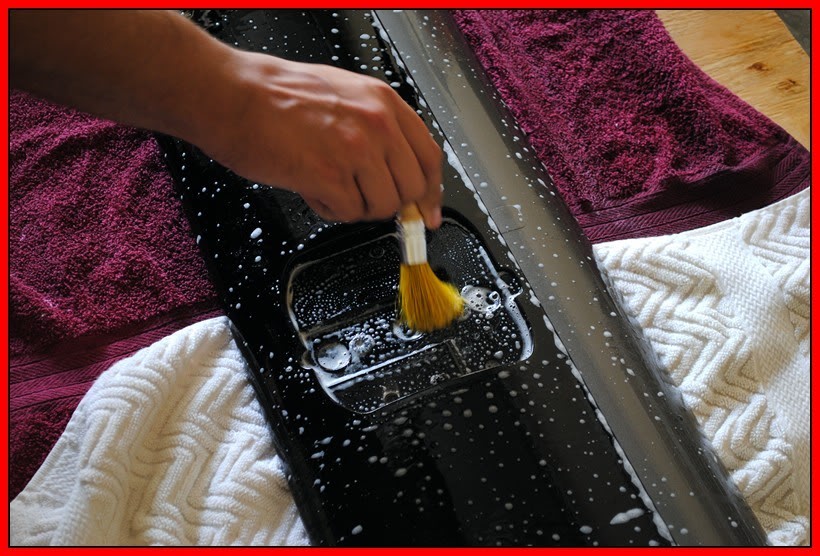
Now that the car was finished with the wash and clay process, It's time for the wheels.

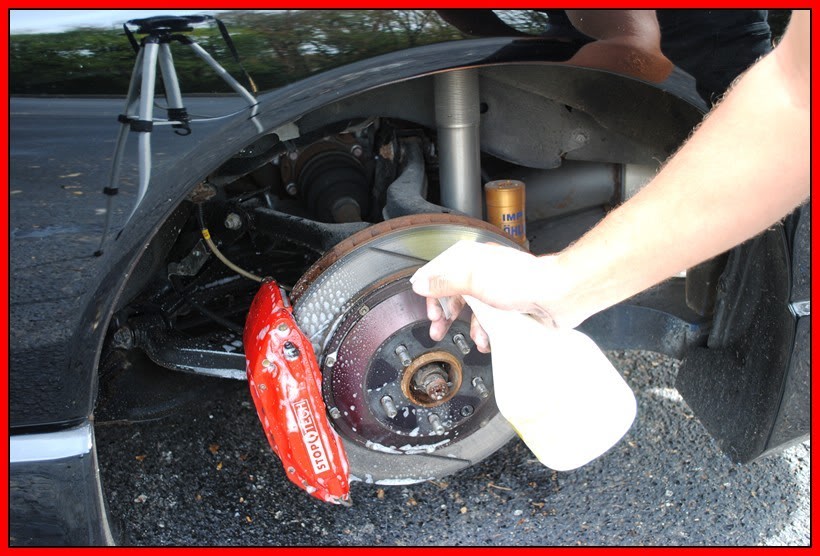
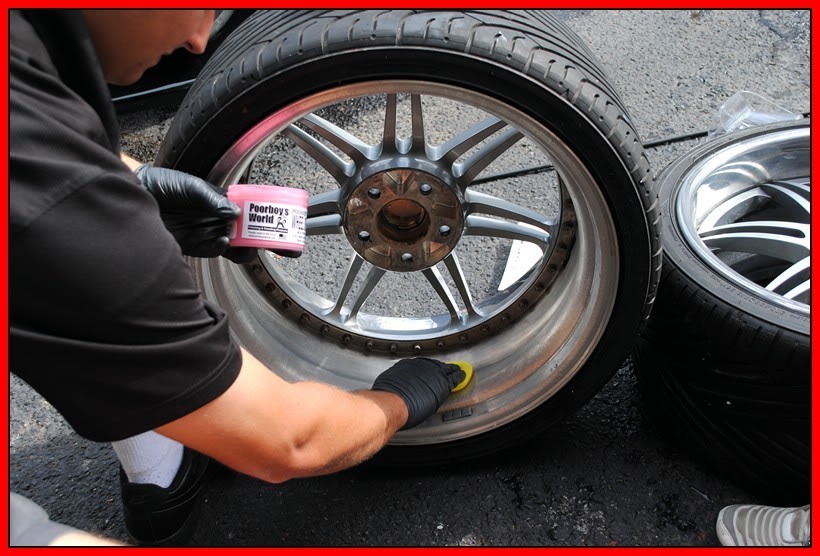
We used some more P21s wheel gel and some 0000# steel wool to brake up all the caked on dirt.

Name:  SkylineGTR172.jpg
Views: 618
Size:  105.3 KB

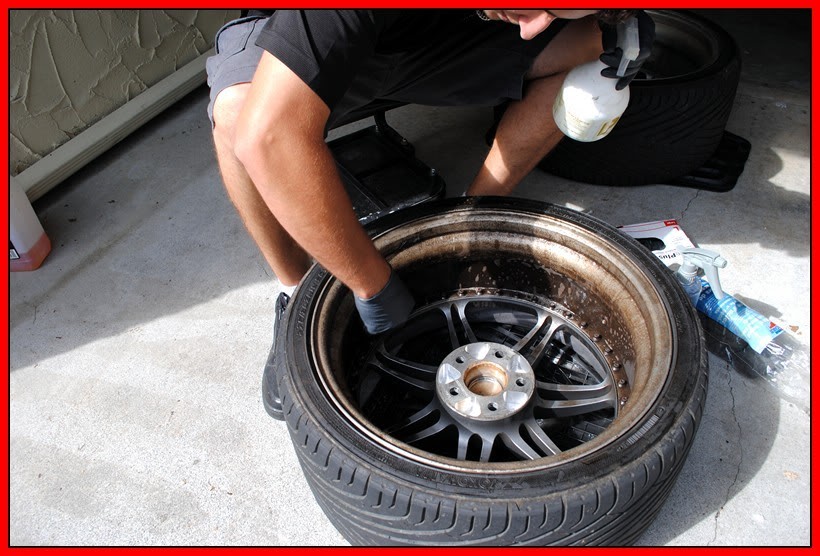
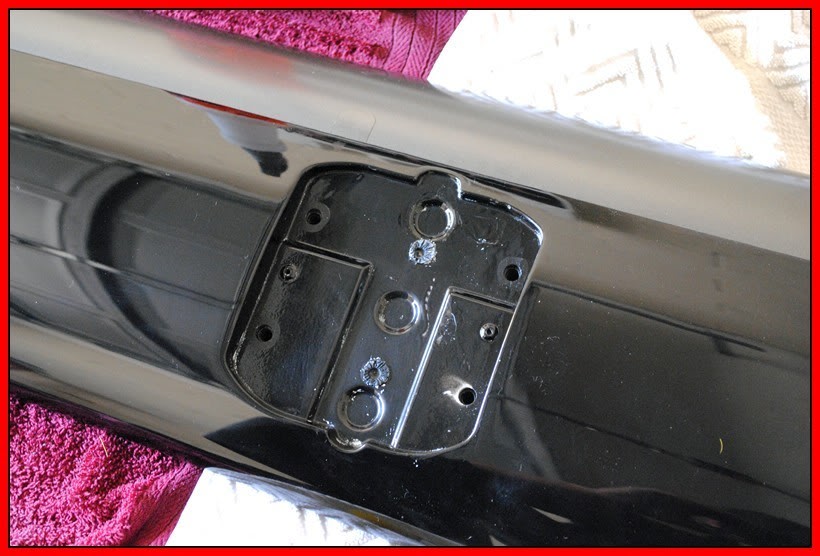
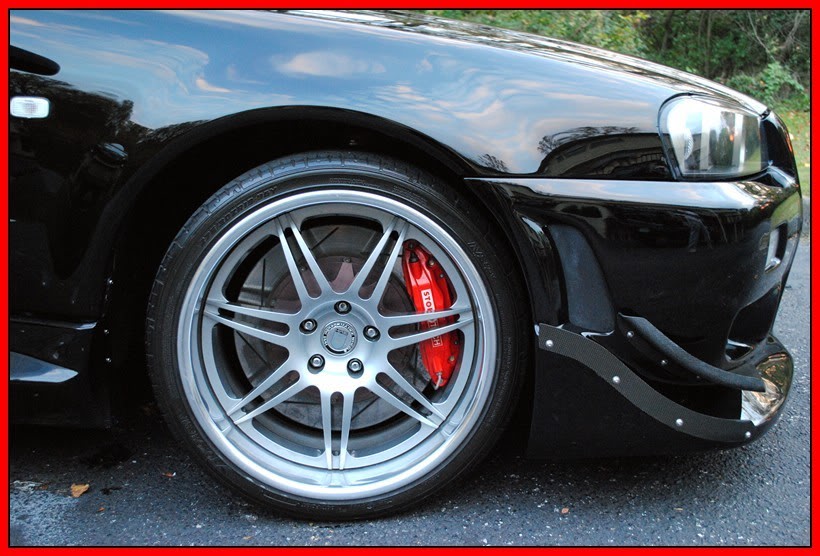
These wheels took forever but came out great.

Name:  SkylineGTR170.jpg
Views: 641
Size:  122.9 KB

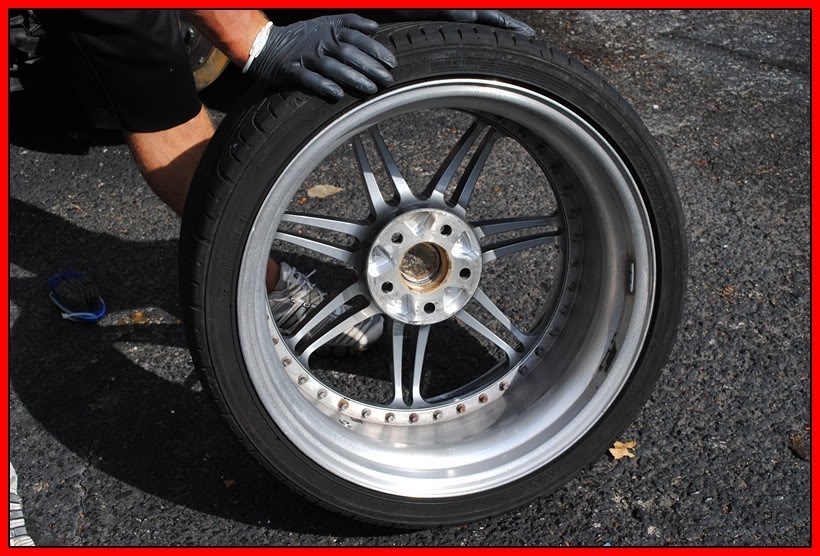
Then we polished up the outer lips.

Name:  SkylineGTR169.jpg
Views: 672
Size:  142.8 KB

Name:  SkylineGTR168.jpg
Views: 631
Size:  115.5 KB

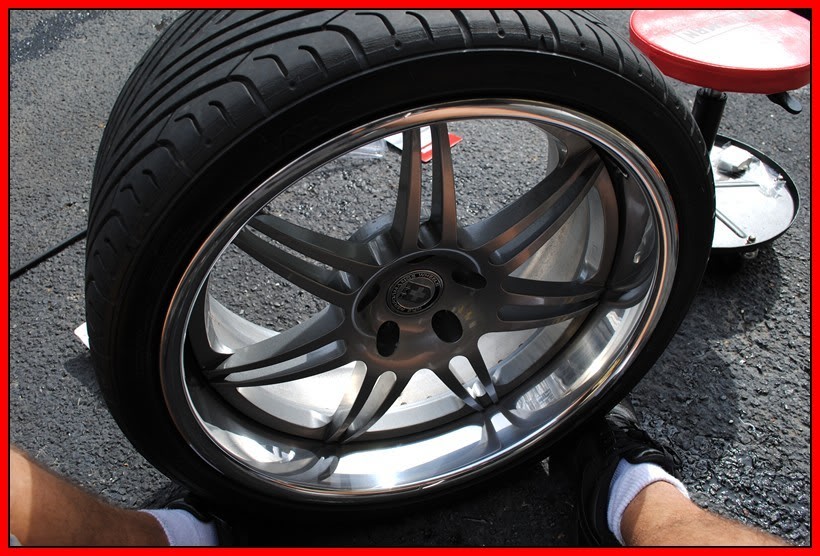
Looks way better now!

Name:  SkylineGTR167.jpg
Views: 659
Size:  91.2 KB

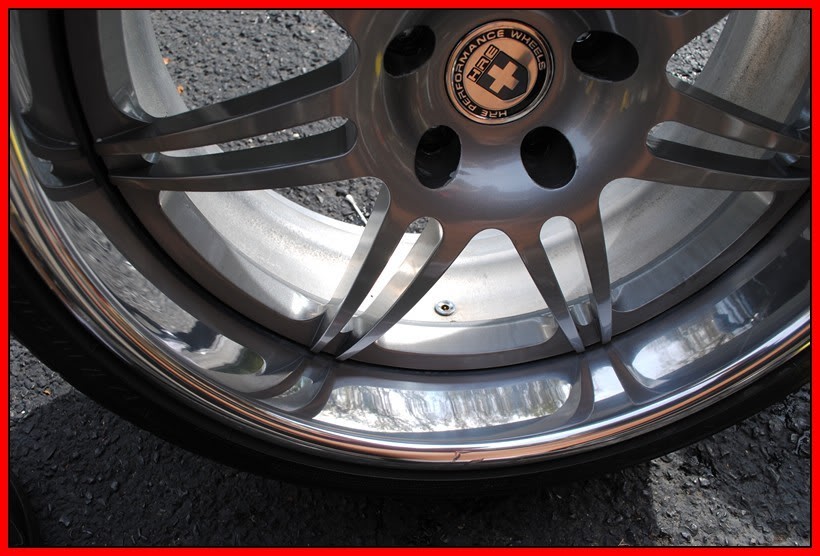
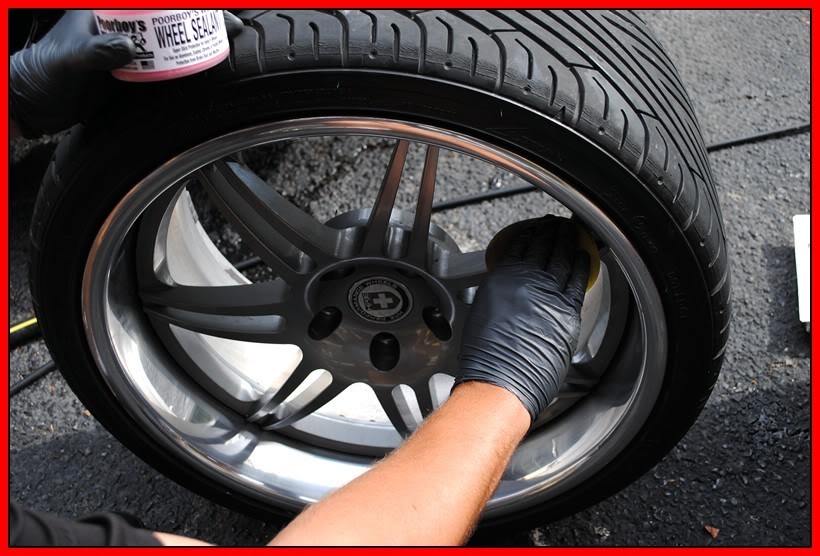
So then, to keep them cleaner longer and to keep them protected, we applied some PB's Wheels Sealant to the insides and outsides of the wheels.

Name:  SkylineGTR163.jpg
Views: 640
Size:  104.5 KB

Name:  SkylineGTR161.jpg
Views: 632
Size:  98.6 KB

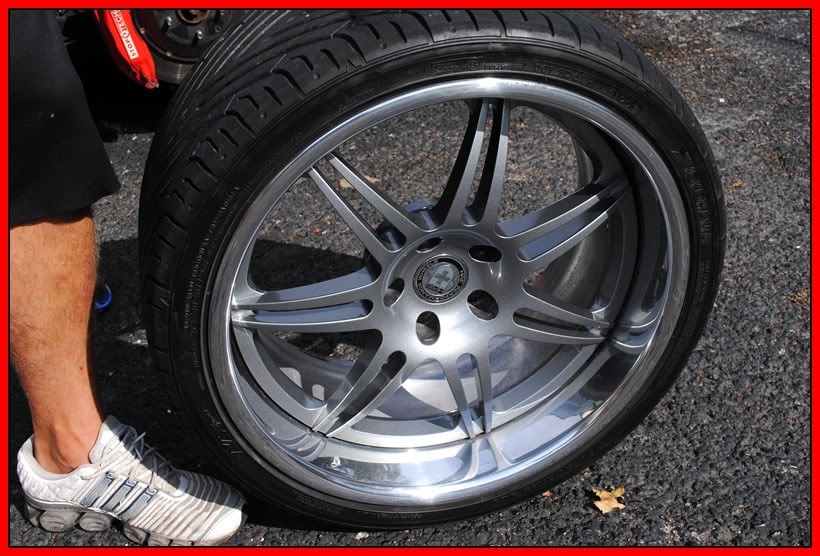
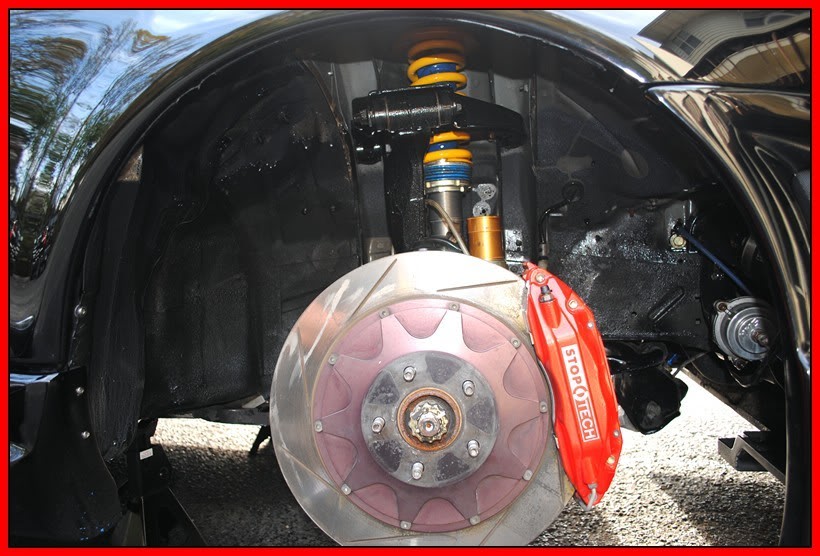
here is the final out come of the wheels

Name:  SkylineGTR160.jpg
Views: 625
Size:  126.4 KB

Name:  SkylineGTR159.jpg
Views: 621
Size:  122.6 KB

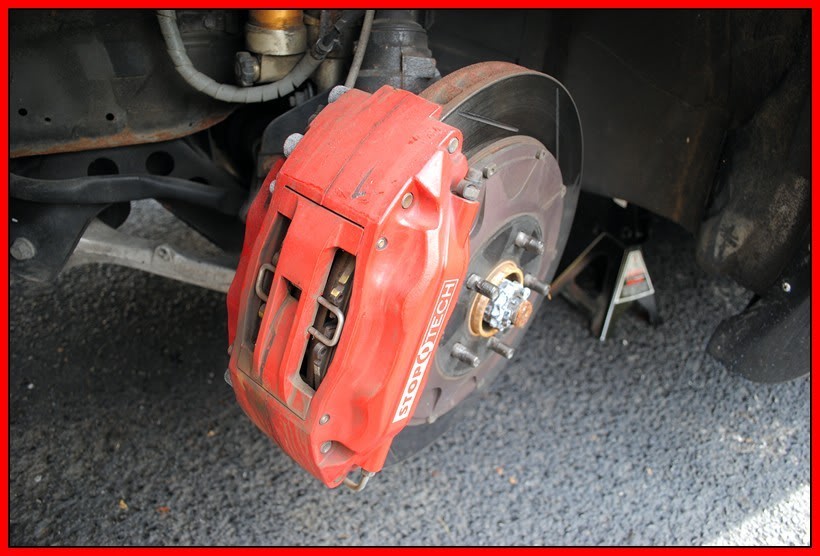
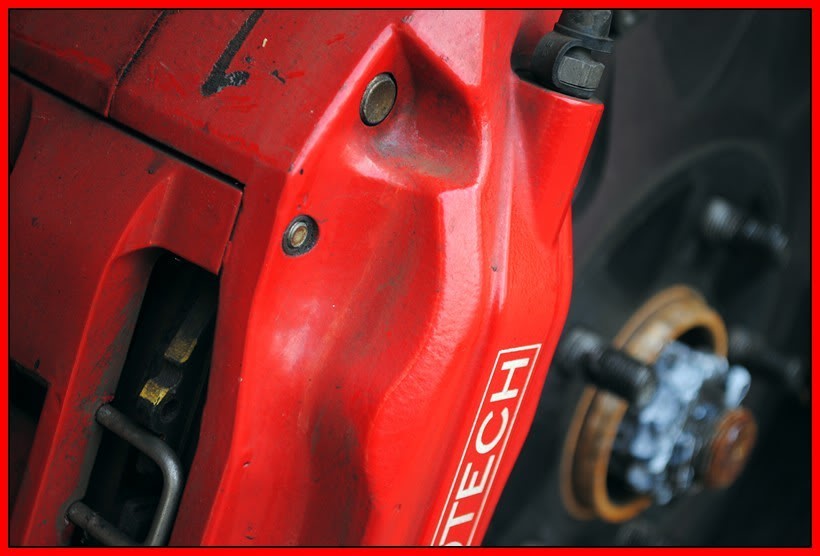
Before we put the wheels back on I applied some Megs Tech wax 2.0 to the calibers to brighten them up a lillte.

Name:  SkylineGTR157.jpg
Views: 604
Size:  78.3 KB

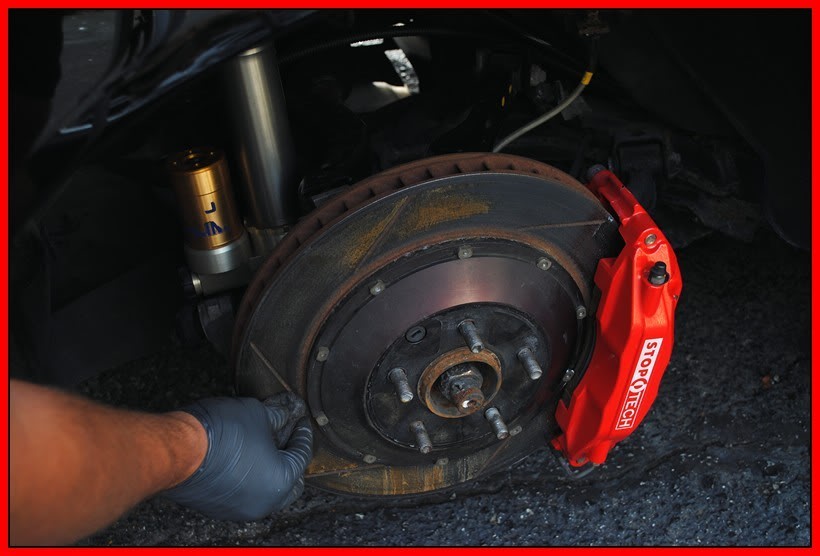
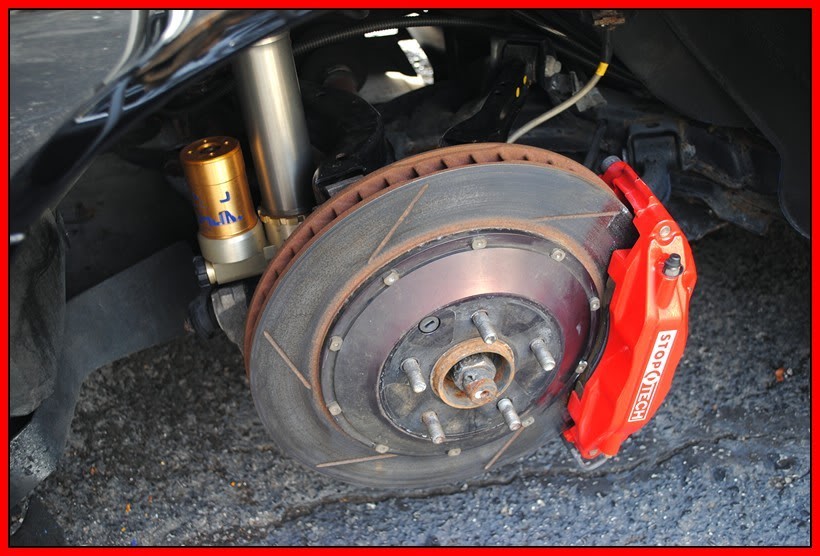
And then I took some steel wool to the rotors to get the ugly Rust look off of them.

Name:  SkylineGTR155.jpg
Views: 623
Size:  62.7 KB

Name:  SkylineGTR154.jpg
Views: 616
Size:  95.2 KB

Name:  SkylineGTR141.jpg
Views: 627
Size:  103.1 KB

Name:  SkylineGTR138.jpg
Views: 603
Size:  113.9 KB

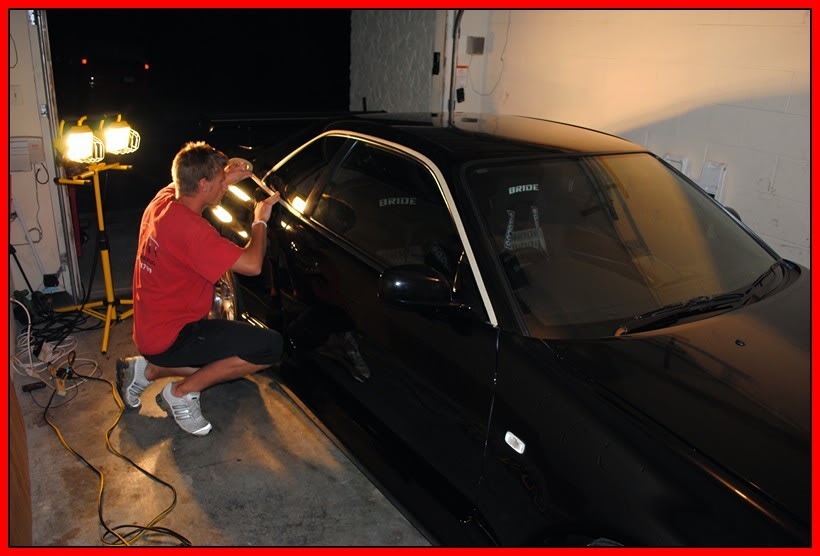
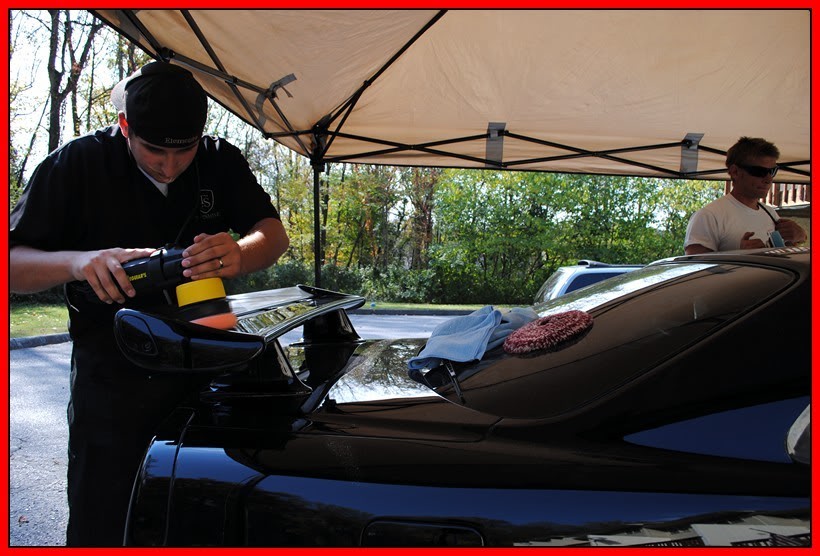
next we brought the car in and began taping up all the plastic moldings useing meguiars masking tape.

Name:  SkylineGTR137.jpg
Views: 623
Size:  63.4 KB

Name:  SkylineGTR135.jpg
Views: 600
Size:  93.3 KB

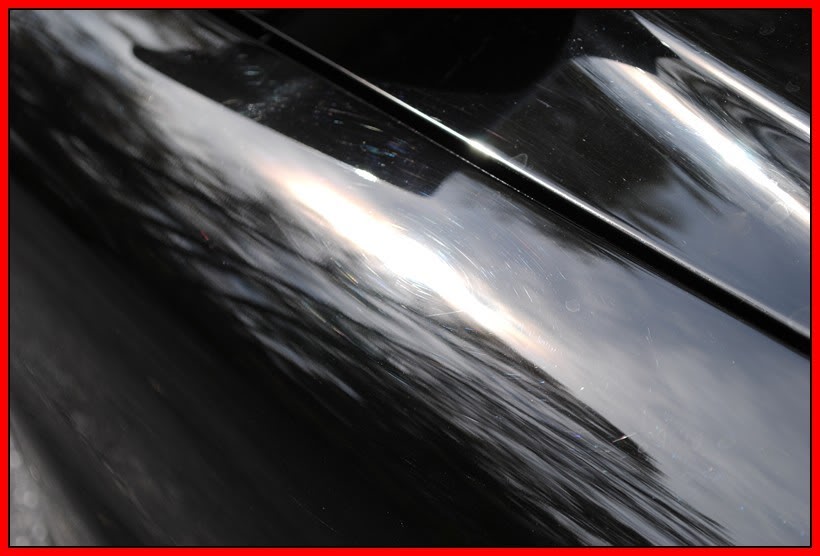
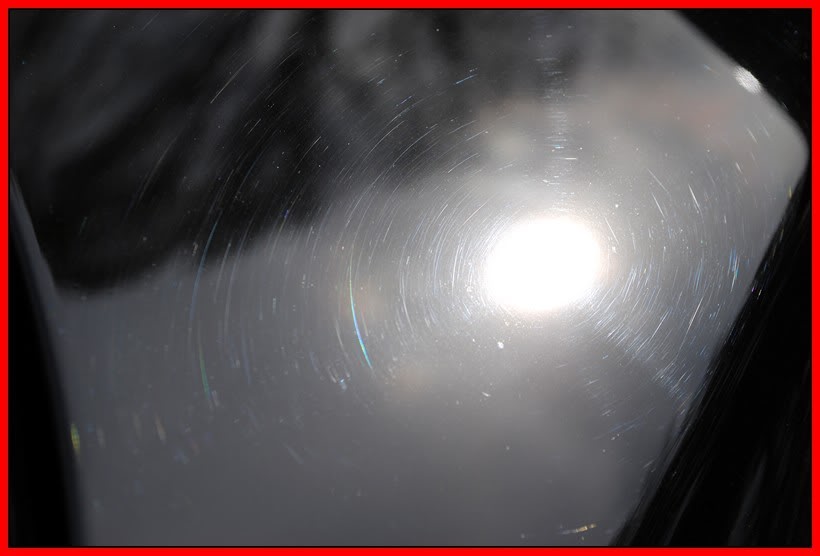
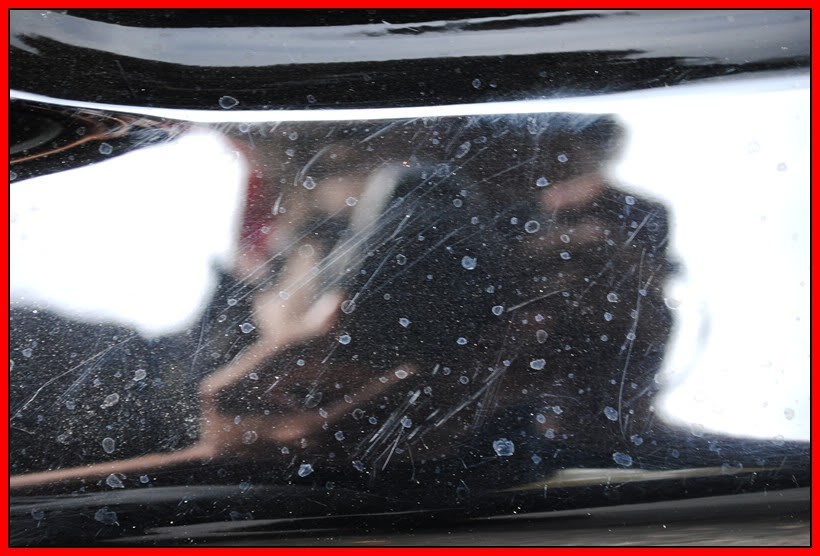
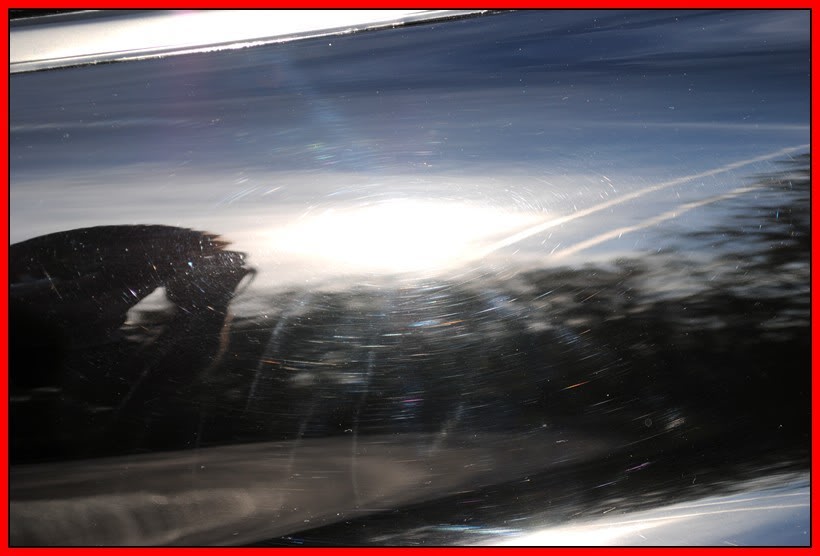
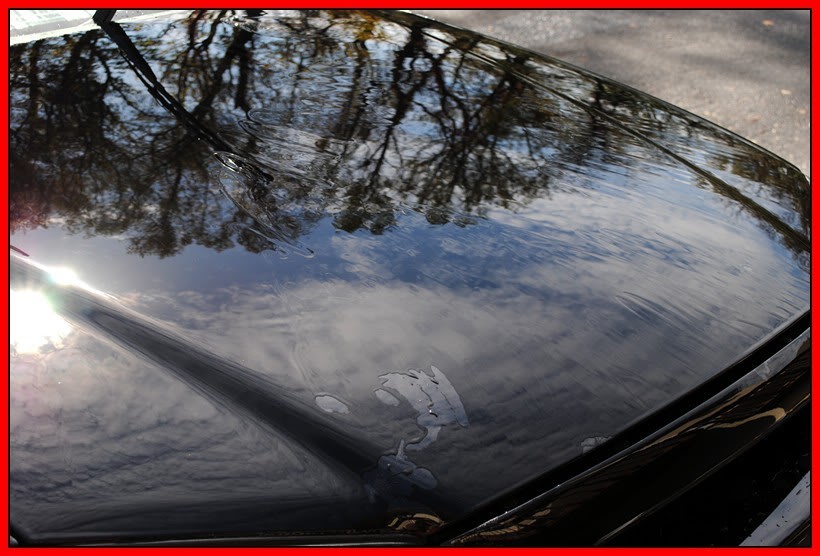
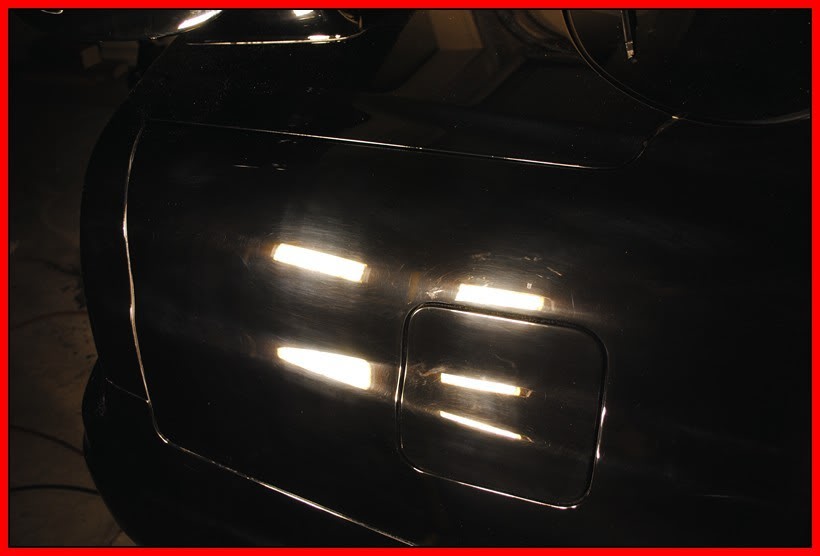
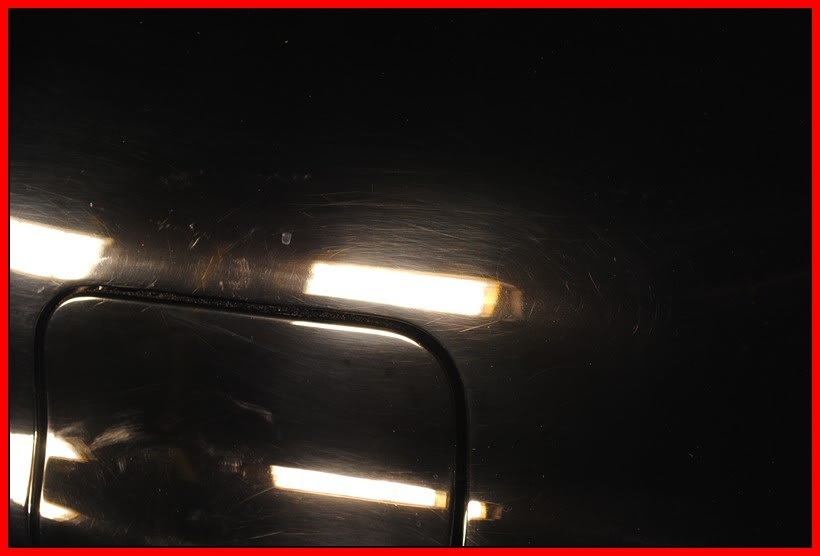
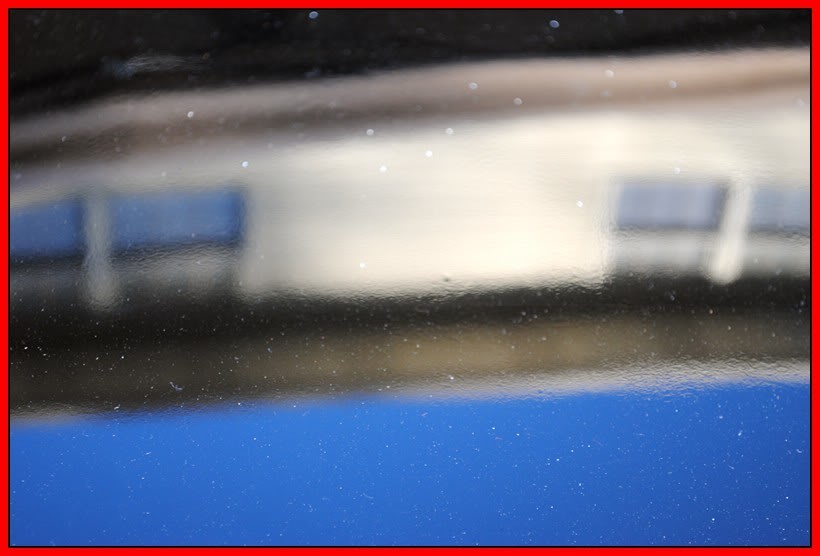
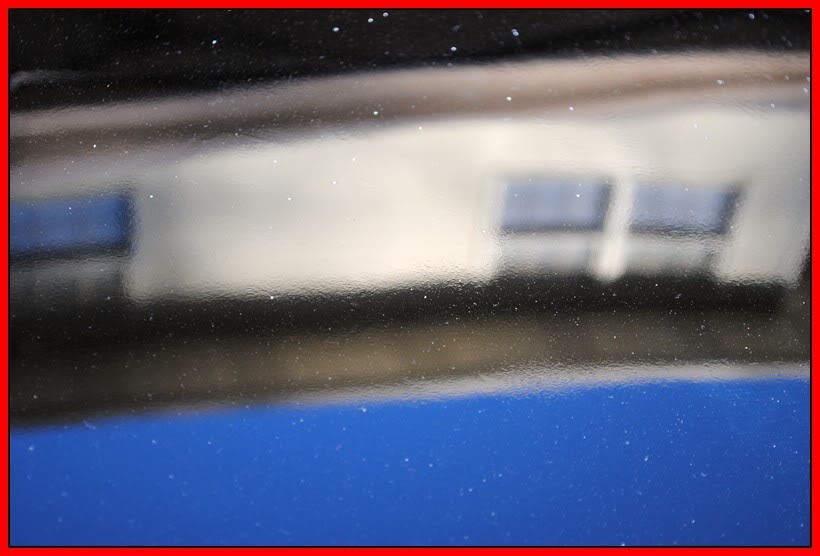
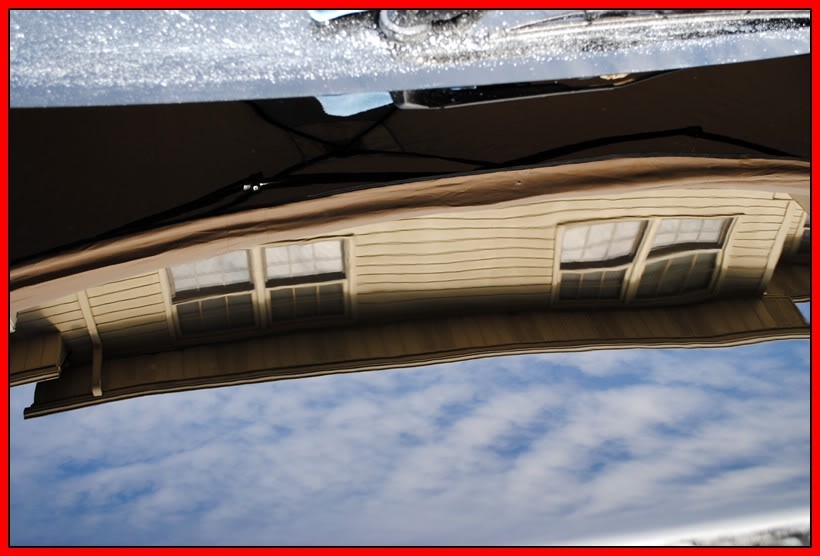
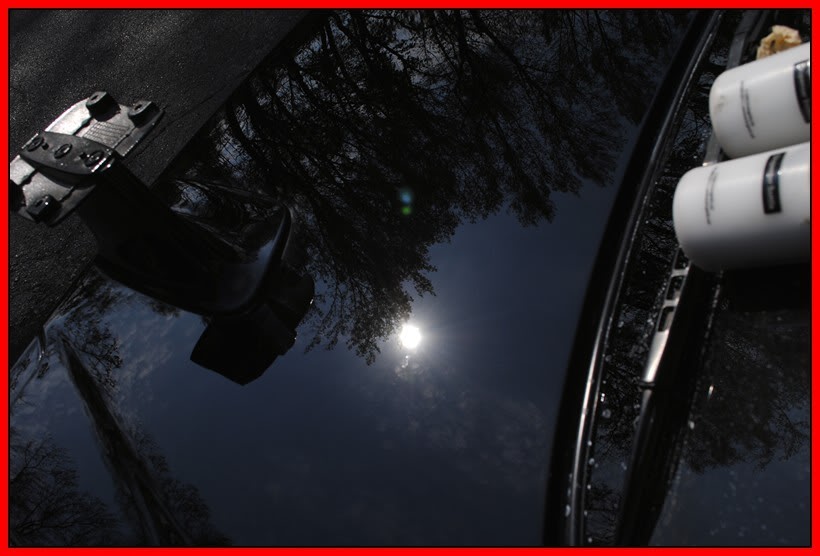
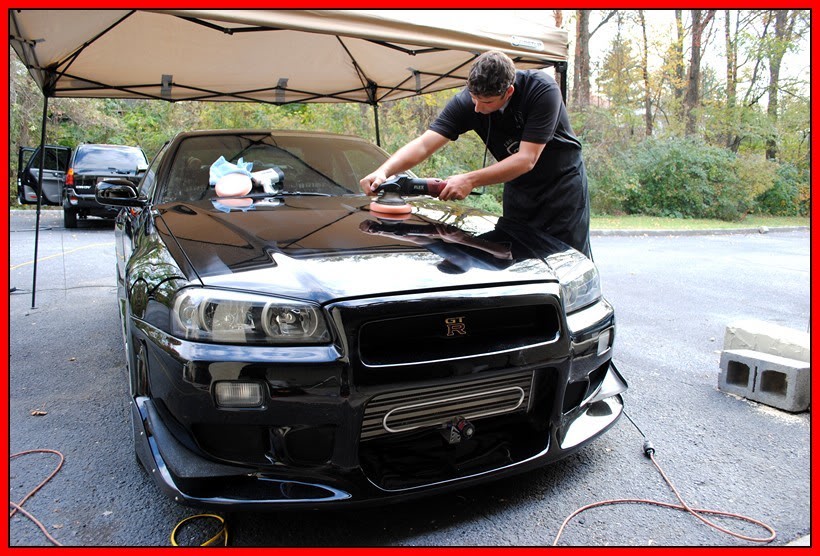
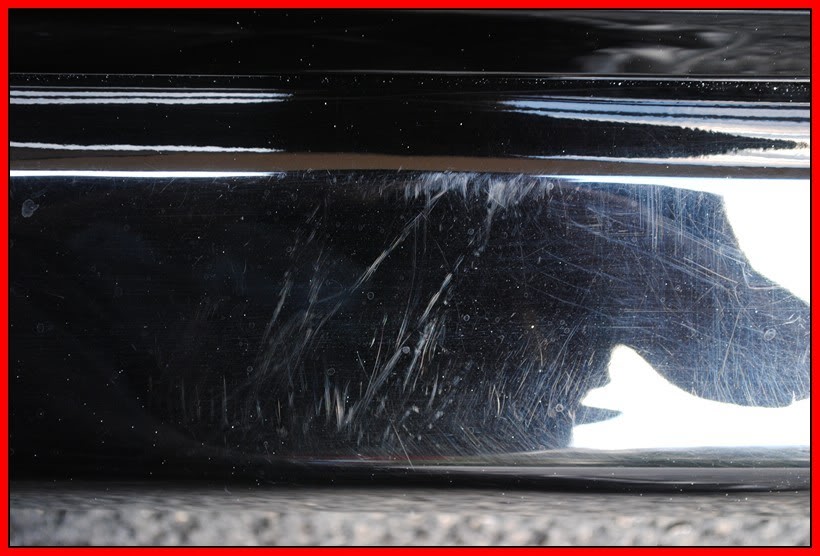
here is what the paint looks like under the halogens

Name:  SkylineGTR134.jpg
Views: 623
Size:  36.7 KB

Name:  SkylineGTR129.jpg
Views: 621
Size:  34.3 KB

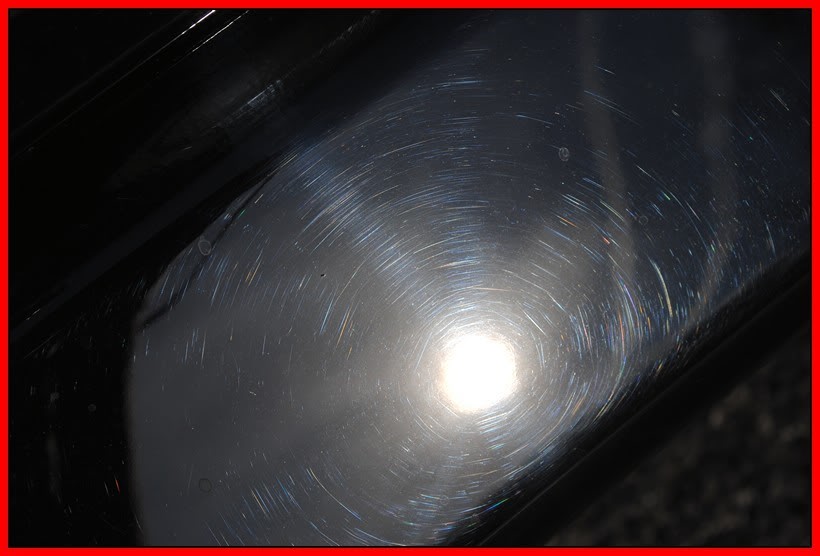
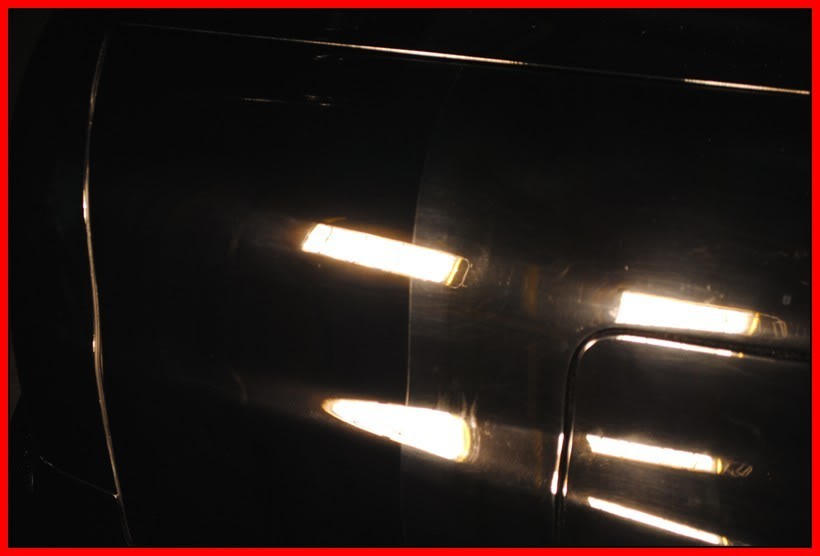
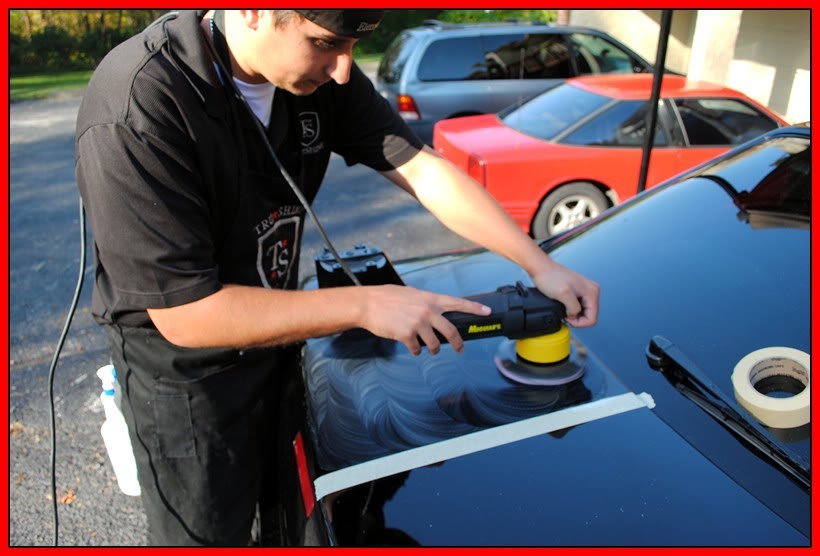
and here is a 50/50 using M105/Cyan via Flex 3401

Name:  SkylineGTR132.jpg
Views: 613
Size:  30.3 KB

Name:  SkylineGTR126.jpg
Views: 619
Size:  64.0 KB

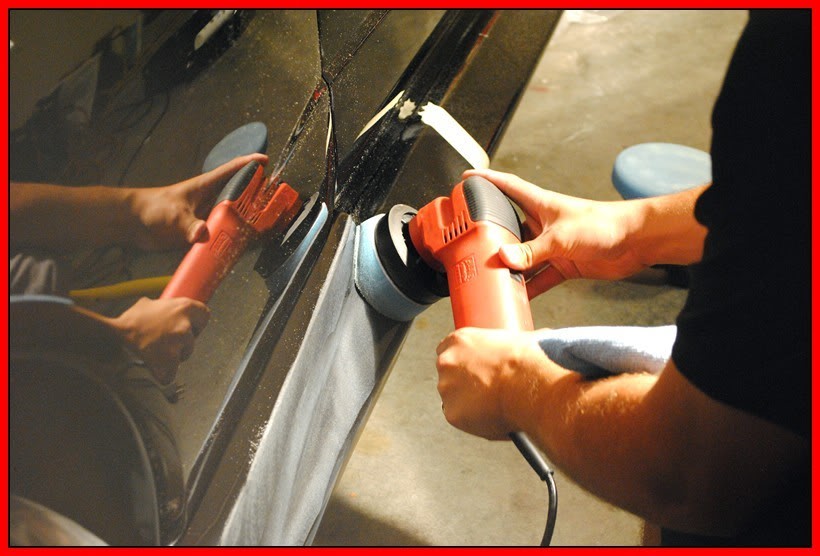
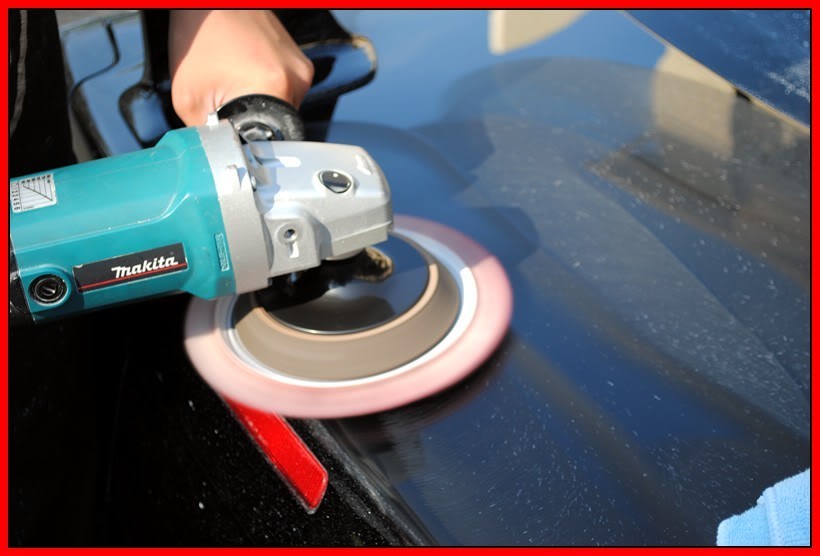
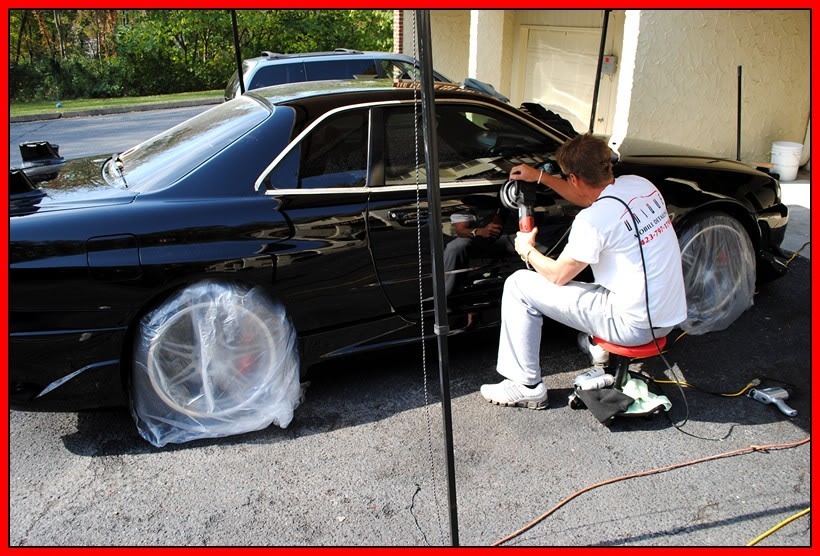
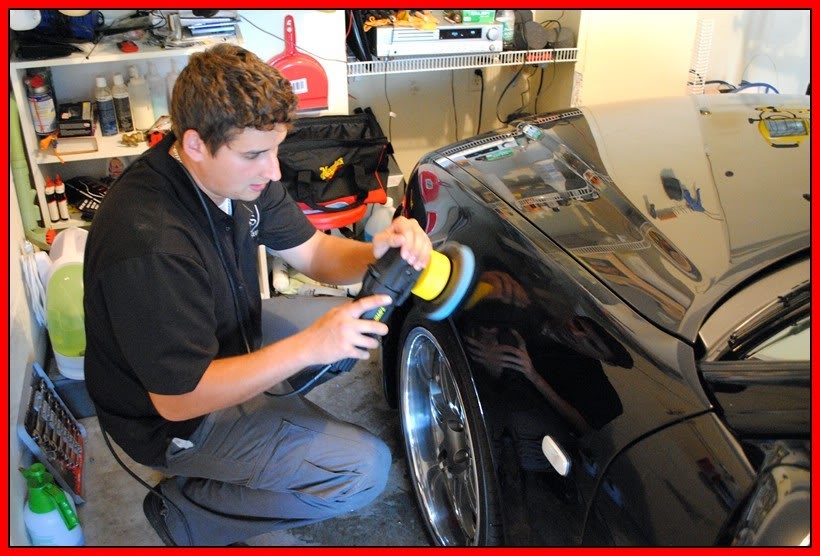
I got the lower tight areas using my Griot's Garage 3in orbital with 4in backing plate and LC cyan pad with M105 compound.

Name:  SkylineGTR124.jpg
Views: 634
Size:  73.9 KB

Some of the scratches on the side skirts need some wetsanding. I used a Eagle supertack 1500 and then followed it with Eagle Bufflex 3000 (forgot to take after pics that night)

Name:  SkylineGTR123.jpg
Views: 663
Size:  58.0 KB

Name:  SkylineGTR121.jpg
Views: 608
Size:  45.8 KB

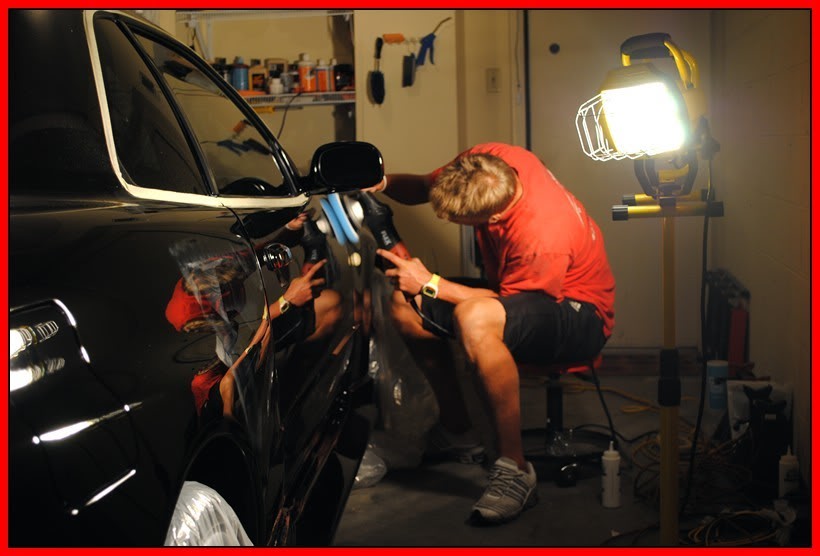
So we worked until 1 am and got the driver side mostly compounded. After a good nights rest we woke up and got back at it.

Name:  SkylineGTR118.jpg
Views: 637
Size:  149.3 KB

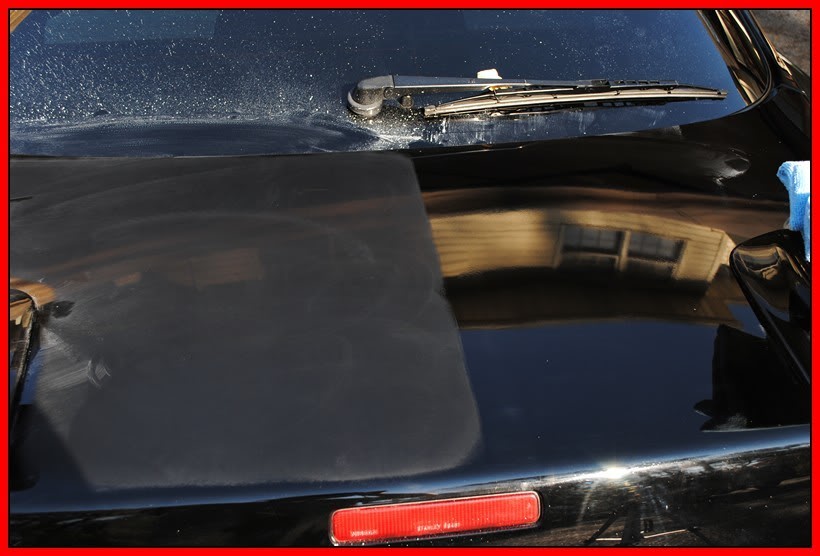
While David was correcting the paint, I started on the rear trunk.

There was a lot of Orange peel on the rear deck lid, so we removed the rear wing for it to be wet sanded.

Name:  SkylineGTR116.jpg
Views: 635
Size:  74.2 KB

Name:  SkylineGTR117.jpg
Views: 601
Size:  47.1 KB

Name:  SkylineGTR113.jpg
Views: 605
Size:  52.4 KB

I used a Meguiars G110 with my Eagle Supertack 1500 disc followed by 3000 grit.

Name:  SkylineGTR109.jpg
Views: 614
Size:  74.7 KB

Name:  SkylineGTR105.jpg
Views: 609
Size:  77.2 KB

Name:  SkylineGTR103.jpg
Views: 675
Size:  68.4 KB

After I wet sanded the trunk I removed the sand marks with a Mikita Rotary using the Meguiars W66 solo backing plate and a Solo maroon wool pad using M105 compound. Followed by M205/Tangerine.

Name:  SkylineGTR100.jpg
Views: 620
Size:  54.7 KB

Name:  SkylineGTR097.jpg
Views: 607
Size:  41.2 KB

Name:  SkylineGTR095.jpg
Views: 625
Size:  65.7 KB

Name:  SkylineGTR082.jpg
Views: 658
Size:  62.2 KB

Name:  SkylineGTR081.jpg
Views: 646
Size:  31.3 KB

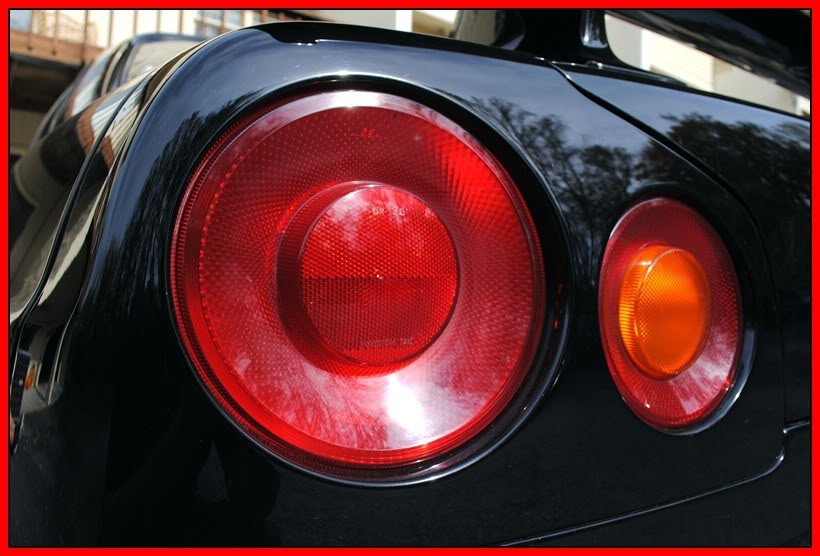
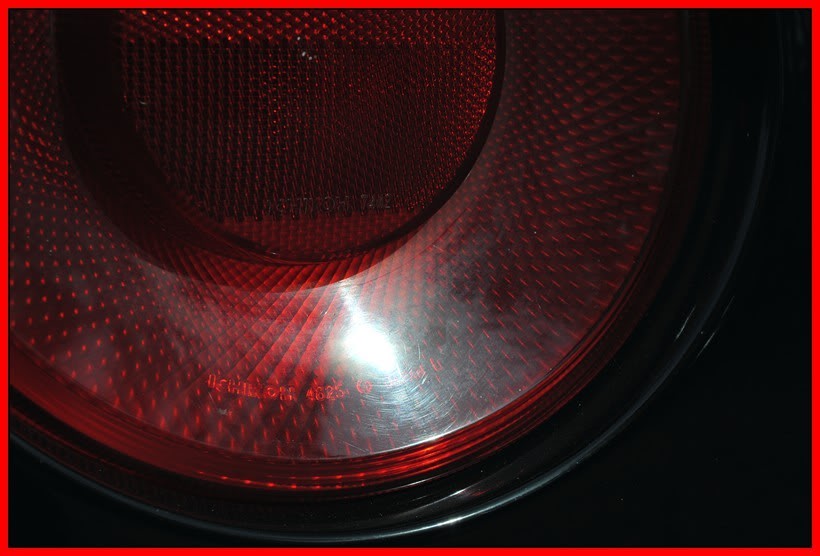
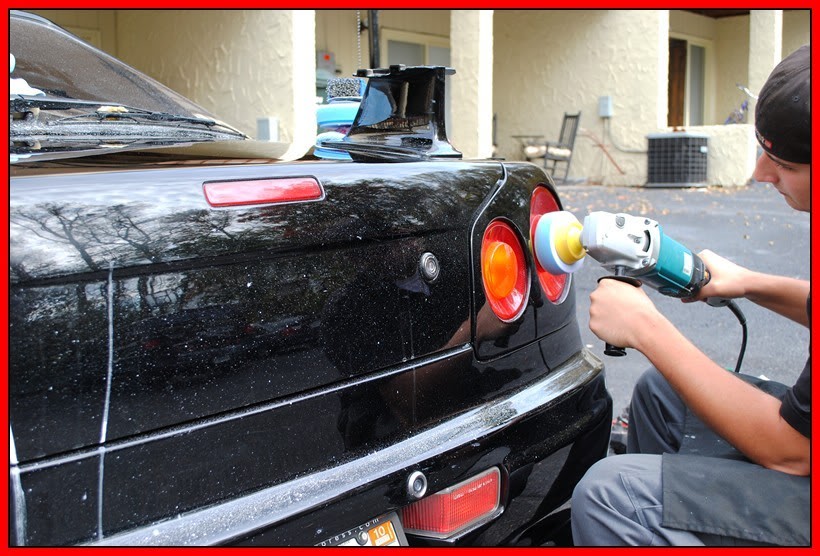
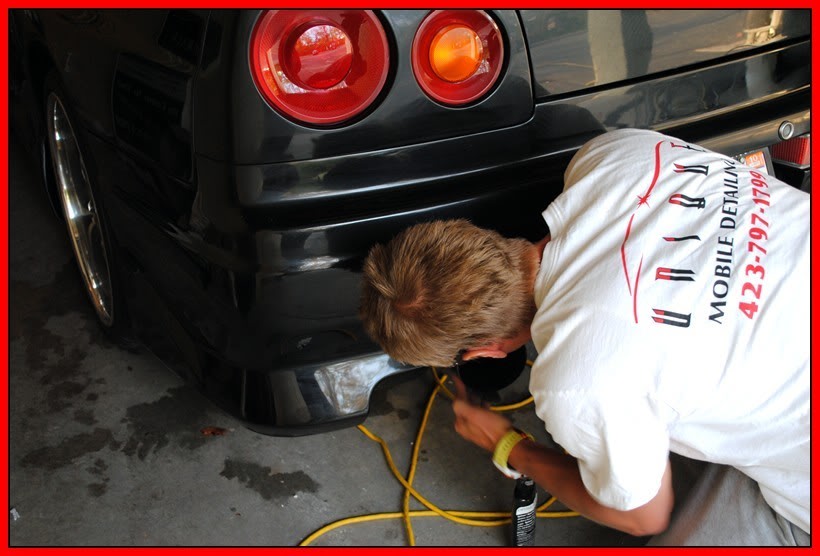
While I was back there I finished up the tail lights and rear bumper.

Name:  SkylineGTR094.jpg
Views: 685
Size:  116.5 KB

Next was the Wing. It had all kinds of compound residue left behind from the previous buff job.

Name:  SkylineGTR080.jpg
Views: 600
Size:  106.7 KB

Name:  SkylineGTR079.jpg
Views: 610
Size:  106.1 KB

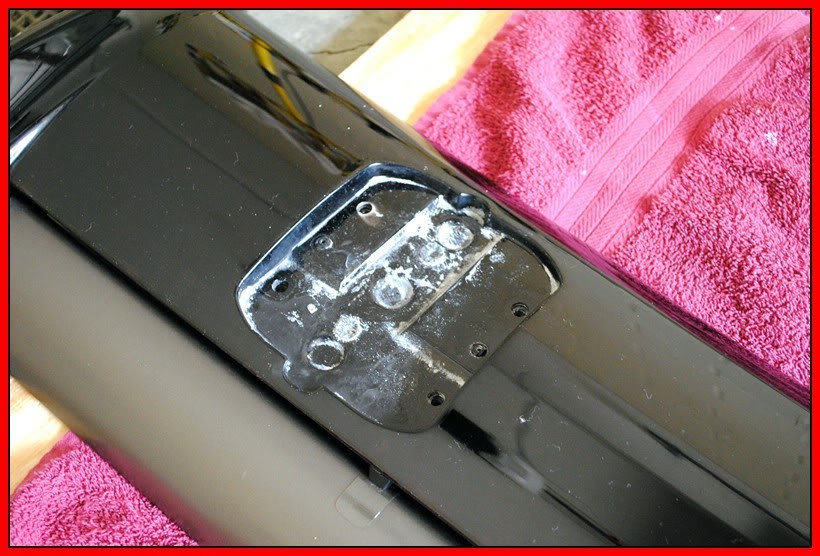
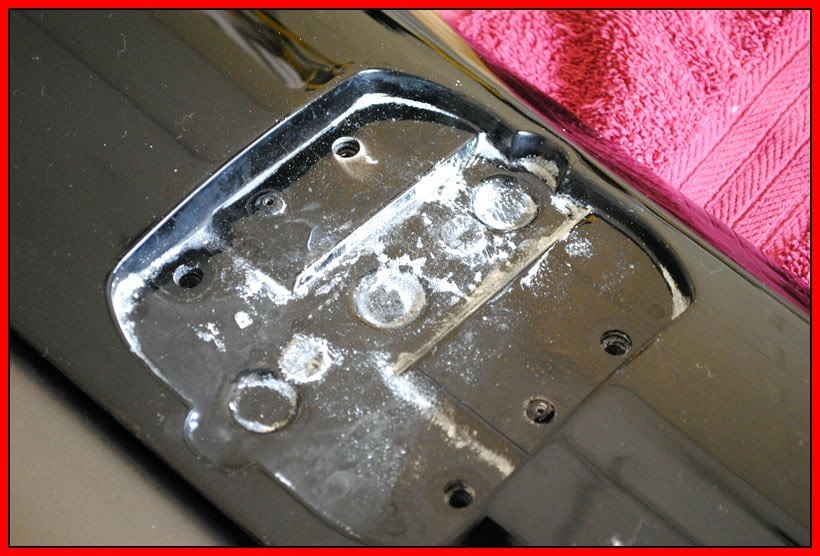
I soaked it down with some APC and agitated it with a brush

Name:  SkylineGTR078.jpg
Views: 650
Size:  121.2 KB

Name:  SkylineGTR076.jpg
Views: 608
Size:  121.0 KB

Name:  SkylineGTR074.jpg
Views: 600
Size:  81.6 KB

The top part of the wing had alot of deeper scratches so I wet sanded a small area to remove them.

Name:  SkylineGTR073.jpg
Views: 600
Size:  112.9 KB

And to buff it I put it back on the car for stability.

Name:  SkylineGTR070.jpg
Views: 618
Size:  102.3 KB

and polished it out via 205/tang pad with the G110v2

Name:  SkylineGTR069.jpg
Views: 587
Size:  101.7 KB

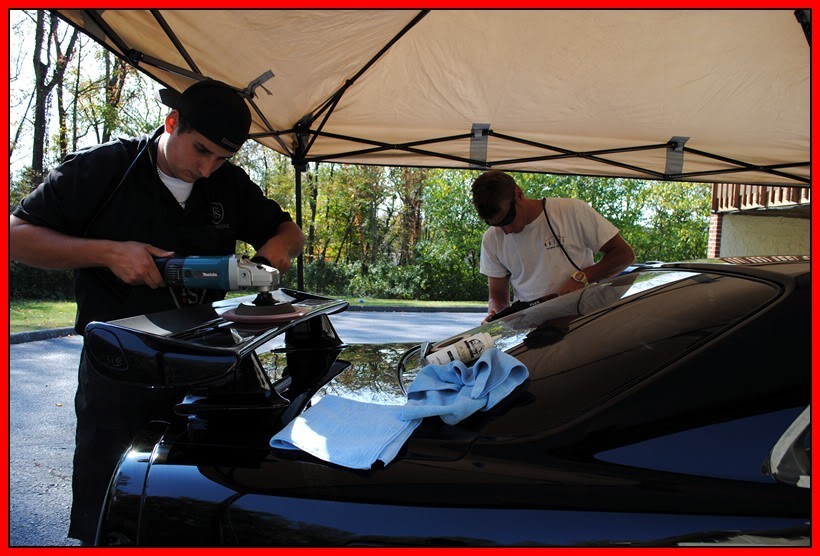
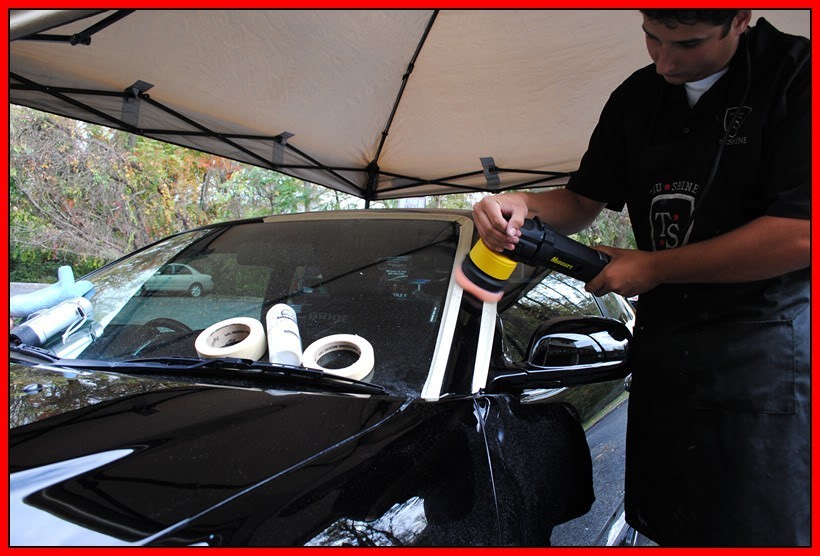
For the polishing stage we used our Flex 3401's with m205 and lake country Tangerine pads.

Name:  SkylineGTR067.jpg
Views: 596
Size:  136.5 KB

Name:  SkylineGTR066.jpg
Views: 590
Size:  91.4 KB

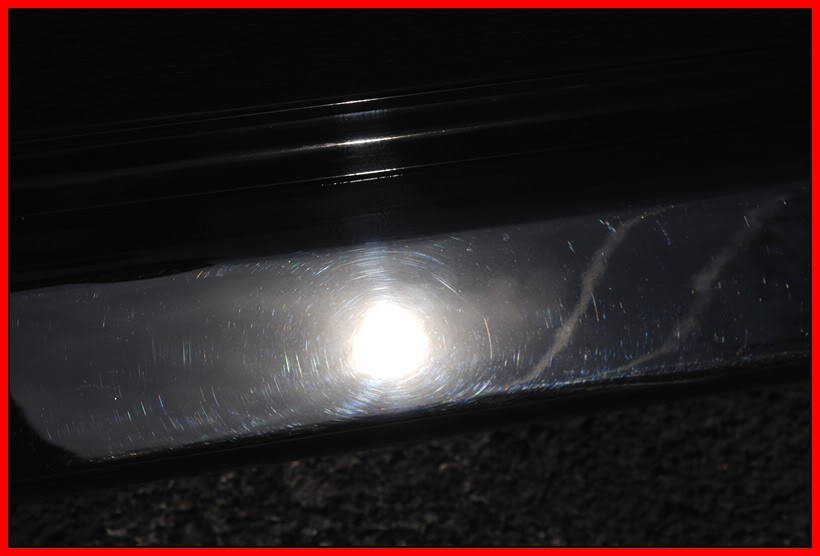
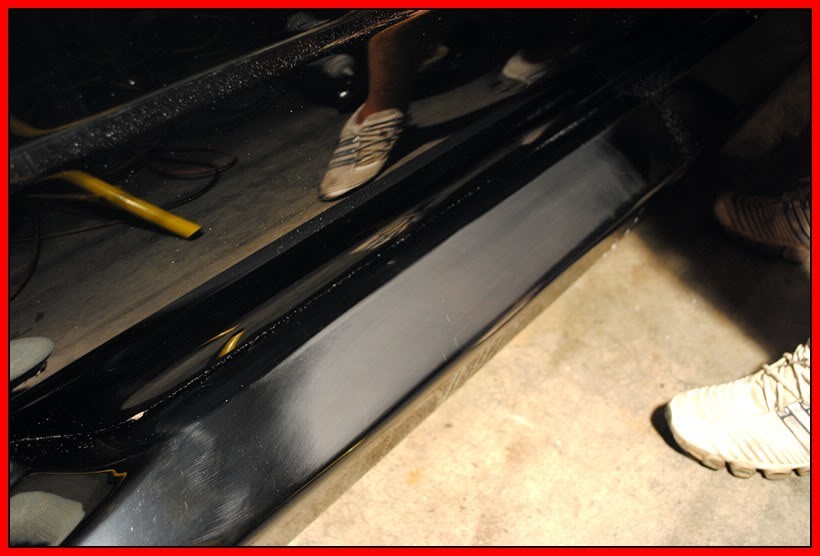
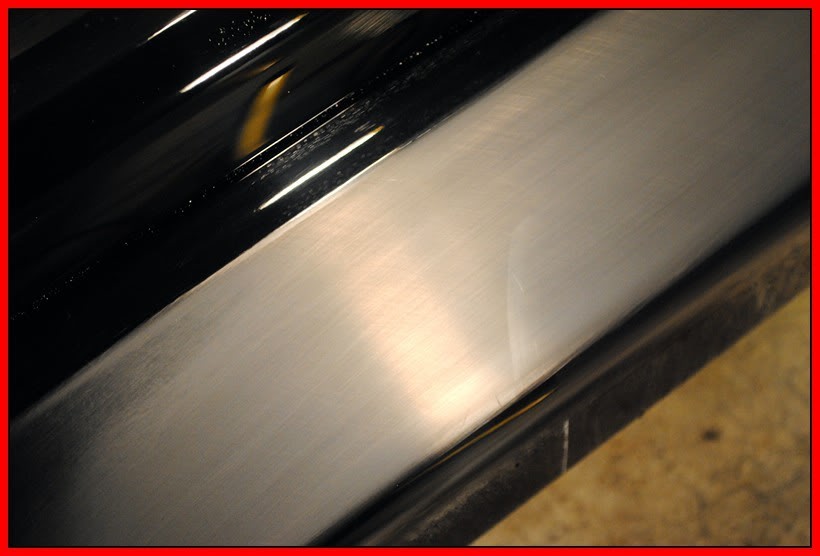
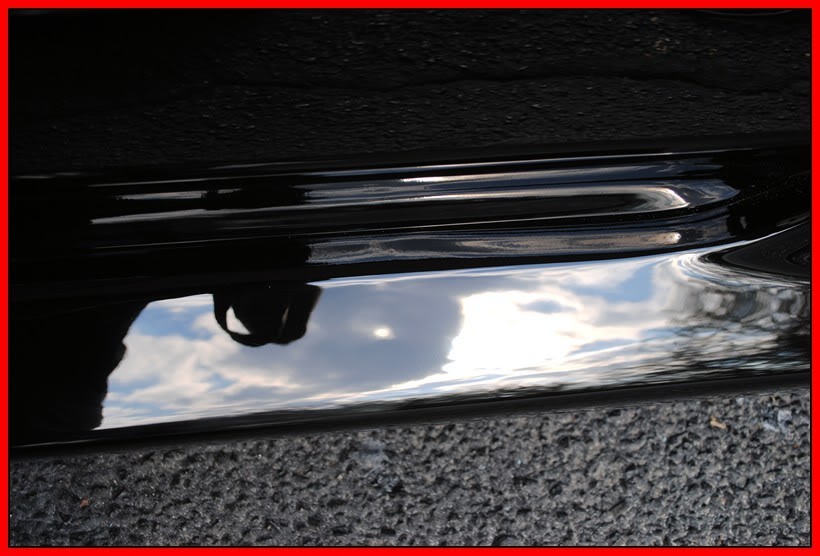
This is a picture of the Driver side skirt with all kinds of deeper scratches.

Name:  SkylineGTR064.jpg
Views: 579
Size:  92.8 KB

Name:  SkylineGTR063.jpg
Views: 582
Size:  82.4 KB

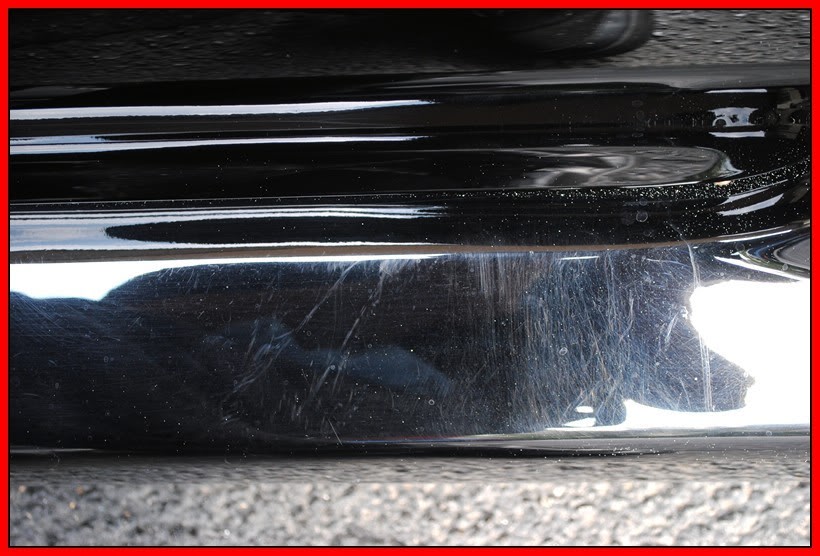
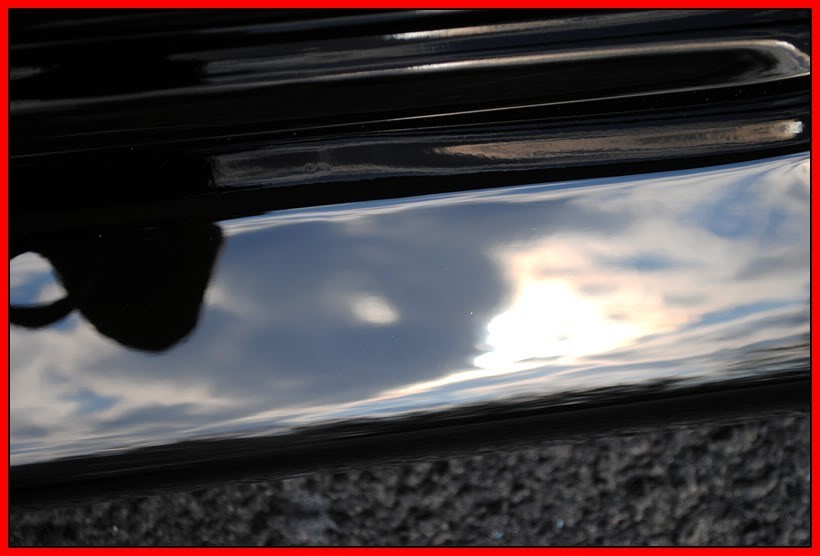
I wet sanded with 1500 then 3000 and this is how it came out.


Name:  SkylineGTR061.jpg
Views: 583
Size:  74.9 KB

Name:  SkylineGTR060.jpg
Views: 574
Size:  49.0 KB

This clear coat was ULTRA soft and would easily marr up just from wiping of compound dust so we finished up the paint with LC black pad and Menzerna 85rd.

Name:  SkylineGTR088.jpg
Views: 575
Size:  135.7 KB

Name:  SkylineGTR058.jpg
Views: 568
Size:  89.5 KB

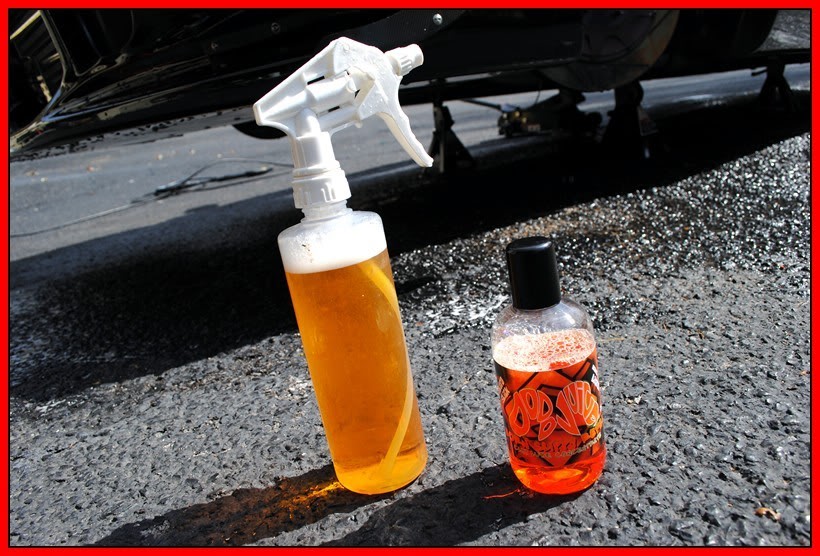
After all of that the car was covered in M105 dust and slingage from the wetsanding so we decided to spray it down with the foam cannon using CG citrus wash and gloss.

Name:  SkylineGTR057.jpg
Views: 577
Size:  130.2 KB

Name:  SkylineGTR056.jpg
Views: 572
Size:  133.3 KB

we let it dwell for a moment and then power washed it off.

Name:  SkylineGTR054.jpg
Views: 566
Size:  149.5 KB

we sealed the car using BlackFire Wet Diamond with a Blue LC pad on the G110.

Name:  SkylineGTR051.jpg
Views: 577
Size:  102.9 KB

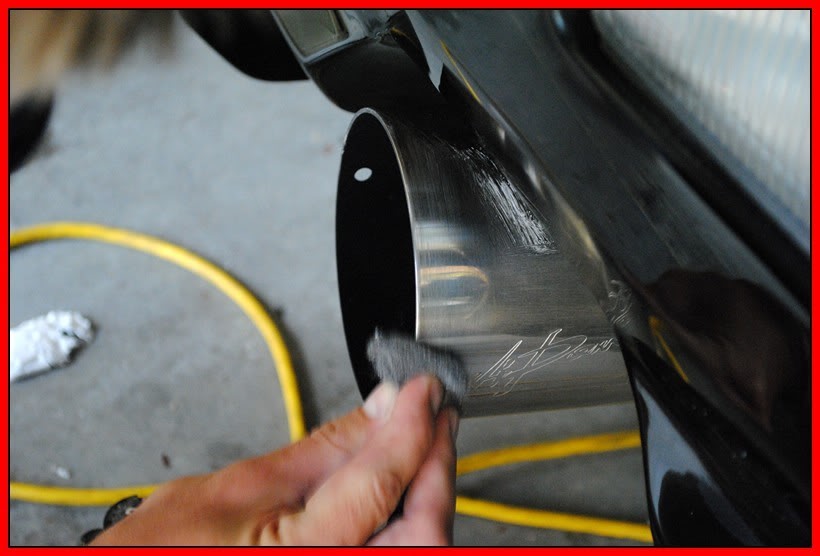
and david polished up the exhaust with some 0000# steel wool and polish

Name:  SkylineGTR050.jpg
Views: 570
Size:  54.9 KB

Name:  SkylineGTR048.jpg
Views: 566
Size:  75.1 KB

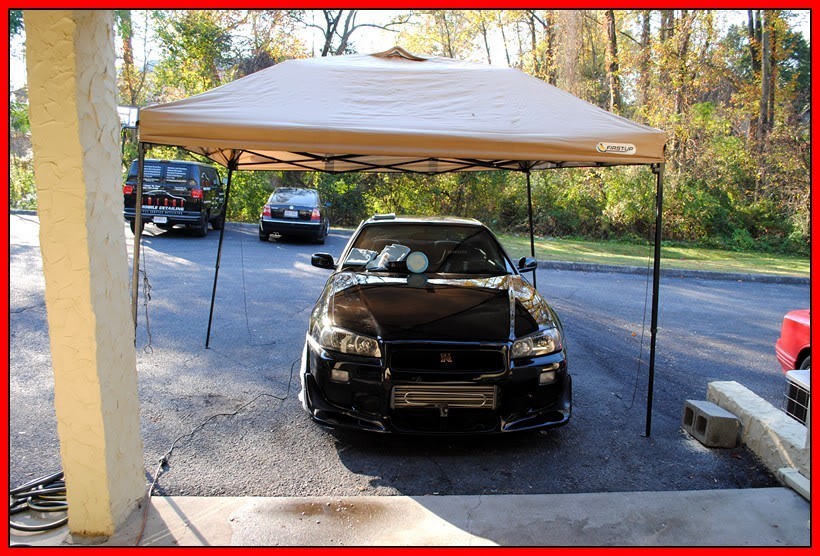
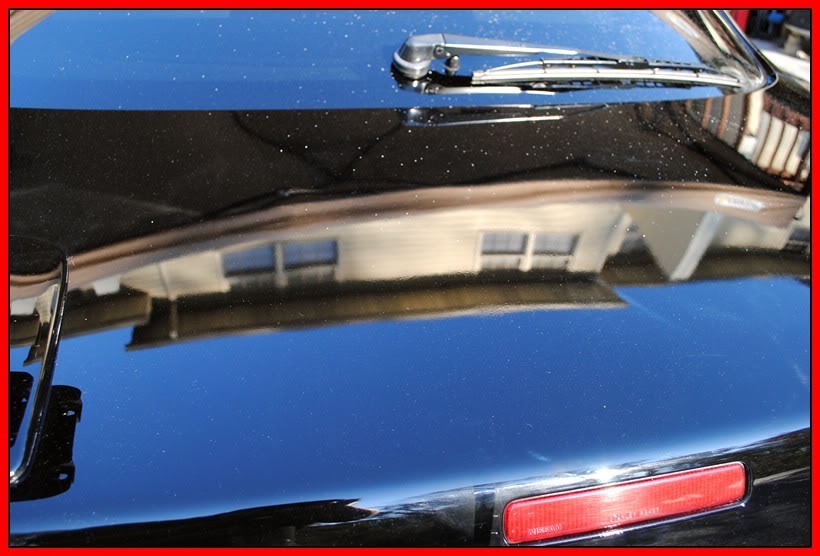
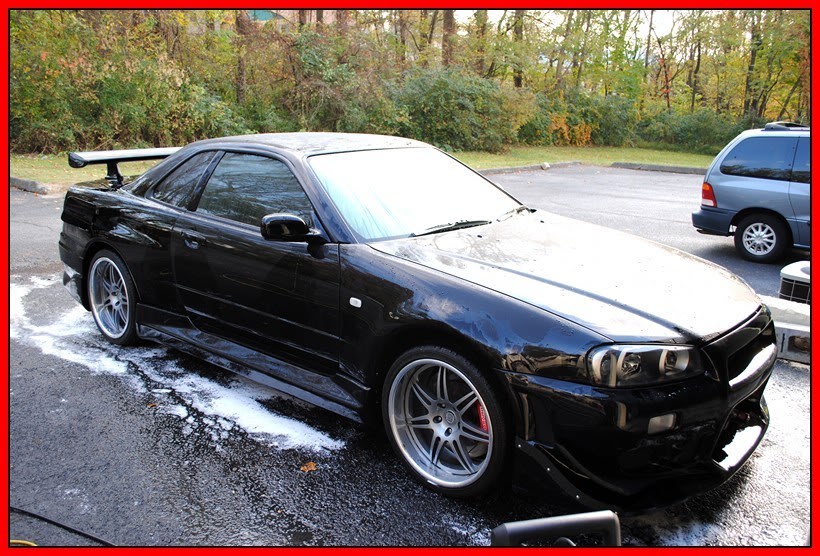
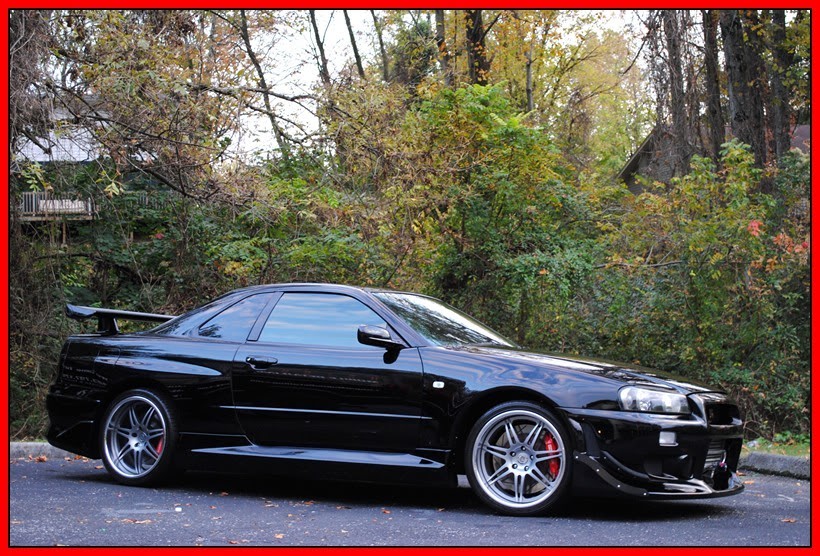
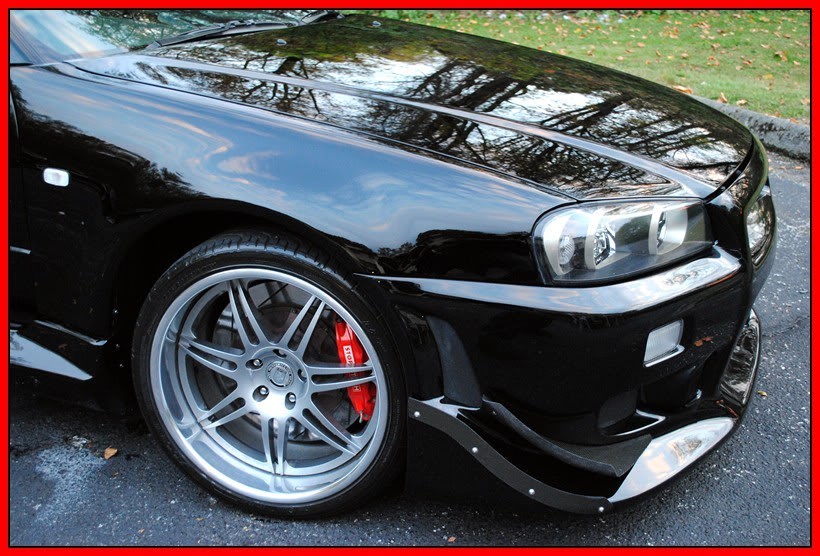
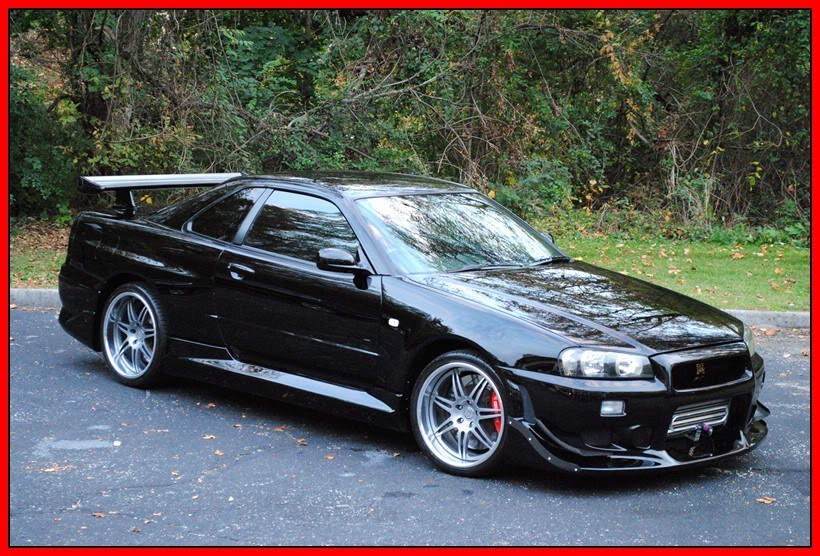
And Finally the finished product, we was running out of sunlight, so I didn't get any direct sun shots, but you get the picture.

Name:  SkylineGTR043.jpg
Views: 564
Size:  169.8 KB

Name:  SkylineGTR042.jpg
Views: 570
Size:  170.1 KB

Name:  SkylineGTR040.jpg
Views: 567
Size:  157.0 KB

Name:  SkylineGTR038.jpg
Views: 594
Size:  149.5 KB

Name:  SkylineGTR037.jpg
Views: 564
Size:  130.4 KB

Name:  SkylineGTR036.jpg
Views: 556
Size:  113.6 KB

Name:  SkylineGTR035.jpg
Views: 575
Size:  104.1 KB

Name:  SkylineGTR031.jpg
Views: 558
Size:  159.2 KB

Name:  SkylineGTR028.jpg
Views: 570
Size:  147.3 KB

Name:  SkylineGTR026.jpg
Views: 559
Size:  139.6 KB

Name:  SkylineGTR024.jpg
Views: 560
Size:  146.7 KB

Name:  SkylineGTR020.jpg
Views: 576
Size:  101.5 KB

Name:  SkylineGTR019.jpg
Views: 573
Size:  155.0 KB

Name:  SkylineGTR018.jpg
Views: 569
Size:  117.5 KB

Name:  SkylineGTR013.jpg
Views: 563
Size:  107.8 KB

Name:  SkylineGTR012.jpg
Views: 563
Size:  124.8 KB

Name:  SkylineGTR007.jpg
Views: 558
Size:  160.0 KB

Thanks for viewing, have a blessed day!

 
  #2  
Old 10-20-2010, 07:23 PM
FitVic's Avatar
Member
5 Year Member
iTrader: (21)
Join Date: Sep 2007
Location: Maryland
Posts: 2,251
me next me next!!!!!!!!!
 
  #3  
Old 10-20-2010, 07:35 PM
JaStonE's Avatar
Member
iTrader: (3)
Join Date: Feb 2010
Location: Sterling Heights MI
Posts: 151
how much do you charge for a job like this if you dont mind me asking
 
  #4  
Old 10-20-2010, 09:32 PM
Perrenoud Fit's Avatar
Member
5 Year Member
iTrader: (2)
Join Date: Dec 2008
Location: Chesapeake, VA. -USA
Posts: 4,429
Fallen Rock the work and love you pour into your job is so impresive in the end results. Thanks for writing down each step and the materials used! You my friend are a giver and that is why He provides all the special works for you. Look foreward to each new thread keep them coming!. And if I were 30 years younger man what I wouldn't give to be there with ya.
God Bless and spread the "Good News" for some of your customers you maybe the only Light that crosses their path.
Mike
PS your partner he is a lucky fellow to be able to work on those Rides!
 

Last edited by Perrenoud Fit; 10-20-2010 at 09:43 PM.
  #5  
Old 10-21-2010, 12:20 AM
johnkimble's Avatar
Member
Join Date: Aug 2010
Posts: 160
wowwww that looks awesome x10000

great work. once this rain/shitty weather is over with i'm detailing my car with all of the stuff you recommended @Fallen_Rock!
 
  #6  
Old 10-21-2010, 04:36 AM
Tedkou's Avatar
Member
Join Date: Sep 2010
Location: VA
Posts: 54
Is that the skyline that used to sit at Ride Revolution? If so my best friend licked it
 
  #7  
Old 10-21-2010, 11:54 AM
Fallen_Rock's Avatar
Member
Thread Starter
iTrader: (2)
Join Date: Jun 2009
Location: Knoxville TN
Posts: 365
Thanks everyone!


Originally Posted by Tedkou
Is that the skyline that used to sit at Ride Revolution?

LOL, yep thats it.........

Originally Posted by Tedkou
If so my best friend licked it
so that was what was wrong with the paint when I was cleaning it!
 
  #8  
Old 11-19-2010, 02:12 PM
landon fit's Avatar
Member
Join Date: Sep 2009
Location: oklahoma city
Posts: 35
skyline FTW
 
  #9  
Old 11-21-2010, 10:03 AM
Klasse Act's Avatar
Member
iTrader: (1)
Join Date: Feb 2010
Location: Woodridge Illinois USA
Posts: 1,283
That car probably didn't look that good when it was re-painted!
 
  #10  
Old 11-30-2010, 08:21 PM
TheRealDooder's Avatar
Member
5 Year Member
iTrader: (2)
Join Date: Mar 2010
Location: Cali
Posts: 953
fuck, thats a dope ass job you did.
 
  #11  
Old 11-30-2010, 11:29 PM
nxtfit_08's Avatar
Member
5 Year Member
Join Date: Aug 2008
Location: orlando,fl
Posts: 1,170
FFFNNNN AMAZING!! great job!!
 
  #12  
Old 11-29-2011, 09:22 AM
Join Date: Oct 2011
Location: Asheville, NC
Posts: 525
Fallen Rock, that is an awesome job!! I wonder if you'd ever consider coming to Asheville and creating another miracle??
 
Related Topics
Thread
Thread Starter
Forum
Replies
Last Post
Fallen_Rock
Fit DIY: Repair & Maintenance
8
03-09-2011 08:29 PM
Fallen_Rock
Fit DIY: Repair & Maintenance
13
08-16-2010 03:44 PM
qbmurderer13
Other Car Related Discussions
22
04-14-2010 03:10 AM
Fallen_Rock
For Sale / Want To Buy / Classified Ads for USED Fit Items
5
07-19-2009 12:24 PM
qbmurderer13
Other Car Related Discussions
21
06-12-2009 12:27 PM


Quick Reply: *Warning! No diving!* paint appears very deep! *No life guard on Duty*


All times are GMT -4. The time now is 12:14 PM.