
Reconditioning Headlights DIY


Thread Starter
|
New Member
Joined: Oct 2013
Posts: 8
From: York, Pennsylvania
Reconditioning Headlights DIY
Hello everyone,
Like most of the vehicles on the road that are a few years old, the headlights on my 5 year old Fit have seen better days. They have a good bit of haze on them and have yellowed quite a bit as well. I know there are many products that you can pick up at local parts stores, but most if not all, seem like short term fixes at best. I was looking for a more permanent solution than they offered so I figured I would try something different.
To do this you will need:
1200 grit sand paper
2000 grit sand paper
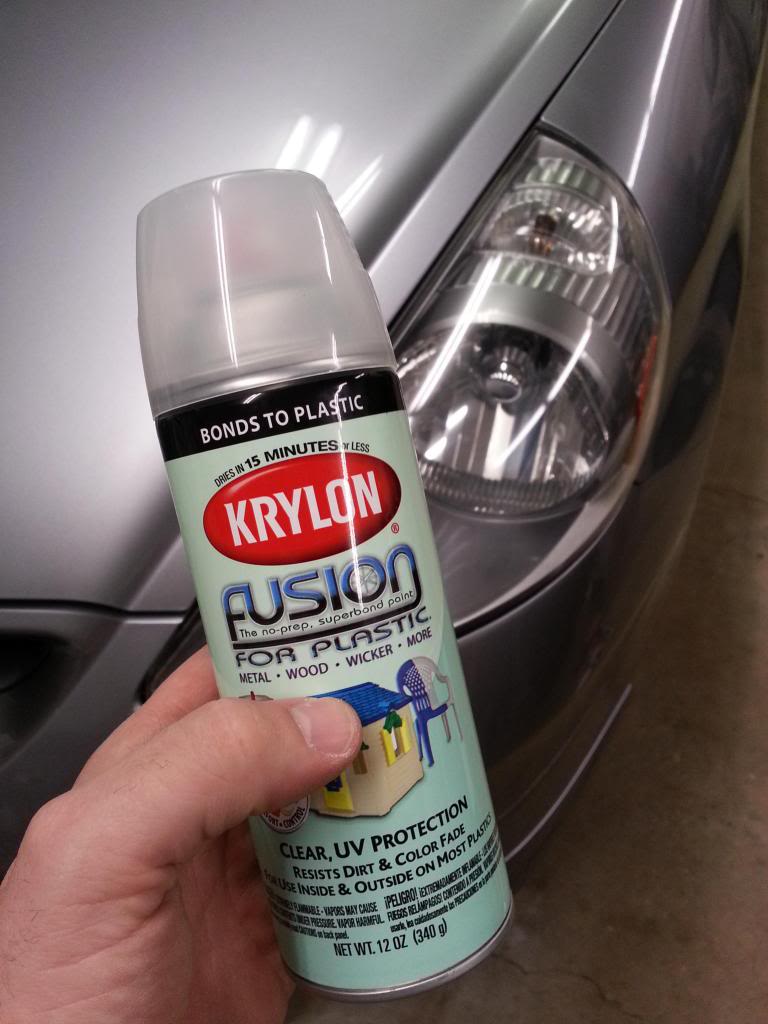
Clear coat, I used Krylon UV resistant clear for plastics
Heat gun
Rubbing Alcohol
Polishing Compound of choice and a buffer - I used Chemical Guys cut 1.5 followed by Chemical Guys v38 and a Porter Cable DA polisher with white pads
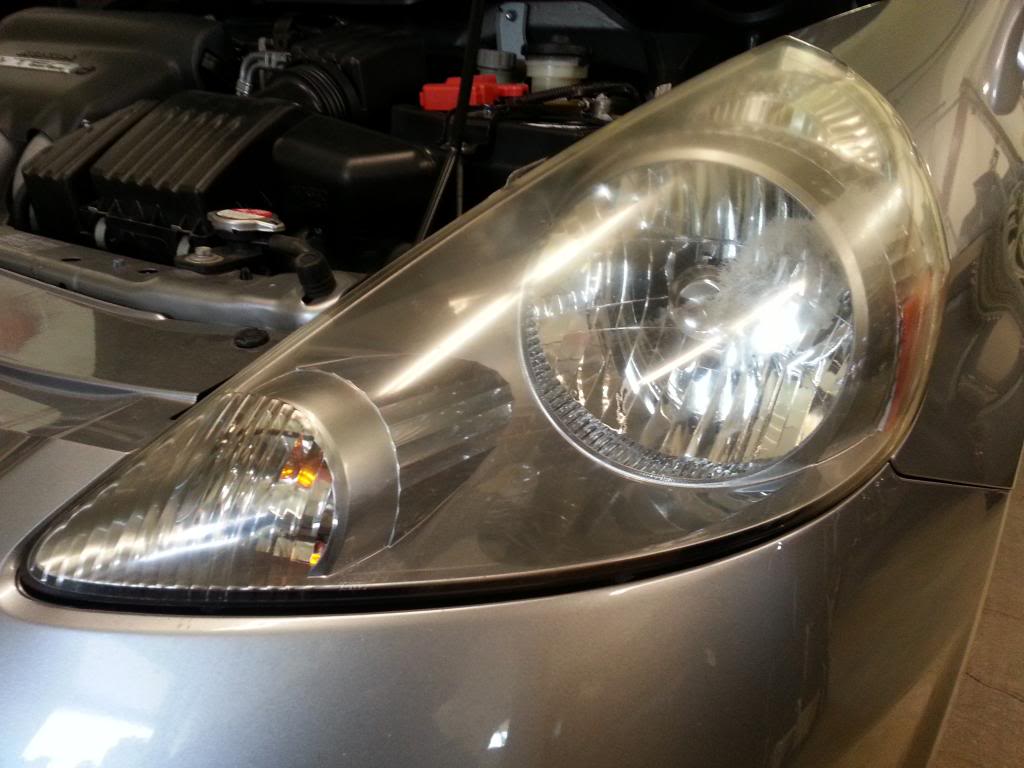
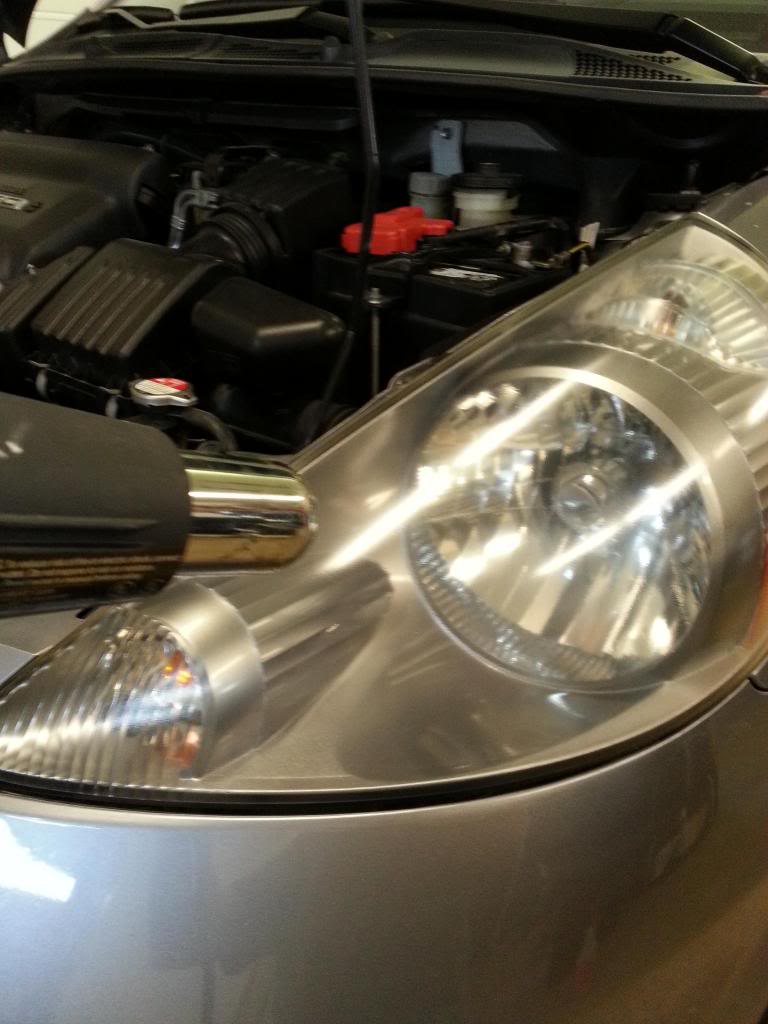
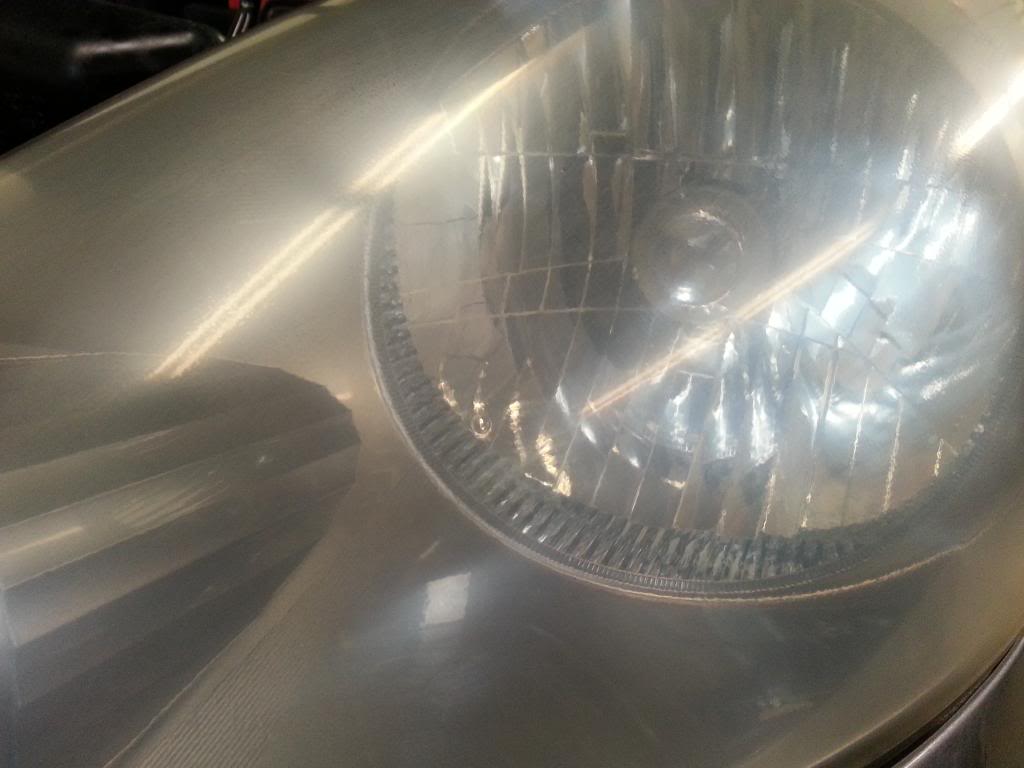
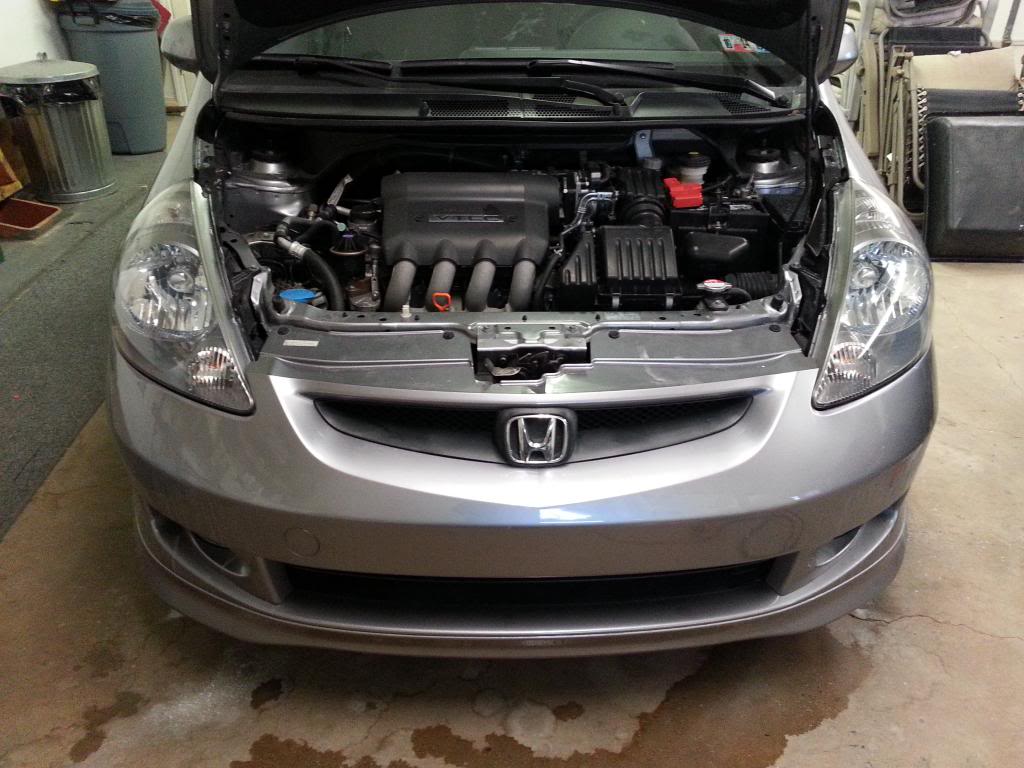
What I started with....Notice the hazing and yellowing. I show the driver's side in this DIY, but both headlights were equally bad.
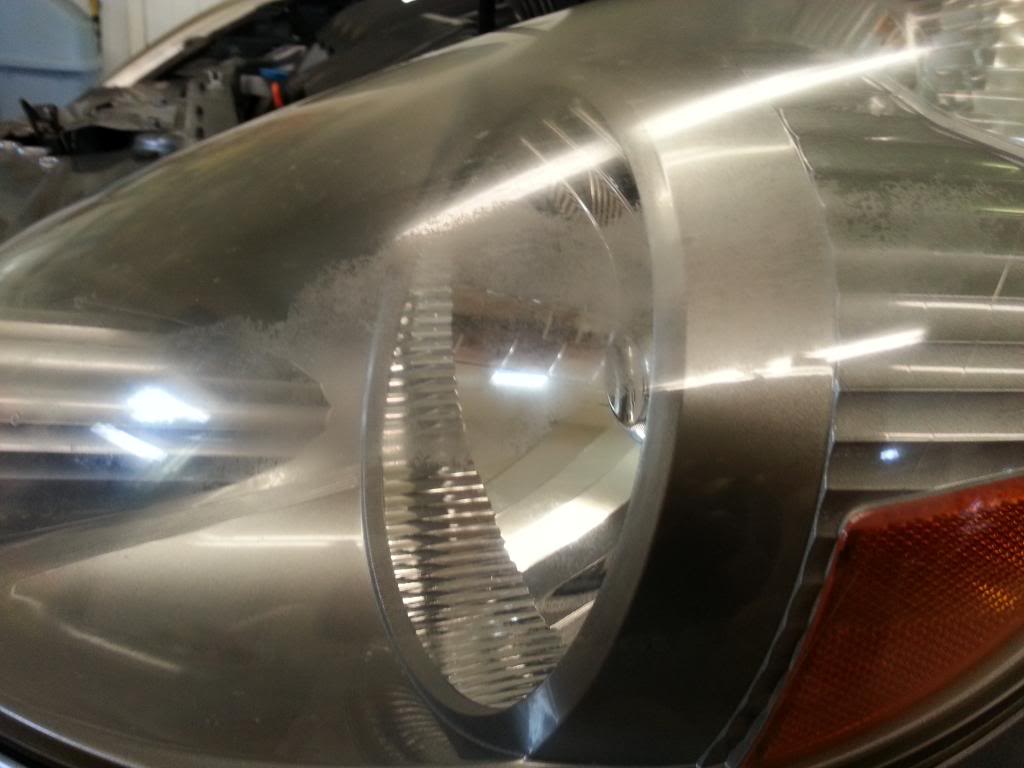
First thing I did was wet sand the haze off. I soaked the sand paper in water for 5 minutes prior to doing any sanding. I used 1200 grit sand paper and sanded the light until it appeared uniform across the entire surface, and made certain to keep a steady layer of soapy water on the light the entire time.
After sanding, and prior to clear coat, make sure to clean the lights thoroughly with rubbing alcohol. If there is any surface contaminants you may get small holes in the clear or other defects.
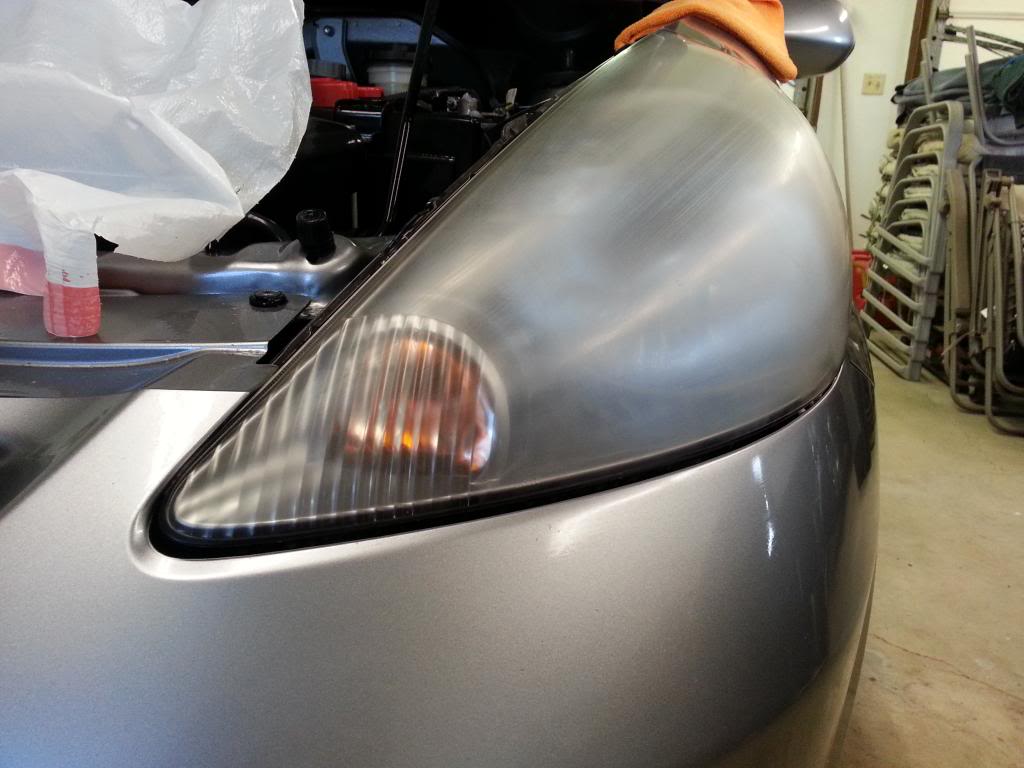
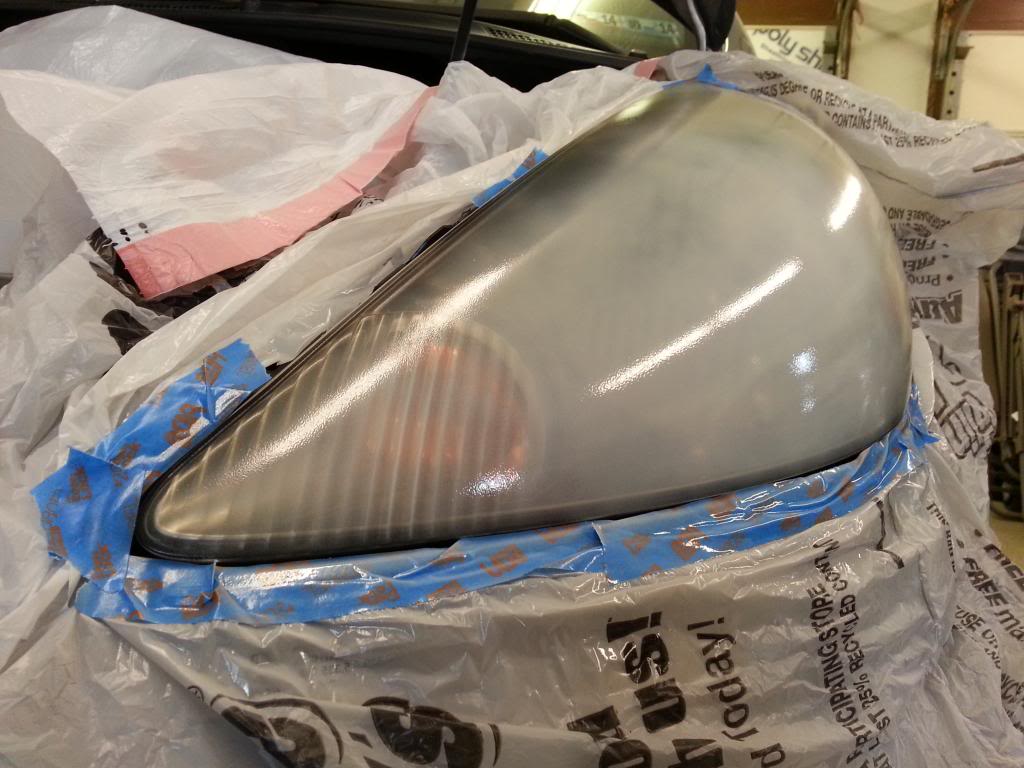
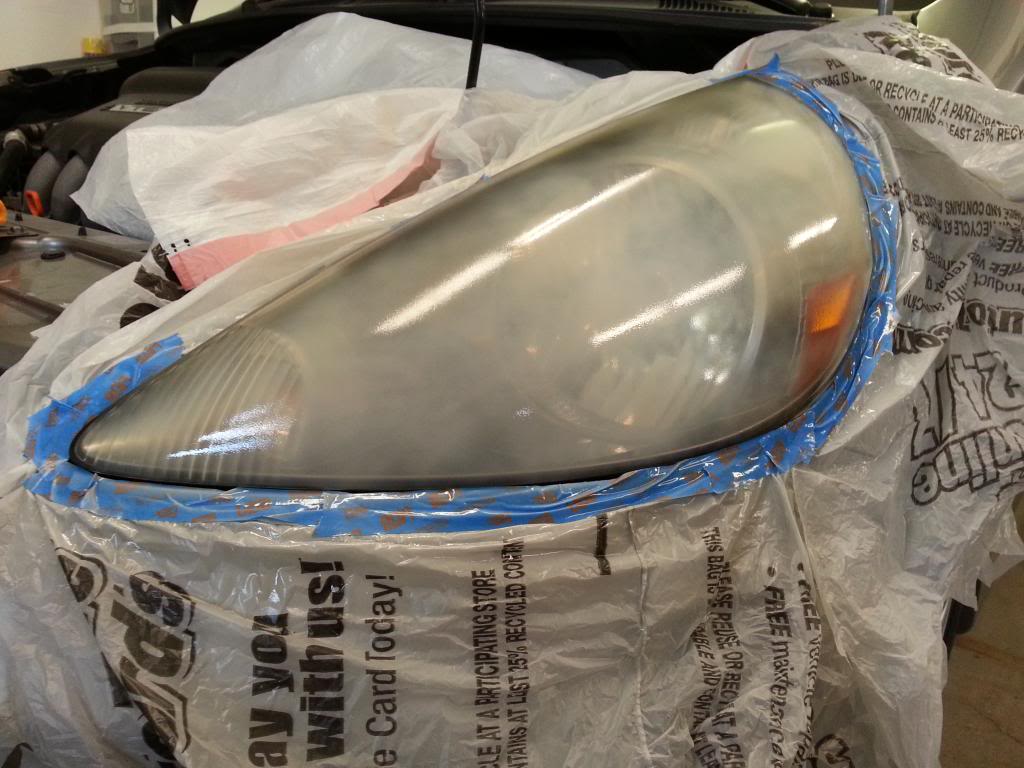
I masked off the area surrounding the headlights with ordinary plastic grocery bags because I am a cheap a**! Lol. It actually worked quite well! I applied 5 layers of clear coat, waiting a minute in between coats per the manufacturer's instructions, and alternated directions of each coat. The lenses became very milky during this step, as the instructions said they might.
After waiting 15 minutes, to speed up the curing process, I decided to use a heat gun. I used the low setting on the heat gun, which was 750*F. It is important to keep the heat gun at a reasonable distance and to keep it moving at all times to avoid damage to the light.
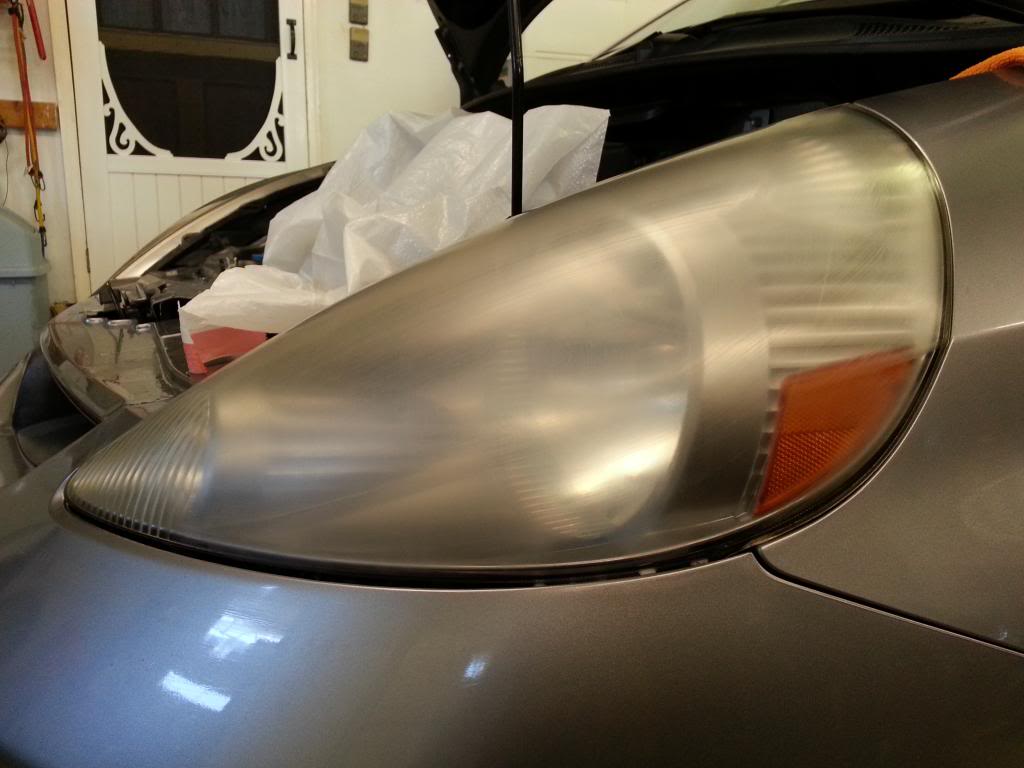
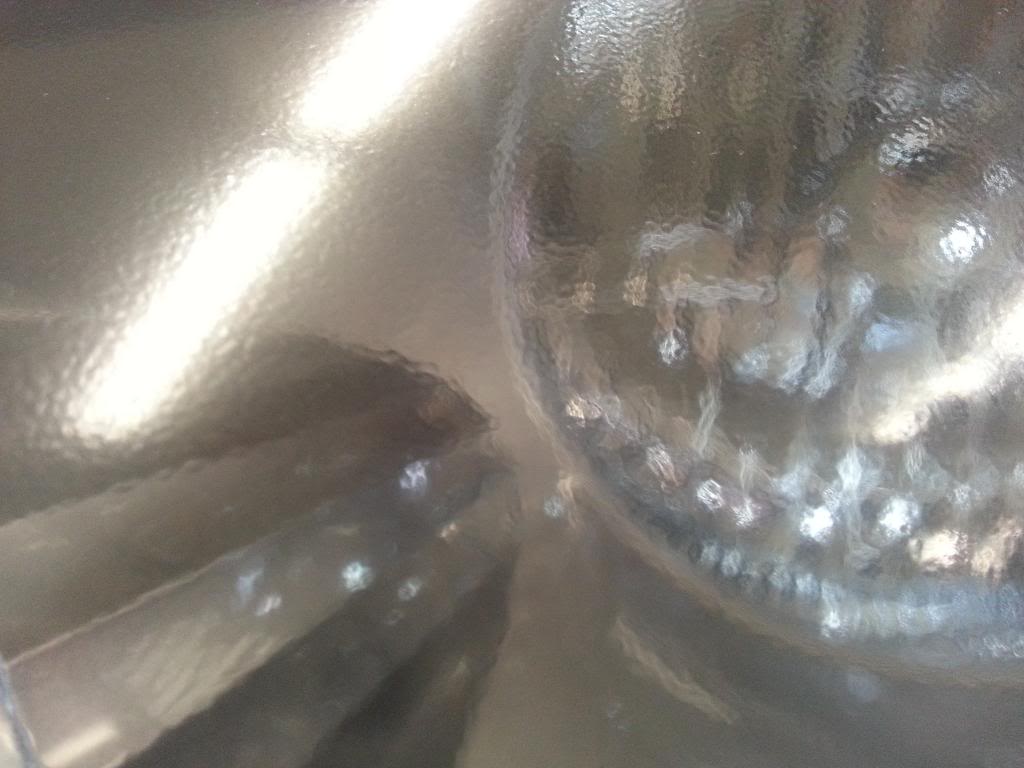
After the light was fully cured by the heat gun (5-7 min), lots of orange peel but this will be taken care of next.
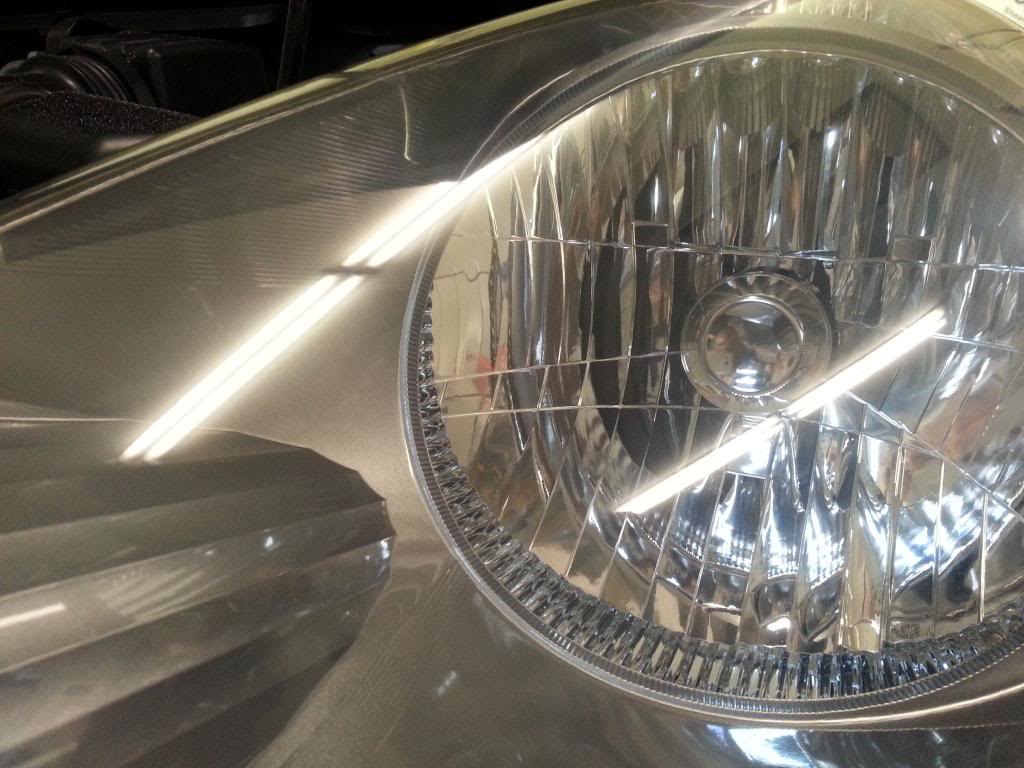
At this point, I wet sanded the headlights again. This time using 2000 grit sand paper. Just like before, keep soapy water on the light, and sand it until the entire light is uniform. Notice that the lens is clearer and the yellowing is gone. Take a deep breath.....we are almost done!!!
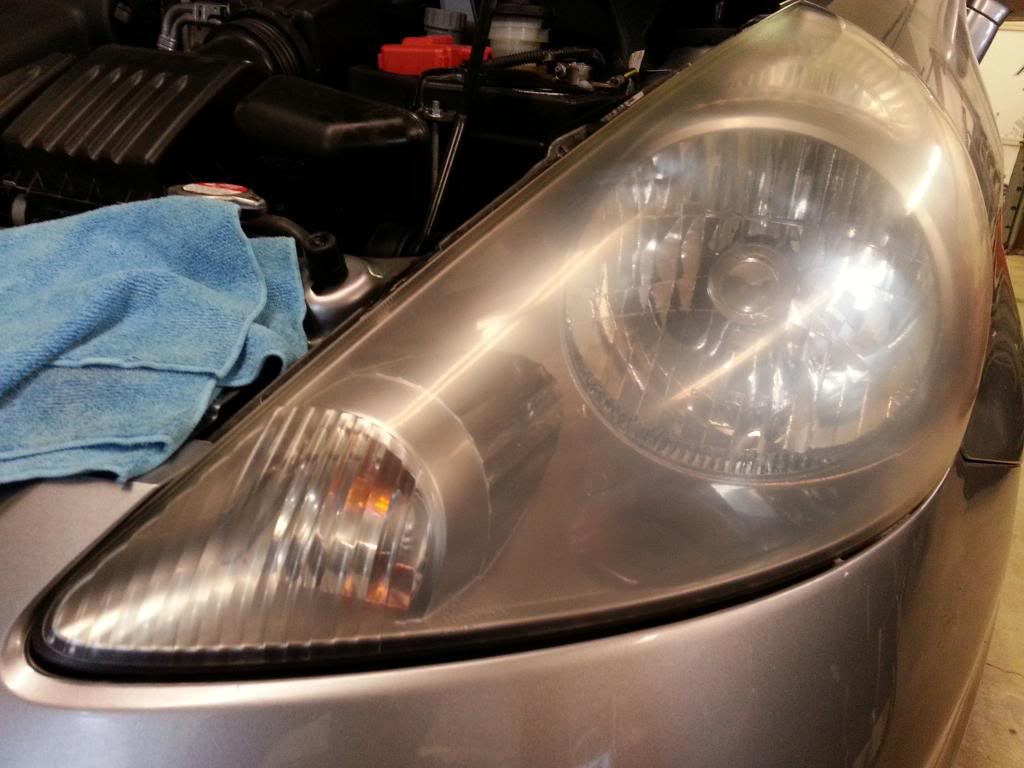
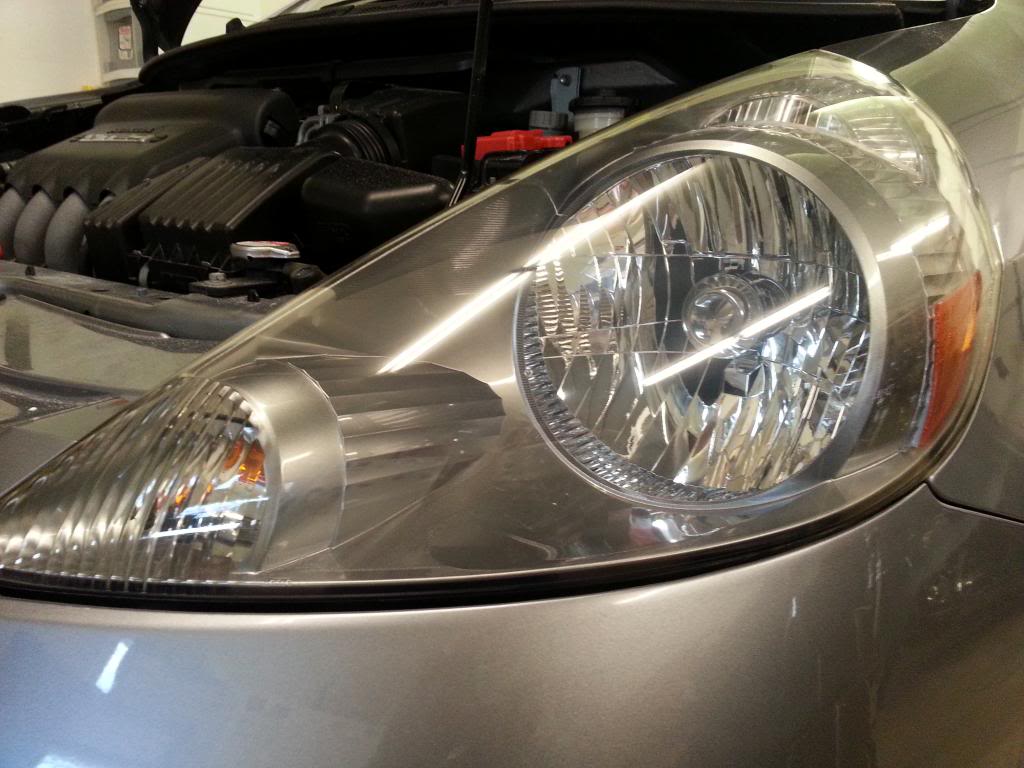
Now, all that is left to do is polish. I used a DA buffer and the products listed above with very good results. Here is the finished product.
And this is just a pic of the clear coat that I used. There may be better stuff out there, but this was cheap, and it has UV protection in it as well. I believe less than $8 for the can. All together I have less than $25 in this project and I am very pleased with the results.
I cannot vouch for the longevity of this process, but I believe it should hold up well. I will update this post periodically and let everyone know how it is holding up. Hopefully others on this site will have equal success with this process as well! Good luck!
Like most of the vehicles on the road that are a few years old, the headlights on my 5 year old Fit have seen better days. They have a good bit of haze on them and have yellowed quite a bit as well. I know there are many products that you can pick up at local parts stores, but most if not all, seem like short term fixes at best. I was looking for a more permanent solution than they offered so I figured I would try something different.
To do this you will need:
1200 grit sand paper
2000 grit sand paper
Clear coat, I used Krylon UV resistant clear for plastics
Heat gun
Rubbing Alcohol
Polishing Compound of choice and a buffer - I used Chemical Guys cut 1.5 followed by Chemical Guys v38 and a Porter Cable DA polisher with white pads
What I started with....Notice the hazing and yellowing. I show the driver's side in this DIY, but both headlights were equally bad.


First thing I did was wet sand the haze off. I soaked the sand paper in water for 5 minutes prior to doing any sanding. I used 1200 grit sand paper and sanded the light until it appeared uniform across the entire surface, and made certain to keep a steady layer of soapy water on the light the entire time.


After sanding, and prior to clear coat, make sure to clean the lights thoroughly with rubbing alcohol. If there is any surface contaminants you may get small holes in the clear or other defects.
I masked off the area surrounding the headlights with ordinary plastic grocery bags because I am a cheap a**! Lol. It actually worked quite well! I applied 5 layers of clear coat, waiting a minute in between coats per the manufacturer's instructions, and alternated directions of each coat. The lenses became very milky during this step, as the instructions said they might.


After waiting 15 minutes, to speed up the curing process, I decided to use a heat gun. I used the low setting on the heat gun, which was 750*F. It is important to keep the heat gun at a reasonable distance and to keep it moving at all times to avoid damage to the light.

After the light was fully cured by the heat gun (5-7 min), lots of orange peel but this will be taken care of next.

At this point, I wet sanded the headlights again. This time using 2000 grit sand paper. Just like before, keep soapy water on the light, and sand it until the entire light is uniform. Notice that the lens is clearer and the yellowing is gone. Take a deep breath.....we are almost done!!!


Now, all that is left to do is polish. I used a DA buffer and the products listed above with very good results. Here is the finished product.


And this is just a pic of the clear coat that I used. There may be better stuff out there, but this was cheap, and it has UV protection in it as well. I believe less than $8 for the can. All together I have less than $25 in this project and I am very pleased with the results.

I cannot vouch for the longevity of this process, but I believe it should hold up well. I will update this post periodically and let everyone know how it is holding up. Hopefully others on this site will have equal success with this process as well! Good luck!


Awesome job on the DIY! Turned out real good! I actually did mine before winter struck, but minus the clear coat and heat gun part since my lamps have a lot of rock chips on them already. I just hate hazy head lights.

Thread Starter
|
New Member
Joined: Oct 2013
Posts: 8
From: York, Pennsylvania
No problem guys! Hopefully this will save everyone a few bucks, while improving the look and night time visibility of their older GD's and GE's. It really made a huge improvement at night!
I was not happy with the offerings on the shelf. I felt they lacked protection and longevity. I have wet sanded and buffed headlights in the past, and they yellowed again shortly after. So I got to thinking, if clear coat is good enough to protect the paint on the outside of your car, why not headlights too? There are many different clear coats available today, but the reason I chose this clear in particular was A) Price and B) it had UV protection. I wasn't sure if it would turn out or not, but I was tired of my Fit looking terrible because of yellowed headlights!
I was not happy with the offerings on the shelf. I felt they lacked protection and longevity. I have wet sanded and buffed headlights in the past, and they yellowed again shortly after. So I got to thinking, if clear coat is good enough to protect the paint on the outside of your car, why not headlights too? There are many different clear coats available today, but the reason I chose this clear in particular was A) Price and B) it had UV protection. I wasn't sure if it would turn out or not, but I was tired of my Fit looking terrible because of yellowed headlights!


Thread
Thread Starter
Forum
Replies
Last Post
503ge8
Fit Exterior Modifications & JDM Styling
6
Sep 14, 2022 01:33 PM
Super Mario
Fit DIY: Repair & Maintenance
0
Jul 6, 2015 06:56 PM
Loevess
1st Generation (GD 01-08)
5
Jul 28, 2010 09:59 AM
smeister
Fit Interior & Exterior Illumination
5
Jul 4, 2009 07:51 PM