
Scoop Intake Build

Would a high density foam with a coat of Bondo be strong enough to create a vacuum mold? And is it possible to clay to to do the same thing? If possible what kind of clay would you recommend? I'm planning to use clay on the trim to give a better shape and cruve for the scoop and Foam/Bondo combo for the airbox.
Thanks...I hope I didn't take any of carbon fiber secrets

Merchant / Group Buy Organizer ( non-certified )
iTrader: (20)
Joined: Mar 2008
Posts: 307
From: Casa Grande, AZ
Thanks for the quick reply.
Would a high density foam with a coat of Bondo be strong enough to create a vacuum mold? And is it possible to clay to to do the same thing? If possible what kind of clay would you recommend? I'm planning to use clay on the trim to give a better shape and cruve for the scoop and Foam/Bondo combo for the airbox.
Thanks...I hope I didn't take any of carbon fiber secrets
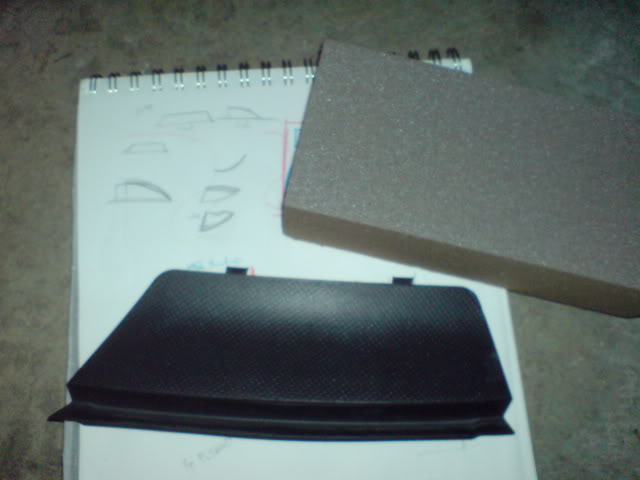
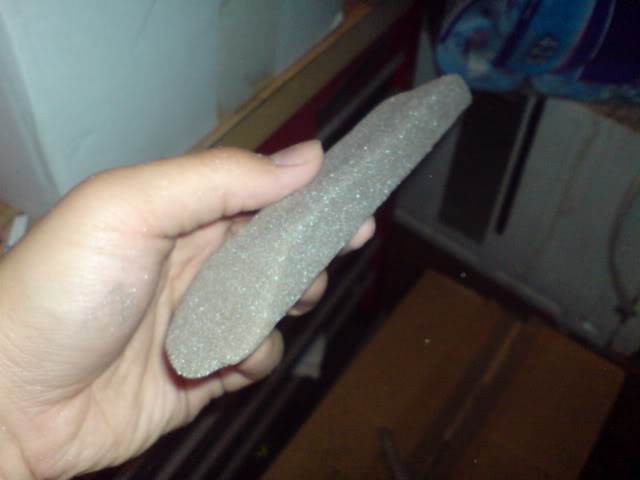
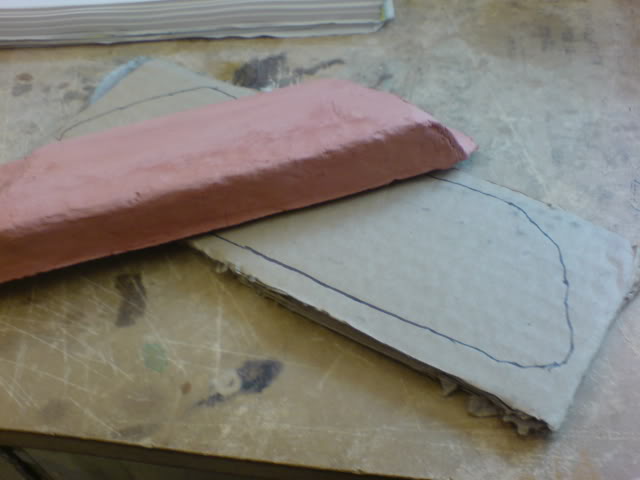
For modeling your parts, I like to use polyurethane foam. This stuff will cut, sand, shape really easy. It comes in full sheets but since you are doing smaller parts you can even go to a craft store and pick up that green foam people stick flowers in. Another good point about this foam is that it won't melt if you paint it or put resin right over it.
So I like to shape the part in foam, spray it with high build primer, and then use a little bondo as needed, and a little modeling clay can help for final touches.
Please keep us posted as to progress.
Thanks alot for the pointer. As for now, I'm taking a little break, to rethink on how to design the box itself....the filter size is giving me a bit of issue, if i want to make it for a "x" brand, i need to figure out how much room I'm going to need.
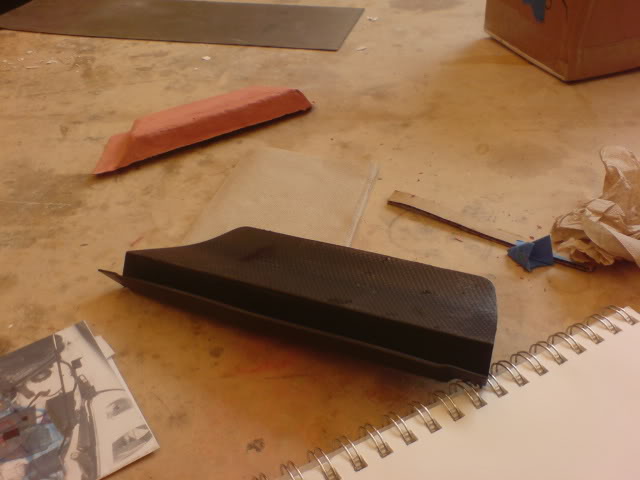
Started to work on the scoop again
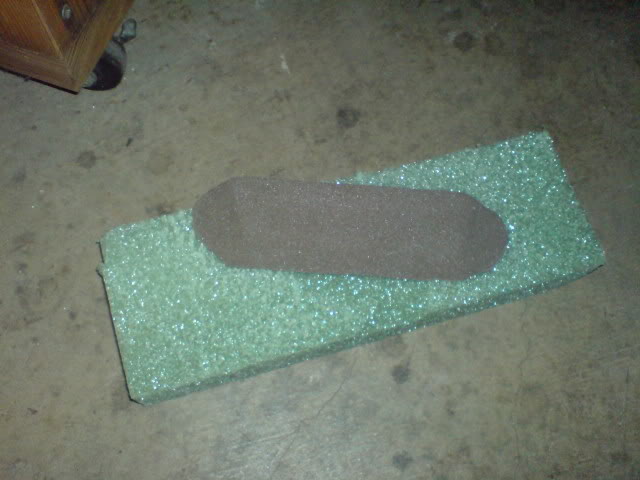
some basic ideas and some high density to practice...

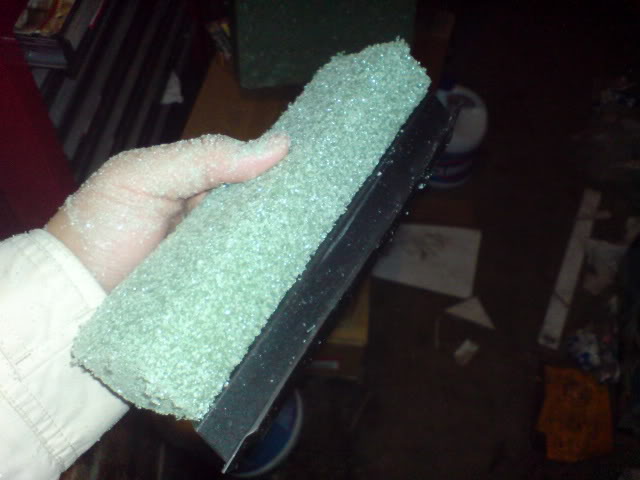
fairly quick

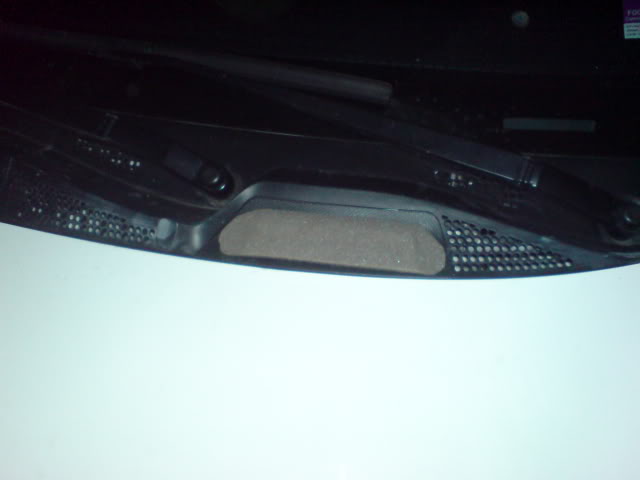
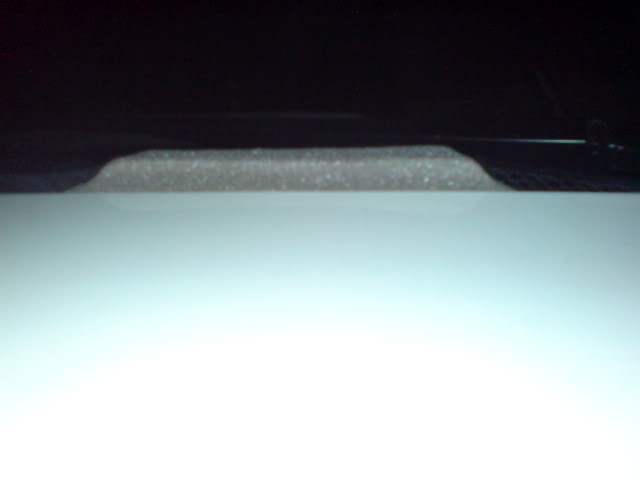
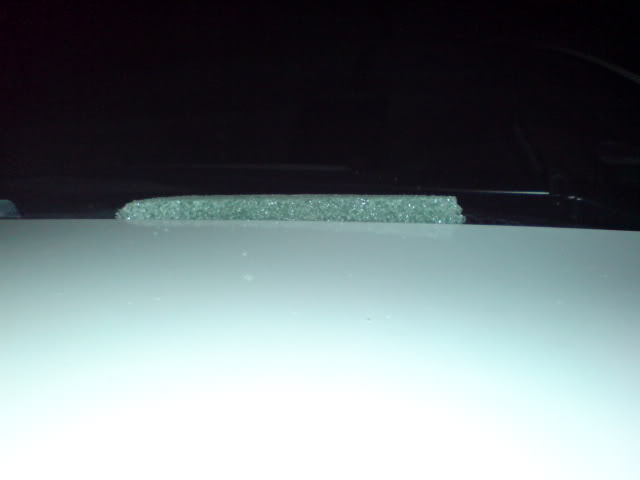
test fitting and "fine tuning"
On for the real thing
ALOT slower....

testing fitting
basic shape...may need to go in again (not really. IMO adds a more character to it)
getting started to shaping it
 planning to finish up the whole shaping tomorrow...I hope
some basic ideas and some high density to practice...
fairly quick
test fitting and "fine tuning"
On for the real thing
ALOT slower....
testing fitting
basic shape...may need to go in again (not really. IMO adds a more character to it)
getting started to shaping it
planning to finish up the whole shaping tomorrow...I hope


Update:
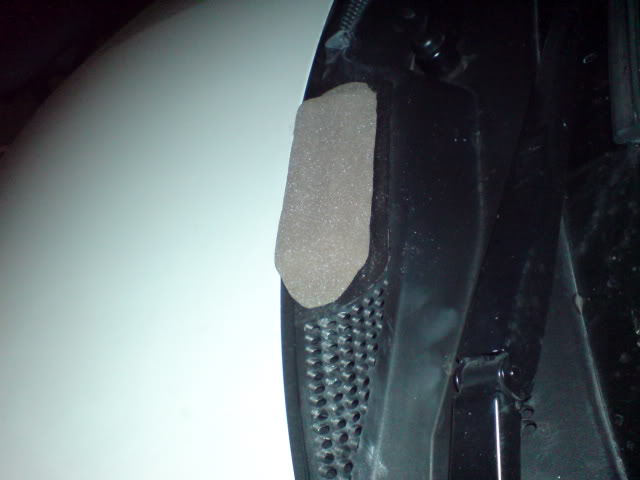
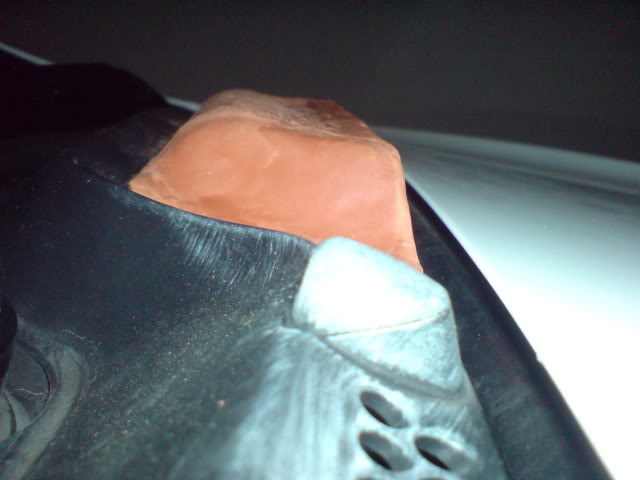
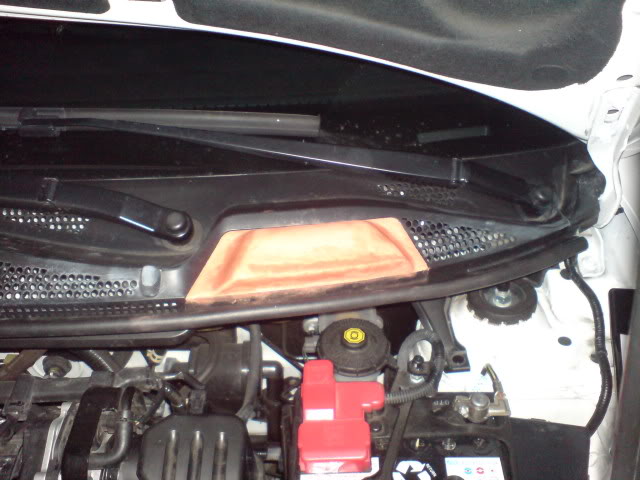
Went in and sand down the rear a bit to give a better feel (at least to me) and resize the scoop to "fit" better.

TIGHT FIT...about 1mm gap on the left side of it
Plans for next time:
1. Email, Apex-i for the measurements of the filter of the Fit. 70mm inlet size, but I lack the cone size.
2.Start working on the airbox, using that wood piece, made earlier, as base
3. Continue sanding, smoothing and fine-tuning the scoop.
Went in and sand down the rear a bit to give a better feel (at least to me) and resize the scoop to "fit" better.
TIGHT FIT...about 1mm gap on the left side of it
Plans for next time:
1. Email, Apex-i for the measurements of the filter of the Fit. 70mm inlet size, but I lack the cone size.
2.Start working on the airbox, using that wood piece, made earlier, as base
3. Continue sanding, smoothing and fine-tuning the scoop.
TIME TO START OVER
 , I ended up not liking on how it look.
Will continue after my roadtrip to LA....
Hint: Going to make the design ALOT simpler...the way the OEM cowl is design, make is hard to match the lines.

Wow, that's great.
I need the diameter of the backplate, and hight of it (without the inlet)
Thanks.
I need the diameter of the backplate, and hight of it (without the inlet)
Thanks.
Sorry for the delay in the dimensions. The height of the filter without the adaptor plate is 5". The diameter of the backplate is 3". I'm thinking about modifying my stock intake to accomodate the apexi filter.
PM Shaggs2Dope and SHG_Mike about the moding the intake box. On mines, I just remove the baffle with a hacksaw (not as a clean of a job when compare to SHG_Mike's airbox) and I gain quite a bit at top end (Butt dyno)
EDIT: Wow the diameter is small...may makes the build a lot easier. Again thanks for the specs.
Last edited by Slimjimx701x; May 3, 2009 at 11:58 AM.
Don't worry, I'll keep everyone updated. I just need to plan better for the scoop.
The current issue I'm having right now, is when the scoop is on the cowl the lines of the cowl (the bend up right before the wipers) makes a close "v" or "W" shape.


I want to fill up that "V" space on the far right side (from Driver's POV) and behind the main scoop

I want to be able to smooth that out
What I have plan now....still figuring out how to make it work (and easy), I'm going to borrow the Spoon Hardtop idea where you have the main hardtop to function as the top and an addon piece to make it more aerodynamic
http://www.evasivemotorsports.com/Me...ardtop_ap1.jpg (borrow from evasivemotorsports to show what I mean)
So back AGAIN to the drawing board
EDIT: How the heck my rep jump from 3 to 320?!?
The current issue I'm having right now, is when the scoop is on the cowl the lines of the cowl (the bend up right before the wipers) makes a close "v" or "W" shape.
I want to fill up that "V" space on the far right side (from Driver's POV) and behind the main scoop
I want to be able to smooth that out
What I have plan now....still figuring out how to make it work (and easy), I'm going to borrow the Spoon Hardtop idea where you have the main hardtop to function as the top and an addon piece to make it more aerodynamic
http://www.evasivemotorsports.com/Me...ardtop_ap1.jpg (borrow from evasivemotorsports to show what I mean)
So back AGAIN to the drawing board
EDIT: How the heck my rep jump from 3 to 320?!?
Last edited by Slimjimx701x; May 4, 2009 at 03:53 AM.

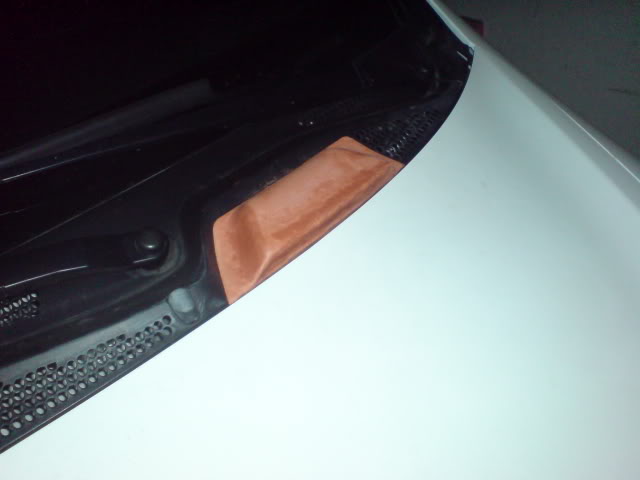
So, I started out planning for the redesign scoop
Just overlapped the old one
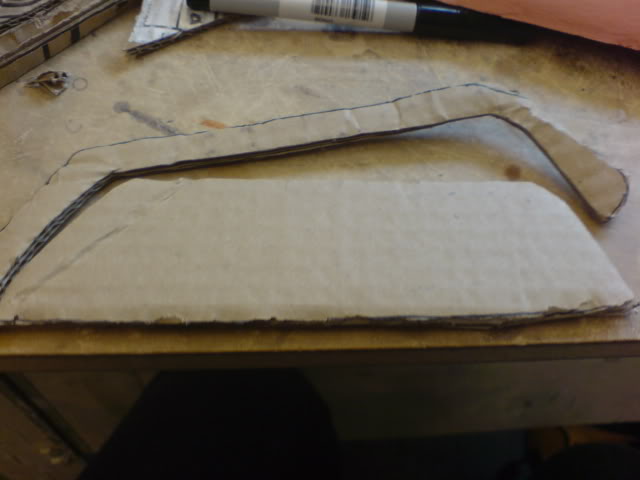
trimed off the center part for the hole of the intake
seeing how would the scoop be mounted on....NOT enough trim left to build the scoop
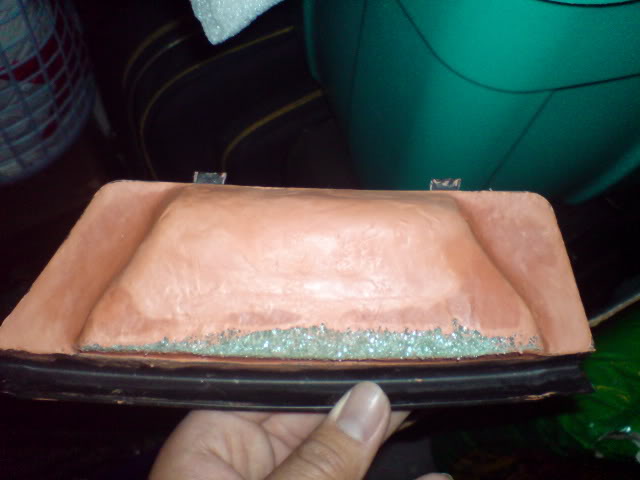
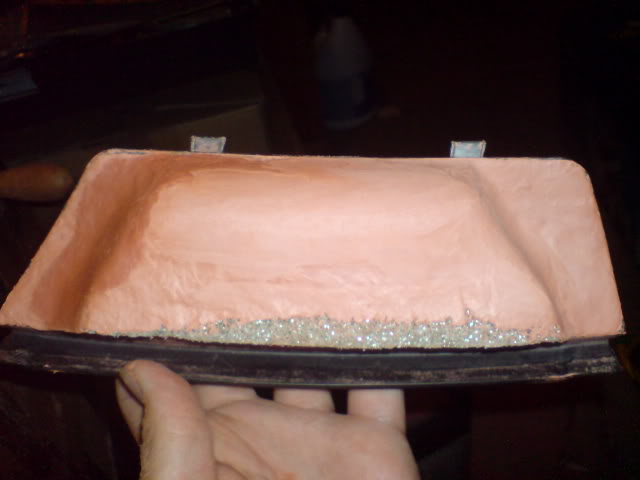
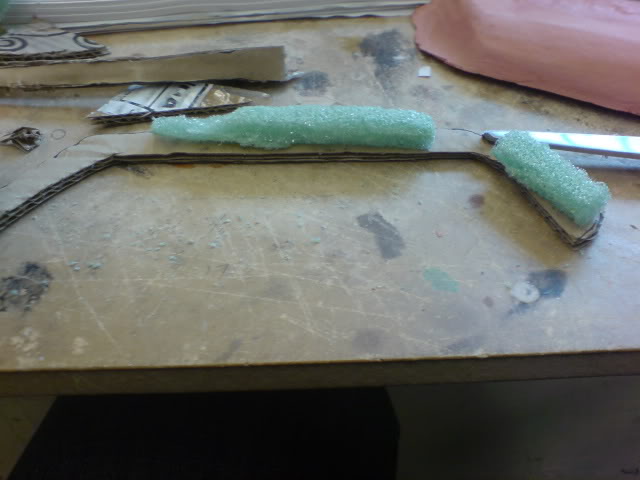
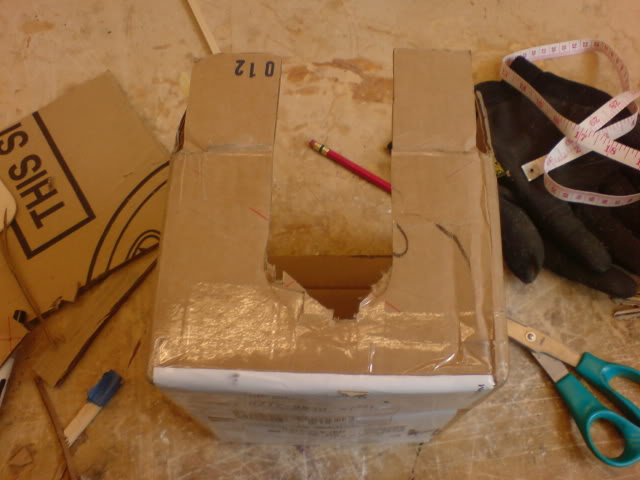
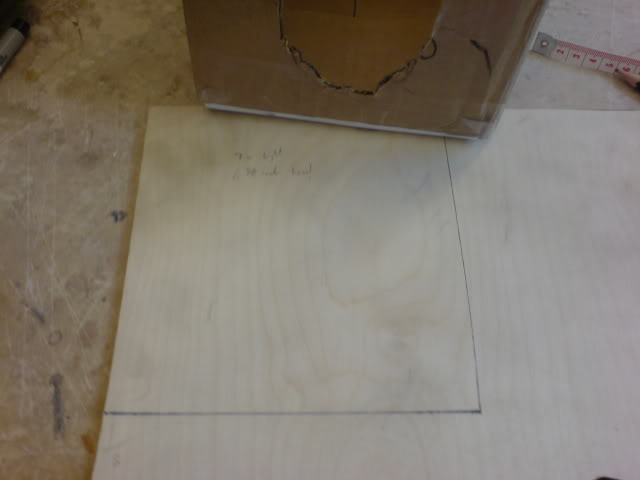
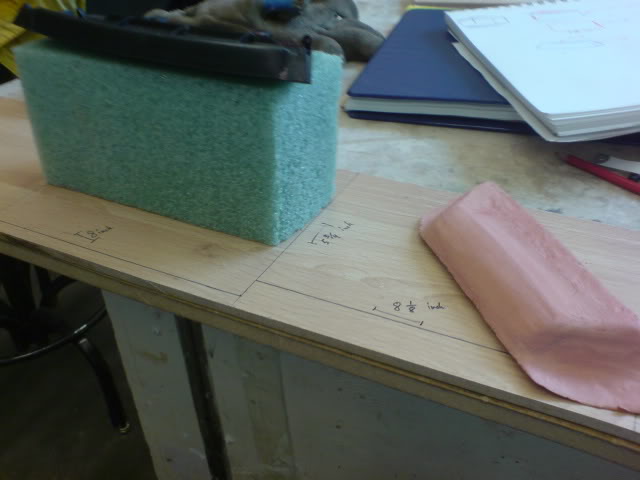
Got angry so I begun working on the airbox, esp when I have the specs now
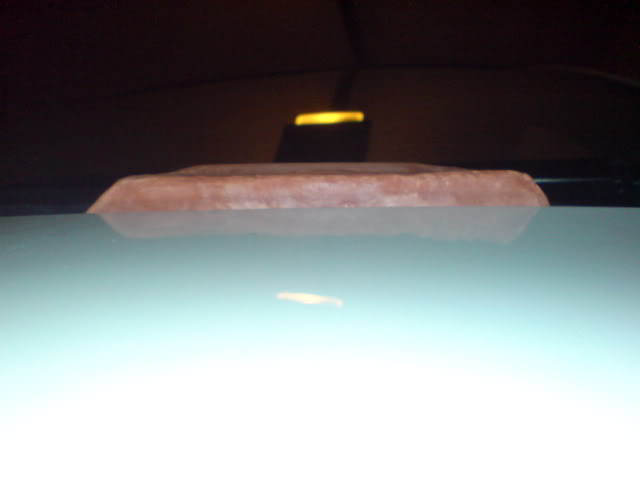
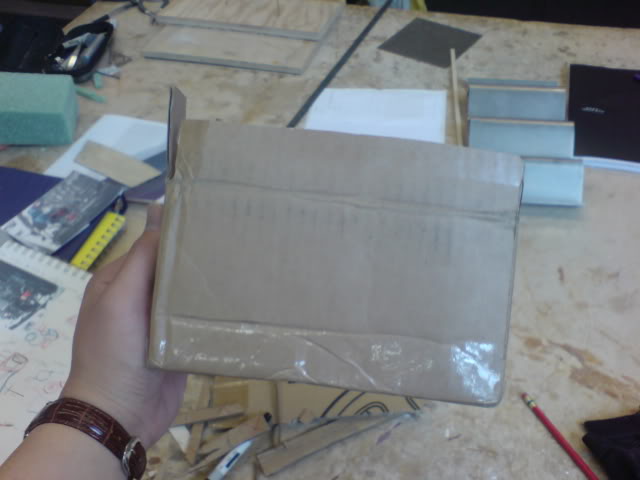
The inlet is 70mm on the Apex-i filter, so I made a 70mm hole and trim a little and little out to fit out rubber conector
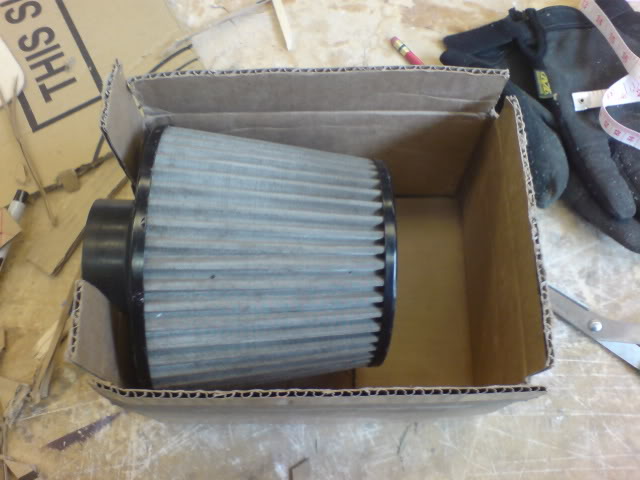
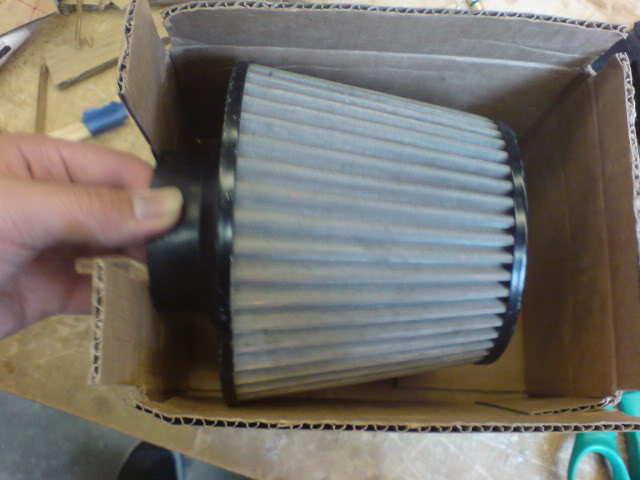
Great measurements. 3inch diameter backplate on the Apex-i IS smaller than what I had for test fitting (5-6inch backplate), and the hight is the SAME for both filter. I guess I lucked out
Nice to have extra room. I may want to add a few cruve out from the box, so it won't be just a box. Maybe it would improve air intake? IDK
So far so good. The building of the airbox is so much easier then the scoop. LOL
Just overlapped the old one
trimed off the center part for the hole of the intake
seeing how would the scoop be mounted on....NOT enough trim left to build the scoop
Got angry so I begun working on the airbox, esp when I have the specs now
The inlet is 70mm on the Apex-i filter, so I made a 70mm hole and trim a little and little out to fit out rubber conector
Great measurements. 3inch diameter backplate on the Apex-i IS smaller than what I had for test fitting (5-6inch backplate), and the hight is the SAME for both filter. I guess I lucked out
Nice to have extra room. I may want to add a few cruve out from the box, so it won't be just a box. Maybe it would improve air intake? IDK
So far so good. The building of the airbox is so much easier then the scoop. LOL
Last edited by Slimjimx701x; May 5, 2009 at 01:38 PM. Reason: gramer
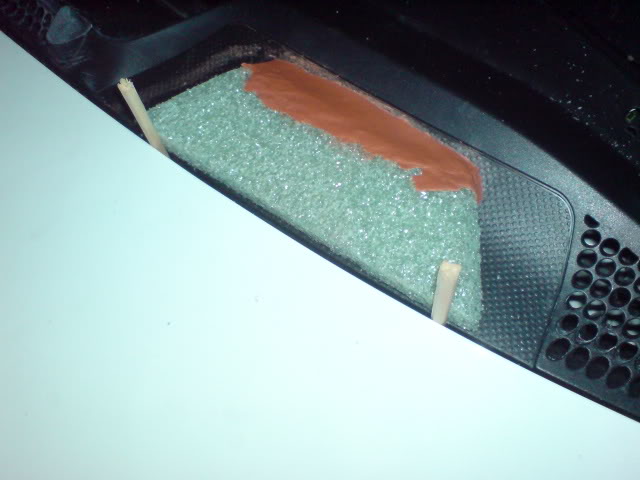
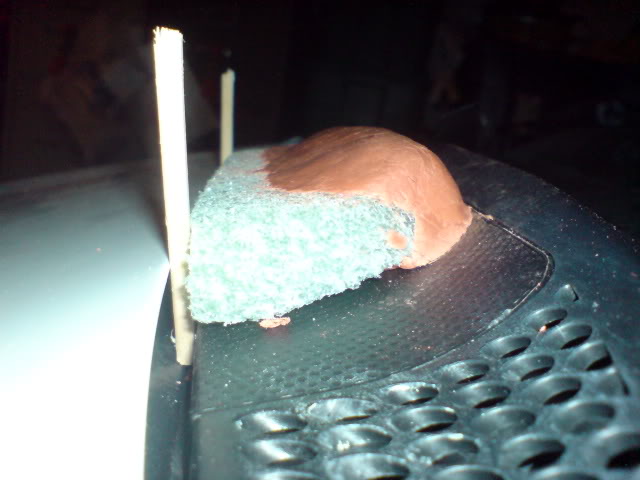
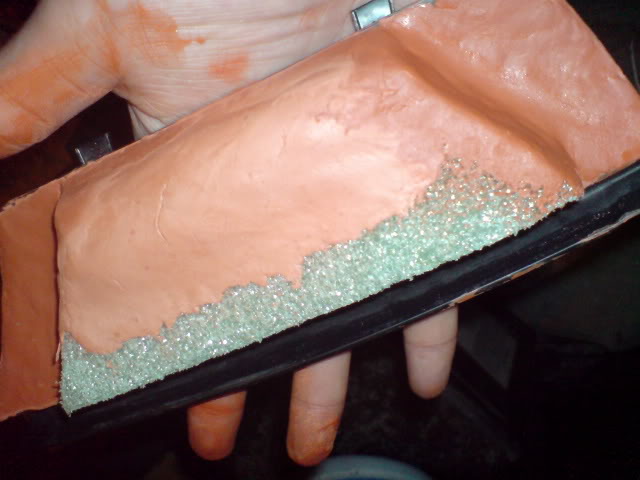
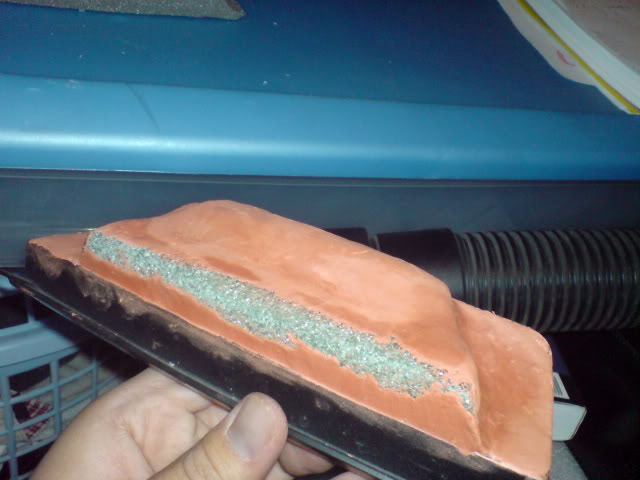
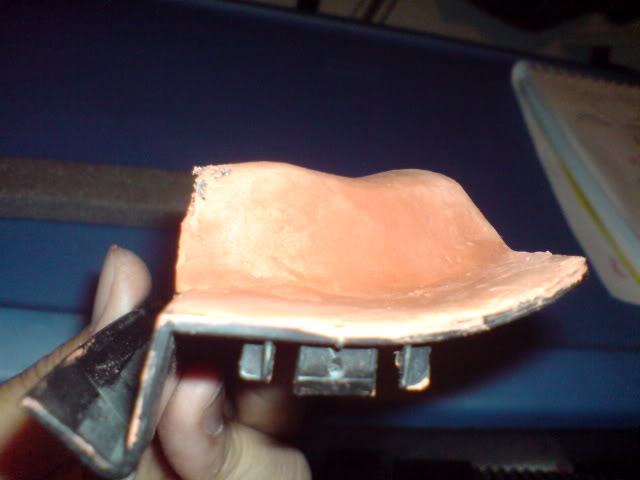
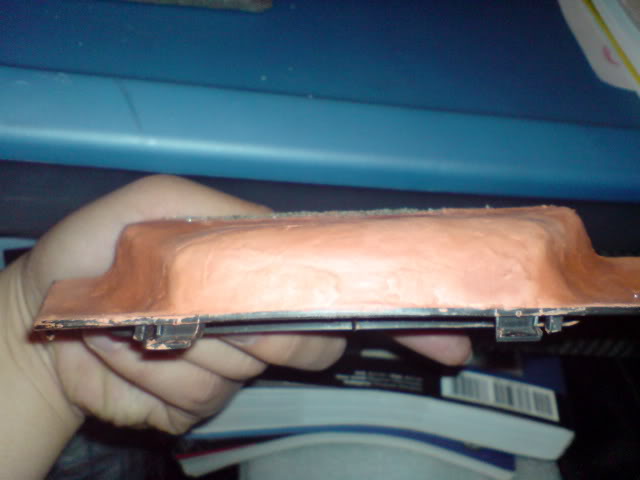
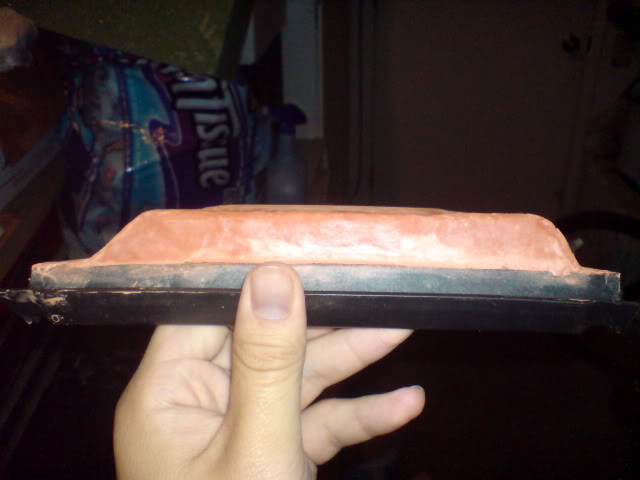
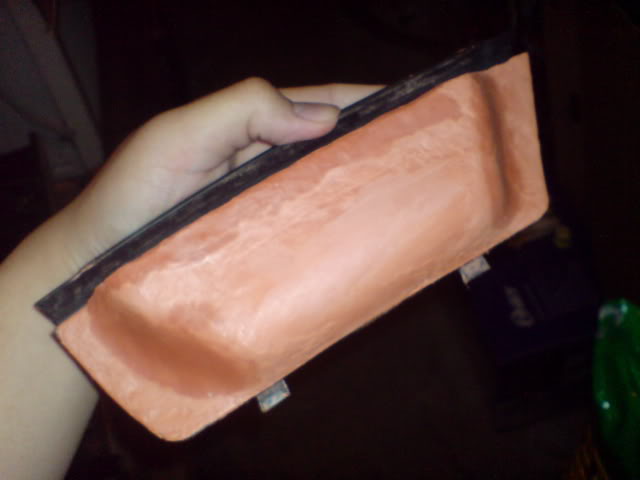
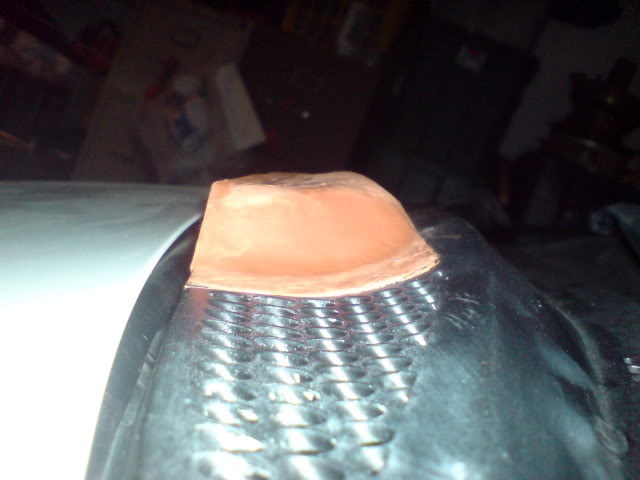
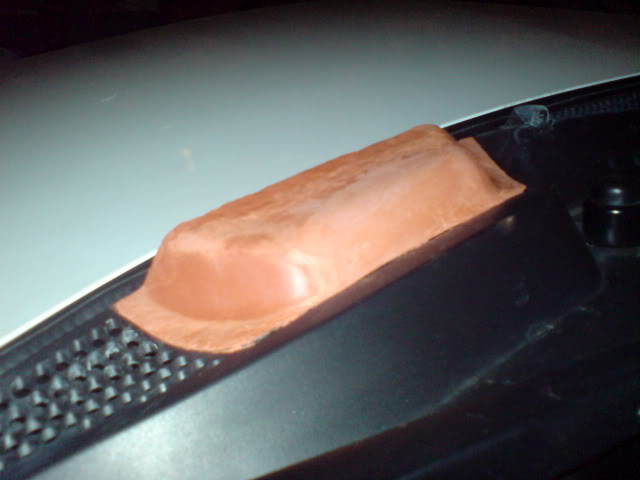
Didn't do too much
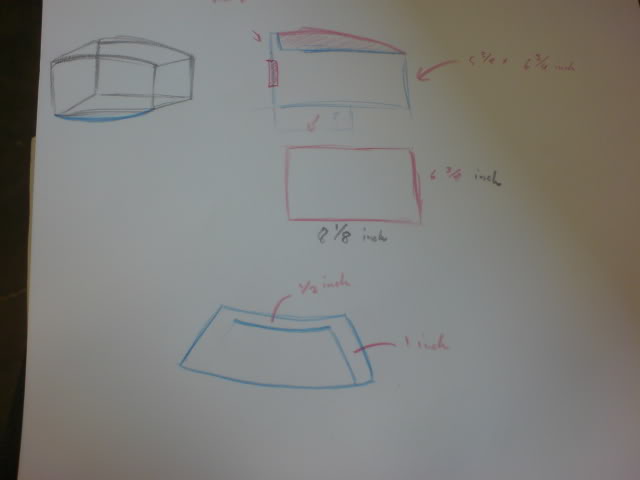
So I got some measurements of that mockup airbox I made, decides to play around with the shape....a plain box seem too boring.
So I came up with the idea if I just round out the edges and cruve up the top. This make make it harder to make that ducting from the cowl to the box, but it should look cooler. ATM I still have not decided yet to do anything more to the box, due to the filter layout, it seems the plan box is perfect. In fact I may even just work with just the inside of the "plan jane" by adding "filter" so the air is forced into the intake, but that I need to have the filter in hand. LOL.
So I got some measurements of that mockup airbox I made, decides to play around with the shape....a plain box seem too boring
.So I came up with the idea if I just round out the edges and cruve up the top. This make make it harder to make that ducting from the cowl to the box, but it should look cooler. ATM I still have not decided yet to do anything more to the box, due to the filter layout, it seems the plan box is perfect. In fact I may even just work with just the inside of the "plan jane" by adding "filter" so the air is forced into the intake, but that I need to have the filter in hand. LOL.
Member

Joined: Aug 2008
Posts: 1,170
From: orlando,fl
looking good man cant wait to see it when you get done and btw are you going to be makeing more than just 1? or are going to makr them by order? and how much?
and just as a suggestion you should make a clip on plat so when you wash the car and when it rains
and just as a suggestion you should make a clip on plat so when you wash the car and when it rains
Last edited by nxtfit_08; May 7, 2009 at 02:06 AM.
. So ATM I do not know if I were to sell them and how much. Odds are, if I do sell them I do not think most people are willing to relocate the battery.PLUS I do like to have a part that ONLY I have
 ...at least for awhile
EDIT: thanks for the tip