
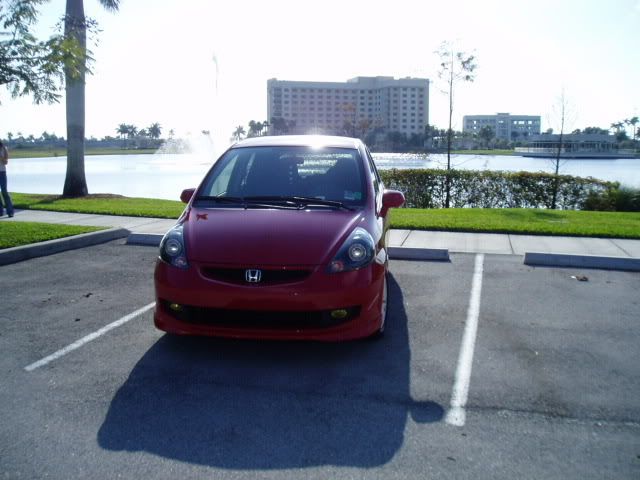
RetroFit - a few pics


Thread Starter
|
Member
Joined: Sep 2007
Posts: 30
From: SOFL
RetroFit - a few pics
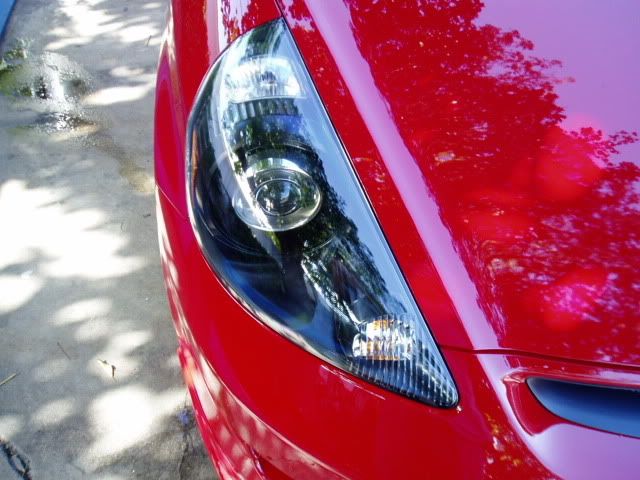
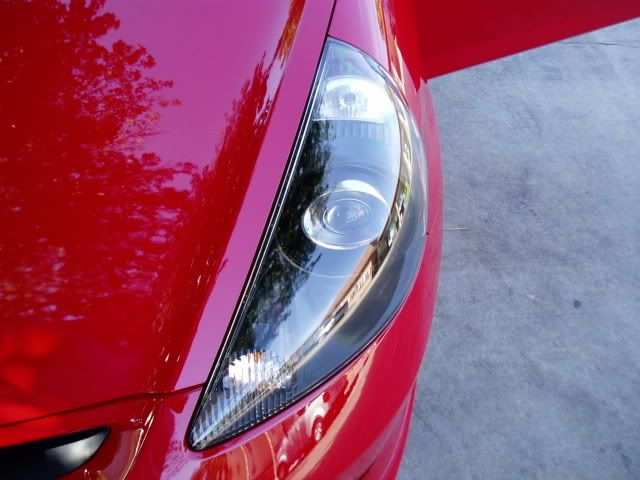
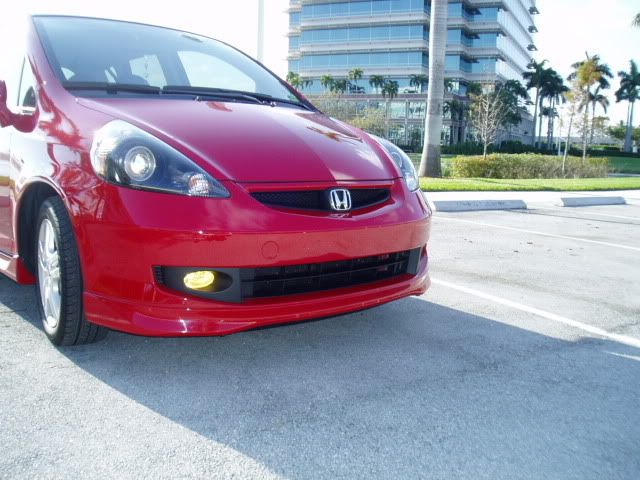
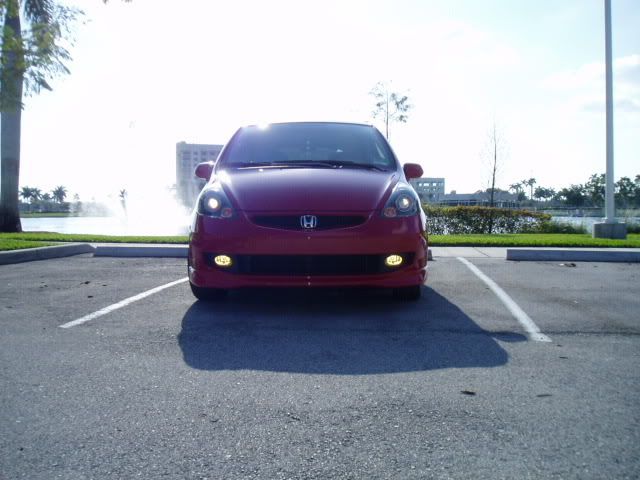
Here are a couple pics of my retrofit. I followed smeister's DIY,
https://www.fitfreak.net/forums/fit-...rojectors.html
Thank you very much!
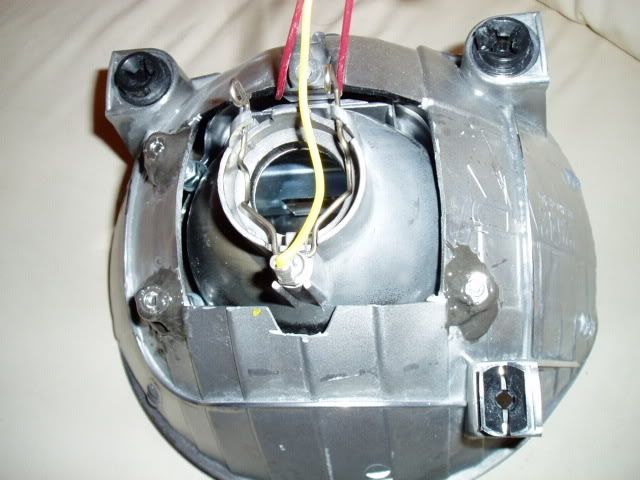
A couple of modifications changed the orientation of the projector mounting screws....I made it so that the projectors could be adjusted from the front instead of having to pull out the reflector.
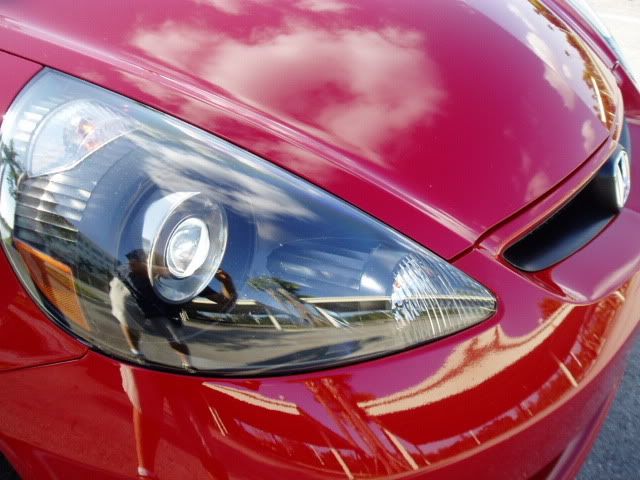
For the projector, I used FX35 Bi-xenon's color shifted with TSX clear lenses.
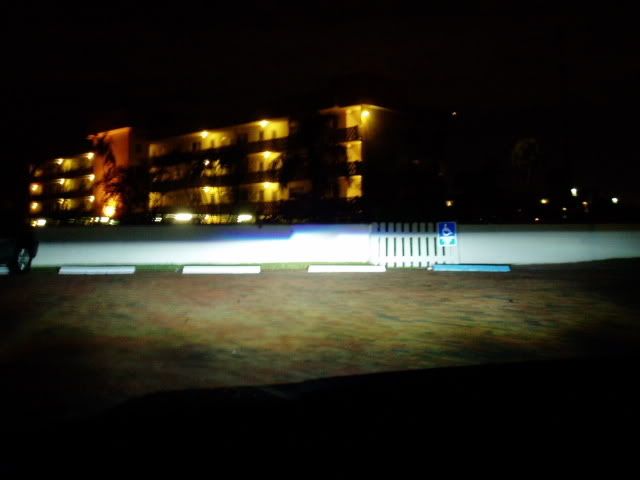
Despite the over-exposed night shot, the line is horizontal with color shifts around the cutoff's. There is a crisp line of pure white (6000 K) at the cutoff's followed by a sliver of blue on top of that, and a deep purple on top of that. I need to get some better shots of that.
I am very pleased with the outcome....except that the color shift seems too strong at times.

https://www.fitfreak.net/forums/fit-...rojectors.html
Thank you very much!
A couple of modifications changed the orientation of the projector mounting screws....I made it so that the projectors could be adjusted from the front instead of having to pull out the reflector.
For the projector, I used FX35 Bi-xenon's color shifted with TSX clear lenses.
Despite the over-exposed night shot, the line is horizontal with color shifts around the cutoff's. There is a crisp line of pure white (6000 K) at the cutoff's followed by a sliver of blue on top of that, and a deep purple on top of that. I need to get some better shots of that.
I am very pleased with the outcome....except that the color shift seems too strong at times.

Thread Starter
|
Member
Joined: Sep 2007
Posts: 30
From: SOFL
Thanks!
Can you explain how you make the adjustments in terms of left to right? How do you access the nuts to tighten them?
Can you explain how you make the adjustments in terms of left to right? How do you access the nuts to tighten them?
Member

Joined: Feb 2007
Posts: 425
From: fort lauderdale
Here are a couple pics of my retrofit. I followed smeister's DIY,
https://www.fitfreak.net/forums/fit-...rojectors.html
Thank you very much!
A couple of modifications changed the orientation of the projector mounting screws....I made it so that the projectors could be adjusted from the front instead of having to pull out the reflector.
For the projector, I used FX35 Bi-xenon's color shifted with TSX clear lenses.
Despite the over-exposed night shot, the line is horizontal with color shifts around the cutoff's. There is a crisp line of pure white (6000 K) at the cutoff's followed by a sliver of blue on top of that, and a deep purple on top of that. I need to get some better shots of that.
I am very pleased with the outcome....except that the color shift seems too strong at times.
Thread Starter
|
Member
Joined: Sep 2007
Posts: 30
From: SOFL
Thanks!
I'm everywhere from Delray Beach to Hollywood along 95... I've been tempted to drive up to Orlando for the meets up there....I'm not sure how well Fit's are represented down here in SOFL....
I bought the FX35's from smeister...he had an extra set. I got the TSX lenses from e-bay....I got an extra set of headlights to put in the car while I was working on the retro. All that cost about $350....
I received an H4 Bi-xenon kit from George at Xenith Xenons.....then I decided to go with the retofit and he let me exchange that kit with the D2S kit. The D2S is the only bulb that will plug into factory projectors. The kits cost $140...
And if you want to equate time with money....it took me about 2 weeks to finish them, working a few days for a few hours at a time...
I would like to do another set, however I was only able to do mine between semesters at school....since I'm back in school, I have very little time.....but smeister will do them for a good price, and he may even have parts on hand... https://www.fitfreak.net/forums/members/smeister.html
Last edited by deocder; Jan 29, 2008 at 10:03 AM.
There are three screws that you can adjust. There is a nut, lock washer, and flat washer on each side of the reflector bowl on the screw. So you can push the projector out on any of the three screws to adjust the cutoff.
My first retrofit took me months to finish, so you did pretty well in 2 weeks.
Also, if you want to buy a custom retrofit from me you don't HAVE to provide the parts if I have them in stock. I am working on getting more parts so there is no hassle shipping parts to me and I can just have them ready made to sell PLUG AND PLAY.
My first retrofit took me months to finish, so you did pretty well in 2 weeks.
Also, if you want to buy a custom retrofit from me you don't HAVE to provide the parts if I have them in stock.
I am working on getting more parts so there is no hassle shipping parts to me and I can just have them ready made to sell PLUG AND PLAY.
Last edited by smeister; Jan 29, 2008 at 09:51 AM.
Thread Starter
|
Member
Joined: Sep 2007
Posts: 30
From: SOFL
Does that mean that you drilled out the threads in the projector housing? Thats what I did....then I secured the projector bowl the same way you did...I also jbwelded a lock nut to the back of the reflector....that way I have a tight joint that can still be rotated. It sounds like we did the same thing, I just misunderstood somewhere along the line.....
I didnt drill out the holes in the projector. I went to Ace Hardware and got the same threaded screws that were 2" long. I didn't use any JBWeld. The lock washers do the job nicely especially since it is already tightened from both sides with the reflector in the middle.
To adjust, I just untightened the nuts and moved the reflector out a little on that screw and retightened on the spot I wanted, I did that to all three screws on both projectors until the cutoff was aligned. I hope that clears the cutoff adjustment.
You could JBWeld everything once you are confident its perfect and stays perfect. I think that's what you did.
Thread Starter
|
Member
Joined: Sep 2007
Posts: 30
From: SOFL
Yes, I used the stock rubber seal but had to cut it a bit to accommodate the bulb socket...
I'll get some pictures from a distance as soon as I can....
smeister, I looked at your DIY again...Does the projector rest against the reflector at all?
This shows how I did the mounting/adjustment screws:
Here is a picture of the screw through the housing. I drilled out the threads to provide free movement. I added a nylon spacer to lift the washers away from the bowl, otherwise the screw would be forced to one side. Then a flat, split, flat and a nut. This allows for the screw to rotate freely while preventing the bowl separating from the lens housing.
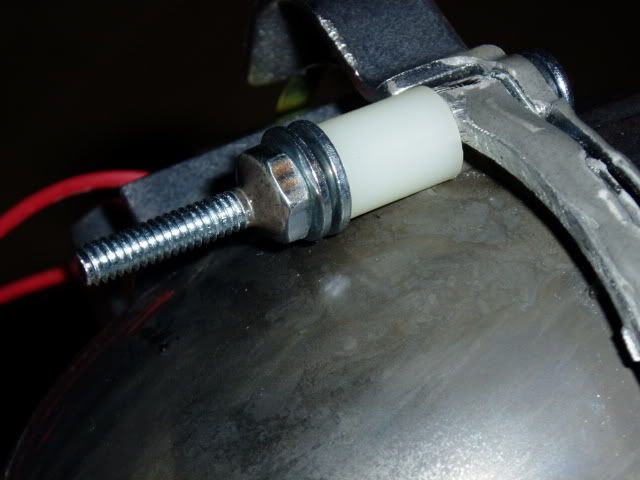
On the back of the reflector I put lock nuts that have a nylon insert that provides enough friction to only allow for small movements at a time of the screw and at the same time keeps it in position.
These were JB welded into place...
All I had to do was rotate the screws from the front of the lens to adjust left/right and up/down.

I'll get some pictures from a distance as soon as I can....
smeister, I looked at your DIY again...Does the projector rest against the reflector at all?
This shows how I did the mounting/adjustment screws:
Here is a picture of the screw through the housing. I drilled out the threads to provide free movement. I added a nylon spacer to lift the washers away from the bowl, otherwise the screw would be forced to one side. Then a flat, split, flat and a nut. This allows for the screw to rotate freely while preventing the bowl separating from the lens housing.
On the back of the reflector I put lock nuts that have a nylon insert that provides enough friction to only allow for small movements at a time of the screw and at the same time keeps it in position.
These were JB welded into place...
All I had to do was rotate the screws from the front of the lens to adjust left/right and up/down.
I see...that's why you drilled it out. Yeah I actually move both of the nuts (front and back) everytime I need to move the projector for adjustments. Cool idea though...I am sure it makes the adjustments easier, but then you have to JBWeld the nuts on the back.
How much of a pain was it to take off the reflector bowl? lol I give you props on just doing that.
How much of a pain was it to take off the reflector bowl? lol I give you props on just doing that.
Member
Joined: Mar 2006
Posts: 272
From: NY
Hey deocder, can you post a pic of the weather strip that you used for your project?? What kind of weather strip are they...I'm thinking of doing the same but not sure if the weather strip is strong enought to hold the bowl in place...
Thread Starter
|
Member
Joined: Sep 2007
Posts: 30
From: SOFL
Originally Posted by greekdaddy000
GOOD JOB! When will you begin offering your services?

Member
Joined: Mar 2006
Posts: 272
From: NY
Interesting...how does the JB weld look after you mount it? Meaning the part between the lens and the bowl, how did you seal up that gap w/o weatherstrip? Can you post a picture of a close up shot of the lens the bowl? Smeister used weatherstrip, but I'm still not sure what to use yet as I'm not sure if it's strong enough over the long run with constant road abuse...

Thread
Thread Starter
Forum
Replies
Last Post
smeister
Fit Interior & Exterior Illumination
135
Nov 16, 2012 05:55 PM
rcantu
Fit Interior & Exterior Illumination
47
Jul 12, 2007 09:05 PM