


Fit / Jazz GD projector install with indicator/main beam relocate guide.

Thread Starter
|
New Member
Joined: Dec 2012
Posts: 18
From: Kent, UK
Fit / Jazz GD projector install with indicator/main beam relocate guide.
Hi all,
been dormant a while. All my focus has been on bikes (zx6r mainly) and my Saab recently (well, wouldn't you with 320bhp on tap) But last year I did an HID projector install on the wife's Jazz/Fit. I've left it over the winter months to see how it's gone, how easy it is to drive with them, how reliable it's been and how I've grown to love (or hate) them.
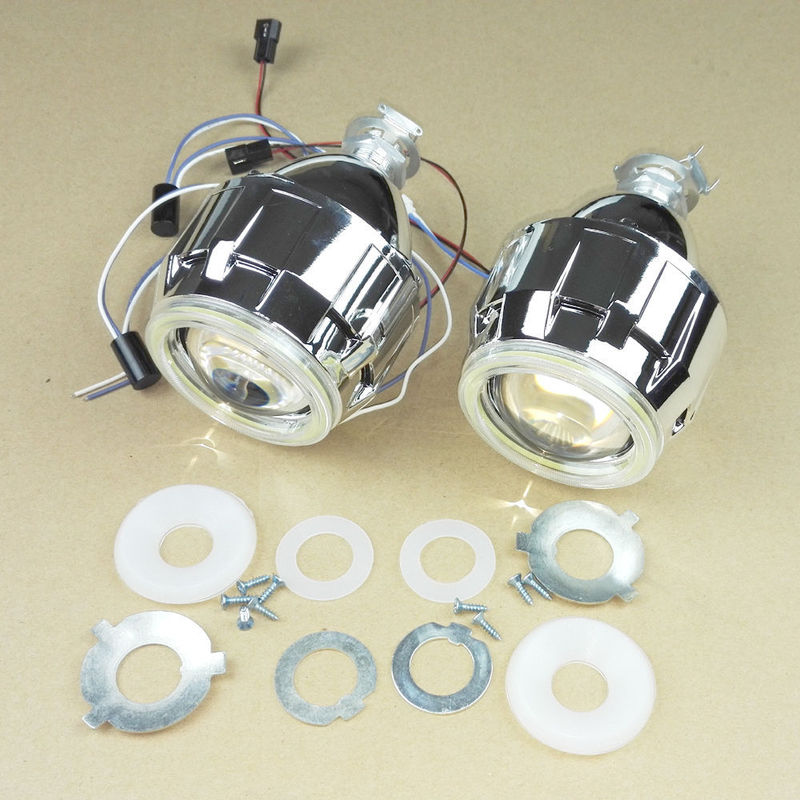
I fitted one pair of these (Dipped and sidelight/angel eye)
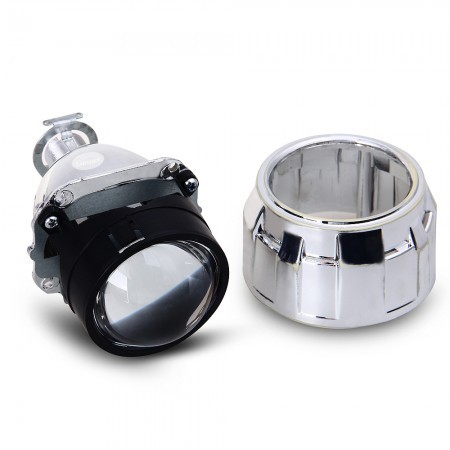
And one pair of these:
Personally, I love it and I'd do it to the next car in a heartbeat if the opportunity arose. I'm running HIDs on the dipped beam and standard bulbs on the high beam.
The boring bit: they are illegal...there is no self levelling system nor are there headlight washers, therefore they are not road legal. My MOT (UK roadworthiness test) place passed the car and only remarked on this when I asked. He was very happy with the beam which was crisp so it didn't cause me trouble. If there were headlamp washers, it ought to be a pass anywhere. Tester's discretion perhaps.
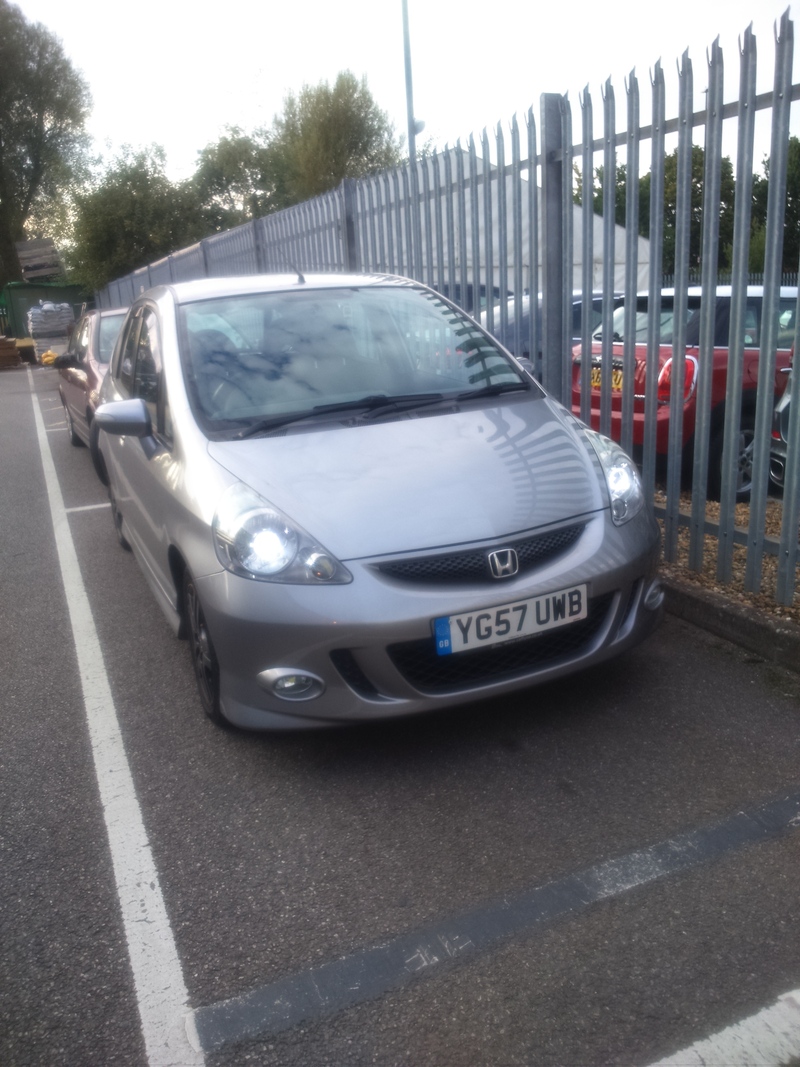
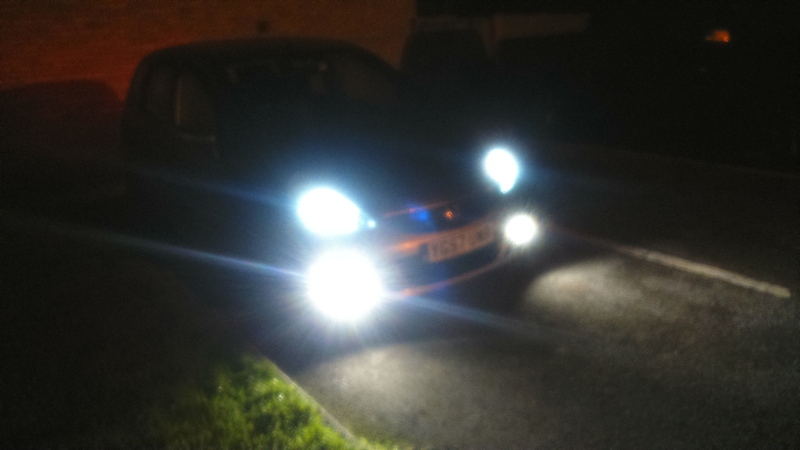
You'll end up with this...
After removing the headlights (if you struggle to do this, I wouldn't recommend going further) you need to remove all the 'bits' from the back (I left the leveling motor in), bulb holders so you're left with the bare headlight.
This goes in the oven - like so:
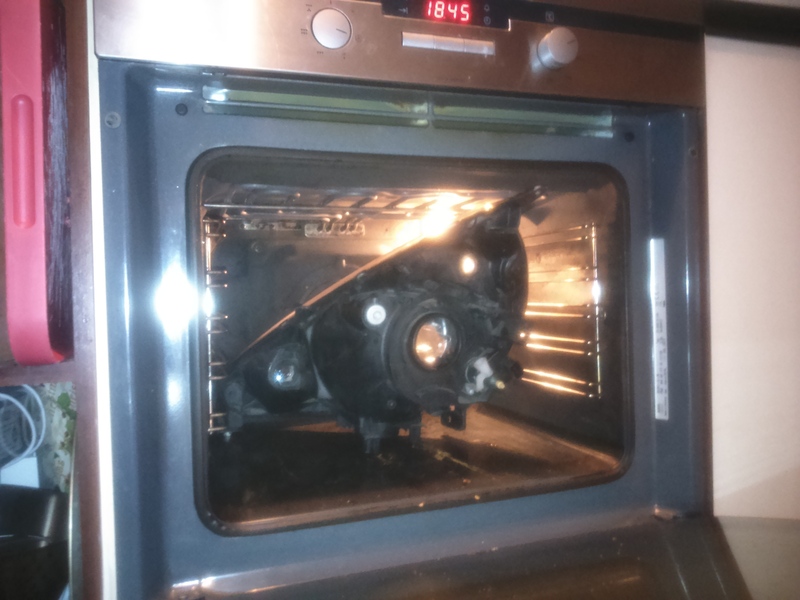
There are a couple of guides on this bit already.
After 7-10 minutes at 100 degrees Celcius, use a couple of flat bladed screwdrivers to split the headlight from the backing. It will be in 3 parts. The backing, the inner and the perspex.
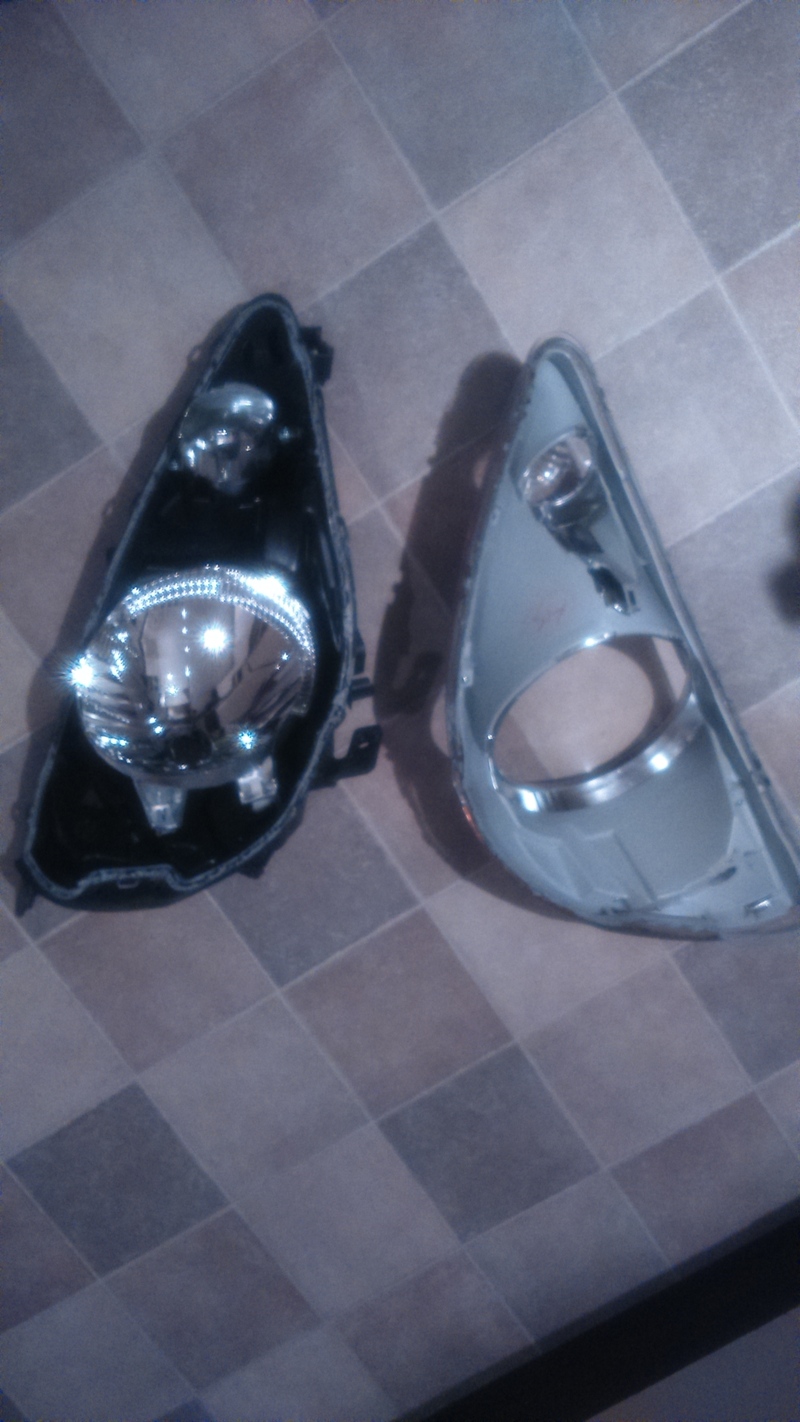
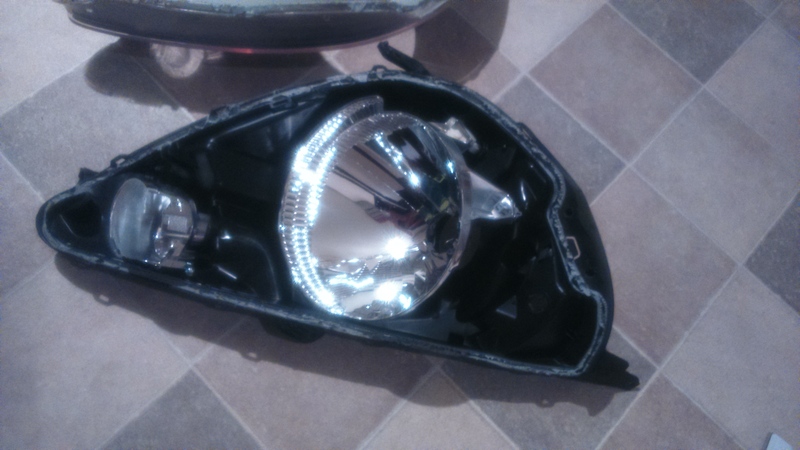
I decided to split the dipped beam and main beam. The main beam would sit where the indicator was, the dipped beam would be where the H4 bulb sat and the indicator would move to the sidelight position. The sidelight is the angel eye incorporated into the projector housing.
The dipped beam sat nicely.
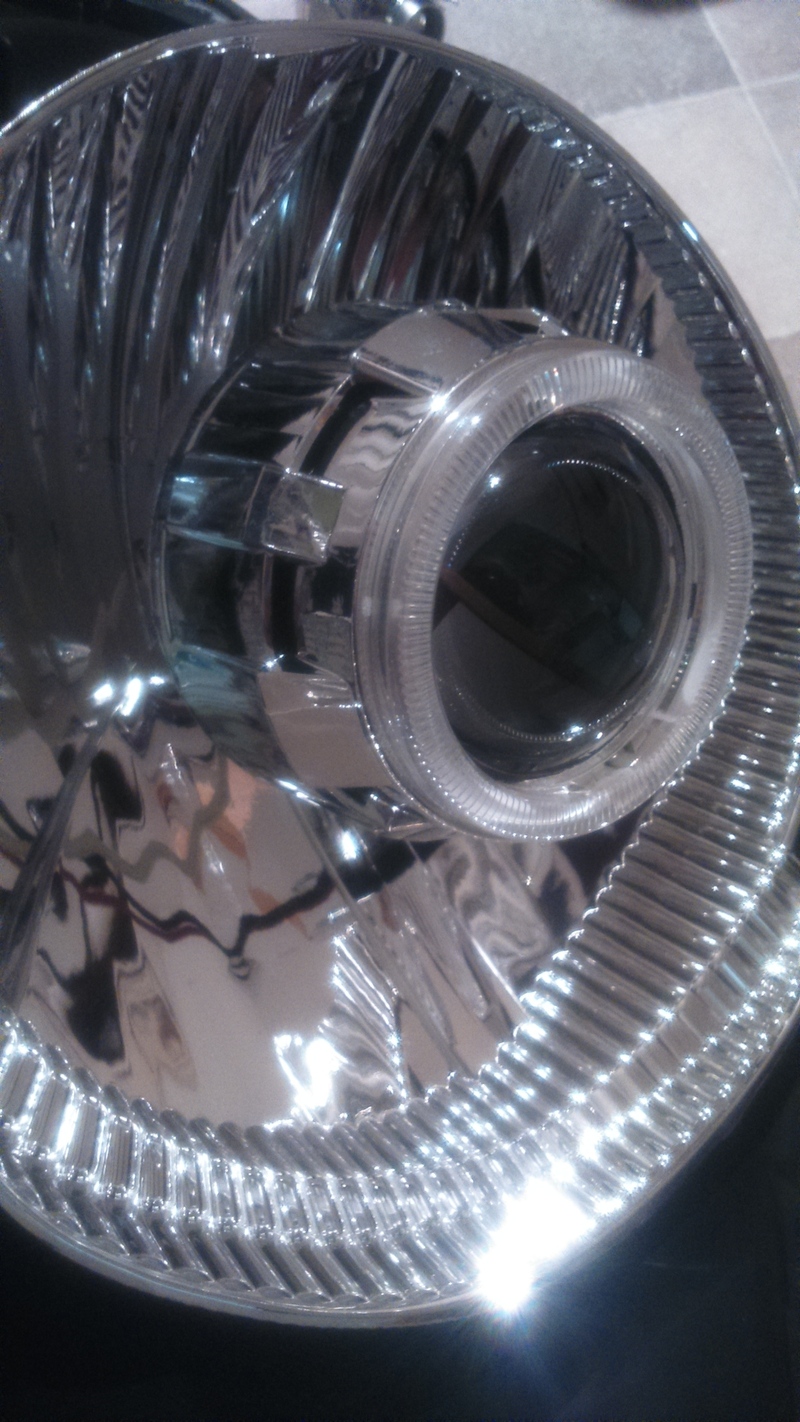
Cables carefully guided back for the high beam solenoid (which I'm not using) and CCFL angel eyes.
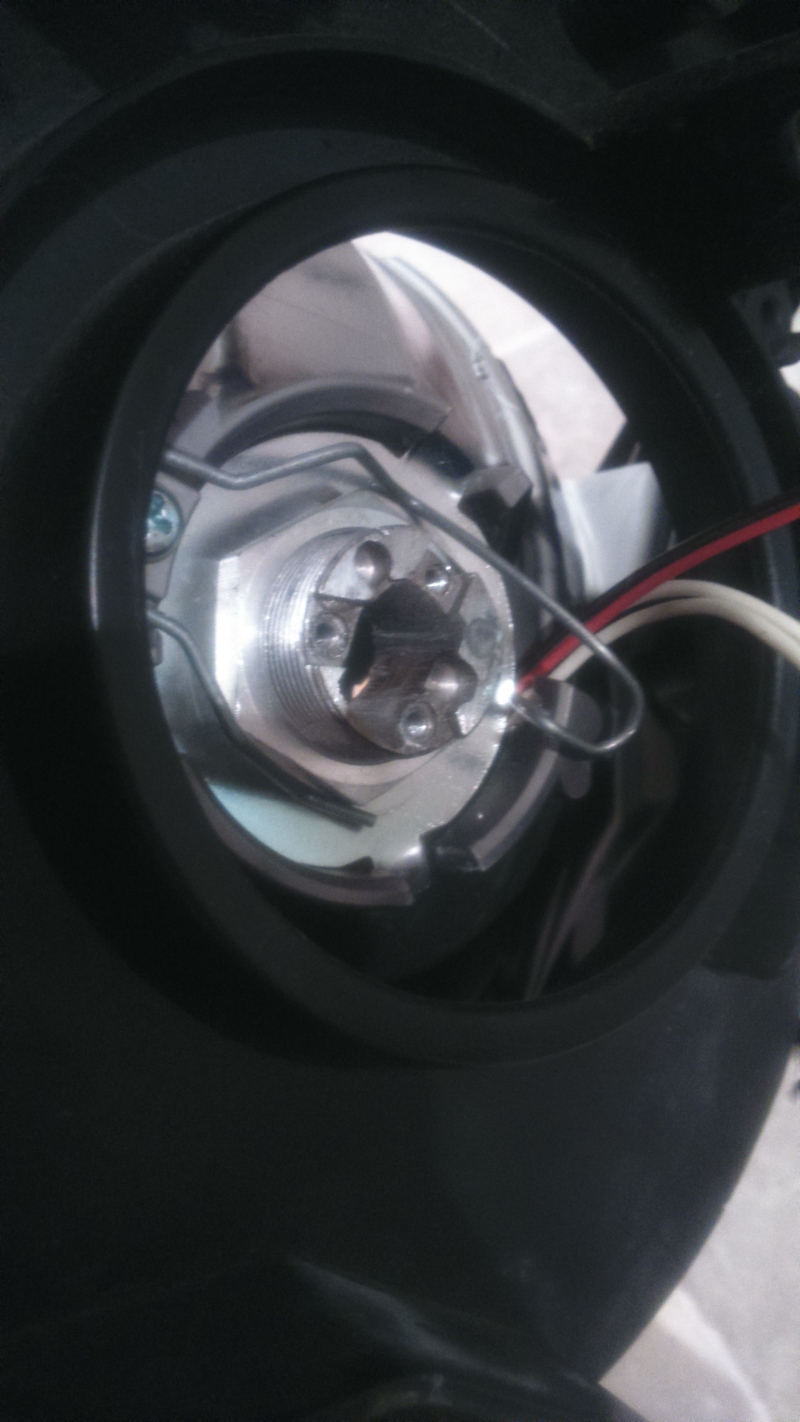
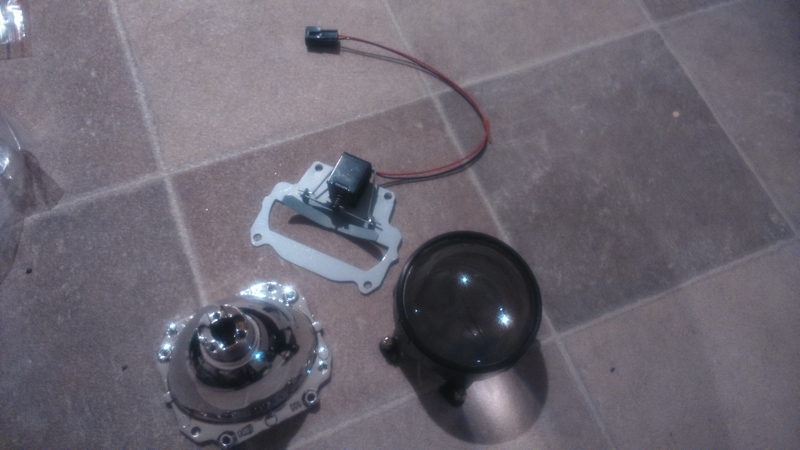
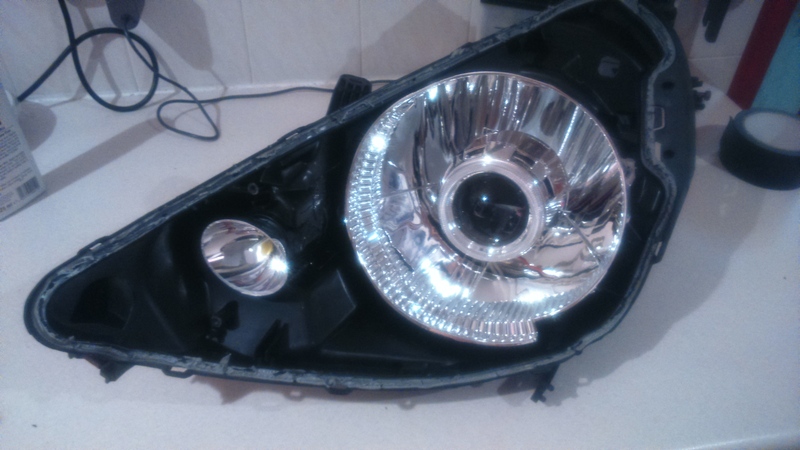
I took apart the second projector and cut down the reflector to fit behind the indicator location.
You can see the hi/low beam solenoid and beam cutoff plate.
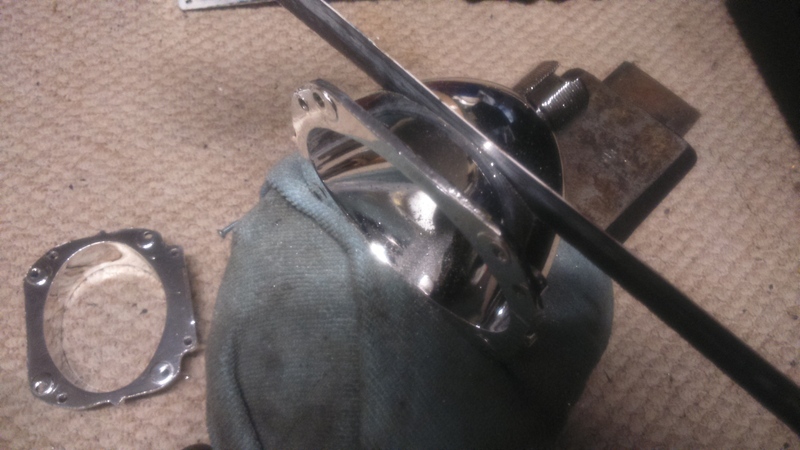
Then fitted the reflector.
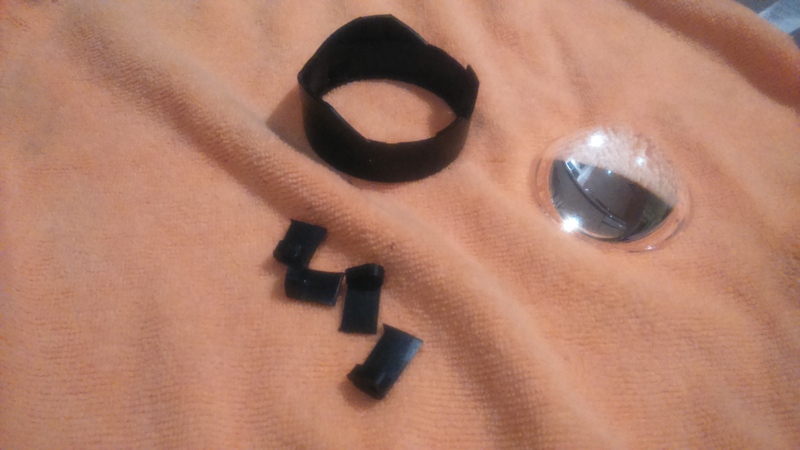
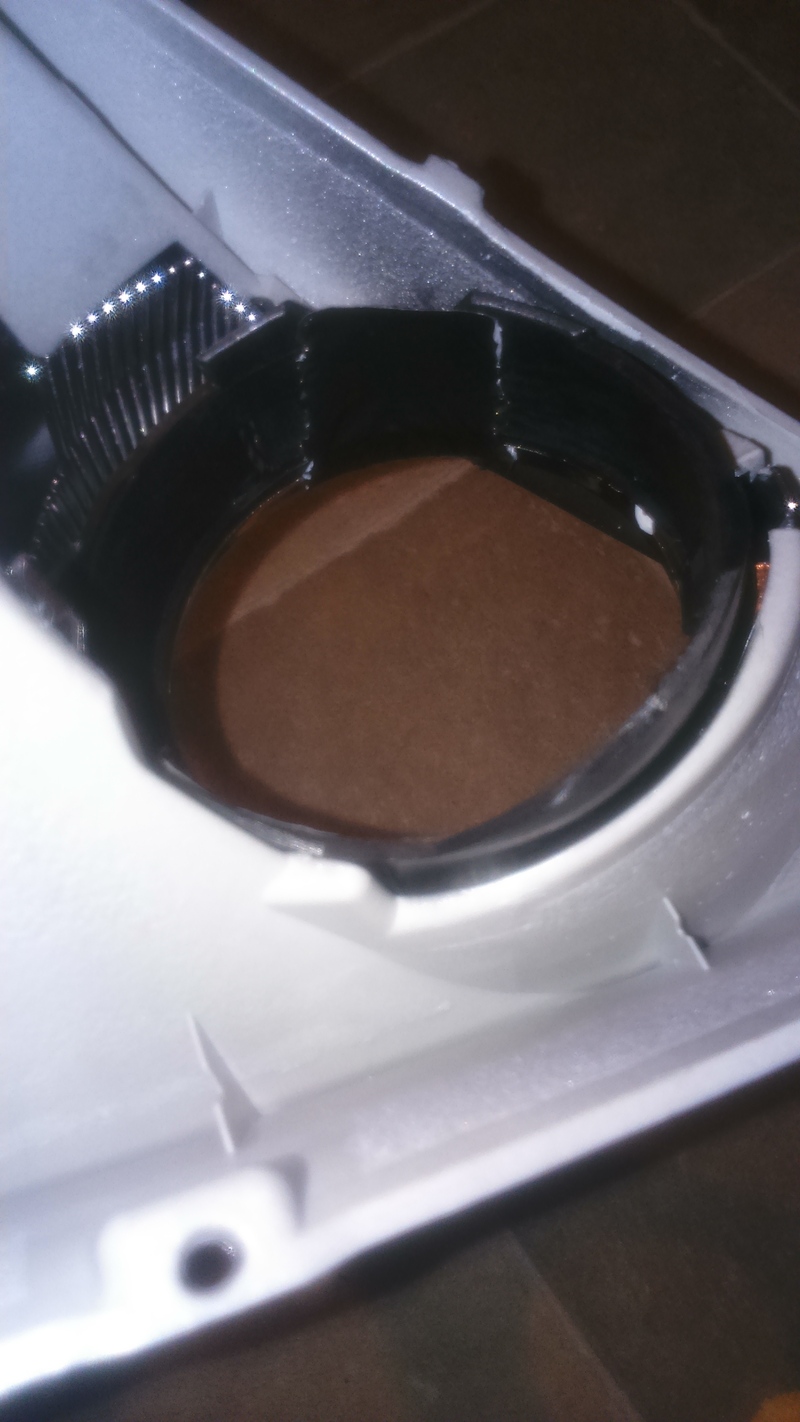
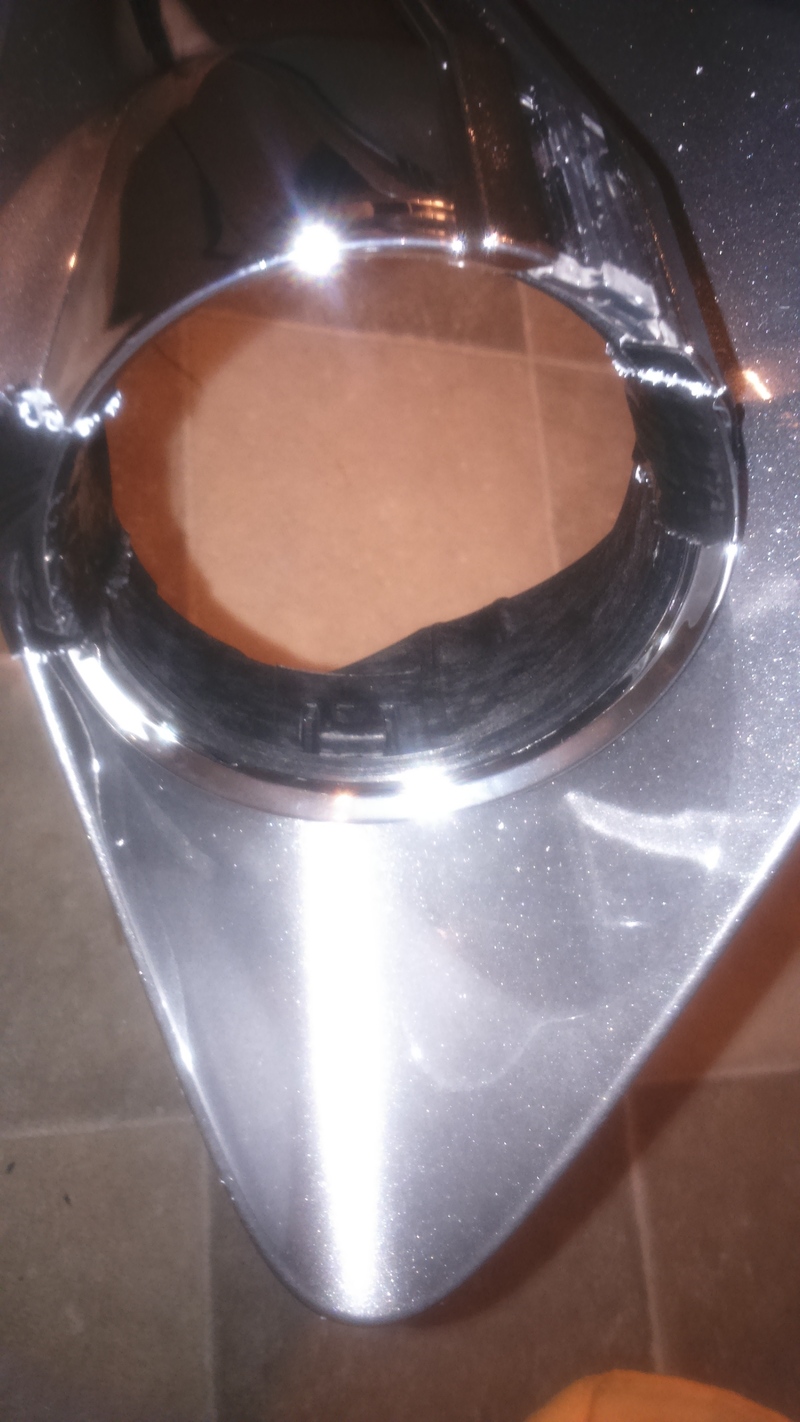
At this point, I took the projector lens and fitted it (araldited the plastic holder) to the indicator position. I removed the front lens from the indicator but kept the clear side section and refitted it. You'll need to use a hacksaw to cut through it. Then file it down to keep it looking neat. Handle the glass lens very carefully, as well as with gloves. Last thing you want is fingerprints or dust ruining a clean lens - if on the inside, they will be magnified and very visible on the outside.
And the result:
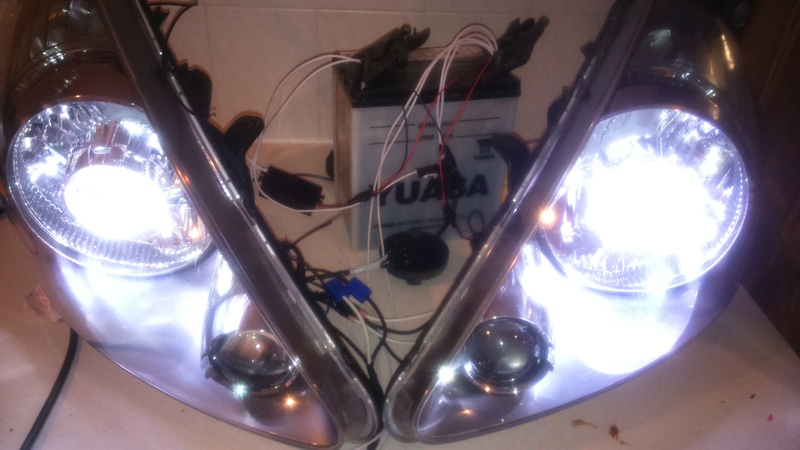
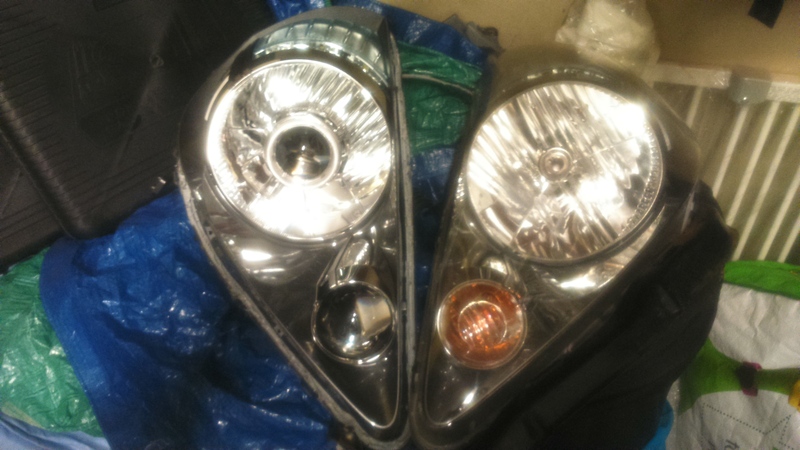
Comparing to an original Sport headlight:
Showing the indicator (A COB 5W indicator). I had to use a pair of motorcycle LED indicator resistors to slow the rate down to legal levels.
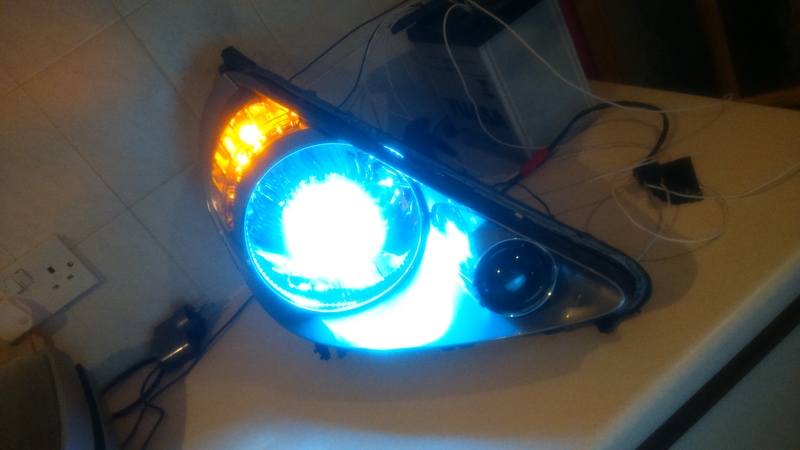
and with main beam.
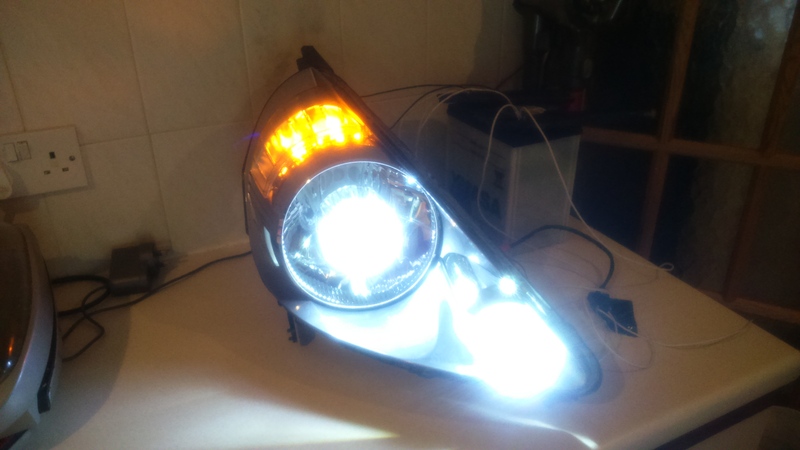
Finally fitted and the HID light on the offside (UK RHD) with an Osram nightbreaker in it. Very white vs very yellow!
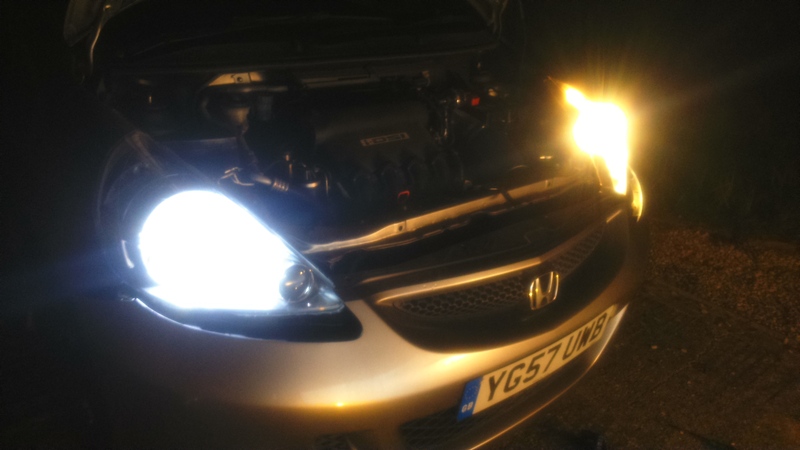
I used an H1 HID loom and spurred off it's positive lead in order to provide power to both the dipped and main beam when you activate it otherwise you end up with dipped beam switching off when you activate it.
The looms need to be extended for indicator and sidelight but I just made link-looms and used self amalgamating tape to hold the additional connections in place.
One big thing I found was that I had to remove the locating lug on the H4 plate mount as the Jazz/Fit has a rotation on the bulb in its housing of around 15 degrees up to the nearside. You need to therefore rotate the housing 15 degrees to compensate and this means removing the lug or you end up with an unacceptable beam cast. That was about the only ball ache.
SMD LED fog bulbs finished the project off nicely.
Overall, it has updated the look of the car and I'm very happy. Total cost of project about 8-10 hours of my time and about £70 of the finest Sterling in parts. Thought I'd share.
been dormant a while. All my focus has been on bikes (zx6r mainly) and my Saab recently (well, wouldn't you with 320bhp on tap) But last year I did an HID projector install on the wife's Jazz/Fit. I've left it over the winter months to see how it's gone, how easy it is to drive with them, how reliable it's been and how I've grown to love (or hate) them.
I fitted one pair of these (Dipped and sidelight/angel eye)
And one pair of these:
Personally, I love it and I'd do it to the next car in a heartbeat if the opportunity arose. I'm running HIDs on the dipped beam and standard bulbs on the high beam.
The boring bit: they are illegal...there is no self levelling system nor are there headlight washers, therefore they are not road legal. My MOT (UK roadworthiness test) place passed the car and only remarked on this when I asked. He was very happy with the beam which was crisp so it didn't cause me trouble. If there were headlamp washers, it ought to be a pass anywhere. Tester's discretion perhaps.
You'll end up with this...
After removing the headlights (if you struggle to do this, I wouldn't recommend going further) you need to remove all the 'bits' from the back (I left the leveling motor in), bulb holders so you're left with the bare headlight.
This goes in the oven - like so:
There are a couple of guides on this bit already.
After 7-10 minutes at 100 degrees Celcius, use a couple of flat bladed screwdrivers to split the headlight from the backing. It will be in 3 parts. The backing, the inner and the perspex.
I decided to split the dipped beam and main beam. The main beam would sit where the indicator was, the dipped beam would be where the H4 bulb sat and the indicator would move to the sidelight position. The sidelight is the angel eye incorporated into the projector housing.
The dipped beam sat nicely.
Cables carefully guided back for the high beam solenoid (which I'm not using) and CCFL angel eyes.
I took apart the second projector and cut down the reflector to fit behind the indicator location.
You can see the hi/low beam solenoid and beam cutoff plate.
Then fitted the reflector.
At this point, I took the projector lens and fitted it (araldited the plastic holder) to the indicator position. I removed the front lens from the indicator but kept the clear side section and refitted it. You'll need to use a hacksaw to cut through it. Then file it down to keep it looking neat. Handle the glass lens very carefully, as well as with gloves. Last thing you want is fingerprints or dust ruining a clean lens - if on the inside, they will be magnified and very visible on the outside.
And the result:
Comparing to an original Sport headlight:
Showing the indicator (A COB 5W indicator). I had to use a pair of motorcycle LED indicator resistors to slow the rate down to legal levels.
and with main beam.
Finally fitted and the HID light on the offside (UK RHD) with an Osram nightbreaker in it. Very white vs very yellow!
I used an H1 HID loom and spurred off it's positive lead in order to provide power to both the dipped and main beam when you activate it otherwise you end up with dipped beam switching off when you activate it.
The looms need to be extended for indicator and sidelight but I just made link-looms and used self amalgamating tape to hold the additional connections in place.
One big thing I found was that I had to remove the locating lug on the H4 plate mount as the Jazz/Fit has a rotation on the bulb in its housing of around 15 degrees up to the nearside. You need to therefore rotate the housing 15 degrees to compensate and this means removing the lug or you end up with an unacceptable beam cast. That was about the only ball ache.
SMD LED fog bulbs finished the project off nicely.
Overall, it has updated the look of the car and I'm very happy. Total cost of project about 8-10 hours of my time and about £70 of the finest Sterling in parts. Thought I'd share.
Last edited by Red_H; Mar 23, 2016 at 07:27 PM.

Member
Joined: Oct 2015
Posts: 1,465
From: Portland Or

Nice! This is really what it takes to do it right..
The first set of projectors are the dual right? (There is a high and low beam?)
I am not 100% sure that what you mean by dipped is what we call low beam?
Cheers!
The first set of projectors are the dual right? (There is a high and low beam?)
I am not 100% sure that what you mean by dipped is what we call low beam?
Cheers!
Thread Starter
|
New Member
Joined: Dec 2012
Posts: 18
From: Kent, UK
Yes, in fact both are high and low beam, I'm just not using the facility on either.
You're right - dipped is the same as your low, main is the same as your high beam.
Thread Starter
|
New Member
Joined: Dec 2012
Posts: 18
From: Kent, UK
My only reason for not doing this is because changing a bulb is easier than changing a solenoid.


Thread
Thread Starter
Forum
Replies
Last Post