
Domo-kun's GD1 Fit-Jazz from Finland

Domo-kun's GD1 Fit-Jazz from Finland
Hi fellow Fit Freaks!
This is my first post, so short introduction is in place I guess. I've been a long time lurker of this forum and finally registered here after I got my Jazz (Fit) last week.


A member here called "FELIXY69" and I have something we share, that is a Nissan Skyline. So I kinda felt right at home here after seeing him at the GT-R owners club forum and here with he's Noblesse kitted Fit. He's ride is off the hook!


My R32 GT-R was my daily driver (except winter driving). I live in northern Europe, Finland � Helsinki to be exact. So I needed a winter friendly daily driver as well, as the GT-R isn't that practical any more.
I've been searching for one time to time and finally found a Milano red, EDM (JDM) 2003 GD1 Jazz, with 1.4 L (L13A1 � 1339cc) i-DSI, manual. Built in Japan. Great � finally my first Fit!
I kinda had this plan not to mod the car, as I already have one car that is tuned a bit more. The GT-R has full Bee*R B324R kit that transforms R32 to R34 front end, wide body. It has custom Alcantara interior with Bride Gias Low Max seats, hugging Takata-seat belts. All instruments by EL-series Apexi, Mild Alpine/MDS stereo set-up. Tein Suspension with 19" ET-6 Work Wheels. (I've had 3 different set's of Work wheels under this car, ouch!), the list goes on...
So my plan not to mod the Jazz lasted about an hour... After driving home I went online and got the first thing done. I got a genuine JDM red-dot Fit badge to replace that boring Jazz emblem.
Next talked to my car club (Alien2nrs) members about wheels. So friend of mine remembered that he had a set of discontinued Work Nezart Spoke 2 -wheels, in 7x16 ET +38, wrapped in 205/45/16 Bridgestone Potenza S-02. Perfect � wheels sorted.


 Yeah, they're like brand new � what a find!

The Work Nezart Spoke 2's have a bit of lip to clear the spokes. The red cap is spot on for the cars overall color.

Then called other friend to get me Eibach Pro kit to drop the car a bit. I don't want to go to low as the roads are hell here. So this got me thinking, few more things, like window tint's and Visors wouldn't look too bad. So been searching for OEM Honda Access or genuine Mugen ones. No luck yet, but I'll get them.

No lowering springs yet. By the end of the next week this should be sorted.
So I think I got a good start here. Little mods, here and there to keep me happy. And to keep the car as a daily driver. The car is fun and solid to drive and has tons of space. The best part is the fuel consumption � what a laugh compared to the (99 RON) V-Power hungry RB26 Twin Turbo Skyline.

Hope to ad more and better pics later. The weather has been bad all week.
Cheers, Domo-kun
This is my first post, so short introduction is in place I guess. I've been a long time lurker of this forum and finally registered here after I got my Jazz (Fit) last week.
A member here called "FELIXY69" and I have something we share, that is a Nissan Skyline. So I kinda felt right at home here after seeing him at the GT-R owners club forum and here with he's Noblesse kitted Fit. He's ride is off the hook!
My R32 GT-R was my daily driver (except winter driving). I live in northern Europe, Finland � Helsinki to be exact. So I needed a winter friendly daily driver as well, as the GT-R isn't that practical any more.
I've been searching for one time to time and finally found a Milano red, EDM (JDM) 2003 GD1 Jazz, with 1.4 L (L13A1 � 1339cc) i-DSI, manual. Built in Japan. Great � finally my first Fit!
I kinda had this plan not to mod the car, as I already have one car that is tuned a bit more. The GT-R has full Bee*R B324R kit that transforms R32 to R34 front end, wide body. It has custom Alcantara interior with Bride Gias Low Max seats, hugging Takata-seat belts. All instruments by EL-series Apexi, Mild Alpine/MDS stereo set-up. Tein Suspension with 19" ET-6 Work Wheels. (I've had 3 different set's of Work wheels under this car, ouch!), the list goes on...
So my plan not to mod the Jazz lasted about an hour...
After driving home I went online and got the first thing done. I got a genuine JDM red-dot Fit badge to replace that boring Jazz emblem. Next talked to my car club (Alien2nrs) members about wheels. So friend of mine remembered that he had a set of discontinued Work Nezart Spoke 2 -wheels, in 7x16 ET +38, wrapped in 205/45/16 Bridgestone Potenza S-02. Perfect � wheels sorted.
Yeah, they're like brand new � what a find!The Work Nezart Spoke 2's have a bit of lip to clear the spokes. The red cap is spot on for the cars overall color.
Then called other friend to get me Eibach Pro kit to drop the car a bit. I don't want to go to low as the roads are hell here. So this got me thinking, few more things, like window tint's and Visors wouldn't look too bad. So been searching for OEM Honda Access or genuine Mugen ones. No luck yet, but I'll get them.
No lowering springs yet. By the end of the next week this should be sorted.
So I think I got a good start here. Little mods, here and there to keep me happy. And to keep the car as a daily driver. The car is fun and solid to drive and has tons of space. The best part is the fuel consumption � what a laugh compared to the (99 RON) V-Power hungry RB26 Twin Turbo Skyline.
Hope to ad more and better pics later. The weather has been bad all week.
Cheers, Domo-kun
The will to Win � Eibach Pro-kit | Sportline
I had the will to WIN, lol
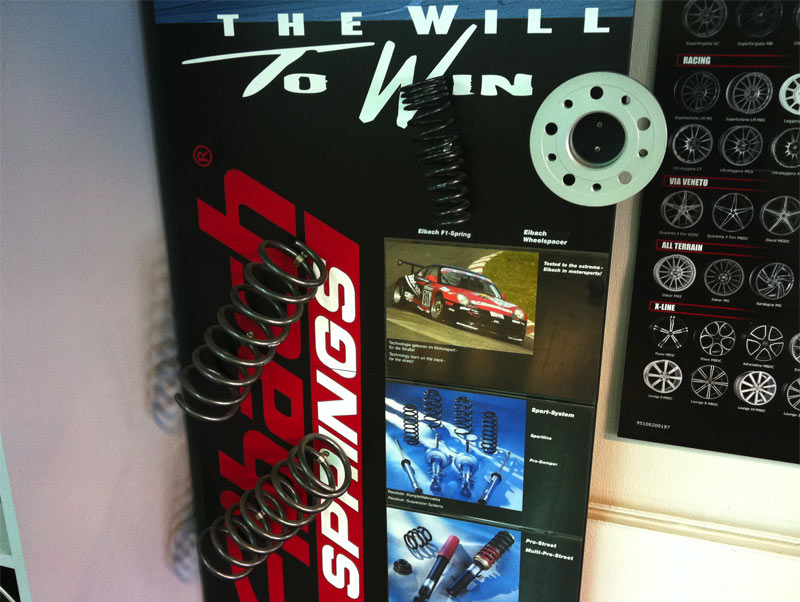
Last week I ordered a set of Eibach Pro-kit Sportline's. They should drop the car about 35-40 mm (1,35 to 1,57 in).
I didn't go for the coilover set-up as I wanted to keep the car drivable on Finnish horror roads. We have too much speed bumps & bad roads in the Helsinki city area.

My lowering springs arrived to Helsingin Rengaspalvelu (tire service), and my friend who works there installed them while I was busy at work.
They even fixed few dents that I had on the driver’s door & rear quarter panel (Sorry no pictures of them). Great service!

So dropped the car off in the morning before heading to work.
I did a little before vs. after pics to show the difference in the ride height.


At first it looks like the front is higher, but actually it's not. The front fender has higher radius, so it just looks like that. The overall "stance" is right. Even drop on both ends.

Looks ok. Could be a bit lower at the front. I'll just have to see how this kit is settling in.
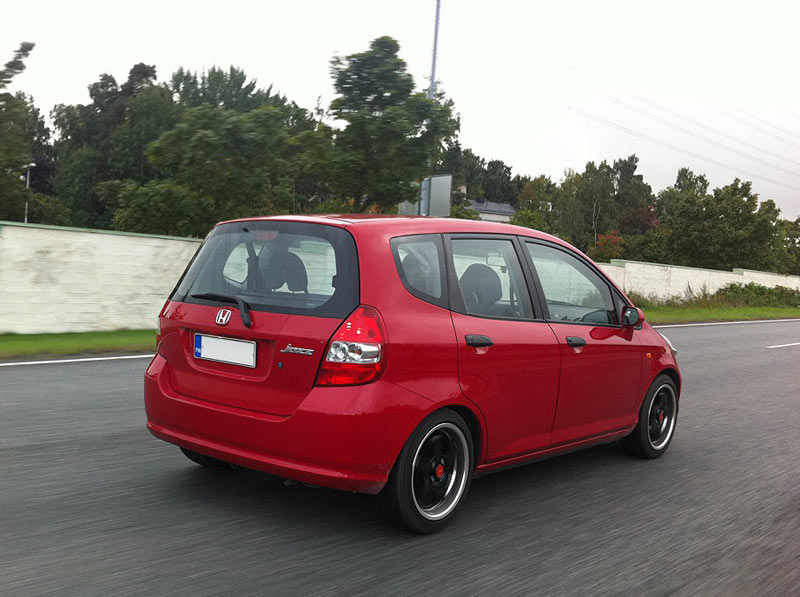
This is how we roll – looking better already. The ride is firm but not too stiff or hard. Progressive is the right word. Next mods to come in a few days
Last week I ordered a set of Eibach Pro-kit Sportline's. They should drop the car about 35-40 mm (1,35 to 1,57 in).
I didn't go for the coilover set-up as I wanted to keep the car drivable on Finnish horror roads. We have too much speed bumps & bad roads in the Helsinki city area.
My lowering springs arrived to Helsingin Rengaspalvelu (tire service), and my friend who works there installed them while I was busy at work.
They even fixed few dents that I had on the driver’s door & rear quarter panel (Sorry no pictures of them). Great service!
So dropped the car off in the morning before heading to work.
I did a little before vs. after pics to show the difference in the ride height.
At first it looks like the front is higher, but actually it's not. The front fender has higher radius, so it just looks like that. The overall "stance" is right. Even drop on both ends.
Looks ok. Could be a bit lower at the front. I'll just have to see how this kit is settling in.
This is how we roll – looking better already. The ride is firm but not too stiff or hard. Progressive is the right word. Next mods to come in a few days


The Valeo Beep & Park system
Hi all, and thanks for the compliments.
Alrighty then � to the business...
I live in downtown Helsinki. We have crowded streets and small parking spots. Also my better half sits behind the wheel time to time and needs help when parking the car. Most of the parking spaces are parallel parking type. Sometimes it's hard to see the distance to the other vehicle or to the hidden poles, curbs, etc. So, my solution was to fit a parking assistance by Valeo.
Valeo Beep & Park kit has a LED display with 8 sensors, 4 front and 4 rear.

The Valeo Beep & Park system is not just an accessory; it's also a high tech device that will make parking your ride really easy! If you dread parallel and reverse parking and, even after years of experience, are still having trouble parking your vehicle after several tries, then the Beep & Park system is just what you need.
Using 4 front and 4 rear mounted sensors, the Beep & Park system locates obstacles to the front and rear of the vehicle (other vehicles, pedestrians, curbs, etc) and informs the driver of their proximity with an audio signal that begins when an obstacle is 1.5 meters (5 feet) away, increasing in volume as they approach the obstacle and becoming continuous when the vehicle comes within 30 cm (12 in) of the object. The Valeo Beep & Park kit is supplied with a set of connectors, a mounting kit and screws, a drill adapted to the diameter of the sensors, angle correction rings and an assembly manual in 12 languages.
Features:
- 8 ultrasonic sensors, 4 front and 4 rear (tow bar compatible)
- LED distance indicator dash display & buzzer with adjustable volume
Valeo recommends that you have this product assembled by a certified professional, so that's what I did. I took the car to my friends ICE & Multimedia store, called Autoextra.

When I dropped the car in the morning I told that I left my pocket camera for their use, to get me some snaps of the installation. Here's their first mod, LOL.
OK, they started by stripping the bumpers & hatch, all the way to the front.


Looks like rust, but it's only dirt, huh! They used the rubber seal / oem places to get the harness through.

Everything ZIP-tied.

Mark the bumpers and drill the holes for the sensors.

The Milano Red (R81) paint was ordered from near by Paint shop in aerosol spray can. Coat of plastic primer, topped by red paint. Little heat to dry the paint fully. Then assembly and check that everything works.

Nice & neat. Not in your face, but in clear visoin on corner of your eye.

 Done!
Done!
Well pleased with this little mod.
Alrighty then � to the business...
I live in downtown Helsinki. We have crowded streets and small parking spots. Also my better half sits behind the wheel time to time and needs help when parking the car. Most of the parking spaces are parallel parking type. Sometimes it's hard to see the distance to the other vehicle or to the hidden poles, curbs, etc. So, my solution was to fit a parking assistance by Valeo.
Valeo Beep & Park kit has a LED display with 8 sensors, 4 front and 4 rear.
The Valeo Beep & Park system is not just an accessory; it's also a high tech device that will make parking your ride really easy! If you dread parallel and reverse parking and, even after years of experience, are still having trouble parking your vehicle after several tries, then the Beep & Park system is just what you need.
Using 4 front and 4 rear mounted sensors, the Beep & Park system locates obstacles to the front and rear of the vehicle (other vehicles, pedestrians, curbs, etc) and informs the driver of their proximity with an audio signal that begins when an obstacle is 1.5 meters (5 feet) away, increasing in volume as they approach the obstacle and becoming continuous when the vehicle comes within 30 cm (12 in) of the object. The Valeo Beep & Park kit is supplied with a set of connectors, a mounting kit and screws, a drill adapted to the diameter of the sensors, angle correction rings and an assembly manual in 12 languages.
Features:
- 8 ultrasonic sensors, 4 front and 4 rear (tow bar compatible)
- LED distance indicator dash display & buzzer with adjustable volume
Valeo recommends that you have this product assembled by a certified professional, so that's what I did. I took the car to my friends ICE & Multimedia store, called Autoextra.
When I dropped the car in the morning I told that I left my pocket camera for their use, to get me some snaps of the installation. Here's their first mod, LOL.
OK, they started by stripping the bumpers & hatch, all the way to the front.
Looks like rust, but it's only dirt, huh! They used the rubber seal / oem places to get the harness through.
Everything ZIP-tied.
Mark the bumpers and drill the holes for the sensors.
The Milano Red (R81) paint was ordered from near by Paint shop in aerosol spray can. Coat of plastic primer, topped by red paint. Little heat to dry the paint fully. Then assembly and check that everything works.
Nice & neat. Not in your face, but in clear visoin on corner of your eye.
Done!Well pleased with this little mod.
Member
Joined: Dec 2006
Posts: 514
From: Troms�, Norway

Nice mods Domo-kun!
I like your Jazz.
Do you plan on any spoilers and skirt around? Or what about a little wing in the rear?
How much was it for those Eiback Pro-Kit springs? And was it much work to install them?
Regards from Norway!
I like your Jazz.
Do you plan on any spoilers and skirt around? Or what about a little wing in the rear?
How much was it for those Eiback Pro-Kit springs? And was it much work to install them?
Regards from Norway!
Yep, more goodies are on the way. I'll post them here as I get them on the car. I want to keep the ride "subtile and clean" looking as my other car has a bit more character. I'll do those "crazy stupid" mods on that one
Next mods in a week or so, been busy lately
It's a few hour job, that's it. Here's a good DIY: Installation of lowering springs on 07-08 GD3. Hope the link helps.
Btw. Nice ride you have there, the Black Amethyst Pearl is rare color as well in Norway (3 cars or so, right). Haven't seen a single Jazz/Fit in Finland with this color. My mom used to have EK Civic with this color, it was some sort limited edition color at the time.
Take care and keep modding!
Cheers, Domo-kun

They said, Let there be light... so, LED-light is what I got!
Ok, more mods to come. Scored these from eBay germany. Got them in mail today. X-max early
A set of Genuine Honda LED rear lights, smoked versions. The seller had bought them from Singapore. But they're 100 % OEM JDM-spec Honda. I got them dirt cheap as well, super stoked!


Had a little peak inside, everyhing works fine. On to the car then...
A set of Genuine Honda LED rear lights, smoked versions. The seller had bought them from Singapore. But they're 100 % OEM JDM-spec Honda. I got them dirt cheap as well, super stoked!
Had a little peak inside, everyhing works fine. On to the car then...
Last edited by Domo-kun; Oct 6, 2011 at 08:14 AM.
Member
Joined: Dec 2006
Posts: 514
From: Troms�, Norway
Nice rear lights. I like them smoked
Is there a rear foglights in them?
I bought a set of Altezza Europa, but they dont have a rear foglight. But I have found a way to add it anyway. Not done it yet, but some time...
The one you have got here does not seems so easy to mod... but they look nice.
I'm looking forward for pictures with them on the car. They would propably look nice on your red car.


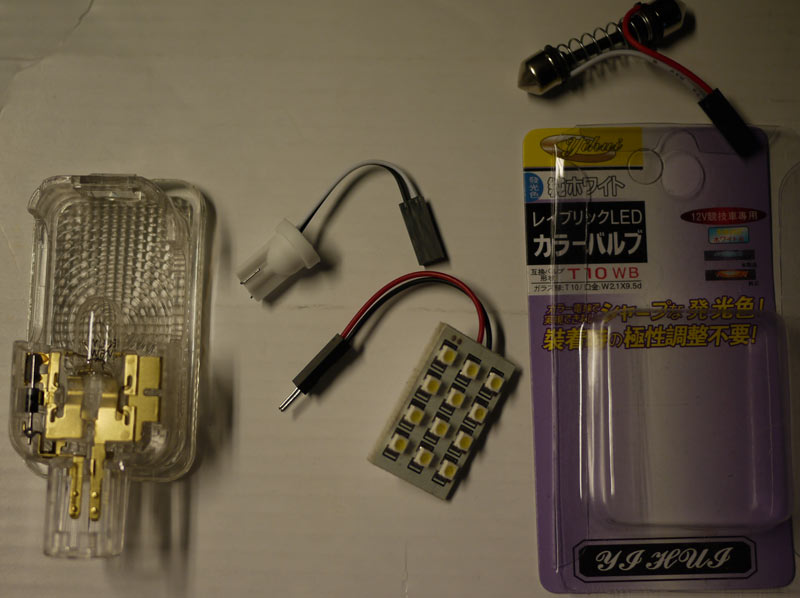
Interior LED's
More LED's... A member here called FITFITFITFITFIT sells these, so I put a few $$ up for the good cause. Waited 4 days and the interior LED's arrived in the mail. Fast & great service
Here's the dull oem dome light with bulbs.


I used flathead screwdriver to pop the dome cover open. Fitting these are really easy mod.

How it looks & close up. Lights really nice, even the dim-light works.
Next to the trunk.
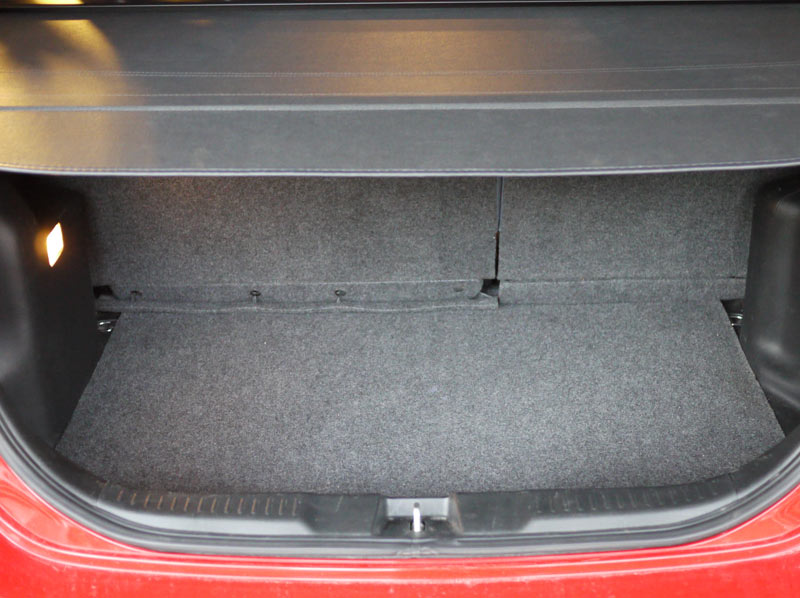
Normal set-up.
The new LED set-up.

Trunk done!
Well worth it, brightens up the interior.
Here's the dull oem dome light with bulbs.
I used flathead screwdriver to pop the dome cover open. Fitting these are really easy mod.
How it looks & close up. Lights really nice, even the dim-light works.
Next to the trunk.
Normal set-up.
The new LED set-up.
Trunk done!
Well worth it, brightens up the interior.
Mugen Ventilated Visor install - DIY
Mugen madness part 1. Oh yeah, there's plenty more to come...
The mail man dropped these a week a go. Got them from King Motorsports "Mugen Clearance sale". Made a good deal!

The set for GD1 - all you need.

Quality like no other.

I started of by degreasing and cleaning the doors. Also took the window lining down.

Attached those little studs to the outer side of the visor, then mounted the clips to the inner side of the visor by pressing them in with the little stud.

Now the tricky part. Use masking tape to the red adhesive stripes. By doing this you help removing adhesive tape later in the process.
Wipe the doors with 3M PAC Primer to make sure the adhesive tape on the visors stick to the doors surface.

This shows how the clips sit to the doors, before/after the rubber lining.
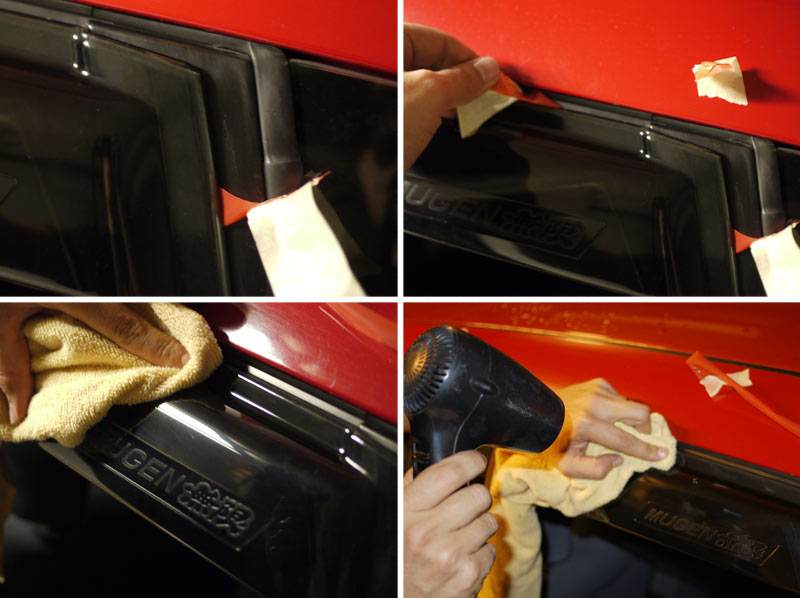
Strip the adhesive tapes off, by pulling slowly. I used hair dryer to heat up the adhesive. Then pushed the visors against the door to really "glue" them in.

This is how they sit. There's a close-up of the front visors litte "hair" that sit's against the window. Nice detail to keep the visors from scraping the window.

Picture taken with flash, they look black.

The other side, picture with out flash and they show the transparent smokey side.
Job done! Took me aprox 2 hours to get them done. Once the one side is done the other is easyer.
Found this link for DIY-help.
The mail man dropped these a week a go. Got them from King Motorsports "Mugen Clearance sale". Made a good deal!
The set for GD1 - all you need.
Quality like no other.
I started of by degreasing and cleaning the doors. Also took the window lining down.
Attached those little studs to the outer side of the visor, then mounted the clips to the inner side of the visor by pressing them in with the little stud.
Now the tricky part. Use masking tape to the red adhesive stripes. By doing this you help removing adhesive tape later in the process.
Wipe the doors with 3M PAC Primer to make sure the adhesive tape on the visors stick to the doors surface.
This shows how the clips sit to the doors, before/after the rubber lining.
Strip the adhesive tapes off, by pulling slowly. I used hair dryer to heat up the adhesive. Then pushed the visors against the door to really "glue" them in.
This is how they sit. There's a close-up of the front visors litte "hair" that sit's against the window. Nice detail to keep the visors from scraping the window.
Picture taken with flash, they look black.
The other side, picture with out flash and they show the transparent smokey side.
Job done! Took me aprox 2 hours to get them done. Once the one side is done the other is easyer.
Found this link for DIY-help.
Last edited by Domo-kun; Oct 16, 2011 at 08:45 AM.
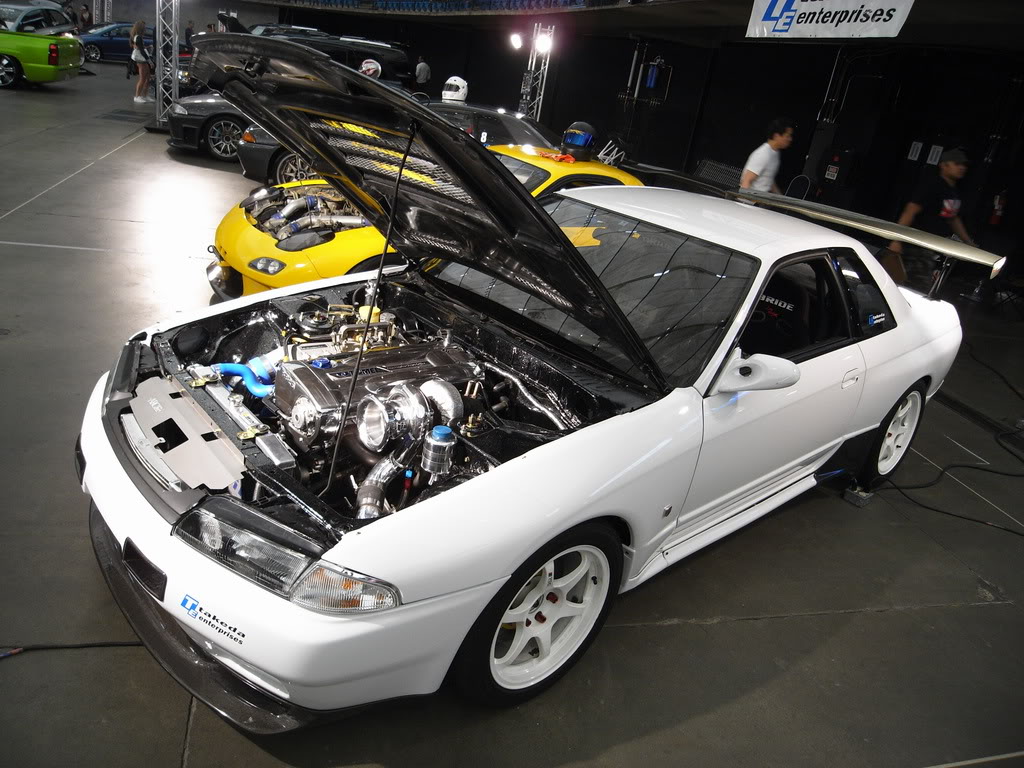

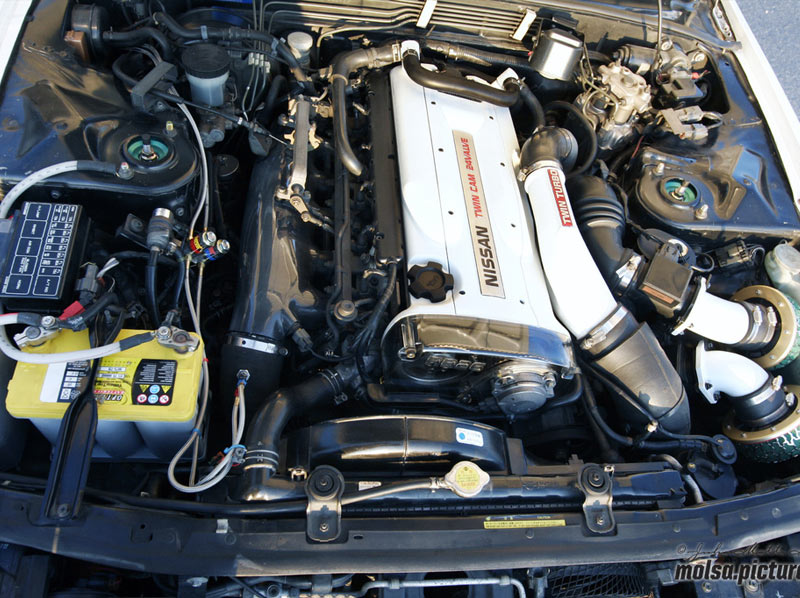
older projects: '94 Skyline B324R GT-R

Thanks guys!
Wanted to put few pics up of my older project. Got My Bee-R kit installed in Japan (at Bee-Racing) in 2007. Shipped the car to Finland and took it right a part. Built a new interior etc. She was my daily drive / show car till I got the Jazz. Now we're on the same road again... mods, mods, mods... LOL
Here's some pics. Tons more in my blog Alien2nrs.com


The car has seen various themes, different sponsor deals, that's why the graphics. Shes currently with out any decals.
Ok, back to my GD Fit project...
