


Speaker upgrade, 2007 Fit Sport


Thread Starter
|
Member
Joined: Apr 2012
Posts: 24
From: NJ
Speaker upgrade, 2007 Fit Sport
Hi all, my first post here. I picked up a certified used 2007 Sport 5MT a couple weeks back. Was truly disappointed with the OEM speakers, so I decided to swap in some halfway-decent coaxials (Polk db651) with the stock 200W head unit. I listen to classical (organ, orchestral, choral, chamber), musical theater, some swing, 70s & 80s rock.
There's a few threads about this here already. The best teardown details, I found at Honda Fit (Jazz) Front Door Panel Removal & Speaker Replacement Guide With Picture Illustrated Instructions
However. My speakers don't have the screw at the top, but an expanding clip which springs into place, with the two slide-in tabs at the bottom. I couldn't figure out how the speaker was mounted before removing it, so I broke both tabs on one, and one tab on another. I was also not able to figure out how to disengage the top spring clip, so I ended up breaking all of them. Edit: my best guess after the fact, is to stick a flat screwdriver straight down from the top to disengage the spring clip, then pull the speaker away. The adhesive foam makes it hard to know whether you've actually disengaged the clip. Edit edit: confirmed by http://hondafitblog.com/2008/11/inst...actory-mounts/
I've been debating a lot whether to use the cannibalize-and-cable-tie method in other threads here, or some mounting method involving drilling and screwing. Realizing that the speakers don't fit directly in the door and would require either cutting the door (no thank you) or a spacer, I figured I'd at least try the cable ties to secure the new speaker in the gutted OEM speaker housing, and use 3M outdoor foam tape (edit: and epoxy to reattach the broken tabs) to secure the speaker housing back into the door. Hopefully it will not vibrate loose.
I'm not sure if I will have to cut down the protruding lip around the outside edge of the speaker housing, but it will probably lend itself to a more solid build.
Right now I have all OEM housings gutted except the driver door, and just bought cable ties & foam tape. Next, to whittle down the lip around the edge, and mount the new speakers in the housings. Then, solder the OEM speaker-side wire connector onto the new speakers. Pics and progress to follow.
There's a few threads about this here already. The best teardown details, I found at Honda Fit (Jazz) Front Door Panel Removal & Speaker Replacement Guide With Picture Illustrated Instructions
However. My speakers don't have the screw at the top, but an expanding clip which springs into place, with the two slide-in tabs at the bottom. I couldn't figure out how the speaker was mounted before removing it, so I broke both tabs on one, and one tab on another. I was also not able to figure out how to disengage the top spring clip, so I ended up breaking all of them. Edit: my best guess after the fact, is to stick a flat screwdriver straight down from the top to disengage the spring clip, then pull the speaker away. The adhesive foam makes it hard to know whether you've actually disengaged the clip. Edit edit: confirmed by http://hondafitblog.com/2008/11/inst...actory-mounts/
I've been debating a lot whether to use the cannibalize-and-cable-tie method in other threads here, or some mounting method involving drilling and screwing. Realizing that the speakers don't fit directly in the door and would require either cutting the door (no thank you) or a spacer, I figured I'd at least try the cable ties to secure the new speaker in the gutted OEM speaker housing, and use 3M outdoor foam tape (edit: and epoxy to reattach the broken tabs) to secure the speaker housing back into the door. Hopefully it will not vibrate loose.
I'm not sure if I will have to cut down the protruding lip around the outside edge of the speaker housing, but it will probably lend itself to a more solid build.
Right now I have all OEM housings gutted except the driver door, and just bought cable ties & foam tape. Next, to whittle down the lip around the edge, and mount the new speakers in the housings. Then, solder the OEM speaker-side wire connector onto the new speakers. Pics and progress to follow.
Last edited by yitznewton; May 9, 2012 at 12:24 PM.
Thread Starter
|
Member
Joined: Apr 2012
Posts: 24
From: NJ
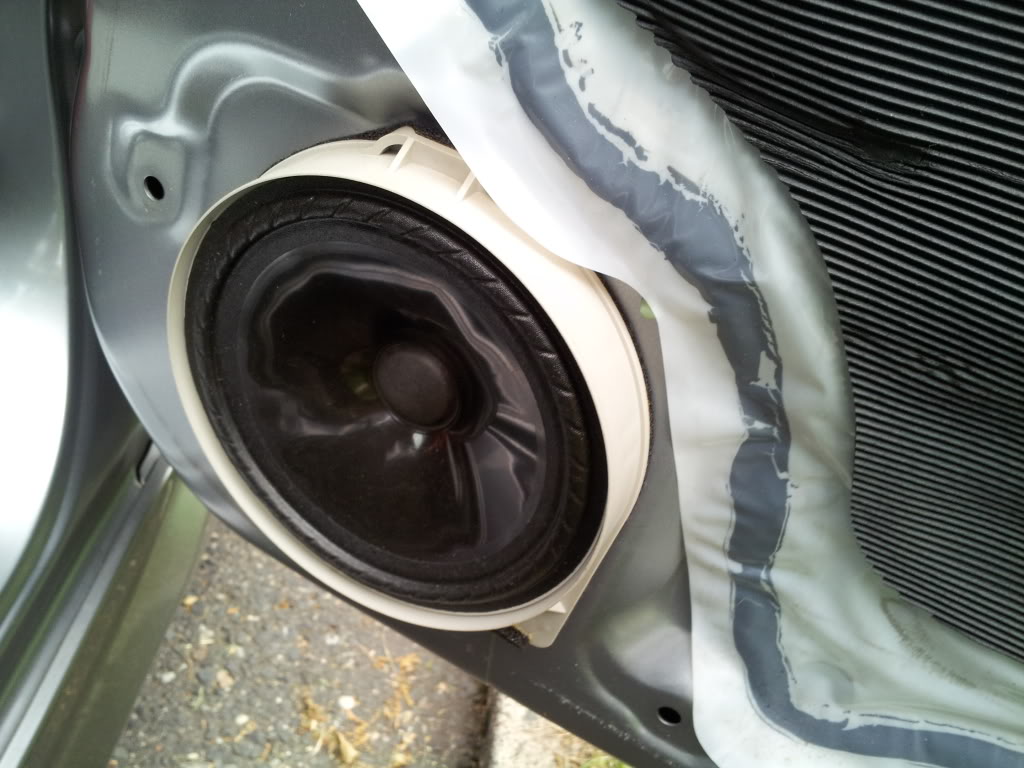
OEM speaker mounted:
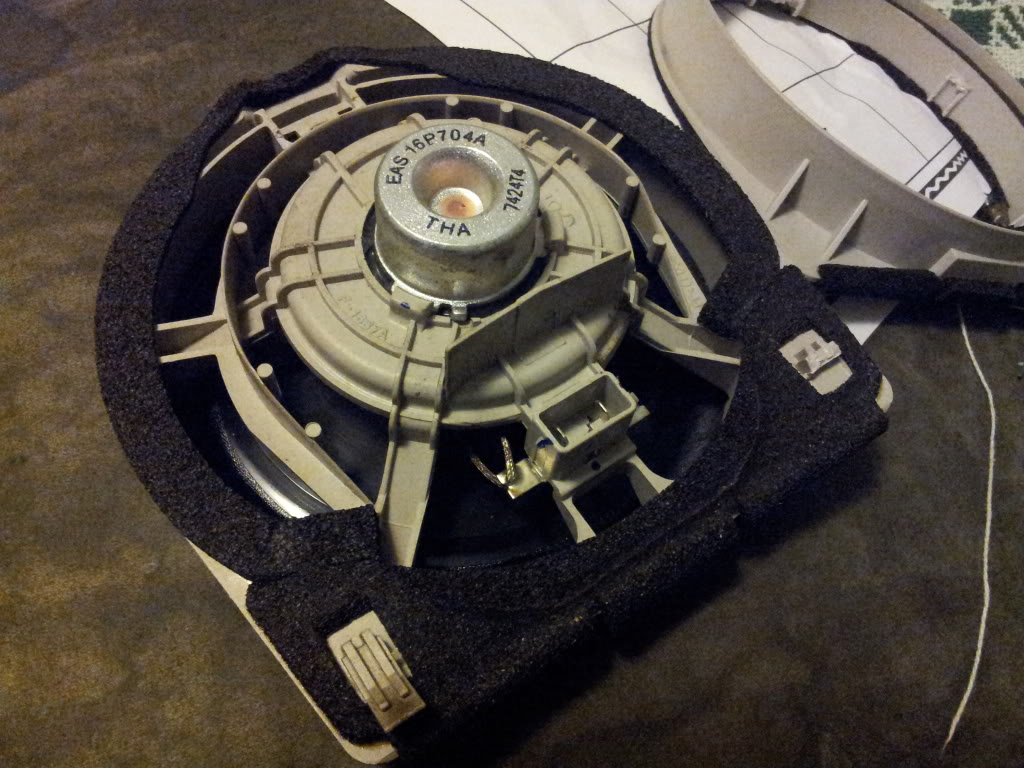
Back of OEM speaker, note tab intact on left and broken on right; top receptacle for spring clip broken:
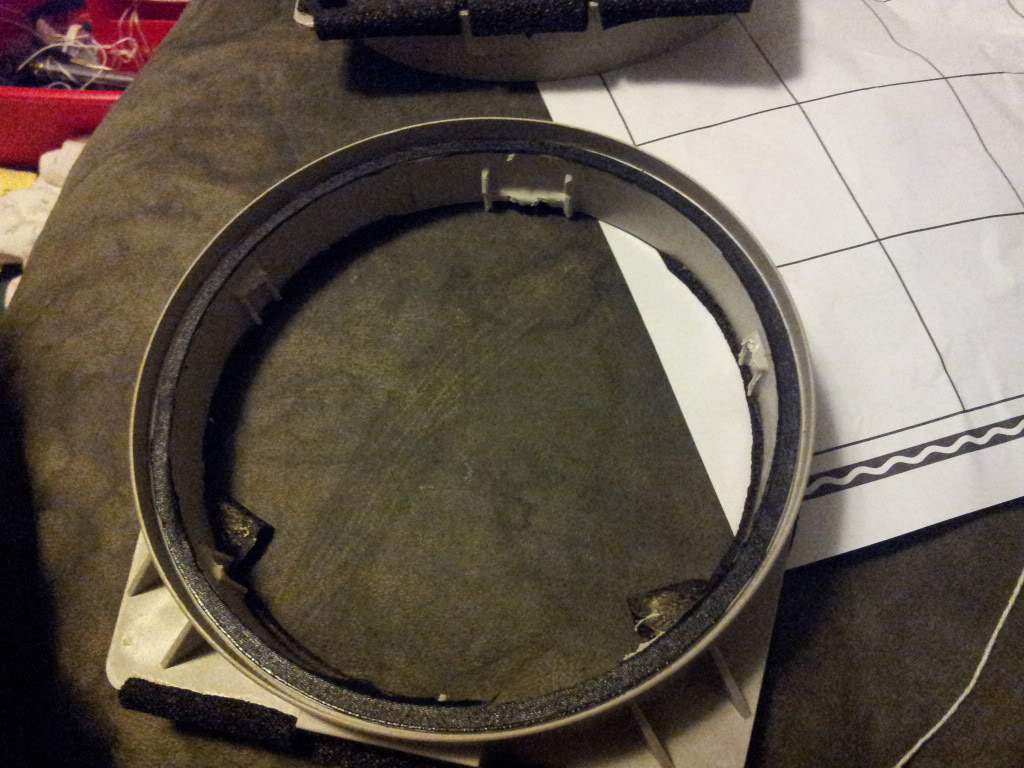
Cannibalized, front:
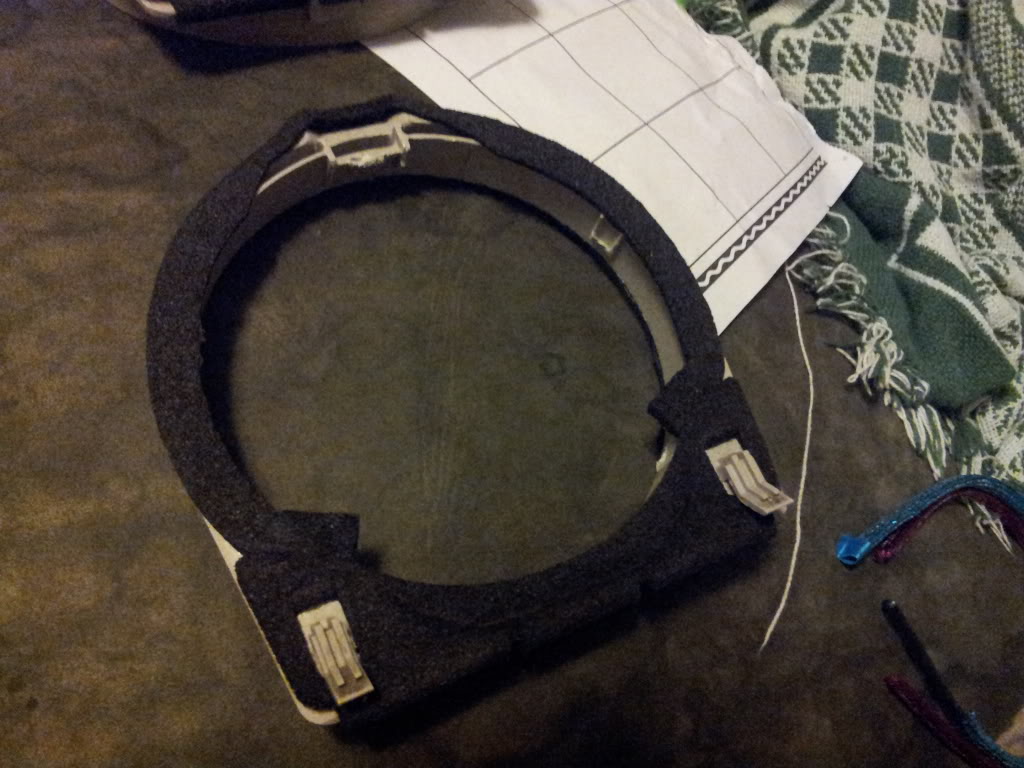
Cannibalized, rear, with both tabs intact:
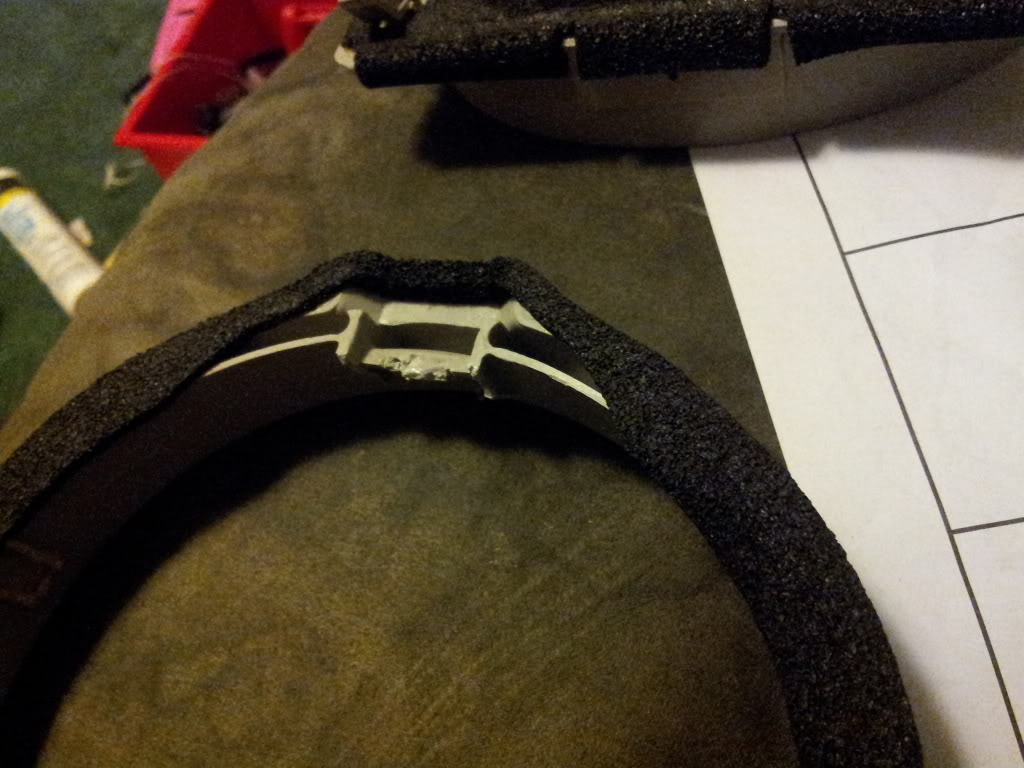
Broken spring clip receptacle:
Back of OEM speaker, note tab intact on left and broken on right; top receptacle for spring clip broken:
Cannibalized, front:
Cannibalized, rear, with both tabs intact:
Broken spring clip receptacle:
Thread Starter
|
Member
Joined: Apr 2012
Posts: 24
From: NJ
Working on the test speaker of my four db651's tonight.
I tried to find quick-release female connectors at AutoZone to match the speaker male ones, and failed. So I soldered the Fit connector's wires onto the males. Not such a great job of soldering, but speaker wire's not so easy. Or at least this was my first time.
Then I mounted the test speaker on the gutted ring with cable ties. It does seem secure, at least.
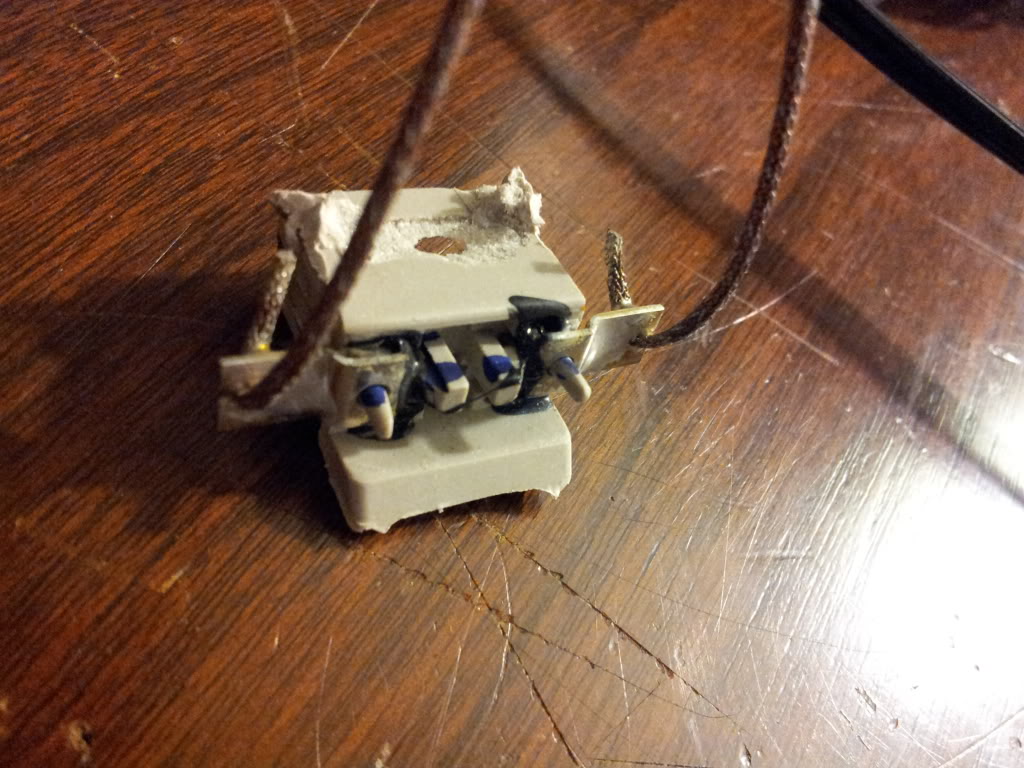
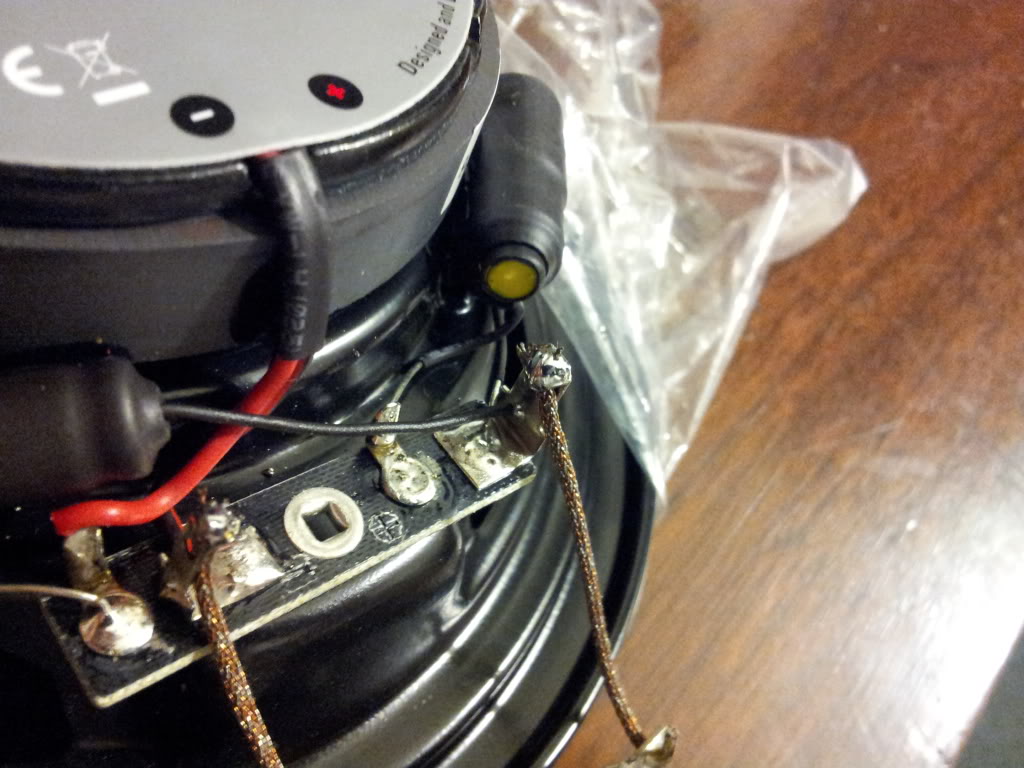
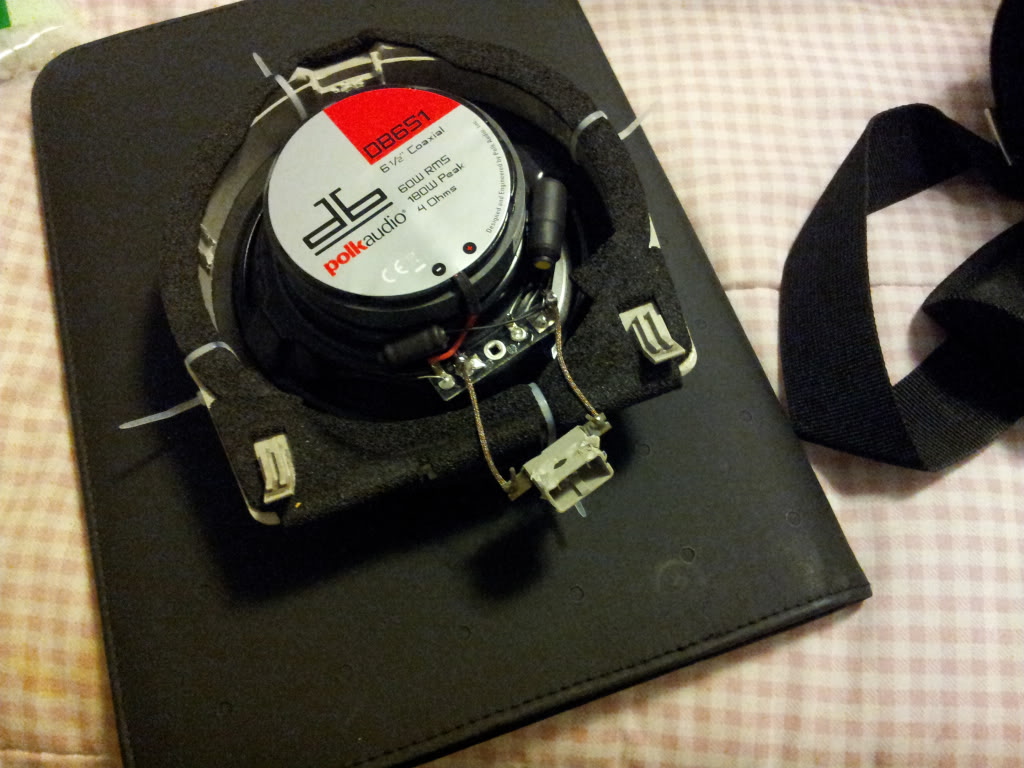
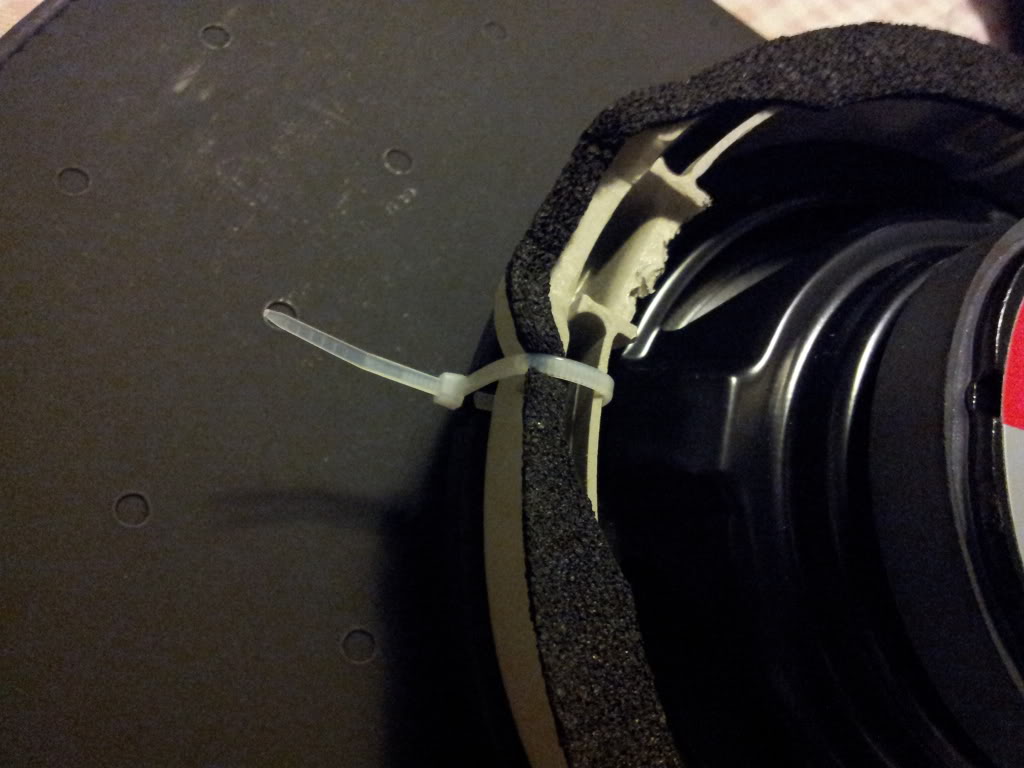
I tried to find quick-release female connectors at AutoZone to match the speaker male ones, and failed. So I soldered the Fit connector's wires onto the males. Not such a great job of soldering, but speaker wire's not so easy. Or at least this was my first time.
Then I mounted the test speaker on the gutted ring with cable ties. It does seem secure, at least.
Thread Starter
|
Member
Joined: Apr 2012
Posts: 24
From: NJ
TL;DR version:
Okay. Project done! The db651's sound great. Two gotchas: first, the speakers are secured either with screws, or spring clips at the top. If it's the latter, pop them loose by sticking a slotted screwdriver down from the top, then pulling away from the top. It came out easily.
Second, when prying the armrest covers off the door panels, just stick your prying tool slightly under the edge of the cover on the frontward underside of the cover - I initially pushed too far in, and the prying tool grabbed the part of the armrest that's attached to the door panel. You only want the edge of the cover.
Here's what the mount should look like, without broken pieces:

- When prying the armrest covers, insert your tool just under the edge
- If your speaker is not secured by a screw, it's a spring clip - push a slotted screwdriver down from the top
Okay. Project done! The db651's sound great. Two gotchas: first, the speakers are secured either with screws, or spring clips at the top. If it's the latter, pop them loose by sticking a slotted screwdriver down from the top, then pulling away from the top. It came out easily.
Second, when prying the armrest covers off the door panels, just stick your prying tool slightly under the edge of the cover on the frontward underside of the cover - I initially pushed too far in, and the prying tool grabbed the part of the armrest that's attached to the door panel. You only want the edge of the cover.
Here's what the mount should look like, without broken pieces:

Thread
Thread Starter
Forum
Replies
Last Post
elwood52rams
1st Generation (GD 01-08)
0
Mar 2, 2013 07:06 PM
