
DIY: Building a new rear floor.


Thread Starter
|
Member
Joined: Apr 2011
Posts: 524
From: North West NJ

DIY: Building a new rear floor.
I have always thought the rear floor in the fit was flimsy since the day I bought it. So, since I am also looking for a place to mount my new car amp, I decided to finally build a new one, it isn't hard at all.
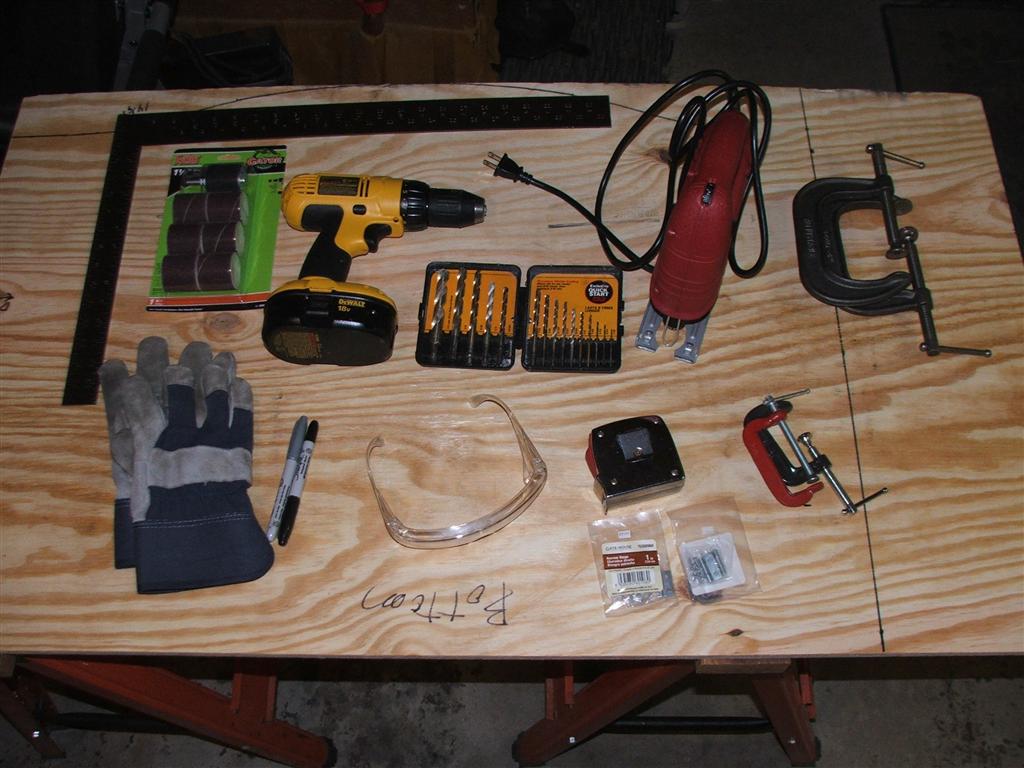
First, I am not responsible for any damage you do to your car or yourself if you decide to undertake this build. You will be doing this at your own risk. Power tools can be dangerous, observe all safety precautions. Wear eye and ear protection. Don't wear gloves around power tools as they can get stuck in the tool and pull your hand in, whereas your skin will just rip and you will loos a bit since you can pull your hand away.
Second, tools. Here is what I used. You can use other tools to achieve the same thing if you like. Though you will need a saw that can cut gentle curves for the end piece.
Next, take the piece of plywood you will be using. I picked up a 4x4 sheet of 1/2" pine ply from lows for $19, had them cut it to 28" wide (that is how deep the floor panel is including the hinge, not including the flaps for the seats though). If you look, there are two steps in the plastic on the side of the floor, one for the stock floor, and then another, further out, that is 1/2" deep. I chose to extend the floor section out to this for a nice flat floor. It is 38.75" wide.
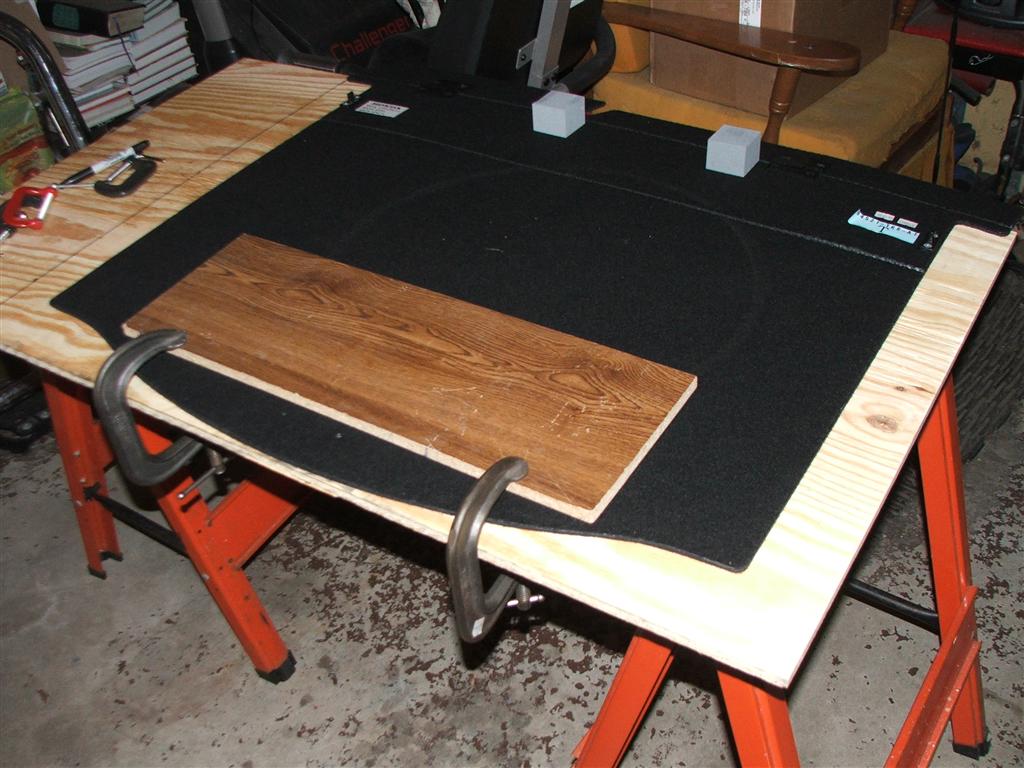
Lay the original floor on the wood and clamp it in place so you can trace it, making sure to extend the sides out equally if you choose to make it wider like mine. Mark the holes for the string so you can lift it later as well, and don't forget to put marks for where the hinge is, you will need to cut a strait line there so you can hinge it later.
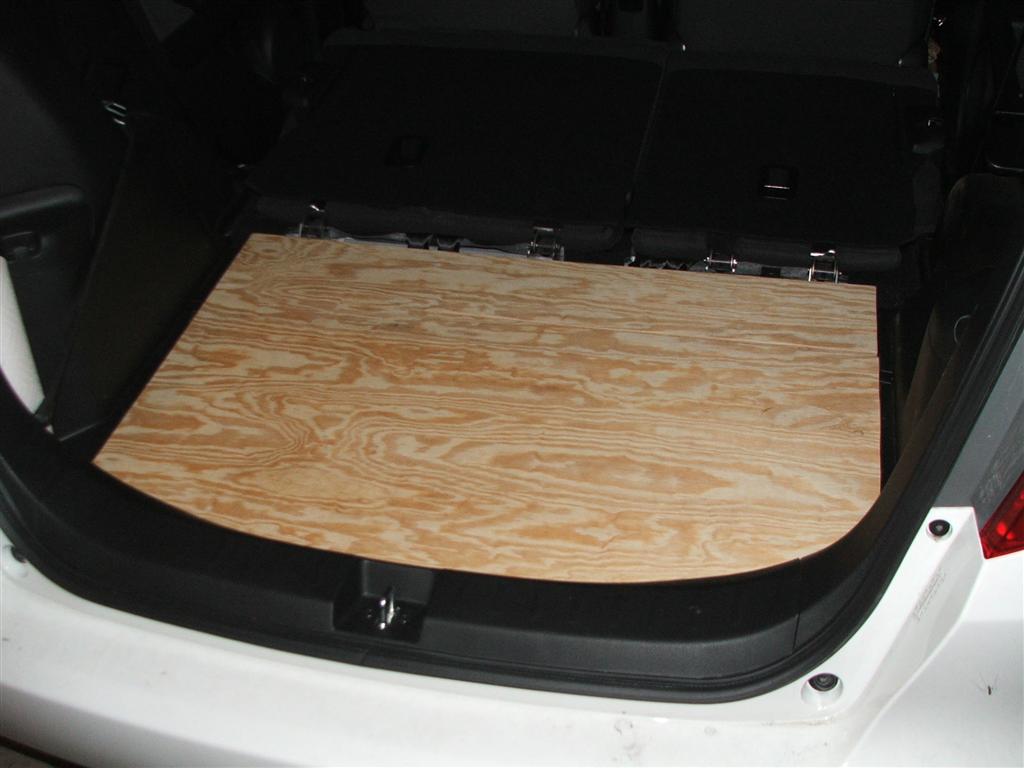
Next step is cut it out and drill the holes.
Ta-da! a new floor. If you choose to paint it this would be a good time to do so (and where mine is at now, I will be showing how to add the hinges later once it is dry).
The plan is to cut some thick carpet to go over it and act as the flaps to the seat as well.
First, I am not responsible for any damage you do to your car or yourself if you decide to undertake this build. You will be doing this at your own risk. Power tools can be dangerous, observe all safety precautions. Wear eye and ear protection. Don't wear gloves around power tools as they can get stuck in the tool and pull your hand in, whereas your skin will just rip and you will loos a bit since you can pull your hand away.
Second, tools. Here is what I used. You can use other tools to achieve the same thing if you like. Though you will need a saw that can cut gentle curves for the end piece.
Next, take the piece of plywood you will be using. I picked up a 4x4 sheet of 1/2" pine ply from lows for $19, had them cut it to 28" wide (that is how deep the floor panel is including the hinge, not including the flaps for the seats though). If you look, there are two steps in the plastic on the side of the floor, one for the stock floor, and then another, further out, that is 1/2" deep. I chose to extend the floor section out to this for a nice flat floor. It is 38.75" wide.
Lay the original floor on the wood and clamp it in place so you can trace it, making sure to extend the sides out equally if you choose to make it wider like mine. Mark the holes for the string so you can lift it later as well, and don't forget to put marks for where the hinge is, you will need to cut a strait line there so you can hinge it later.
Next step is cut it out and drill the holes.
Ta-da! a new floor. If you choose to paint it this would be a good time to do so (and where mine is at now, I will be showing how to add the hinges later once it is dry).
The plan is to cut some thick carpet to go over it and act as the flaps to the seat as well.

Plywood is heavy as hell, nice work but 1/4" MDF would have probably been a better choice based on weight. The plywood is a little stronger but unless your kids are using the hatch as a trampoline then it should be fine with the MDF.
Again, nice work!
Again, nice work!
Thread Starter
|
Member
Joined: Apr 2011
Posts: 524
From: North West NJ

This is the fun part though, waiting for the black rubberized paint to dry. Then I need to decide what to do for carpet. I will probably go with that outdoor stuff like jcuecker did.
Also, forgot to say thanks to jcuecker for the inspiration for this.


Member
Joined: Apr 2012
Posts: 48
From: Charlotte, NC
I agree with the OP, 1/4 mdf would be too thin, and I believe it is actually more dense than most plywood. That's why it's used for sub boxes.
I would like to do this mod, but with a piece of hard plastic. I'll update if I ever find a good donor source @ lowes. I'm thinking plastic with dense foam on both sides, for sound proofing
I would like to do this mod, but with a piece of hard plastic. I'll update if I ever find a good donor source @ lowes. I'm thinking plastic with dense foam on both sides, for sound proofing

Thread
Thread Starter
Forum
Replies
Last Post
Taffeta Fit
Fit Photos & Videos
3
Jun 17, 2009 08:26 PM
kenton
General Fit Talk
10
Jun 5, 2008 02:43 AM