
Starter replacement


Thread Starter
|
New Member
Joined: Jul 2012
Posts: 12
From: Los Angeles

Starter replacement
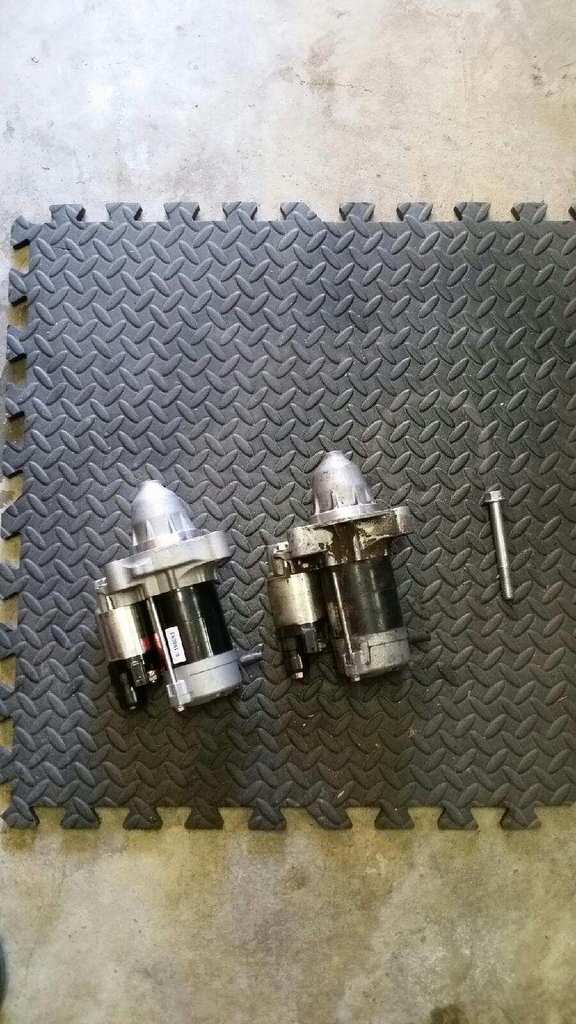
Had to replace the starter today because it was "sticking" while the gear was retracting from the flex plate/flywheel causing a grinding noise.
Basically you'll need a 17mm, 14mm Deep Socket, 12mm for positive cable on the starter, and a 10mm for disconnecting the battery, oil dip stick, and wiring harness.
1. Disconnect the battery
2. Remove 17mm bolt holding the starter near the battery side of the car (US Driver).
3. remove (2) 10mm bolts holding the wiring harness to the intake manifold.
4. Unplug knock sensor, water temperature sensor, and signal sensor to the starter. This is the bundle with the wiring harness you want to move out of the way.
5. Lift up the car.
6. Remove 10mm bolt holding dip stick and remove the dipstick and the tube that holds it. (This sets you up for the next step)
7. Remove the 14mm bolt, which is under the Thermostat housing, holding the starter to the transmission. Using various extensions & swivel sockets can make your life easier. I only used a flex head ratchet and deep socket. (It's really torqued on there so use some aggression)
8. Pull the starter out of the transmission and you should be able to remove the last 12mm nut that is under a rubber grommet located on the starter. It should be near the sensor you unplugged earlier. (Note: if you didn't unplug your battery and this live wire touches any part of the engine. Say goodbye to all your fuses and ecu.)
9. Pull the starter from under the car while moving some coolant / ac lines out of the way.
Success! Then put everything back for fun.
Member

Joined: Nov 2009
Posts: 824
From: Atlanta, Georgia
about to do mine tomorrow!
Been having the same grinding sound every morning on the first start since winter....I'm concerned it's damaging the transmission....any thoughts?
So I tried doing it today thinking 2 hrs was enough time...it took an hr to remove the bottom bolt alone and could not Remove the dipstick. i was able to rotate the dipstick but they was no indication that I could pull it out. Any advice?
So I tried doing it today thinking 2 hrs was enough time...it took an hr to remove the bottom bolt alone and could not Remove the dipstick. i was able to rotate the dipstick but they was no indication that I could pull it out. Any advice?

Member
Joined: Aug 2012
Posts: 1,199
From: Vermont, USA
There's no way a starter making bad noises would be damaging to the transmission. The two parts do not connect to each other directly. There might be a small risk of damaging the flywheel, though I suspect that's not too likely to cause any big problems as there are so many more teeth on the flywheel than the starter pinion.
Member
Joined: Nov 2009
Posts: 824
From: Atlanta, Georgia
Did it!
So this was the most pain in the ass job I've done for this car and I've done plenty, including shocks and springs.
Hardest part: the top bolt, the electrical connectors to the sensors and putting the new one back in place. Took about 3 hrs....old one was rusty on the outside and the gears showed signs or wear... started right up without grinding.
Decided to replace outer tie rods as well....another pita bUT a propane torch helped there.

Member
Joined: Feb 2013
Posts: 34
From: CA
I replaced the starter in my 09 Sport today, using this DIY. Posted about it here:
https://www.fitfreak.net/forums/2nd-...ter-today.html
https://www.fitfreak.net/forums/2nd-...ter-today.html

New Member
Joined: Nov 2016
Posts: 2
From: Arizona
Bumping an old post here...anyone know if this procedure is the same on a 1G fit? My wife's '08 1G is suffering from the cold weather starter grind. It's worse this year than it was last year and I'm hoping to just be able to replace it myself proactively, but I cannot find a DIY specific to the 1G car.

New Member
Joined: Apr 2017
Posts: 9
From: San Diego, CA
Tom, just posted a DIY, since I couldn't find one for the GD3.
https://www.fitfreak.net/forums/1st-...ml#post1369551
https://www.fitfreak.net/forums/1st-...ml#post1369551

Member
Joined: Nov 2016
Posts: 24
From: USA
I know for most Denso starters that you can replace the copper contacts and plunger inside the starter for a cheap repair. Over time with thousands of starts the plunger will wear the contacts down until the starter 'dies'. You're left with just a loud, 'click' if that.
Repair is pretty easy, remove the starter, there's maybe 2 bolts holding the solenoid contacts and replace those and install a new plunger. Often times the plunger sold is longer than the housing, but it's made of copper so it can be cut to correct length.
Here's an
Repair is pretty easy, remove the starter, there's maybe 2 bolts holding the solenoid contacts and replace those and install a new plunger. Often times the plunger sold is longer than the housing, but it's made of copper so it can be cut to correct length.
Here's an
Member
Joined: Aug 2008
Posts: 1,606
From: Orange, CA, USA
I know for most Denso starters that you can replace the copper contacts and plunger inside the starter for a cheap repair. Over time with thousands of starts the plunger will wear the contacts down until the starter 'dies'. You're left with just a loud, 'click' if that.
Repair is pretty easy, remove the starter, there's maybe 2 bolts holding the solenoid contacts and replace those and install a new plunger. Often times the plunger sold is longer than the housing, but it's made of copper so it can be cut to correct length.
Repair is pretty easy, remove the starter, there's maybe 2 bolts holding the solenoid contacts and replace those and install a new plunger. Often times the plunger sold is longer than the housing, but it's made of copper so it can be cut to correct length.
 Sorry
Sorry

New Member
Joined: May 2019
Posts: 1
From: Princeton
Replaced starter from the top with only a standard tool set, specifically Crescent brand 170 (mostly tiny useless bits) tool set from Amazon, $154. Starter was $99, and battery cost more than both of them here in central NJ.
Old post but new member and new method to changing the starter. I'll either put pictures and video in this thread or start my own. First off, the knock sensor clip is clocked in the most inconvenient way. Looking straight onto it, the push to release was at 10:30am, nicely tucked behind the metal coolant "oops" line. It might vary but if you feel for the square sides you'll find the button hiding between the higher than needed "walls" of the connector. I removed the entire wiring harness, starting at the alternator. I also removed the passenger side fan which if you haven't already done it, has a couple of parts that need uncliping at the bottom of the shroud. Once the fan was removed it was a lot easier to navigate the starter up and out. I didn't have to remove the oil filter, nor the intake but I did take out the dip-stick. I managed to get the dip stick tube out of the block using a simple screw driver and mechanical advantage. A video or picture will be worth more words than I care to type. Basically I put the screw driver under the dip stick tube bracket and up against the block. I had a bout a 4:1 force multiplication from where the fulcrum sat on the block. While keeping my hand on the tube and pulling it while keeping it straight, the tube popped right up and out. That was probably the easiest part of the job and this fit has over 200k NJ non-garaged miles on it. The owner even bragged about never washing it and having driven it across country multiple times.
With the wiring harness out of the way (unbolting and unclipping) the next job was the starter itself. A 14mm boxed end wrench was the only tool I needed for the top bolt. Oh, and a really strong "row" action to get it started. I'm pretty strong so this might be more difficult for some people. Once it got loose I used my fingers to get it further out but left it in. The bottom 17mm bolt was a deep socket on a 3/8" ratchet with a 5/8 wrench over the end to help give me leverage. If you haven't seen the trick, it's a good one and again, a video/picture will explain it better than I can. Using both hands, one on the rachet handle holding the wrench end and the other on the open end of the wrench, it broke lose. Removed it only a few mm then took a hammer and tapped gently on the 17mm bolt to brake the corrosion. Pried a little on the top with a screw driver while tapping the bottom bolt with the hammer until it came out. Remove the screws and you can gently, patiently, clock it out between the annoying metal coolant pipe and the lower radiator coolant line. Up and out it came. Reverse the order with the new starter only to find out it still slow cranks because your positive starter wire is badly corroded and that's what you should have looked at first with the nice Fluke multimeter that you overspent on. Do a voltage drop test first folks! Learn from my mistake. I mean mistakes

New Member
Joined: Apr 2021
Posts: 6
From: Joliet
Fit startet shims?
I replaced the starter in my 09 Sport today, using this DIY. Posted about it here:
https://www.fitfreak.net/forums/2nd-...ter-today.html
https://www.fitfreak.net/forums/2nd-...ter-today.html
Member
Joined: Apr 2014
Posts: 1,628
From: California
Finally. Now, I can get up from my computer.


Thread
Thread Starter
Forum
Replies
Last Post
MyFitment
2nd Generation (GE 08-13)
14
Aug 2, 2020 03:29 PM
claymore
Fit DIY: Repair & Maintenance
3
Jan 16, 2008 01:19 AM