
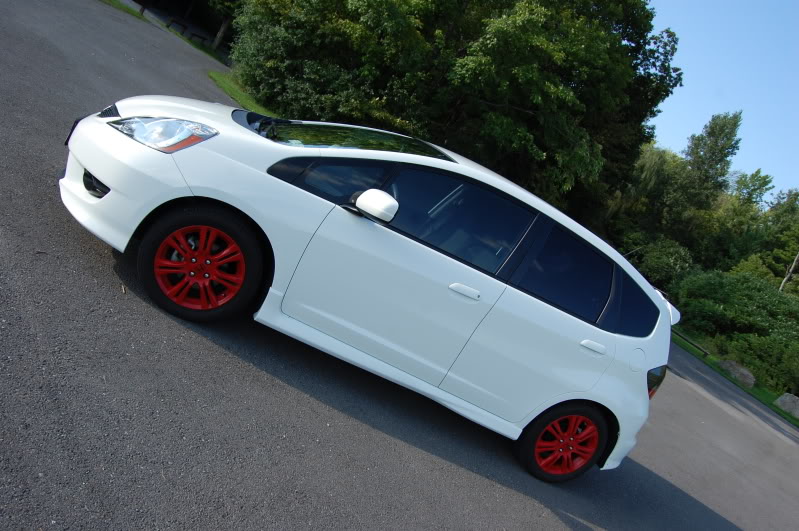
DIY Plasti-Dipped Wheels


What you will need for this project is:
Step One:
The first step is to take all of the wheels off of the car.
Step Two:
In the second step you want to clean all the wheels the best you can to get rid of any dirt and grease that may be on them. This step is very important to make sure the plasti dip will have the best surface to stick to.
Step Three:
Stick Index Cards Along the outside of the rim to protect the time from the Plasti Dip. Here is a picture of what it will look like. (Note the picture is after the fact that i painted them, The wheels are back on the car, i am simply just showing how to place the cards.
DSC_3985.jpg?t=1311546189
Step Four:
Step four is when you start to paint. Also make sure you put just a little bit of tape around your valve covers so that they dont get sealed shut. Take your time an do light coats. It doesnt seem very thick for the first two coats you can still see alot of the previous rim. The second coat it really starts to thicken up and become more covered. It slowly builds into a nice finish. You know plasti dip is dry when it turns from a glossy finish to a dull matte finish.
Step Five: Make sure the wheels are dry. I recommend letting them dry for 10 or so hours after the fact. The paint needs time to fully dry and set.
After that they can be put back on the car.
Be carful when putting the lugs back on. The lugs will cause the plasti dip to rip around the inside of the lug holes on the wheel. This is fine. I touched this up after but it is not noticeable if you dont. It is not a step you really need to take.
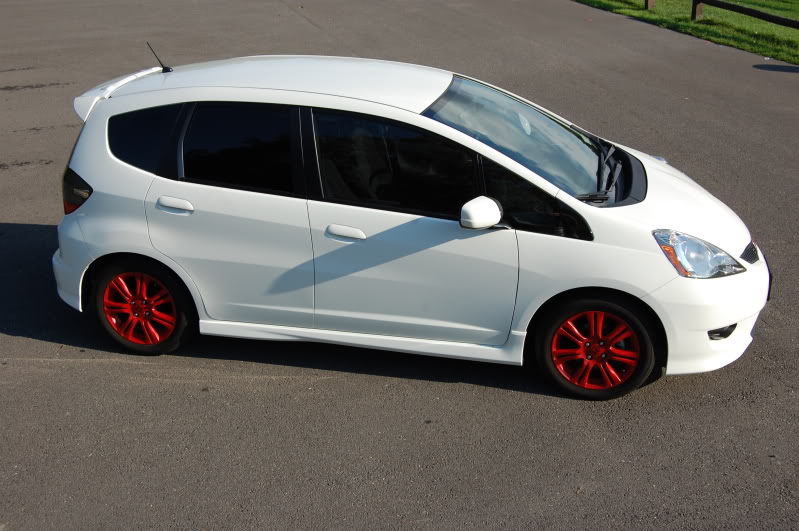
After the wheels are back on the car You have a whole new look!
Simple and easy way to change it up.
So go have fun with it
you can always peel it off if you dont like it :P
- 3-4 cans of Plasti Dip
- Playing Cards, Or Index Cards
- A set of Wheels
- Painters Tape
- Jack Stands and a Jack
Step One:
The first step is to take all of the wheels off of the car.
Step Two:
In the second step you want to clean all the wheels the best you can to get rid of any dirt and grease that may be on them. This step is very important to make sure the plasti dip will have the best surface to stick to.
Step Three:
Stick Index Cards Along the outside of the rim to protect the time from the Plasti Dip. Here is a picture of what it will look like. (Note the picture is after the fact that i painted them, The wheels are back on the car, i am simply just showing how to place the cards.
DSC_3985.jpg?t=1311546189
Step Four:
Step four is when you start to paint. Also make sure you put just a little bit of tape around your valve covers so that they dont get sealed shut. Take your time an do light coats. It doesnt seem very thick for the first two coats you can still see alot of the previous rim. The second coat it really starts to thicken up and become more covered. It slowly builds into a nice finish. You know plasti dip is dry when it turns from a glossy finish to a dull matte finish.
Step Five: Make sure the wheels are dry. I recommend letting them dry for 10 or so hours after the fact. The paint needs time to fully dry and set.
After that they can be put back on the car.
Be carful when putting the lugs back on. The lugs will cause the plasti dip to rip around the inside of the lug holes on the wheel. This is fine. I touched this up after but it is not noticeable if you dont. It is not a step you really need to take.
After the wheels are back on the car You have a whole new look!
Simple and easy way to change it up.
So go have fun with it
you can always peel it off if you dont like it :P
Plasti dip can also be painted and cleared just like any other paint. That way color can be changed as simple as peeling it off and redoing it.
Also be careful at the car wash. Pressure washing will blast it right off if not careful.
Also be careful at the car wash. Pressure washing will blast it right off if not careful.


From everything I have been reading on this you want to apply it thick coats so its easier to peel off if you decide to change your mind. Applying it thin coats makes the finish harder to remove cleanly if you ever decide to change it. Also, again from forum sourcing, its easier to "patch" imperfections should something tear away. Any thoughts?
being a noob to the plasti dip stuff...what does it look like? is it a can? like a paint can, spray can? and what colours are available?
this comes off easy too? if so, i'm gonna do my stock sport rims in white if available. little more info, and i got myself a winter project. lol
this comes off easy too? if so, i'm gonna do my stock sport rims in white if available. little more info, and i got myself a winter project. lol

New Member
Joined: Aug 2011
Posts: 5
From: Long Island, NY
being a noob to the plasti dip stuff...what does it look like? is it a can? like a paint can, spray can? and what colours are available?
this comes off easy too? if so, i'm gonna do my stock sport rims in white if available. little more info, and i got myself a winter project. lol
this comes off easy too? if so, i'm gonna do my stock sport rims in white if available. little more info, and i got myself a winter project. lol
Dip Coating & Specialty Rubber Coating | Plasti Dip Create Your Color Kit
Granted, I didn't even know what Plastidip was until I saw this thread so for all I know this is the wrong stuff.
I tried to find white when i did mine, but they were sold out i could see they sold it though 
so i did black lol, but hopefully over the winter im going to take the time and properly paint my wheels, i have always wanted to do a white on white style,
Maybe something funky but not for a while lol
so i did black lol, but hopefully over the winter im going to take the time and properly paint my wheels, i have always wanted to do a white on white style,
Maybe something funky but not for a while lol

I just can't see white plastidipped wheels looking clean even after a 5 mile drive.
If you want white...I would black or white plastidip, then spraypaint white over it with a clear. That gives you a clean finish thats also removable.
Or just plastidip white, then a few clears overs it so it repels dirt a little better than h\just leaving it bare.
Also you can order a 6 pack of any color from home depot for $40, just go to their pro desk. They just stock the black instore, but can order any color.
Last edited by britdevine; Sep 2, 2011 at 03:13 AM.

Member
Joined: Sep 2011
Posts: 180
From: Mililani, Hawaii
I plasti-dipped my rims a while back but i peeled them off because i was always worried that something would scratch it and it would start to peel off. I was also concerned whenever i washed my car because since it's relatively fragile, i couldn't give it elbow grease to clean it up, so instead, i just painted them black. now it's a glossy black with red muteki lug nuts. i love it <3
so basically i just used the plasti-dip to see how my car would look with black rims and i liked it
so basically i just used the plasti-dip to see how my car would look with black rims and i liked it
so basically i just used the plasti-dip to see how my car would look with black rims and i liked it
i did the same thing with mine, i just havent gotten around to actually paint them but i am planning on doing that before summer arrives

Thread
Thread Starter
Forum
Replies
Last Post