MODS/ACCESSORIES for the GK


#802
 01-03-2015, 11:40 AM

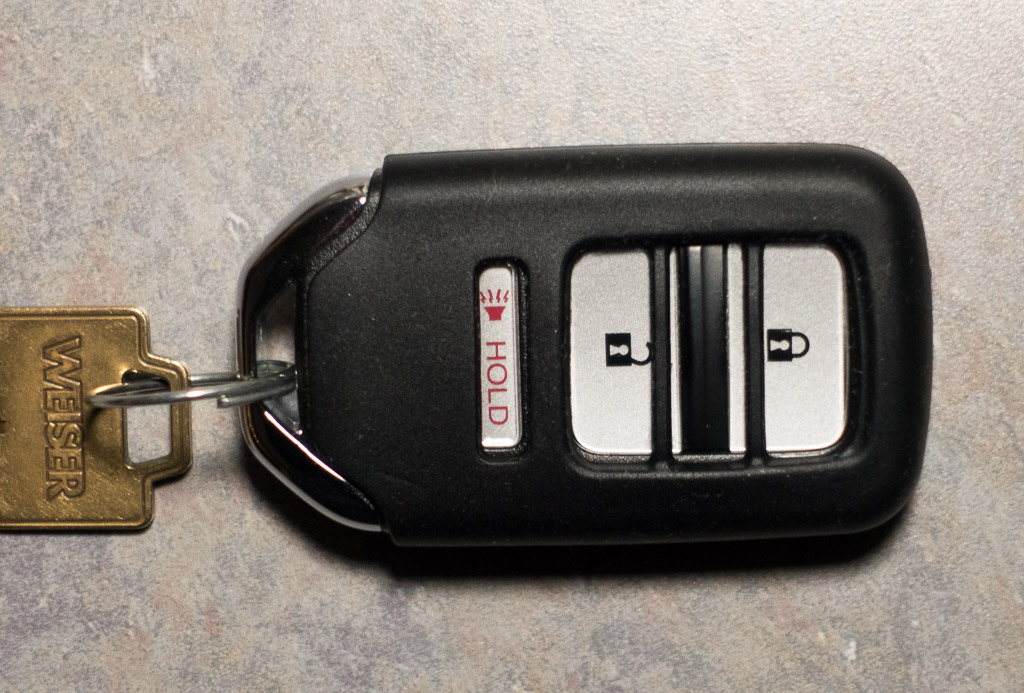
honda keyfob protector
honda keyfob protector
@ Amazon -
Fits nice and snug. $8
@ Amazon -
Fits nice and snug. $8
#803
01-03-2015, 12:01 PM
Wheelskins EuroPerf Perforated Leather Steering Wheel Cover
I selected the euro style (which works better on the 3 spoke designs) with perforated sides, smooth top and bottom.
Size for fit 2015 I personally measured was 14 1/2" x 4" which matched the online fit 2013 sizing.
Purchased on-line at autoanything for $57 incl CA tax and 10% promo code, with free shipping.
Wheelskins EuroPerf Perforated Leather Steering Wheel Covers - Sides Perforation
(All Fit models)
Part #: Black/Black Perf 14 1/2 X 4

Took several hours and I used the extra thread to wrap around the 3 spokes to tighten up the fit, especially the backside that otherwise doesn't get stitched. Word of warning... The perforated section is harder to stitch because it is more difficult to find the 'through' holes over the perfs.
'Tight is right' is definitely the case when stitching these and gloves help a lot.
Feels great while driving. A worthy upgrade for those wanting the leather steering wheel without the leather seats.
More pics here of follow up install.
Size for fit 2015 I personally measured was 14 1/2" x 4" which matched the online fit 2013 sizing.
Purchased on-line at autoanything for $57 incl CA tax and 10% promo code, with free shipping.
Wheelskins EuroPerf Perforated Leather Steering Wheel Covers - Sides Perforation
(All Fit models)
Part #: Black/Black Perf 14 1/2 X 4
Took several hours and I used the extra thread to wrap around the 3 spokes to tighten up the fit, especially the backside that otherwise doesn't get stitched. Word of warning... The perforated section is harder to stitch because it is more difficult to find the 'through' holes over the perfs.
'Tight is right' is definitely the case when stitching these and gloves help a lot.
Feels great while driving. A worthy upgrade for those wanting the leather steering wheel without the leather seats.
More pics here of follow up install.
Last edited by tbFit; 02-20-2015 at 10:35 PM.
#804
01-03-2015, 12:15 PM
DIY Cargo Cover
Following the $11 DIY Cargo Cover guide, picked up a sheet of black foam board at Michaels for $15 and made my own cargo cover.
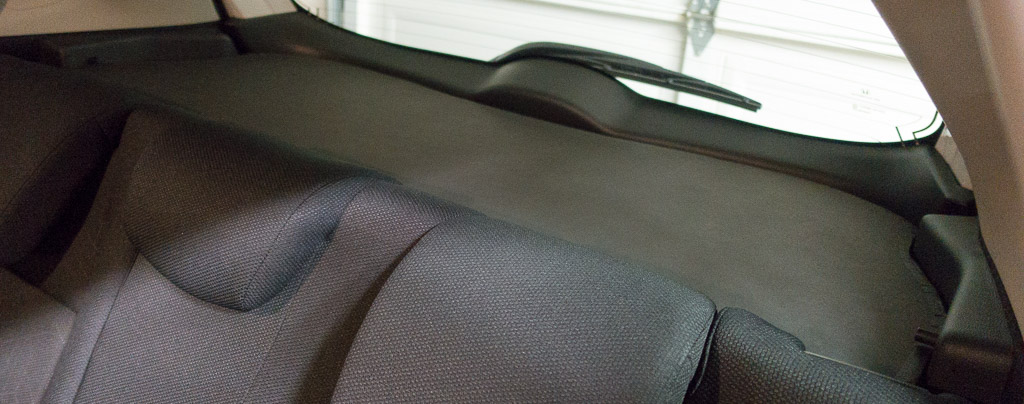
I made a cardboard template first, cut to shape with a minor amount of trimming, added some gaffers tape to the perimeter and installed. It bends nicely around the rear middle wiper assembly and fits pretty snug.
It came out pretty nice and it wedges in nicely without any velcro. Just bend slightly in the middle up or down to remove and chuck out of the way for the larger costco runs.
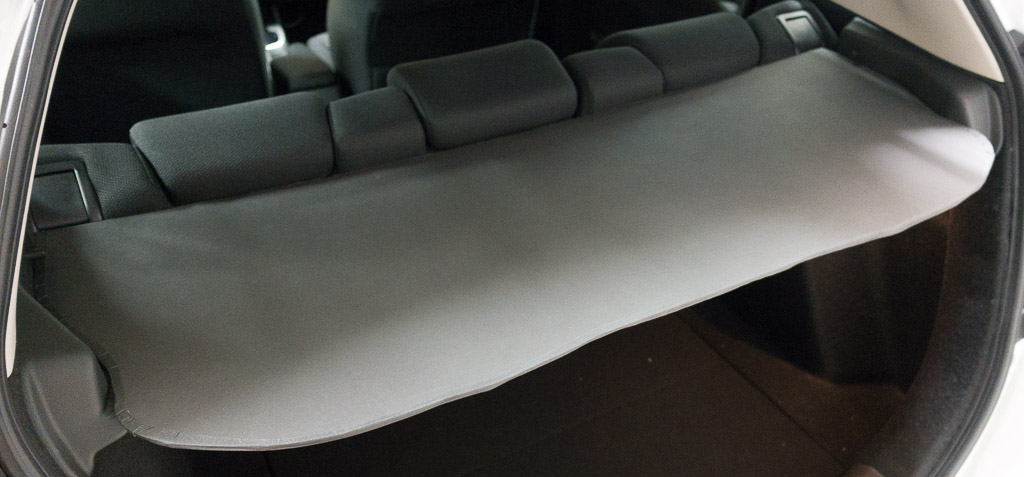
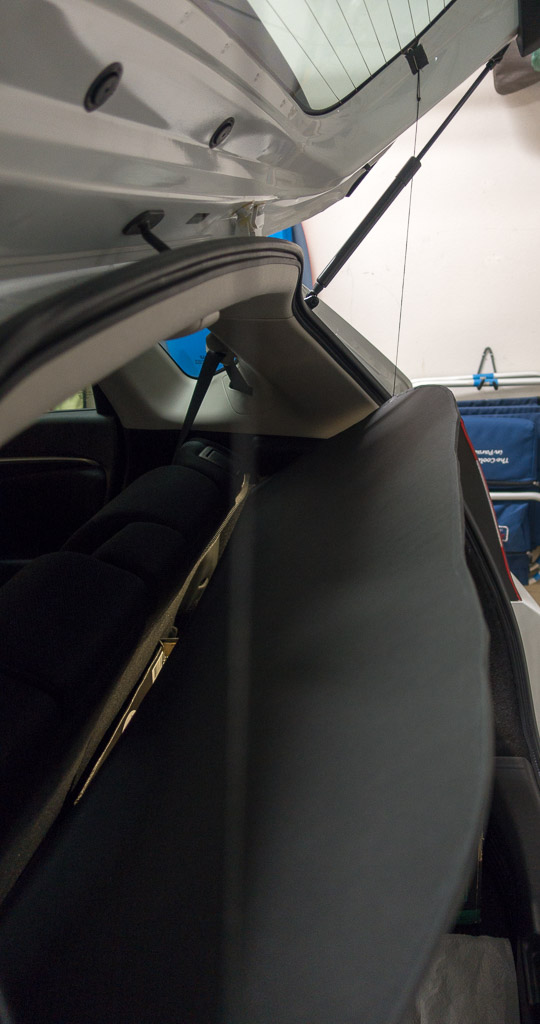
I added some strong thread left over from a previous wheelskin cover for lifting duty and attached paper clips with tape for attachment points on the trunk. It pivots reasonably well when the hatch opens.
I made a cardboard template first, cut to shape with a minor amount of trimming, added some gaffers tape to the perimeter and installed. It bends nicely around the rear middle wiper assembly and fits pretty snug.
It came out pretty nice and it wedges in nicely without any velcro. Just bend slightly in the middle up or down to remove and chuck out of the way for the larger costco runs.
I added some strong thread left over from a previous wheelskin cover for lifting duty and attached paper clips with tape for attachment points on the trunk. It pivots reasonably well when the hatch opens.
#805
01-03-2015, 12:21 PM
DIY Cargo Organizer and LED light
Two empty beer boxes, and a spare bungee cord. Cost $0 (not including the beer).
I also bought the LED light on Amazon for the trunk which is at least 4x as bright.
@ Amazon, 2 pack for $7
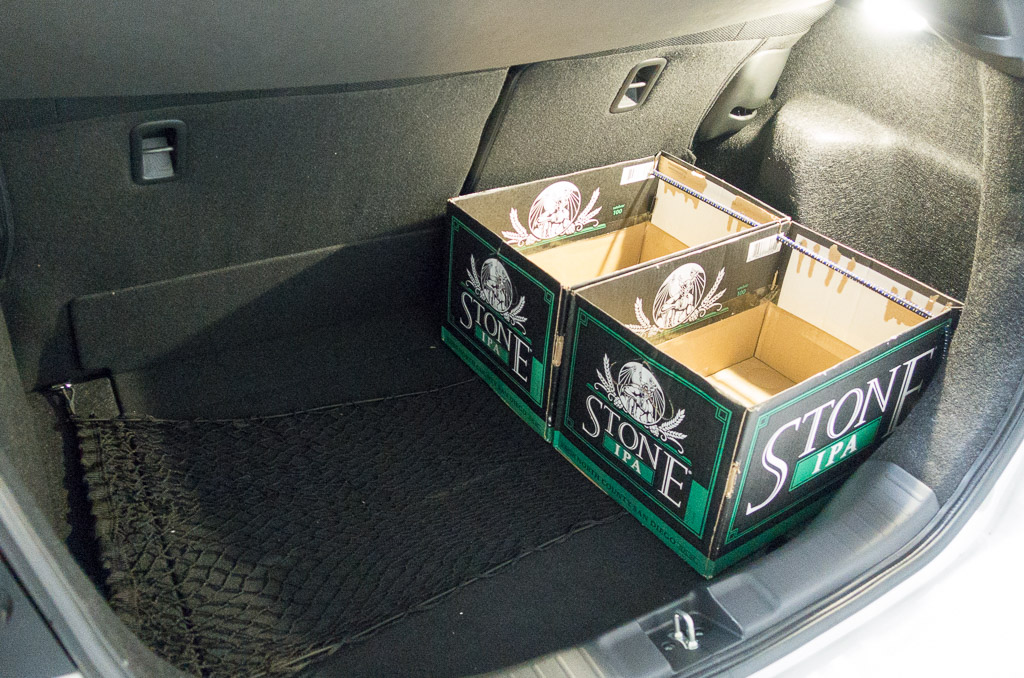
I love the cargo area hooks!
I also bought the LED light on Amazon for the trunk which is at least 4x as bright.
@ Amazon, 2 pack for $7
I love the cargo area hooks!
#806
01-03-2015, 12:28 PM
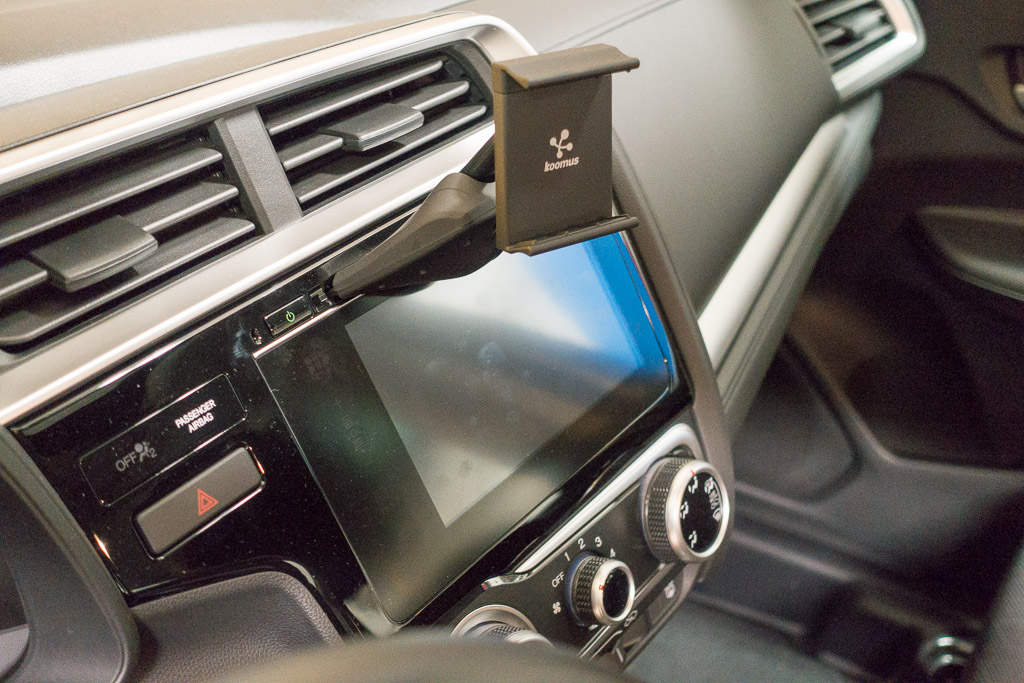
CD Slot Mount Smartphone Holder
Found a good use for the antiquated CD slot...
This phone holder is super sturdy and far superior to the vent versions.
@ Amazon for $20
..and winner of the longest product description ever.
This phone holder is super sturdy and far superior to the vent versions.
@ Amazon for $20
..and winner of the longest product description ever.
#807
01-03-2015, 01:00 PM
Two empty beer boxes, and a spare bungee cord. Cost $0 (not including the beer).
I also bought the LED light on Amazon for the trunk which is at least 4x as bright.
@ Amazon, 2 pack for $7
Jtech 2x T10 921 194 24- SMD LED Bulb Super Bright Warm White

I love the cargo area hooks!
I also bought the LED light on Amazon for the trunk which is at least 4x as bright.
@ Amazon, 2 pack for $7
Jtech 2x T10 921 194 24- SMD LED Bulb Super Bright Warm White
I love the cargo area hooks!
#808
01-03-2015, 01:32 PM
Increased Seat Bottom Pitch- Front Seats
Thanks to the tips from others on the site for increasing seat comfort, I went to Lowes and picked up some parts and raised the driver and passenger seats by 3/4" on the front side.
I'm 5'9" with 34" inseam and found it difficult to get a happy spot in these seats and when I came to a stop, i always felt like i was sliding off the front of the seat.
Raising the front by adding washers was fairly straightforward and most of the time was spent finding the parts at Lowes.
Revised 2015-01-26 - swapped out the Lowes parts and went with class 10.9 bolts and larger fender washers.
The parts I used are available at amazon:
Parts list:
Cap Screws (bag of 10) $8.23
Fender Washers (bag of 100) $14.90
Cost was around $24 for the parts.
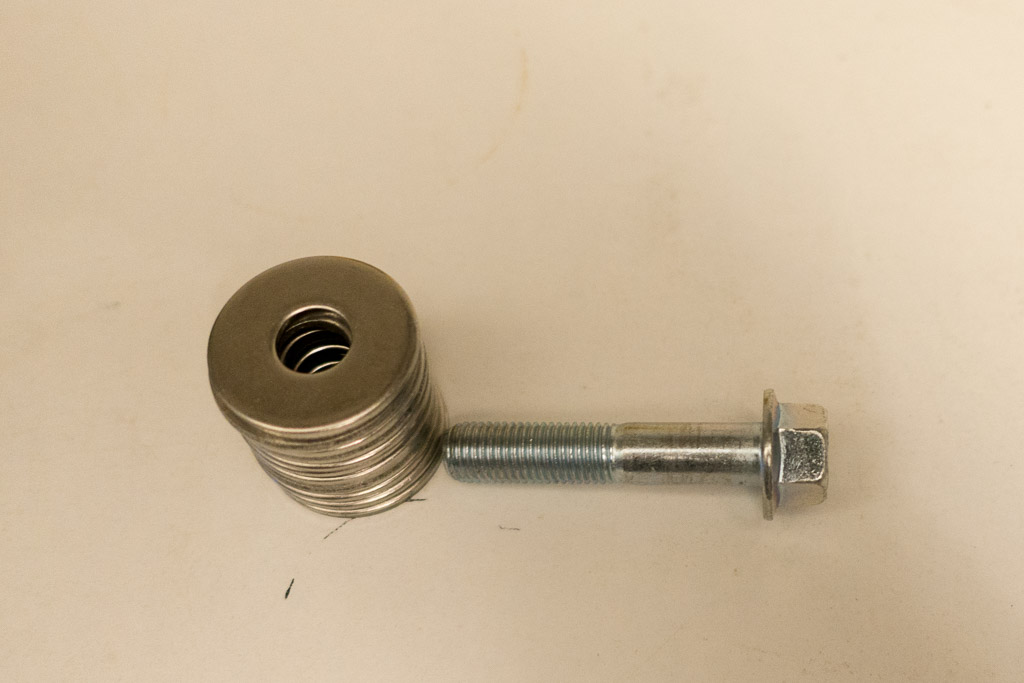
I used black electrical tape to keep the washers together and keep them from falling under the carpet.
To make it easier to get aligned on the front, I filed the front holes in order to get a vertical enough approach on the bolt hole.
The higher you go, the more difficult it becomes to get the proper angle on the bolt hole. I used a torque wrench to make sure I did not strip out the bolt holes!
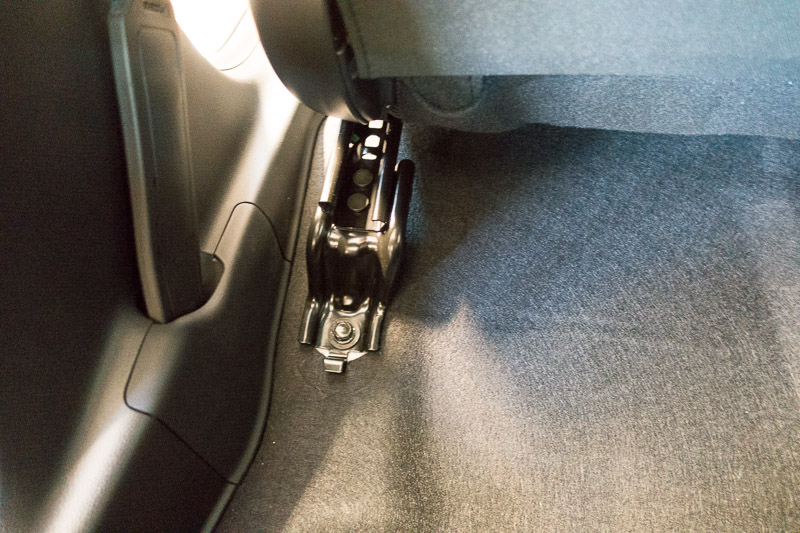
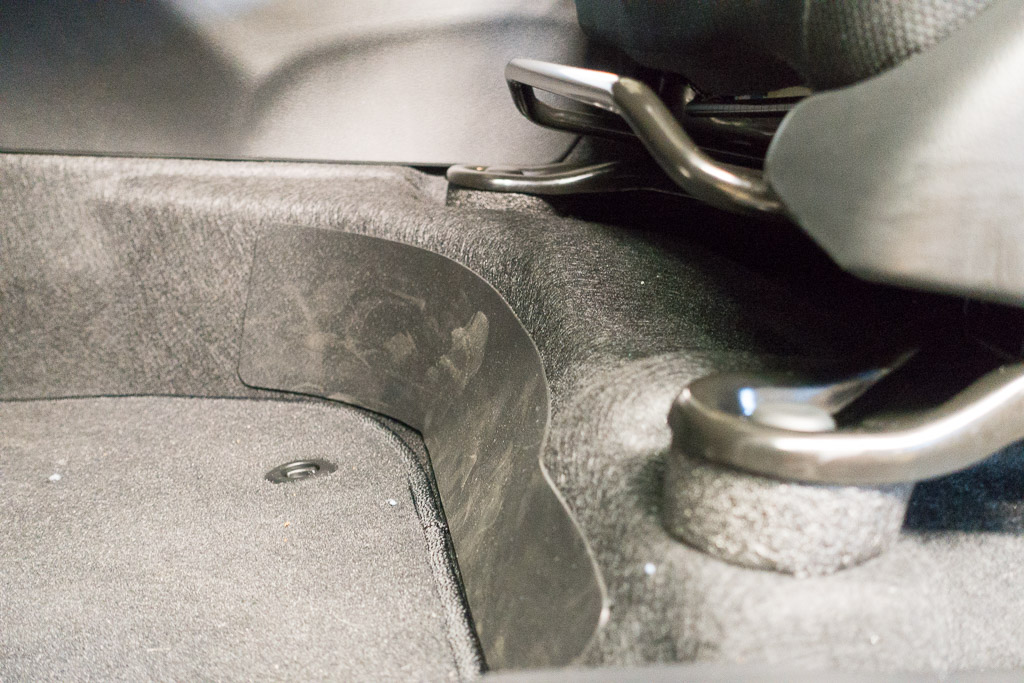
The little plastic cover in the back comes off if you grab it and pull down and to the side and back. There is a tab at the rear that you need to slide under to get it back on snug.

Finished install with black pipe foam added:
Comfort is greatly improved! By far the best mod to date, I no longer feel like I'm sliding off the front seats when braking to a stop.
I'm 5'9" with 34" inseam and found it difficult to get a happy spot in these seats and when I came to a stop, i always felt like i was sliding off the front of the seat.
Raising the front by adding washers was fairly straightforward and most of the time was spent finding the parts at Lowes.
Revised 2015-01-26 - swapped out the Lowes parts and went with class 10.9 bolts and larger fender washers.
The parts I used are available at amazon:
Parts list:
Cap Screws (bag of 10) $8.23
Fender Washers (bag of 100) $14.90
Cost was around $24 for the parts.
I used black electrical tape to keep the washers together and keep them from falling under the carpet.
To make it easier to get aligned on the front, I filed the front holes in order to get a vertical enough approach on the bolt hole.
The higher you go, the more difficult it becomes to get the proper angle on the bolt hole. I used a torque wrench to make sure I did not strip out the bolt holes!
The little plastic cover in the back comes off if you grab it and pull down and to the side and back. There is a tab at the rear that you need to slide under to get it back on snug.
Finished install with black pipe foam added:
Comfort is greatly improved! By far the best mod to date, I no longer feel like I'm sliding off the front seats when braking to a stop.
Last edited by tbFit; 01-26-2015 at 10:59 AM. Reason: updated with revised parts from amazon
#809
01-03-2015, 01:51 PM
Thanks to the tips from others on the site for increasing seat comfort, I went to Lowes and picked up some parts and raised the driver and passenger seats by 3/4" on the front side.
I'm 5'9" with 34" inseam and found it difficult to get a happy spot in these seats and when I came to a stop, i always felt like i was sliding off the front of the seat.
Raising the front by adding washers was fairly straightforward and most of the time was spent finding the parts at Lowes.
The parts I used at Lowes were in the hardware section where they have specialty drawers in metric.
Parts list:
4x - Item# 883204
10-mm-1.25 x 40-mm Zinc Plated Metric Hex Bolt
The Hillman Group 10-mm-1.25 x 40-mm Zinc Plated Metric Hex Bolt
(unfortunately, the 1.25 pitch did not come in stainless steel, perhaps Home Depot has it?)
9x - Item# 882100
5-Count 10-mm Stainless Steel Metric Flat Washers
The Hillman Group 5-Count 10-mm Stainless Steel Metric Flat Washers
1x - Item# 882104
5-Count 10-mm Metric Split Lock Washers
The Hillman Group 5-Count 10-mm Metric Split Lock Washers
Cost was around $18 for the parts.
To confirm the thread size and pitch, I brought the original with me and used the screw in guides on the aisle.
The stock bolts are 14mm head and these replacements have a 17mm head.
Here are some pics from the install.


I used black electrical tape to keep the washers together and keep them from falling under the carpet.

Installed:

To make it easier to get aligned on the front, I loosened up the rear bolts. Which worked great on the drivers side, but the passenger side needed a little bit of filing on the front holes in order to get a vertical enough approach on the bolt hole.
The higher you go, the more difficult it becomes to get the proper angle on the bolt hole. I also used hand tightening to make sure I did not strip out the bolt holes!

The little plastic cover in the back comes off if you grab it and pull down and to the side and back. There is a tab at the rear that you need to slide under to get it back on snug.

Comfort is greatly improved! By far the best mod to date, I no longer feel like I'm sliding off the front seats when braking to a stop.
I'm 5'9" with 34" inseam and found it difficult to get a happy spot in these seats and when I came to a stop, i always felt like i was sliding off the front of the seat.
Raising the front by adding washers was fairly straightforward and most of the time was spent finding the parts at Lowes.
The parts I used at Lowes were in the hardware section where they have specialty drawers in metric.
Parts list:
4x - Item# 883204
10-mm-1.25 x 40-mm Zinc Plated Metric Hex Bolt
The Hillman Group 10-mm-1.25 x 40-mm Zinc Plated Metric Hex Bolt
(unfortunately, the 1.25 pitch did not come in stainless steel, perhaps Home Depot has it?)
9x - Item# 882100
5-Count 10-mm Stainless Steel Metric Flat Washers
The Hillman Group 5-Count 10-mm Stainless Steel Metric Flat Washers
1x - Item# 882104
5-Count 10-mm Metric Split Lock Washers
The Hillman Group 5-Count 10-mm Metric Split Lock Washers
Cost was around $18 for the parts.
To confirm the thread size and pitch, I brought the original with me and used the screw in guides on the aisle.
The stock bolts are 14mm head and these replacements have a 17mm head.
Here are some pics from the install.
I used black electrical tape to keep the washers together and keep them from falling under the carpet.
Installed:
To make it easier to get aligned on the front, I loosened up the rear bolts. Which worked great on the drivers side, but the passenger side needed a little bit of filing on the front holes in order to get a vertical enough approach on the bolt hole.
The higher you go, the more difficult it becomes to get the proper angle on the bolt hole. I also used hand tightening to make sure I did not strip out the bolt holes!
The little plastic cover in the back comes off if you grab it and pull down and to the side and back. There is a tab at the rear that you need to slide under to get it back on snug.
Comfort is greatly improved! By far the best mod to date, I no longer feel like I'm sliding off the front seats when braking to a stop.
To understand what I mean, get a toothpick and hold it between 2 fingers with an 1/8" sticking out. Now try to break that 1/8" off by pressing the side of it with another finger. Now do it again using another toothpick that is sticking out 3/4" and it will snap off much more easily with much less force.
These cars are engineered extensively, for crash protection purposes, literally down to every weld point and nut and bolt used. You've raised those front seat toothpicks up quite a bit. From an engineering perspective, 3/4" can be a lot.
#810
01-03-2015, 02:59 PM
Did you check to make sure the new bolts seat to the same depth into the floor as the old bolts? Even if you did, I would be worried that those bolts are now a weak point if you get in a crash because you've significantly changed the lateral stress load angle.
To understand what I mean, get a toothpick and hold it between 2 fingers with an 1/8" sticking out. Now try to break that 1/8" off by pressing the side of it with another finger. Now do it again using another toothpick that is sticking out 3/4" and it will snap off much more easily with much less force.
These cars are engineered extensively, for crash protection purposes, literally down to every weld point and nut and bolt used. You've raised those front seat toothpicks up quite a bit. From an engineering perspective, 3/4" can be a lot.
Of course, the standard disclaimer applies to any of these modifications; do at your own risk.
It sure would be nice if Honda put another few $ of parts into these front seats and made them angle adjustable like the better seats in the old days; '85 Supra, 99' Integra, etc.
#811
01-03-2015, 03:18 PM

Hi! I ordered them off of EBay. Stainless Steel Door Sill Scuff Plate for Honda Fit Jazz 2014 2015 New | eBay
#812
01-03-2015, 03:23 PM
Found a good use for the antiquated CD slot...
This phone holder is super sturdy and far superior to the vent versions.
@ Amazon for $20
Koomus CD-Air CD Slot Mount Universal CD Slot Smartphone Car Mount Holder Cradle for iPhone 6 6+ 5S, 5C, 5, 4S, 4, iPod touch, Samsung Galaxy S5, S4, S3, Note 2, Note 3, Nexus S, Motorola Droid Razr HD, Maxx, Nokia Lumia 920, LG Optimus G, HTC One X, S, M7
..and winner of the longest product description ever.
How secure is it when it's inserted into the slot?
#813
01-03-2015, 03:28 PM
Found a good use for the antiquated CD slot...
This phone holder is super sturdy and far superior to the vent versions.
@ Amazon for $20
Koomus CD-Air CD Slot Mount Universal CD Slot Smartphone Car Mount Holder Cradle for iPhone 6 6+ 5S, 5C, 5, 4S, 4, iPod touch, Samsung Galaxy S5, S4, S3, Note 2, Note 3, Nexus S, Motorola Droid Razr HD, Maxx, Nokia Lumia 920, LG Optimus G, HTC One X, S, M7
..and winner of the longest product description ever.
How secure is it when it's inserted into the slot?
#814
01-03-2015, 10:58 PM

After many additions (new horns, mats, window visors, body moulding, door edge guard, leather shift knob... I wondered what I could do with the garage door opener. I've never been comfortable with leaving it exposed, clipped to the visor, or the pre-installed openers in the overhead. I had installed an inconspicuous one in my truck so I decided to do the same with the new FIT. On the EX I had a few blanks in the dash panel just left and below the steering wheel. Only one occupied was the traction control. I popped one of those out, did some careful trimming of the inside of it to make room for a button, and gutted a garage door opener for its circuit board. Some soldering, a cheap plastic housing I had laying around, some drilling, some Dremel'ing and I had an opener velcro'd under the dash (with enough wire I could pull it should I need to change the battery) with the button looking like it was part of the dash and design somewhat. Either way, it's not obvious what it is for and gives me a little more quiet mindedness should I leave the car in the driveway and forget to lock it that no one could just open the door and then have access to my garage. Not sure I'm able to post pics yet but when I figure out how to, I'll post some results. Now I'm just contemplating some design ideas for the armrest based on some others I've seen in this community.
#815
01-03-2015, 11:32 PM
I went out and grabbed it to check fit and shook the vehicle with it... Didn't budge at all with the standard sized grip installed. It also comes with inserts for 3 other thicknesses. It seems very solid. 
#816
01-04-2015, 07:43 AM
After many additions (new horns, mats, window visors, body moulding, door edge guard, leather shift knob... I wondered what I could do with the garage door opener. I've never been comfortable with leaving it exposed, clipped to the visor, or the pre-installed openers in the overhead. I had installed an inconspicuous one in my truck so I decided to do the same with the new FIT. On the EX I had a few blanks in the dash panel just left and below the steering wheel. Only one occupied was the traction control. I popped one of those out, did some careful trimming of the inside of it to make room for a button, and gutted a garage door opener for its circuit board. Some soldering, a cheap plastic housing I had laying around, some drilling, some Dremel'ing and I had an opener velcro'd under the dash (with enough wire I could pull it should I need to change the battery) with the button looking like it was part of the dash and design somewhat. Either way, it's not obvious what it is for and gives me a little more quiet mindedness should I leave the car in the driveway and forget to lock it that no one could just open the door and then have access to my garage. Not sure I'm able to post pics yet but when I figure out how to, I'll post some results. Now I'm just contemplating some design ideas for the armrest based on some others I've seen in this community.
#817
01-04-2015, 06:46 PM
Following the $11 DIY Cargo Cover guide, picked up a sheet of black foam board at Michaels for $15 and made my own cargo cover.
I made a cardboard template first, cut to shape with a minor amount of trimming, added some gaffers tape to the perimeter and installed. It bends nicely around the rear middle wiper assembly and fits pretty snug.
It came out pretty nice and it wedges in nicely without any velcro. Just bend slightly in the middle up or down to remove and chuck out of the way for the larger costco runs.


I added some strong thread left over from a previous wheelskin cover for lifting duty and attached paper clips with tape for attachment points on the trunk. It pivots reasonably well when the hatch opens.

I made a cardboard template first, cut to shape with a minor amount of trimming, added some gaffers tape to the perimeter and installed. It bends nicely around the rear middle wiper assembly and fits pretty snug.
It came out pretty nice and it wedges in nicely without any velcro. Just bend slightly in the middle up or down to remove and chuck out of the way for the larger costco runs.
I added some strong thread left over from a previous wheelskin cover for lifting duty and attached paper clips with tape for attachment points on the trunk. It pivots reasonably well when the hatch opens.


#819
01-04-2015, 08:53 PM
Attachment was simple, I used a paper clip adjusted with some needle nose pliers to go over 1/8" lip and some gaffers tape to hold in place.
#820
01-04-2015, 11:52 PM
Thanks! The person who rang it up told me it wouldn't work on the custom framing, too, but I was also buying some thick thread to make the lift, so we thought it would reduce the price of that. But the computer took 50% off the foam board.