
Seat heater Install Factory Look


Thread Starter
|
New Member
Joined: Apr 2015
Posts: 9
From: Austin,TX
[GUIDE] Seat heater Install With Factory Look
This is how I modded my Fit to have stock-like seat heaters under the upholstery. To clarify, the upholstery is not glued to the seat cushions. The air bag sensor does not get interference from the seat heaters. It will be wired to the ignition circuit to prevent drain when the engine is off. I did this install back in December so I don't remember specific socket sizes.
What you need:
Metric Socket set
Breaker Bar
Drill with 5/8 bit
Seat Heaters (one set does both front seats; there is a Dorman set that is similar):
https://www.amazon.com/gp/product/B0...?ie=UTF8&psc=1
Add-A-Circuit (spares for future projects):
https://www.amazon.com/Support-Truck...iglink21001-20
Zip Ties (to replace the hog rings):
https://www.amazon.com/TR-Industrial...words=zip+ties
Wire Stripper (this one is a gift from the electrical gods):
https://www.amazon.com/Irwin-Industr...pper+vise+grip
Crimp set:
https://www.amazon.com/ASSORTED-INSU...ZVQ1VTWS5H1THJ
Spare Wire:
https://www.amazon.com/Grand-General...rds=wire+spool
Hog ring cutter (this is more general so you can use it for anything):
https://www.amazon.com/TEKTON-3386-8...ds=wire+cutter
I also have a solder iron, heat shrink tubing, and heat gun because I like my installs being delicious.
Tips before starting:
You can never have too much light in your work space. Get the right tools for the job. Be careful with plastic trim pieces. Leave battery disconnected until everything is finished or you will run codes for the disconnected air bag.
Steps:
Disconnect the battery. Black negative terminal pulled away and not touching frame metal. Zip tied to the side.
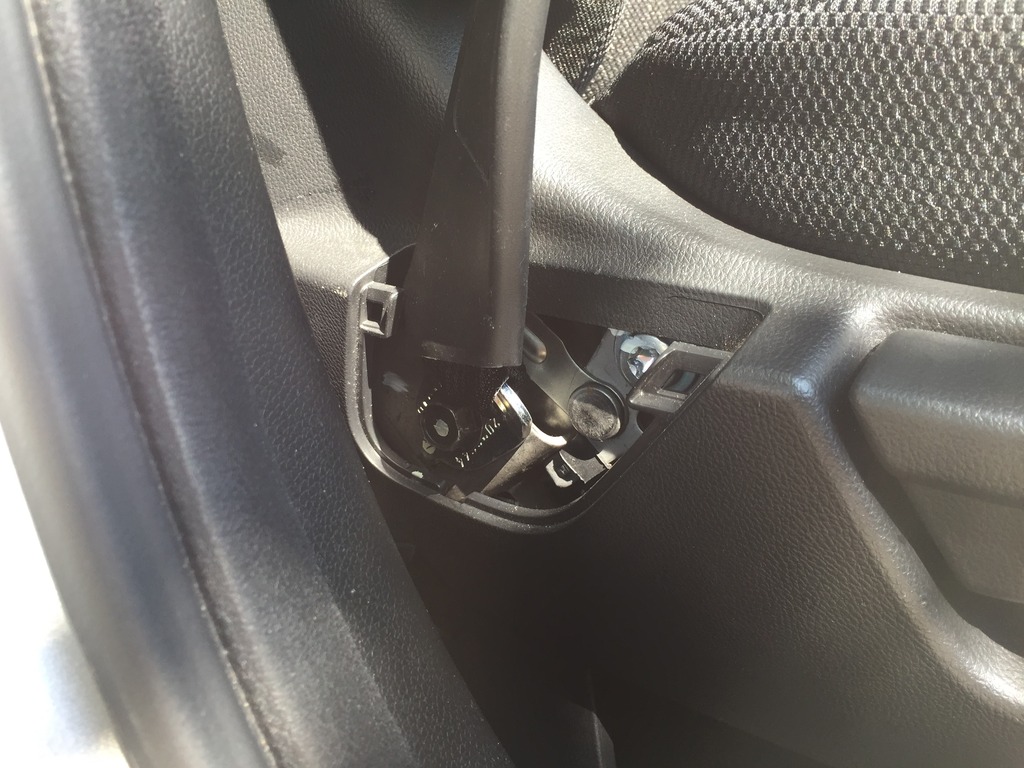
Remove seat-belt bolt. Passenger seat has plastic trim cover. Be careful when prying to prevent breaking. Remove bolt and set aside. Driver's side does not connect to seat.
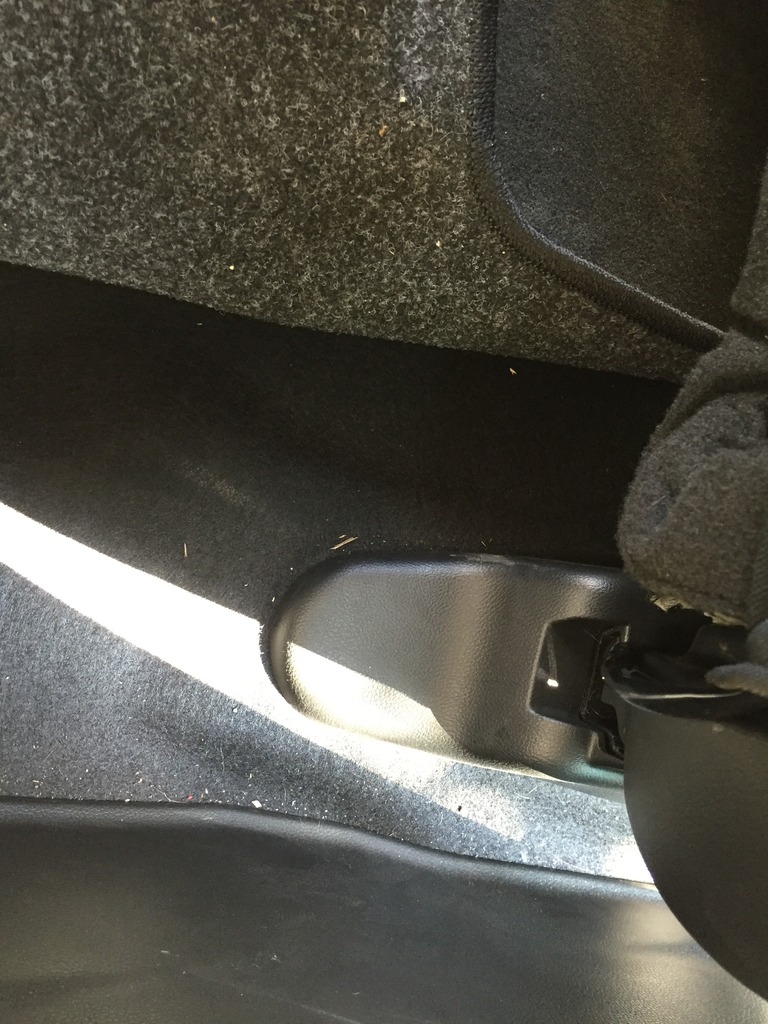
Remove seat bolts. Two in front under plastic caps. Two in rear under trim pieces. Lift and slide back at same time.

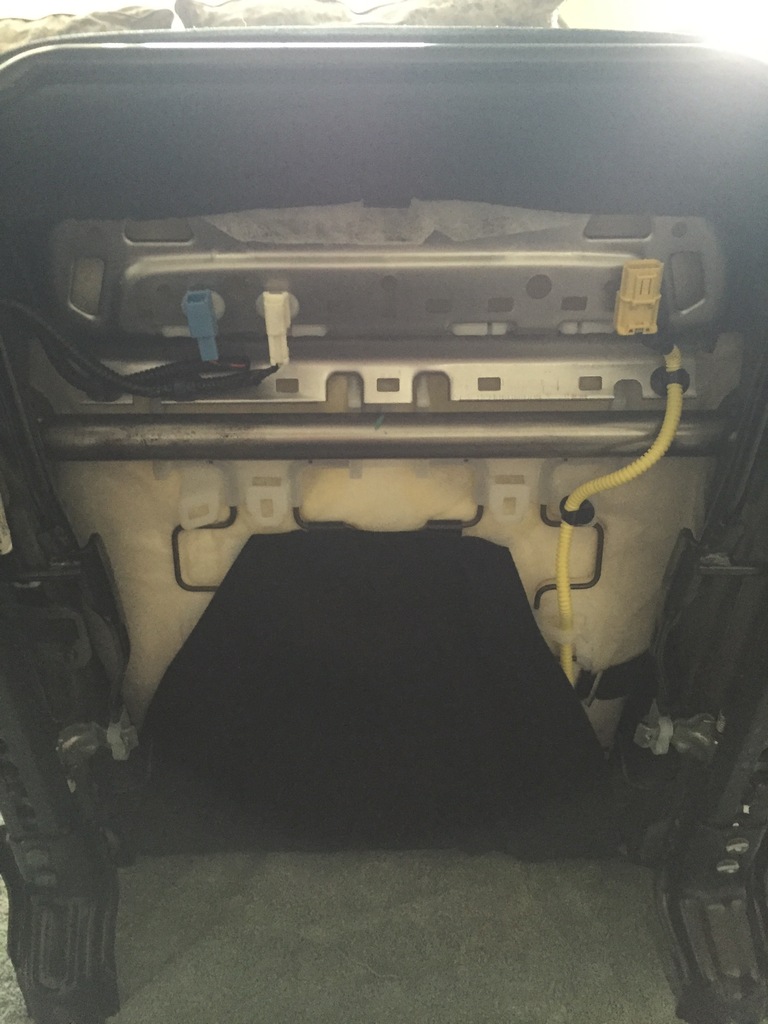
Remove seat wiring. Three wire connectors in front. Tilt seat back on feet to access. One of them was a bit finicky and I can't remember which. I think it was the blue.
Remove seats. Tilt seat back forward to make seat smaller. Take out with care and watch the rails to avoid scratching paint.
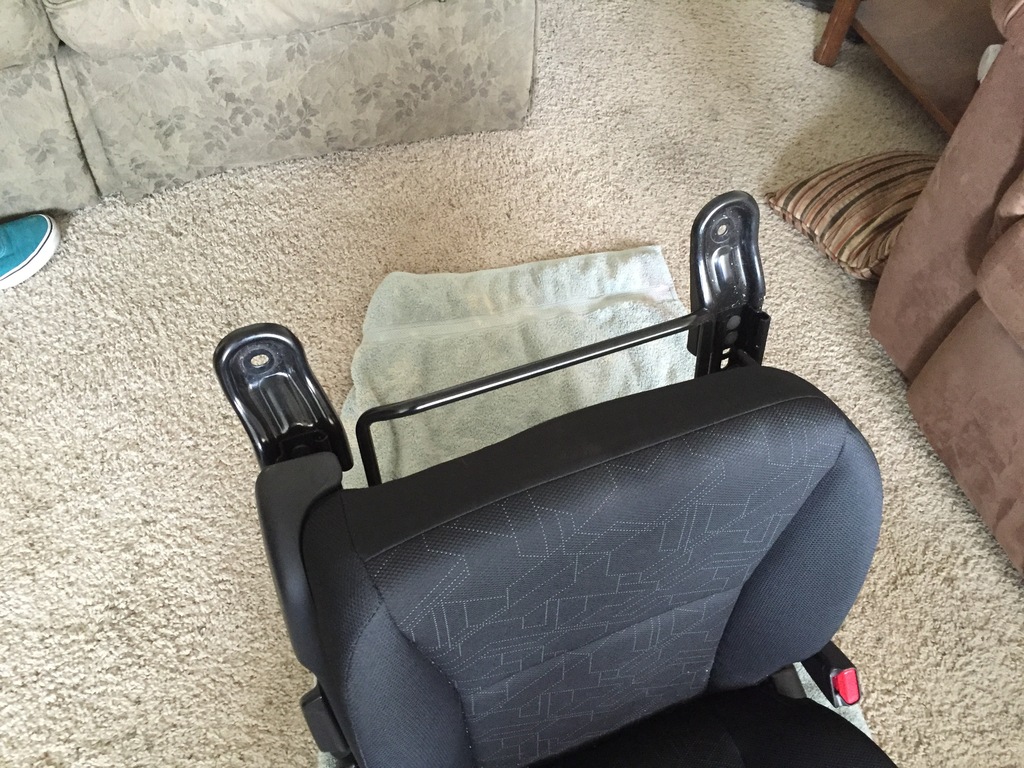
Remove upholstery. Take pictures of what you will remove if you have shitty memory. You will forget where some things clip at the end. Undo zipper on rear of seat.
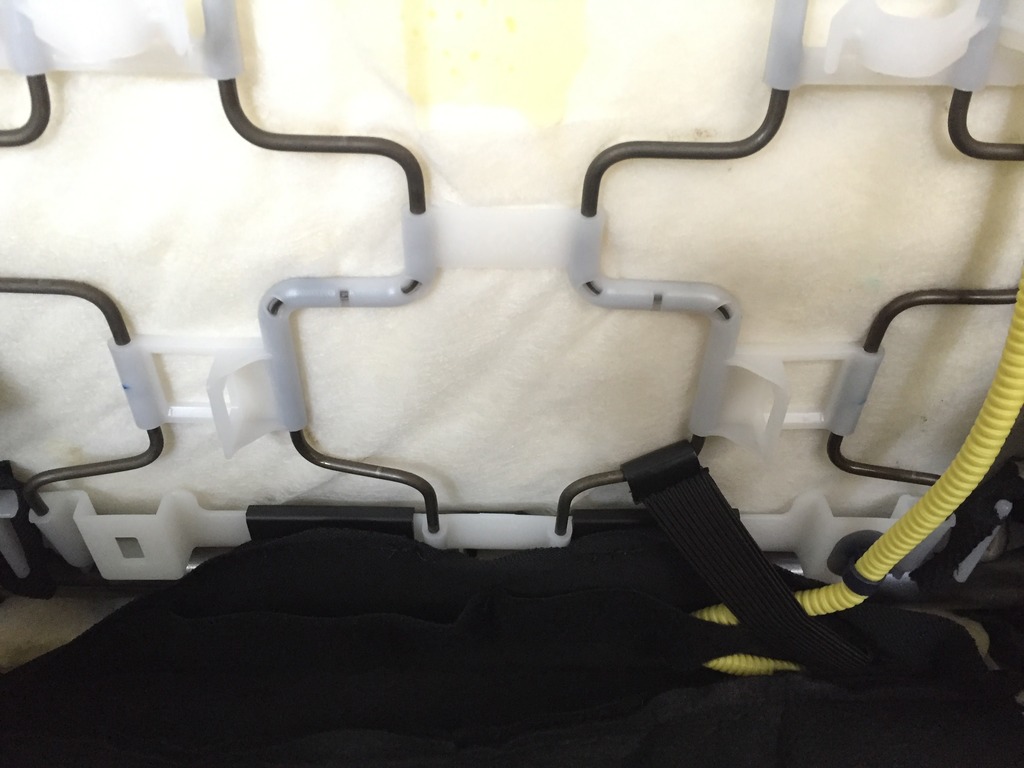
The lower flap will be exposed at base of seat back. Lift off of seat and let fall to ground. Plastic clips with elastic run through the seat back and bottom. There are many of them.
Pull and lift to release tension on seat covers.
Lift seat lever to expose trim screw. Unscrew and gently pry to get access to last clips.
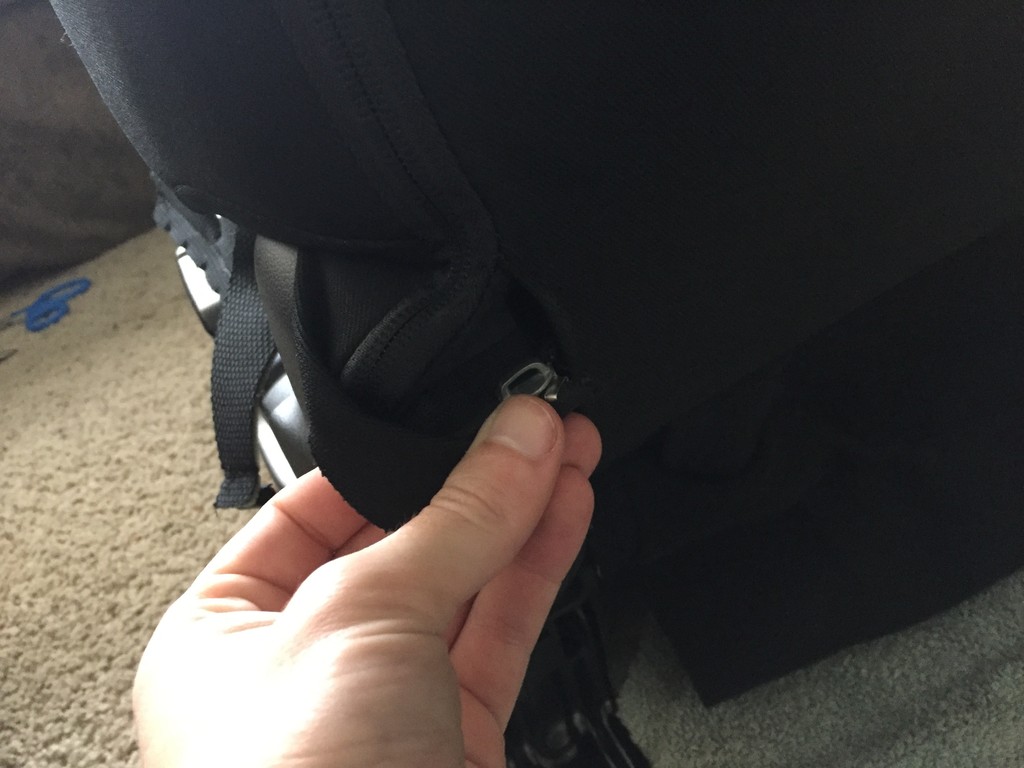
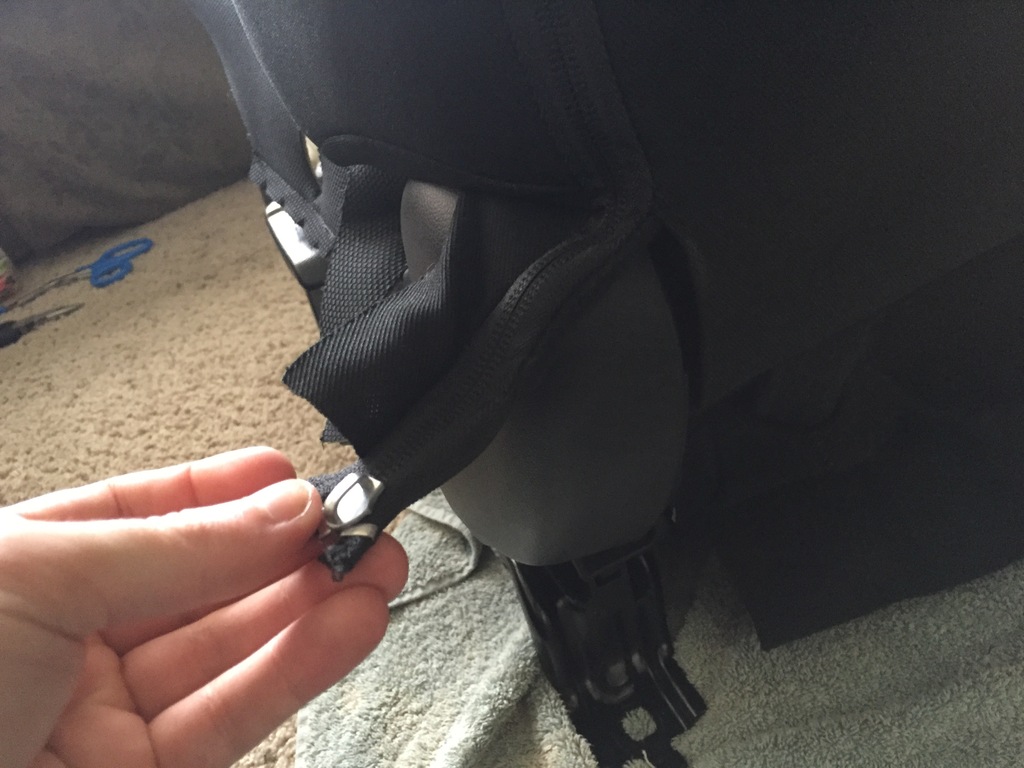
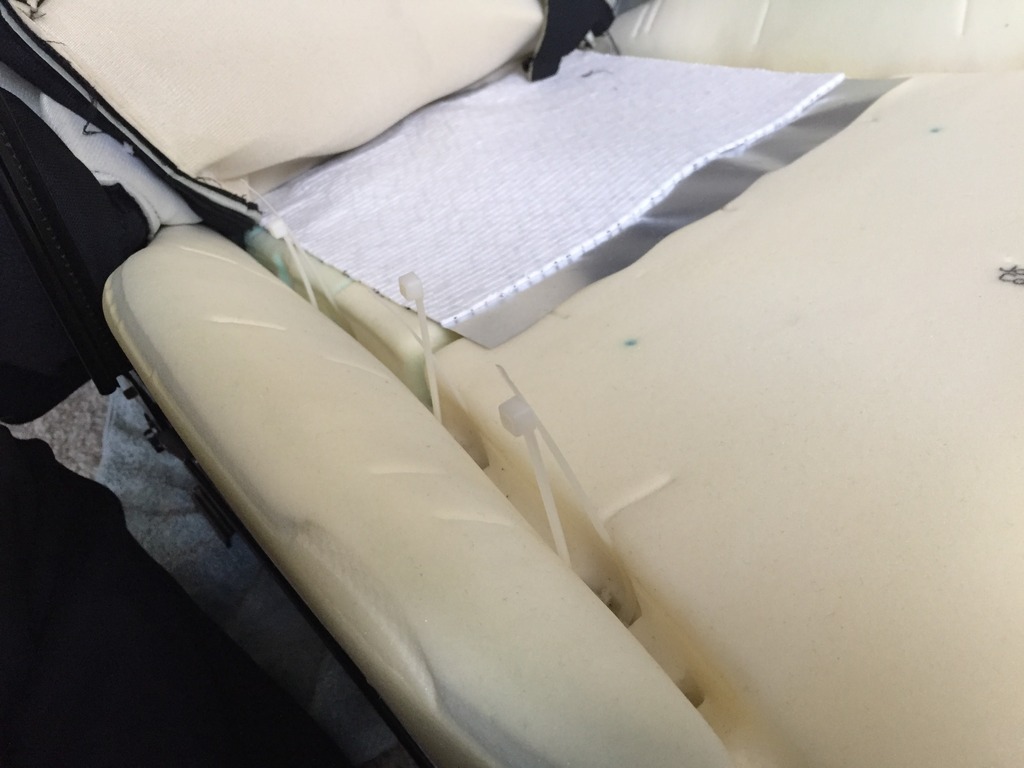
Pull fabric up as far as possible. This will leave remaining tension on hog rings. Use cutters to remove hog rings running parallel to bolsters and across the center of the cushion in front and rear.
The front of the seat back is a tight space and you can only go so far. Do not worry about slight bends in the fabric bar. Zip ties will straighten it back.
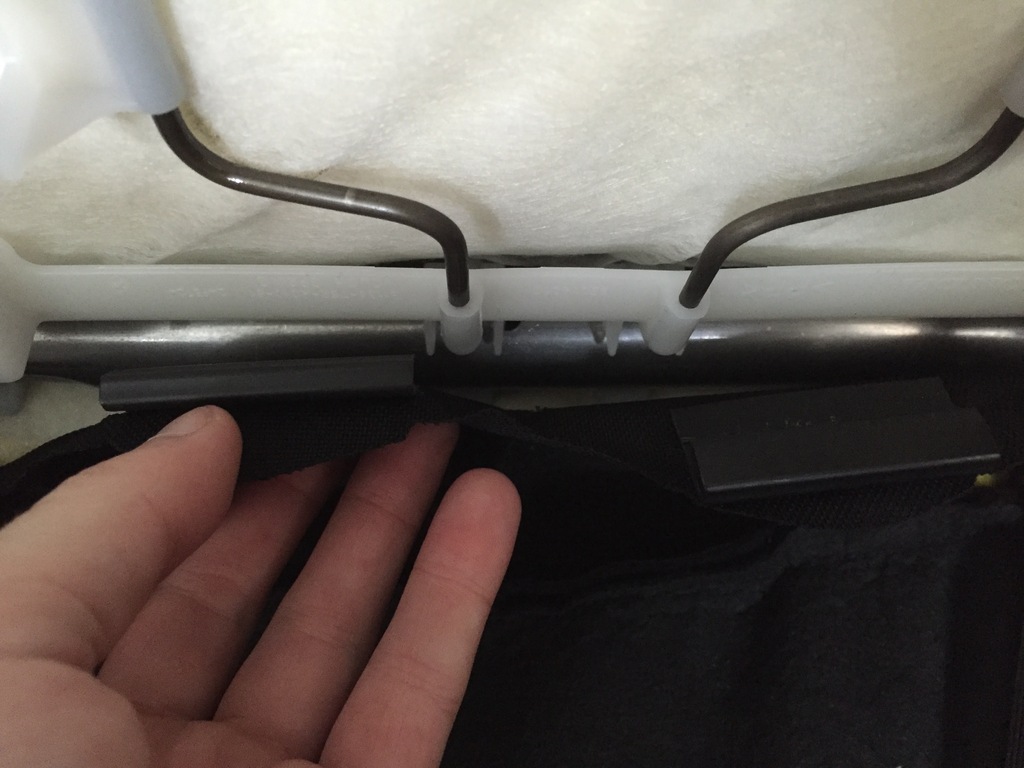
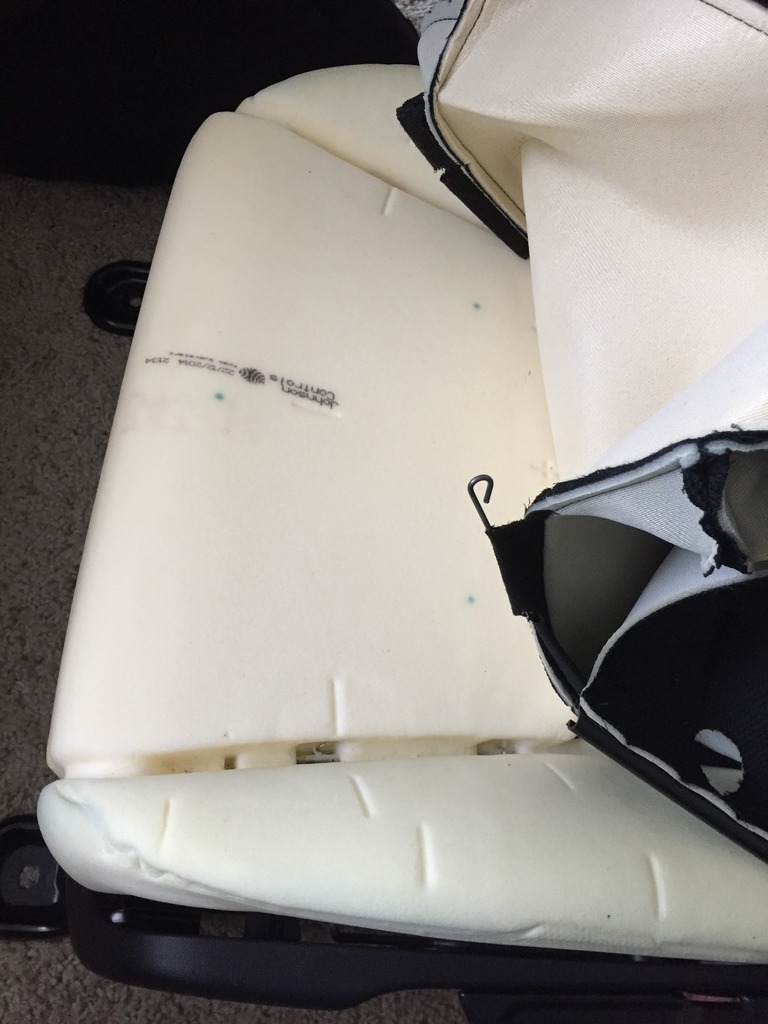
Cut Pads. The middle of the seat bottom will make it so you cannot have the full pad, unfortunately.
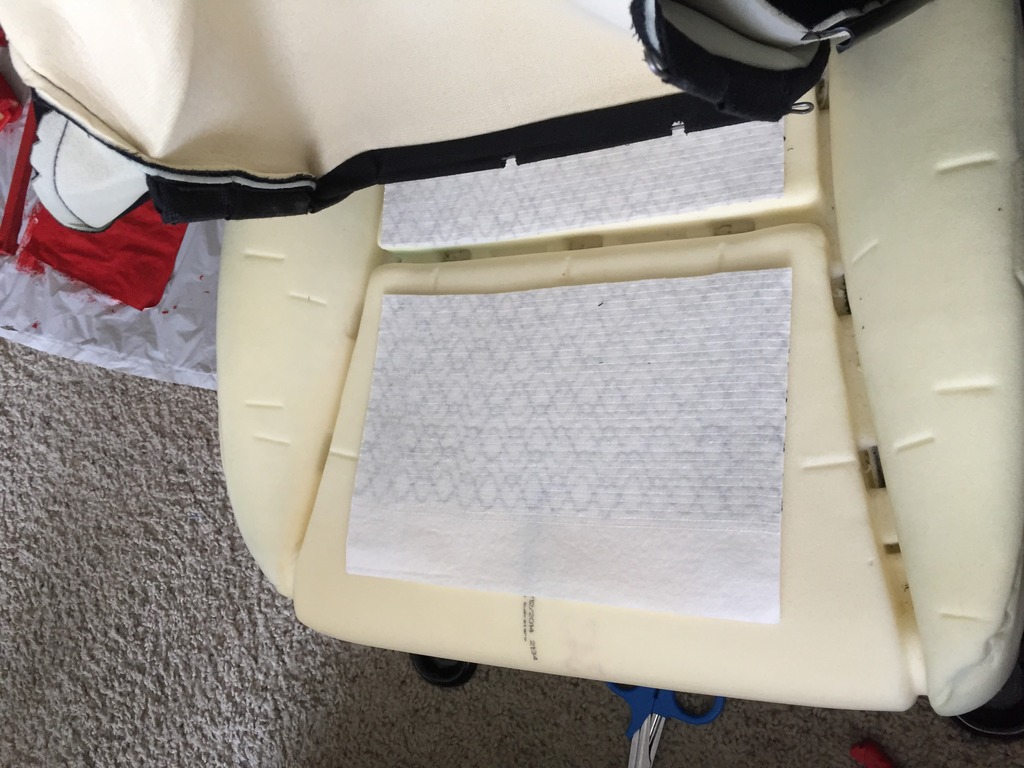
Cut the pads across so that they stop just short of the middle bar and do not touch.
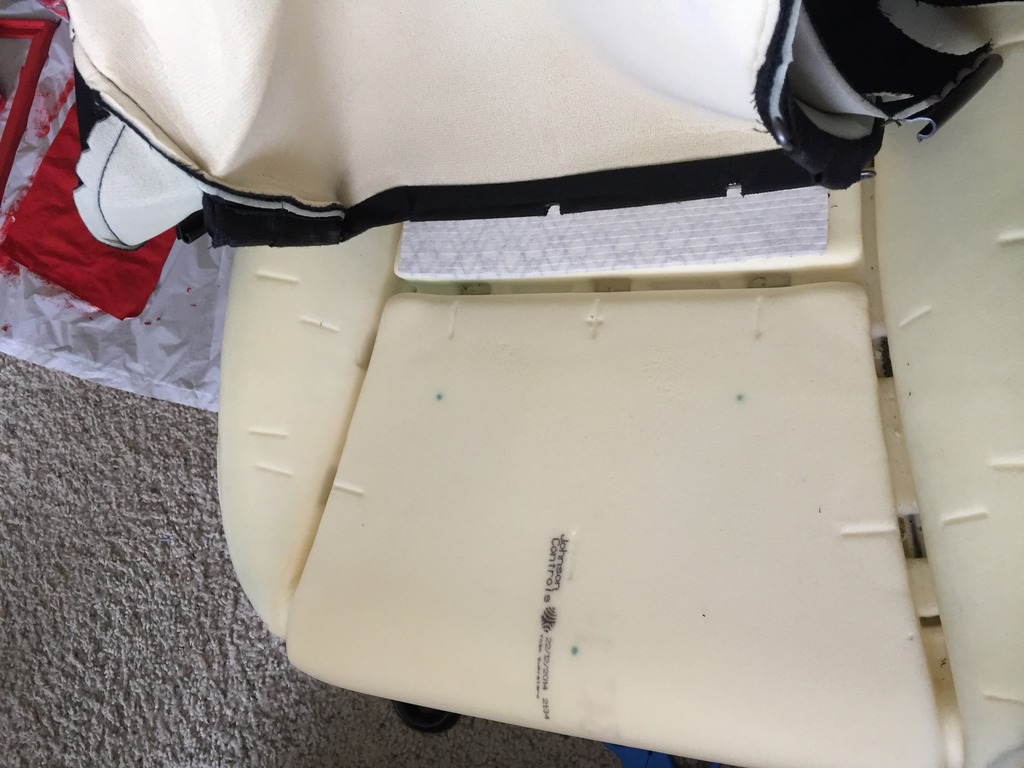
Wrap included silver tape over cut end to prevent exposed element contacting seat bars.
Wedge the top pad into the seat back as far as possible. Take care not to bend elements. This takes some finesse and is a massive bitch. Do not use adhesive strips on the bottom if you want this to be easy. I did one seat with adhesive and it was nigh impossible to slide it back where it needed to go. I left the adhesive plastic liners on the other pad and it has not slipped since installation. Save yourself the trouble.
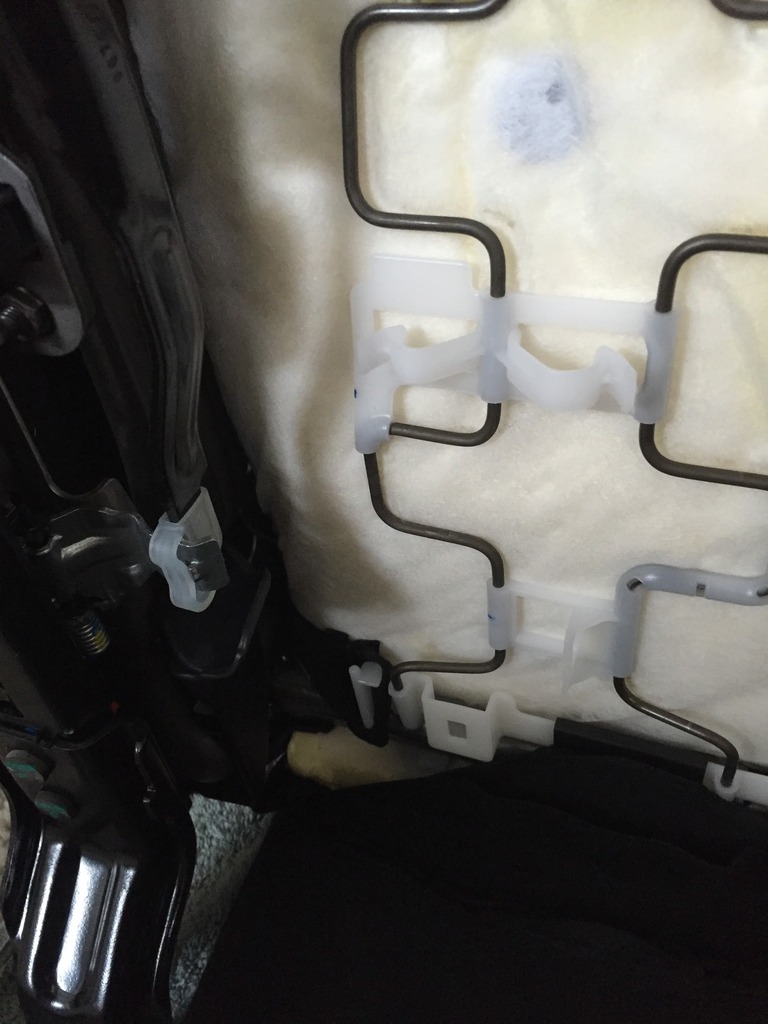
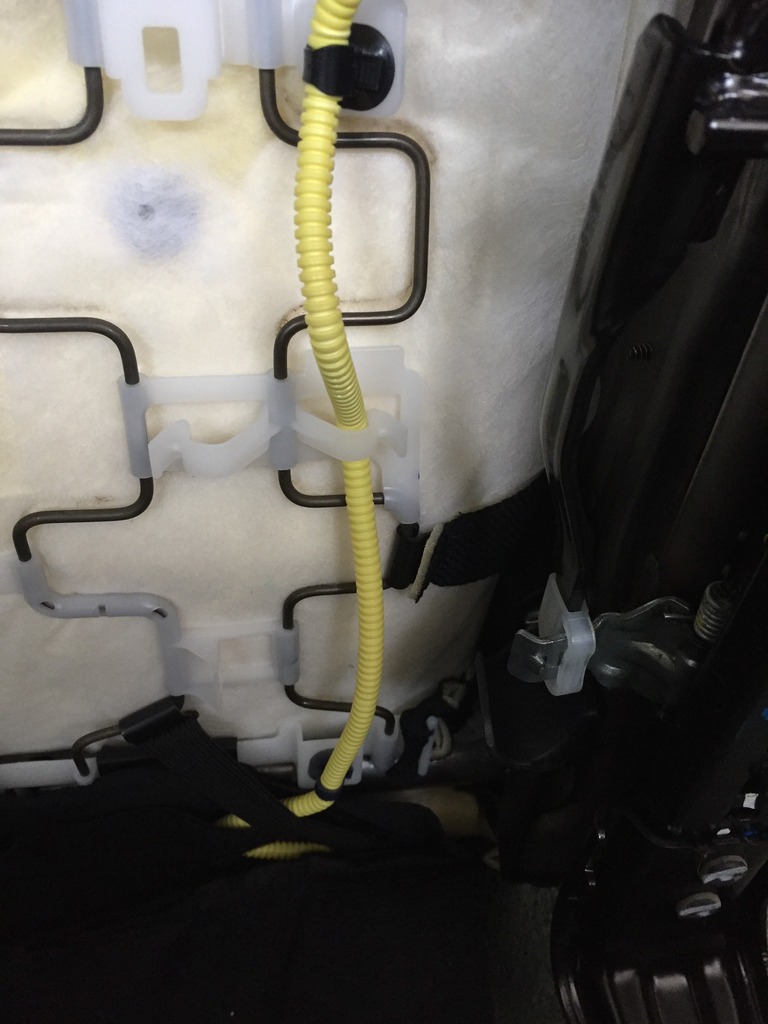
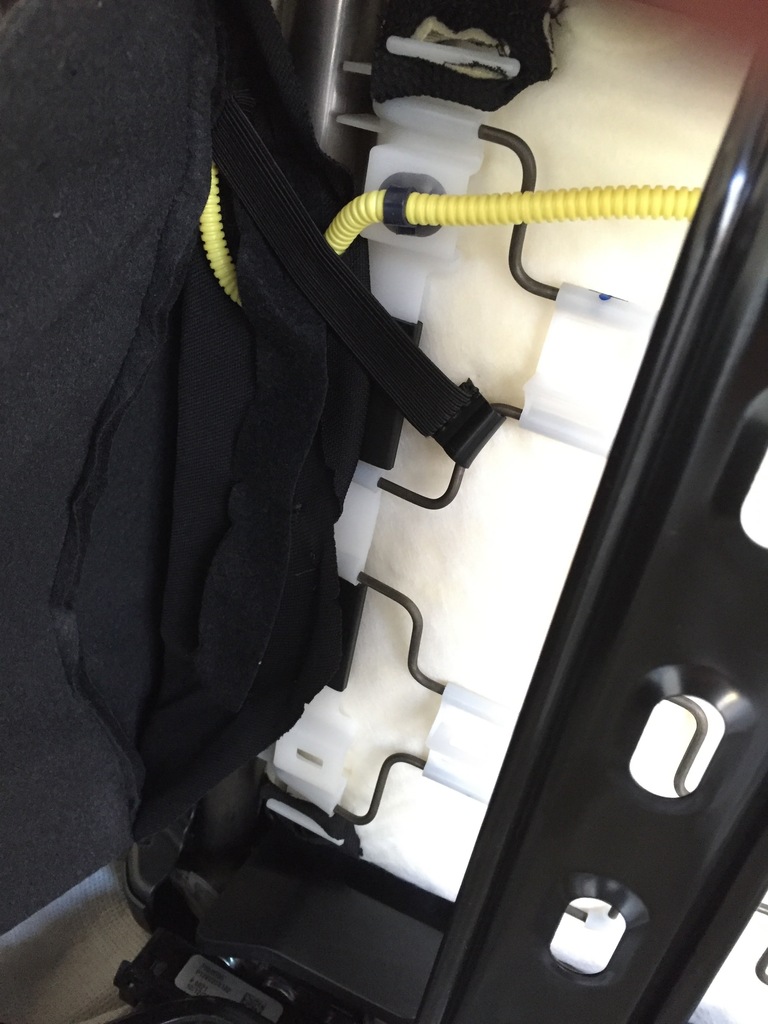
Run wiring. Top pad and bottom pad wires run through the hinge opening in bottom back of seat. Play with wire length to give slack for seat positioning and leave hanging to bottom left on passenger seat and bottom right on driver's seat. Zip tie to seat back coils to hold in place.
Visualize how button wiring will run to your button position. I chose the side of seat to allow a stealth delete.
Wait to zip tie until installed because the wiring directly behind the button does not flex well and is tricky to run until drilled and placed.
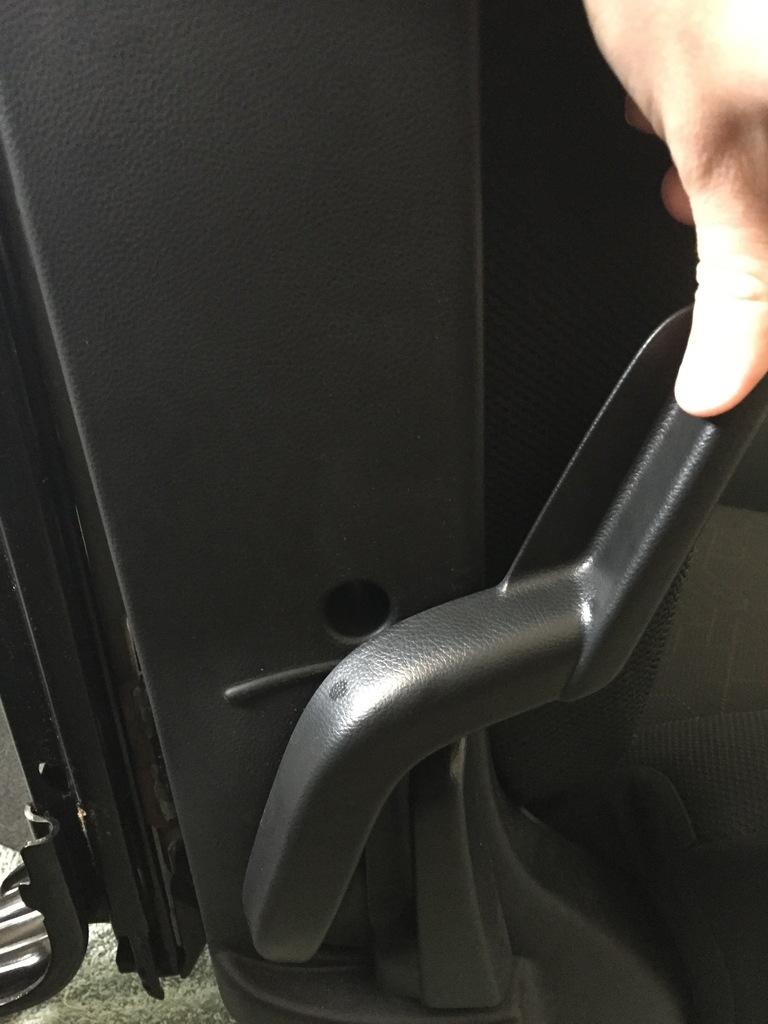
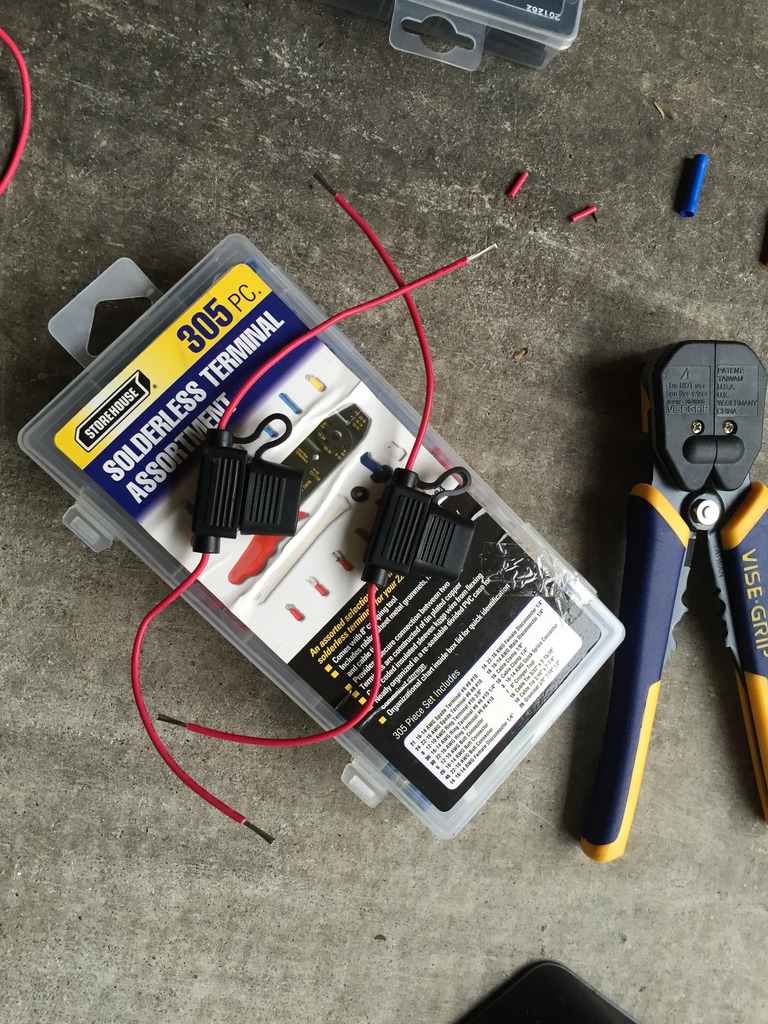
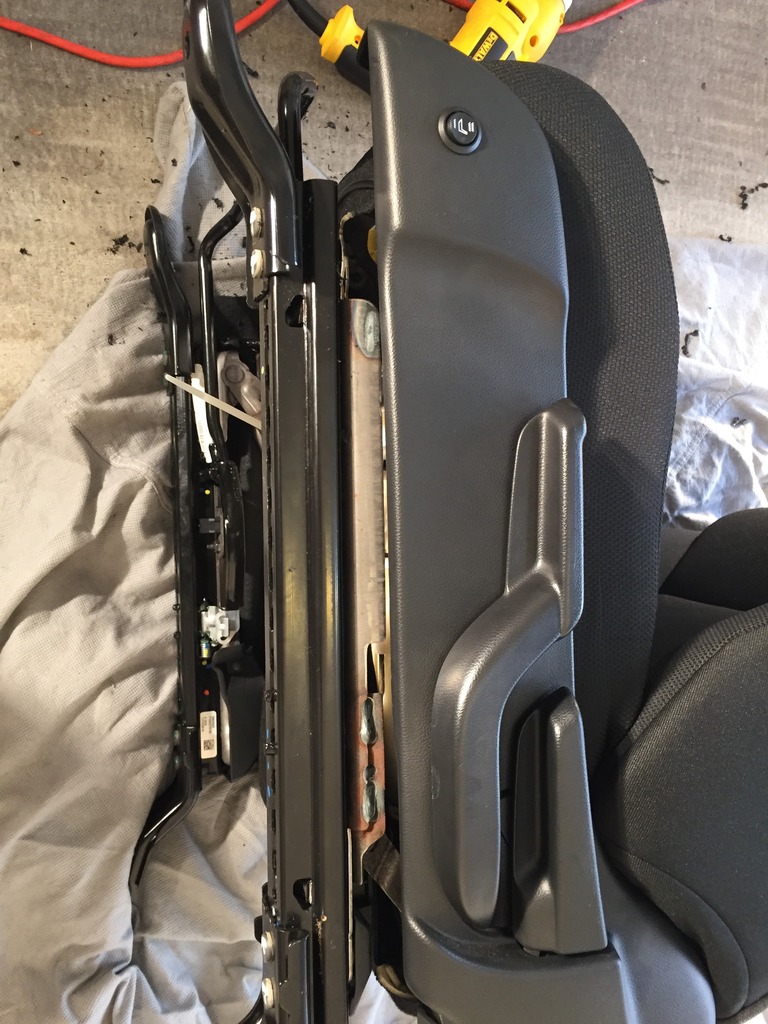
Fuse wiring will need to be extended with extra wire. Either crimp together or solder. I ran my wires under the carpet. Tuck wires under armrest trim by slipping it in with fingers or edge of cd case. You do not need to remove the armrest. Access to carpet by driver's armrest side for main wiring. Run through carpet to door sill trim. Pull up on door gasket gently to gain access to plastic trim pieces. Pop them off with hand force. Do not use screw driver or other leverage. Remove trim from gas/ hood levers.
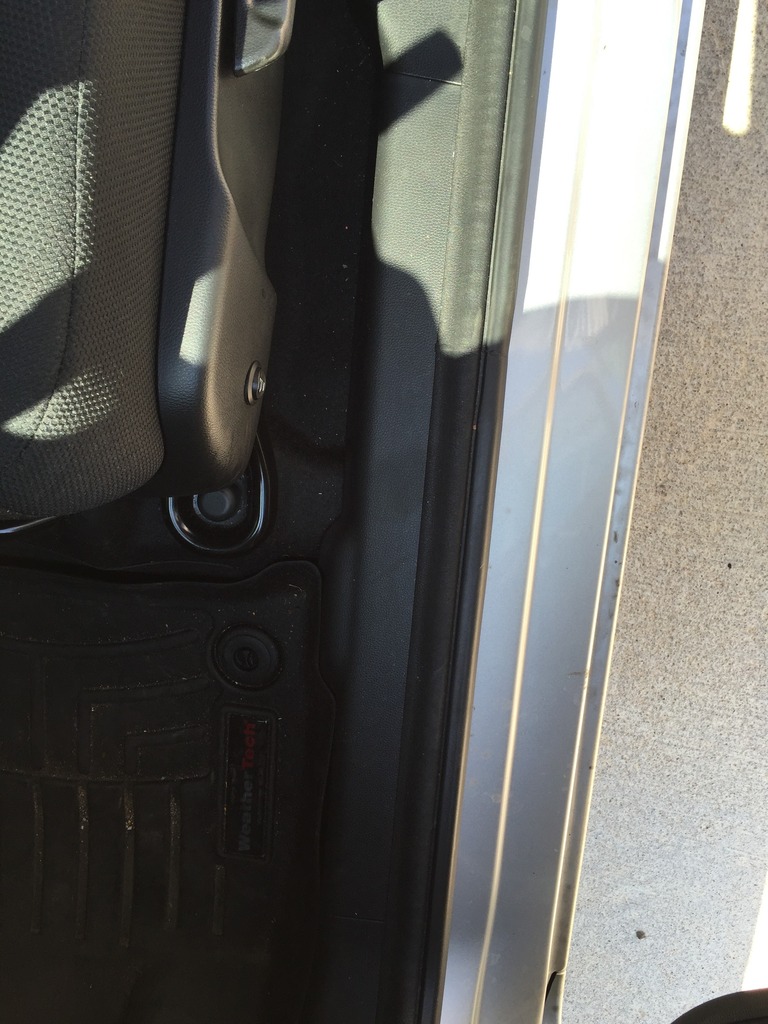
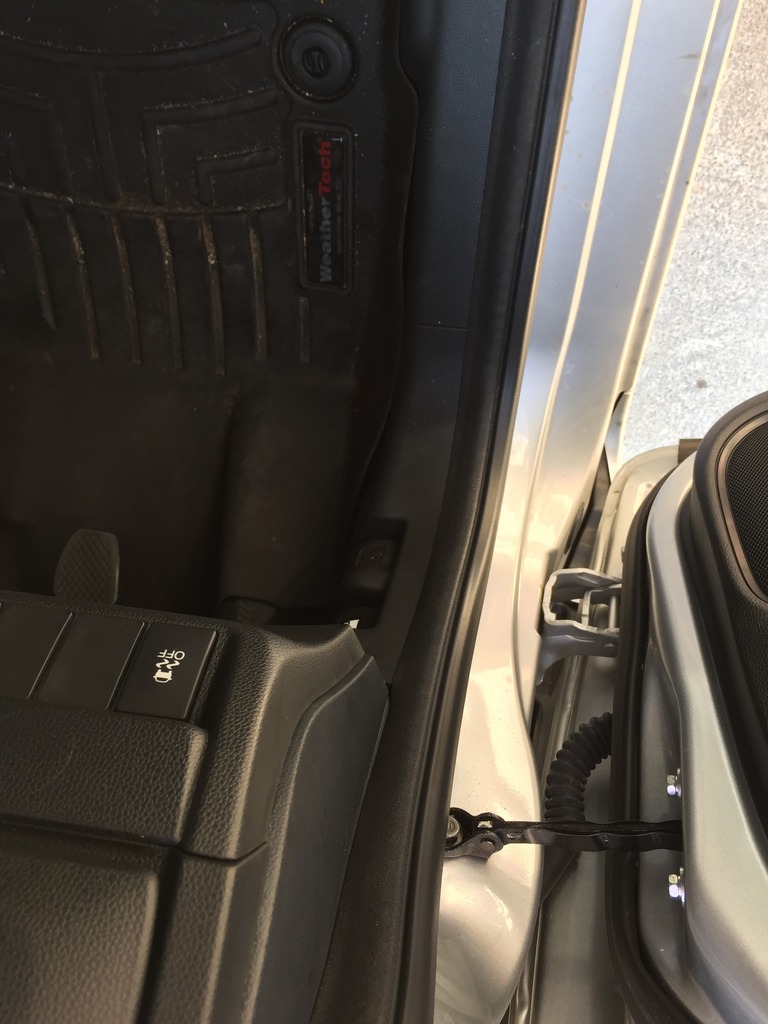
Remove trim from left of wheel cup holder that the door sits against. Run your grounds and zip tie excess.
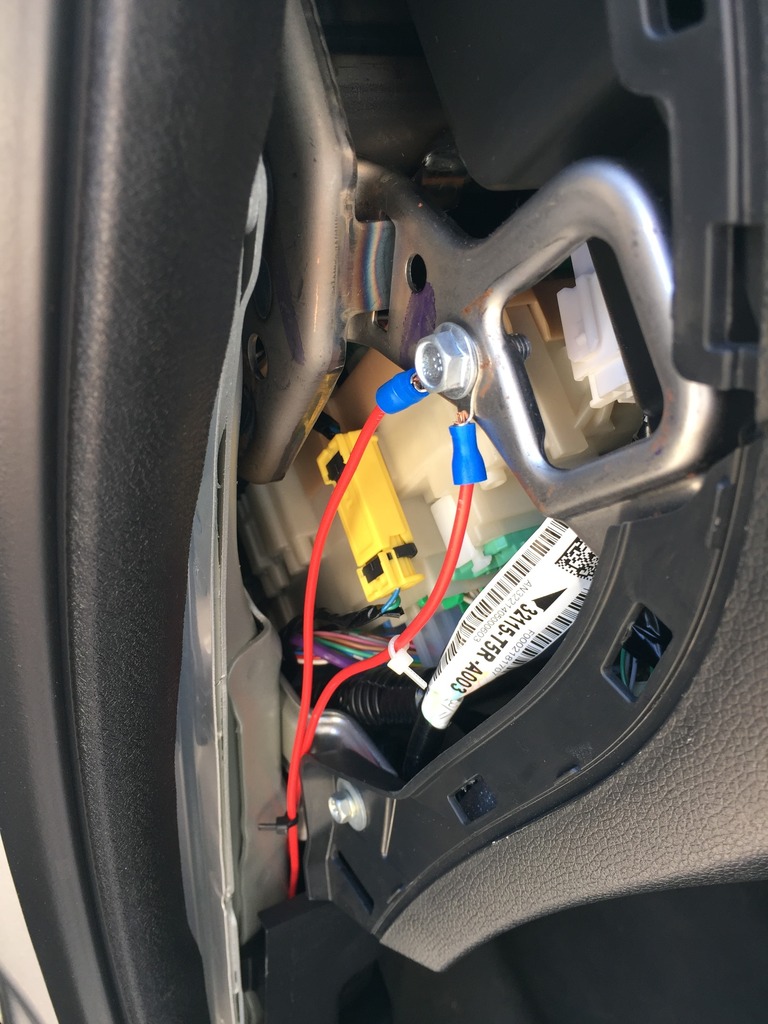
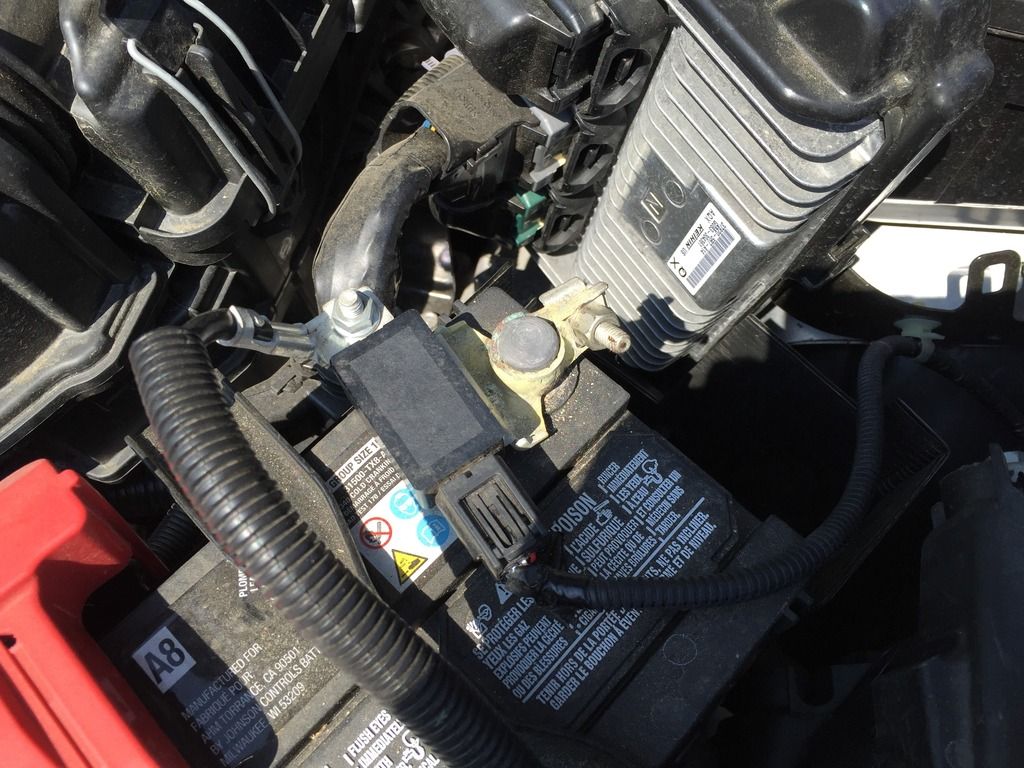
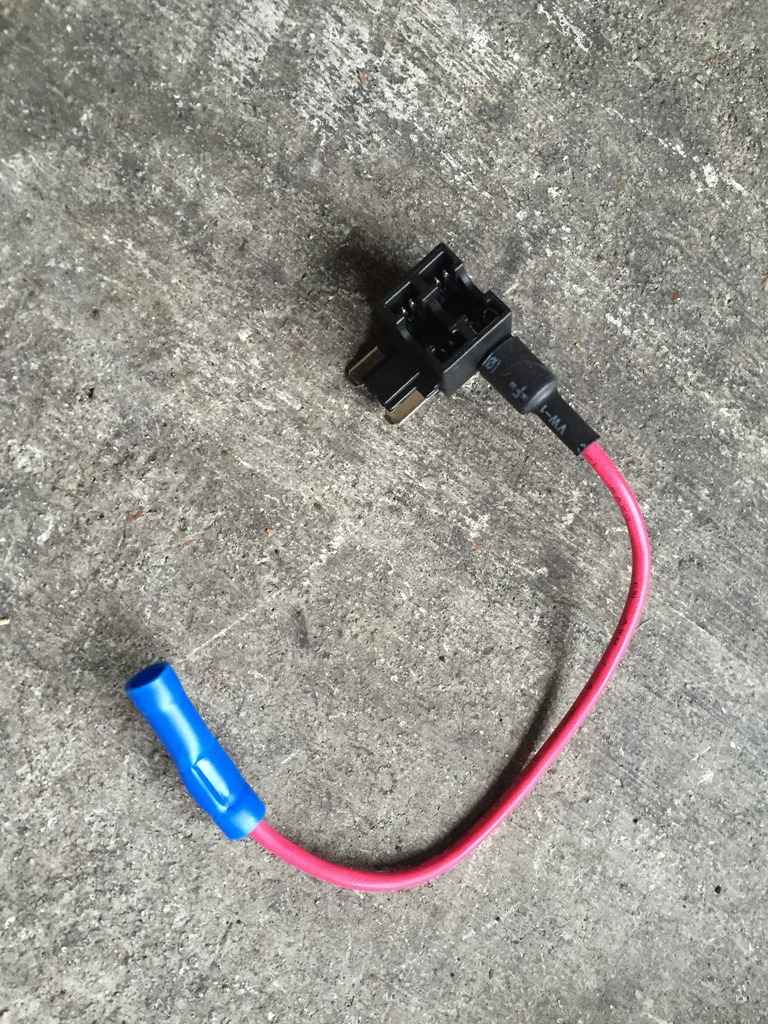
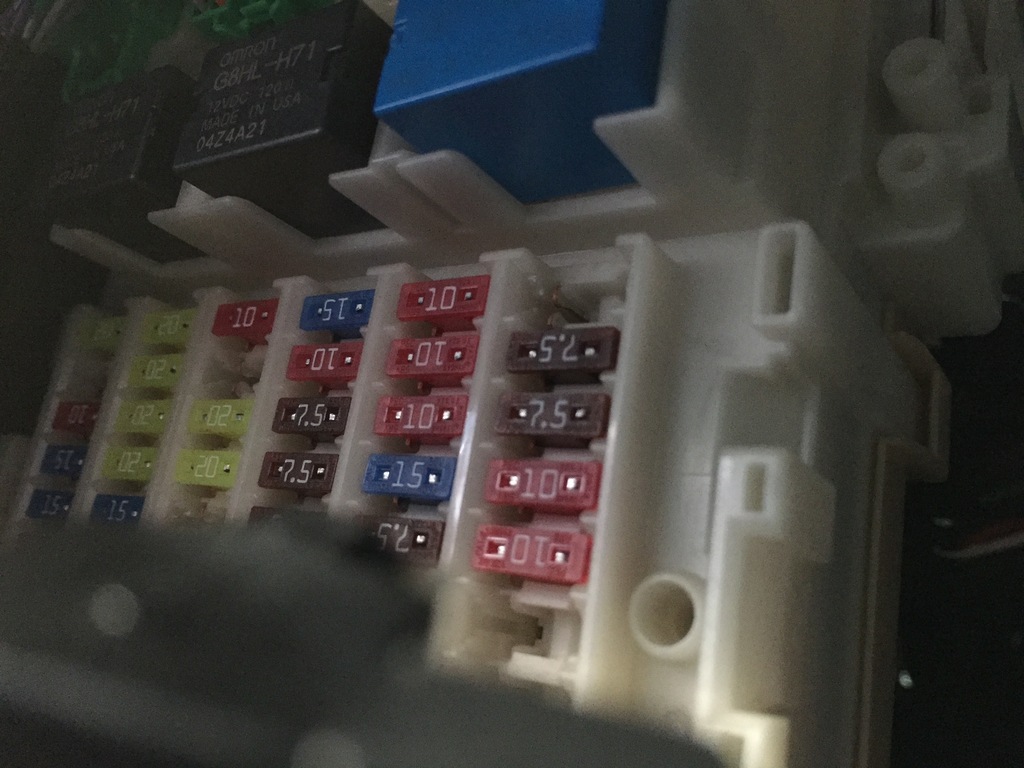
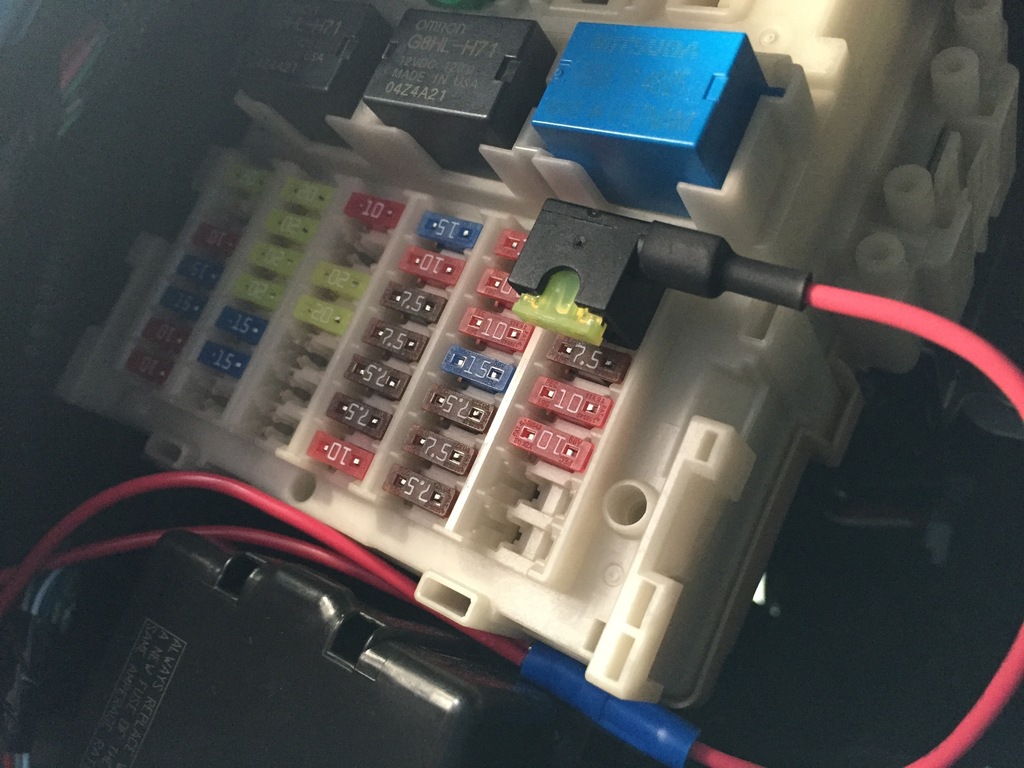
Connect yours inline fuses to the tap. Connect your Add-A-Circuit tap and place with fuses in slot on fusebox. I ran both seats into the one tap as shown.
Zip tie cables out of the way and tuck to hide all installation. Replace sill trim. Push door gasket back onto frame splines.
Drill Buttons. 5/8 bit. Go straight in. I chose where there was nothing for the bit to hit on the other side with some space for wiring.
I have seen friends tap the blanks next to the TCS button, but that requires more effort and I am lazy. It is also much more obvious if you need a warranty claim that your electrical system has been modified. Another user on this forum got the OEM seat control and placed it in the coin slot of the armrest. Looks great, but also looked like a massive bitch to wire correctly.
Replace upholstery. Whip out those industrial zip ties and prepare to hate your life. Starting from the back of the seat forward, make sure all pieces of hog ring are gone. Pull zip ties through where they were and work the seat bar back down towards the front.
This takes a lot of time and finesse. Be patient. Pull tight. Cut excess. Turn cut ends into seat cushion and wedge into crevices. Re-clip all plastic elastic fantastic fasteners where they need to be. Screw seat lever trim back in. Zip up back with heat pad cables sticking out far enough for access.
Replace seats. Place in car. Tilt back. Plug in three seat cables. Connect your wired buttons and taps for seat pads.
Bolt seats. Two in front. Two in back. Wedge those rear trim pieces back on carefully. The inner most two are a pain. Take your time.
Bolt seat-belt and replace seat-belt trim on passenger side.
Connect battery. Turn on car. Turn on seat heater. Look for light on switch to ensure power. Turn off car. Make sure light turns off. I ran the heaters on the wrong fuse for the first week and killed my battery. Try getting into the hatch with a dead battery. You can't. Now imagine lifting the cargo tray, accessory tray, and pulling your jumper cable out from around your spare wheel from over the rear seats in the dead ass cold of winter at 5 am in your pajamas. Now imagine your car alarm is going off while you are charging it. Try not to shoot yourself in this imagined fantasy. It is hard.
Enjoy the seat heaters. If you have suggestions for the guide or better wiring tips let me know. I went in mostly blind.
What you need:
Metric Socket set
Breaker Bar
Drill with 5/8 bit
Seat Heaters (one set does both front seats; there is a Dorman set that is similar):
https://www.amazon.com/gp/product/B0...?ie=UTF8&psc=1
Add-A-Circuit (spares for future projects):
https://www.amazon.com/Support-Truck...iglink21001-20
Zip Ties (to replace the hog rings):
https://www.amazon.com/TR-Industrial...words=zip+ties
Wire Stripper (this one is a gift from the electrical gods):
https://www.amazon.com/Irwin-Industr...pper+vise+grip
Crimp set:
https://www.amazon.com/ASSORTED-INSU...ZVQ1VTWS5H1THJ
Spare Wire:
https://www.amazon.com/Grand-General...rds=wire+spool
Hog ring cutter (this is more general so you can use it for anything):
https://www.amazon.com/TEKTON-3386-8...ds=wire+cutter
I also have a solder iron, heat shrink tubing, and heat gun because I like my installs being delicious.
Tips before starting:
You can never have too much light in your work space. Get the right tools for the job. Be careful with plastic trim pieces. Leave battery disconnected until everything is finished or you will run codes for the disconnected air bag.
Steps:
Disconnect the battery. Black negative terminal pulled away and not touching frame metal. Zip tied to the side.

Remove seat-belt bolt. Passenger seat has plastic trim cover. Be careful when prying to prevent breaking. Remove bolt and set aside. Driver's side does not connect to seat.

Remove seat bolts. Two in front under plastic caps. Two in rear under trim pieces. Lift and slide back at same time.


Remove seat wiring. Three wire connectors in front. Tilt seat back on feet to access. One of them was a bit finicky and I can't remember which. I think it was the blue.

Remove seats. Tilt seat back forward to make seat smaller. Take out with care and watch the rails to avoid scratching paint.

Remove upholstery. Take pictures of what you will remove if you have shitty memory. You will forget where some things clip at the end. Undo zipper on rear of seat.


The lower flap will be exposed at base of seat back. Lift off of seat and let fall to ground. Plastic clips with elastic run through the seat back and bottom. There are many of them.

Pull and lift to release tension on seat covers.


Lift seat lever to expose trim screw. Unscrew and gently pry to get access to last clips.

Pull fabric up as far as possible. This will leave remaining tension on hog rings. Use cutters to remove hog rings running parallel to bolsters and across the center of the cushion in front and rear.

The front of the seat back is a tight space and you can only go so far. Do not worry about slight bends in the fabric bar. Zip ties will straighten it back.
Cut Pads. The middle of the seat bottom will make it so you cannot have the full pad, unfortunately.

Cut the pads across so that they stop just short of the middle bar and do not touch.

Wrap included silver tape over cut end to prevent exposed element contacting seat bars.

Wedge the top pad into the seat back as far as possible. Take care not to bend elements. This takes some finesse and is a massive bitch. Do not use adhesive strips on the bottom if you want this to be easy. I did one seat with adhesive and it was nigh impossible to slide it back where it needed to go. I left the adhesive plastic liners on the other pad and it has not slipped since installation. Save yourself the trouble.
Run wiring. Top pad and bottom pad wires run through the hinge opening in bottom back of seat. Play with wire length to give slack for seat positioning and leave hanging to bottom left on passenger seat and bottom right on driver's seat. Zip tie to seat back coils to hold in place.

Visualize how button wiring will run to your button position. I chose the side of seat to allow a stealth delete.

Wait to zip tie until installed because the wiring directly behind the button does not flex well and is tricky to run until drilled and placed.

Fuse wiring will need to be extended with extra wire. Either crimp together or solder. I ran my wires under the carpet. Tuck wires under armrest trim by slipping it in with fingers or edge of cd case. You do not need to remove the armrest. Access to carpet by driver's armrest side for main wiring. Run through carpet to door sill trim. Pull up on door gasket gently to gain access to plastic trim pieces. Pop them off with hand force. Do not use screw driver or other leverage. Remove trim from gas/ hood levers.


Remove trim from left of wheel cup holder that the door sits against. Run your grounds and zip tie excess.

Connect yours inline fuses to the tap. Connect your Add-A-Circuit tap and place with fuses in slot on fusebox. I ran both seats into the one tap as shown.


Zip tie cables out of the way and tuck to hide all installation. Replace sill trim. Push door gasket back onto frame splines.
Drill Buttons. 5/8 bit. Go straight in. I chose where there was nothing for the bit to hit on the other side with some space for wiring.

I have seen friends tap the blanks next to the TCS button, but that requires more effort and I am lazy. It is also much more obvious if you need a warranty claim that your electrical system has been modified. Another user on this forum got the OEM seat control and placed it in the coin slot of the armrest. Looks great, but also looked like a massive bitch to wire correctly.
Replace upholstery. Whip out those industrial zip ties and prepare to hate your life. Starting from the back of the seat forward, make sure all pieces of hog ring are gone. Pull zip ties through where they were and work the seat bar back down towards the front.

This takes a lot of time and finesse. Be patient. Pull tight. Cut excess. Turn cut ends into seat cushion and wedge into crevices. Re-clip all plastic elastic fantastic fasteners where they need to be. Screw seat lever trim back in. Zip up back with heat pad cables sticking out far enough for access.
Replace seats. Place in car. Tilt back. Plug in three seat cables. Connect your wired buttons and taps for seat pads.
Bolt seats. Two in front. Two in back. Wedge those rear trim pieces back on carefully. The inner most two are a pain. Take your time.
Bolt seat-belt and replace seat-belt trim on passenger side.
Connect battery. Turn on car. Turn on seat heater. Look for light on switch to ensure power. Turn off car. Make sure light turns off. I ran the heaters on the wrong fuse for the first week and killed my battery. Try getting into the hatch with a dead battery. You can't. Now imagine lifting the cargo tray, accessory tray, and pulling your jumper cable out from around your spare wheel from over the rear seats in the dead ass cold of winter at 5 am in your pajamas. Now imagine your car alarm is going off while you are charging it. Try not to shoot yourself in this imagined fantasy. It is hard.

Enjoy the seat heaters. If you have suggestions for the guide or better wiring tips let me know. I went in mostly blind.
Last edited by TequilaSqueela; Jun 28, 2016 at 12:57 PM. Reason: Grammar; Title

Member
Joined: Aug 2014
Posts: 1,620
From: Connecticut

Bravo on the mod and nice writeup. I didn't see the need to cut the pad so that the front of the lower pad would not function. Couldn't you have cut holes through the pad itself to loop the hog wires through and still maintain the length of the pad? I believe this is how the OEM pads work. I get what you were saying about the adhesive pads, they are not worth the use. Mine are under my seat covers and it was much easier to clean the seat covers when the pads were removable and not stuck to the seat cover. No sticky glue to deal with on the seats.
A lot of work. Good write-up and pics.
I have Clazzio seat covers so my install was much easier. Just put the pads under the covers. I ran my wiring into the center console up in to the Aux Circuit and placed the switches on the lower center panel.
I have had mine for 3 or 4 winters now. I did have to replace the seat portion on drivers side. I guess wiring must have broken inside.
I used the Ebay pads.

Thread
Thread Starter
Forum
Replies
Last Post
SilverEX15
3rd Gen GK Specific Fit Interior Modifications Sub-Forum
26
Mar 3, 2019 12:21 PM
Bluflu
2nd Gen GE8 Specific Fit Interior Modifications Sub-Forum
1
Jun 19, 2013 04:10 PM
alanchan
Greater Vancouver BC Community
2
Dec 13, 2011 04:39 PM
Chairman Kaga
1st Generation (GD 01-08)
19
Sep 4, 2011 12:12 PM
gts1985
Fit Exterior Modifications & JDM Styling
2
Jan 2, 2008 01:48 PM