


Rottboy's WOP GK LX 6-spd and Garage Stablemates



Thread Starter
|
Someone that spends his life on FitFreak.net
Joined: Mar 2014
Posts: 1,116
From: Hawaii: relocated to Western Canada Sept, 2015
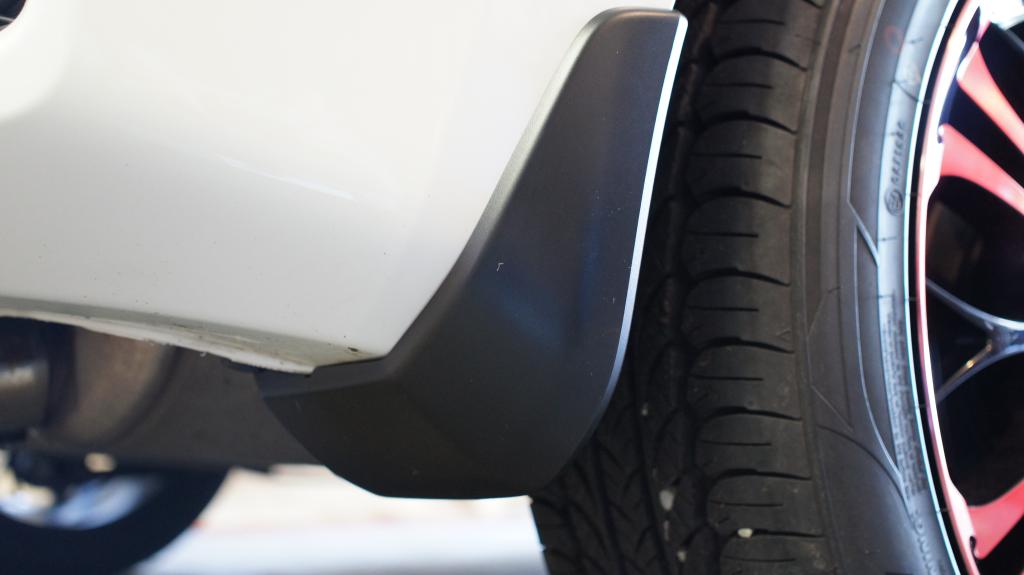
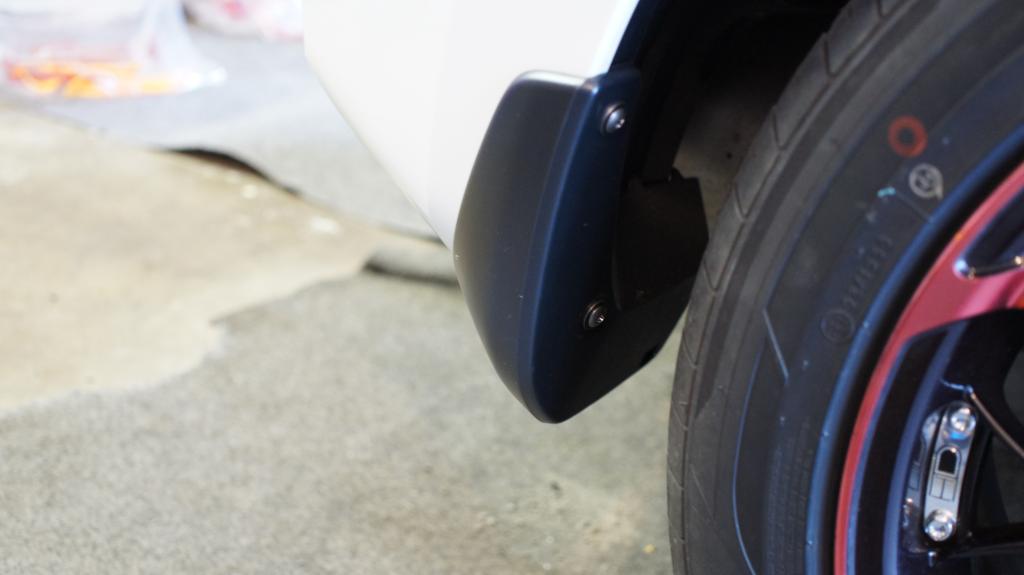
OEM MudGuard install done today:
Rear Right MudGuard
Left Rear MudGuard
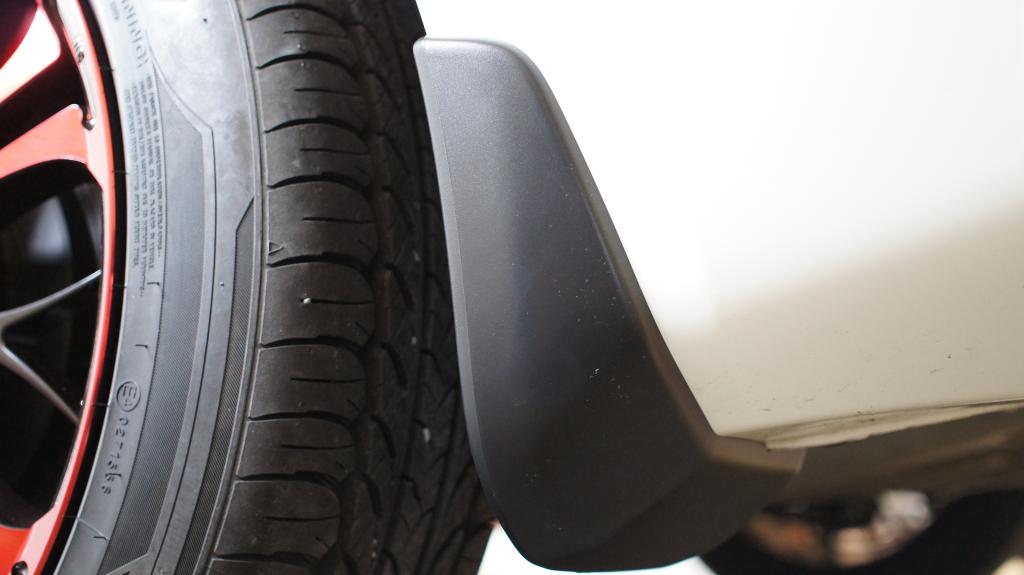
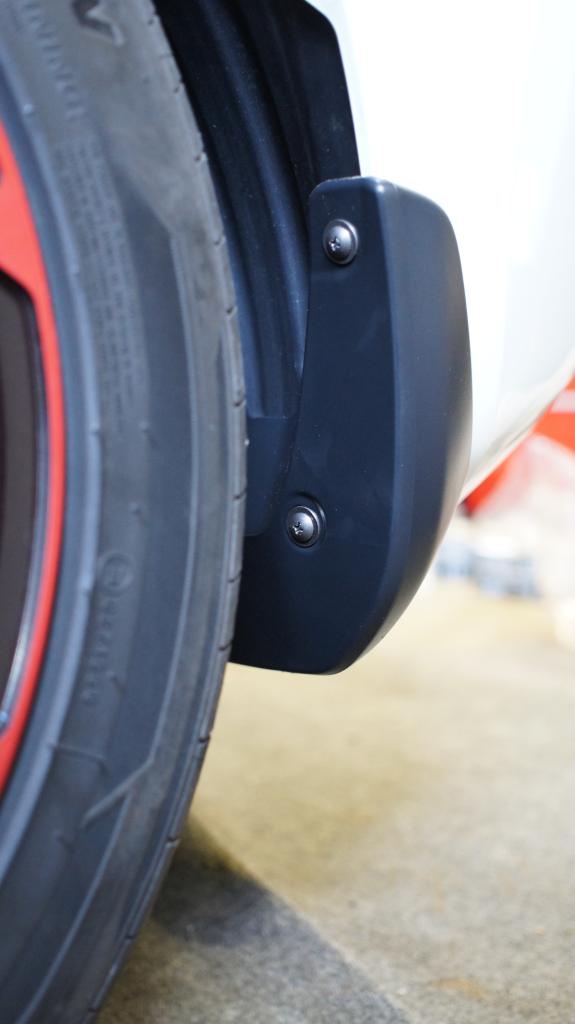
For those wanting to do this mod, for the rear install, make sure you have a very short screwdriver (Phillips head) handy plus a sharp boxcutter. The fronts are simple (one screw and 2 fasteners) - a 5 minute exercise.

Thread Starter
|
Someone that spends his life on FitFreak.net
Joined: Mar 2014
Posts: 1,116
From: Hawaii: relocated to Western Canada Sept, 2015
Looks like 2015 may cost me more than I thought. Was hoping my urge to spend would stop. WRONG!!!!!
As posted on the "What Mods......" thread:
Last Nov., my niece's guy suggested I have wrap installed on the front as he noticed I was quite anal about the new Fit. Told him that I already an OEM bra but after a couple of months, I figured the convinience of "full-time" protection would be worth looking into. That, plus, a couple of FF guys have already done it to their GK's.
Lucky for me, his buddy does this business on the island, part-time, for "high-end" cars.
He cut me a deal for $160 for the bonnet, mirrors and headlights. Found that affordable so had it done today.
3M wrapping the bonnet starts
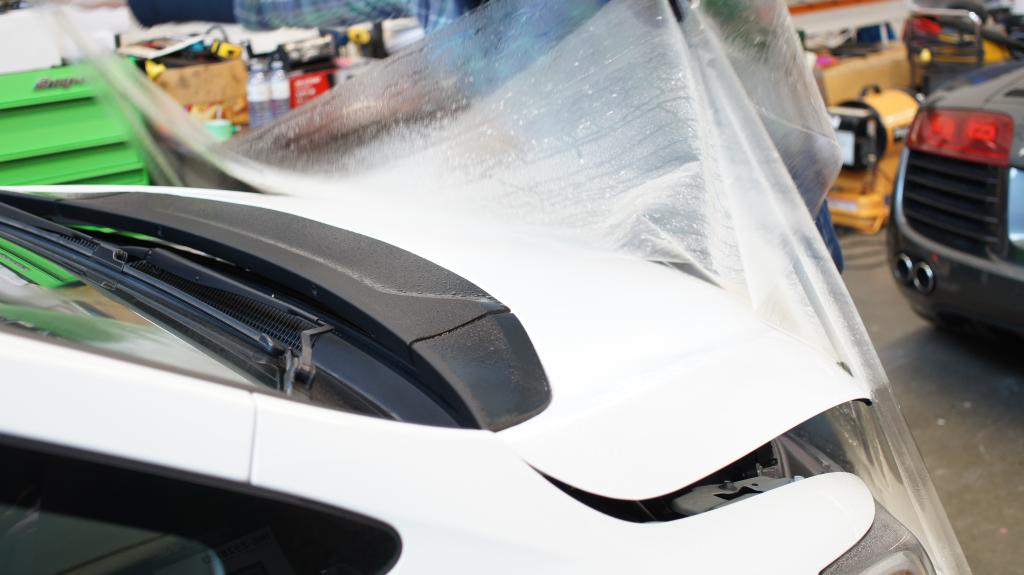
On the bonnet
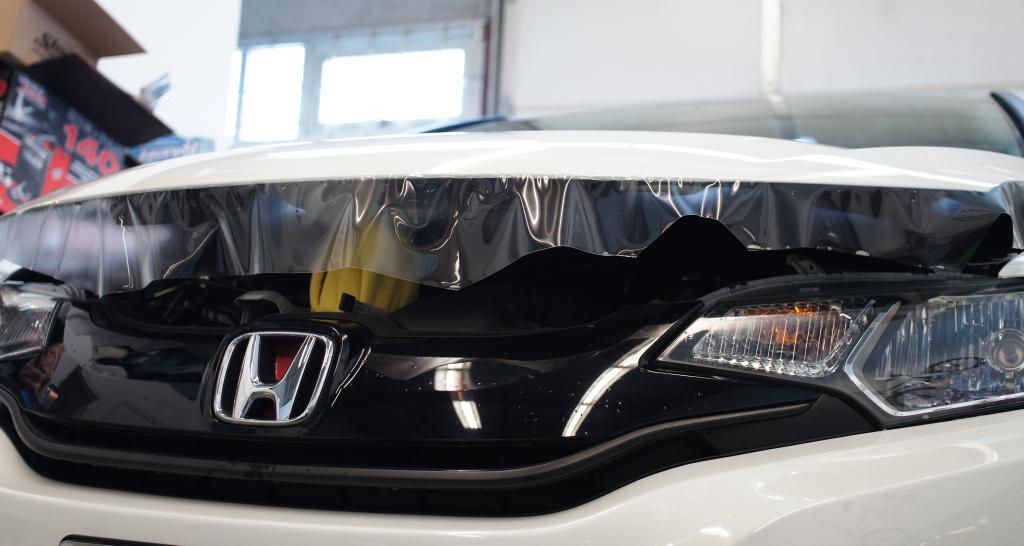
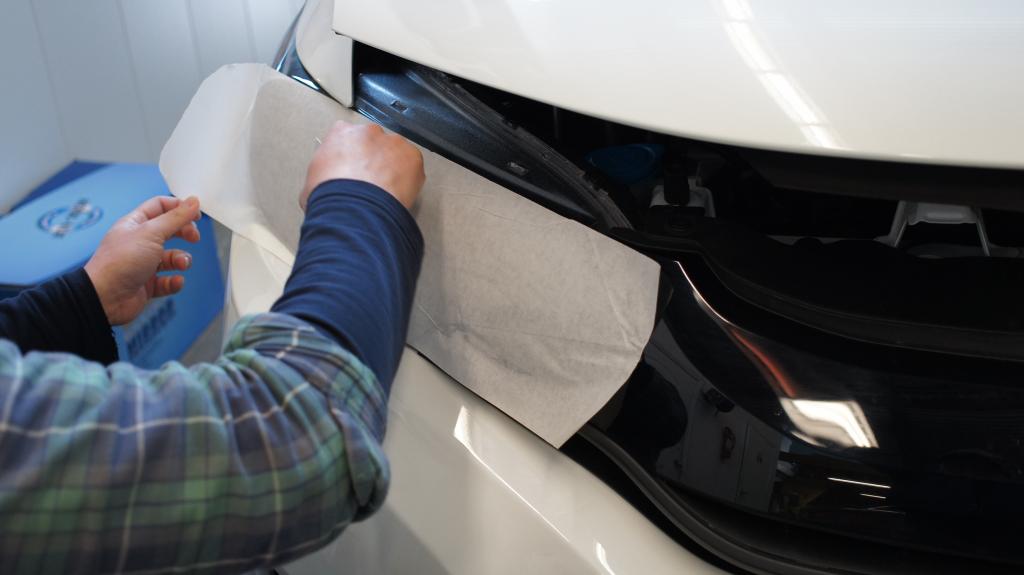
Stencil for the headlights
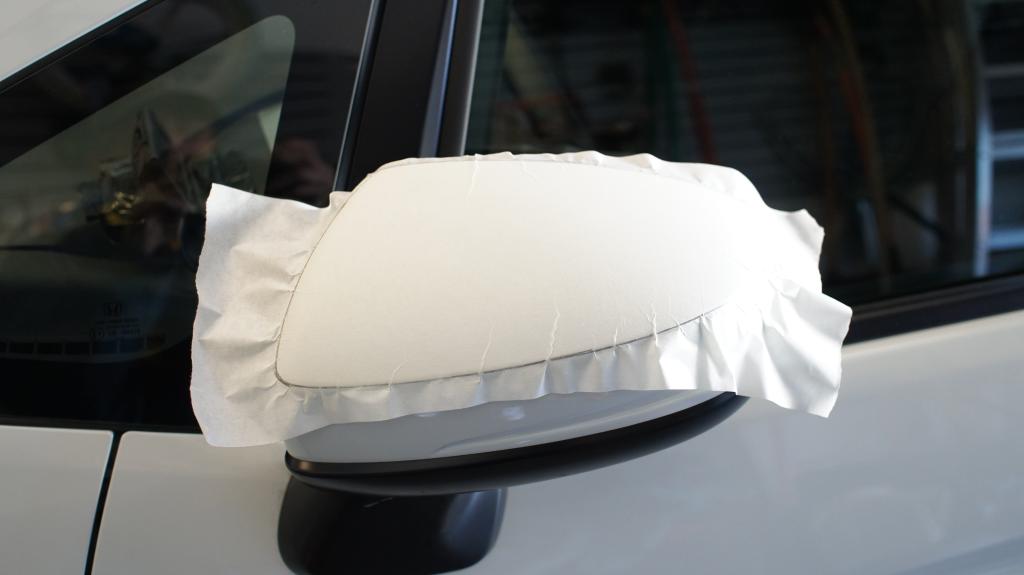
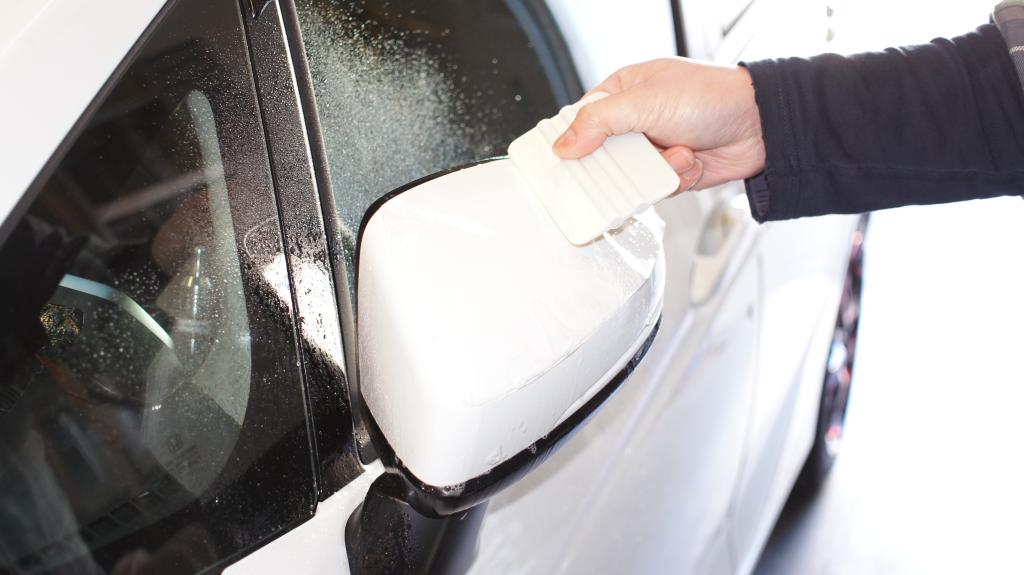
Then again for the mirrors
Install took about three hours. In the meantime I enjoyed the cars in his garage waiting for full body wraps - a Gallardo and an R8
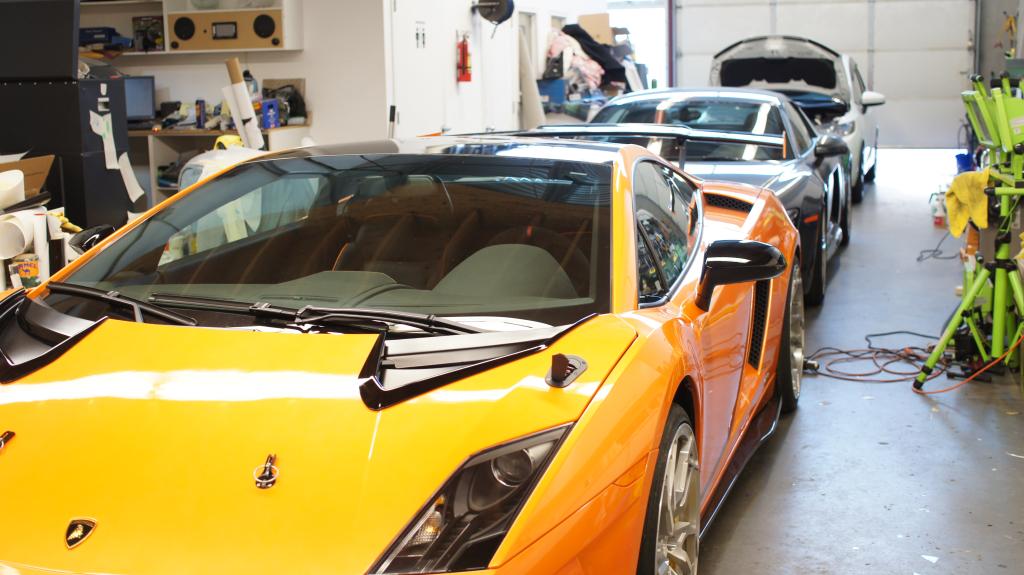
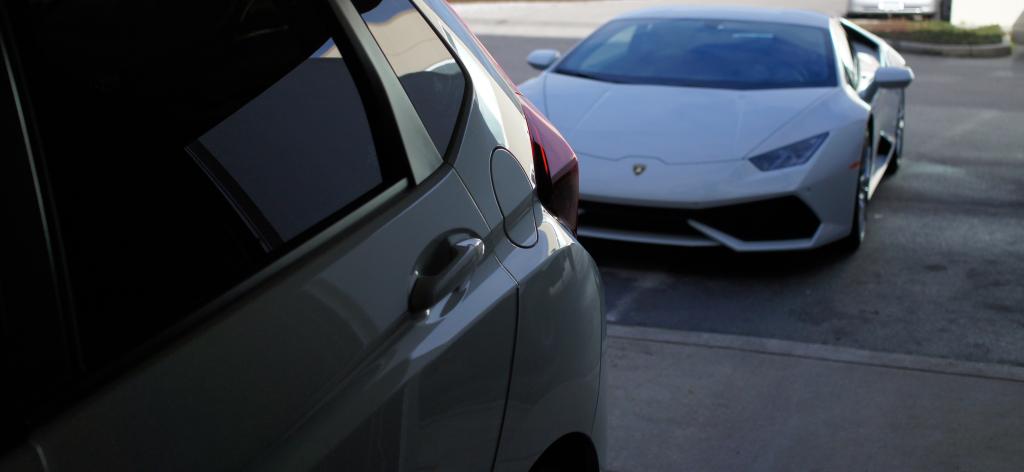
Then a Hurracan (correction: its an AVentador) arrives for an estimate. Owner says its first and only one, so far, on our island. I was totally humbled.
Finishing up the mirrors
Finished product in the garage
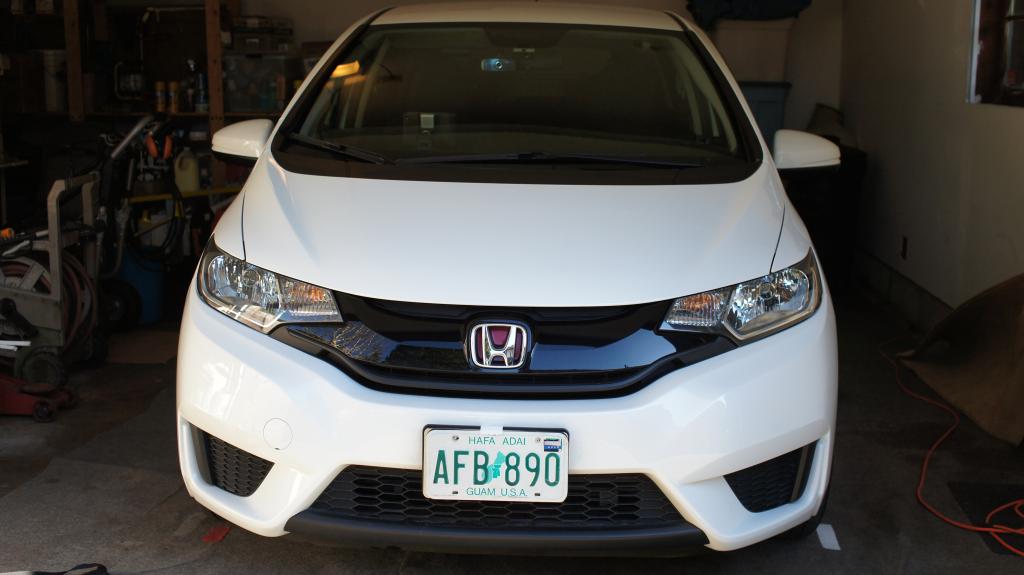
Wife is so pissed cause she says it looks the same????????????? Nutz! Most probably will let her shop again this weekend to appease the household.
As posted on the "What Mods......" thread:
Last Nov., my niece's guy suggested I have wrap installed on the front as he noticed I was quite anal about the new Fit. Told him that I already an OEM bra but after a couple of months, I figured the convinience of "full-time" protection would be worth looking into. That, plus, a couple of FF guys have already done it to their GK's.
Lucky for me, his buddy does this business on the island, part-time, for "high-end" cars.
He cut me a deal for $160 for the bonnet, mirrors and headlights. Found that affordable so had it done today.
3M wrapping the bonnet starts
On the bonnet
Stencil for the headlights
Then again for the mirrors
Install took about three hours. In the meantime I enjoyed the cars in his garage waiting for full body wraps - a Gallardo and an R8
Then a Hurracan (correction: its an AVentador) arrives for an estimate. Owner says its first and only one, so far, on our island. I was totally humbled.
Finishing up the mirrors
Finished product in the garage
Wife is so pissed cause she says it looks the same????????????? Nutz! Most probably will let her shop again this weekend to appease the household.
Last edited by ROTTBOY; Jan 30, 2015 at 08:59 AM.

Thread Starter
|
Someone that spends his life on FitFreak.net
Joined: Mar 2014
Posts: 1,116
From: Hawaii: relocated to Western Canada Sept, 2015
More accessories
From the "What Mods......" thread:
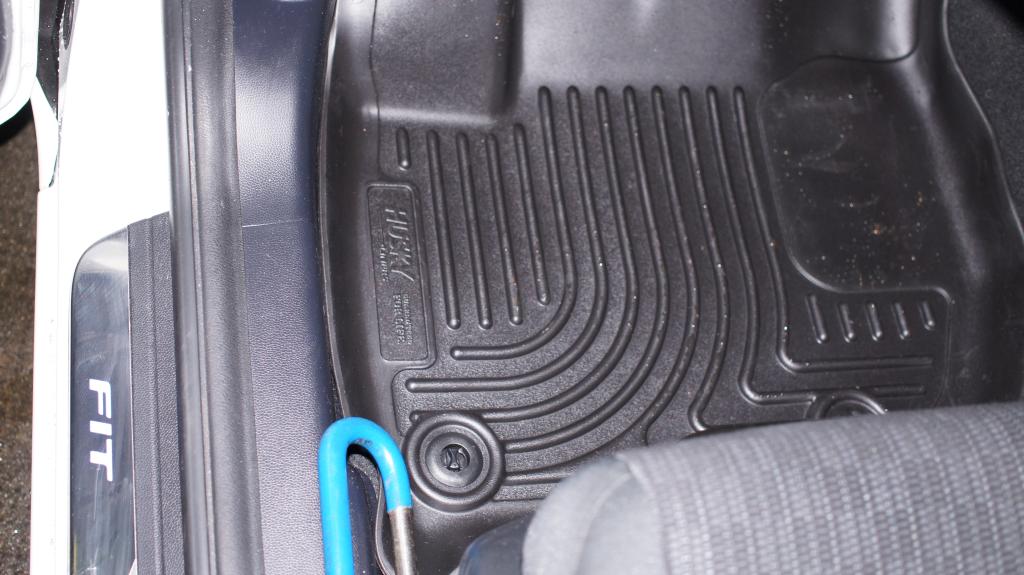
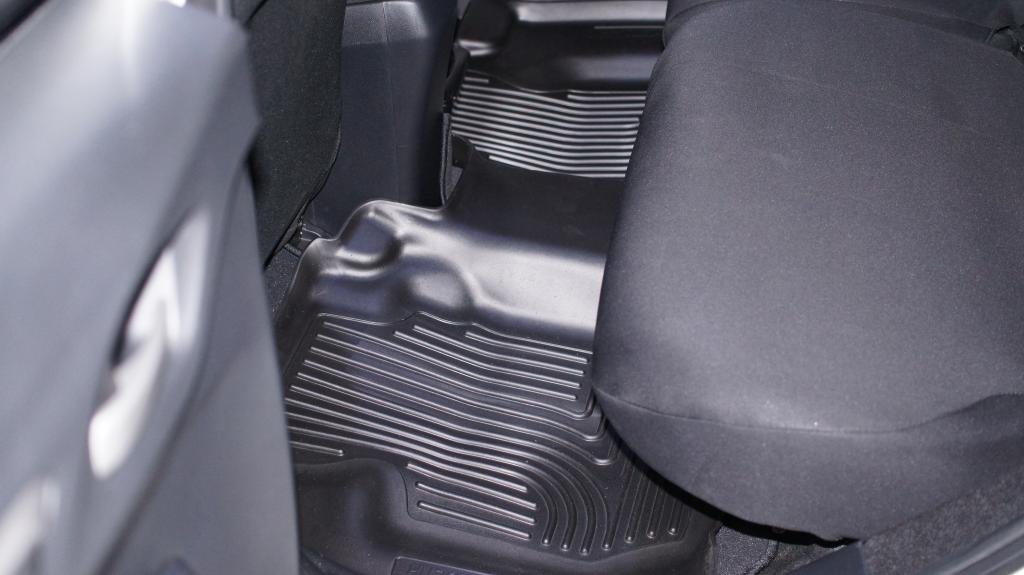
The ordered Husky's finally arrived. Carpet was getting its share of sand and debris with the OEM rubber mats so am liking the higher edges. Price was $118.96 shipped for the F & R (mainland). Its moulded exactly. Another like - the rear mat is one long piece that covers the center.
Front
REar
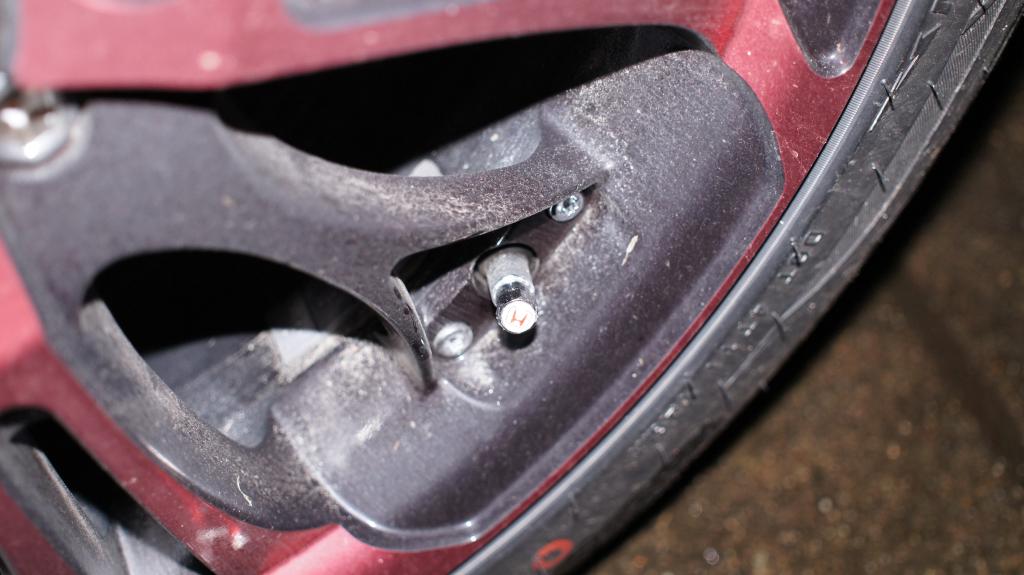
Knock-off Honda Tire valves. Pardon the sand covered wheel.
Husky WeatherBeater mat update:
A day and a half after using the Husky's, gotta amend my first statement regarding the grip (on shoe soles). Its pretty darn good. Very evident in wet conditions. Dare I say better than the OEM's. The other feature that pleases me - driver's side mat covers the dead pedal completely.
The ordered Husky's finally arrived. Carpet was getting its share of sand and debris with the OEM rubber mats so am liking the higher edges. Price was $118.96 shipped for the F & R (mainland). Its moulded exactly. Another like - the rear mat is one long piece that covers the center.
Front
REar
Knock-off Honda Tire valves. Pardon the sand covered wheel.
Husky WeatherBeater mat update:
A day and a half after using the Husky's, gotta amend my first statement regarding the grip (on shoe soles). Its pretty darn good. Very evident in wet conditions. Dare I say better than the OEM's. The other feature that pleases me - driver's side mat covers the dead pedal completely.
Last edited by ROTTBOY; Feb 5, 2015 at 10:08 PM.

Member
Joined: May 2014
Posts: 1,917
From: Delaware

^^^.....This is EXACTLY what I need. I have a moulded on like this in my RAV4. My floor is horrible right now but I don't want to put in any floor mats that has any 'weight' to them.
How long did it take to get to you?
REPLY: Myxalplyx, ordered mid-Dec. but arrived here on Feb. 2. The price shown is only for mainland shipping. Being on the islands, most of the "stuff" are ordered from the mainland and then shipped it to my relative in WA. state who arranges transport to HI. Not super fast but its free!!!! The Husky's, when ready for shipment, took 4 days to arrive in WA. Should be the same for your locale. - rttby
How long did it take to get to you?
REPLY: Myxalplyx, ordered mid-Dec. but arrived here on Feb. 2. The price shown is only for mainland shipping. Being on the islands, most of the "stuff" are ordered from the mainland and then shipped it to my relative in WA. state who arranges transport to HI. Not super fast but its free!!!! The Husky's, when ready for shipment, took 4 days to arrive in WA. Should be the same for your locale. - rttby
Last edited by ROTTBOY; Feb 6, 2015 at 03:44 PM.
Hey Rottboy, what size WheelSkins did you get for your steering wheel? I was looking to get one also since it's cheaper than a replacement OEM wheel. The one you got looks a size too large, though.
Do you like it? Any qualms about the purchase?
Thanks
Do you like it? Any qualms about the purchase?
Thanks
Member
Joined: Dec 2014
Posts: 647
From: San Diego - Carlsbad, CA
Thread Starter
|
Someone that spends his life on FitFreak.net
Joined: Mar 2014
Posts: 1,116
From: Hawaii: relocated to Western Canada Sept, 2015
Recent add-ons
As posted on the "What Mods...... " thread:
Wife surprised me yesterday and my ordered seat covers finally arrived from the mainland.
These are Neoprene from CalTrend #HD193-01PP (US$250). They also have NeoSupreme for about $70 less but decided to stick with the same material as the rear seat OEM covers.
When these were purchased through one of their retailers but still had to call CalTRend for the exact part #'s for the GK as they still weren't online.
Install took me 15 minutes and whatever creases are visible should level out in a couple of days.
They feel great and look OEM. Unlike NeoSupreme, these are water resistant and where I live, its a true protector.
Both Front SEATS:
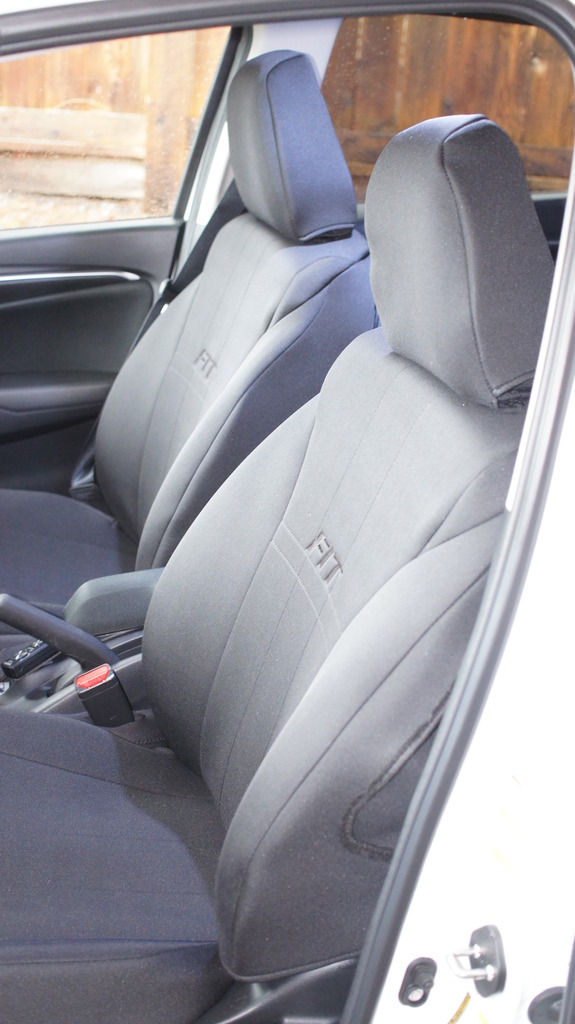
Driver's
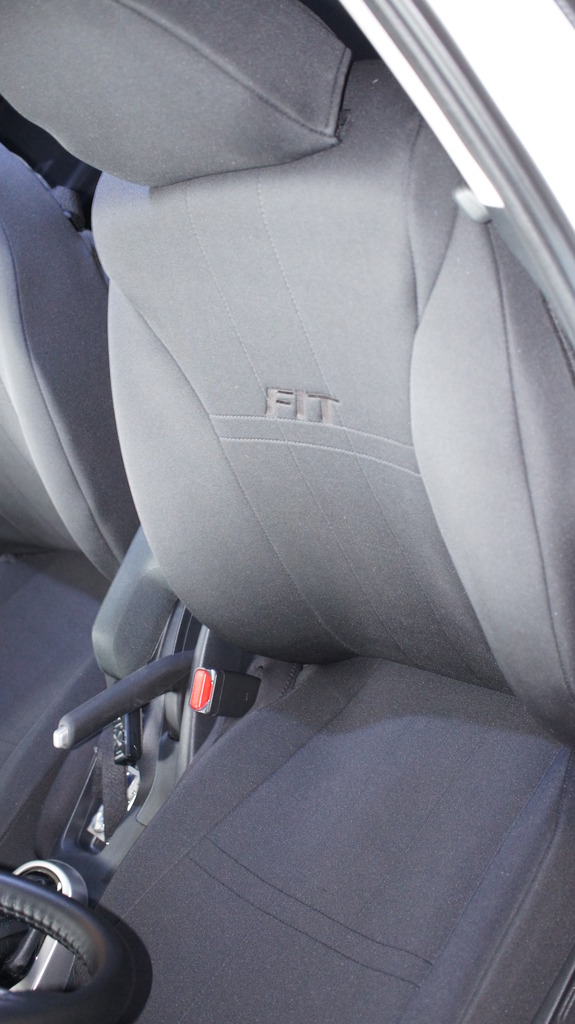
Passenger's
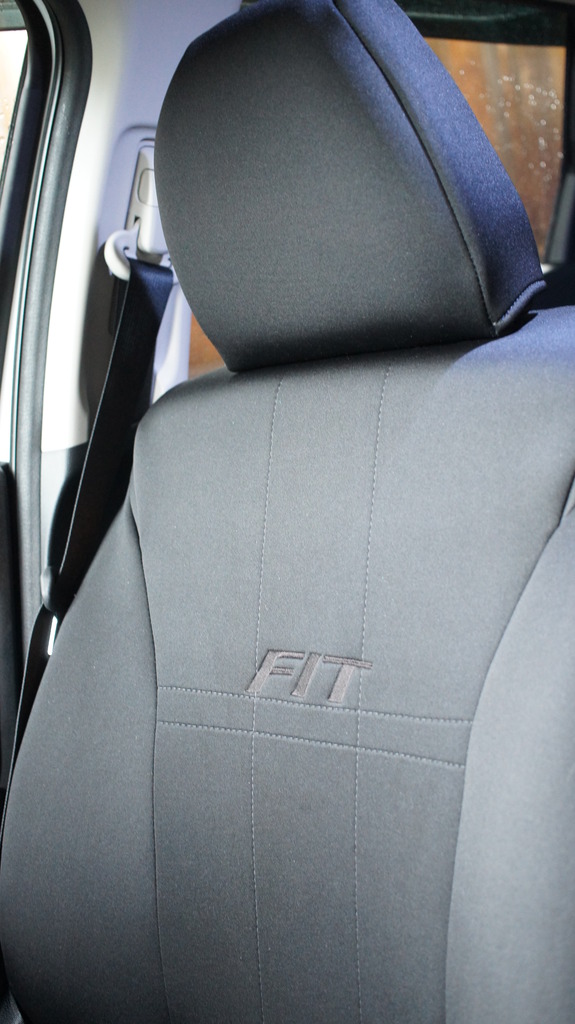
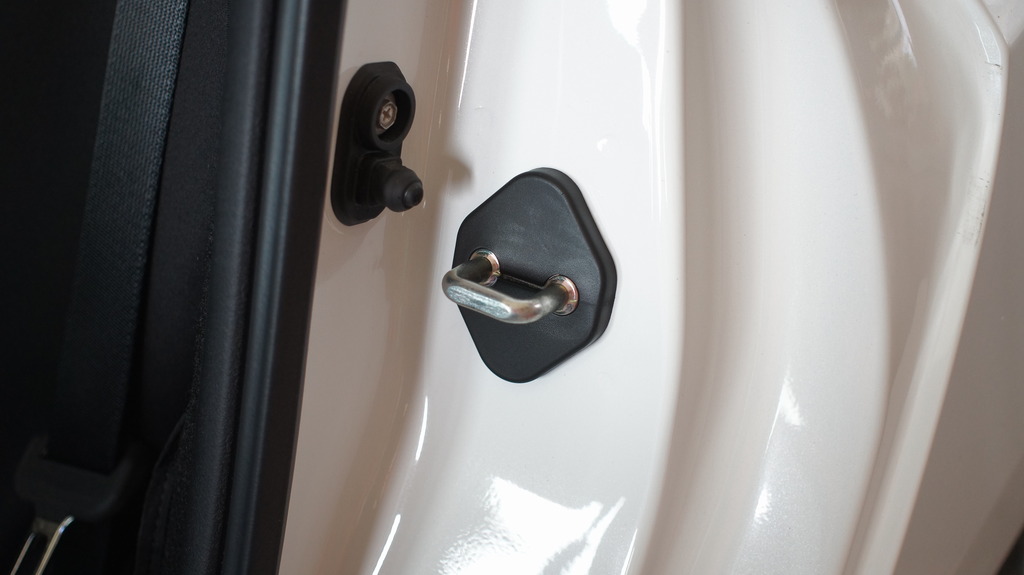
One more useless goodie from China - Door striker covers
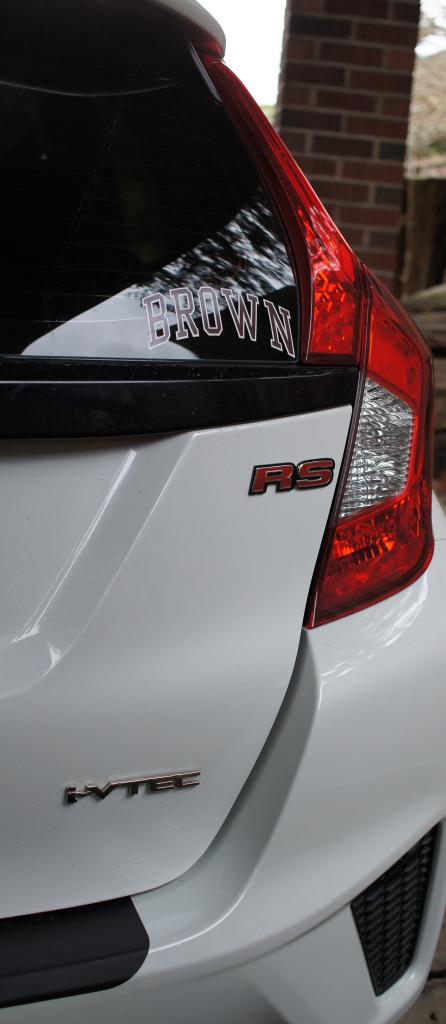
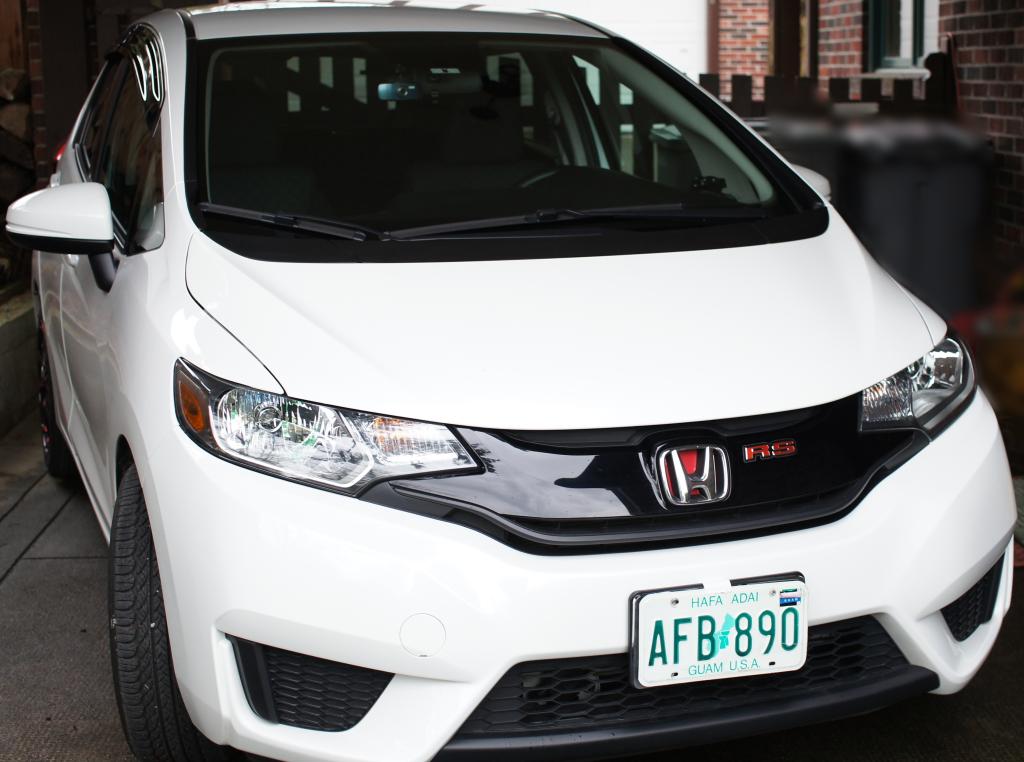
Did OEM JDM RS emblems last month:
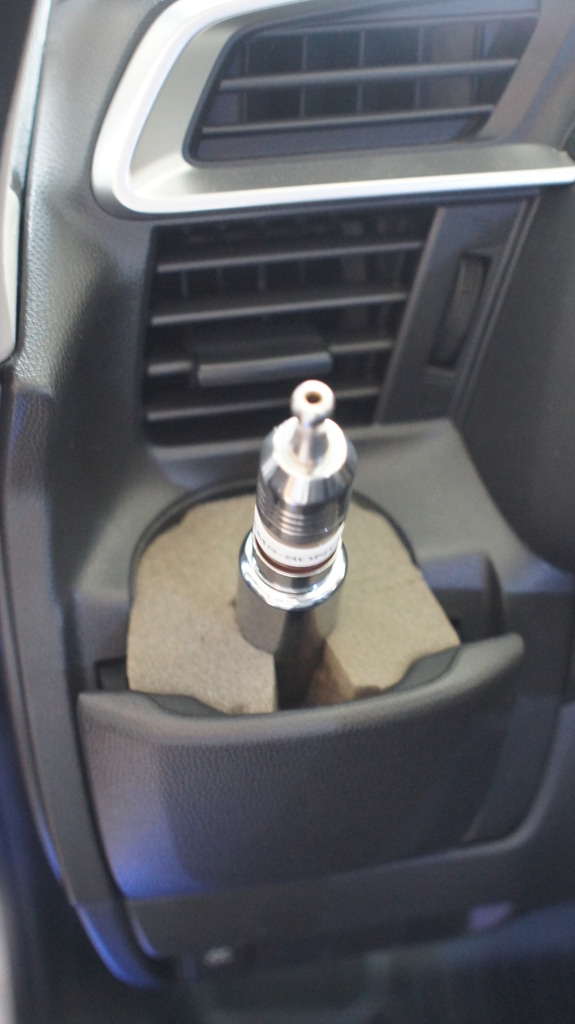
Here's my sunglass holder solution from Ebay ($0.96 shipped).

Cupholder is being used as a vape holder!
Wife surprised me yesterday and my ordered seat covers finally arrived from the mainland.
These are Neoprene from CalTrend #HD193-01PP (US$250). They also have NeoSupreme for about $70 less but decided to stick with the same material as the rear seat OEM covers.
When these were purchased through one of their retailers but still had to call CalTRend for the exact part #'s for the GK as they still weren't online.
Install took me 15 minutes and whatever creases are visible should level out in a couple of days.
They feel great and look OEM. Unlike NeoSupreme, these are water resistant and where I live, its a true protector.
Both Front SEATS:
Driver's
Passenger's
One more useless goodie from China - Door striker covers
Did OEM JDM RS emblems last month:
Here's my sunglass holder solution from Ebay ($0.96 shipped).
Cupholder is being used as a vape holder!
Last edited by ROTTBOY; Mar 15, 2015 at 04:42 PM.
Thread Starter
|
Someone that spends his life on FitFreak.net
Joined: Mar 2014
Posts: 1,116
From: Hawaii: relocated to Western Canada Sept, 2015
Foglight/DRL/HEated seat/Horn installs
As posted on the What Mods........ thread:
In preparing for our eventual relocation to the mainland, decided to install the foglight/drl kit that's been lying around for months. Fit is being shipped by June (wife's Lexus is sold). Added heated seats using OEM switches. I cheated putting the heated seat core under the neoprene seatcovers instead of ripping apart the factory cloth seats.
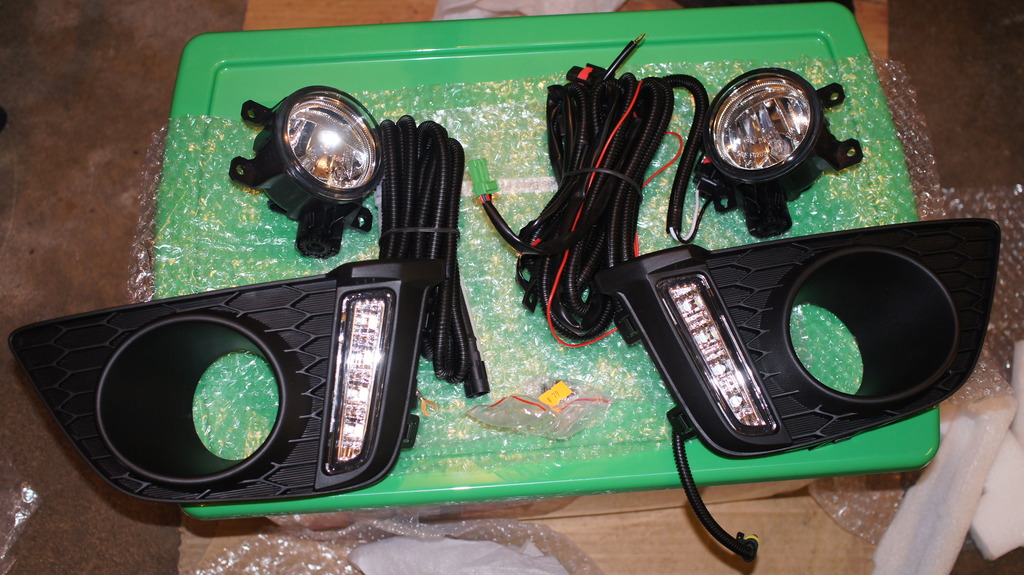
For those who had doubts about the Chinese sourced Foglight/DRL housing, let me say that its an exact fit. Got mine on Ebay for $150 shipped. Comes complete with two harnesses and a foglight switch.
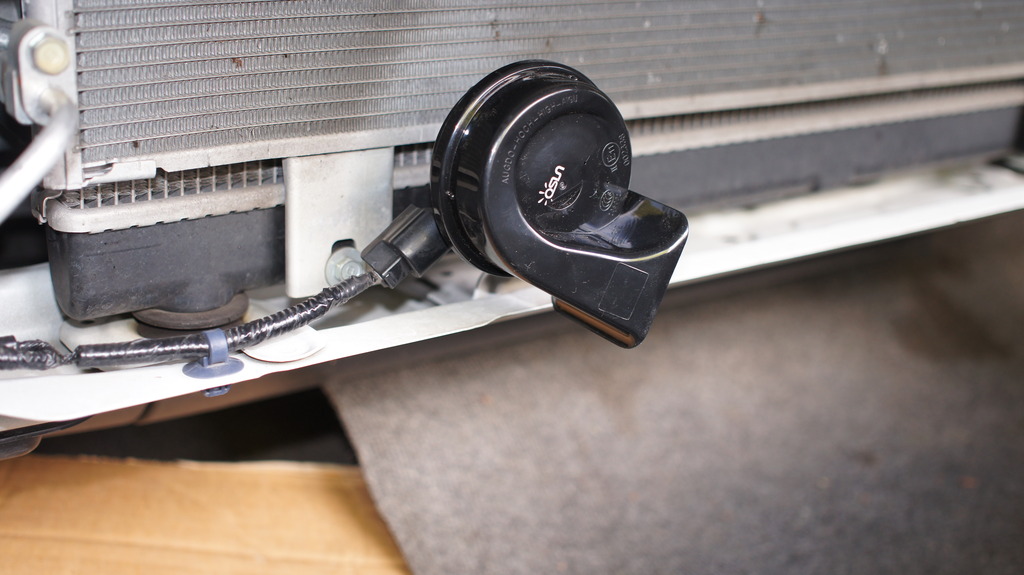
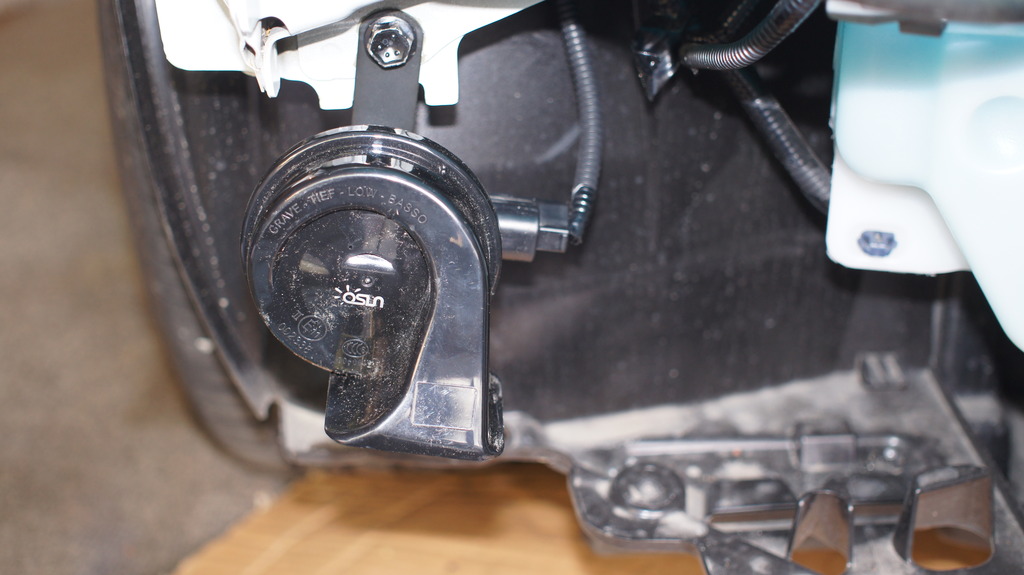
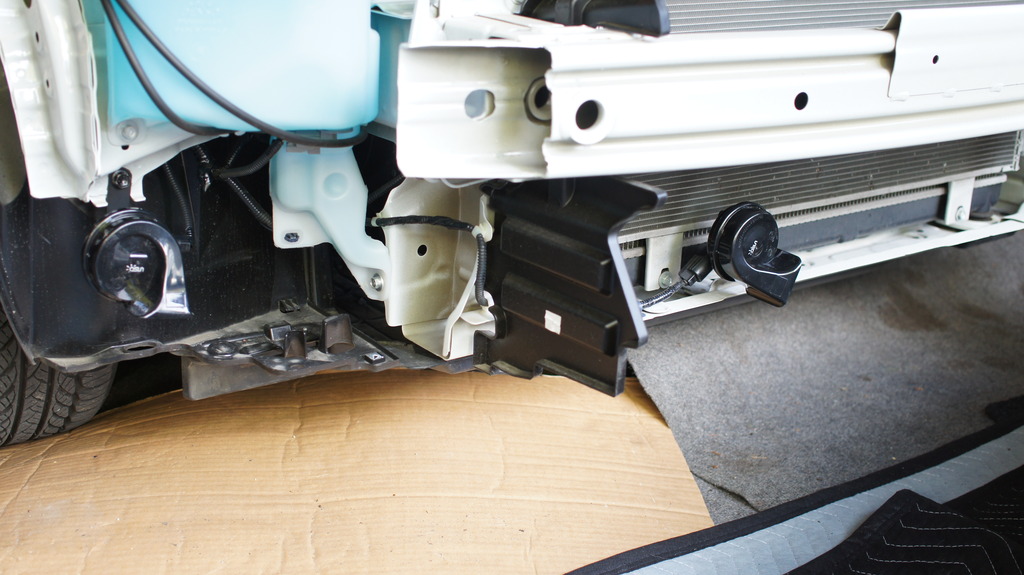
Installed Hellas horns last year and one tone is already sounding weird. Replaced them with horns from College Hills (saw this from one of the forum guys - SAM SNEED). Good thing I didn't snip off the original connectors as it was a simple swap. These are nice and loud.
College Hill horns installed
Aftermarket Fog/DRL kit unpacked
Blank LX OEM Bumper garnish
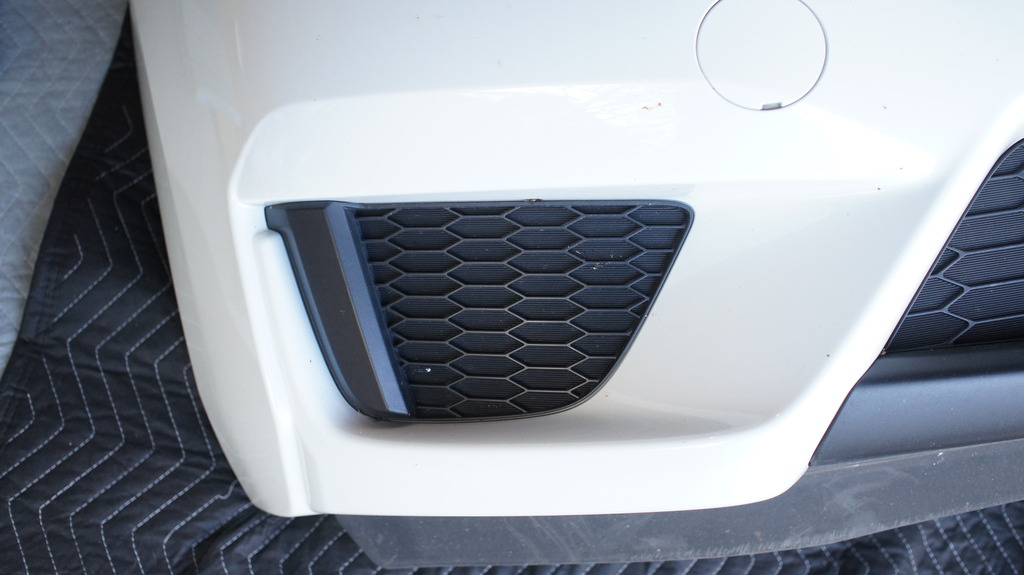
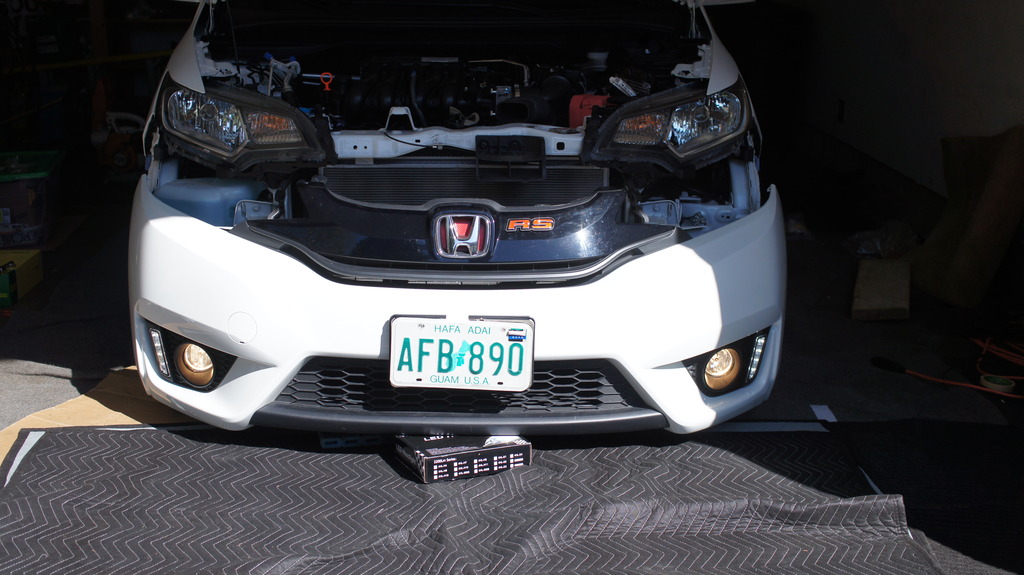
TEst fit of aftermarket Foglight housing
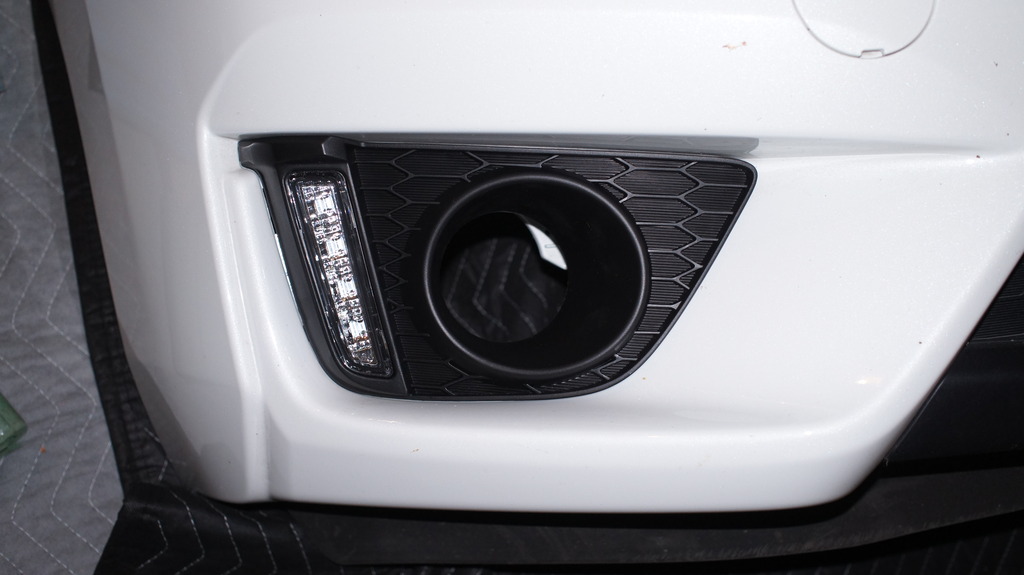
Fitting foglight
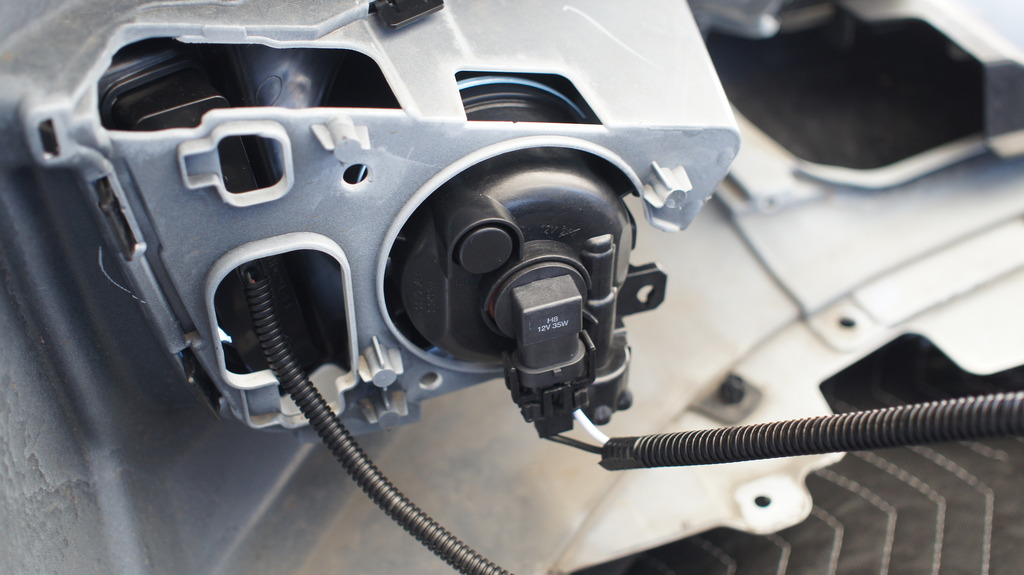
Wiring set-up for testing
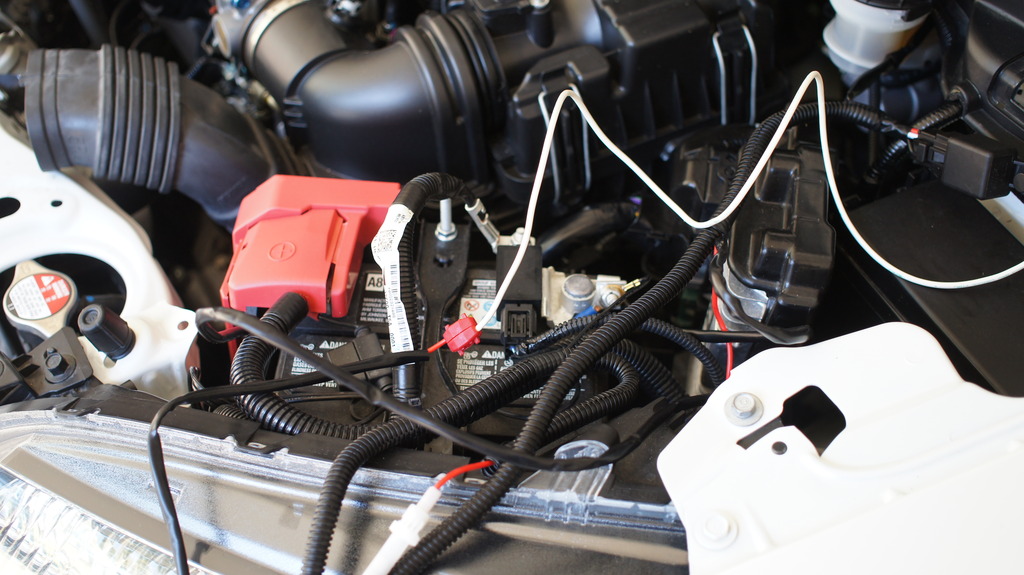
Wiring harness left and right sides
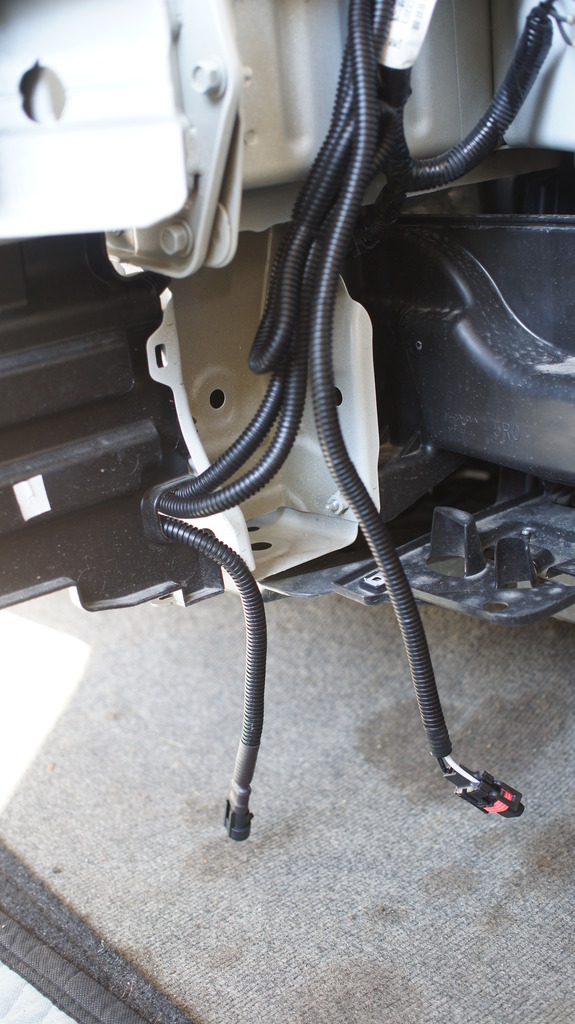
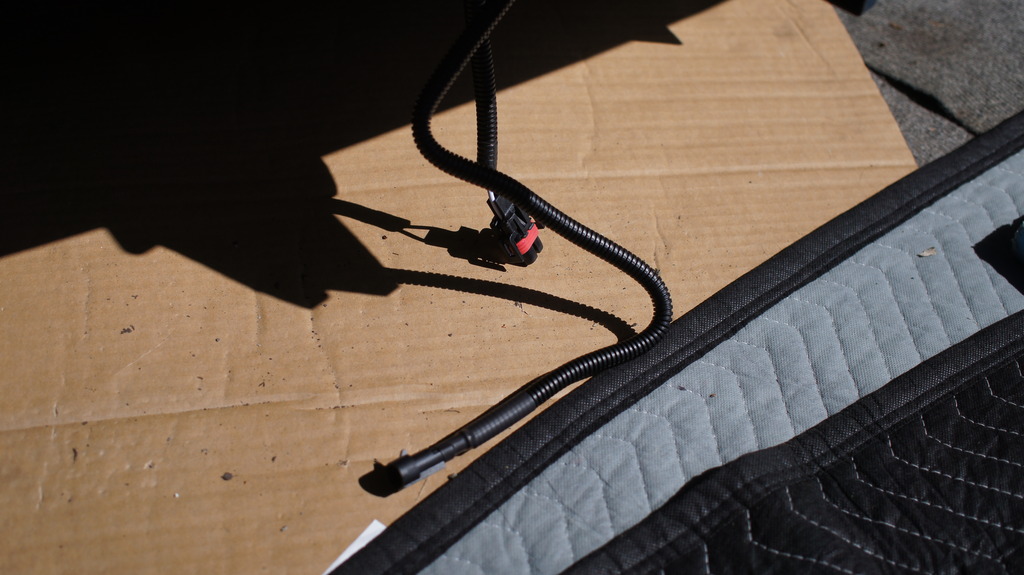
TEsting
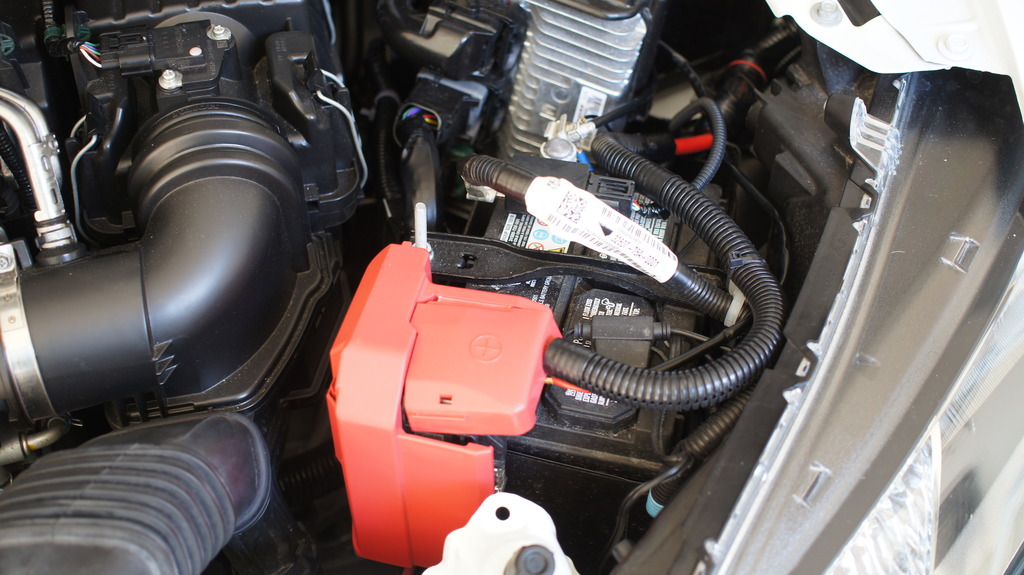
Wiring harness cleaned up and tied down
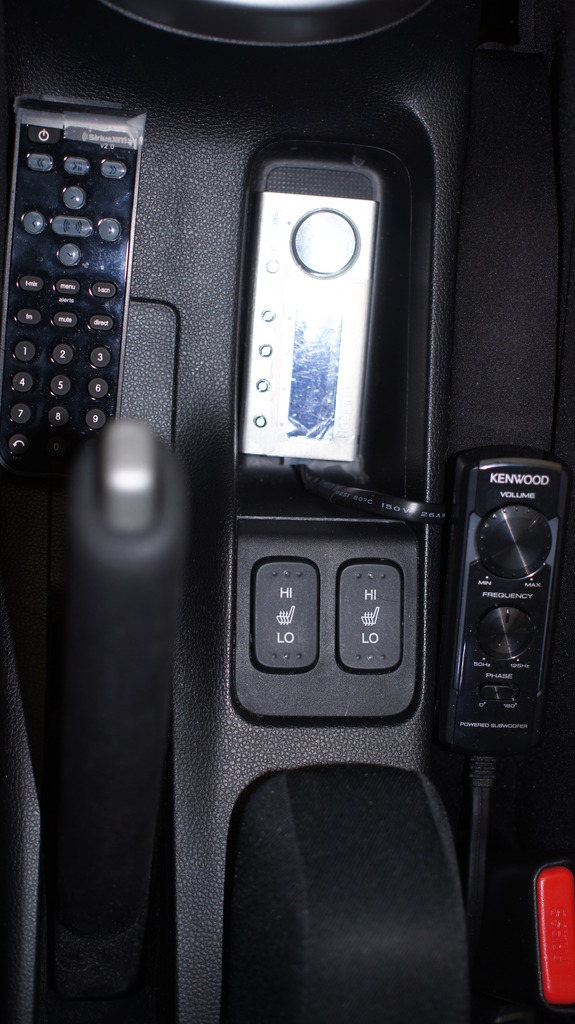
Foglight switch fits exactly in any blank slot
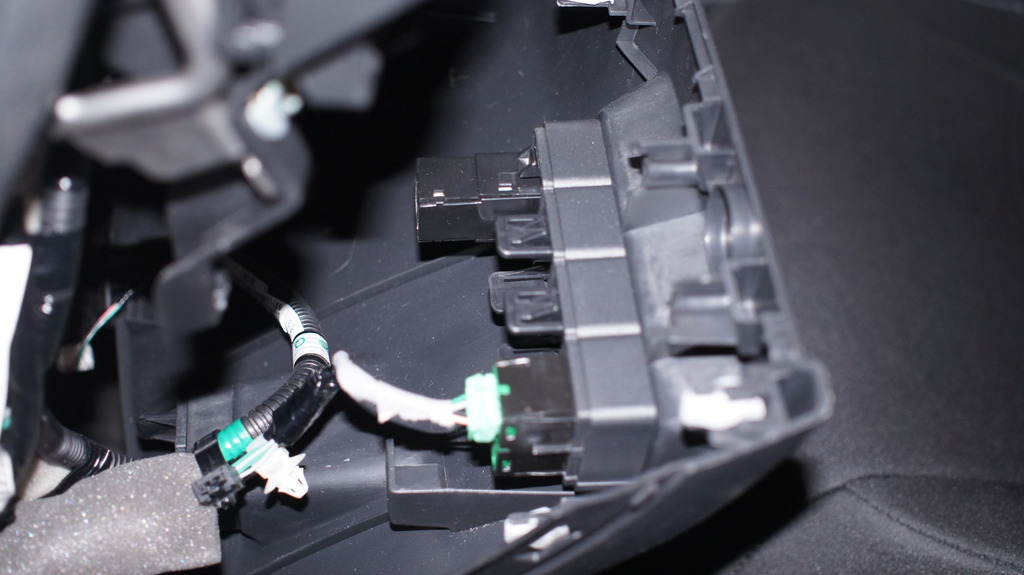
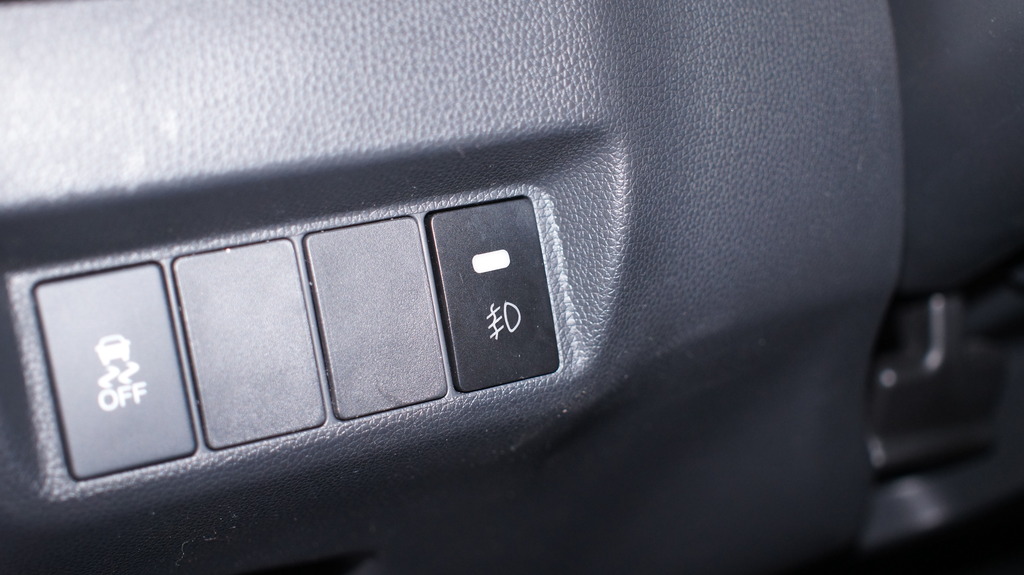
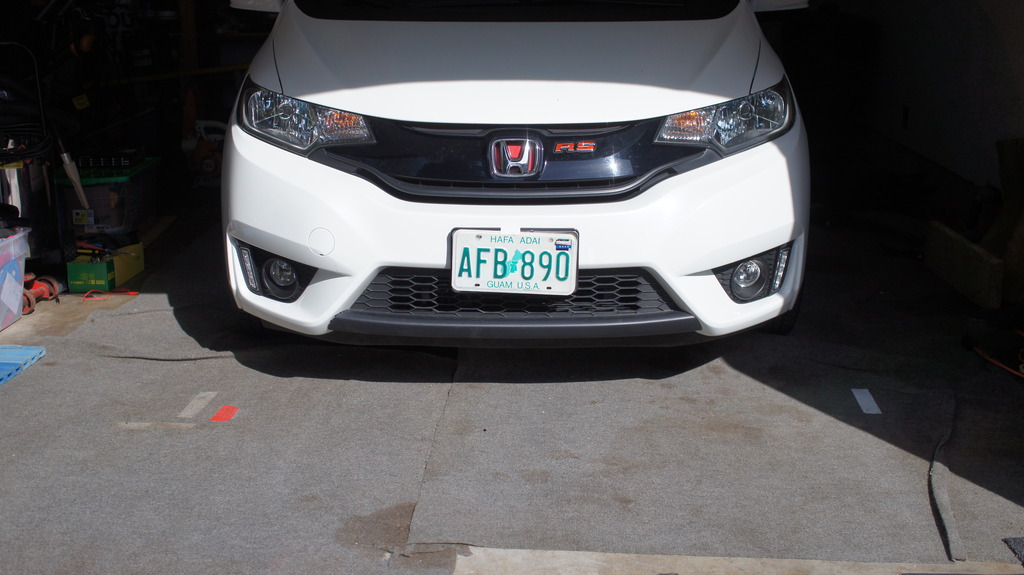
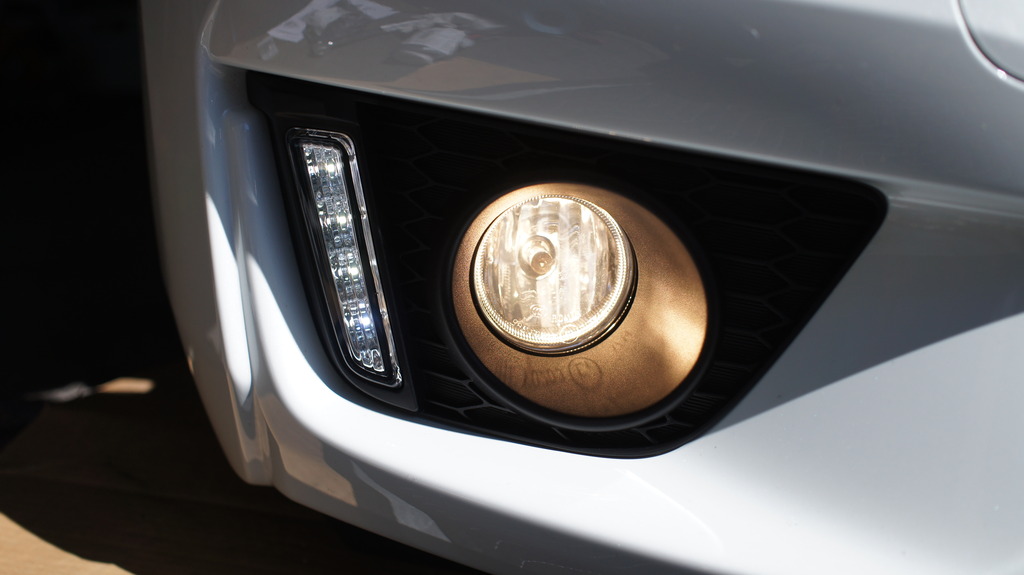
Finished product
OEM heated seat switches
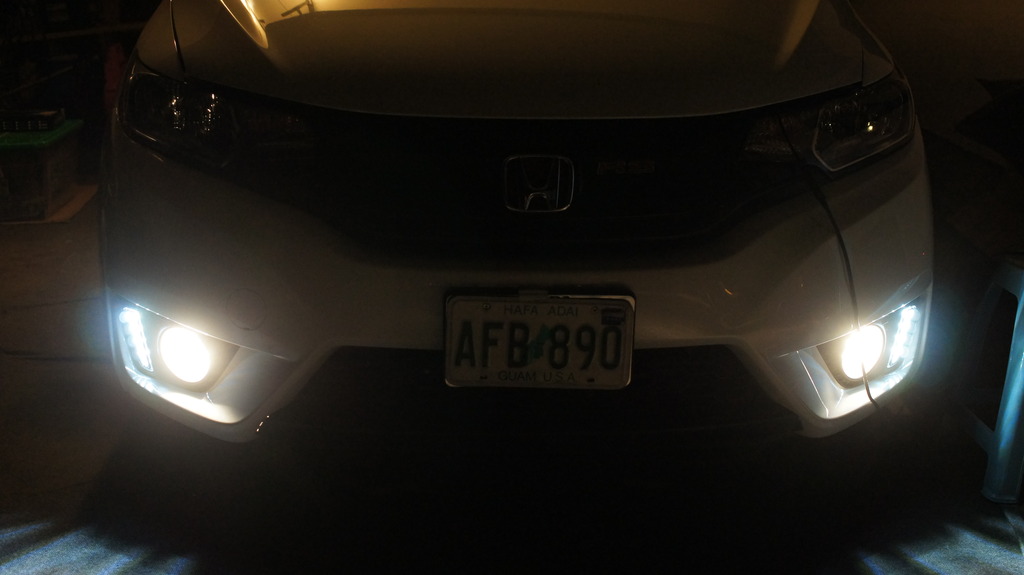
The factory DRL's are disabled and the LED strip(s) are now functioning in its place. Followed Bassquitarist1985 lead and will install LED H8 for the fogs later. This project took me the whole day. Routing the wires was the longest.
See you guys on the mainland in a couple of months.
UPDATE: NIghtime test.
DRL
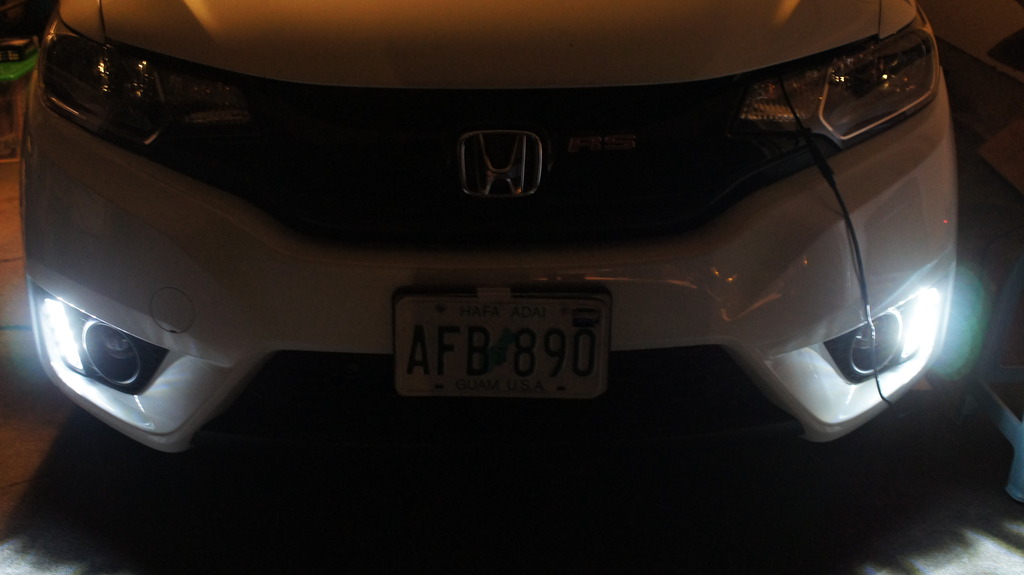
DRL & FOGLIGHTS:
In preparing for our eventual relocation to the mainland, decided to install the foglight/drl kit that's been lying around for months. Fit is being shipped by June (wife's Lexus is sold). Added heated seats using OEM switches. I cheated putting the heated seat core under the neoprene seatcovers instead of ripping apart the factory cloth seats.
For those who had doubts about the Chinese sourced Foglight/DRL housing, let me say that its an exact fit. Got mine on Ebay for $150 shipped. Comes complete with two harnesses and a foglight switch.
Installed Hellas horns last year and one tone is already sounding weird. Replaced them with horns from College Hills (saw this from one of the forum guys - SAM SNEED). Good thing I didn't snip off the original connectors as it was a simple swap. These are nice and loud.
College Hill horns installed
Aftermarket Fog/DRL kit unpacked
Blank LX OEM Bumper garnish
TEst fit of aftermarket Foglight housing
Fitting foglight
Wiring set-up for testing
Wiring harness left and right sides
TEsting
Wiring harness cleaned up and tied down
Foglight switch fits exactly in any blank slot
Finished product
OEM heated seat switches
The factory DRL's are disabled and the LED strip(s) are now functioning in its place. Followed Bassquitarist1985 lead and will install LED H8 for the fogs later. This project took me the whole day. Routing the wires was the longest.
See you guys on the mainland in a couple of months.
UPDATE: NIghtime test.
DRL
DRL & FOGLIGHTS:
Last edited by ROTTBOY; Apr 26, 2015 at 11:24 PM.

Member
Joined: Aug 2014
Posts: 1,620
From: Connecticut
Thank you Rottboy for the shout out mention!
1. Could the DRL/foglight garnish be installed without have to remove the bumper?
2. It just clips over the existing foglight? (On the EX) i know you have an LX
3. Any pictures of the heated seat install? You got the OEM switch and garnish, did you also get the electrical harness from Honda?
4. How did you connect the aftermarket heated pads to the OEM switches? Did you buy any specific connector ends?? Or they standard?
Once I know the above i'm ordering the parts. Till then i did order the EX-L side mirror skulls and LED winkers to install on my EX 6MT. Damn shame that feature and heated side mirrors were not at least an option on the EX.
REPLY:
1. With great difficulty, one may be able to remove the OEM garnish from the movable slot under each front side of the bumper. The vehicle will definitely have to go on a lift. Using this method, am sure a couple of the retaining clips will get ruined. Therefore, my suggestion remains to remove the bumper. Have done it 3 times and it just gets easier. REfer to Honda's installation manual for the procedure applicable for the OEM Sports Grill accessory (download from Bernardi or College Hills sites).
2. On all models, there is a permanent provision to have foglights secured to the bumper - not the garnish. The vertical LED is integrated into the garnish.
3. & 4. Both heated seat cores go to its respective switches then into one harness which passes through a relay then to the power source. Only got the OEM switches and the OEM female connector. These aftermarket heated seat cores have their own wiring harness. Using a regulated power supply, a bunch of alligator clips and a multi-meter, its easy enough to open the female connector and create the required wiring pattern (used the aftermarket switches/connectors as guides - they are round w/ hi/lo positions - exact functions like the OEM stuff). Strongly suggest testing out your heated seat core (uninstalled) and from there you can determine your wiring route. Used the primary cigar lighter fuse socket with a piggy back fuse holder as the switched power source.
TIP: In between the core and the cloth seats, I added some thin insulation cloth pads (bought from Home Depot). Mainly to ensure that the cores don't mark the face of the cloth seats over time. Good thing the neoprene seat covers are very fitted. Nothing moves underneath.
If I was staying on the islands, this mod would'nt be needed but since we'll be relocating to the Northwest region, might as well get it out of the way. Got my undergraduate diploma in Ohio so I know well what a joy it is to have "butt warmers" during the winter season.
Good luck and feel free to ask if you get stuck anywhere. (Doubt you'll need any assistance after seeing how you did your other Fit projects). Am looking forward to your skull and LED winker install.
KEEP UP the SHARE!!! - rttby
1. Could the DRL/foglight garnish be installed without have to remove the bumper?
2. It just clips over the existing foglight? (On the EX) i know you have an LX
3. Any pictures of the heated seat install? You got the OEM switch and garnish, did you also get the electrical harness from Honda?
4. How did you connect the aftermarket heated pads to the OEM switches? Did you buy any specific connector ends?? Or they standard?
Once I know the above i'm ordering the parts. Till then i did order the EX-L side mirror skulls and LED winkers to install on my EX 6MT. Damn shame that feature and heated side mirrors were not at least an option on the EX.
REPLY:
1. With great difficulty, one may be able to remove the OEM garnish from the movable slot under each front side of the bumper. The vehicle will definitely have to go on a lift. Using this method, am sure a couple of the retaining clips will get ruined. Therefore, my suggestion remains to remove the bumper. Have done it 3 times and it just gets easier. REfer to Honda's installation manual for the procedure applicable for the OEM Sports Grill accessory (download from Bernardi or College Hills sites).
2. On all models, there is a permanent provision to have foglights secured to the bumper - not the garnish. The vertical LED is integrated into the garnish.
3. & 4. Both heated seat cores go to its respective switches then into one harness which passes through a relay then to the power source. Only got the OEM switches and the OEM female connector. These aftermarket heated seat cores have their own wiring harness. Using a regulated power supply, a bunch of alligator clips and a multi-meter, its easy enough to open the female connector and create the required wiring pattern (used the aftermarket switches/connectors as guides - they are round w/ hi/lo positions - exact functions like the OEM stuff). Strongly suggest testing out your heated seat core (uninstalled) and from there you can determine your wiring route. Used the primary cigar lighter fuse socket with a piggy back fuse holder as the switched power source.
TIP: In between the core and the cloth seats, I added some thin insulation cloth pads (bought from Home Depot). Mainly to ensure that the cores don't mark the face of the cloth seats over time. Good thing the neoprene seat covers are very fitted. Nothing moves underneath.
If I was staying on the islands, this mod would'nt be needed but since we'll be relocating to the Northwest region, might as well get it out of the way. Got my undergraduate diploma in Ohio so I know well what a joy it is to have "butt warmers" during the winter season.
Good luck and feel free to ask if you get stuck anywhere. (Doubt you'll need any assistance after seeing how you did your other Fit projects). Am looking forward to your skull and LED winker install.
KEEP UP the SHARE!!!
- rttby
Last edited by ROTTBOY; Apr 27, 2015 at 12:44 AM.
Member
Joined: Aug 2014
Posts: 1,620
From: Connecticut
Rottboy,
1. What is the part# for the female connector of the OEM heated seat switches? I'm assuming its 32114-T5A-J00? I'll likely need to cut that one up to make it work with an aftermarket kit.
2. Looked at the disassembly of the front bumper, it doesn't look too terrible to do. I'll try my hand at releasing the clips of the foglight garnish without removing the bumper. I'm more afraid of breaking the clips on the side where the bumper meets the body trying to release them. I've heard they are not very durable. Any pictures of these clips?
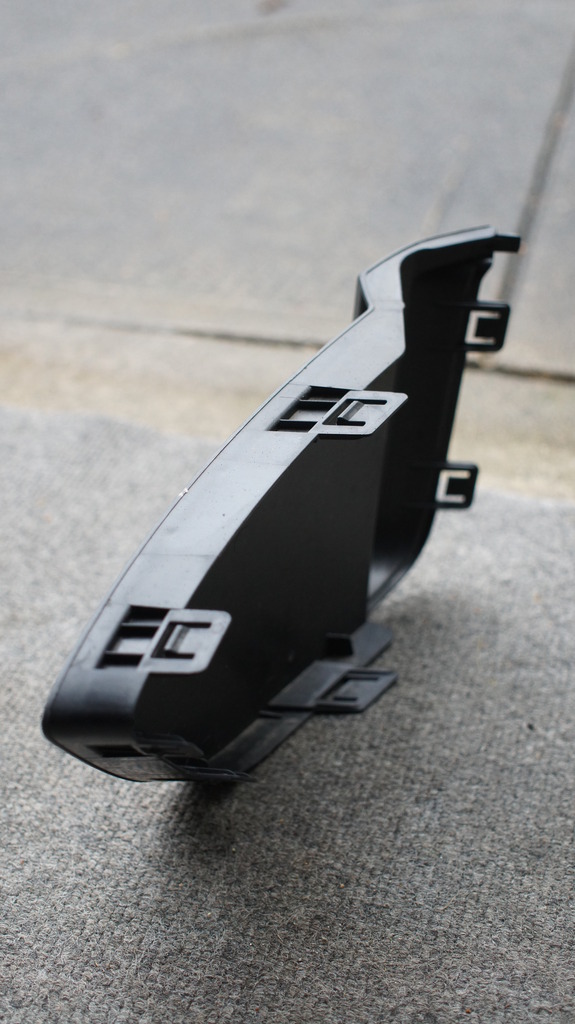
3. How many clips are around the stock garnish, can you take a clear picture of the rear of the garnish?
4. LED winker install shouldn't be too hard. Tedious as I've stated before. If you are moving to the mainland Midwest...you will need those heated mirrors and winkers (why not, since they are apart already) for the weather out there.
**I would have installed (and should have) the LED winkers when I did the heated mirrors, but the cost I couldn't justify at the time. Since I have essentially way out there on the cost of various mods what's another few hundred dollars right?!
REPLY:
1. Part # is correct for the female connector. Switches are 35600-TF0-003 & 35650-TF0-003. The females will have to be taken apart. I modded them to replace the aftermarket female connectors. This was done after prior bench testing to determine the wiring sequence.
2. I have pics of the disassembled bumper on another post and you'll be able to see some of the clips your concerned about. They total 4 on each side. They are pretty tough. It depends on how you pull them out. Use a firm jerk, rather than a hard long pull.
3. 8 clips on the garnish, 7 flat and 1 pointed.
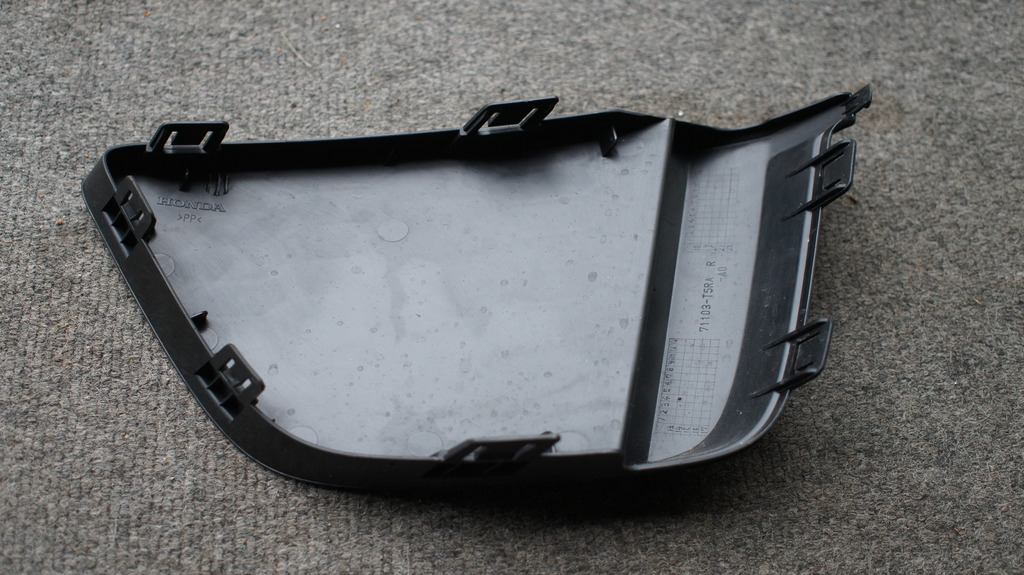
4. Most probably will do the heated mirrors but it won't happen till after we relocate. I agree, they are extremely functional. - rttby
1. What is the part# for the female connector of the OEM heated seat switches? I'm assuming its 32114-T5A-J00? I'll likely need to cut that one up to make it work with an aftermarket kit.
2. Looked at the disassembly of the front bumper, it doesn't look too terrible to do. I'll try my hand at releasing the clips of the foglight garnish without removing the bumper. I'm more afraid of breaking the clips on the side where the bumper meets the body trying to release them. I've heard they are not very durable. Any pictures of these clips?
3. How many clips are around the stock garnish, can you take a clear picture of the rear of the garnish?
4. LED winker install shouldn't be too hard. Tedious as I've stated before. If you are moving to the mainland Midwest...you will need those heated mirrors and winkers (why not, since they are apart already) for the weather out there.
**I would have installed (and should have) the LED winkers when I did the heated mirrors, but the cost I couldn't justify at the time. Since I have essentially way out there on the cost of various mods what's another few hundred dollars right?!
REPLY:
1. Part # is correct for the female connector. Switches are 35600-TF0-003 & 35650-TF0-003. The females will have to be taken apart. I modded them to replace the aftermarket female connectors. This was done after prior bench testing to determine the wiring sequence.
2. I have pics of the disassembled bumper on another post and you'll be able to see some of the clips your concerned about. They total 4 on each side. They are pretty tough. It depends on how you pull them out. Use a firm jerk, rather than a hard long pull.
3. 8 clips on the garnish, 7 flat and 1 pointed.
4. Most probably will do the heated mirrors but it won't happen till after we relocate. I agree, they are extremely functional. - rttby
Last edited by ROTTBOY; Apr 27, 2015 at 01:21 PM.
Thread Starter
|
Someone that spends his life on FitFreak.net
Joined: Mar 2014
Posts: 1,116
From: Hawaii: relocated to Western Canada Sept, 2015
Next upgrade is to install the Cree LED's for the headlights and the H8 LED's for the fogs (still incoming from China). For now, busy shutting down this home for the new owners. With the garage now 80% packed no more big project for the coming months. In fact, the wife is finally hoping I stop playing with the Fit!!!! LOL!!!!
Will eventually do the heated mirrors once we've settled and look for a wrecked EX-L to simplify the mod.
Keep on with your projects. Your continuing posts/threads are all interesting, educational and followed by many!!!!!
Member
Joined: Aug 2014
Posts: 1,620
From: Connecticut
Your very welcome. With your ongoing contributions to our FF forum, its a pleasure to assist. Efforts to share installs not only help this community but further stimulates ideas in our never-ending quest to make our rides more functional and enjoyable.
Next upgrade is to install the Cree LED's for the headlights and the H8 LED's for the fogs (still incoming from China). For now, busy shutting down this home for the new owners. With the garage now 80% packed no more big project for the coming months. In fact, the wife is finally hoping I stop playing with the Fit!!!! LOL!!!!
Will eventually do the heated mirrors once we've settled and look for a wrecked EX-L to simplify the mod.
Keep on with your projects. Your continuing posts/threads are all interesting, educational and followed by many!!!!!
Next upgrade is to install the Cree LED's for the headlights and the H8 LED's for the fogs (still incoming from China). For now, busy shutting down this home for the new owners. With the garage now 80% packed no more big project for the coming months. In fact, the wife is finally hoping I stop playing with the Fit!!!! LOL!!!!
Will eventually do the heated mirrors once we've settled and look for a wrecked EX-L to simplify the mod.
Keep on with your projects. Your continuing posts/threads are all interesting, educational and followed by many!!!!!
Thank you sir! While you are at it you might as well do the winkers too, yeah the skulls are a bit pricey but since you will have them apart might as well.
Now you cheated on the heated seats and put them under your seat covers. You know for a fact the fabric is "glued" to the foam cushion? If I have time this weekend that's what I want to find out. taking apart the bottom cushion seems to be the easier of the two...
Thread Starter
|
Someone that spends his life on FitFreak.net
Joined: Mar 2014
Posts: 1,116
From: Hawaii: relocated to Western Canada Sept, 2015
As for my seat "cheat". was constrained by time availability and overall importance. Safe to say, vehicles will not be the priority till we are finally settled into our new townhome on the mainland. Nevertheless, the "priority" status will return swiftly as my new garage space: can easily fit two long Escalades, its underground and, best of all, its got its own separate garage door. This will surely be my "man-cave".
My niece has our previous GD and a spring on the driver's seat bottom either broke or got mis-aligned. Observed that the foam cushion was glued to the fabric when the repair was done.
The other consideration in using these aftermarket heated seat cores, don't know how good they are long-term. With no WARRANTY, couldn't bear ripping the whole seat apart if one of them broke. Will observe its performance during this year's coming winter season and decide on a more permanent install later.
Last edited by ROTTBOY; Apr 28, 2015 at 03:03 PM.
Member
Joined: Aug 2014
Posts: 1,620
From: Connecticut
Cinches it then, I'm removing the passenger front seat for research purposes this weekend if time permits. I'll be in touch.
Concurrently, my home brew apricot ale should be ready to tap this weekend too. Liquid refreshment to drink with a worthy side project? Is
it Friday yet?!

COMMENT: Forge ahead and let us know what is the real deal. As for your consumption of the home brew, everytime I complete an install, neatly, with no broken parts, whip out my favorite Coors and/or Miller lites, sit back and enjoy the moment!!!!
 - rttby
Last edited by ROTTBOY; Apr 28, 2015 at 03:34 PM.

New Member
Joined: May 2015
Posts: 3
From: Malaysia
hi sir, nice car and mods done..
is there any relays needed for that aftermarket horn?? or just simple plug and play?
REPLY:: They are plug and play. Here is the link so watch the install video:
http://www.ebay.com/itm/2015-2016-Honda-Fit-Sport-Horn-Upgrade-Kit-NEW-DL162-/261694323097?fits=Year%3A2015%7CMake%3AHonda%7CModel%3AFit&hash=item3cee327999&vxp=mtr
good luck - rttby
is there any relays needed for that aftermarket horn?? or just simple plug and play?
REPLY:: They are plug and play. Here is the link so watch the install video:
http://www.ebay.com/itm/2015-2016-Honda-Fit-Sport-Horn-Upgrade-Kit-NEW-DL162-/261694323097?fits=Year%3A2015%7CMake%3AHonda%7CModel%3AFit&hash=item3cee327999&vxp=mtr
good luck - rttby
Last edited by ROTTBOY; Aug 3, 2015 at 02:55 PM.