
DIY OEM Fog Light install on Base Fit

Thread Starter
|
Member
Joined: Jun 2006
Posts: 196
From: Pennsylvania

After recently scooping up some OE fogs for a great price, I figured I would take some pictures of the install as I went along. Overall it took me about 2 hours. I took my time and didn't encounter any real trouble.
First things first. Remove the front bumper. This is pretty straightforward as there are 4 clips right above the grille to remove and 4 screws and about 5 clips on the underside of the bumper to remove. After that the bumper just pulls off.
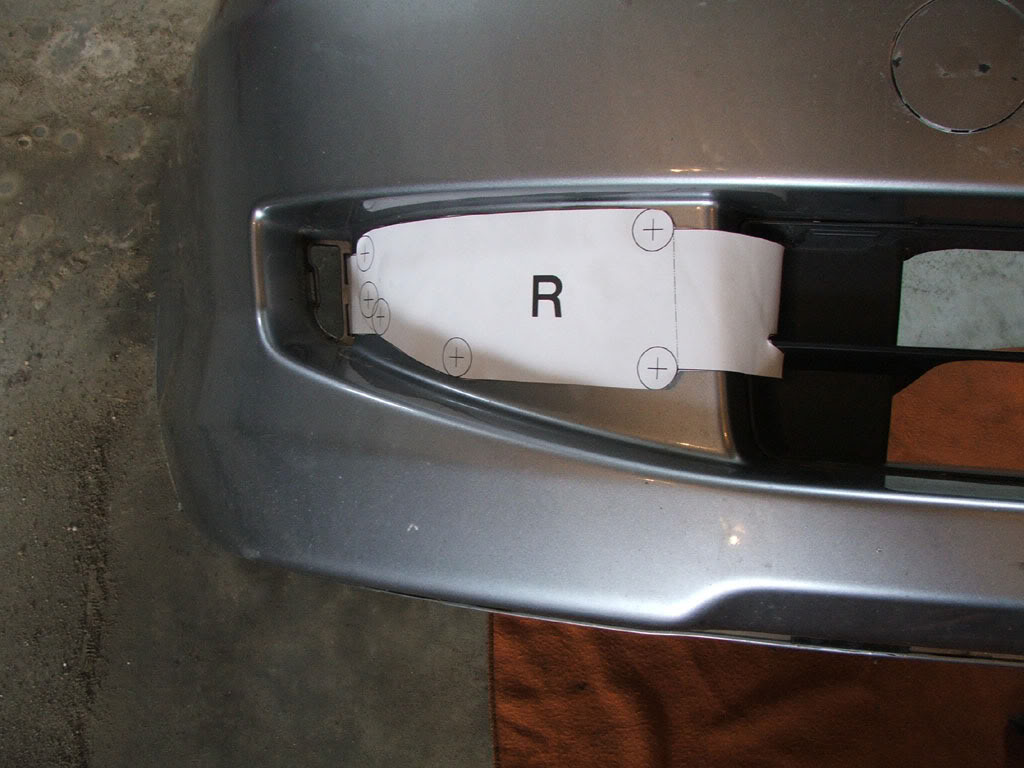
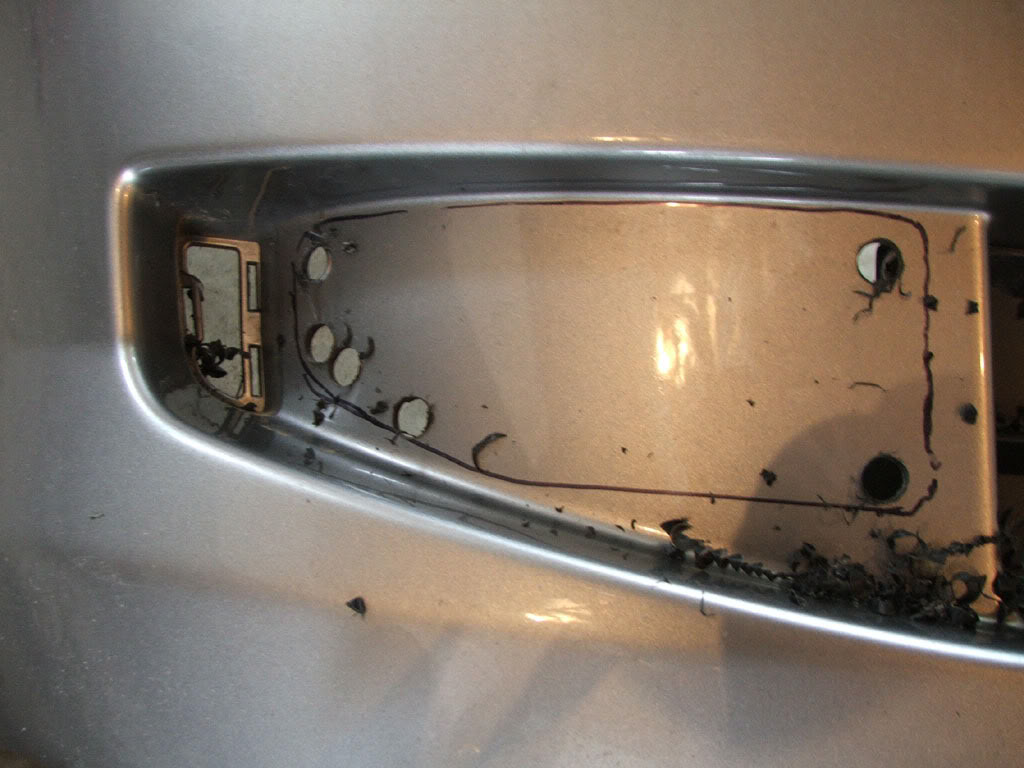
The fog light kit should include the templates you'll need to use for cutting the bumper. As you'll see, there is some drilling and cutting involved here to get them to fit.
There is a plug tucked up in the driver's side fender well that you'll need to find. This plugs into the foglight harness at the bumper. It is secured with blue tape, so, it should be relatively easy to spot. Here's what it looks like.
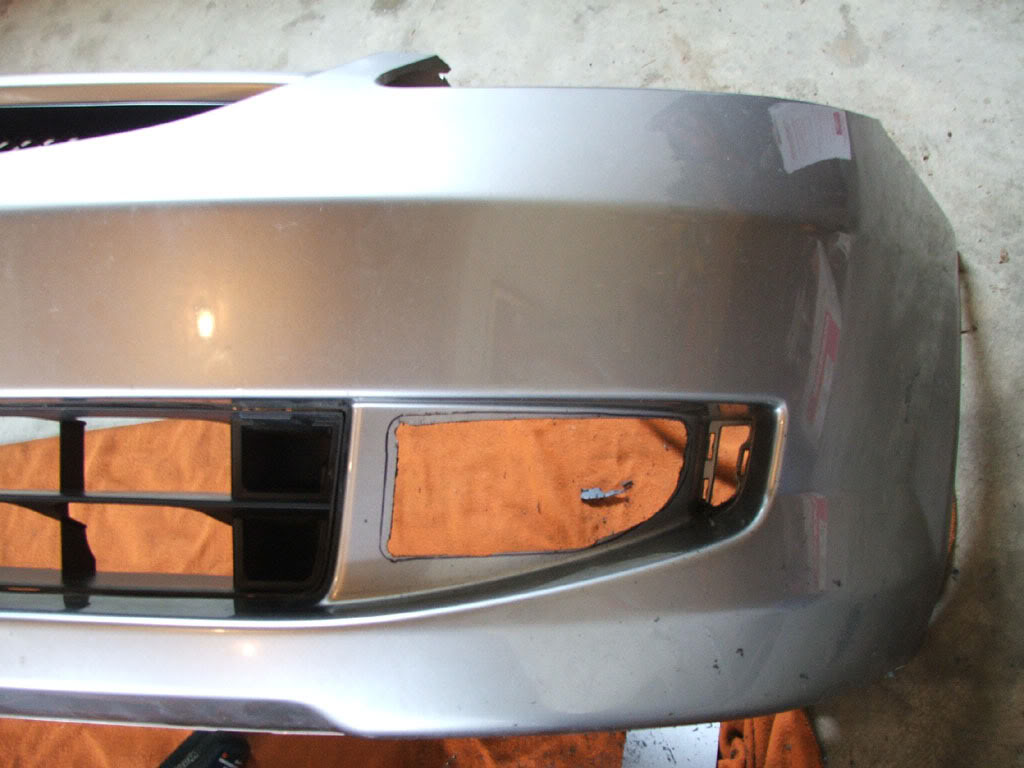
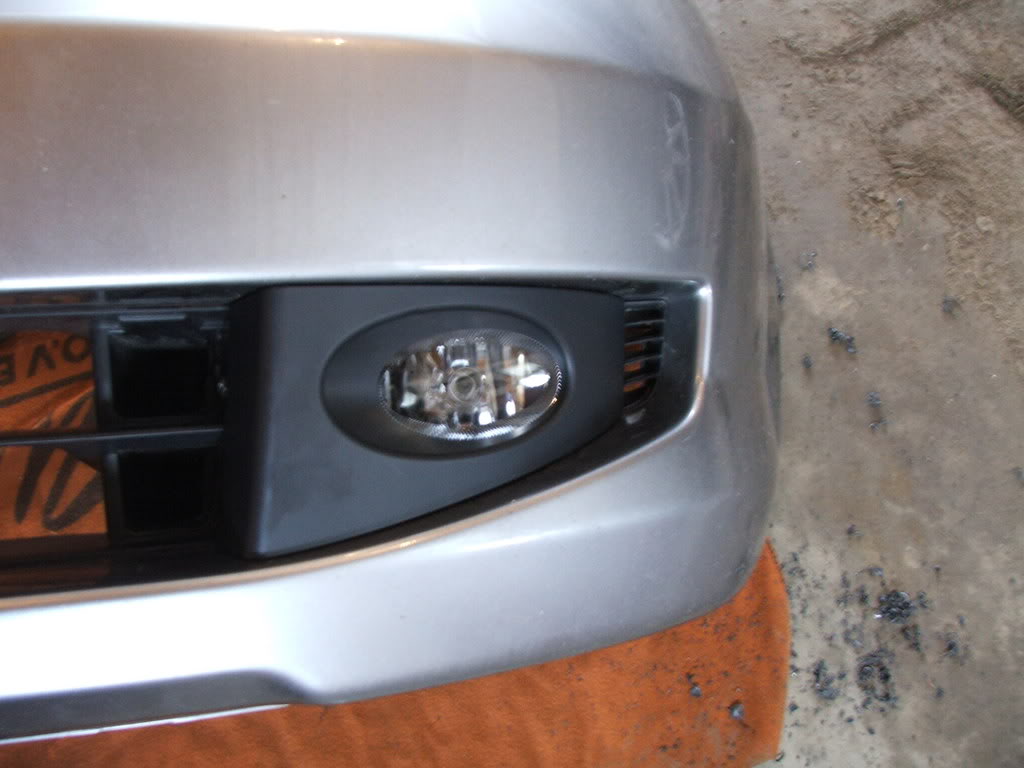
After you get the bumper cut and get them mounted, the tough part is over. All you have to do them is plug them into their harness and reinstall the bumper.
It can be a challenge sometimes working with the harnesses at the fuse panel. I had a few extra in there to fight around because I added the keyless to my base model after purchasing it.
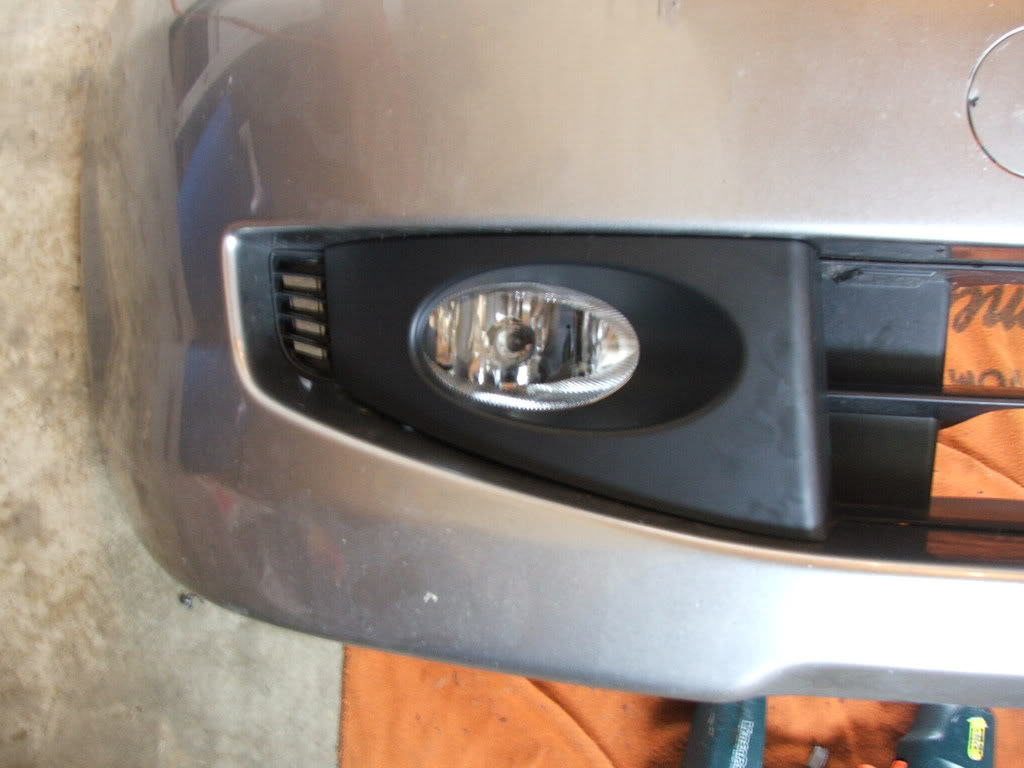
I'm very happy with them and the way they look. I will probably be covering them with yellow lamin-x film here in the next week or so to distinguish their light pattern and protect them from rocks and road debris.
If anyone has any questions I'd be happy to help.
First things first. Remove the front bumper. This is pretty straightforward as there are 4 clips right above the grille to remove and 4 screws and about 5 clips on the underside of the bumper to remove. After that the bumper just pulls off.
The fog light kit should include the templates you'll need to use for cutting the bumper. As you'll see, there is some drilling and cutting involved here to get them to fit.
There is a plug tucked up in the driver's side fender well that you'll need to find. This plugs into the foglight harness at the bumper. It is secured with blue tape, so, it should be relatively easy to spot. Here's what it looks like.
After you get the bumper cut and get them mounted, the tough part is over. All you have to do them is plug them into their harness and reinstall the bumper.
It can be a challenge sometimes working with the harnesses at the fuse panel. I had a few extra in there to fight around because I added the keyless to my base model after purchasing it.
I'm very happy with them and the way they look. I will probably be covering them with yellow lamin-x film here in the next week or so to distinguish their light pattern and protect them from rocks and road debris.
If anyone has any questions I'd be happy to help.
Last edited by StormSilverGD3; Dec 2, 2021 at 10:37 PM. Reason: updated img urls
Wow, looks really good. They will look 10x better once you get the yellow film on there. Glad you like them.
This should probably get a sticky for future base owners!
This should probably get a sticky for future base owners!
Last edited by smeister; Mar 24, 2007 at 07:12 PM.
Thread Starter
|
Member
Joined: Jun 2006
Posts: 196
From: Pennsylvania
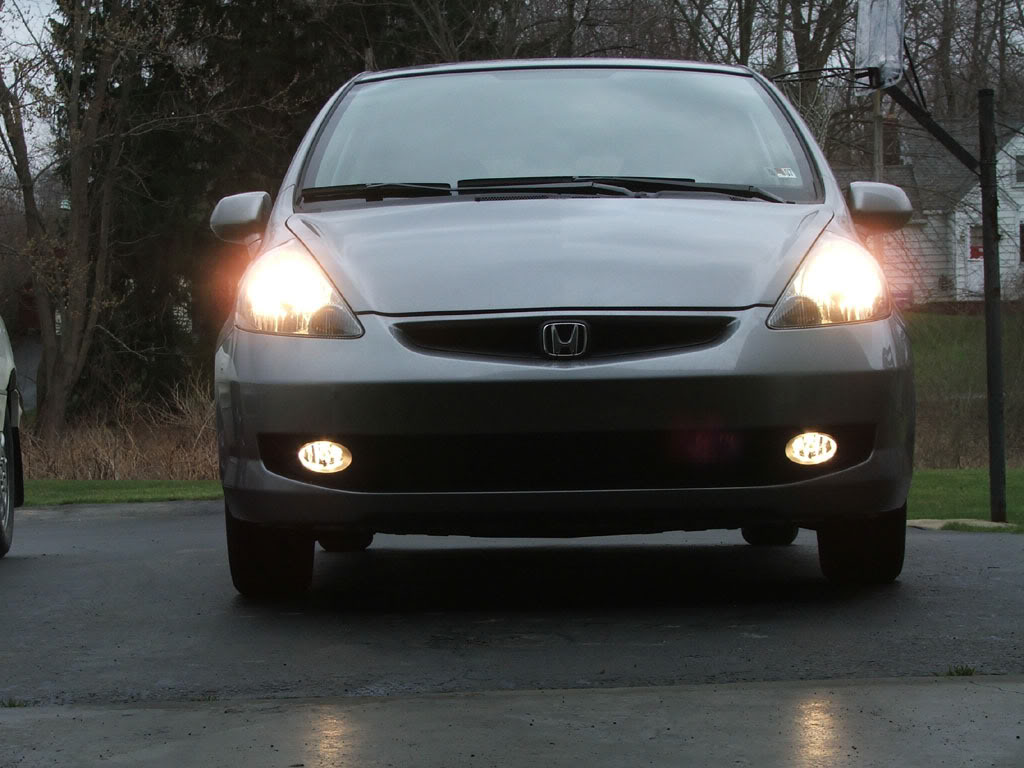
Thanks! And now that nightfall has come I checked the light output. I love the nice wide beam these things shoot. And I'm lucky enough that I don't even have to adjust them. They are aimed good.


Member

Joined: Apr 2006
Posts: 577
From: USA
I did not realize there was a post on this, I just did my set last Saturday.
The Honda instruction sheet is good, but I wish to point out a few things that are different between the instructions and what I found on my car (built 03/06) and a couple tips.
#16. Did not see any blue tape, but the plug is WAY up in there. Easy enough to pull down, found it by touch, not visual.
#28. The clips tend to free float on the black plastic. Make sure you line them up before installing the screw, or pinch with pliars for a tighter fit?
#36. My fuse label and the one in the kit were identical.
#39. I have keyless entry, so I had to "piggyback" the five pin connector as stated.
#40. Fuse was already there?!?!
#46. A bit of a pain to get to the 20 pin plug. Latch is toward the door/fender.
#48. Again, never did see any blue tape, the plug is WAY up in there, another feel around to get it.
#52. Be careful re-installing the side kick panel that the side moulding by the door does not get its tab that goes into the kick panel kinked. Check and see that all white plastic locking pins are in place.
#1/#54. I did not loose my radio pre-sets, but I did need to reset the clock. Had to enter radio code however. Window auto function was not impacted either.
I did install the pre cut Lamin-X yellow film. $14.95 of stone chip protection! Not as yellow as my older European cars, but still neat at nite.
Member
Joined: Apr 2006
Posts: 577
From: USA
Do it, it is worth the effort.
My only complaint is we do not have a gauge indicator as on the Sport (I would assume gauge cluster the same for all cars?) so it is on the dash. So when the lights are on you get a nice bright green light reflecting right by the mirror in the side window.
My only complaint is we do not have a gauge indicator as on the Sport (I would assume gauge cluster the same for all cars?) so it is on the dash. So when the lights are on you get a nice bright green light reflecting right by the mirror in the side window.
Member
Joined: Apr 2006
Posts: 577
From: USA
If you wish to change yours, a few minutes and a can of matte black paint could work.
Mr. Mx6GT89 painted his, and his headlamp units black, makes the car look a lot better than all one color up front in my opinion. Still do not have the nerve to pop open the headlights and paint them black myself....maybe soon? The last light units I painted were the plastic bits for a set of Merc Bosch W123 European units that had sunbleached many years ago.
Member
Joined: May 2006
Posts: 288
From: camarillo,ca,usa
Help On Fog Lights Installation
Guys i need your help,i tried to install my foglights today my problem is instruction number 48.
48.Locate the 2 pin connector blue taped to the vehicle harness.Remove the blue tape to free the connector.Plug the switch harness 2-pin connector into the 2 pin connector you just freed.
i been looking for the BLUE taped for at least half an hour already & i cant find it,i hope somebody here in this forum that can help me.
It is pretty much next to the fender. If you peel back the plastic lining you have to reach all the way up there to get to it. If you have a SUPER hard time then just take out the headlight and then you can get to it easily.
Member
Joined: May 2006
Posts: 288
From: camarillo,ca,usa
To:stormsilvergd3,
you & smeister are talking about instruction no 16.which is the 1 - pin connector,i'm already in instruction no.48 which is a 2 pin
connector,this 2-pin connector is wrapped alledgedly in BLUE TAPE.
you & smeister are talking about instruction no 16.which is the 1 - pin connector,i'm already in instruction no.48 which is a 2 pin
connector,this 2-pin connector is wrapped alledgedly in BLUE TAPE.
Last edited by boyetssilverfit; Aug 11, 2007 at 01:46 AM.
Member
Joined: Apr 2006
Posts: 577
From: USA
The method I used was "feel around until I found a loose plug and put it in". It (I THINK) was on the left side or above the fuse box. This tactic is left over from Merc S class climate control repair days.
The only real bit of asistance I can give is the plug is grey in color. I just went out and looked at my fuse box area. It does not have much wire going to it either, I think one very thin wire is it.
Sorry, I wish I could give you more, but it REALLY is a pain to find.

Best wishes and good luck!
Member
Joined: May 2006
Posts: 288
From: camarillo,ca,usa
To Spule or Stormsilvergd3,
heres a picture that i took,its wrapped in a BLACK TAPE but its wires are connected to the front panel,i'm not sure if this is the one,the color of the switch is GRAY and it fits perfectly on the switch harness.fig.1 shows the 2 pin gray switch,fig.2 shows when its connected to harness.
but when i tried to turn on my switch the foglights did'nt do nothing.,
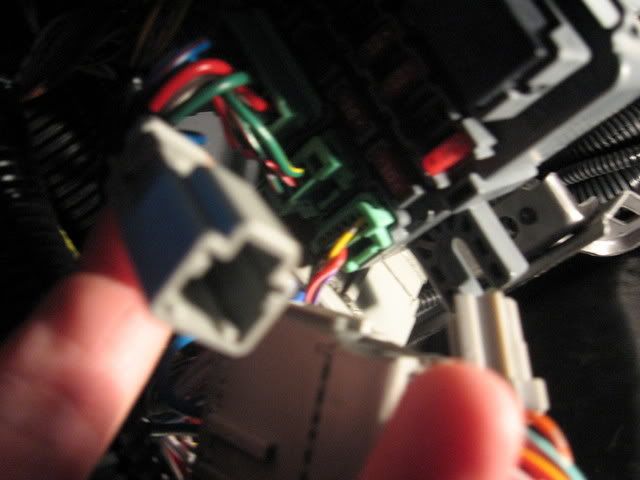
Oh okay, I thought you had already found that one. Again, its behind one of those fat wires. It is pretty hard to find, but once you feel around you will eventually find one lonely guy taped there. It is definitely IN there though. AGAIN, the picture is pretty accurate where the item is located. GL!
Member
Joined: May 2006
Posts: 288
From: camarillo,ca,usa
smeister,
its very very hard,i thought its the one coz it fits but its not,i will try again tomorrow,too dark already,of all the mods that i did this one is definitely the hardest,my back hurts already,hopefully i will find it,
its very very hard,i thought its the one coz it fits but its not,i will try again tomorrow,too dark already,of all the mods that i did this one is definitely the hardest,my back hurts already,hopefully i will find it,