
DIY: Installation of hard mount shifter bushings in an 07-08 GD3


DIY: Installation of hard mount shifter bushings in an 07-08 GD3
The following Do-It-Yourself article is for the installation of Strut King shifter bushings on a 2007-2008 Honda Fit. This is a more basic installation. I am not responsible for any damage or injury that may occur during your installation by following these directions.
Tools:
-12 mm socket with extension or deep socket
-Flat head screwdriver
-Phillips head screwdriver
1. Remove the shift knob by twisting it counter clockwise.

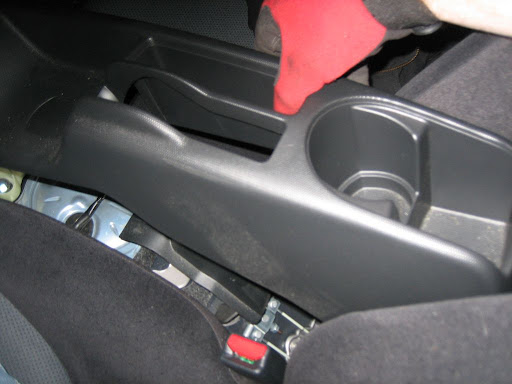
2. Slide driver and passenger seats forward as far as they will go. Locate two screws on either side of the back of the center console. Use phillips head screwdriver to remove these two screws.
3. Locate two clips on either side of the front of the center console. Push the center of the clips and they should pull right out.
4. Pull the handbrake as far up as it will go. Pull up on the center console from the rear cup holder area. Do not pull all the way out at the front as you have to remove the plugs for the 12v accessory outlet and auxiliary audio outlet.
5. Unplug the 12v accessory outlet plug by pulling straight back then remove the auxiliary audio outlet plug.
*Note, base model Fits do not have the auxilary outlet.
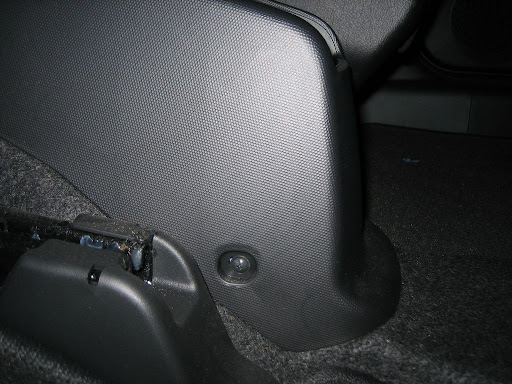
6. Pull carpeting away from the black frame surrounding the white shifter assembly by pulling the carpet tabs out from the black plastic tabs. Pull the carpet back to reveal two plastic clips holding the black plastic frame. Pull up from these clips. They will remain connected to the plastic frame.
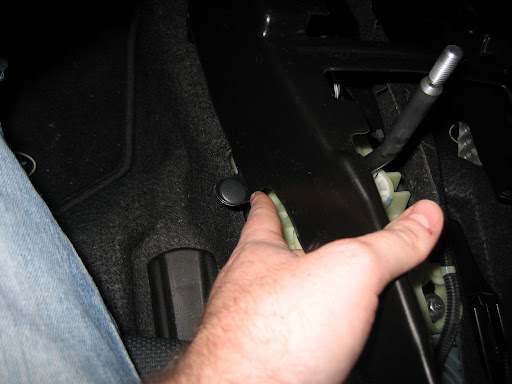
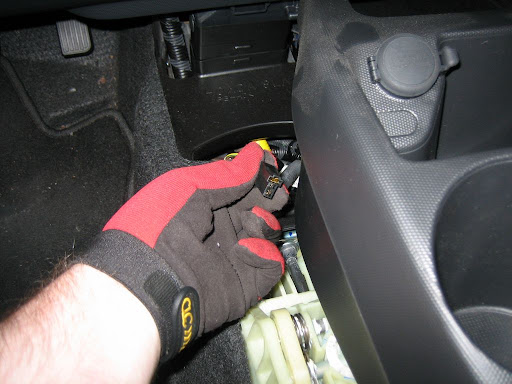
7. Next you will need to disconnect part of the shift linkage from the shifter assembly. Turn the pictured black plastic shifter linkage counter clockwise. It will pop out of place. Pull it up and just enough out of the way so that the bolt below it can be accessed.

8. Unclip the white wire loom plug towards the rear of the shifter assembly. I found that a flat head screwdriver helps to pry it up. Remove all four bolts at each corner using the 12 mm socket. You may need to use a deep socket or an extension to reach the two front bolts.
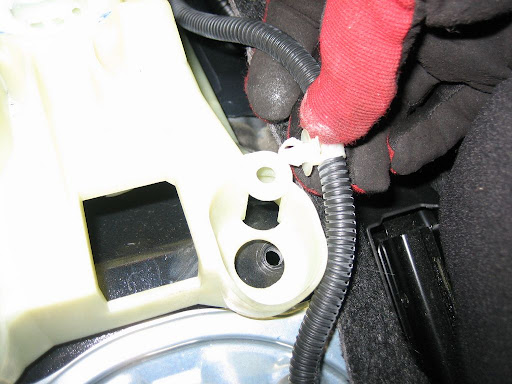
*Note: The stock bushings have already been removed in this picture.
9. Remove the stock rubber bushings by pushing the center metal cylinder down through the bottom. Then push the rubber outer area of the bushing down. You will need to crush them a little to fit them through the hole.
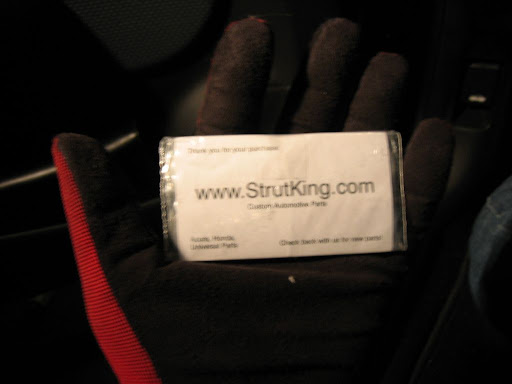
10. Examine your hard mount bushings. There are a couple of different style. I those the Strut King 8 piece shifter bushing kit as I feel this is a superior design.
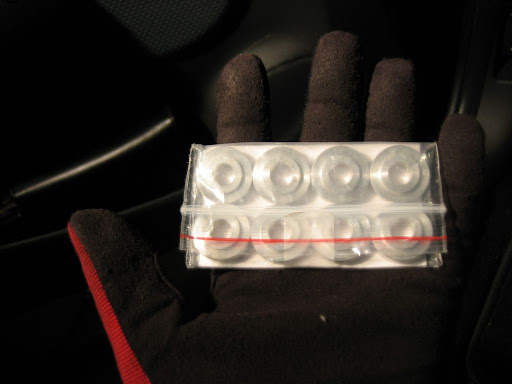
Notice how each of the pieces has a small raised area on one side.
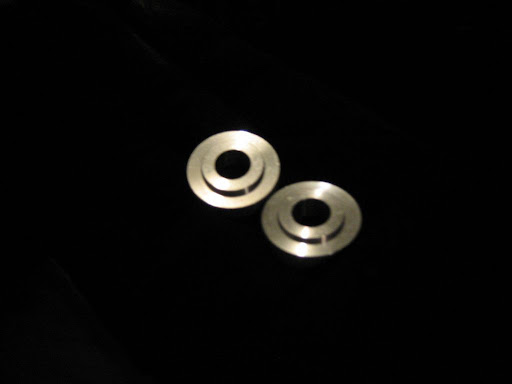
They will be installed with the raised sides touching each other. One half will be under the shifter assembly and the other is installed from the top of the shifter assembly essentially sandwiching the white plastic shifter between the bushings.
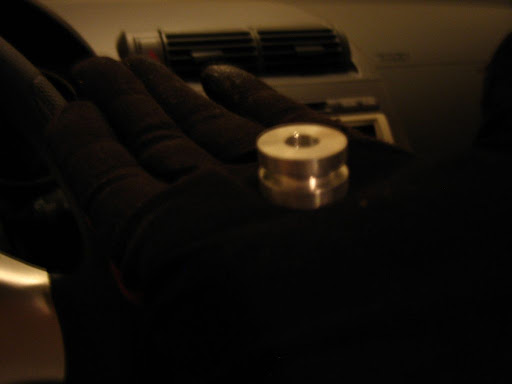
11. Work with one corner at a time. Lift the shifter assembly and place one half of a bushing under one of the bushing mounting holes with the raised side up. Place a second half of the bushing raised side down from above the shifter assembly. Reinstall a factory 12 mm bolt but do not tighten all the way down until all four corners have their bushings inserted. Once all four bushings are installed. Torque each of the four bolts to 16 ft-lbs. Reattach the white wire loom clip to the shifter assembly.
12. Reinstall the black frame around the shifter but pushing the front area back up into it's place and pushing the back area down and pushing the clips back into place. Pull the carpet back over the plastic tabs.
13. Reinstall the center console by dropping the front side down first. Make sure the shifter lever goes through the shift boot. Plug the 12v accessory outlet plug and auxiliary plugs in. Guide the console down minding the parking brake.
14. Reinstall the two clips located at the front of the center console. Reinstall the two rear phillips head screws at the rear of the center console. Finally, reinstall the shift knob by turning it clockwise onto the shifter lever.
Enjoy your more crisp gear change shifter.
Tools:
-12 mm socket with extension or deep socket
-Flat head screwdriver
-Phillips head screwdriver
1. Remove the shift knob by twisting it counter clockwise.
2. Slide driver and passenger seats forward as far as they will go. Locate two screws on either side of the back of the center console. Use phillips head screwdriver to remove these two screws.
3. Locate two clips on either side of the front of the center console. Push the center of the clips and they should pull right out.
4. Pull the handbrake as far up as it will go. Pull up on the center console from the rear cup holder area. Do not pull all the way out at the front as you have to remove the plugs for the 12v accessory outlet and auxiliary audio outlet.
5. Unplug the 12v accessory outlet plug by pulling straight back then remove the auxiliary audio outlet plug.
*Note, base model Fits do not have the auxilary outlet.
6. Pull carpeting away from the black frame surrounding the white shifter assembly by pulling the carpet tabs out from the black plastic tabs. Pull the carpet back to reveal two plastic clips holding the black plastic frame. Pull up from these clips. They will remain connected to the plastic frame.
7. Next you will need to disconnect part of the shift linkage from the shifter assembly. Turn the pictured black plastic shifter linkage counter clockwise. It will pop out of place. Pull it up and just enough out of the way so that the bolt below it can be accessed.
8. Unclip the white wire loom plug towards the rear of the shifter assembly. I found that a flat head screwdriver helps to pry it up. Remove all four bolts at each corner using the 12 mm socket. You may need to use a deep socket or an extension to reach the two front bolts.
*Note: The stock bushings have already been removed in this picture.
9. Remove the stock rubber bushings by pushing the center metal cylinder down through the bottom. Then push the rubber outer area of the bushing down. You will need to crush them a little to fit them through the hole.
10. Examine your hard mount bushings. There are a couple of different style. I those the Strut King 8 piece shifter bushing kit as I feel this is a superior design.
Notice how each of the pieces has a small raised area on one side.
They will be installed with the raised sides touching each other. One half will be under the shifter assembly and the other is installed from the top of the shifter assembly essentially sandwiching the white plastic shifter between the bushings.
11. Work with one corner at a time. Lift the shifter assembly and place one half of a bushing under one of the bushing mounting holes with the raised side up. Place a second half of the bushing raised side down from above the shifter assembly. Reinstall a factory 12 mm bolt but do not tighten all the way down until all four corners have their bushings inserted. Once all four bushings are installed. Torque each of the four bolts to 16 ft-lbs. Reattach the white wire loom clip to the shifter assembly.
12. Reinstall the black frame around the shifter but pushing the front area back up into it's place and pushing the back area down and pushing the clips back into place. Pull the carpet back over the plastic tabs.
13. Reinstall the center console by dropping the front side down first. Make sure the shifter lever goes through the shift boot. Plug the 12v accessory outlet plug and auxiliary plugs in. Guide the console down minding the parking brake.
14. Reinstall the two clips located at the front of the center console. Reinstall the two rear phillips head screws at the rear of the center console. Finally, reinstall the shift knob by turning it clockwise onto the shifter lever.
Enjoy your more crisp gear change shifter.
Last edited by Tofuman; Oct 27, 2008 at 10:12 PM.

Member
Joined: Jul 2008
Posts: 548
From: USA
The million dollar question... do they buzz?
Old school honda short shifters had buzzing problems due to replacing rubber parts with metal. These look like the same kinda deal, but since the linkage is cable, it may not be a problem...
Old school honda short shifters had buzzing problems due to replacing rubber parts with metal. These look like the same kinda deal, but since the linkage is cable, it may not be a problem...
Great product, great vendor. Super fast shipping. I highly recommend these. It says "RSX" bushings, but they are located under "Fit" and are universal fit on Hondas.
I have had these on for about a week now and I have not experienced any buzzing at all. No difference in sound from stock.
It's not a huge difference in normal driving, but you can notice it. It really is much more noticeable when shifting quickly. In stock form, the shifter feels kind of numb. With the bushings, the shifter feels like it's ready for action.
this doesn't shorten the throw at all, it just hard mounts the shifter assembly to the car for less flex when shifting.

I prefer the strut king design of bushings.
you must really want a super short throw.

thanks a lot Tofuman for this great DIY, just a few notes, after i went through this myself:
1.if you're doing a short shifter mod at the same time, do the bushings after you finished the rest as the rubber ones will keep in place
2.the shifter linkage is a little hard to free, try harder...
3. you don't really have to remove the white wire loom
1.if you're doing a short shifter mod at the same time, do the bushings after you finished the rest as the rubber ones will keep in place
2.the shifter linkage is a little hard to free, try harder...
3. you don't really have to remove the white wire loom
/Resurrecting an old thread I have the mugen shift box on my GD and I know the bushings are better than stock on that. However, would these Strut King bushings still fit? Has anyone tried it on the Mugen shift box? I'm def looking for a cleaner shift feel.
I just haven't found anyone who has done it though. There is a good chance I'll just leave the stock mugen ones in there, but I would still like to have some feedback.


Thread
Thread Starter
Forum
Replies
Last Post
YourConfused
3rd Generation (2015+)
5
Mar 24, 2017 04:11 AM
saiko
2nd Generation GE8 Specific Fit I.C.E. Sub-Forum
11
Jul 13, 2015 11:52 AM
YA2_user_GD3
Fit DIY: Repair & Maintenance
5
Mar 11, 2009 01:34 AM