
Glove Box light


Member
Joined: Jun 2007
Posts: 32
From: Los Angeles, CA
Cool
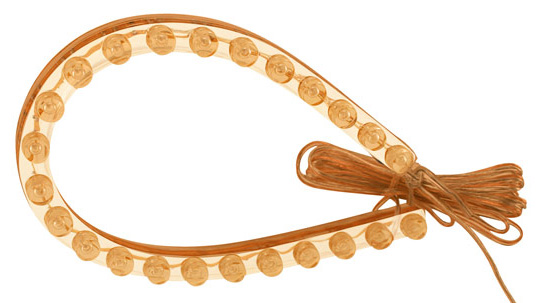
Overkill for this task, seems more suited for show and almost be a waste for the glove box. But I'll file this for later use. 
Here's a pic from what CuTeBoi was talking about...
Here's a pic from what CuTeBoi was talking about...
Last edited by stephanpark; Jun 17, 2007 at 01:27 AM.

New Member
Joined: Jun 2007
Posts: 28
From: Texas
Actually the shortest length one they sell for $4 is only 3 LEDs long and looks like it might be perfect. Here are some technical specs for the various sizes/colors.
From the wiring diagrams you posted it looks like there are several wires that would be suitable.
always has power: wht/red
power when key on: blk/yel, yel
other candidates: red (dash lights), red/blk (looks like always hot?)
Also, looking at the glove box yesterday I noticed there are little rubber door-stopper like things on the upper left and right of the box. I felt in behind there and the door-stops are actually mounted through a hole in the plastic. This might be a good place for the switch, I think it will blend in to the stock look and minimize the amount of drilling/filing.
Member
Joined: Jun 2007
Posts: 32
From: Los Angeles, CA
Good to go.
I think I'm going to use standard connectors on my stuff so I can mix and match later if need (Molex).
I'm not an electrician so remind me again, is it parallel or serial to pull load instead of splitting it?
Also, should we uprate the fuse that will take the additional load? I have heard on Map Lamp mod threads that blown fuses became an issue.
I'm not an electrician so remind me again, is it parallel or serial to pull load instead of splitting it?
Also, should we uprate the fuse that will take the additional load? I have heard on Map Lamp mod threads that blown fuses became an issue.
New Member
Joined: Jun 2007
Posts: 28
From: Texas
You pretty much have to wire these up in parallel to the existing circuits in the car, i.e. hook one end to your power line of choice and the other to any convenient ground. Do NOT wire them in series, i.e. cut a power wire and insert the lighting in the gap you made. The results would be...undesirable...big time 
According to the specs, the oznium strip will be 60 mA for the 3 LED version. Thats only 0.06 amps so unless you plan to add a lot of these things there shouldn't be any problem with the fuses.
According to the specs, the oznium strip will be 60 mA for the 3 LED version. Thats only 0.06 amps so unless you plan to add a lot of these things there shouldn't be any problem with the fuses.
Member
Joined: Aug 2006
Posts: 544
From: Grant, Alabama U.S.A.

or you can directly wire them into the 12v connection without the need of a resistor and cut down to the size you need:
Flexible LED Strips
read all the documentation, this seems to be the easiest method to get some really bright lighting, white, red, blue? up to you.
Also, they are working on a lighting method to control the color of the light on the "million" version of their LED lights, which come with all 3 colors to make any color you want in any hue... maybe you can match it to the other panels in the car?
who knows, but i know for sure i want to change out all LEDs and control them with the million controller when it comes out...
On to the glove box light. I used the Quik Brite light for now here's how I did it. Sorry for the blurry pics.

A little better pic of where it's mounted.

Here's where the magnet is mounted for switching it on and off. See it in the lower left on the glove box door.

And this is when the light goes off. The glove box isn't even closed yet. It switches the light from a pretty good distance so there's no problem with hitting the light at all.

The double stick tape it comes with wasn't strong enough to hold the light there when it gets hot so I used some hot glue on it. Works fine and makes plenty of light to find whatever I'm looking for.
I'll take one apart later and see if I can wire it into the cars electrical system with a resistor.
Last edited by 2hot6ft2; Jun 17, 2007 at 09:12 PM.
Member
Joined: Jun 2007
Posts: 32
From: Los Angeles, CA
Some pictures of QuikBrite
ZebiFit, I've dissected it for you to take a look.

On making it permanent, I figure if the correct resistors and maybe some capacitors could replace the three 1.5V batteries, then this could be a maintenance free installation...although, that mag-switch seems kinda flimsy. Incidentally these LR44 Coin Batteries are typically 150 mAh, but I wouldn't know what to do with this information.

Back to you 2Hot and Zebi

Last edited by stephanpark; Jun 19, 2007 at 06:03 AM.
Member
Joined: Aug 2006
Posts: 544
From: Grant, Alabama U.S.A.
I'm going to use QuikBrite lights on mine, hopefully 2hot6ft2 can wire up something and show/tell.
ZebiFit, I've dissected it for you to take a look.
Here is a closeup of the board 2hot6ft2. Oh, and great post and images.
On making it permanent, I figure if the correct resistors and maybe some capacitors could replace the three 1.5V batteries, then this could be a maintenance free installation...although, that mag-switch seems kinda flimsy. Incidentally these LR44 Coin Batteries are typically 150 mAh, but I wouldn't know what to do with this information.
Back to you 2Hot and Zebi
The mag-switch may not be the best but it sure is convenient the way it is and it works good.
OK, I'm not very good at circuit boards and such so if someone can tell me if I'm on the right track it would help a lot.
I'm thinking all we have to do here is replace the batteries with the same current using the cars electrical system. So.
We have 3 button batteries at 1.5 volts each so together we have 3 x 1.5 volts = 4.5 volts. This much I'm sure of but I'll ask anyway. Am I right?
If each battery rates at 150 mAh would we also follow the same calculation being 3 x 150 mAh = 450 mAh?
If this is right we need to supply the switch circuit with 4.5 volts and 450 mAh, correct?
Using an on-line Current Limiting Resistor Calculator for LEDs here Current limiting Resistor calculator for leds to find the resistor needed I came up with this:
Supply Voltage
12 VOLTS
Voltage Drop Across LED
4.5 VOLTS
Desired LED Current
450 MILLIAMPS
How many leds connected
1
Exact calculated resistance
16.67 OHMS
Nearest higher rated resistor
18 Ohms


Wattage recommendation for the resistor
3 WATTS
Circuit's total current consumption
416.7 mA
Actual Single LED Current
416.7 mA
Power dissipated by the LED
1875 mW
Power dissipated by the Resistor
3125 mW
The figure: "Actual Single LED Current" (416.7 mAh) is I believe the mAh that would be available to the switch and we would have the 4.5 volts.
The figure: "Power dissipated by the LED" I think is irrelevant for this application since this calculator was made for calculating LED's not what we're after at this point. We want to power it at the switch replacing the batteries.
The final figure: "Power dissipated by the Resistor" at 3125 mW means the resistor will get very hot and would need to be placed accordingly. Since this is for a glove box light and it will generally only be used for fairly short periods this shouldn't be a major factor. Since there shouldn't be any current draw while the light is off.
Now we have a 18 Ohm 3 watt resistor for the job but wait now we have more choices, this only gives us 3 color bands "Brown" "Gray" and "Black" which gives us a resistor that is 3 watt 18 ohm "+/-20%".
There are 2 more 18 ohm resistors which give us these options with 4 color bands each:
"Brown" "Gray" "Black" and "Silver" which gives us a resistor that is 18 ohm "+/-10%". and
"Brown" "Gray" "Black" and "Gold" which gives us a resistor that is 18 ohm "+/-5%".
I would think that the last one would be the better choice since it has less of a variable.
Time to let those that have electronic expertise take the ball and tell me where I went wrong or if I got it right (which would really surprise me
") ).
).The other option would be to take a cigarette lighter charger that will cut the 12 volts to 4.5 volts and hard wire it to the cars electrical system and to the switch.
Member
Joined: Jun 2007
Posts: 32
From: Los Angeles, CA
Frankenstein vs. Dolly.
If no propellerheads are in the house, let's find a 12V to 4.5V converter. You can sent me link since Ive got an 110V AC to 12V DC converter to test Automotive gizmos with 8 of these QuikBrites sitting around to fry.
Side thought, whether we make our own or buy off the shelf...will the converter continue to draw current even if the light is not "On"? I know some cheaper car charger's little led power light stay on when there is no device drawing from it so I was concerned.
Last edited by stephanpark; Jun 19, 2007 at 07:21 PM.
Member
Joined: Aug 2006
Posts: 544
From: Grant, Alabama U.S.A.
Frankenstein was a hack job but it/he worked (never mind the fact that he was fictional). No point in building this from scratch...although Tall&Sexy did do some heroic research for us. If we can't get input from an Electronics Wiz, I'd rather dispense with the basic circuit board, soldering, and then crossing of our collective fingers.
If no propellerheads are in the house, let's find a 12V to 4.5V converter. You can sent me link since Ive got an 110V AC to 12V DC converter to test Automotive gizmos with 8 of these QuikBrites sitting around to fry.
Side thought, whether we make our own or buy off the shelf...will the converter continue to draw current even if the light is not "On"? I know some cheaper car charger's little led power light stay on when there is no device drawing from it so I was concerned.
You could always open it up and cut the LED leads to remove the LED power on indicator but a LED draws so little power it would take a good month to drain your battery to any noticeable extent.
By the way that was the first one that came up in a search so shop around for the best price.
Member
Joined: Jun 2007
Posts: 32
From: Los Angeles, CA
Darn. Another goofy bobble to stuff under the dash? That resistor solution is sounding better all the time. But without spike and amp management, the QuikBrite and its delicate mag-switch would pop after a couple months I'd think. Now I really wish I'd paid attention in my Electrical Physics courses.
New Member
Joined: Jun 2007
Posts: 28
From: Texas
Unfortunately, your resistor calculation above is incorrect. The 150 mAH rating is the total charge stored in the battery, not the current that is being drawn by the circuit. It means that you can draw 150 mA for one hour, or 15 mA for 10 hours or 30 mA for 5 hours or...you get the picture. The current draw for this circuit is difficult to know without any part numbers on the LEDs or the two transistors that implement the switch but if I had to guess I would say the thing is drawing between 20 and 40 mA. Alternatively if they advertise how long the battery life is supposed to be you can approximate the current draw from that, just divide 150 by the number of hours of expected life to get the current of the circuit (note that is 150, not 450, the batteries are in series). It is possible that the circuit will run at 12V with a simple current limiting resistor in series with the high side (150-300 ohms should be about right). If that ends up blowing up the circuit, a couple of different voltage dividers come to mind, but I really can't recommend that you use them since they make a constant drain on the car battery, which is not so good if you leave your car parked for a month or so.
Radio Shack has 3 prong linear regulators that can convert 12V to 5V that you can solder in to place, not a very efficient solution electrically, but we're only talking a couple hundred milliwatts of wasted power and only when the light is on. Also, as has already been suggested, you can tear apart a 12V-5V power converter and hide it up in there but by the time you've gone to all that trouble why not just install a mechanical switch and those 12V LED strips like me
Radio Shack has 3 prong linear regulators that can convert 12V to 5V that you can solder in to place, not a very efficient solution electrically, but we're only talking a couple hundred milliwatts of wasted power and only when the light is on. Also, as has already been suggested, you can tear apart a 12V-5V power converter and hide it up in there but by the time you've gone to all that trouble why not just install a mechanical switch and those 12V LED strips like me

you guys are seriously trying too hard...
=|
if you guys want something that requires NO knowledge on circuitry, why not get the magnetic switches, get the light strip i suggested, and wire it up on the direct 12v setup?
if you get the larger led ropes, you can reuse them if you want (hard, but it can be done)
Magnetic Switches: put one behind that rubber stopper, and the other half someplace inside the glove box. I'm going to be doing this, and writing it up for you guys
http://www.action-electronics.com/grc/cr40753w.jpg
5$ for the magnetic switch
Flexible LED Strips
$3.66 for the red color
i can wire the switch to the hot wire, then ground out the LED as needed, and voila i have a magnetic switch driven LED which is only 1.2 inches wide.
you guys need to calm down, and just go the easy way.
Member
Joined: Jun 2007
Posts: 32
From: Los Angeles, CA
High and mighty.
Quick and dirty would be just the QuikBrites-DONE. AS-HONDA-WOULD-DO-IT install would be a little more drawn out, most likely a mechanical switch with plastic lens and bulb housing, I don't think Soichiro would approve of double sided sticky LED clusters that look more at home on a makeup room mirror.
Hey, but you've got some cool toys to try, please show your installation for others...me I'm committed to the QuikBrites.
...and if I can't sort out a good way to feed it juice, then it it goes with Velcro.
Last edited by stephanpark; Jun 20, 2007 at 06:26 AM. Reason: Filling in the story.
New Member
Joined: Jun 2007
Posts: 28
From: Texas
My technical post above was simply to provide correct information for those attempting to adapt the quickbrite to 12V operation.

Member
Joined: Aug 2006
Posts: 544
From: Grant, Alabama U.S.A.
Unfortunately, your resistor calculation above is incorrect. The 150 mAH rating is the total charge stored in the battery, not the current that is being drawn by the circuit. It means that you can draw 150 mA for one hour, or 15 mA for 10 hours or 30 mA for 5 hours or...you get the picture. The current draw for this circuit is difficult to know without any part numbers on the LEDs or the two transistors that implement the switch but if I had to guess I would say the thing is drawing between 20 and 40 mA. Alternatively if they advertise how long the battery life is supposed to be you can approximate the current draw from that, just divide 150 by the number of hours of expected life to get the current of the circuit (note that is 150, not 450, the batteries are in series). It is possible that the circuit will run at 12V with a simple current limiting resistor in series with the high side (150-300 ohms should be about right). If that ends up blowing up the circuit, a couple of different voltage dividers come to mind, but I really can't recommend that you use them since they make a constant drain on the car battery, which is not so good if you leave your car parked for a month or so.
Radio Shack has 3 prong linear regulators that can convert 12V to 5V that you can solder in to place, not a very efficient solution electrically, but we're only talking a couple hundred milliwatts of wasted power and only when the light is on. Also, as has already been suggested, you can tear apart a 12V-5V power converter and hide it up in there but by the time you've gone to all that trouble why not just install a mechanical switch and those 12V LED strips like me
Radio Shack has 3 prong linear regulators that can convert 12V to 5V that you can solder in to place, not a very efficient solution electrically, but we're only talking a couple hundred milliwatts of wasted power and only when the light is on. Also, as has already been suggested, you can tear apart a 12V-5V power converter and hide it up in there but by the time you've gone to all that trouble why not just install a mechanical switch and those 12V LED strips like me
I have one of those oznium led strips sitting on the counter but it's blue and I want a white light in the glove box. I got 3 of them and installed 2 in the foot wells (under the dash) the other I was planning on installing as a hood light with a pin switch. Besides it's 9" long and that's way too much for the glove box.
Now that I think of it I have some mag-switches sitting around that are for a security system that I could probably use for a switch.
I don't know who CuTeBoi thinks is getting excited other than himself. We're having a little fun playing with the possibilities and perhaps learning a little along the way.
I have some 3mm LEDs along with resistors and the mounts for them that I could use as well, but again their blue and I want white in the glove box.
I could even use the Quik Brite circuit board and LED's and wire them to resistors and one of the security mag-switches. After cutting the board or removing the rest of the circuitry for the LED's themselves.
The light from the Quik Brite is just right in my opinion not too bright but plenty of light to dig for what ever I'm after. For now it works just fine and I can take my time on making it or another option permanent.
stephanpark, cool, you got that part covered now to decide how to make it a permanent solution.
that's what i said... =P
either way, i shall see what they are doing, i got the 1 million color LED setup, and i'll install that inside, using the magnetic switch to turn it on and off, the magnetic switch can be hidden along the rail of the USDM glove box, no one can see it, or i can bondo it, and paint it to the color of the glove box, the way to hide a little piece of magnet is unlimited, just like with the brightlites.
either way, i shall see what they are doing, i got the 1 million color LED setup, and i'll install that inside, using the magnetic switch to turn it on and off, the magnetic switch can be hidden along the rail of the USDM glove box, no one can see it, or i can bondo it, and paint it to the color of the glove box, the way to hide a little piece of magnet is unlimited, just like with the brightlites.
Member
Joined: Jun 2007
Posts: 32
From: Los Angeles, CA
Yes, yes we are. Care to join the asylum?
Hey, wannah do it to it old school style, go for it. Personally I just don't like the way it looks, kinda well, old school. Yeah, yeah, glove box no one will care blah blah, I care Dog Dammit! Can't get the smell and look of melting plastic in an old Oldsmobile (Man were those crap cars) out of my head when you say bulb but you may have a slick solution, some nice casing that looks stock using one of those snazzy peanut bulbs that match the model of the other interior lights? Clay, you sly dog you. That would look pretty cool...walk the talk bro. Serious, we're all down our respective solutions and yours sounds easy to follow. I'd like to see it here for out fellow FITFREAKs.
Hahahhahha! You never know, the ECU is set to loose MPG if you play with the electronics...didn't you know! That fuse under the hood or that relay under the dash, or is it...oh my god, ITS GOING TO BLOW!!!
But I digress...CuTeBoi, the magnet I'm pretty sure can be put inside the Glove box lid itself, I remember seeing a seam somewhere. Problem is the distance, the switch trigger is sensitive up to only a half an inch.
First one to pry out an always-hot line gets...a compliment of some kind.
Hey, wannah do it to it old school style, go for it. Personally I just don't like the way it looks, kinda well, old school. Yeah, yeah, glove box no one will care blah blah, I care Dog Dammit! Can't get the smell and look of melting plastic in an old Oldsmobile (Man were those crap cars) out of my head when you say bulb but you may have a slick solution, some nice casing that looks stock using one of those snazzy peanut bulbs that match the model of the other interior lights? Clay, you sly dog you. That would look pretty cool...walk the talk bro. Serious, we're all down our respective solutions and yours sounds easy to follow. I'd like to see it here for out fellow FITFREAKs.
But I digress...CuTeBoi, the magnet I'm pretty sure can be put inside the Glove box lid itself, I remember seeing a seam somewhere. Problem is the distance, the switch trigger is sensitive up to only a half an inch.
First one to pry out an always-hot line gets...a compliment of some kind.
Last edited by stephanpark; Jun 21, 2007 at 03:37 AM.
If I was going to hard wire into the car, I would not even bother to use a quik-brite. In fact, before I started the development for a universal glovebox light as described earlier, I was in fact looking at purchasing a glovebox light assembly from another car and retrofitting it into my Fit. There's room enough for a few models of glovebox lights out there, and you can either mount the push-pin switch in place of the grommet at the left of the glovebox opening, or use an all-in-one type unit such as from an earlier Neon that has the push-pin switch built into the same unit as the light itself. Many of these units can be found even in your local junk yard for next to nothing, and no worries about resisters, etc since it's designed to work on 12vDC. I would much prefer a flush-mounted glovebox light than one that's stuck on. then... not to be so old school...put in a LED light panel inside instead of the regular wedge bulb.
The light I'm developing obviously isn't targeted towards someone who can hardwire a light into their own car. It's meant to be something that anyone can install in minutes and be done with it. Like the quik-brite, but brighter, more functional because it can be detached, uses easy to find AAA battery, and looks better. Plus you won't have to buy 10 lights just to get one or two.
As for a always hot wire, just pull one from the fuse box. There are a few unused slots that are either always live, or switched. It's probably your easiest bet. Not too hard to fish a wire from the fuse box across to the glovebox area.
Member
Joined: Jun 2007
Posts: 32
From: Los Angeles, CA
...the light I'm developing obviously isn't targeted towards someone who can hardwire a light into their own car. It's meant to be something that anyone can install in minutes and be done with it. Like the quik-brite, but brighter, more functional because it can be detached, uses easy to find AAA battery, and looks better. Plus you won't have to buy 10 lights just to get one or two.