GB: Tiger Tuning KMR Fit Chassis Brace Sets!
#501
 06-14-2011, 02:11 PM


Tiger - would it be possible for you to indicate which orders on the 1st page have been shipped so far? I'm toward the end of the list and would like *some* idea of when I can expect my order to ship.
Thx,
Joel
Thx,
Joel
#502
06-14-2011, 02:41 PM

The Upper Rear Strut (hehe "upper rear") only requires the removal of two nuts (haha get your nuts off), unfortunately they are nylon threaded locking nuts that are a B!#%& to get off (snicker snicker).
#503
06-14-2011, 06:29 PM

looks good...doesn't fit so well
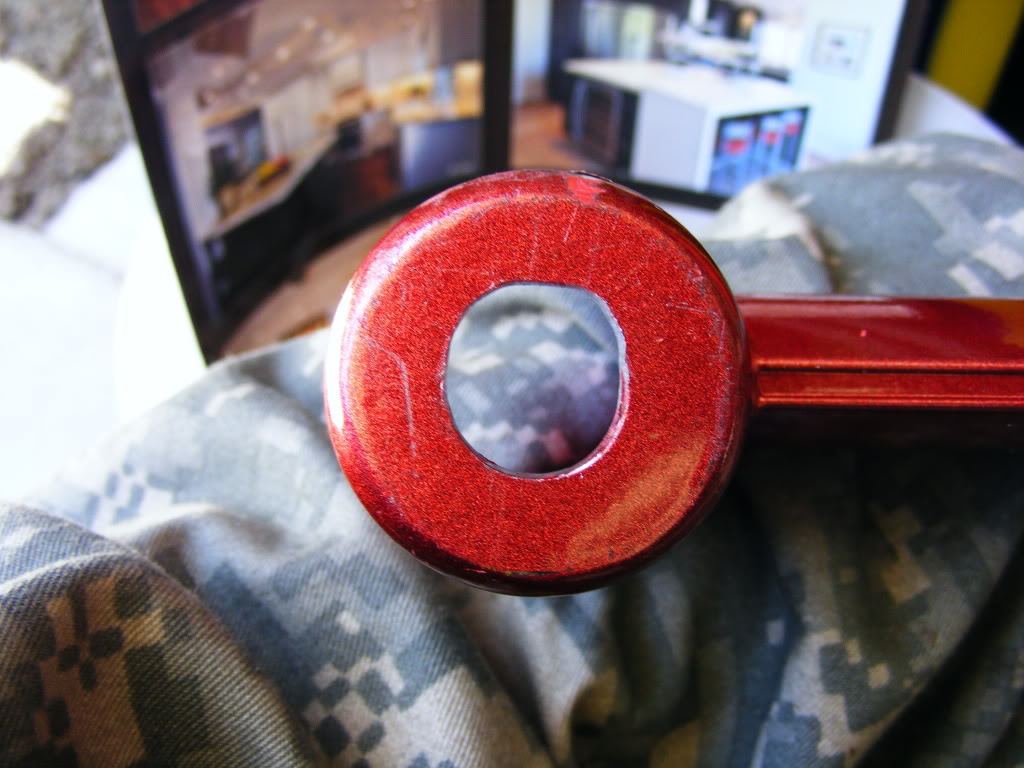
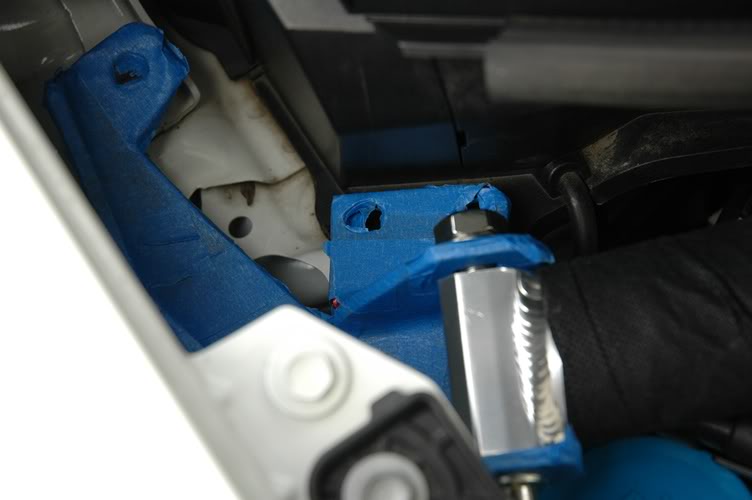
Today I installed the braces today on my GD3. I like the way they looked, sadly I did not like taking a file to my brand new braces just to make them fit.
The rear side braces are 14 mm bolts
-I torqued these down to about 40 lbs
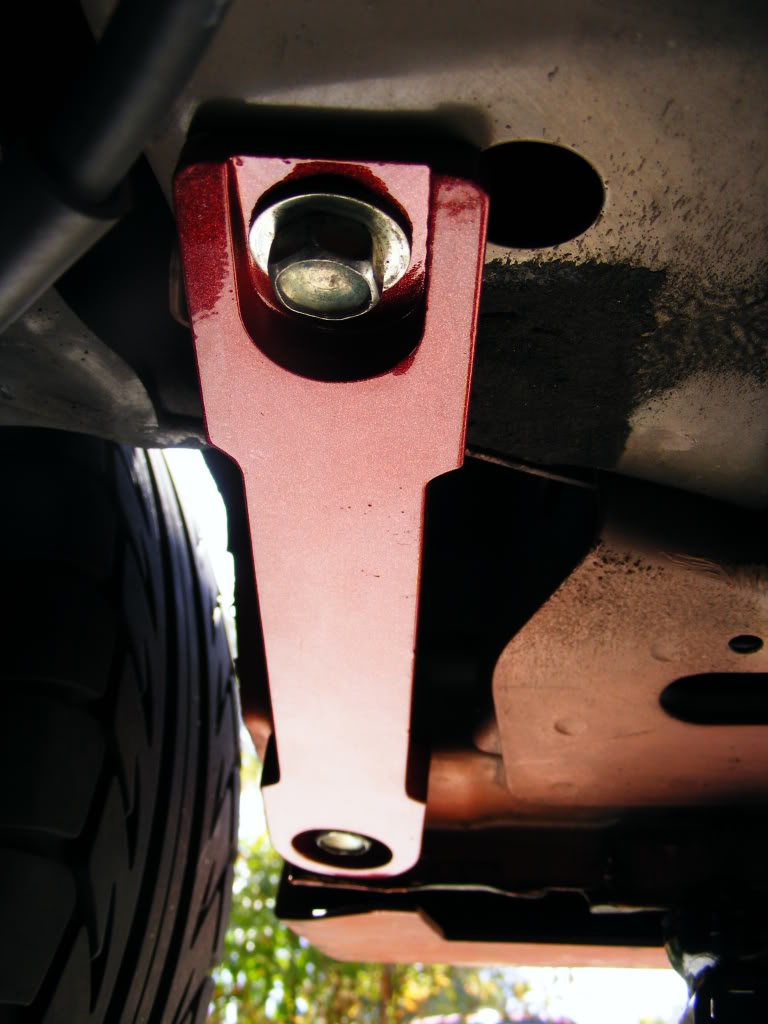
The lower front tie bar brace are 17 mm bolts
-I torqued these down to about 65 lbs
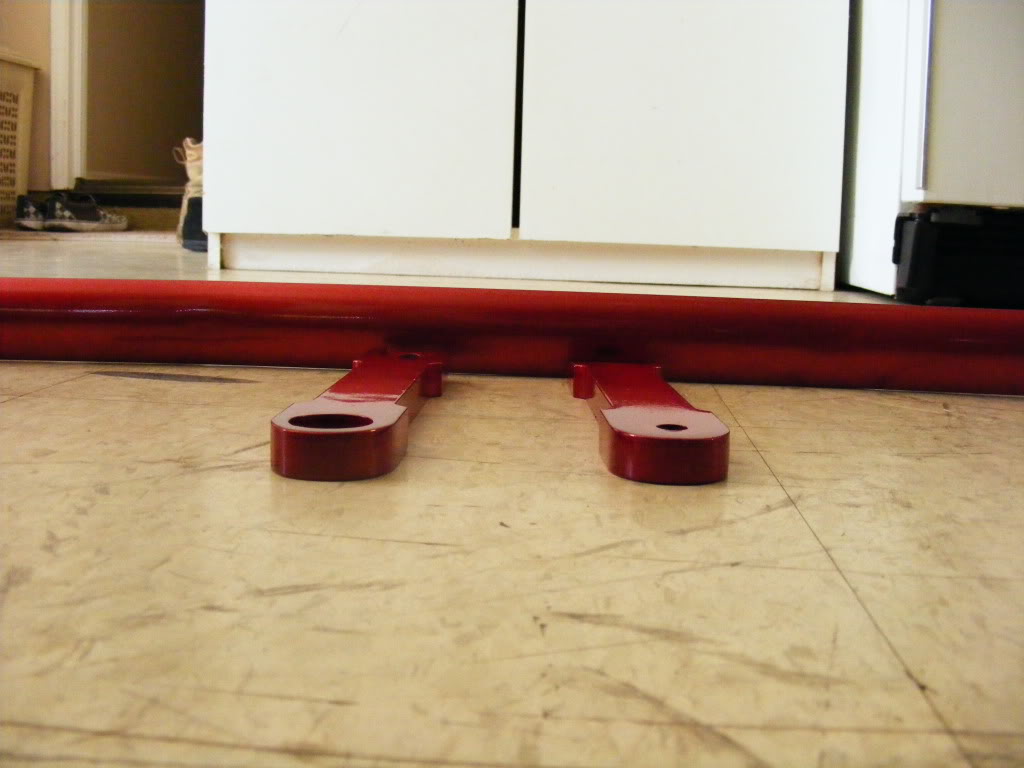
The KMR rear side braces are meatier replacement parts for our stock parts seen below.
The rear side brace fit perfectly on the rear right (rear passenger) side of the car
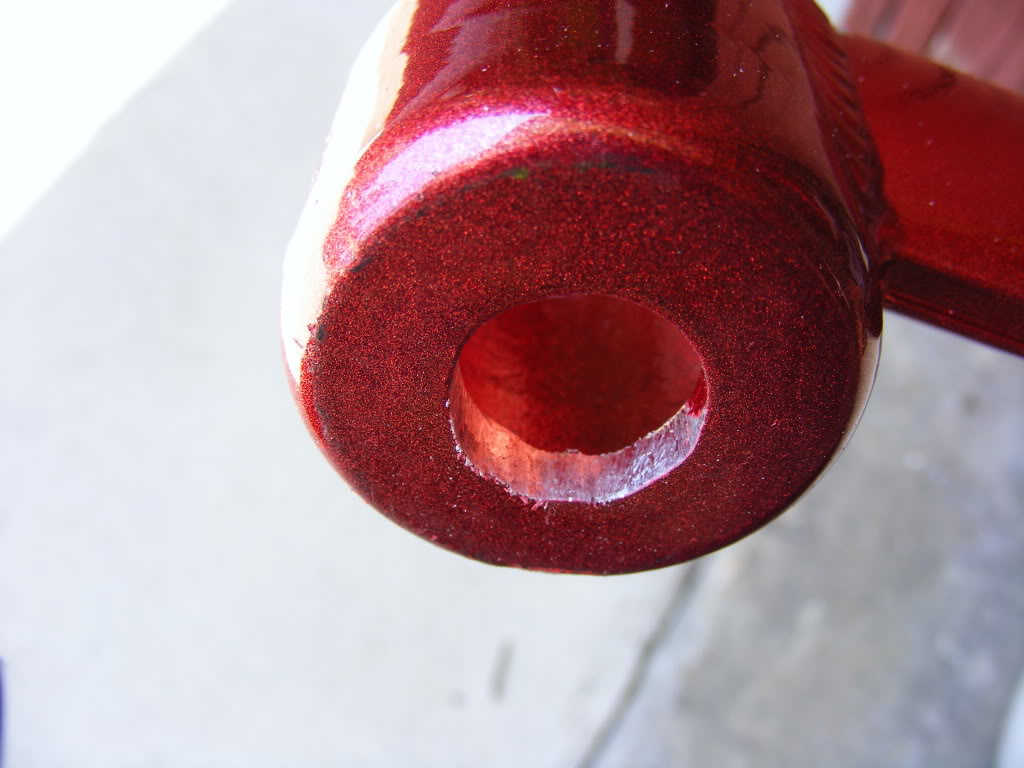
The rear side brace didn't fit so well on the rear left (rear driver) side of the car...I had to file it down a bit more than the pictures showed for it to fit since the chassis was in the way, so the holes wouldn't line up.
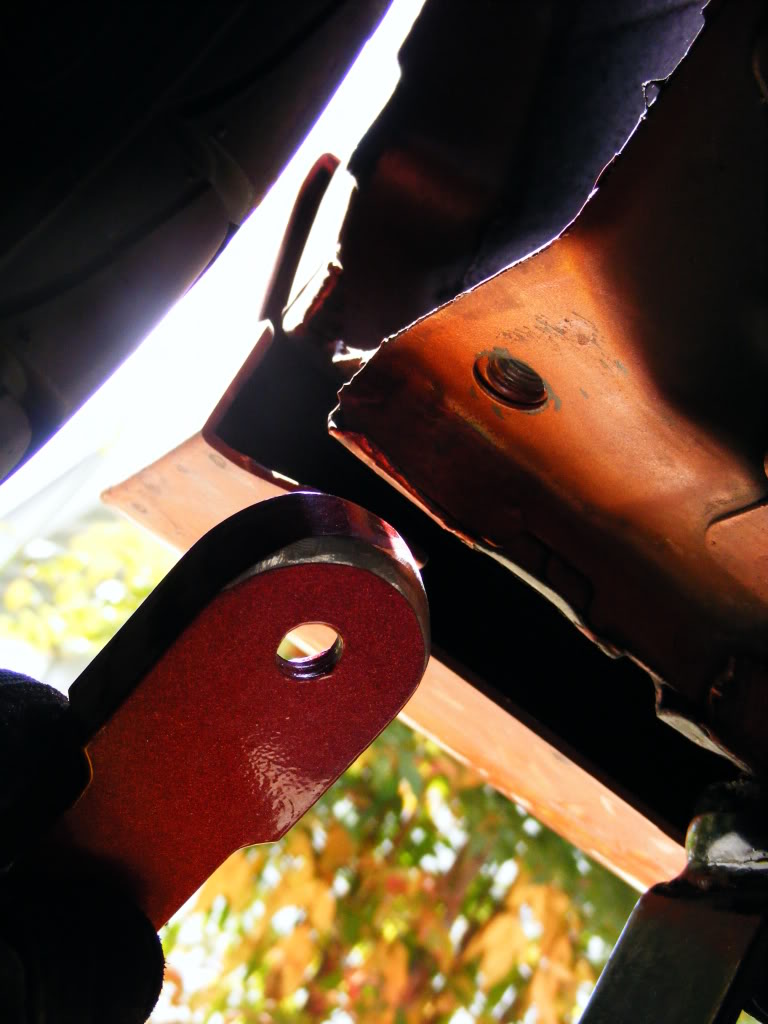
But after some filing it fit great.
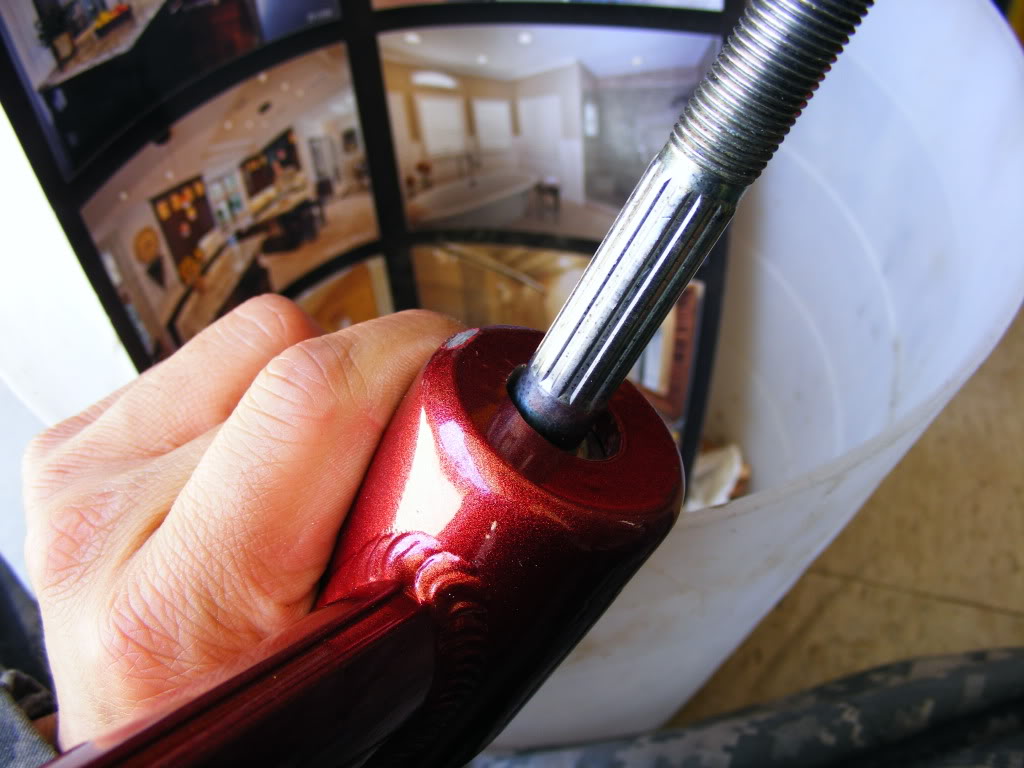
The Front Lower Tie Bar Brace had Problems as well, which could be remedied if the holes were drilled about maybe 2 mm lower towards the side with the KMR sticker, instead of dead center.
Passenger side
Passenger side

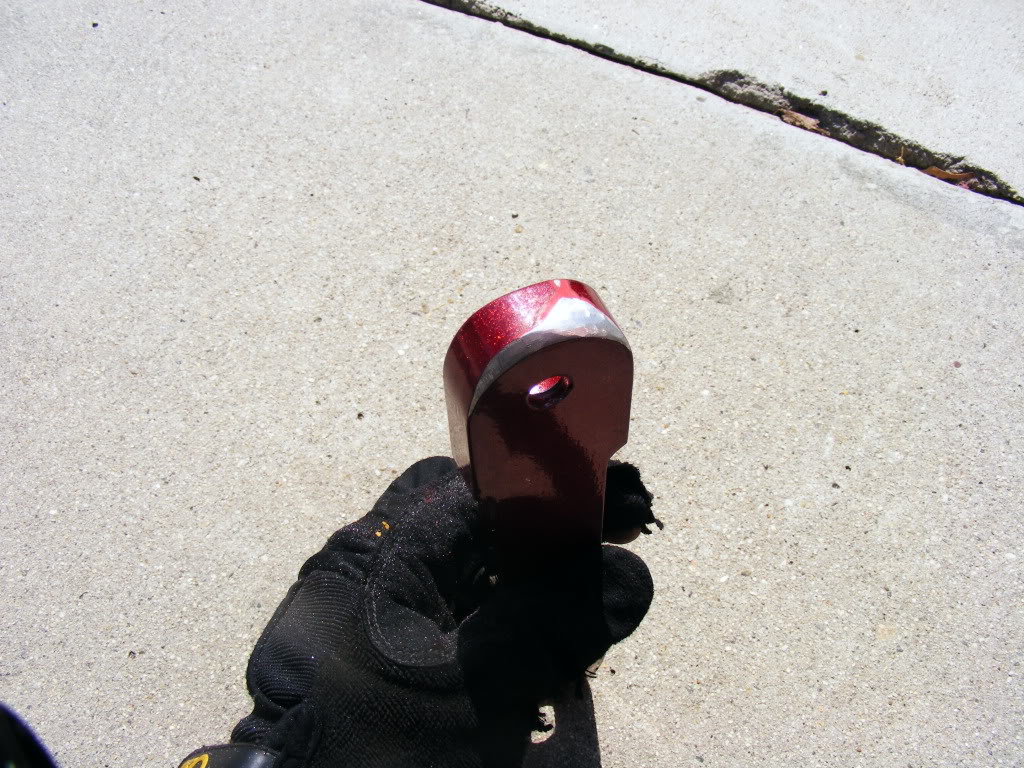
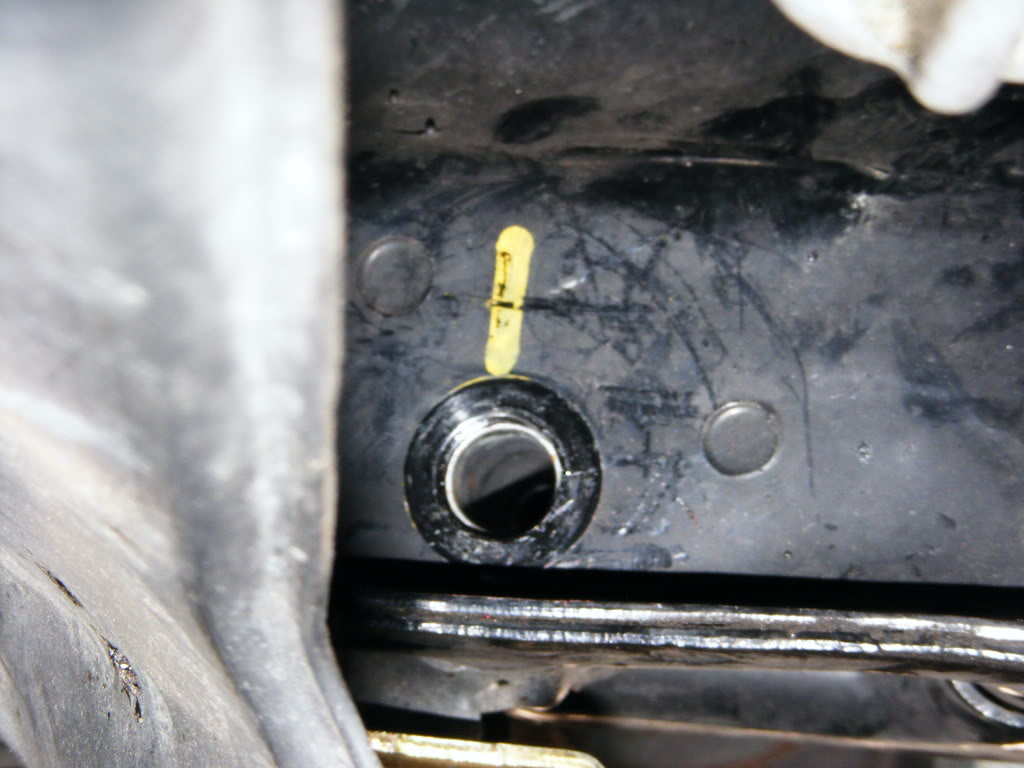
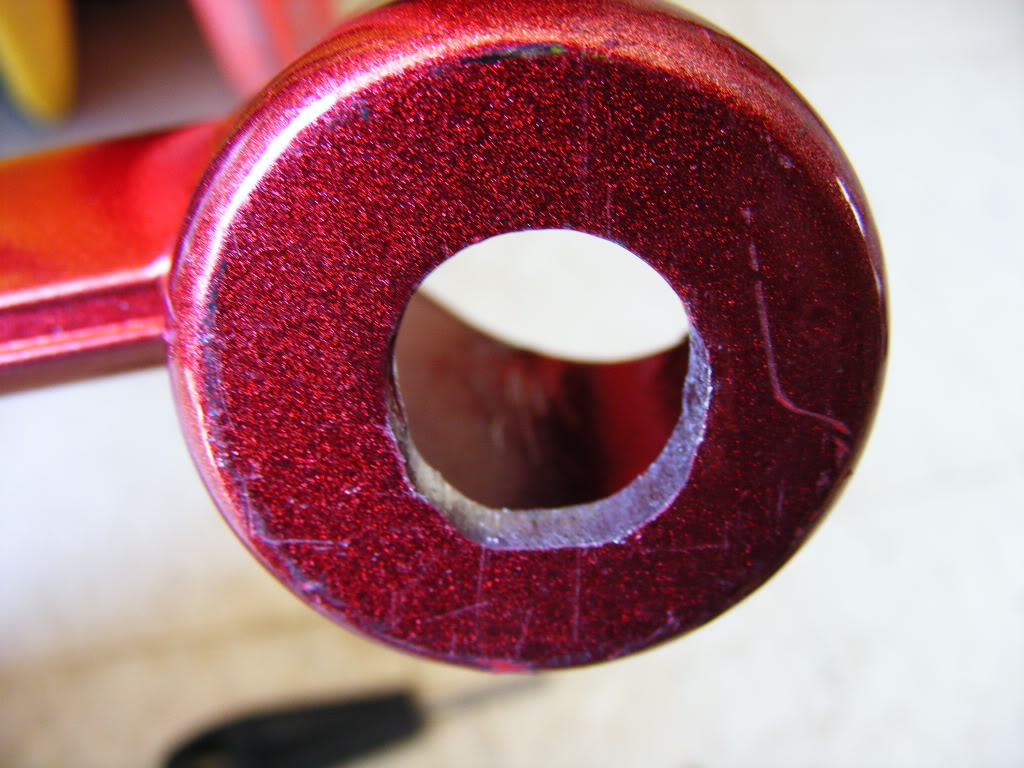
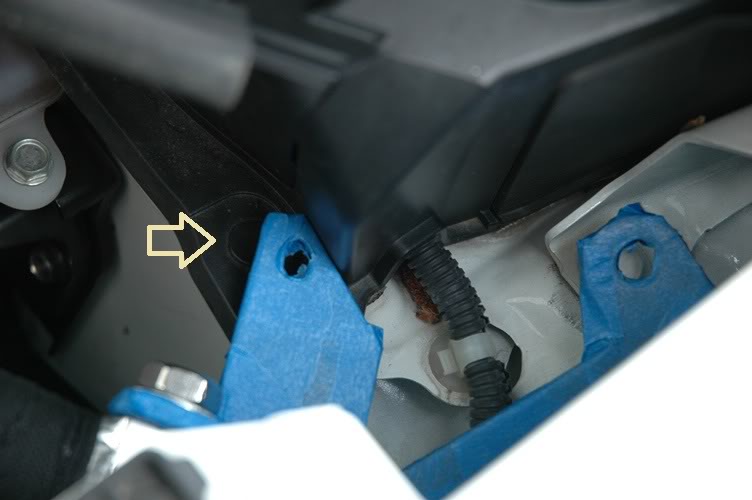
Driver side with the bolt. As you can see the Bolt is not centered, it is damn near the wall of the tube
Not a Nice round circle any more
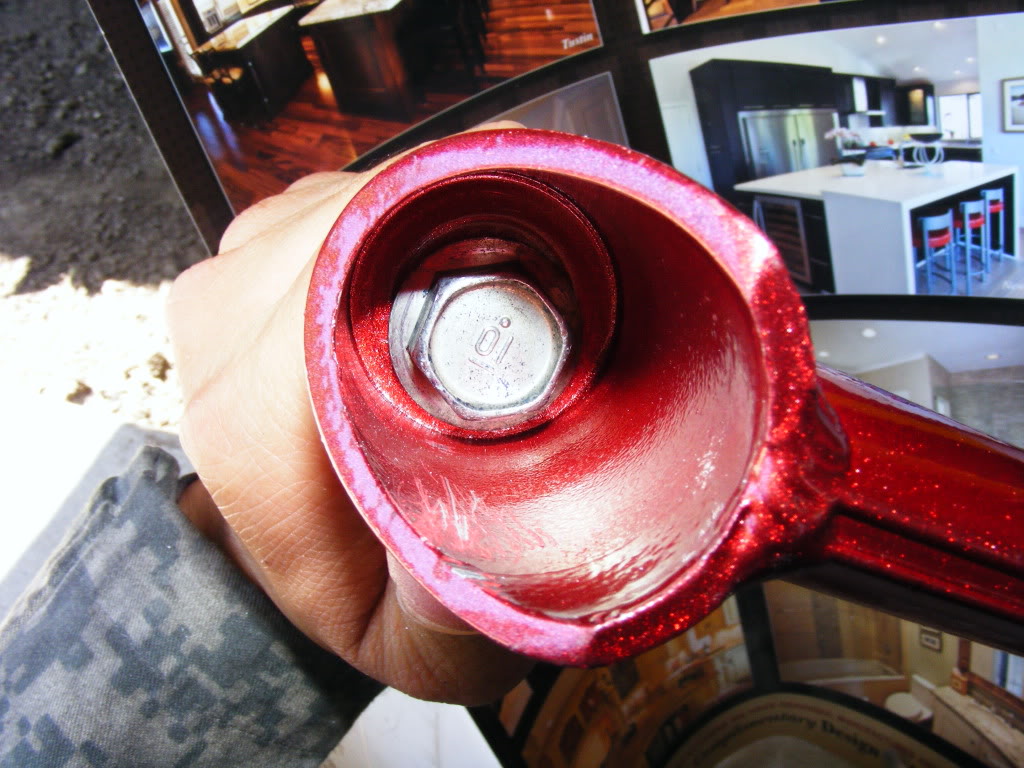
The holes were already pretty damn big before I started filing, I just made it more oval and circular. You can also see in this picture you can see my brace got scratched at the part near my finger because it was hitting the lip where the brace bolts.
SO to summarize, it looks great, just fix where the holes are drilled (maybe 1 mm towards the outside of the rear side braces and 2 mm lower on the lower front tie bar brace) and all will be good...CAN I HAVE A FREE 4 point sub frame brace now?
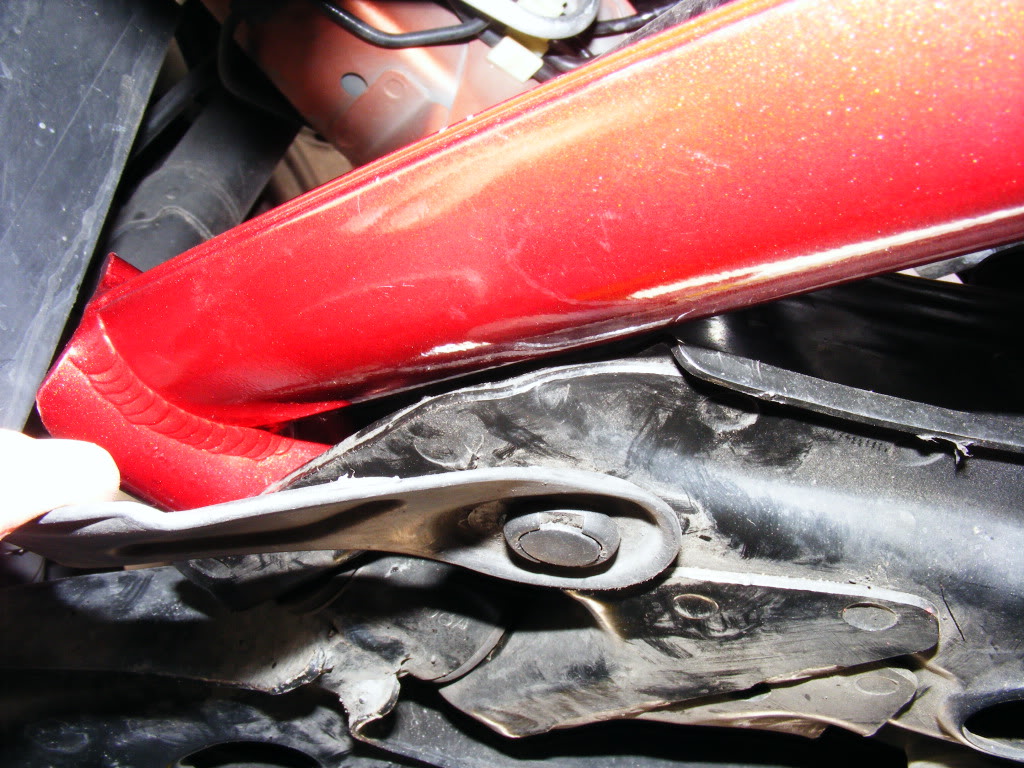
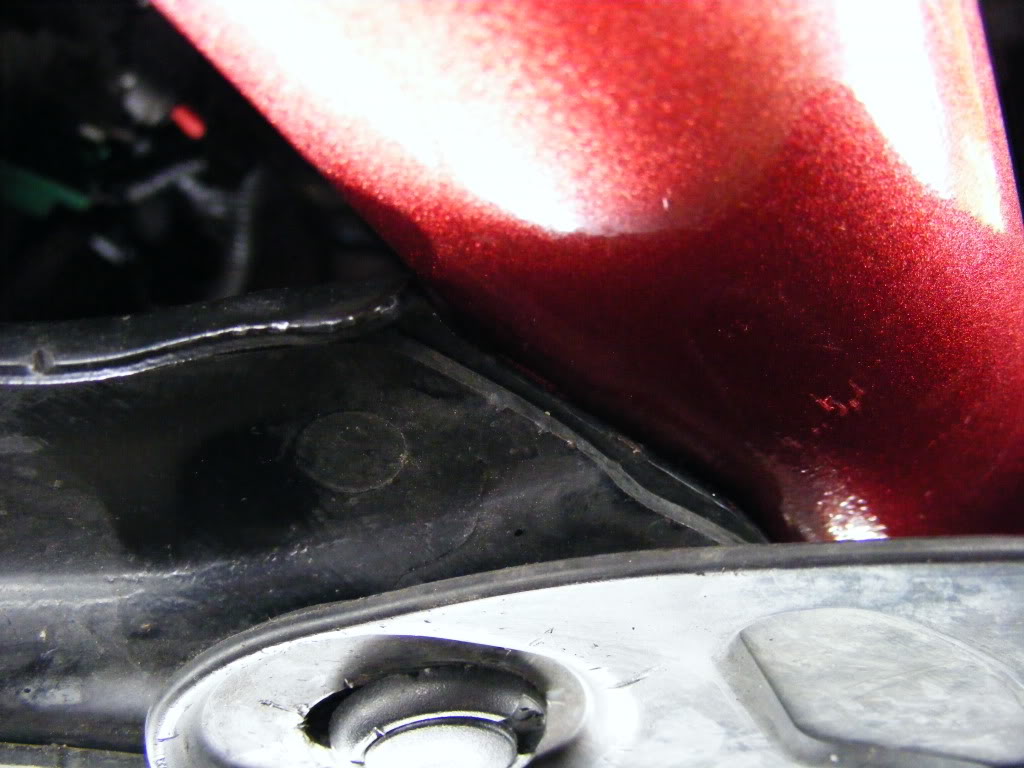
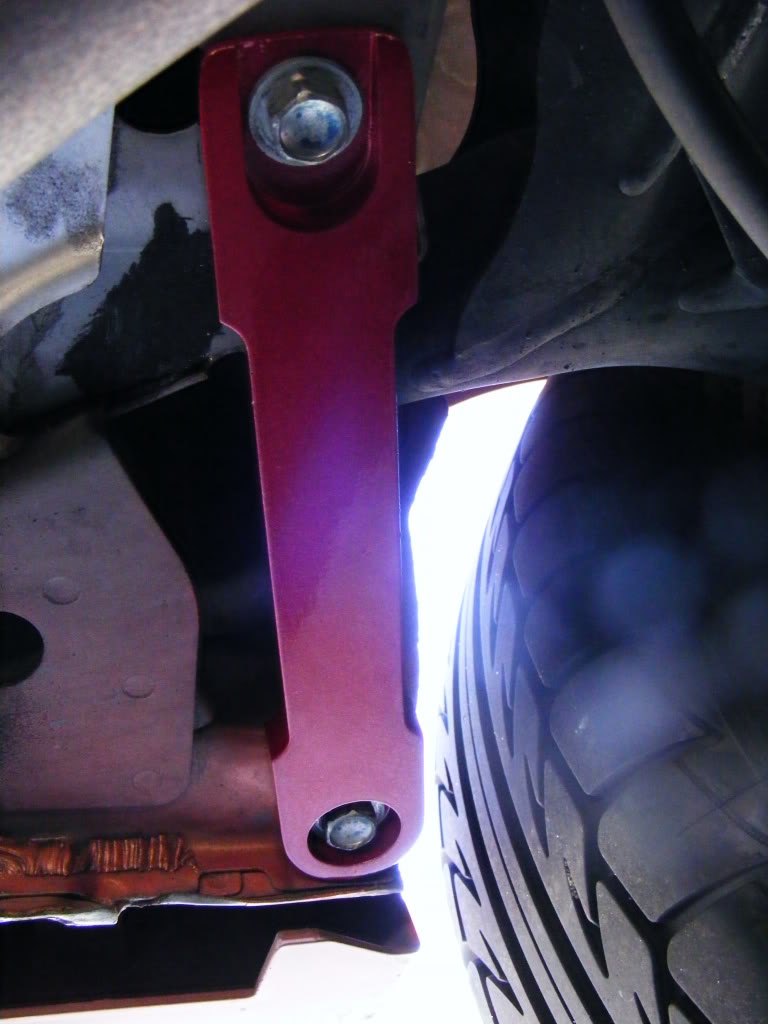
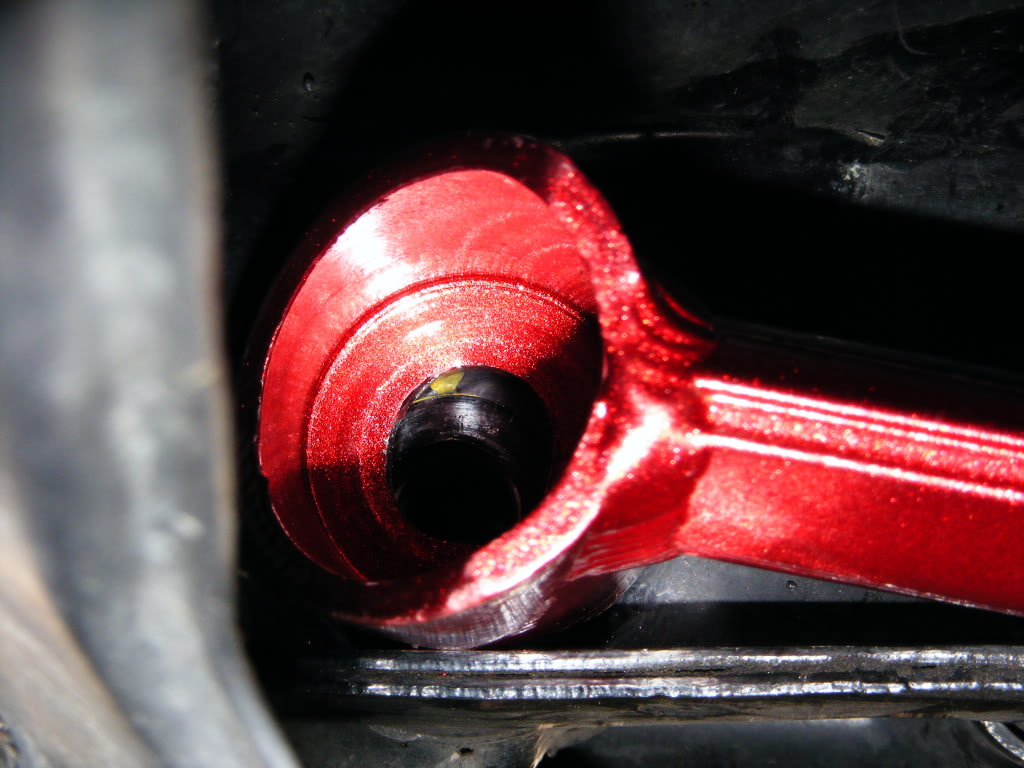
The brace also sits hella close to...I guess i'll call it the sub frame, I think it was actually touching on the driver side.
It helps to have a small jack holding up the lower A arm to line up the holes.
To make the install easier, line up the holes first without the brace and then put the brace on.
The rear side braces are 14 mm bolts
-I torqued these down to about 40 lbs
The lower front tie bar brace are 17 mm bolts
-I torqued these down to about 65 lbs
The KMR rear side braces are meatier replacement parts for our stock parts seen below.
The rear side brace fit perfectly on the rear right (rear passenger) side of the car
The rear side brace didn't fit so well on the rear left (rear driver) side of the car...I had to file it down a bit more than the pictures showed for it to fit since the chassis was in the way, so the holes wouldn't line up.
But after some filing it fit great.
The Front Lower Tie Bar Brace had Problems as well, which could be remedied if the holes were drilled about maybe 2 mm lower towards the side with the KMR sticker, instead of dead center.
Passenger side
Passenger side
Driver side with the bolt. As you can see the Bolt is not centered, it is damn near the wall of the tube
Not a Nice round circle any more
The holes were already pretty damn big before I started filing, I just made it more oval and circular. You can also see in this picture you can see my brace got scratched at the part near my finger because it was hitting the lip where the brace bolts.
SO to summarize, it looks great, just fix where the holes are drilled (maybe 1 mm towards the outside of the rear side braces and 2 mm lower on the lower front tie bar brace) and all will be good...CAN I HAVE A FREE 4 point sub frame brace now?
The brace also sits hella close to...I guess i'll call it the sub frame, I think it was actually touching on the driver side.
It helps to have a small jack holding up the lower A arm to line up the holes.
To make the install easier, line up the holes first without the brace and then put the brace on.
Last edited by TunaDaMan; 06-14-2011 at 06:40 PM. Reason: MOAR INFO... I know it's MORE*
#504
06-14-2011, 07:24 PM
I don't have a lot of experience installing small-run parts like this but I have to admit, I'm disappointed that they require this level of customization to fit the application they're designed for. I don't know if the original pattern is off, if the fabrication tolerances aren't so tight or what but I'm still a little bummed. Maybe when my tracking number arrives, and then some day when the parts show up, and after I do all of my own swearing, head-scratching & grinding, I'll be able to see the brighter side like you Tuna. You da man! 


#508
06-18-2011, 10:58 AM
I received my bars on thursday!
I did PM Tiger and ask about my shipment a couple of days beforehand.
He was quick to ship them and supply the tracking number.
I will install them this week sometime along with a set of Tein springs.
Anybody have any tips on the install for the top front strut bar and also the lower? I have never installed these before.
#509
06-19-2011, 10:19 AM

I received my bars on thursday!
I did PM Tiger and ask about my shipment a couple of days beforehand.
He was quick to ship them and supply the tracking number.
I will install them this week sometime along with a set of Tein springs.
Anybody have any tips on the install for the top front strut bar and also the lower? I have never installed these before.
I did PM Tiger and ask about my shipment a couple of days beforehand.
He was quick to ship them and supply the tracking number.
I will install them this week sometime along with a set of Tein springs.
Anybody have any tips on the install for the top front strut bar and also the lower? I have never installed these before.
https://www.fitfreak.net/forums/2nd-...t-mugen-9.html
#510
06-19-2011, 10:30 AM
I got my front strut bar last Saturday. I tried it on the car today. I think this is where it resides?
Right bracket fits to existing holes.
Left bracket (driver side): holes are off. I might be wrong but I will wait since there is no instruction that came with it.
We might have to trim the plastic piece but I don't think we have to remove it.
Right bracket fits to existing holes.
Left bracket (driver side): holes are off. I might be wrong but I will wait since there is no instruction that came with it.
We might have to trim the plastic piece but I don't think we have to remove it.
Last edited by FITMugen; 06-19-2011 at 01:27 PM.
#511
06-20-2011, 01:50 PM
did anyone install the ge8 FSB? well, i tried lining it up. it seems to be okay. just trim or drill the second hole next to the tab holding the cowl down. I lost the passenger side one so this FSB should hold it down. yay. I went ahead and trimmed or notched the passenger side of the cowl like this:
before

after

i know it doesn't look to line up...but cowl is slightly raise which makes it look off.
so basically the two bolts mount there on both sides and the other hole mounts to the bolt holding down the hood mount. i might run into problems because thats where my hood shocks mount to. i'll try to finish it up on my lunch break...and for the middle...need to look at that more. might need to take off cowl to get a better understanding. anyone else can chime in for installation?
before
after
i know it doesn't look to line up...but cowl is slightly raise which makes it look off.
so basically the two bolts mount there on both sides and the other hole mounts to the bolt holding down the hood mount. i might run into problems because thats where my hood shocks mount to. i'll try to finish it up on my lunch break...and for the middle...need to look at that more. might need to take off cowl to get a better understanding. anyone else can chime in for installation?
Last edited by beangrower; 06-20-2011 at 07:51 PM.
#513
06-20-2011, 06:30 PM
I just installed my front 3pt and 2pt bars on my GE.
I am aware that it could just be the pieces that I received but a few things to note....
- I had to enlarge several of the holes on both bars. The holes simply did not line up correctly. A step drill bit did the trick nicely.
- Im not certain but I dont think the finish is powder coated as some of the red rubbed off when I wiped off my finger prints, along with grease and a little dirt.
- The 2pt bar will not work with the CR-Z engine under panel. I had to trim some of the areas where the bar protruded downwards. Not big deal to me and no problem if you're not using the CR-Z panel.
Other then that, I am quite pleased with my purchase, mainly because of the price I paid . The mods are very minor IMO. If it were something in the lines of Cusco and I paid about double, that would be a different story.
I am aware that it could just be the pieces that I received but a few things to note....
- I had to enlarge several of the holes on both bars. The holes simply did not line up correctly. A step drill bit did the trick nicely.
- Im not certain but I dont think the finish is powder coated as some of the red rubbed off when I wiped off my finger prints, along with grease and a little dirt.
- The 2pt bar will not work with the CR-Z engine under panel. I had to trim some of the areas where the bar protruded downwards. Not big deal to me and no problem if you're not using the CR-Z panel.
Other then that, I am quite pleased with my purchase, mainly because of the price I paid
. The mods are very minor IMO. If it were something in the lines of Cusco and I paid about double, that would be a different story.
Last edited by circa40; 06-20-2011 at 06:33 PM.
#514
06-20-2011, 07:49 PM

looks like u gotta trim the hole that mounts to the hood mount of the bar(the ole farthest from the bar)...or trim the holes on the body. also, if u have hood shock like me, u gotta buy longer hood bolts or just remove the hood shocks altogether.
#515
06-20-2011, 11:49 PM

I paid the rest of my amount on Friday, still haven't heard back. Reading through this thread, it seems like all customer service has completely dropped off.
#516
06-21-2011, 01:10 AM
im glad i got to see this post. Im not willing to spend money on a bar i have to grind down to install, just saying. Atleast I know what not to buy now. I was feeling bad that i missed the group buy too.
#517
06-21-2011, 05:51 AM
Yes, I would agree with you about customer service. Additional, there is no installation instruction that come with it. Finally, fitment is the major issue. I am not willing to modyfy my car to install these bars. I prefer bolt-on. I had lower A-Arm and 4-point subframe installed. They just bolted right on.
This is the cost of being part of a group buy for new products under delopment. It is my first time in group buy as well. I would not participate in any group buy in the future until I see the final products. I am willing to pay more for quality products than get them cheap. Just my personal opinion.
This is the cost of being part of a group buy for new products under delopment. It is my first time in group buy as well. I would not participate in any group buy in the future until I see the final products. I am willing to pay more for quality products than get them cheap. Just my personal opinion.
#518
06-21-2011, 06:39 AM

No problems installing the 3 chassis braces I ordered. Only one of the four holes on the ladder brace had to be opened up a bit with a step drill. No biggie. The other two bolted right on. So for all practical purposes, if you bought GE8 chassis braces, you shouldn't have any installation or fitment issues unless the mfg changed part templates mid-stream. I can't speak for anything above the belt-line.

#520
06-21-2011, 03:21 PM
I have had my bars for weeks but one of them wasn't shipped but my money was returned to my PayPal account before I received the bars... When you buy custom fit performance parts it isn't uncommon to do a little tweak here and there to make them work... That is what we have special tools like vises, grinders, files and drills for.... You would not believe the cost of precision frame dressing tools that are needed for prepping a custom bike frame for bottom racket and headset installation... It is nice when things bolt right up, but not a problem when they don't since there is a simple solution that takes very little time or effort to solve... I have seen this on all kinds of parts I have purchased for a lot of different cars, motorcycles, bikes, small engines and inboard outboard boat units... It's one of the first things you learn in a mechanics course and one of the things that separates a mechanic from a parts changer.