BlackNDecker's "mini-Mugen" build thread

Thread Starter
|
Member
Joined: Apr 2010
Posts: 1,316
From: Minnesota
BlackNDecker's "mini-Mugen" build thread
I've posted this on several other sites but figured I share some pics here as well.
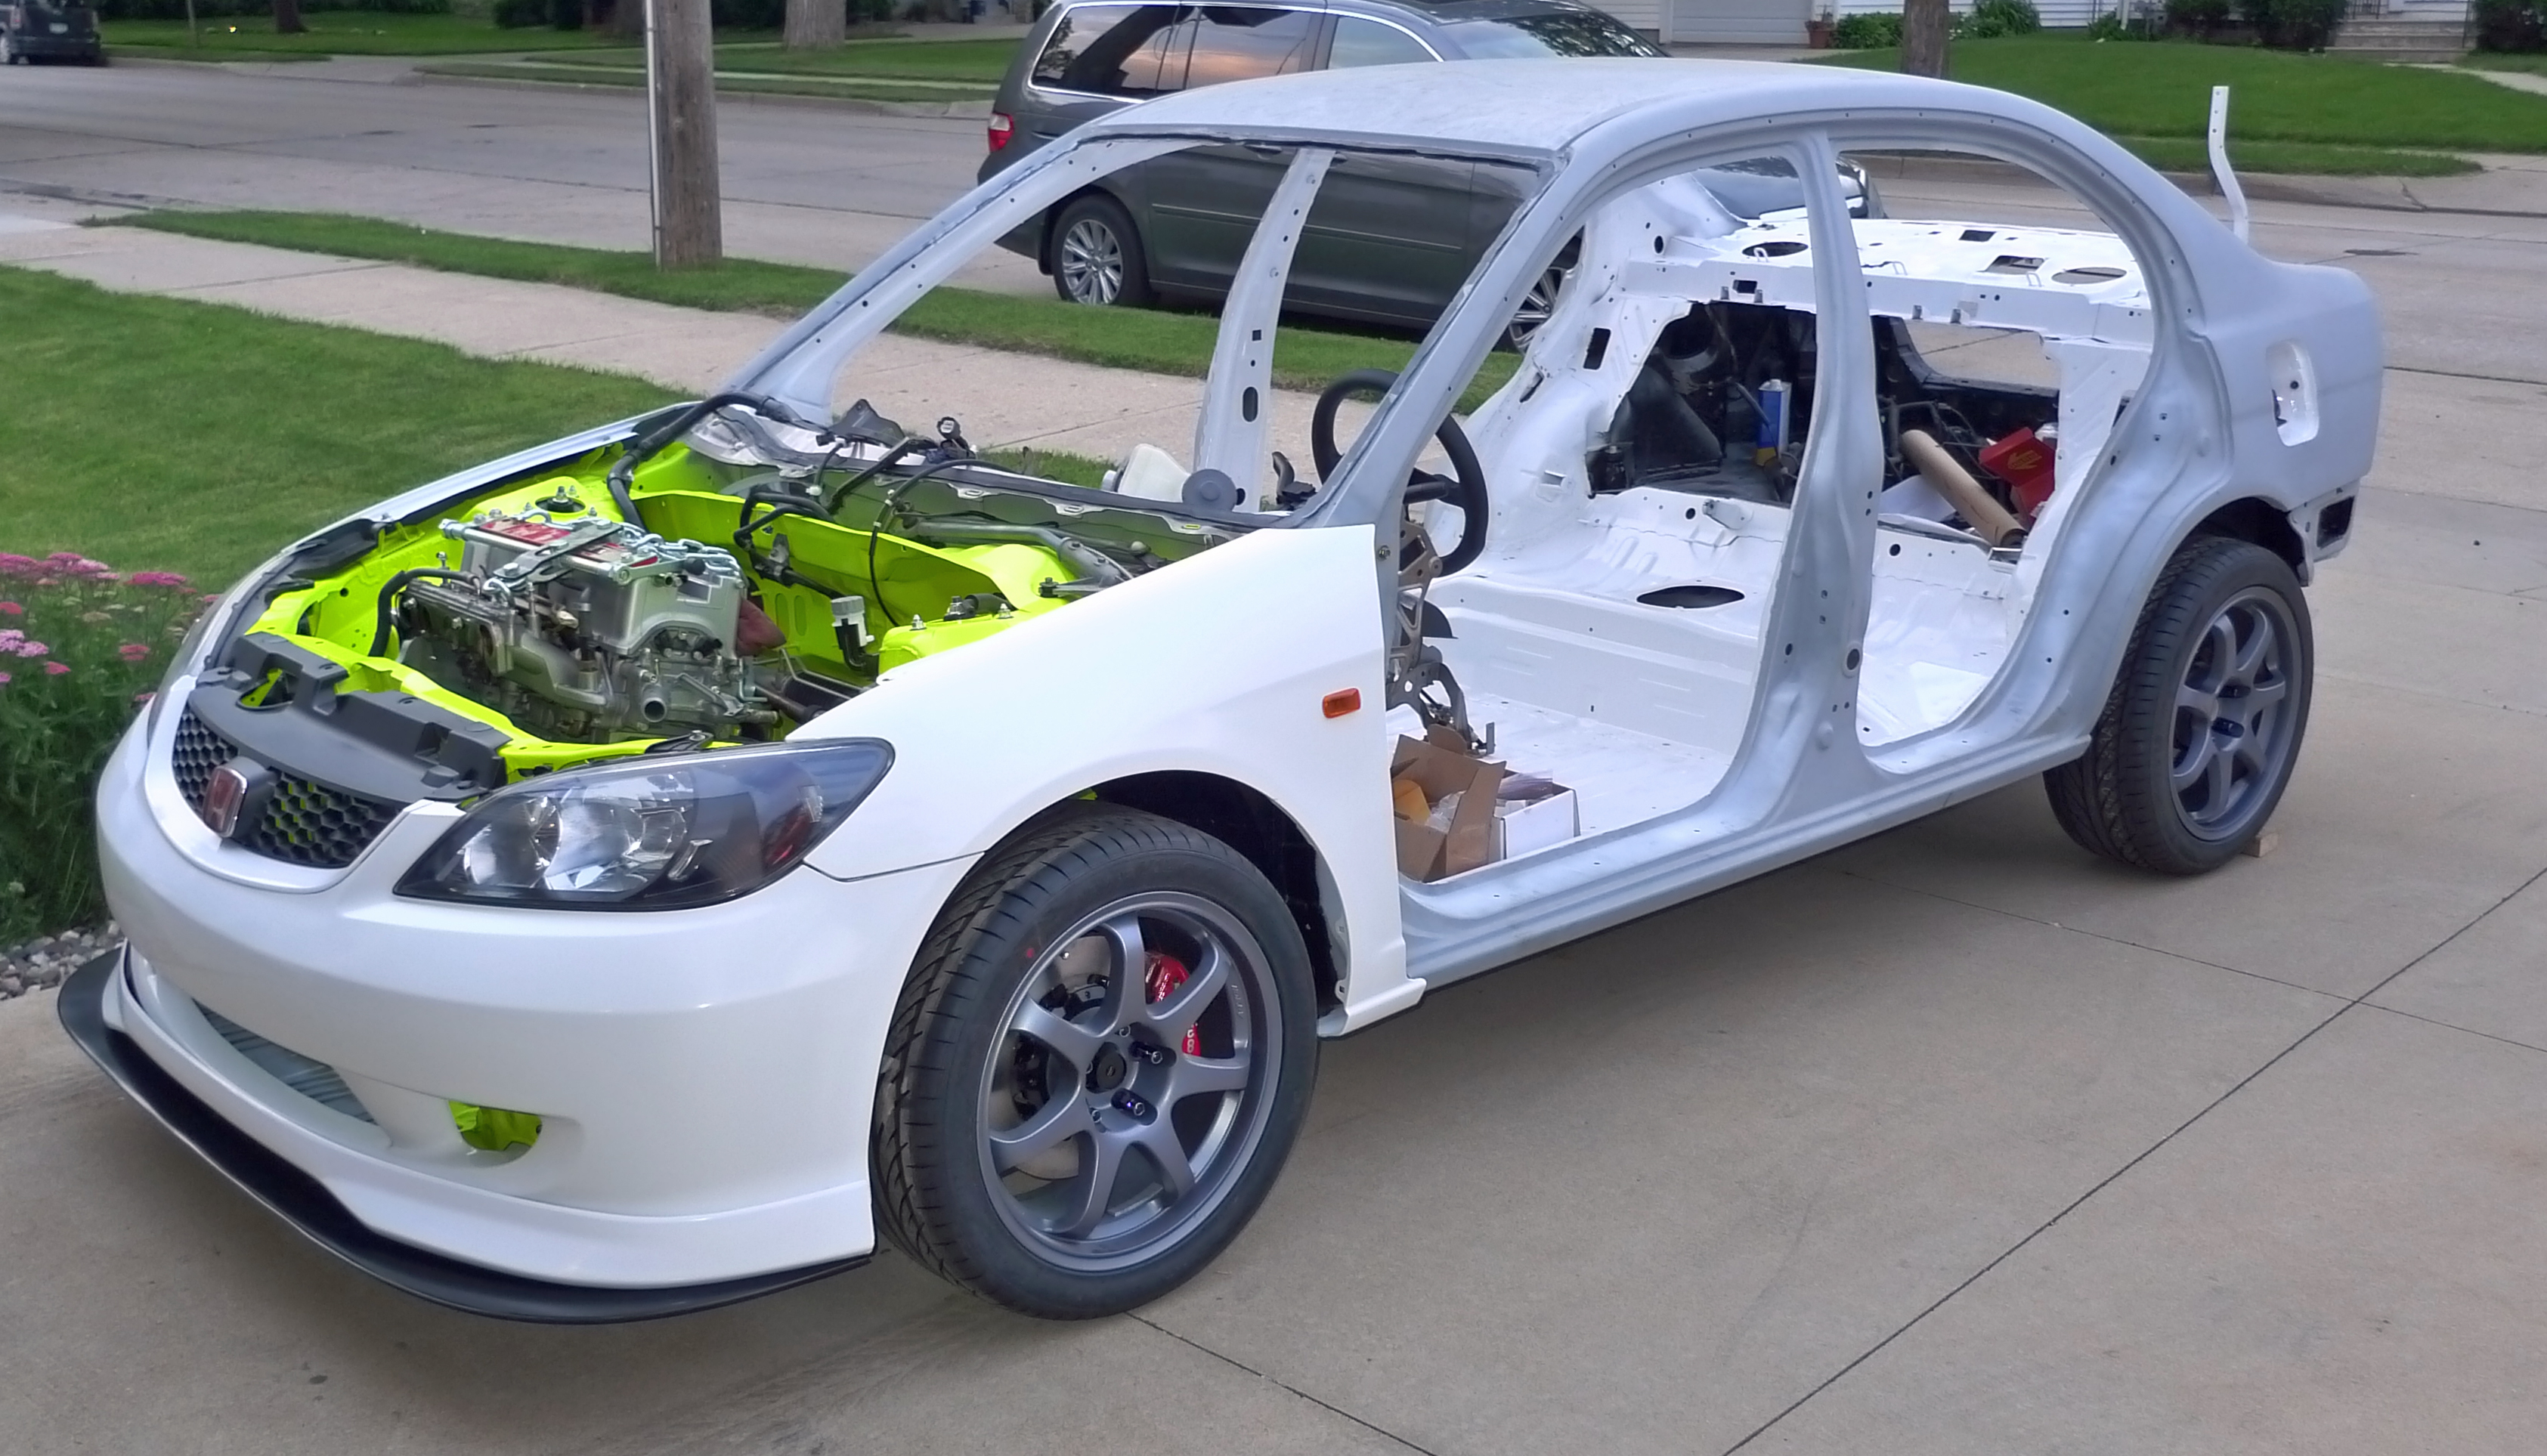
The car started out as a perfectly mundane 2001 civic grocery-getter:

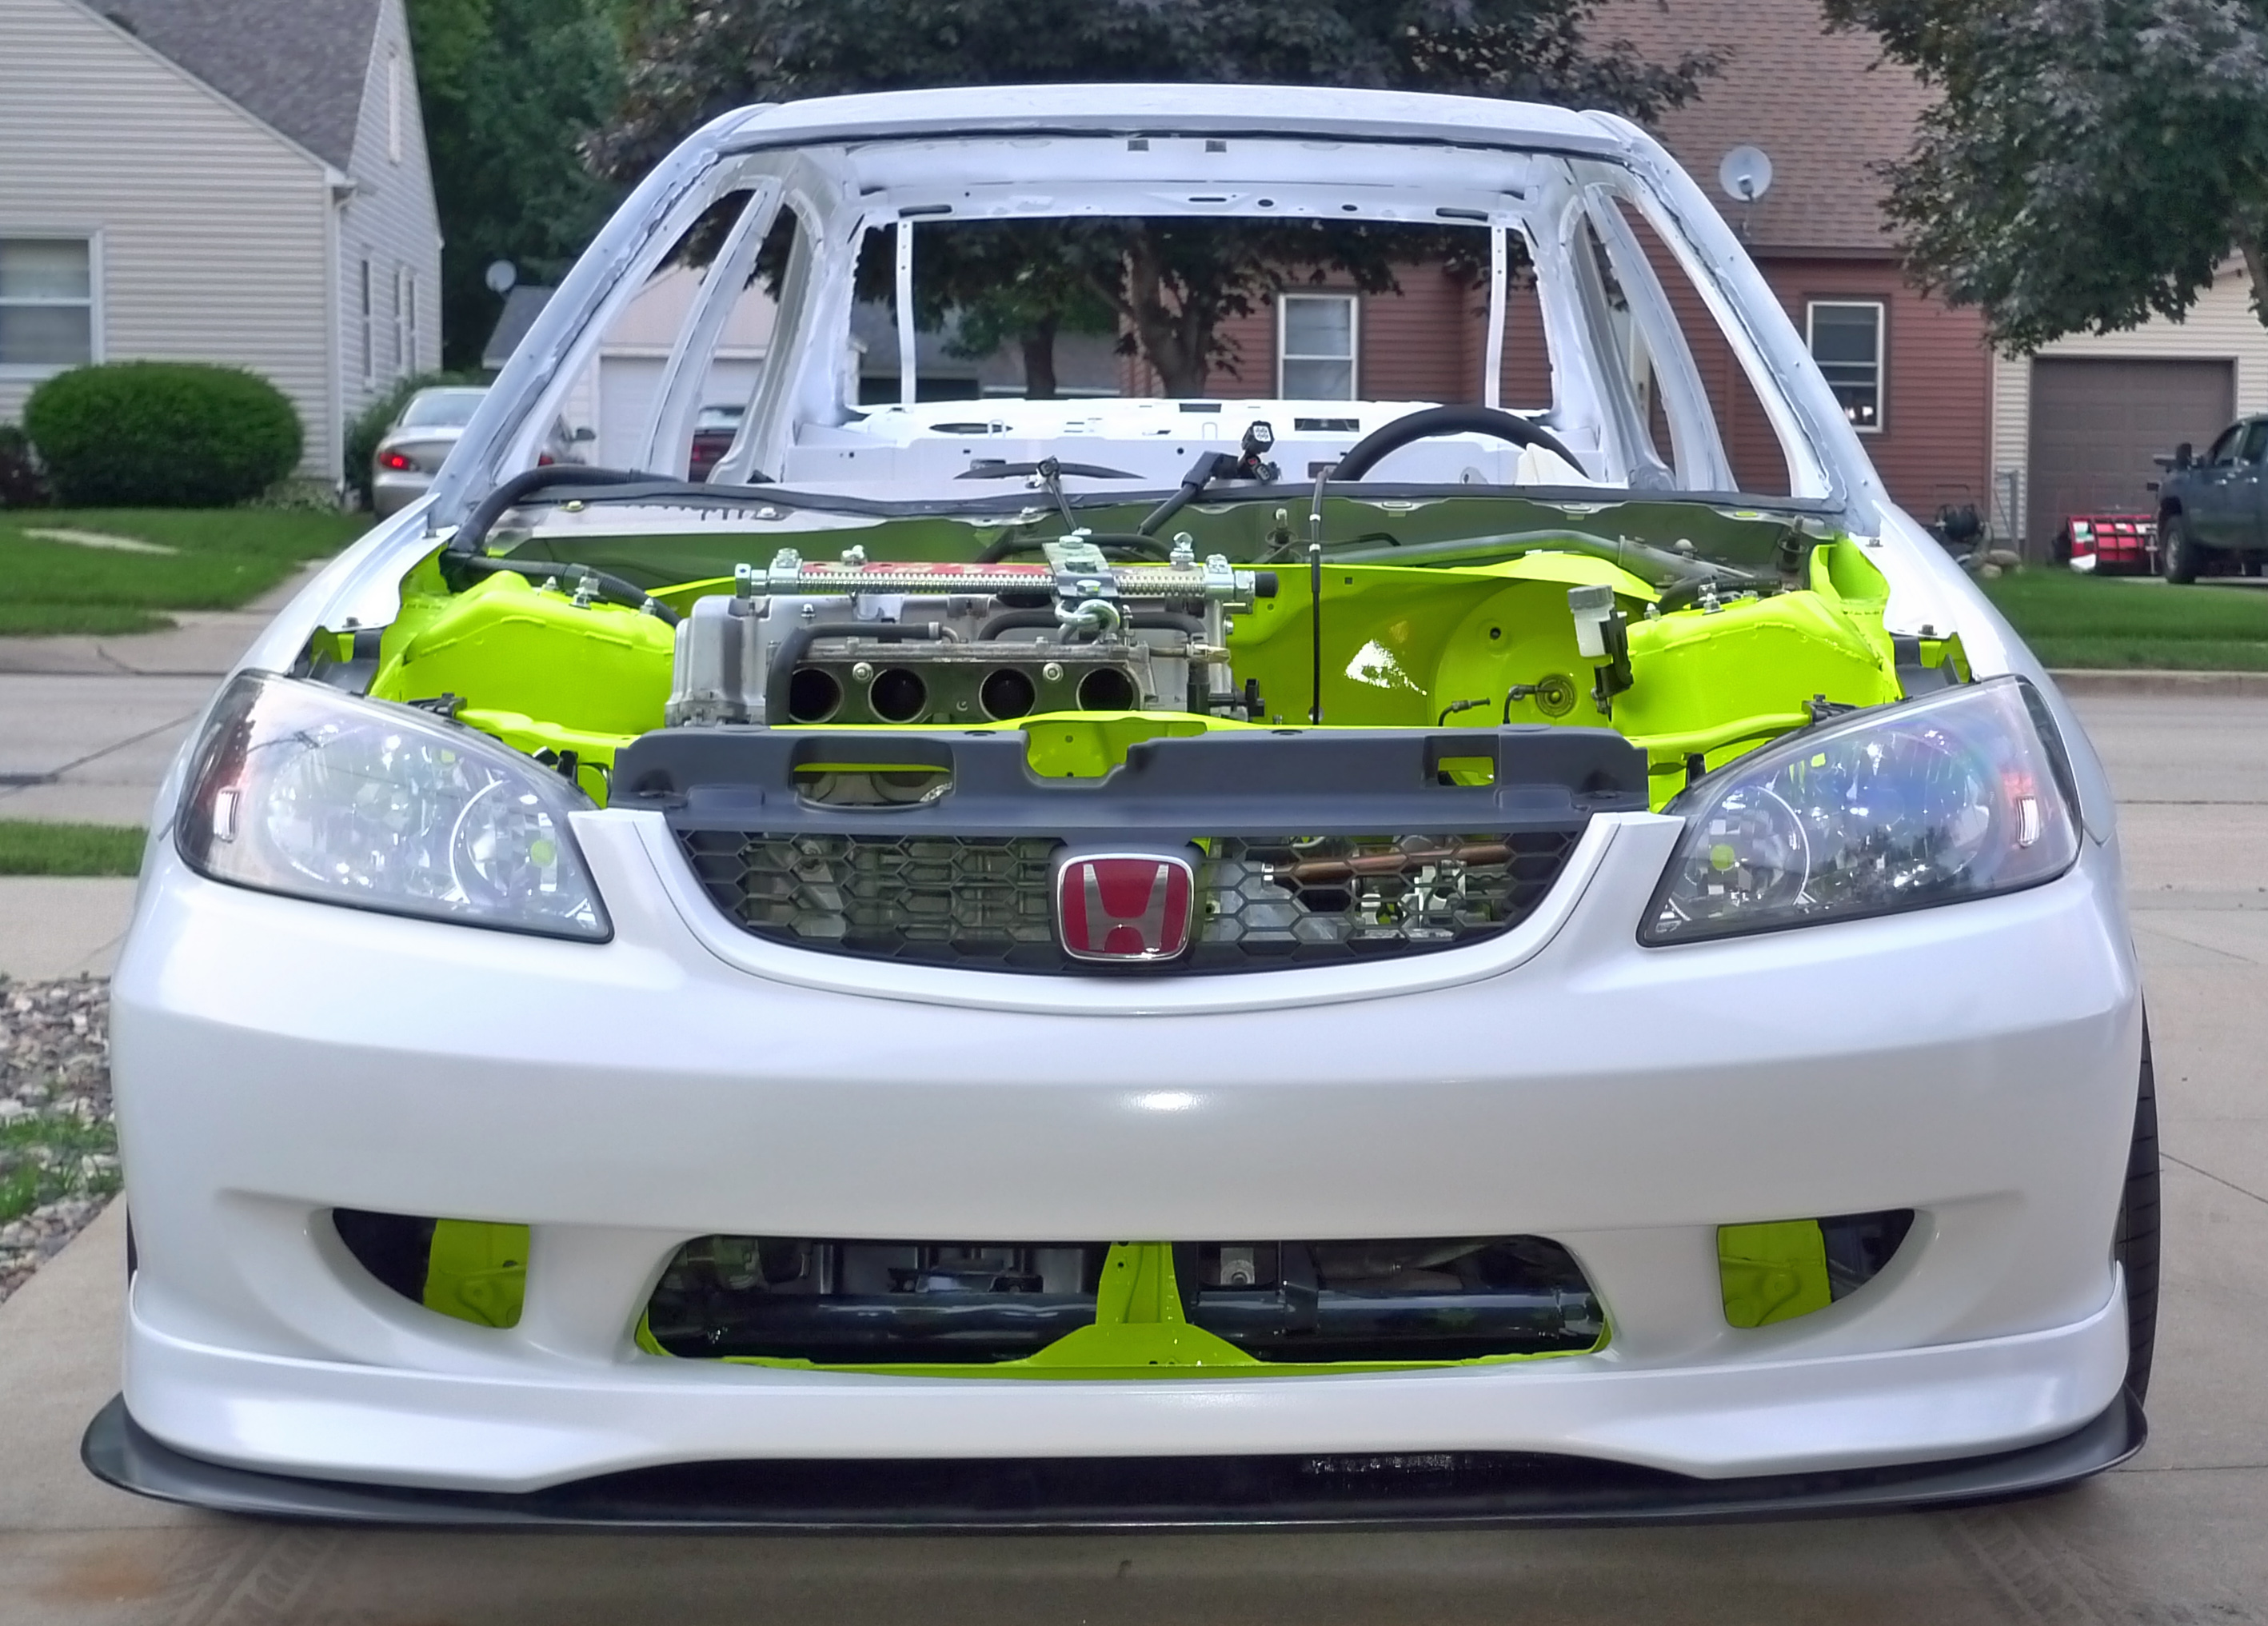
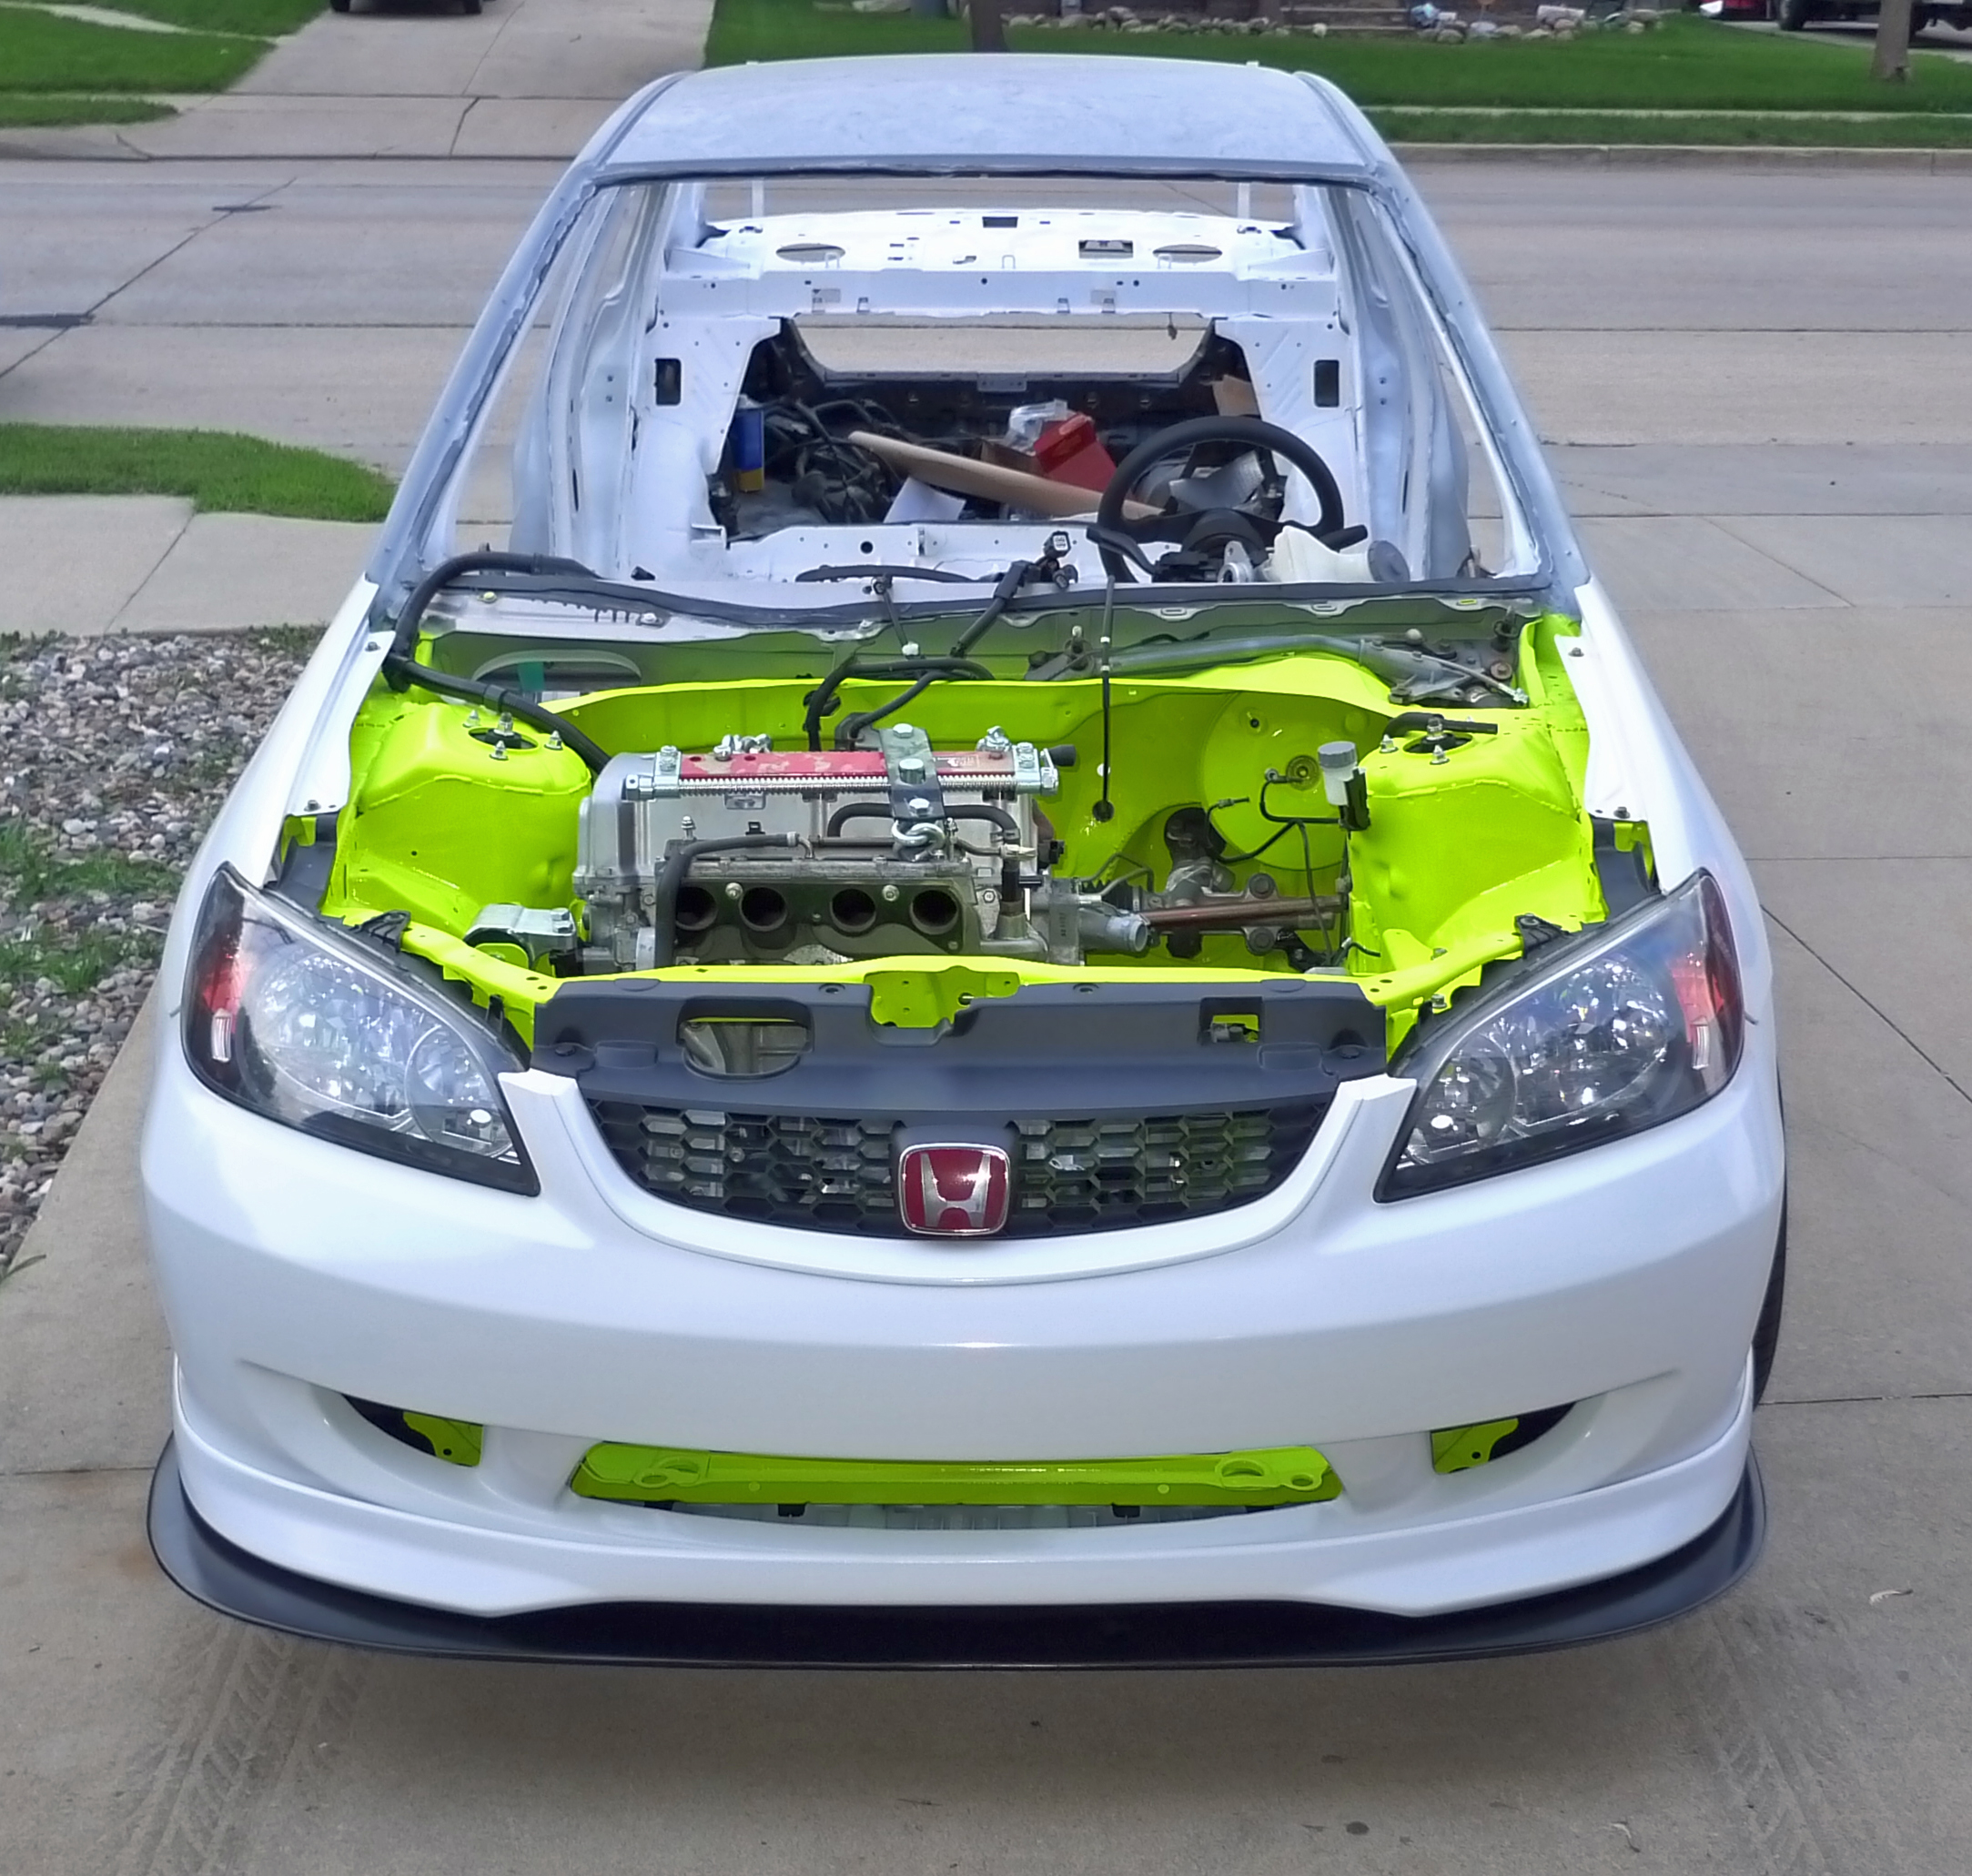
Of course it didn't stay that way. Thousands of man-hours and disposable dollars later...the car is getting completely overhauled. Better, stronger, faster...oh and a K24 swap:

The car started out as a perfectly mundane 2001 civic grocery-getter:
Of course it didn't stay that way. Thousands of man-hours and disposable dollars later...the car is getting completely overhauled. Better, stronger, faster...oh and a K24 swap:


Thread Starter
|
Member
Joined: Apr 2010
Posts: 1,316
From: Minnesota
Thanks man!
Yeah, there is some wicked wheel well gap...but, the car is still stripped so the springs haven't settled.
The entire chassis has been converted to RSX type S: 5-lug, lower control arms, and all knuckle bushings have been replaced with Energy Suspension polyurethane. The shocks themselves are brand new OEM A-Spec for the 05-06 RSX. They have a conservative drop of ~1" and are rumored to be the same as the Type R suspesion. Eventually I will swap the "innards" for Koni race struts up front and get custom coilovers in the rear...but I want to get the car up and running first.
The only problem with this chassis (includes RSX, EP3, EM2, and ES1) is that if you go too low you will compromise handling due to the flawed McPherson strut design. So this car will unfortunately always have some degree of wheel gap --> Function > Form.

Thread Starter
|
Member
Joined: Apr 2010
Posts: 1,316
From: Minnesota
Thanks fellas!
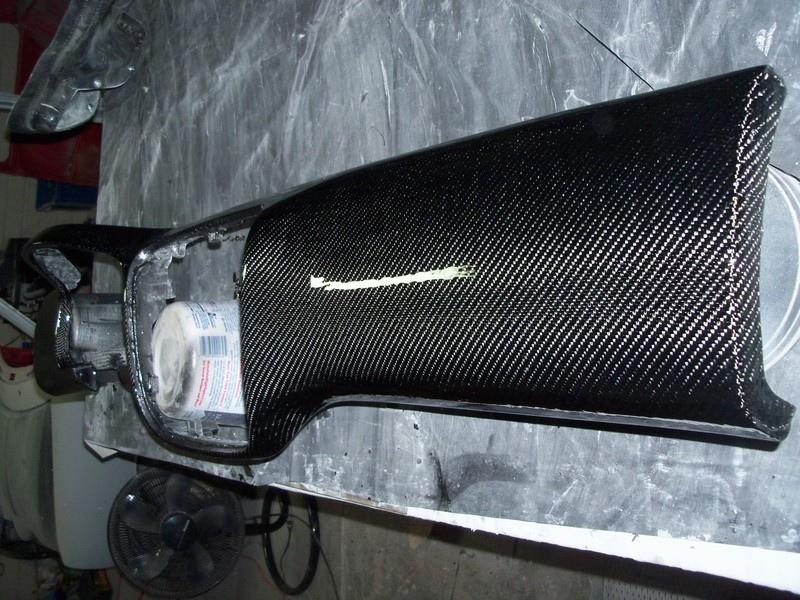
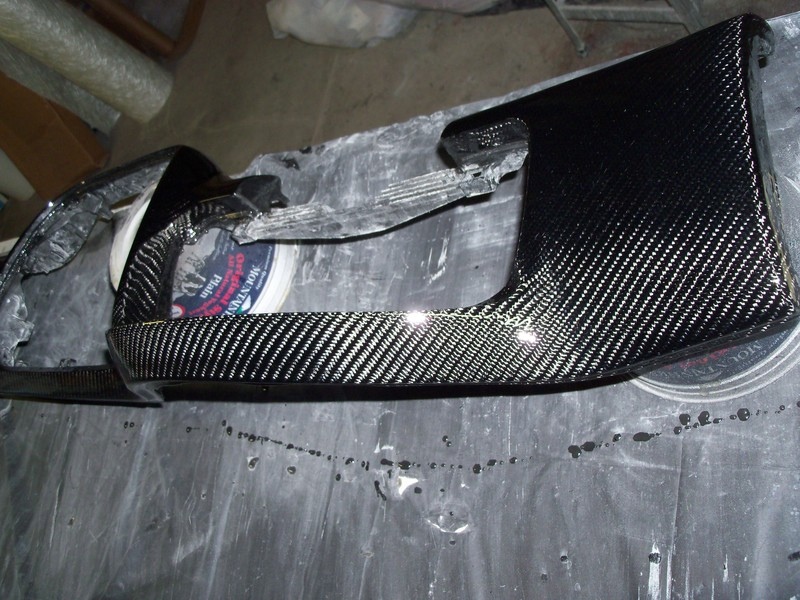
The actual build thread is in my sig...I just thought I'd share some pics here on FitFreak. Lots of custom one-off parts in progress...including carbon fiber dash overlay (thanks to Rogue7), the front splitter I fabricated from scratch, and a diffuser I'm making for the rear bumper.
The actual build thread is in my sig...I just thought I'd share some pics here on FitFreak. Lots of custom one-off parts in progress...including carbon fiber dash overlay (thanks to Rogue7), the front splitter I fabricated from scratch, and a diffuser I'm making for the rear bumper.
Thread Starter
|
Member
Joined: Apr 2010
Posts: 1,316
From: Minnesota
Thanks man! I have a good eye for form and design...I knew it would all come together eventually. The thing is...if you're really pushing the boundaries then there will be people who either don't understand or don't like what you're doing. I haven't used anybody else's car for inspiration and I think that is why this build is really unique. Not to mention lots of one-off parts that I am making myself.
Thread Starter
|
Member
Joined: Apr 2010
Posts: 1,316
From: Minnesota
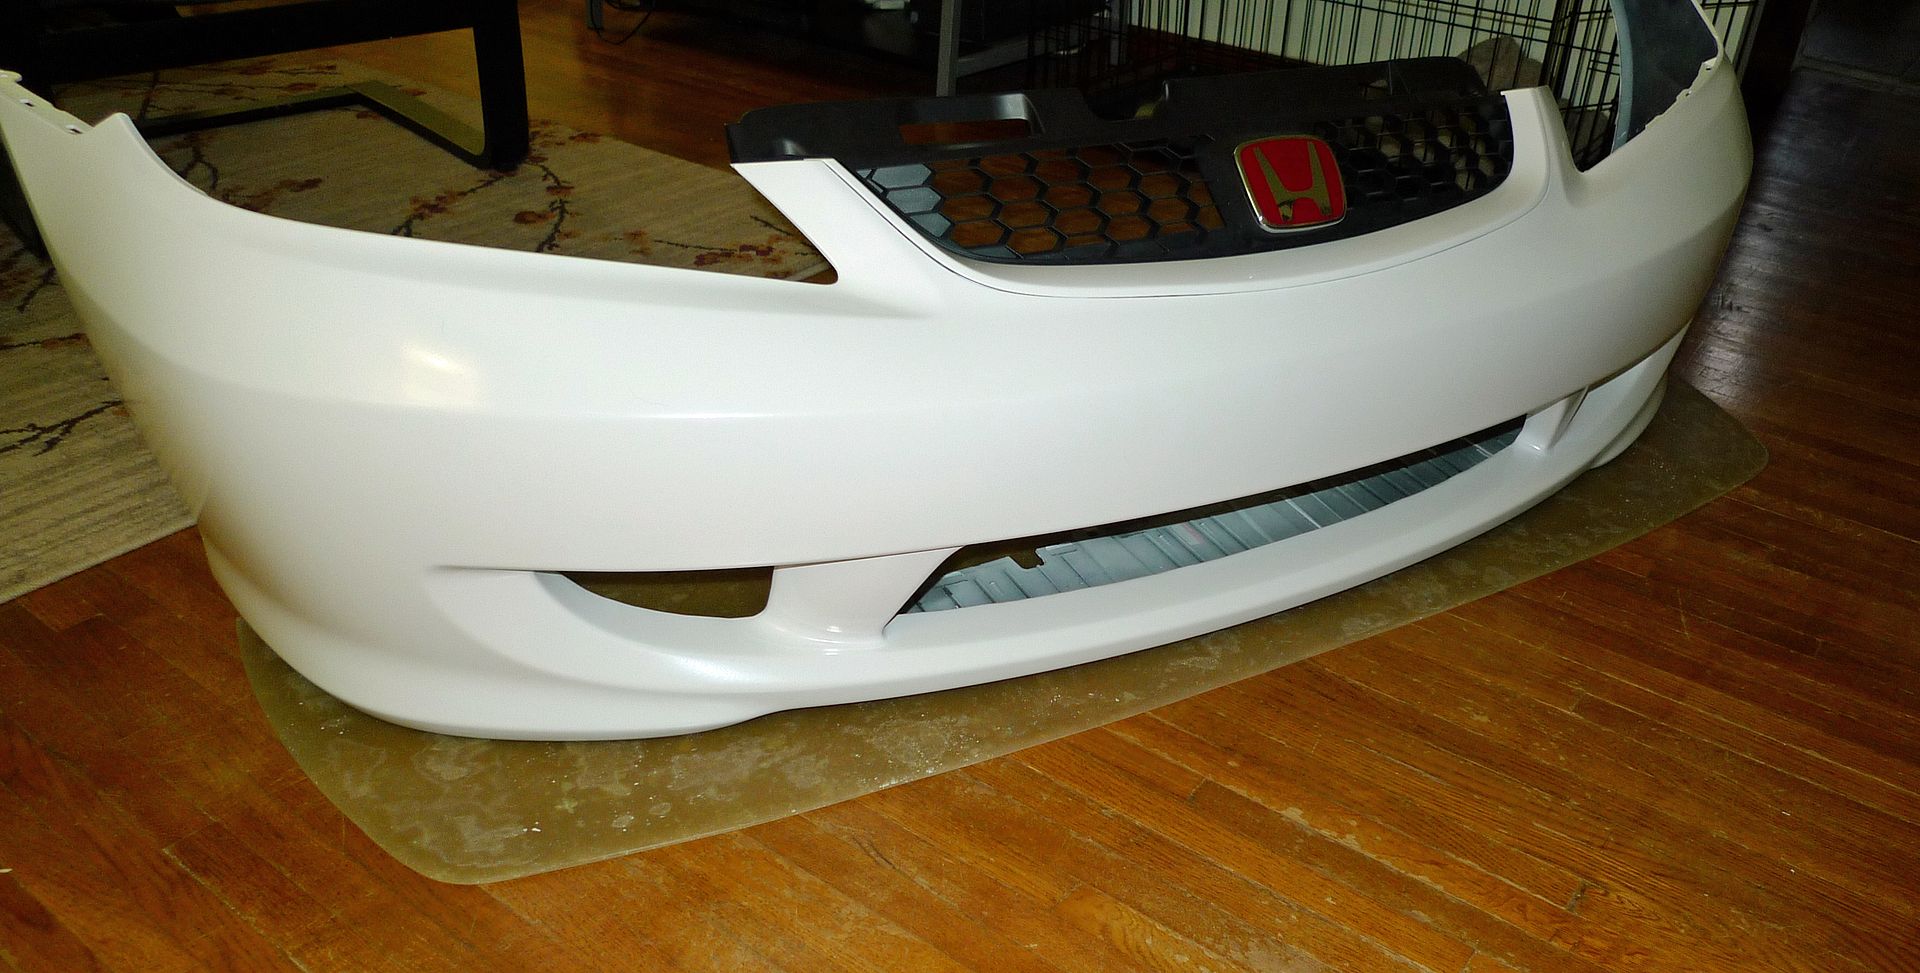
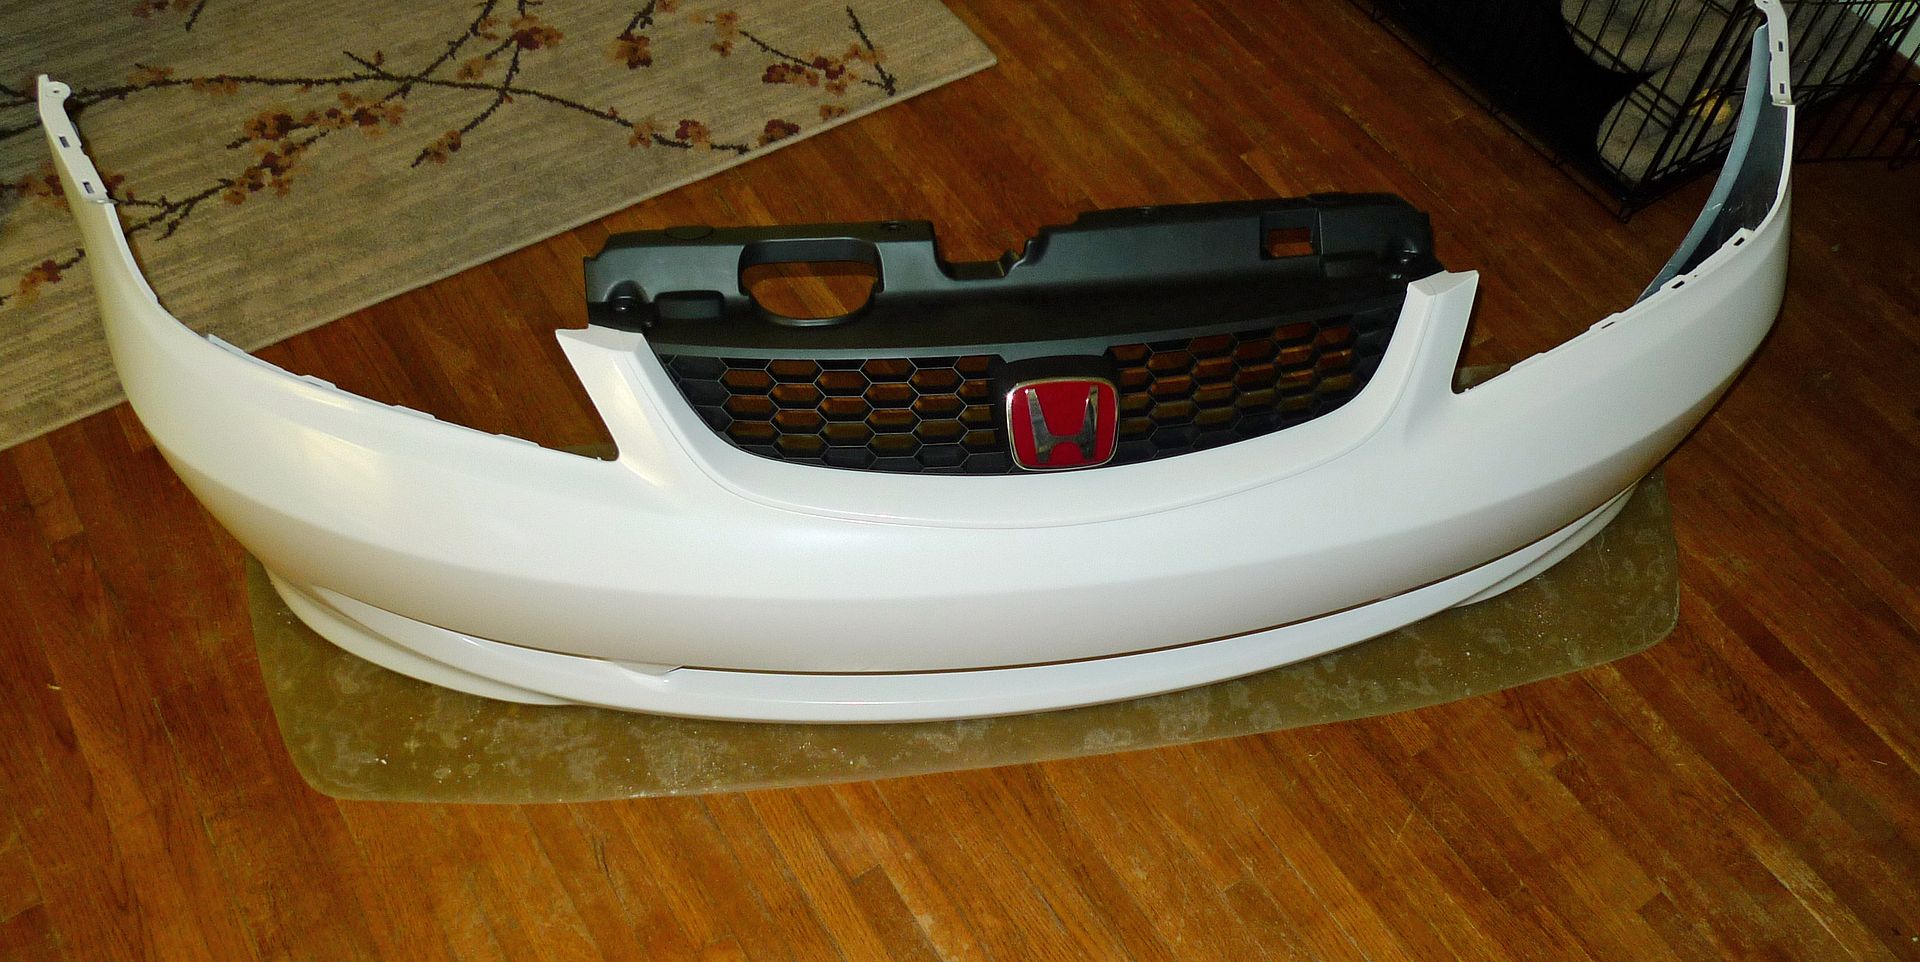
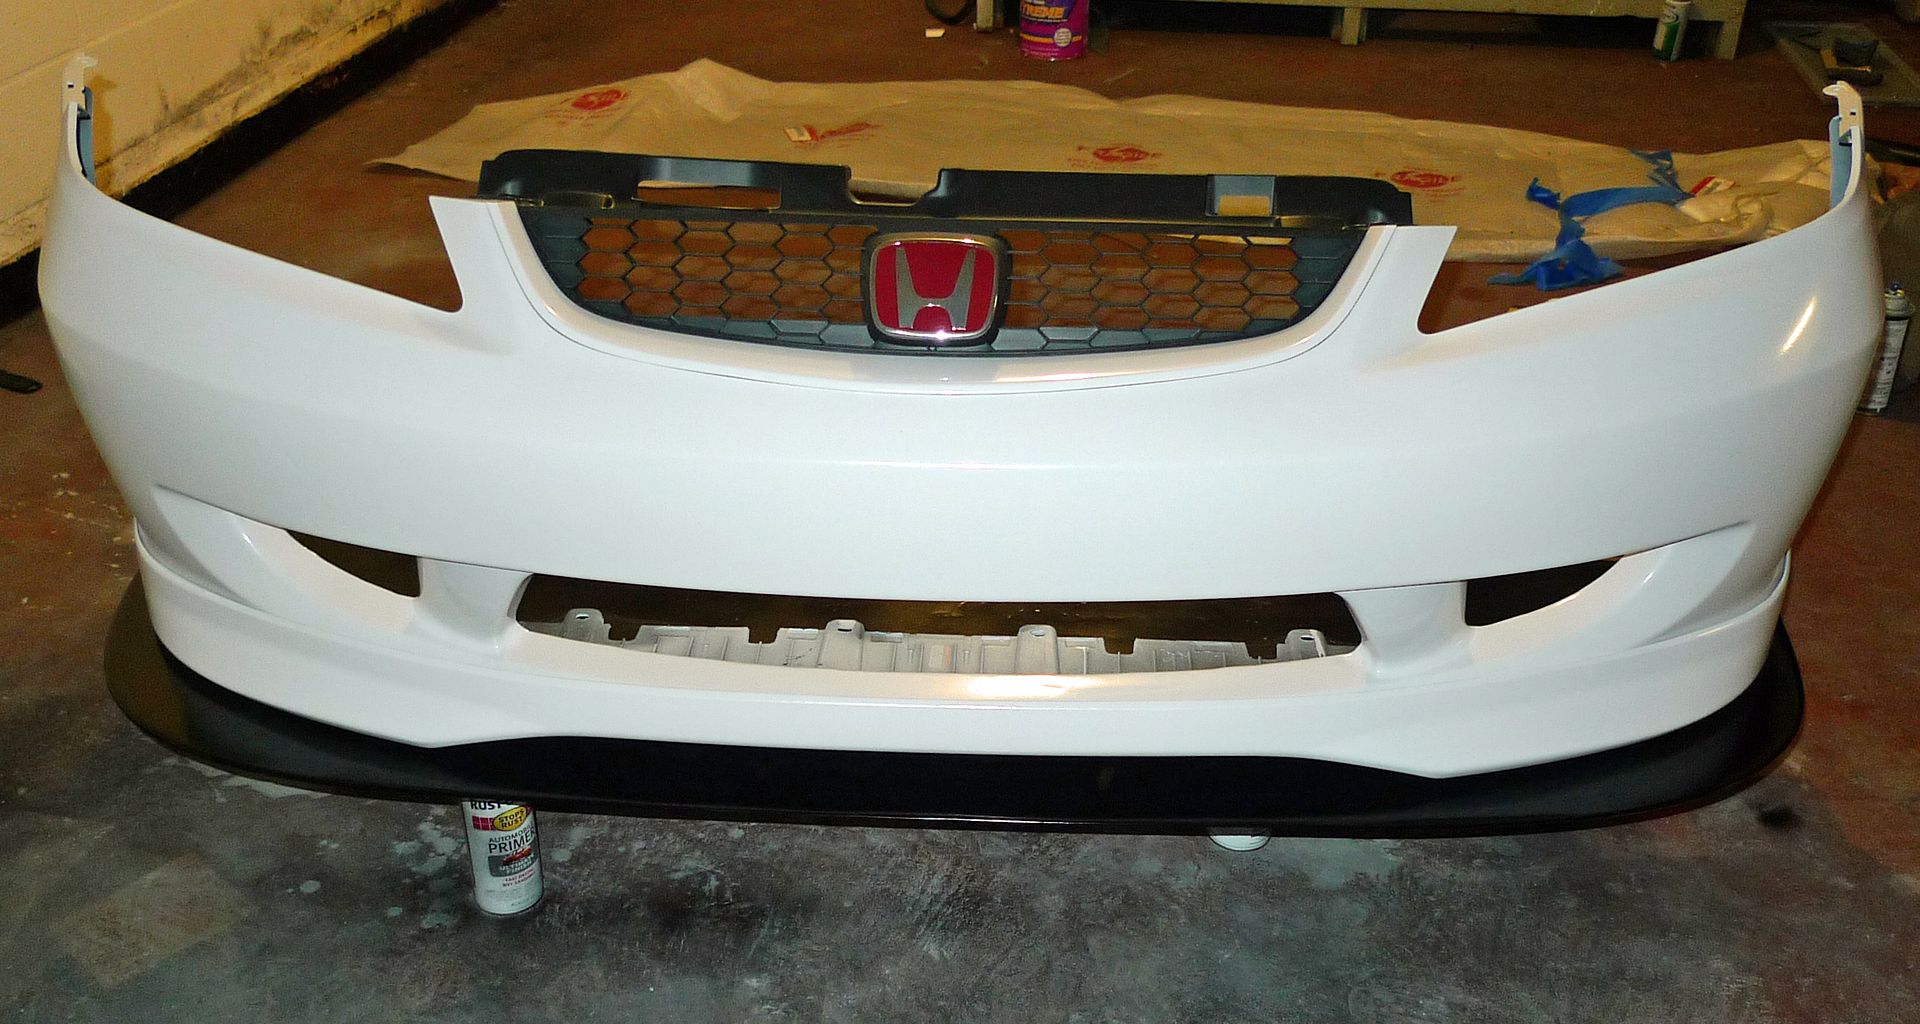
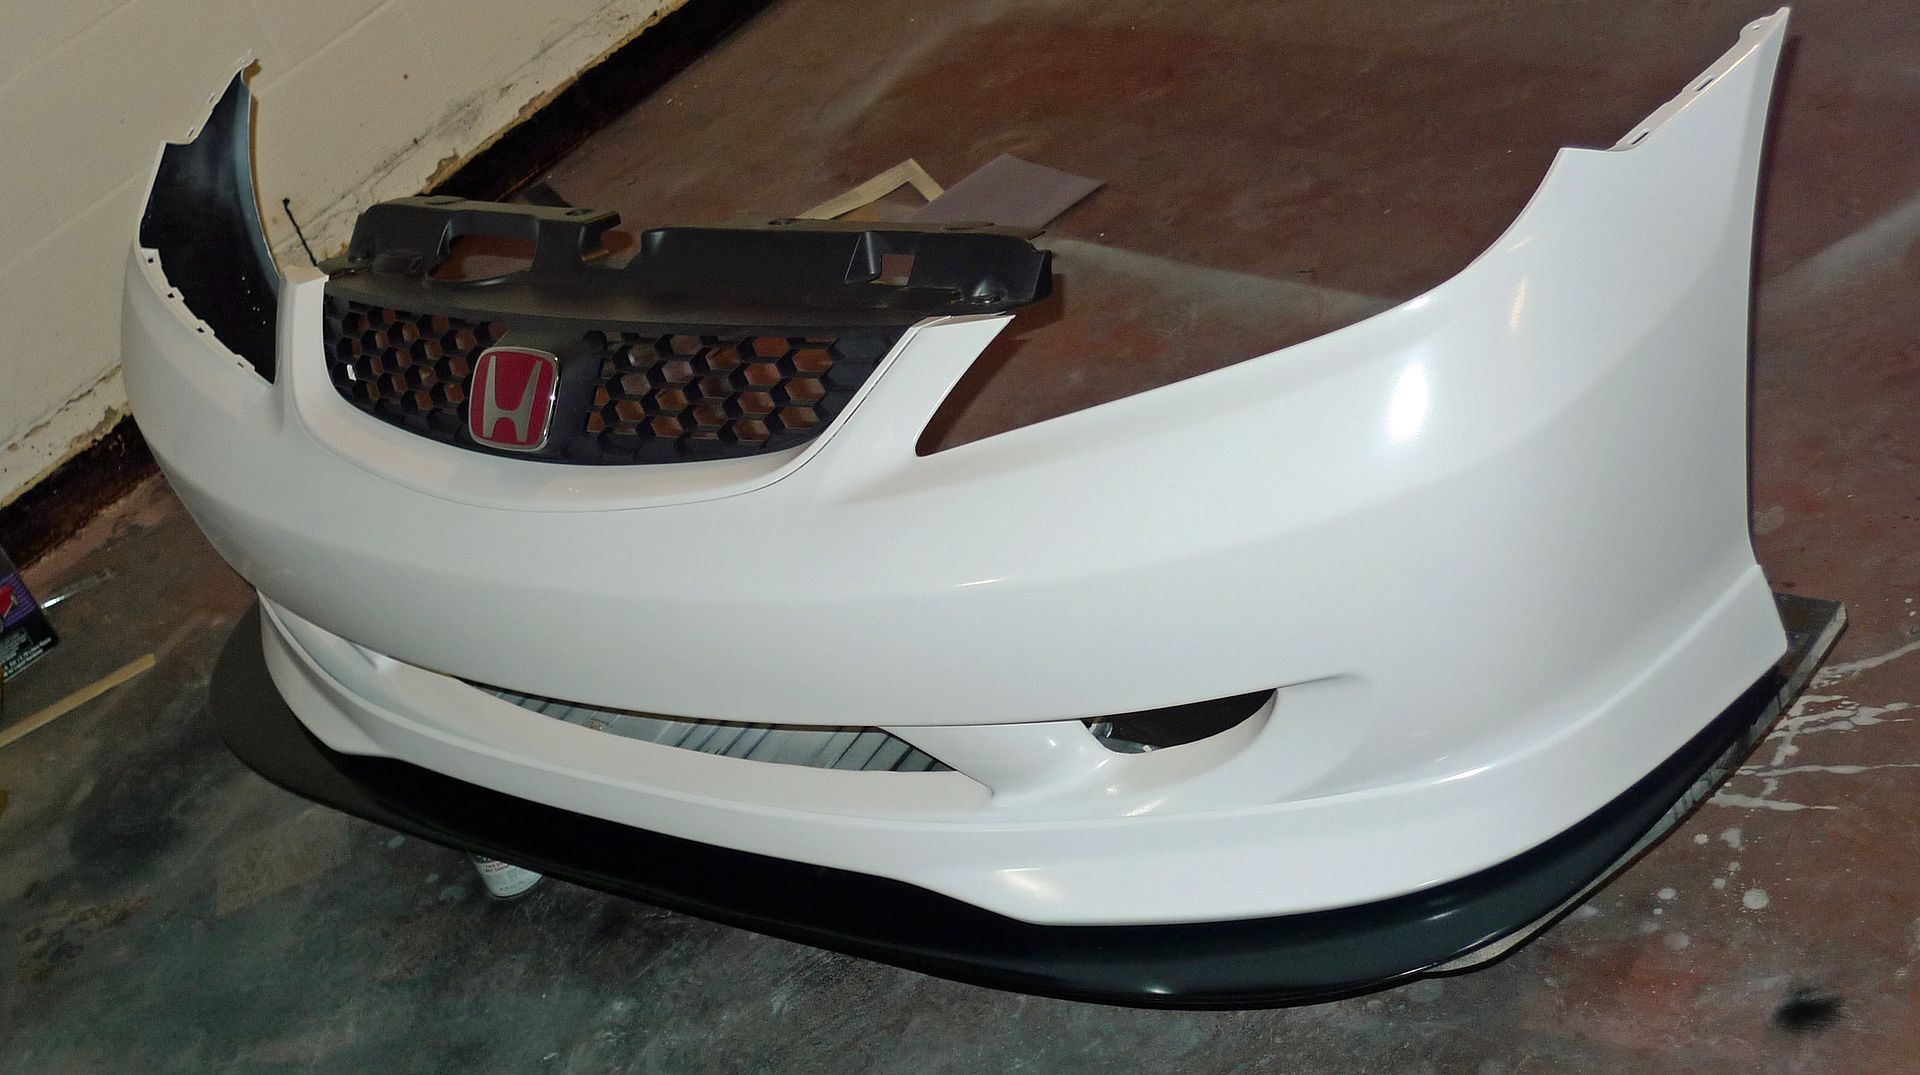
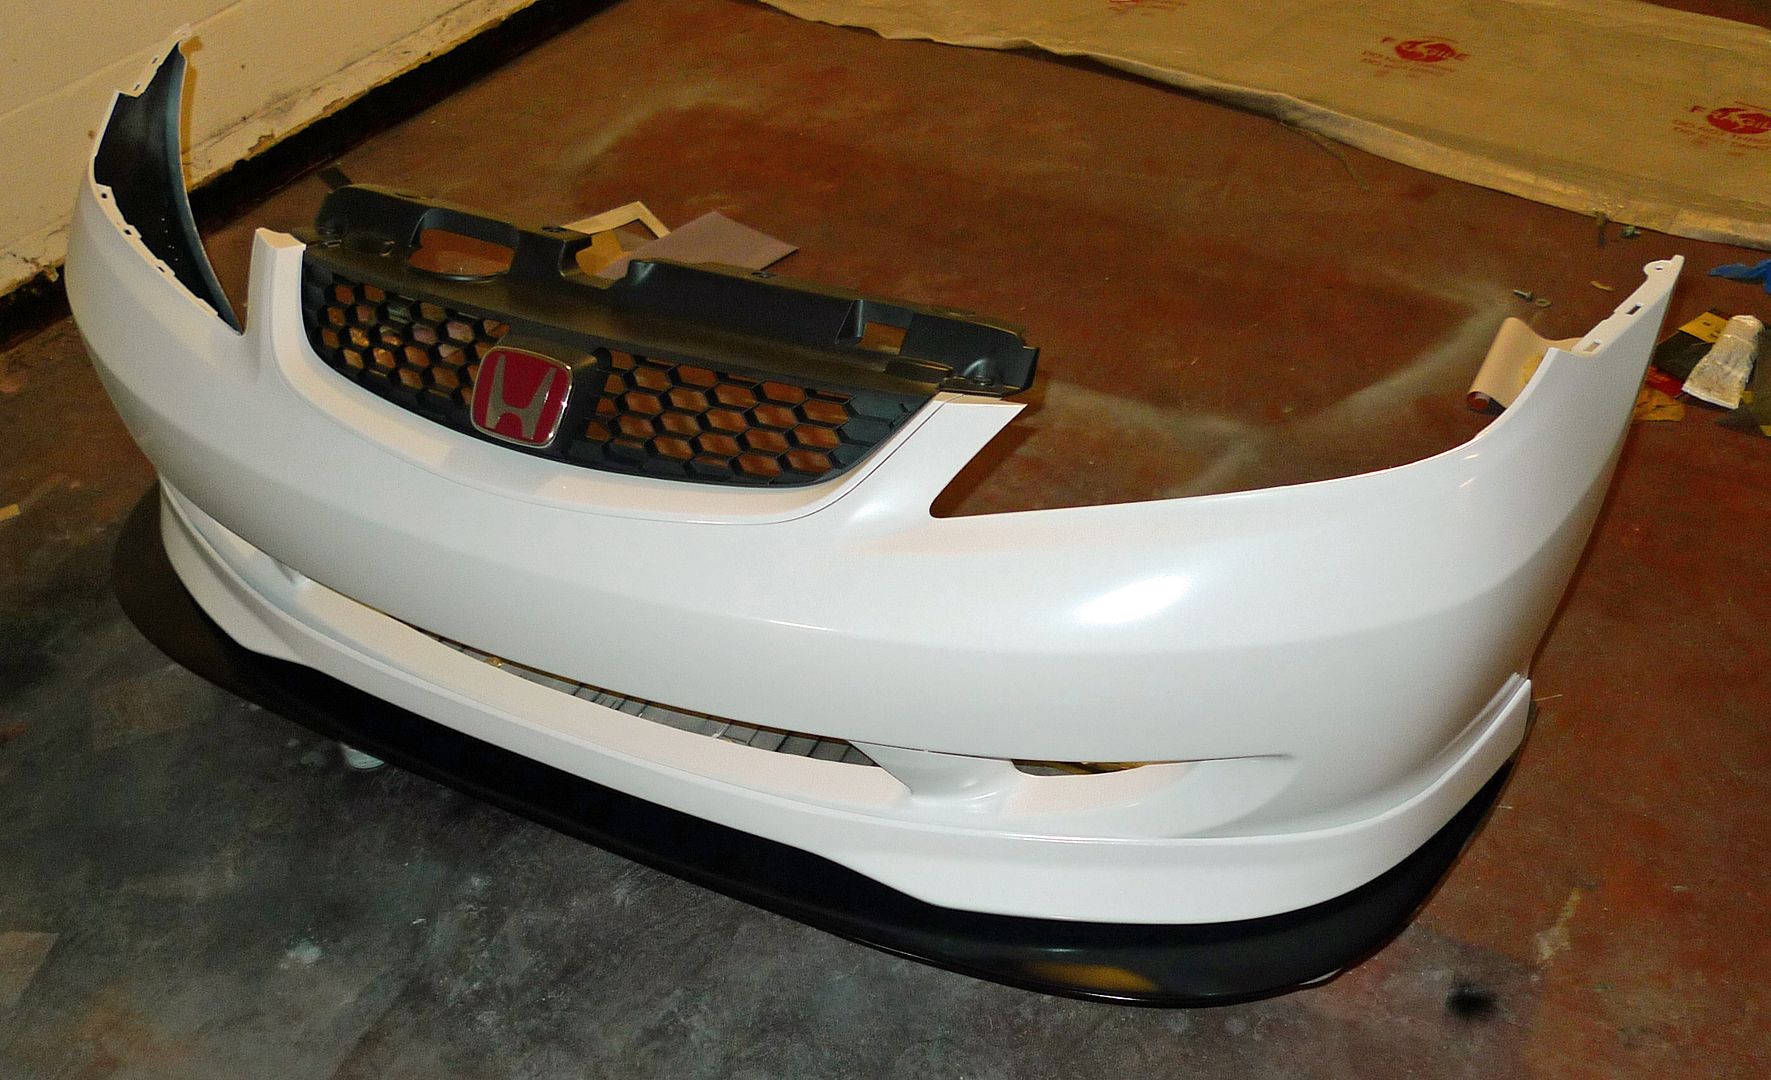
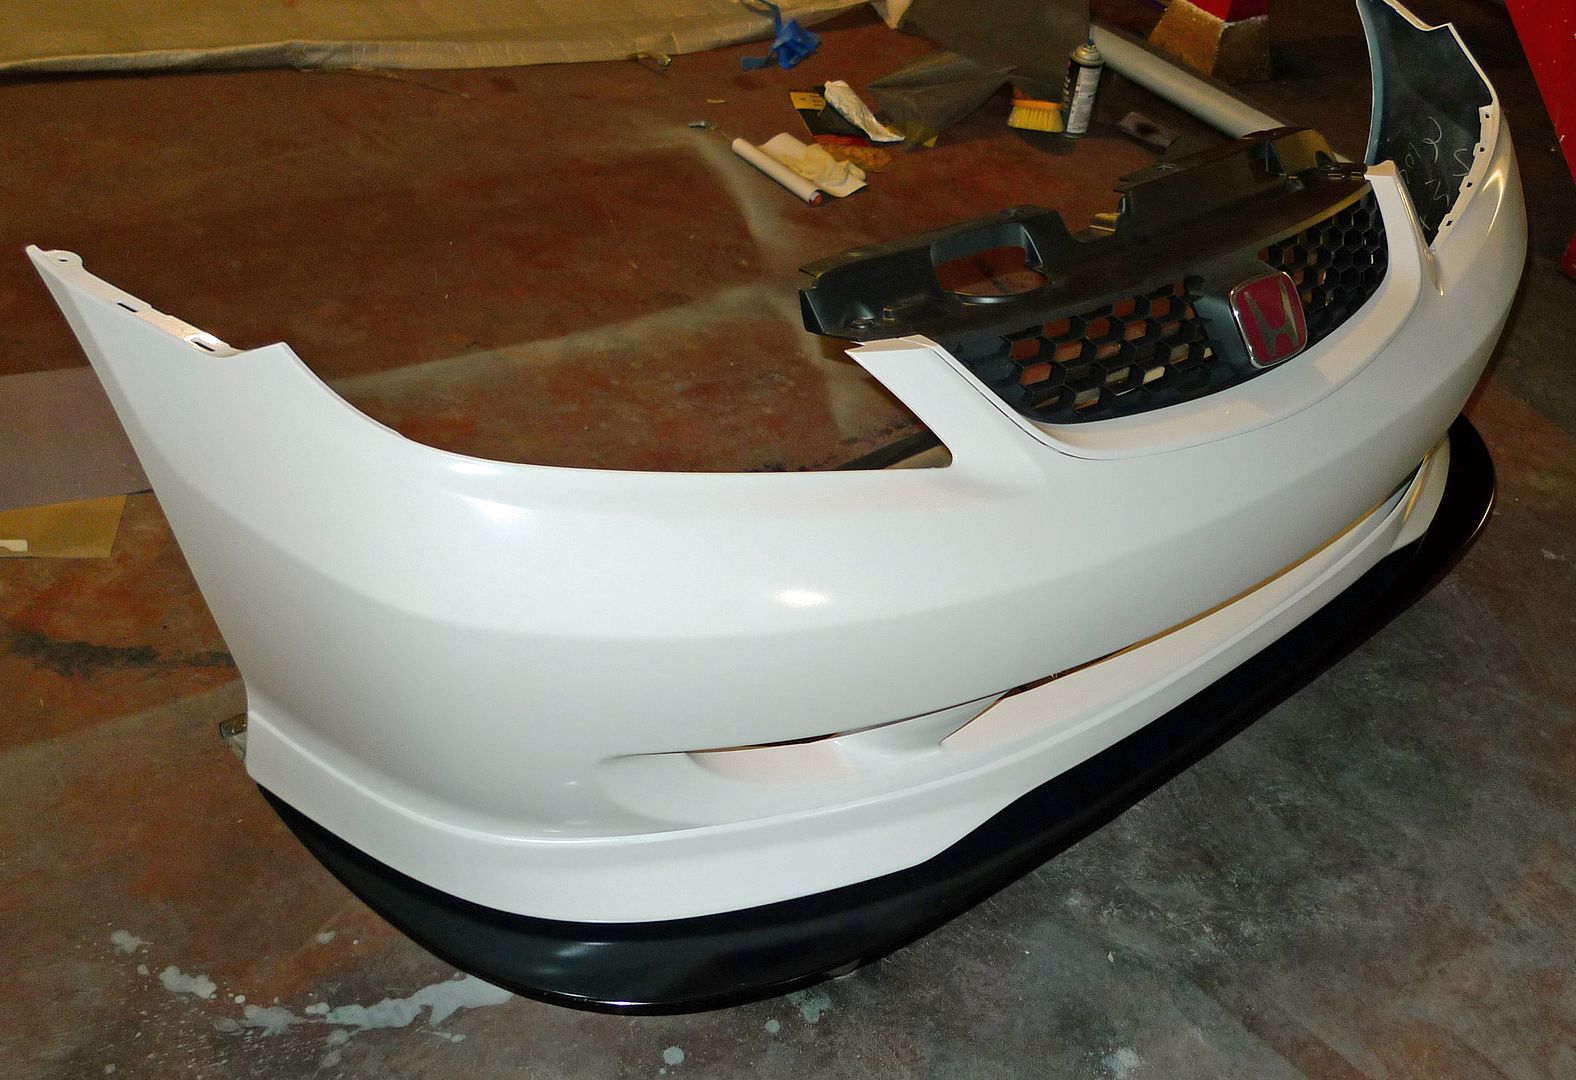
Here are some pics of the custom lip and custom rear diffuser...this is cut and pasted from another forum:
Originally Posted by BlackNDecker
I've been looking for some aero bits for my civic build and unfortunately there really aren't any functional pieces for our cars. So...I'm making my own.
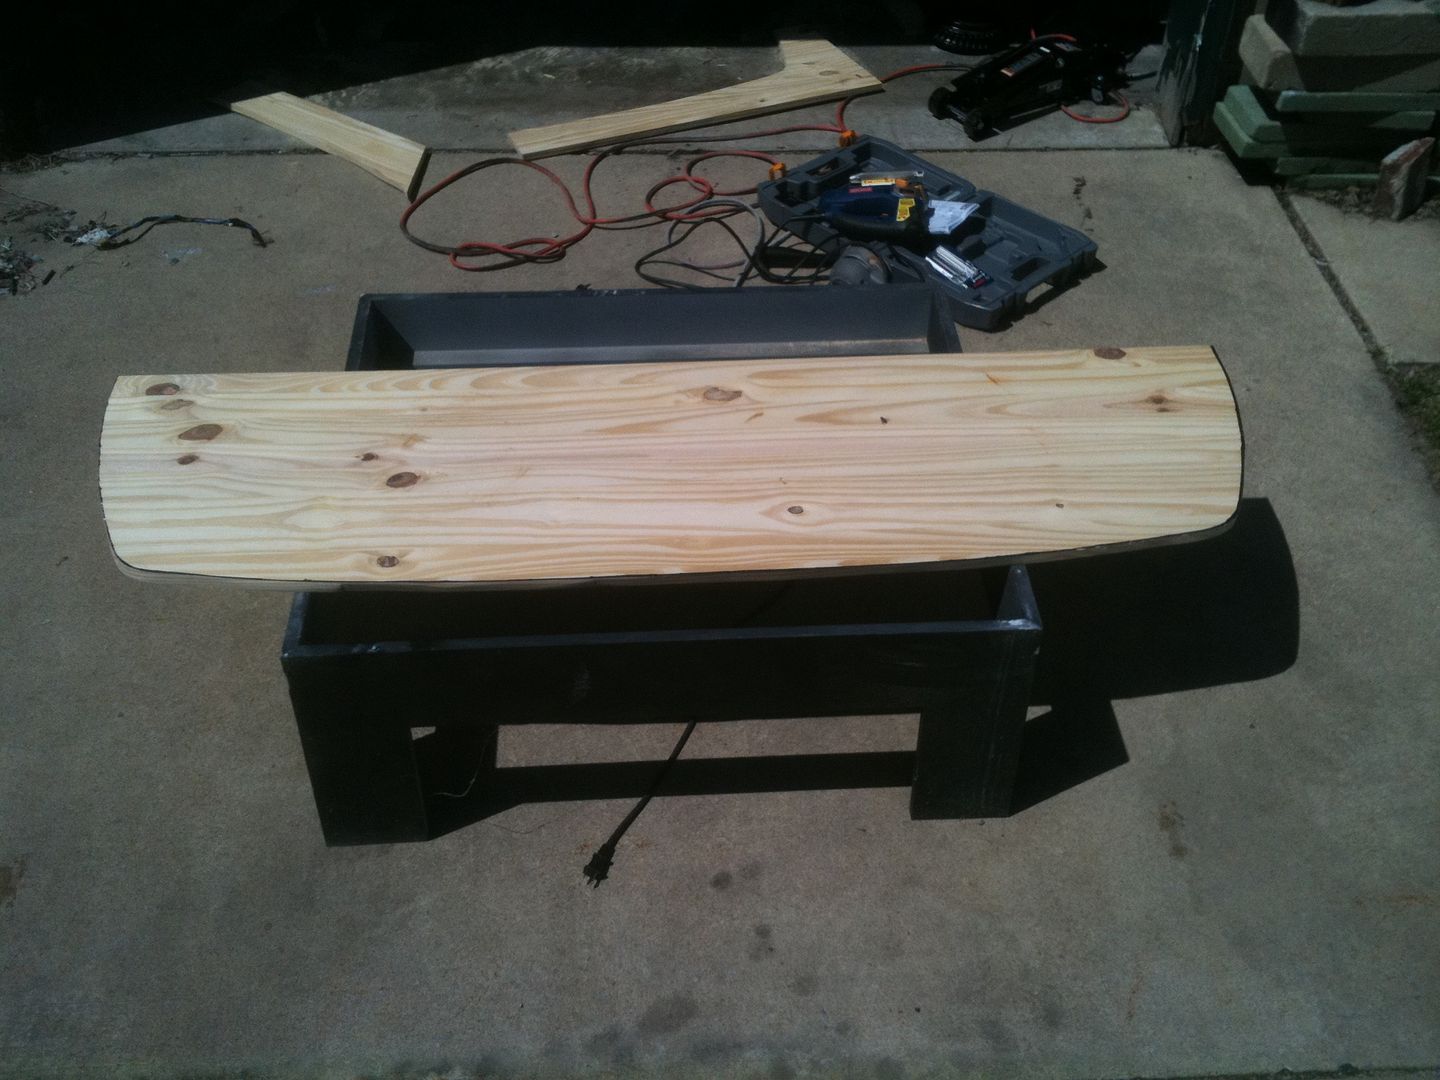
I made a tracing of the bumper and then extended the area slightly all around till I came up with an overall shape that I liked. I just made a template out of cardboard (no pics).
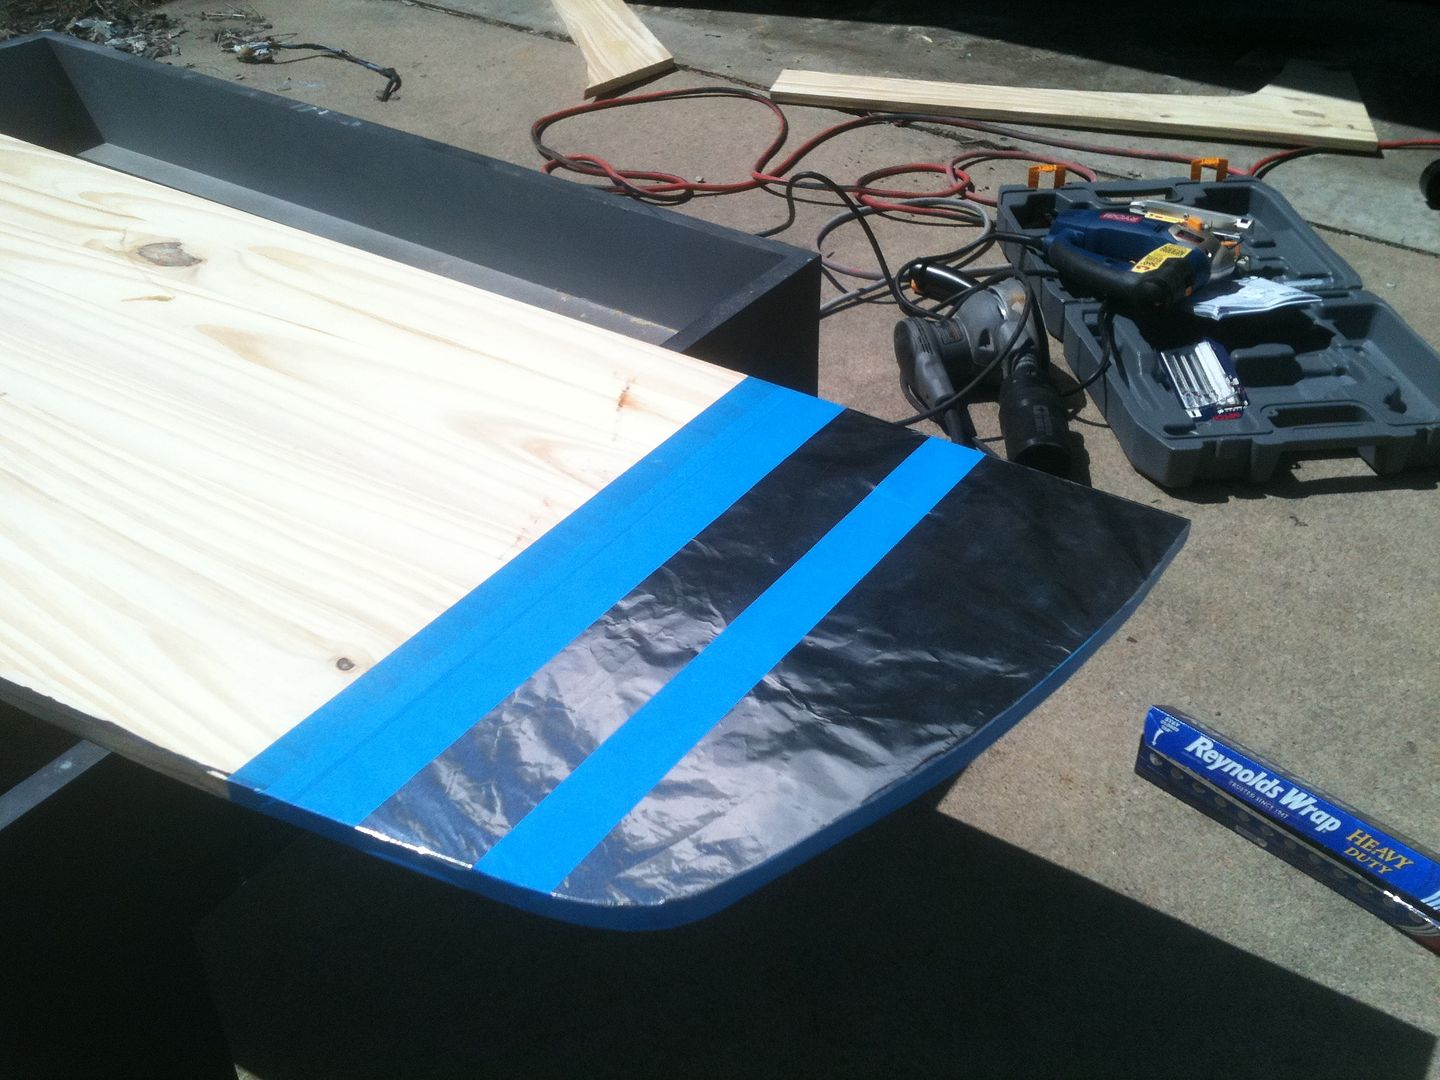
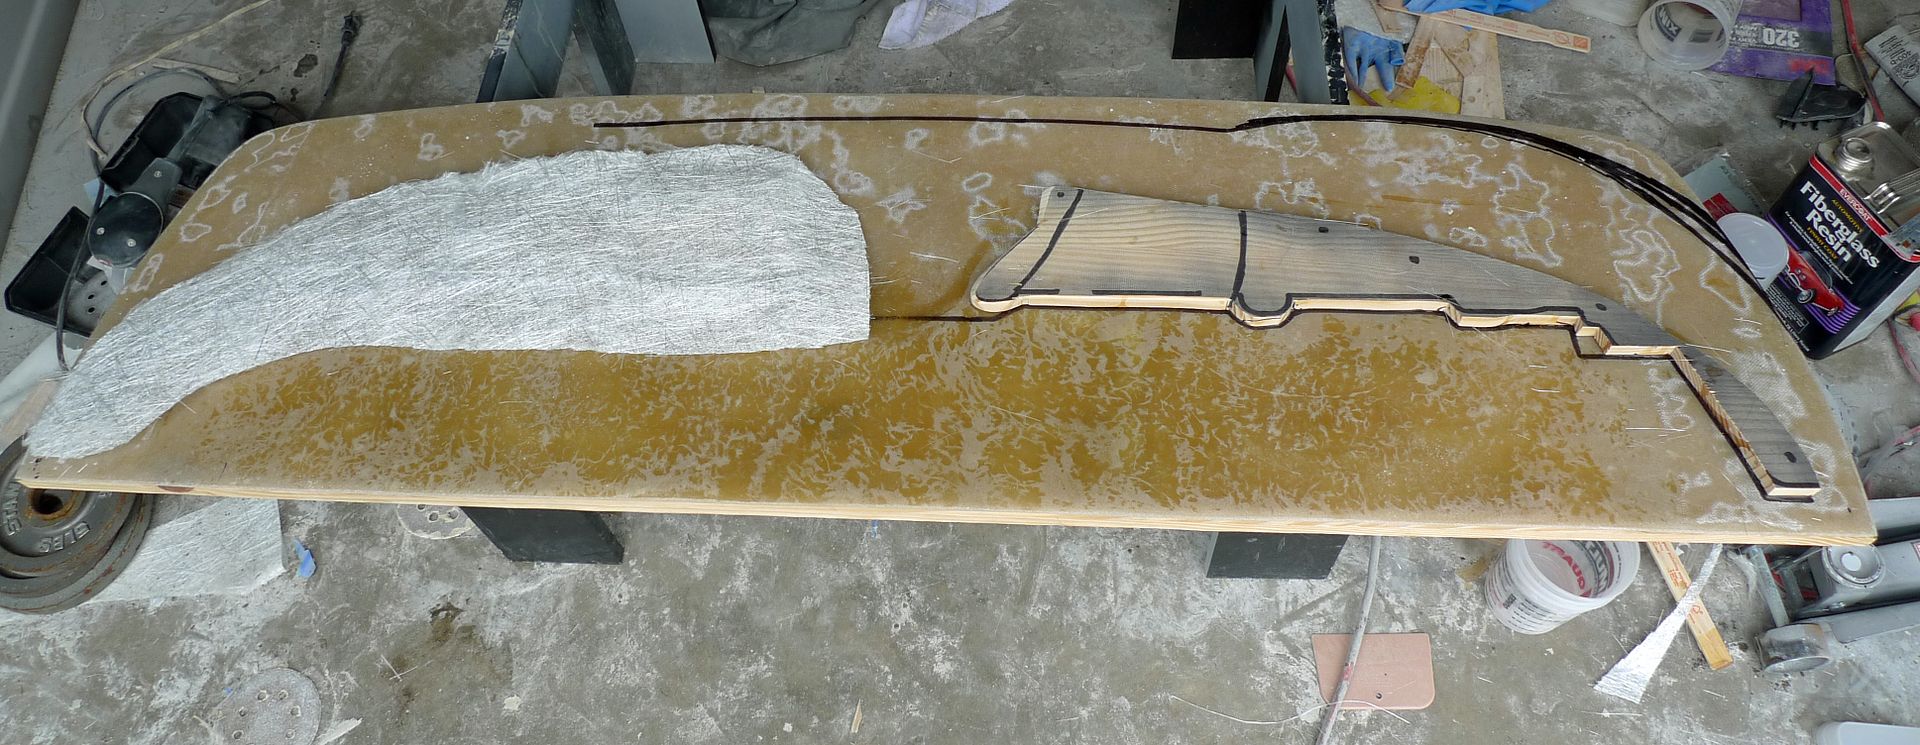
Then I traced the design on to a piece of REALLY flat wood and cut it out with a jig saw:
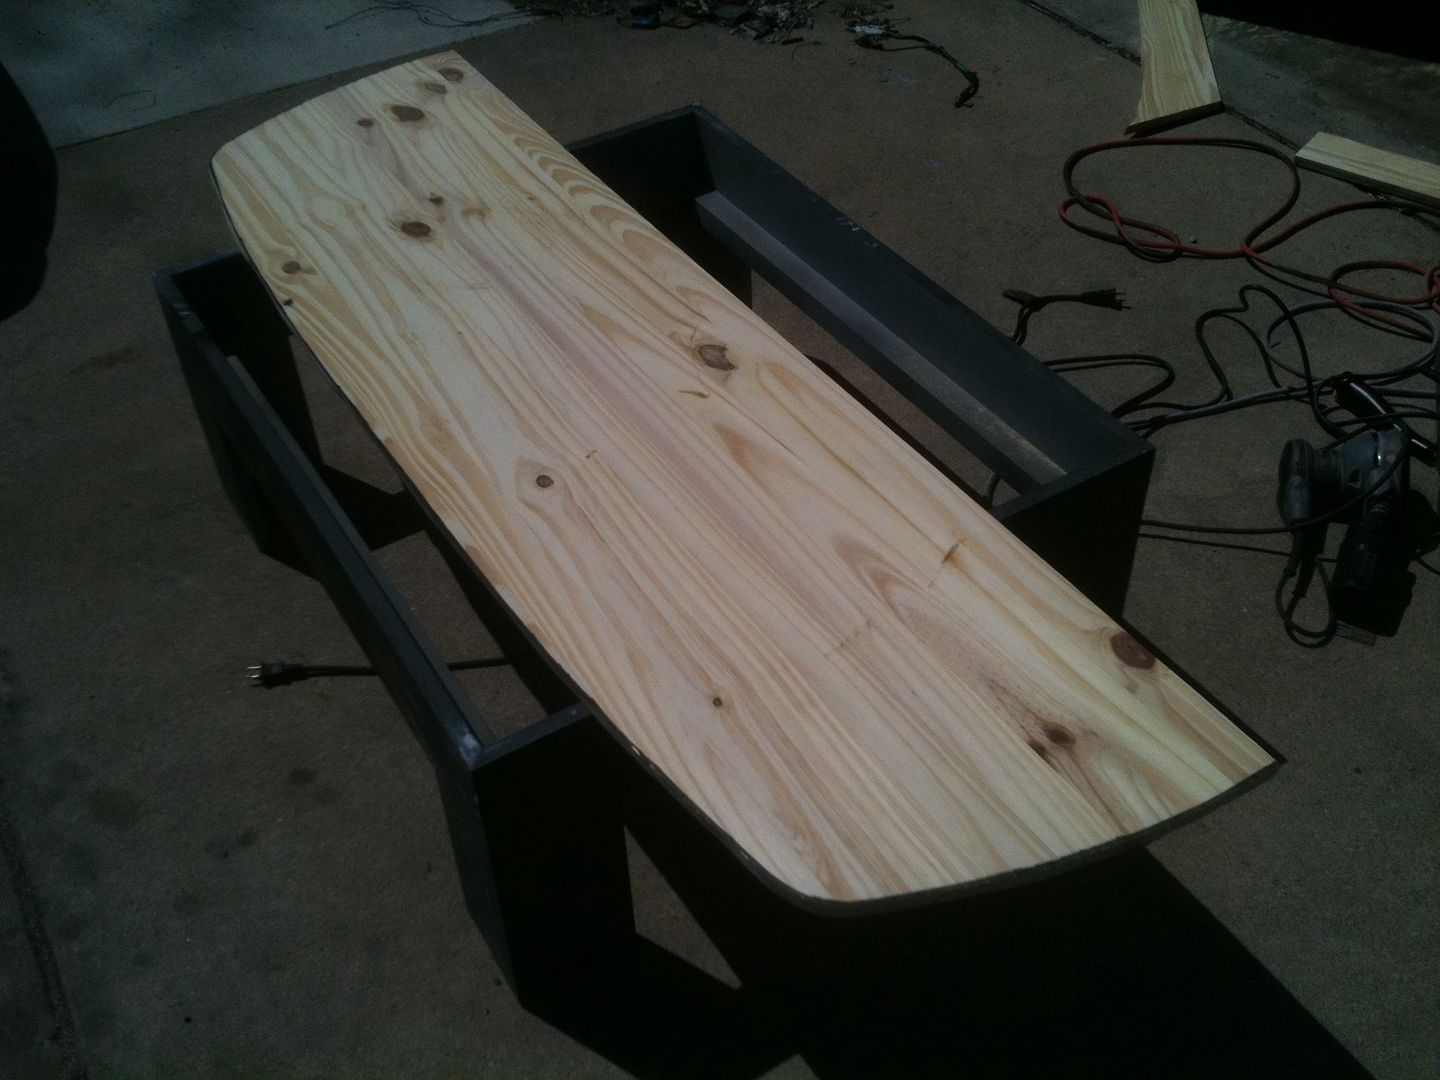
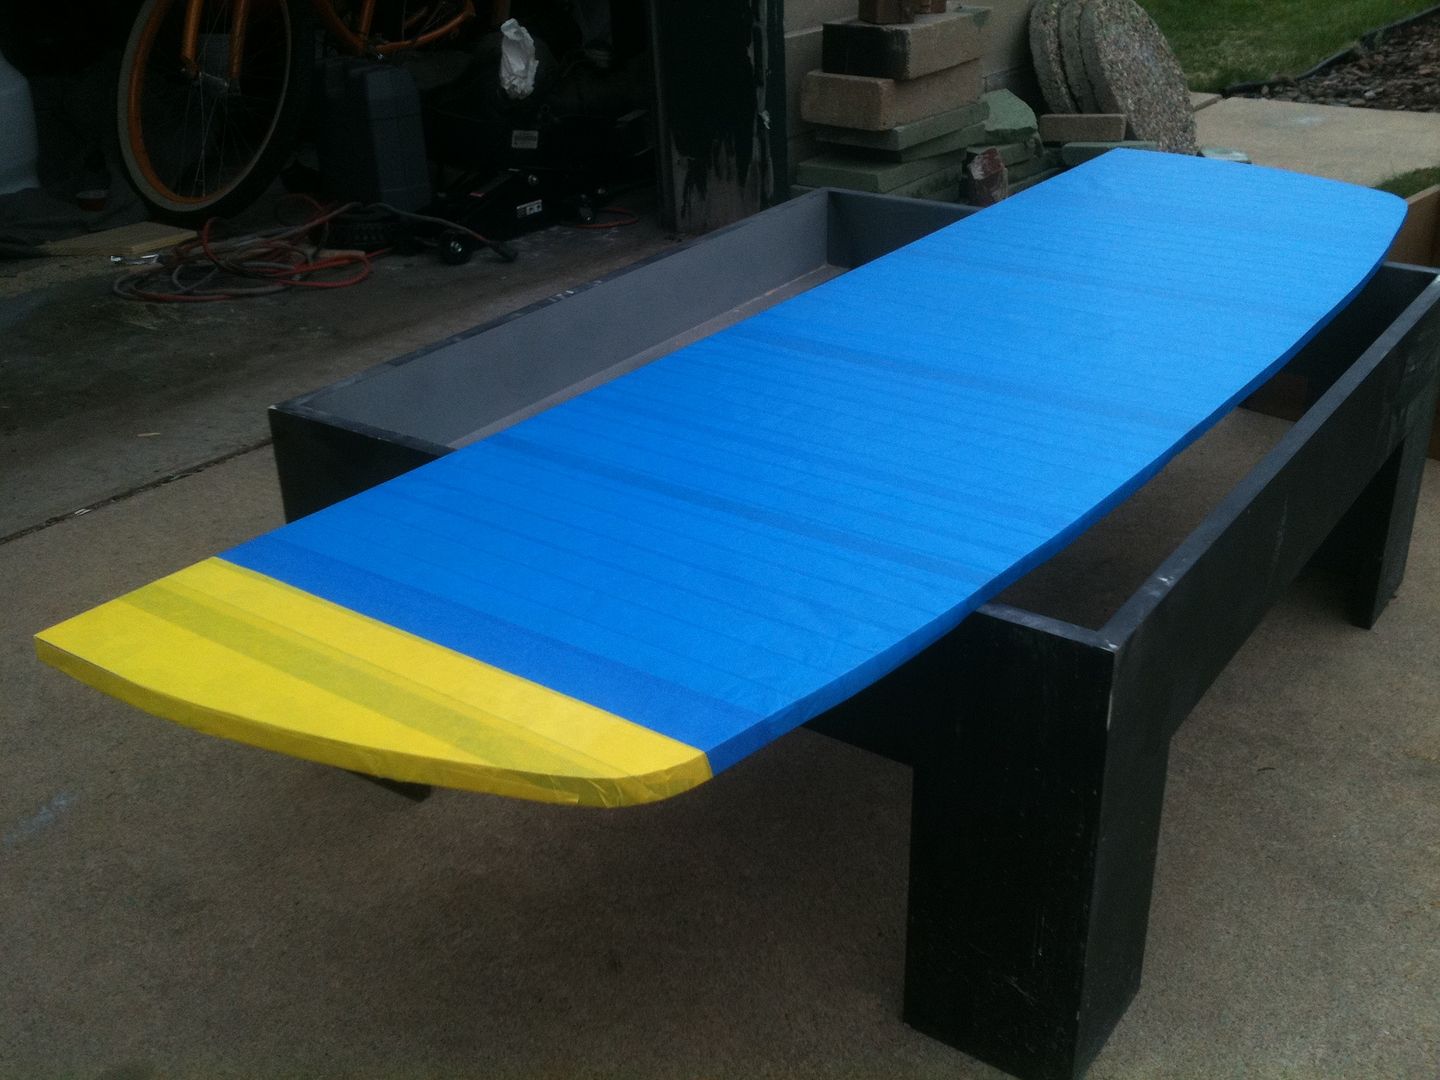
Then I covered it with aluminum foil and painter's tape so the fiberglass won't stick to the wood:
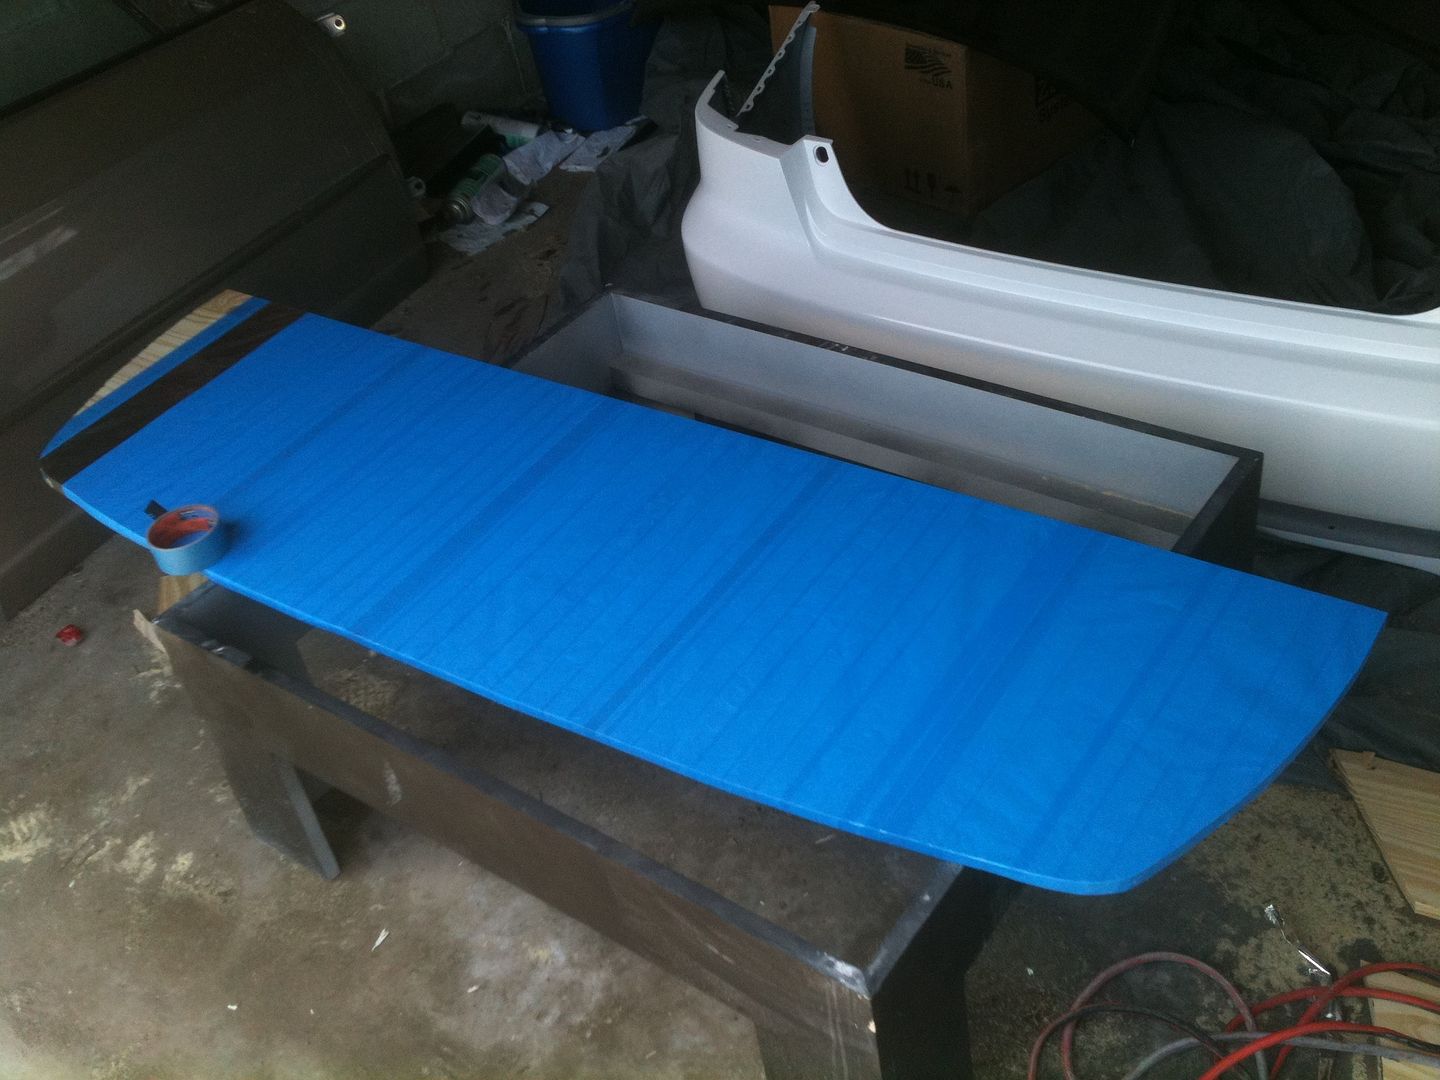
Then I ran out of blue and had to finish the last little bit with yellow painter's tape:

Then I laid down the first two layers of fiberglass cloth and resin:

This will dry overnight then I'll sand it and lay down two more layers. I am also going to mold in a lip to mount to the bumper. The bottom of the splitter will extend the length of the bumper and will be ADJUSTABLE. More to come...
I got the splitter sanded and removed it from the wooden template. I have some more pics showing step-by-step but my iPhone died. I'll post them when it's charged.
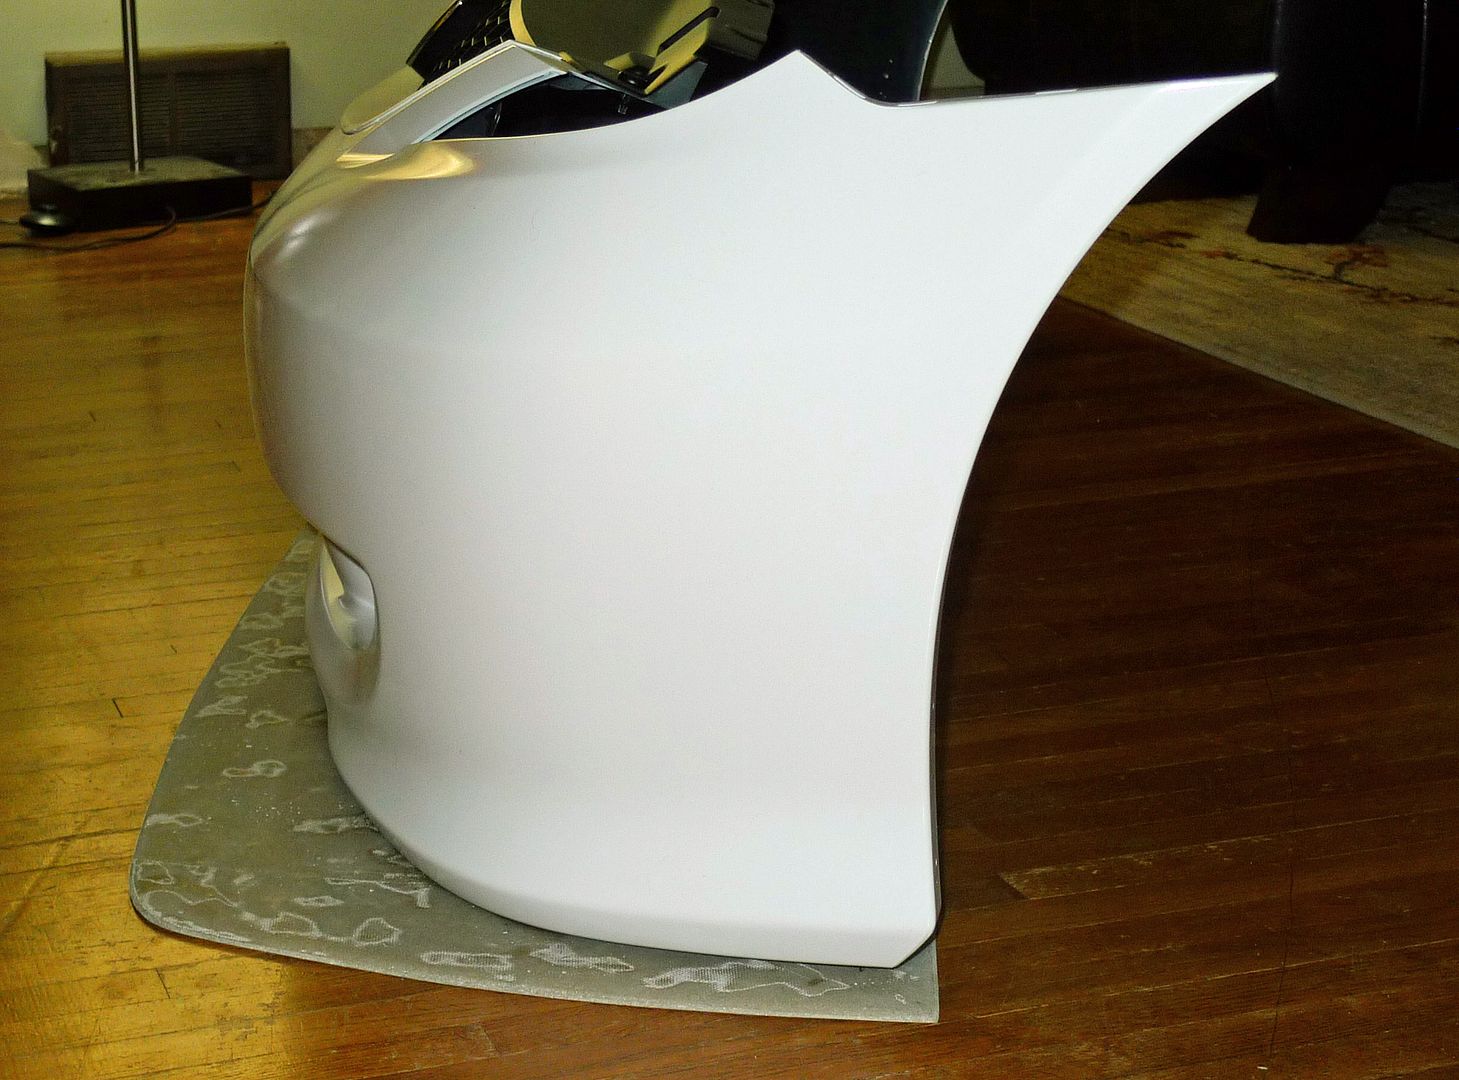
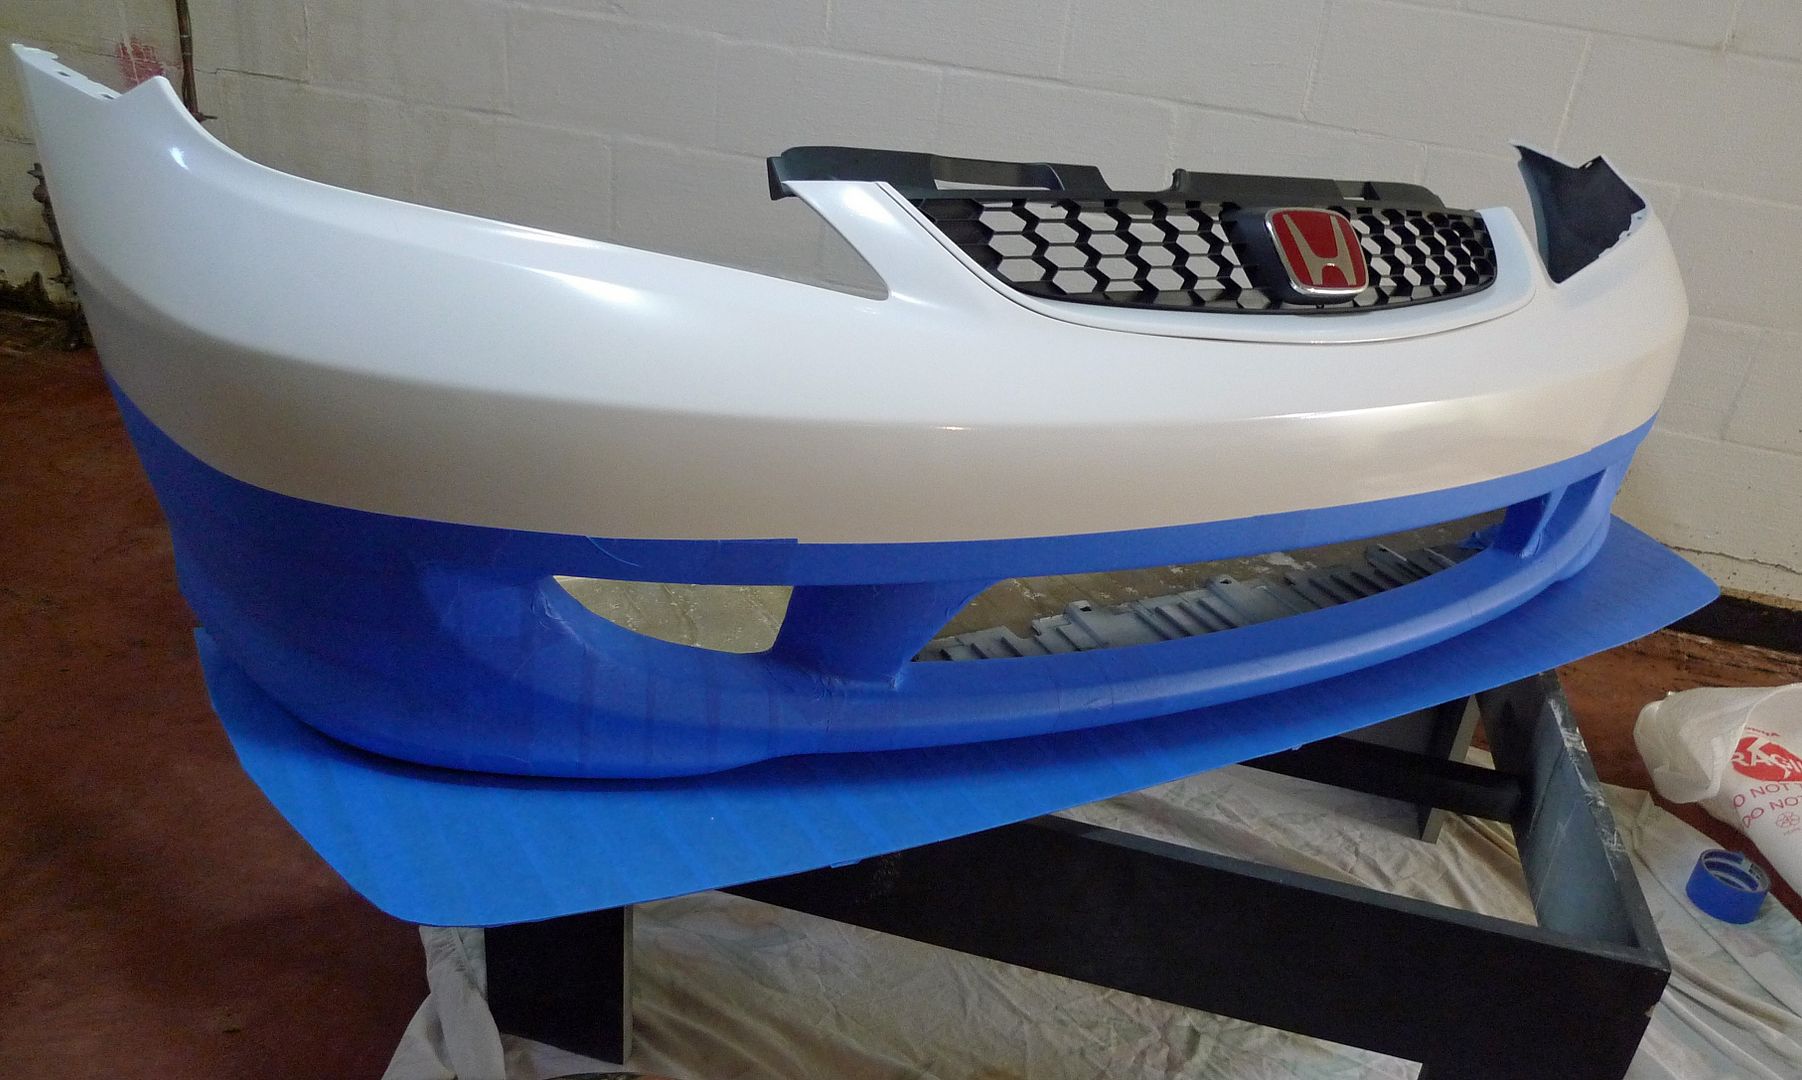
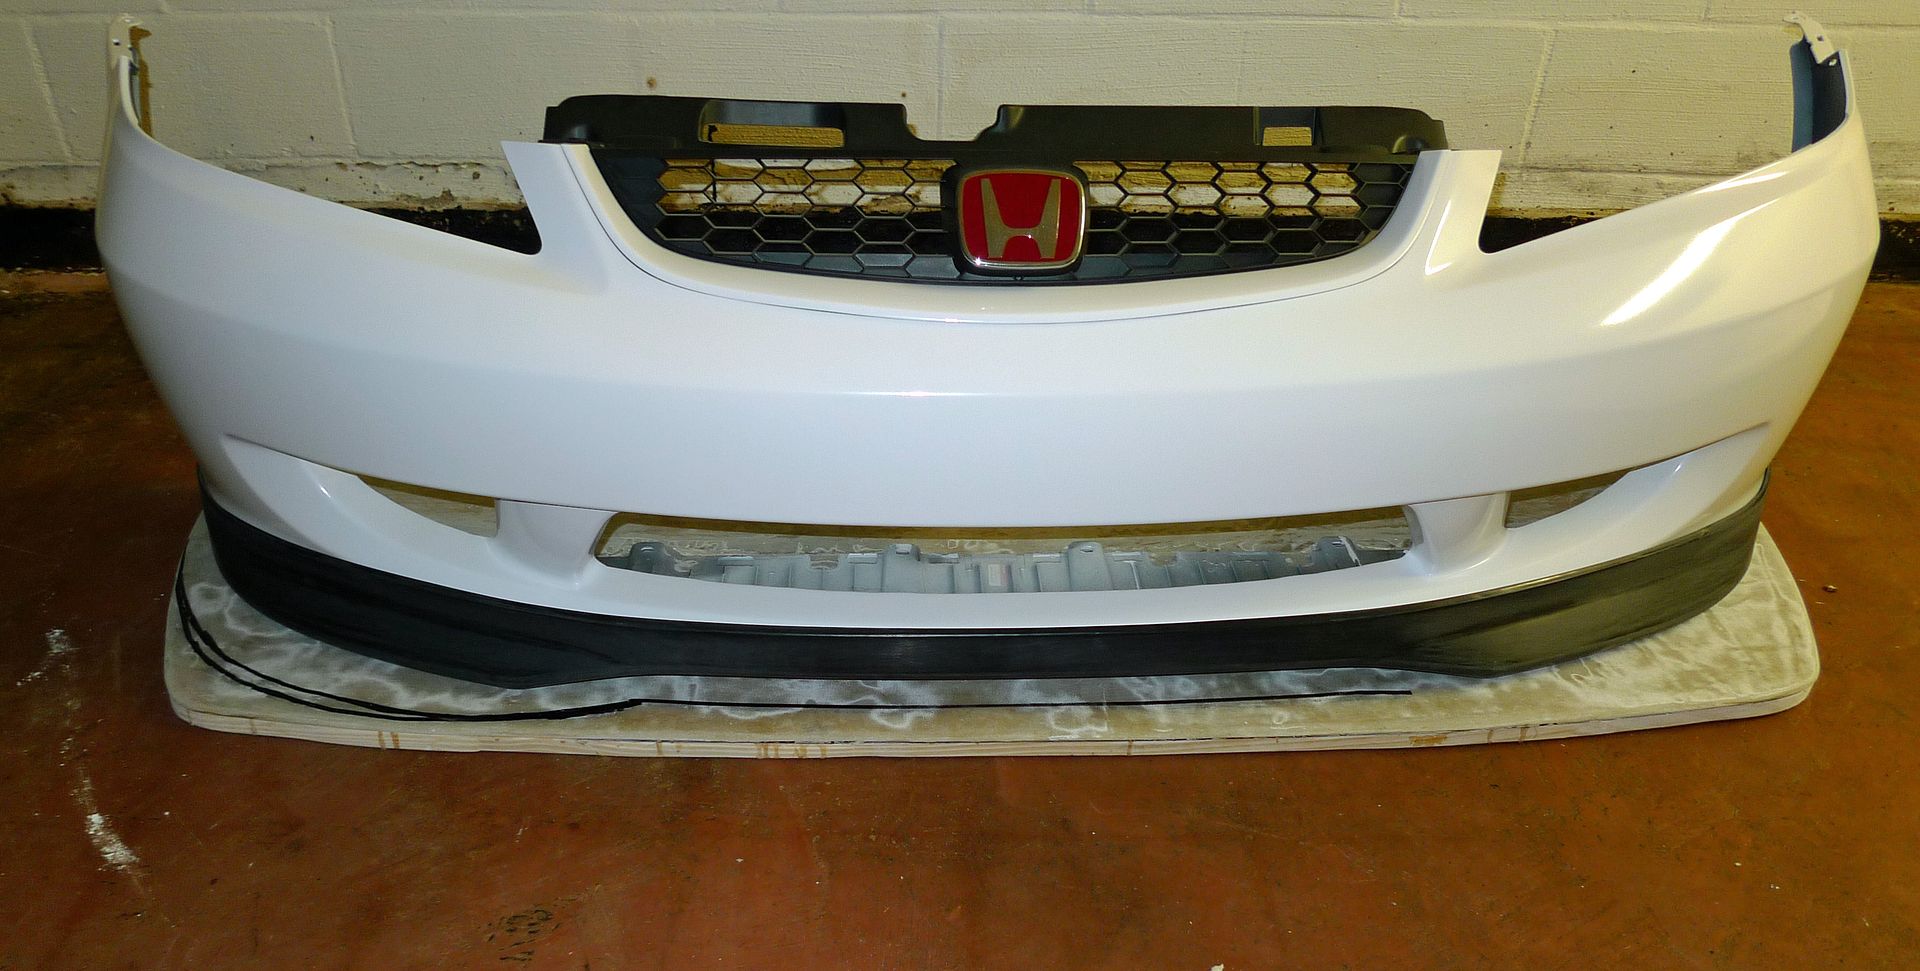
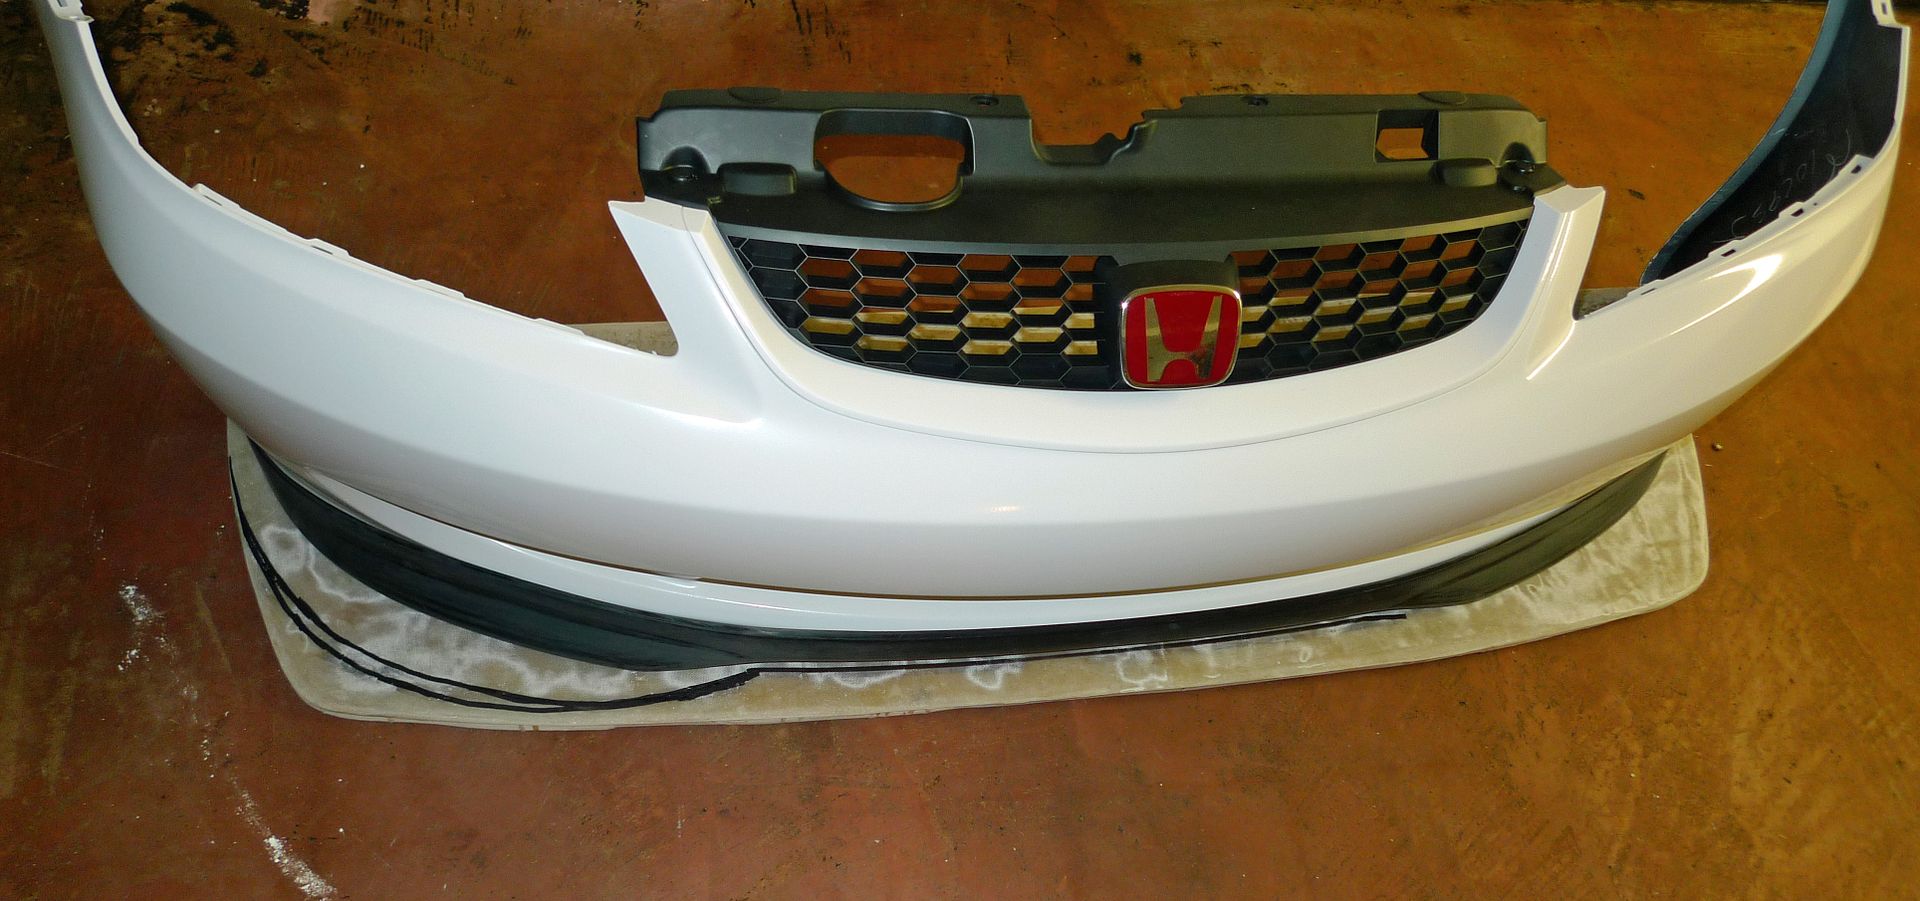
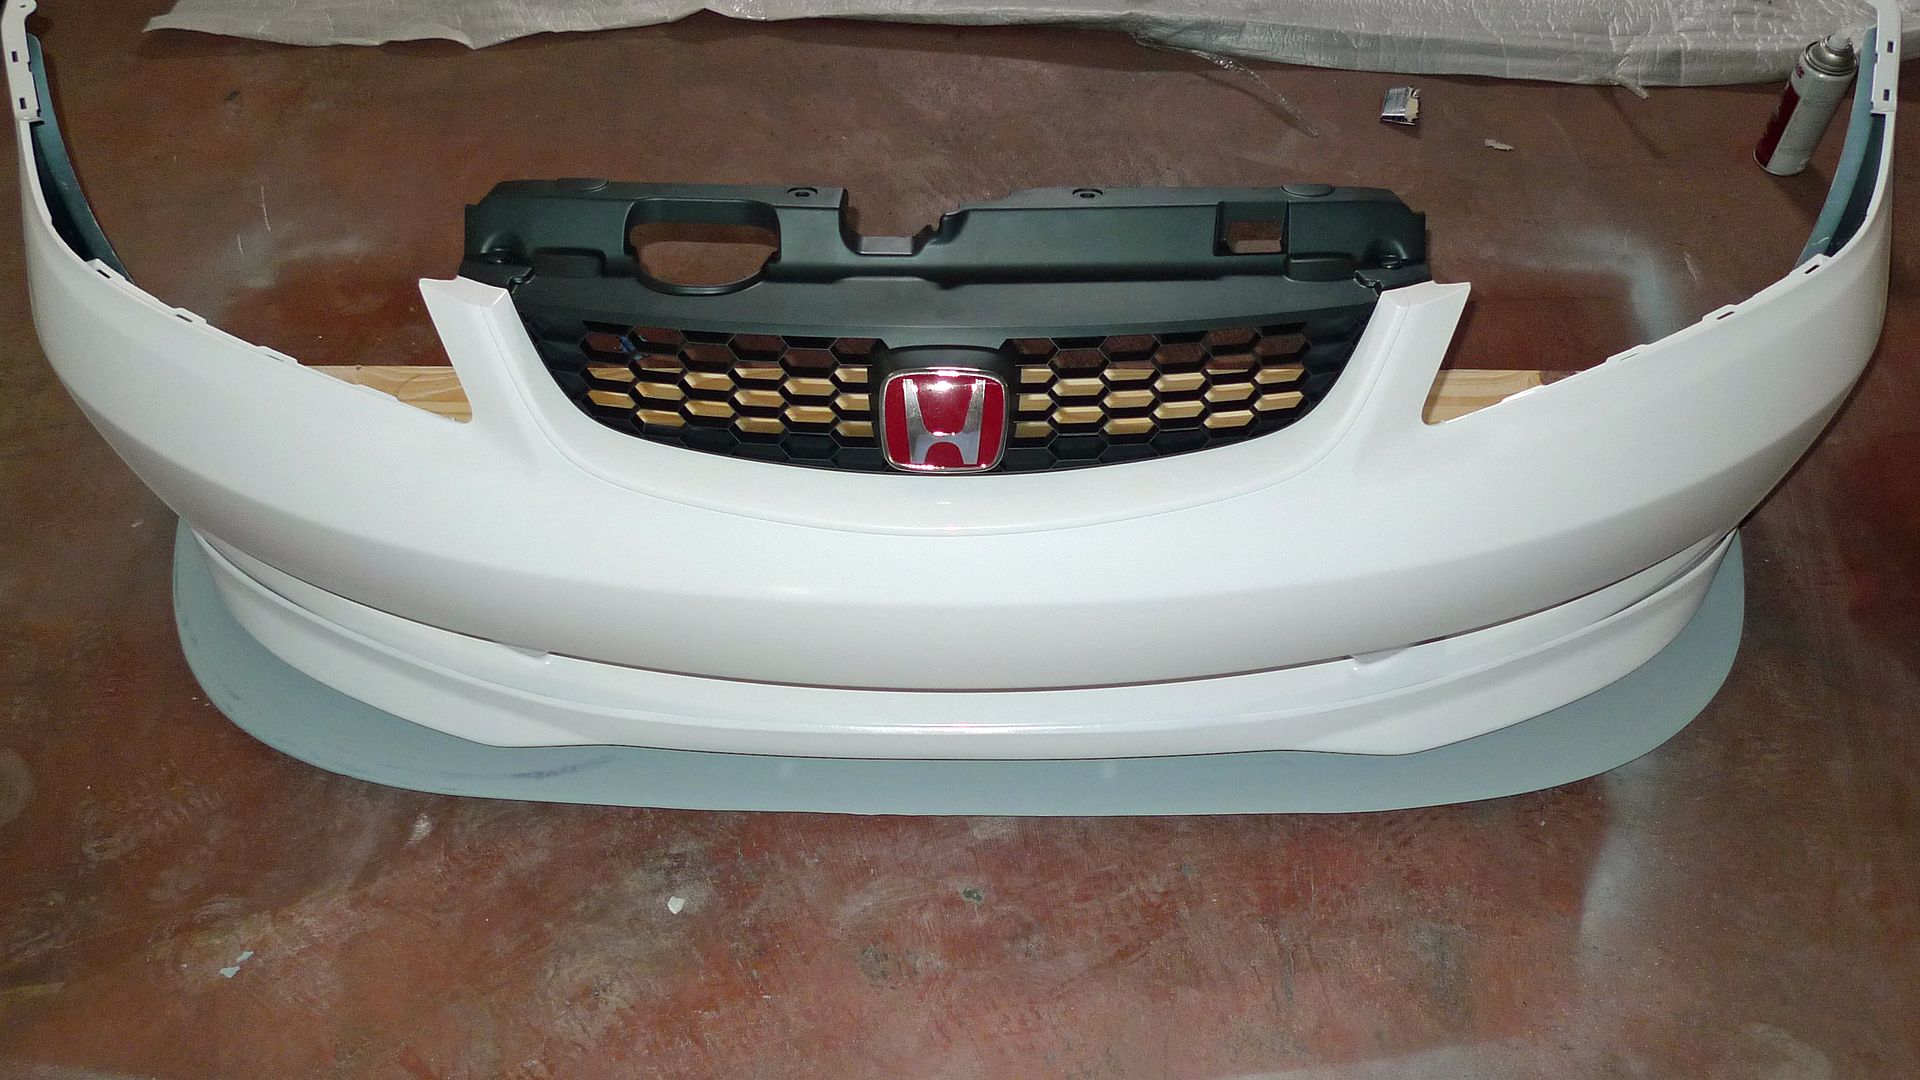
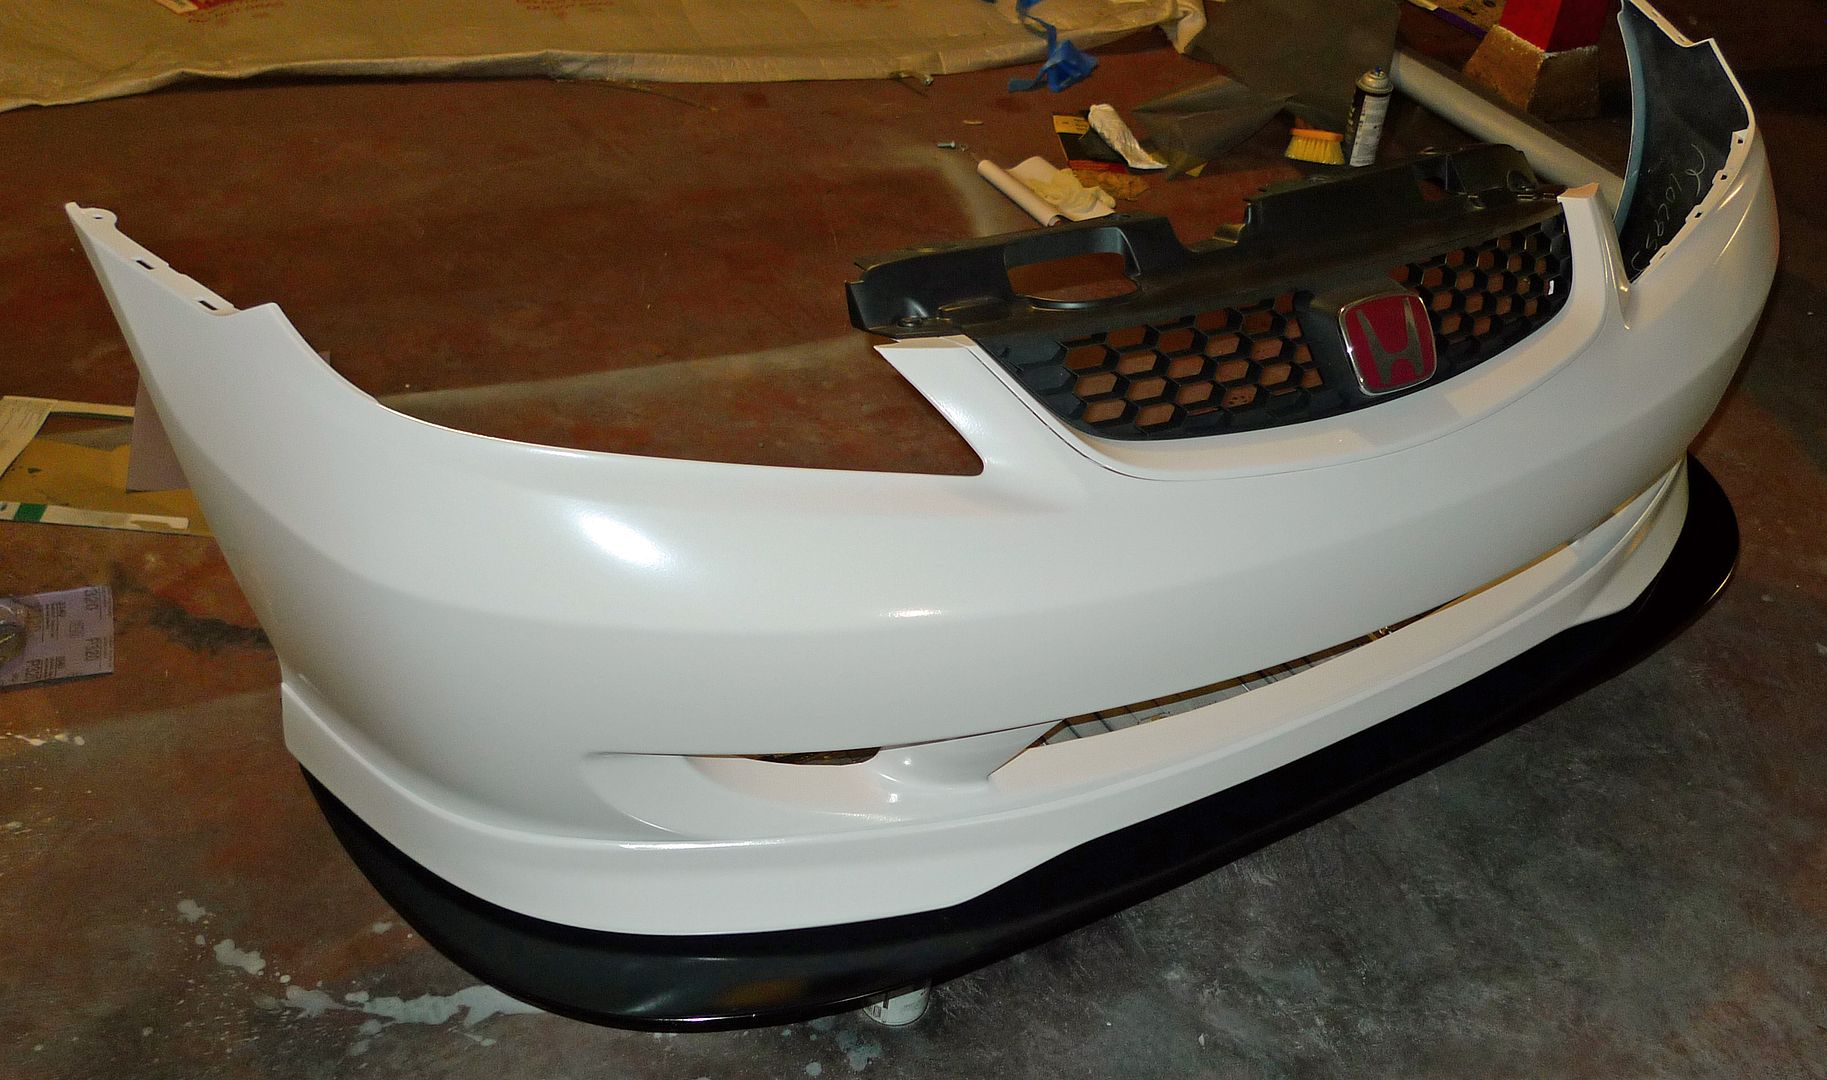
So the splitter will look like this under the bumper. I'm going to mold the bumper so that it transitions smoothly to the splitter. I want to incorporate a Type R lip as the transition:
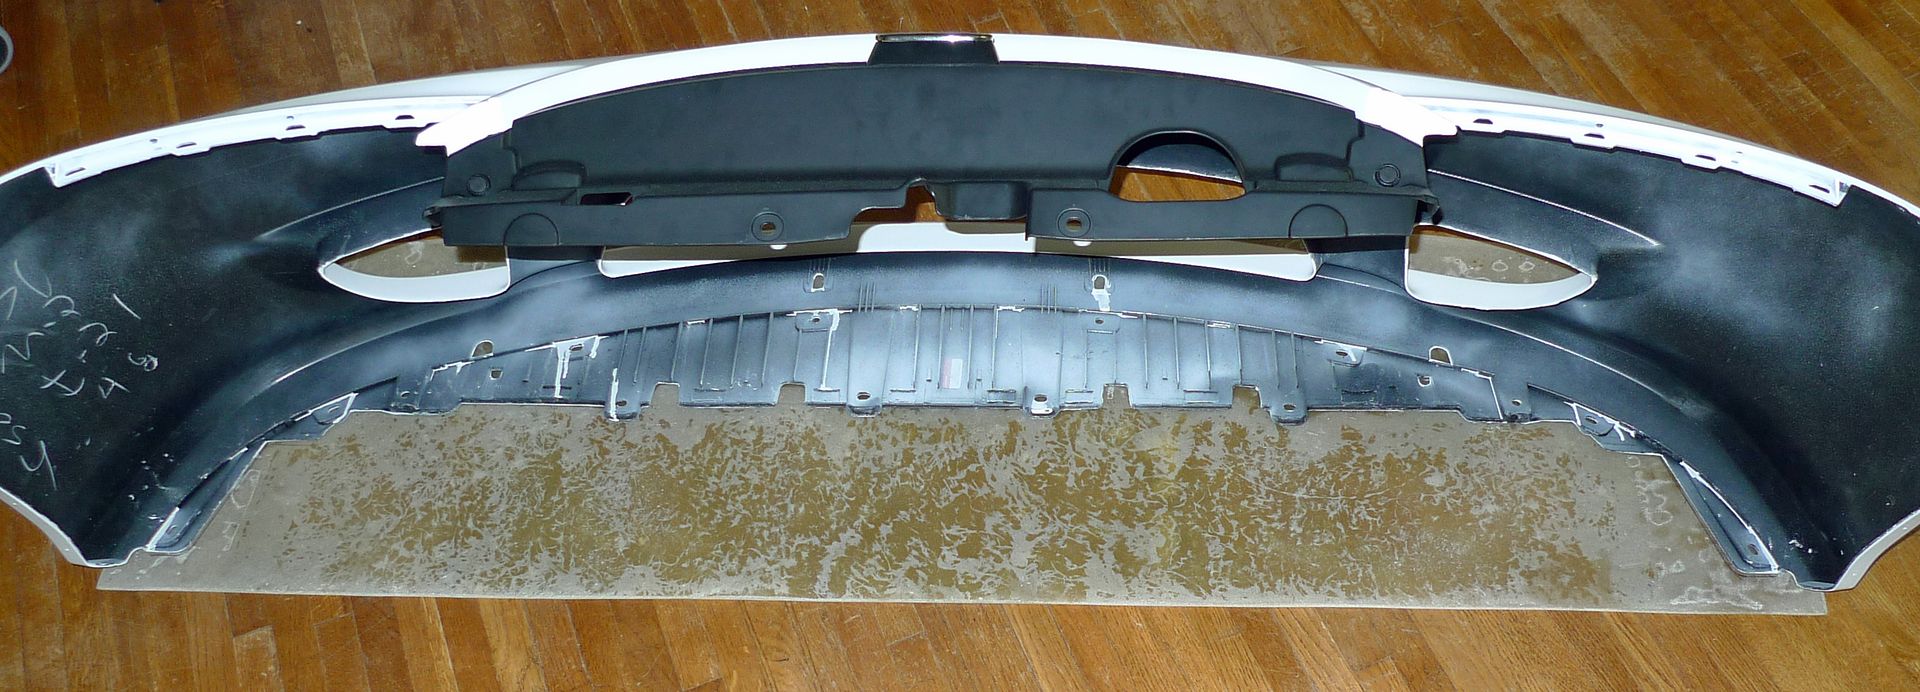
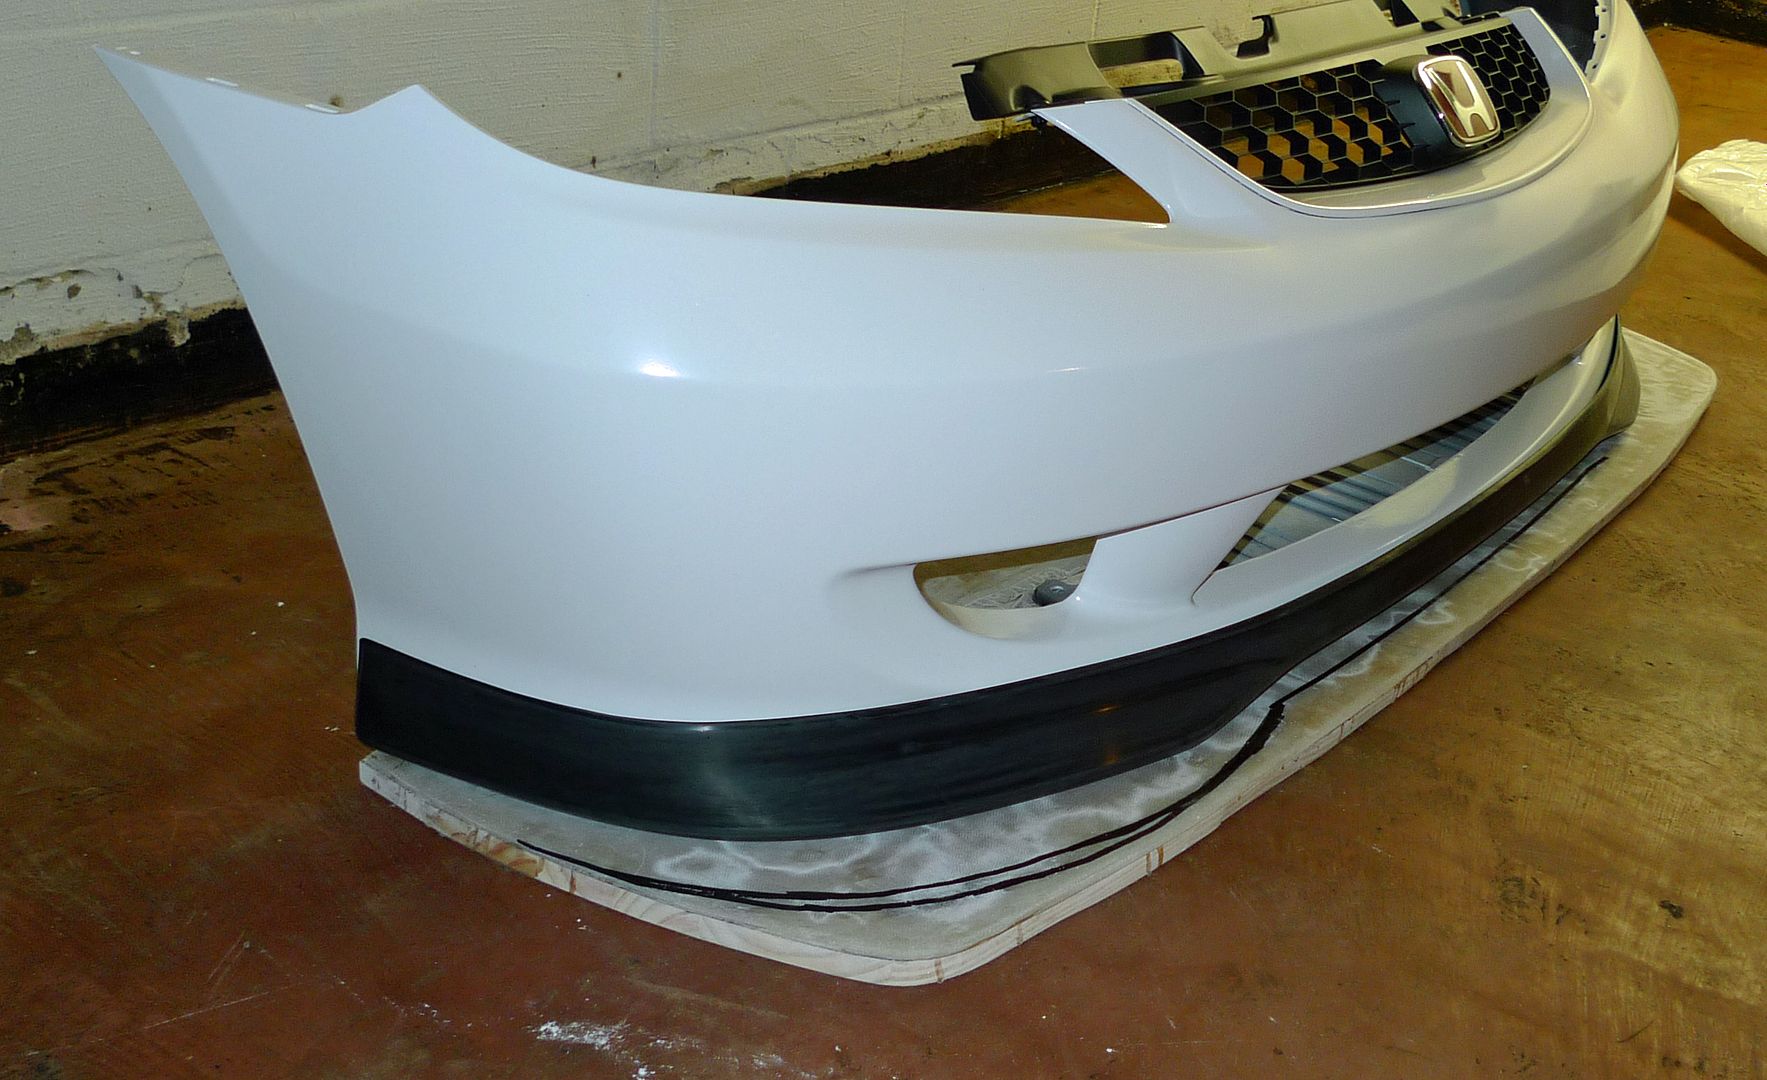
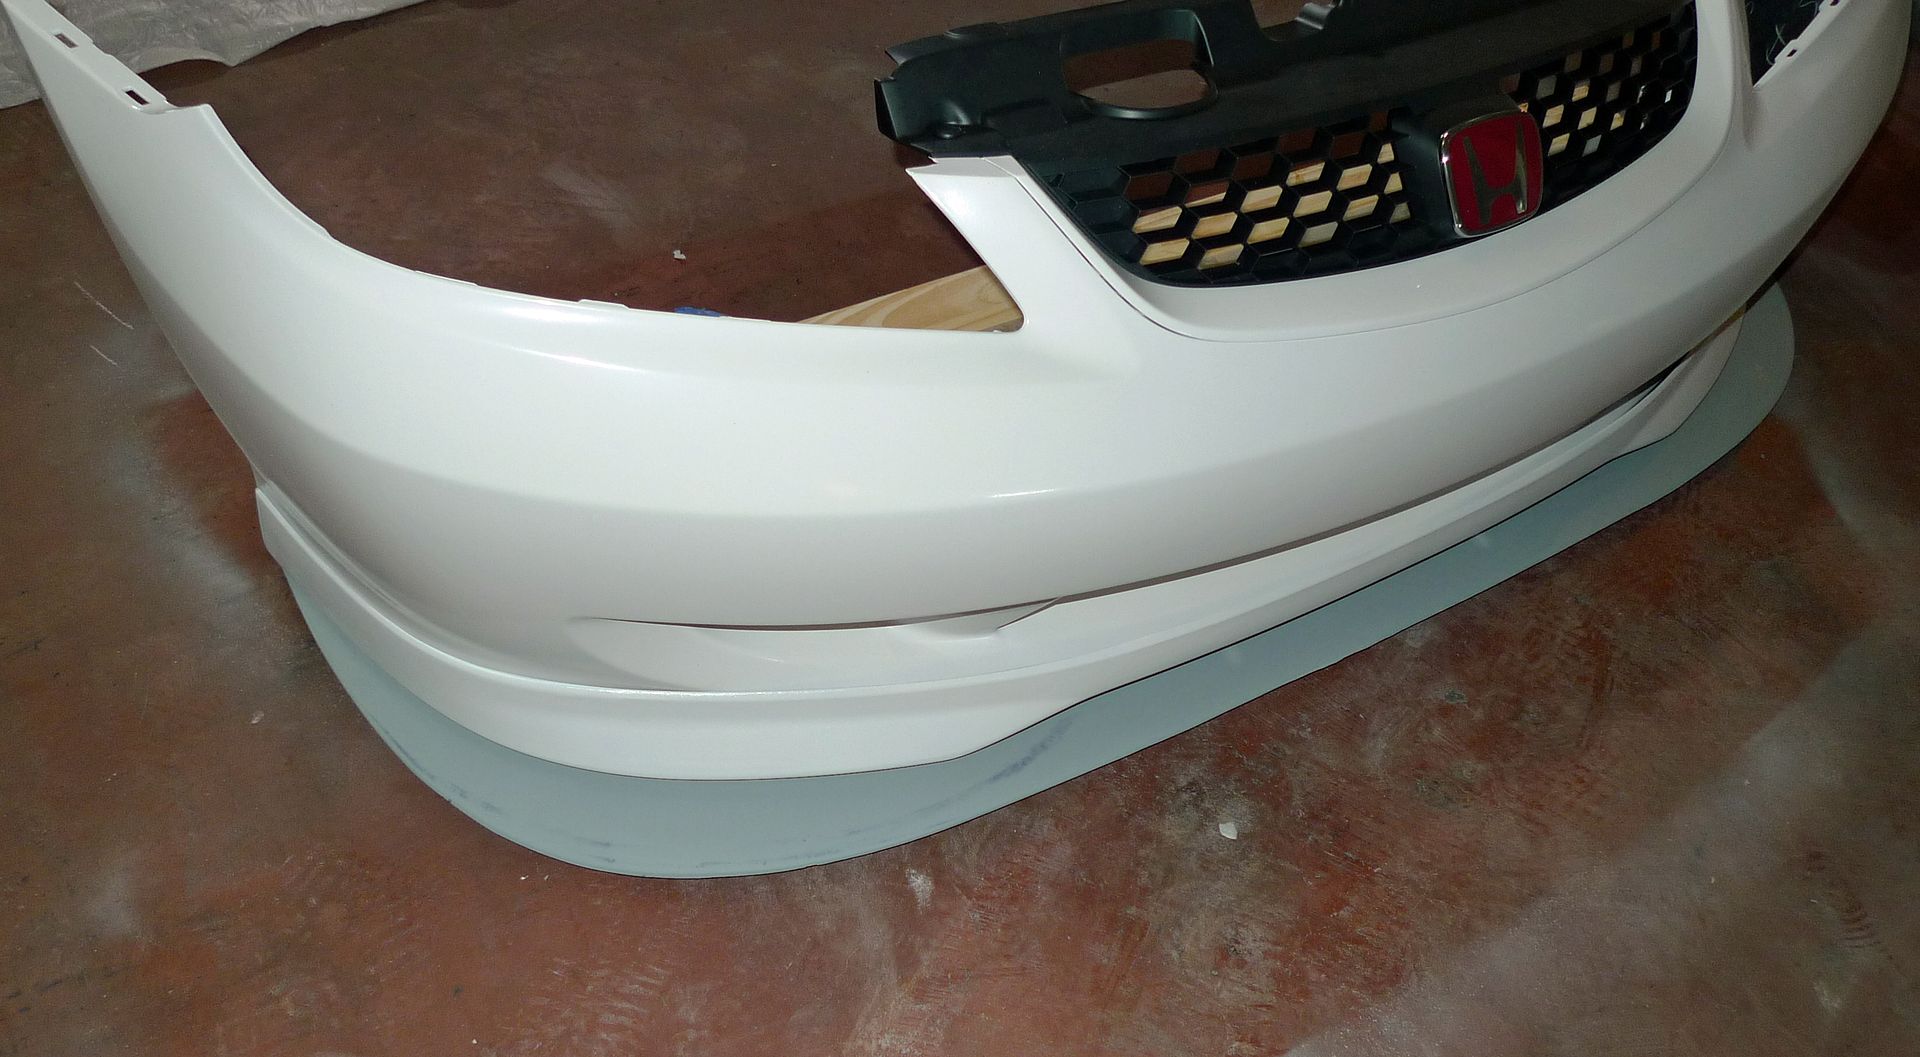
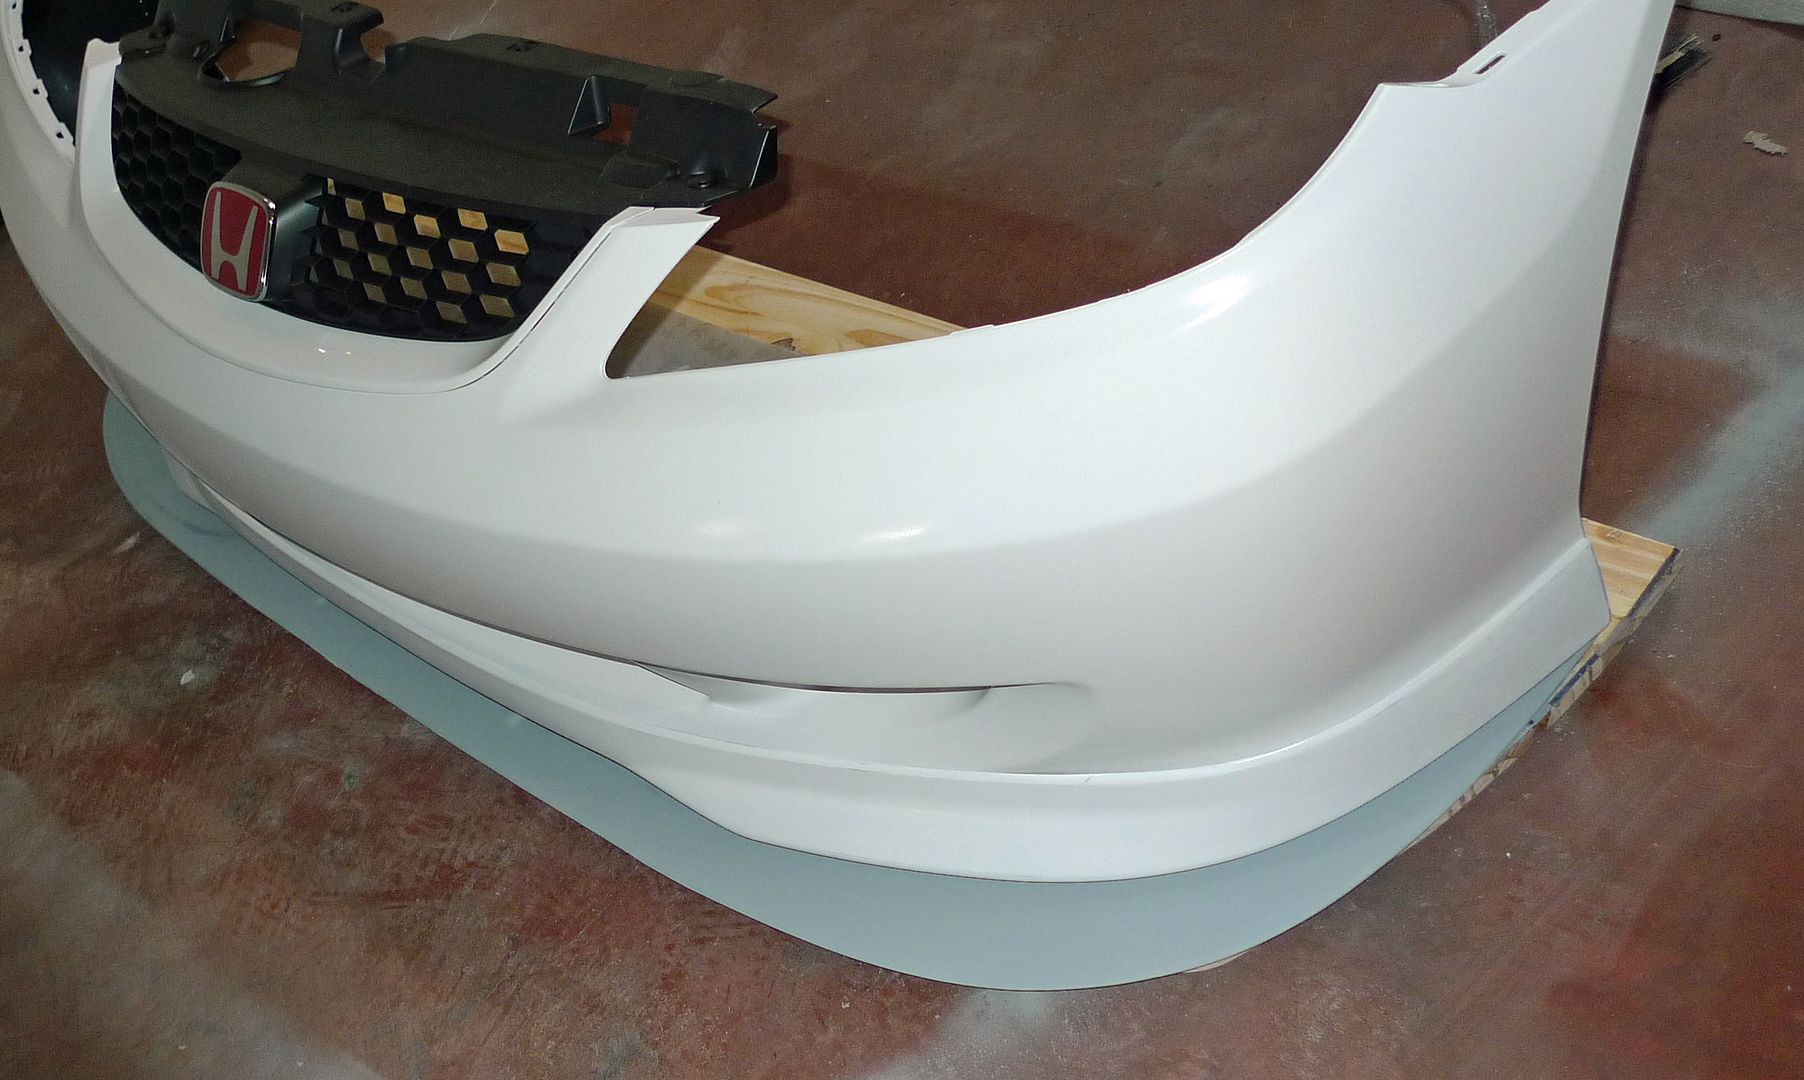
And this pic shows how far back the splitter extends:
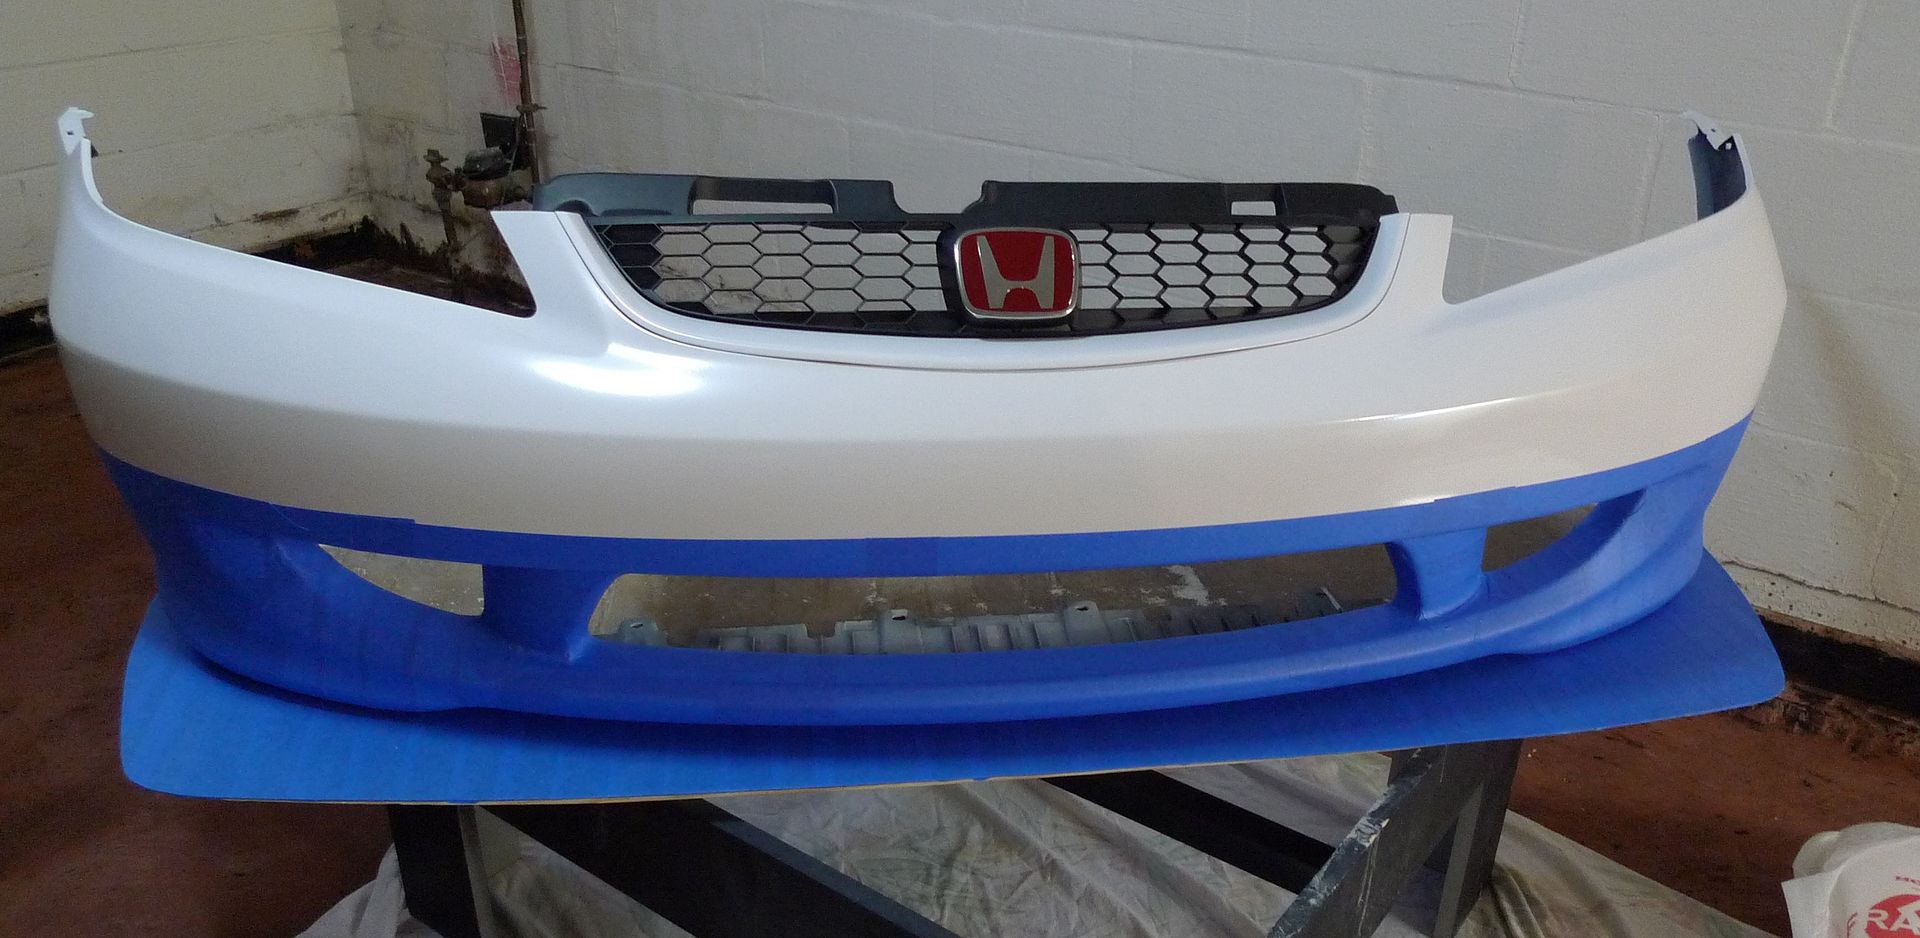
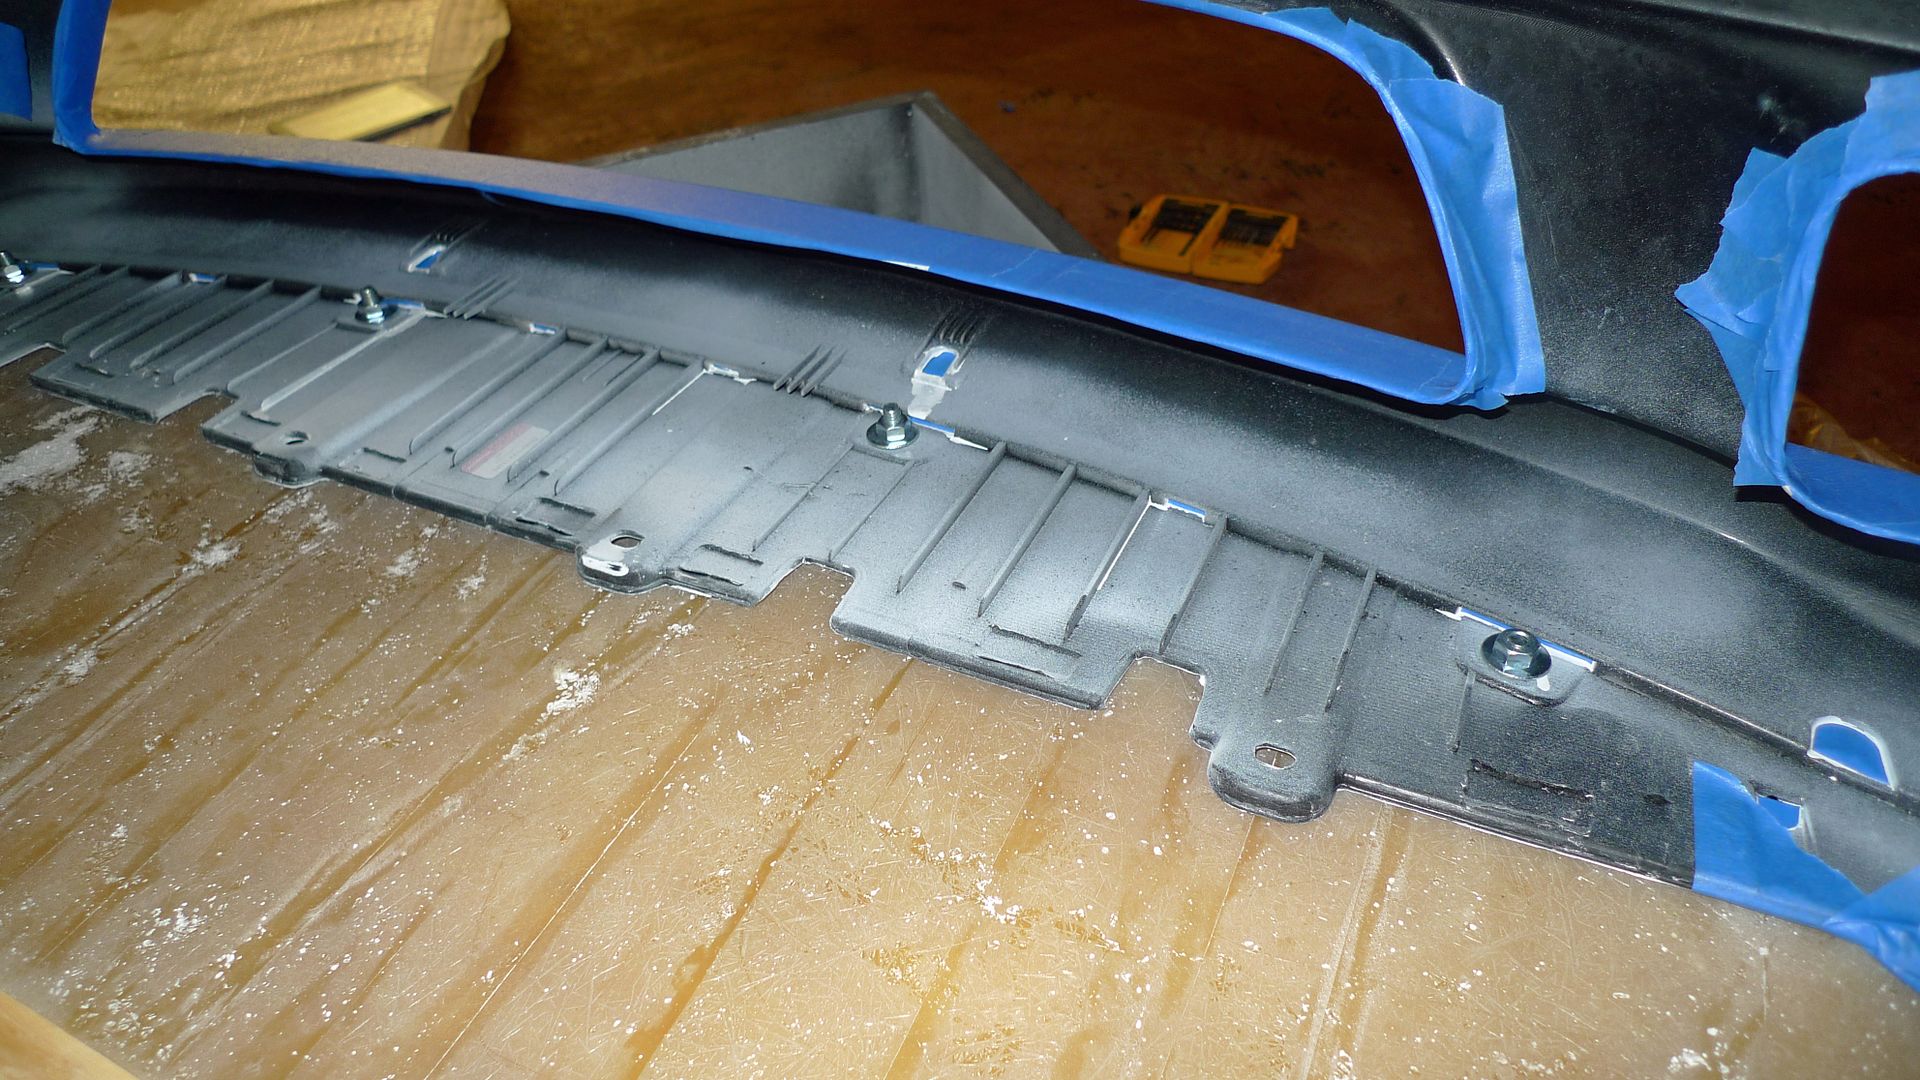
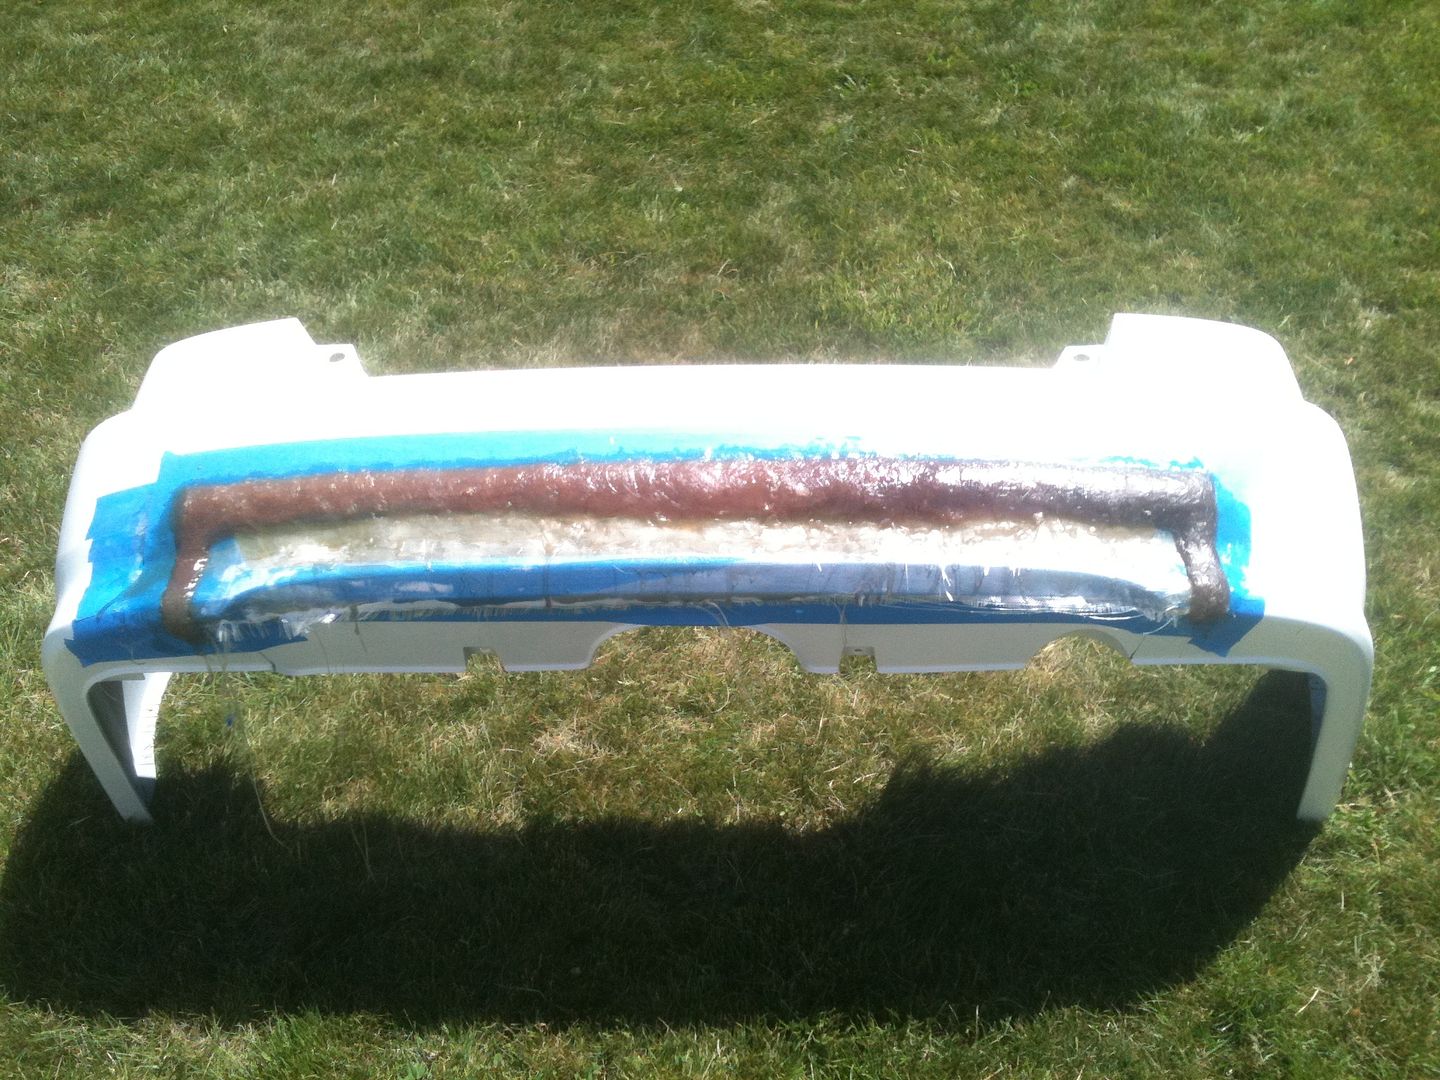
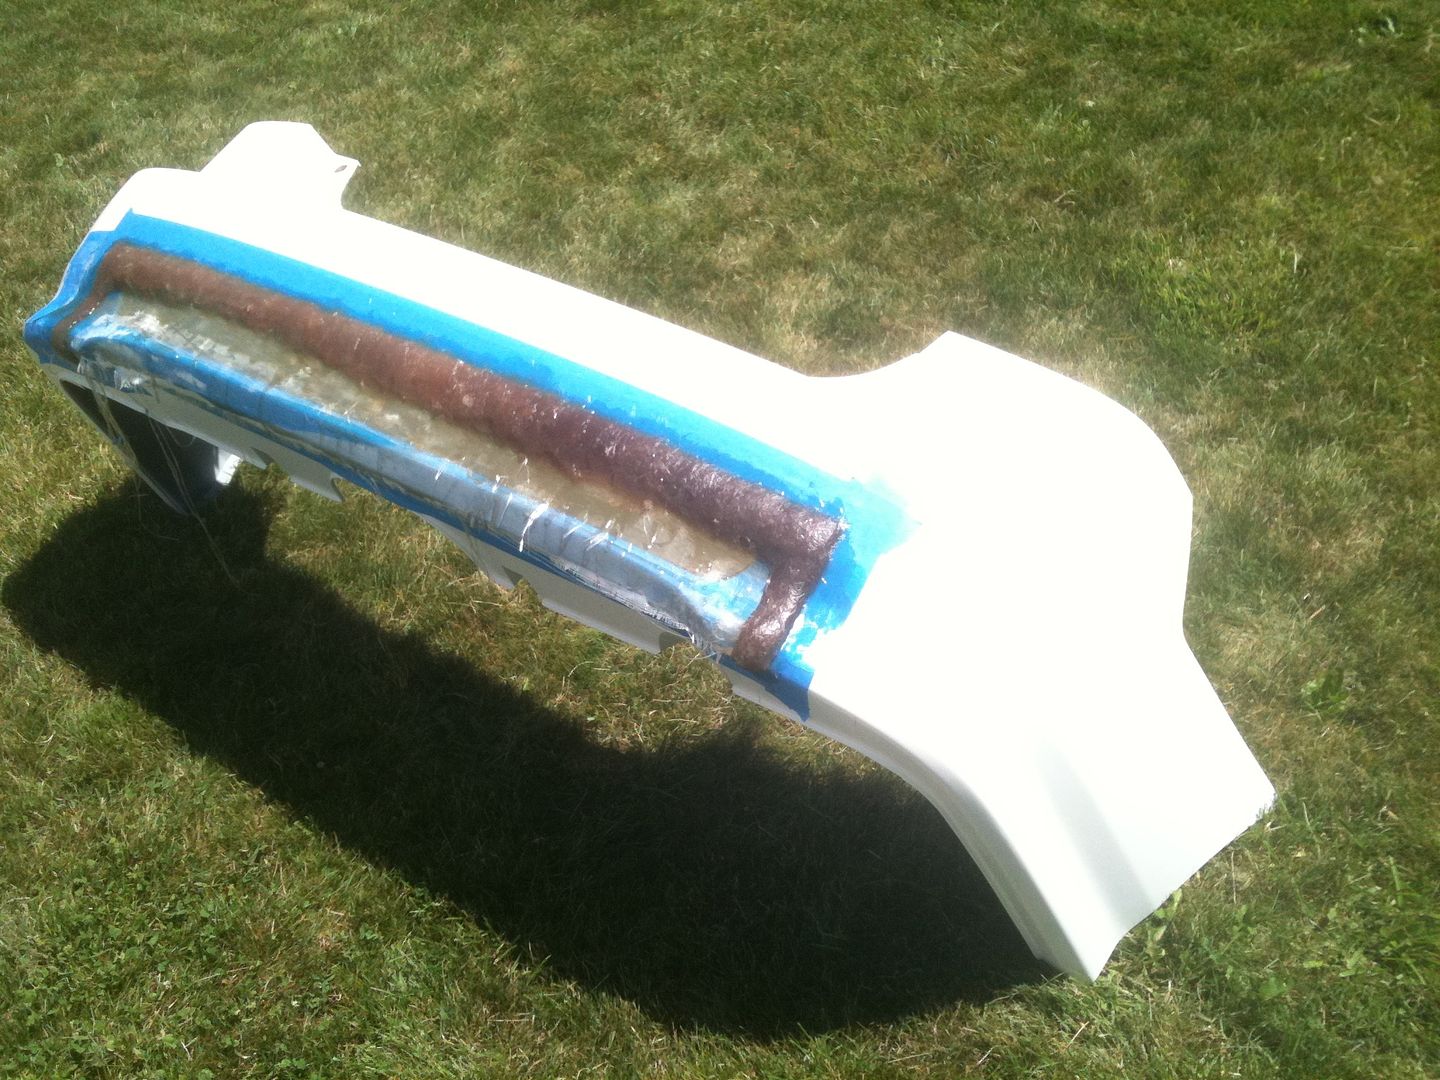
Some more progress. Got the bumper and splitter all taped up:
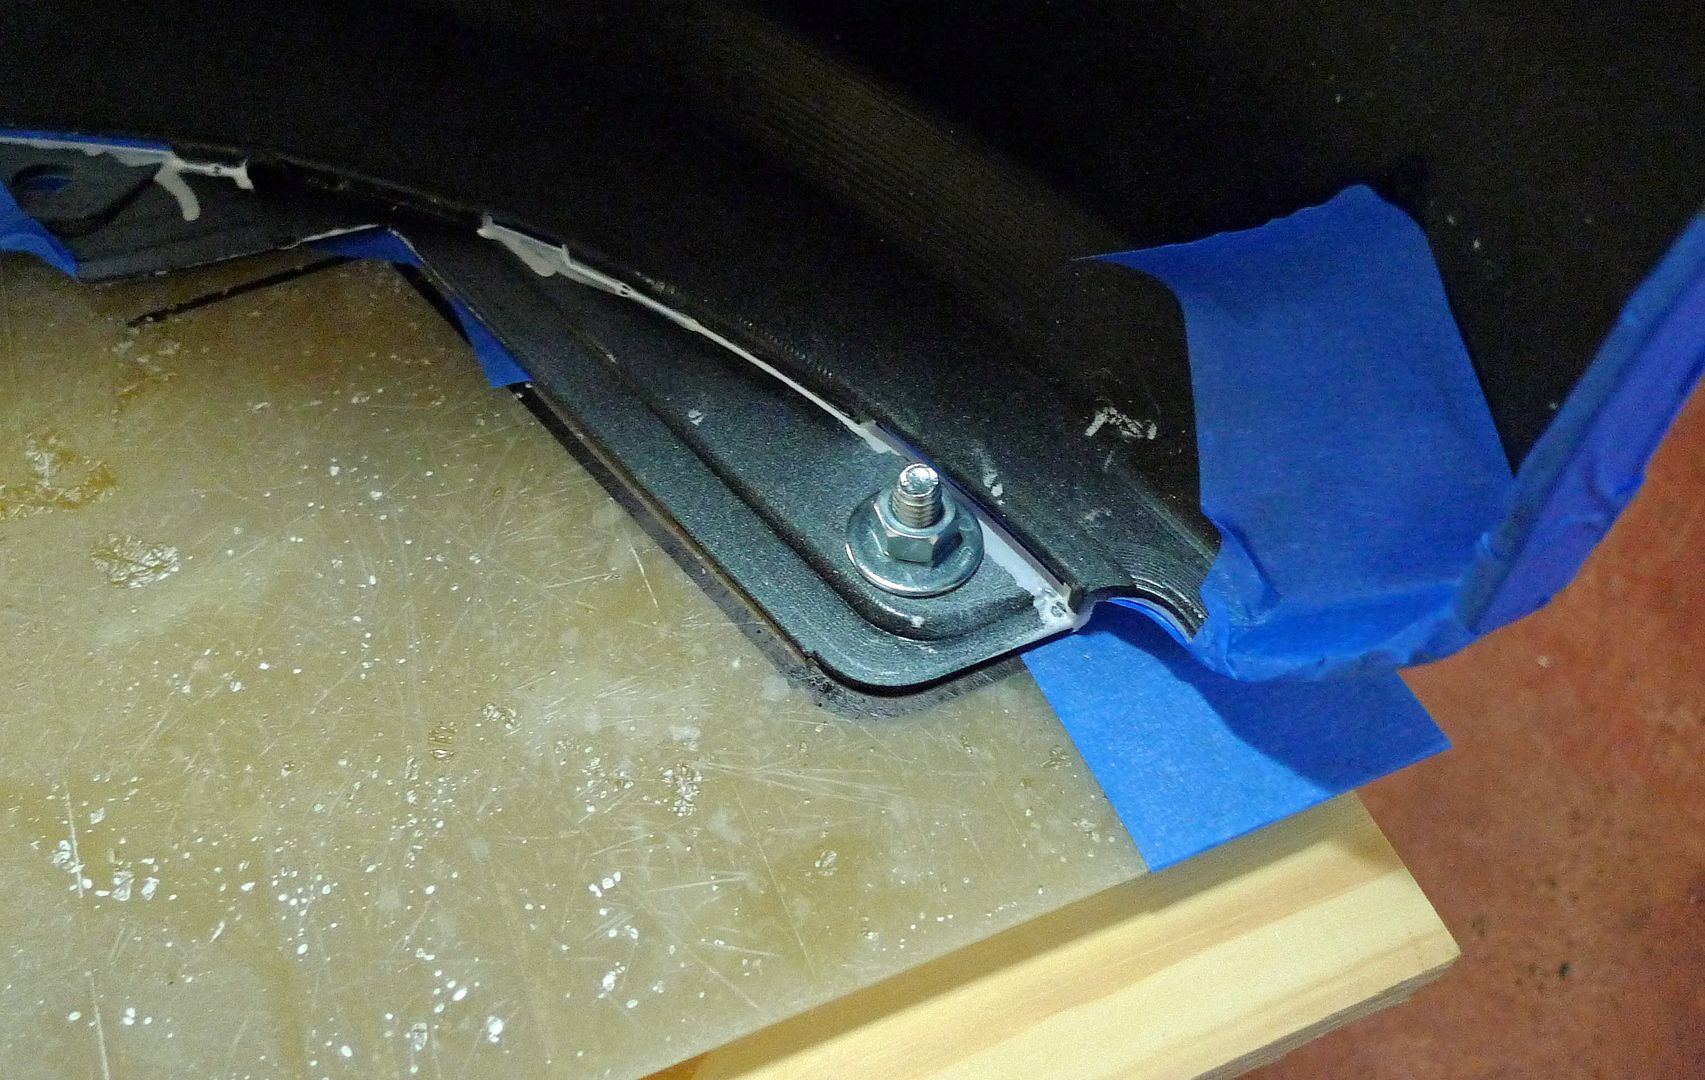
Here is a shot of the mounting...I used the holes already in the bumper:
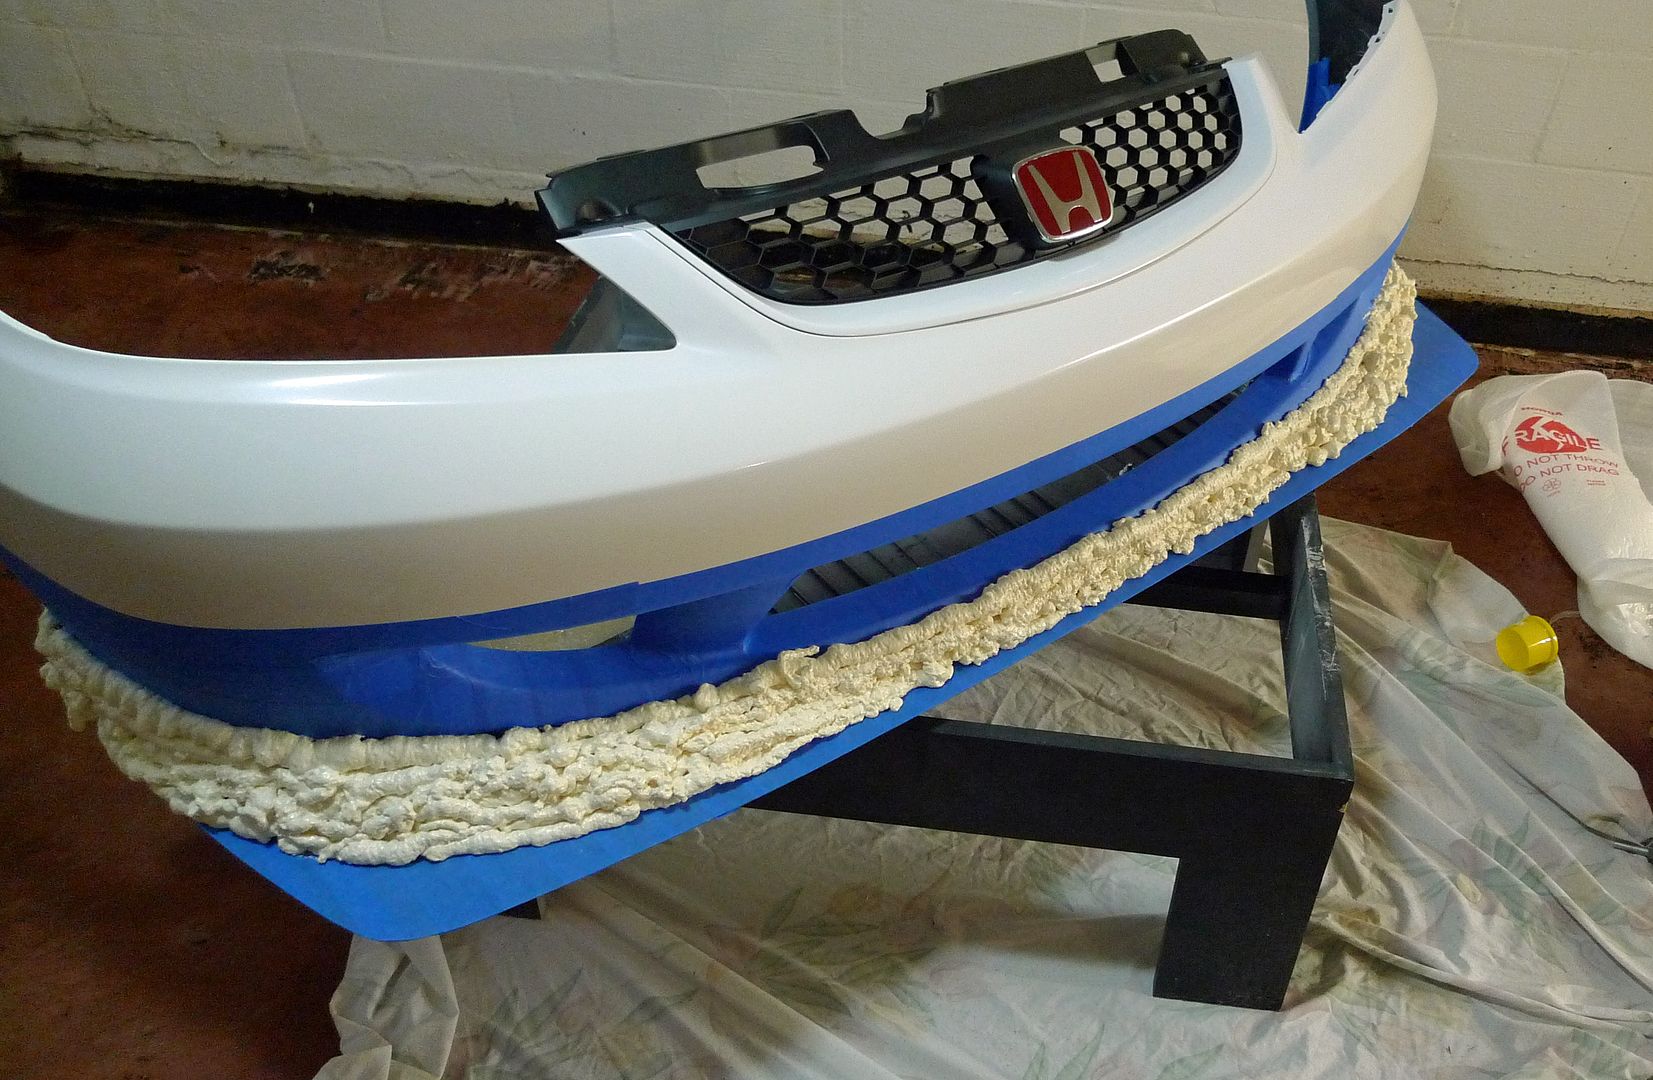
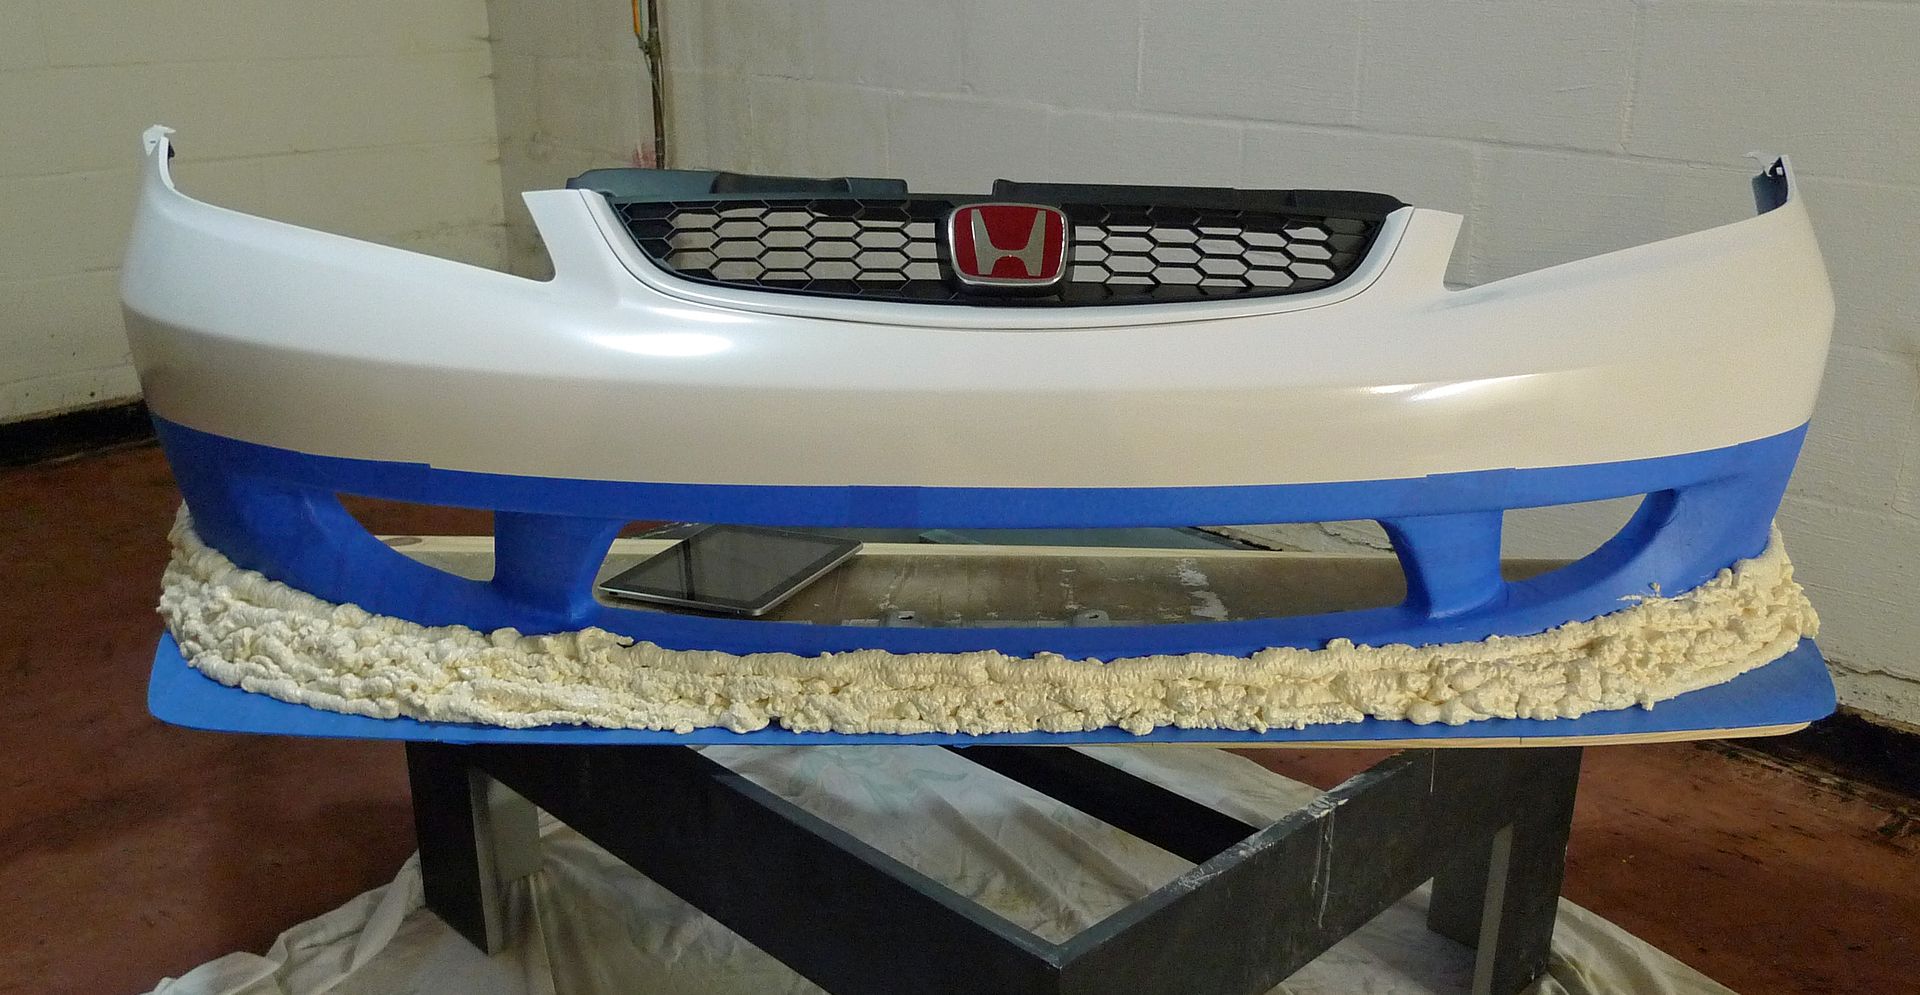
And getting foamy with the Great Stuff. This is the basic form...it still needs some shaping, but you can see that the splitter really doesn't stick out that much once a lip is installed:
Coming along nicely...
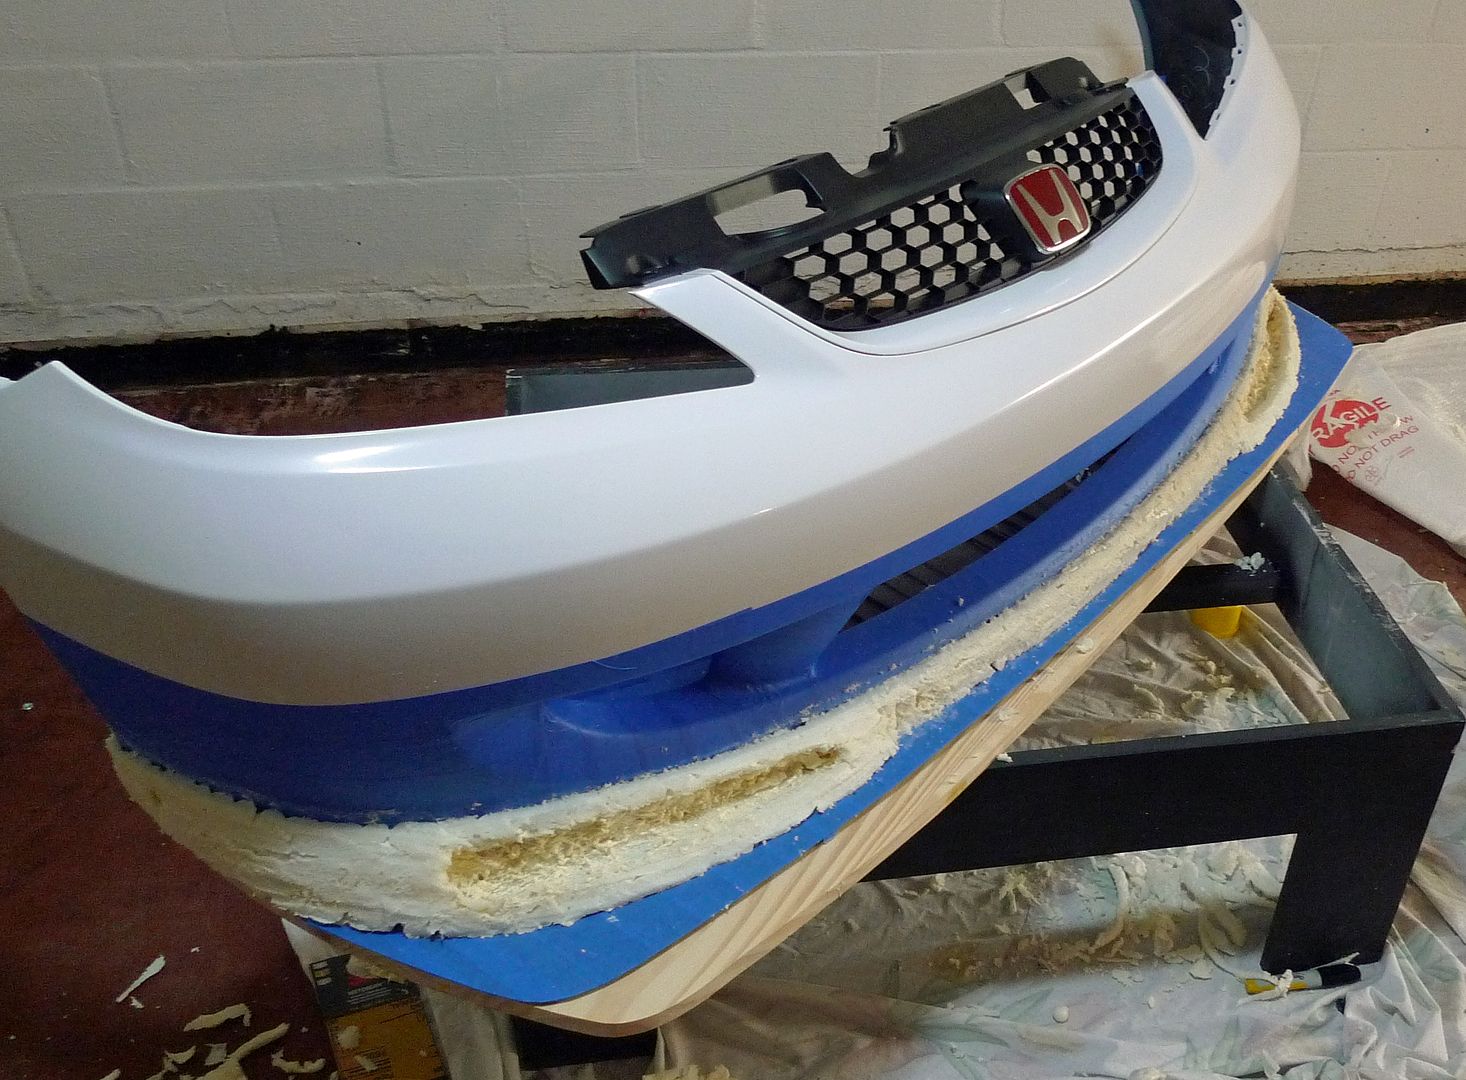
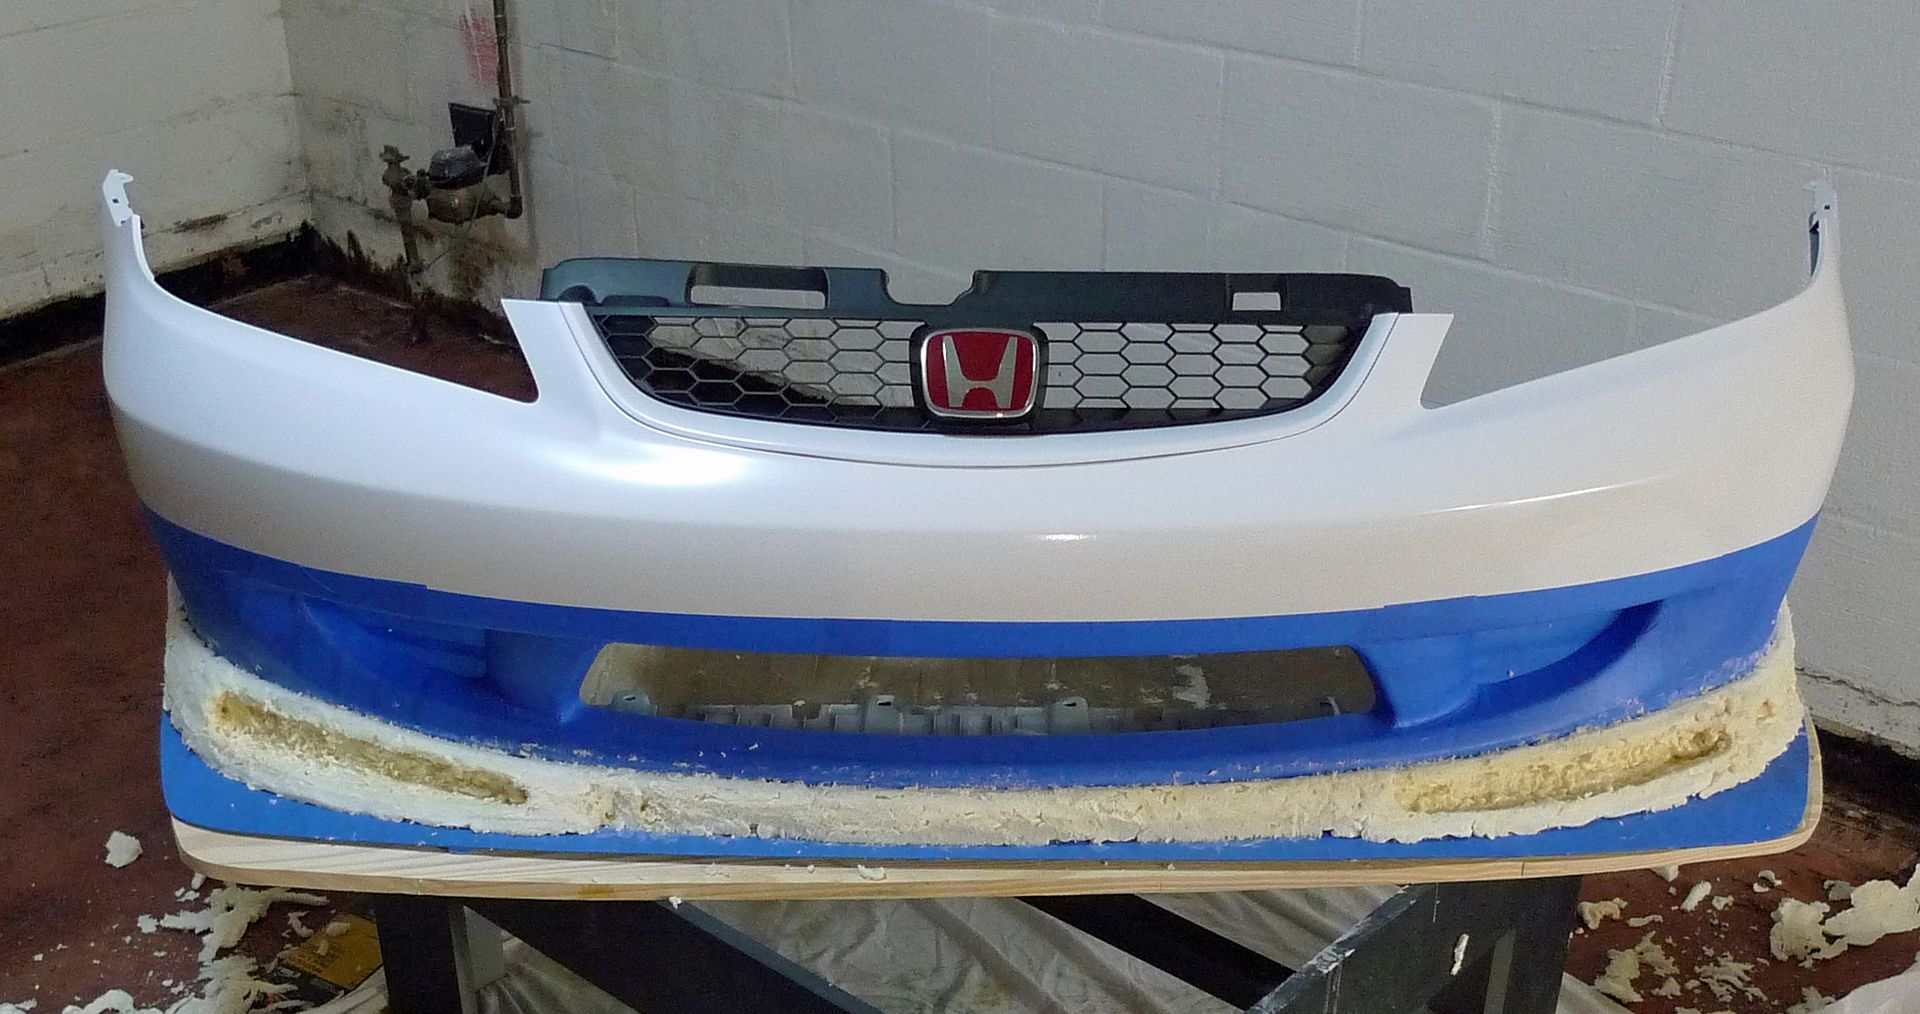
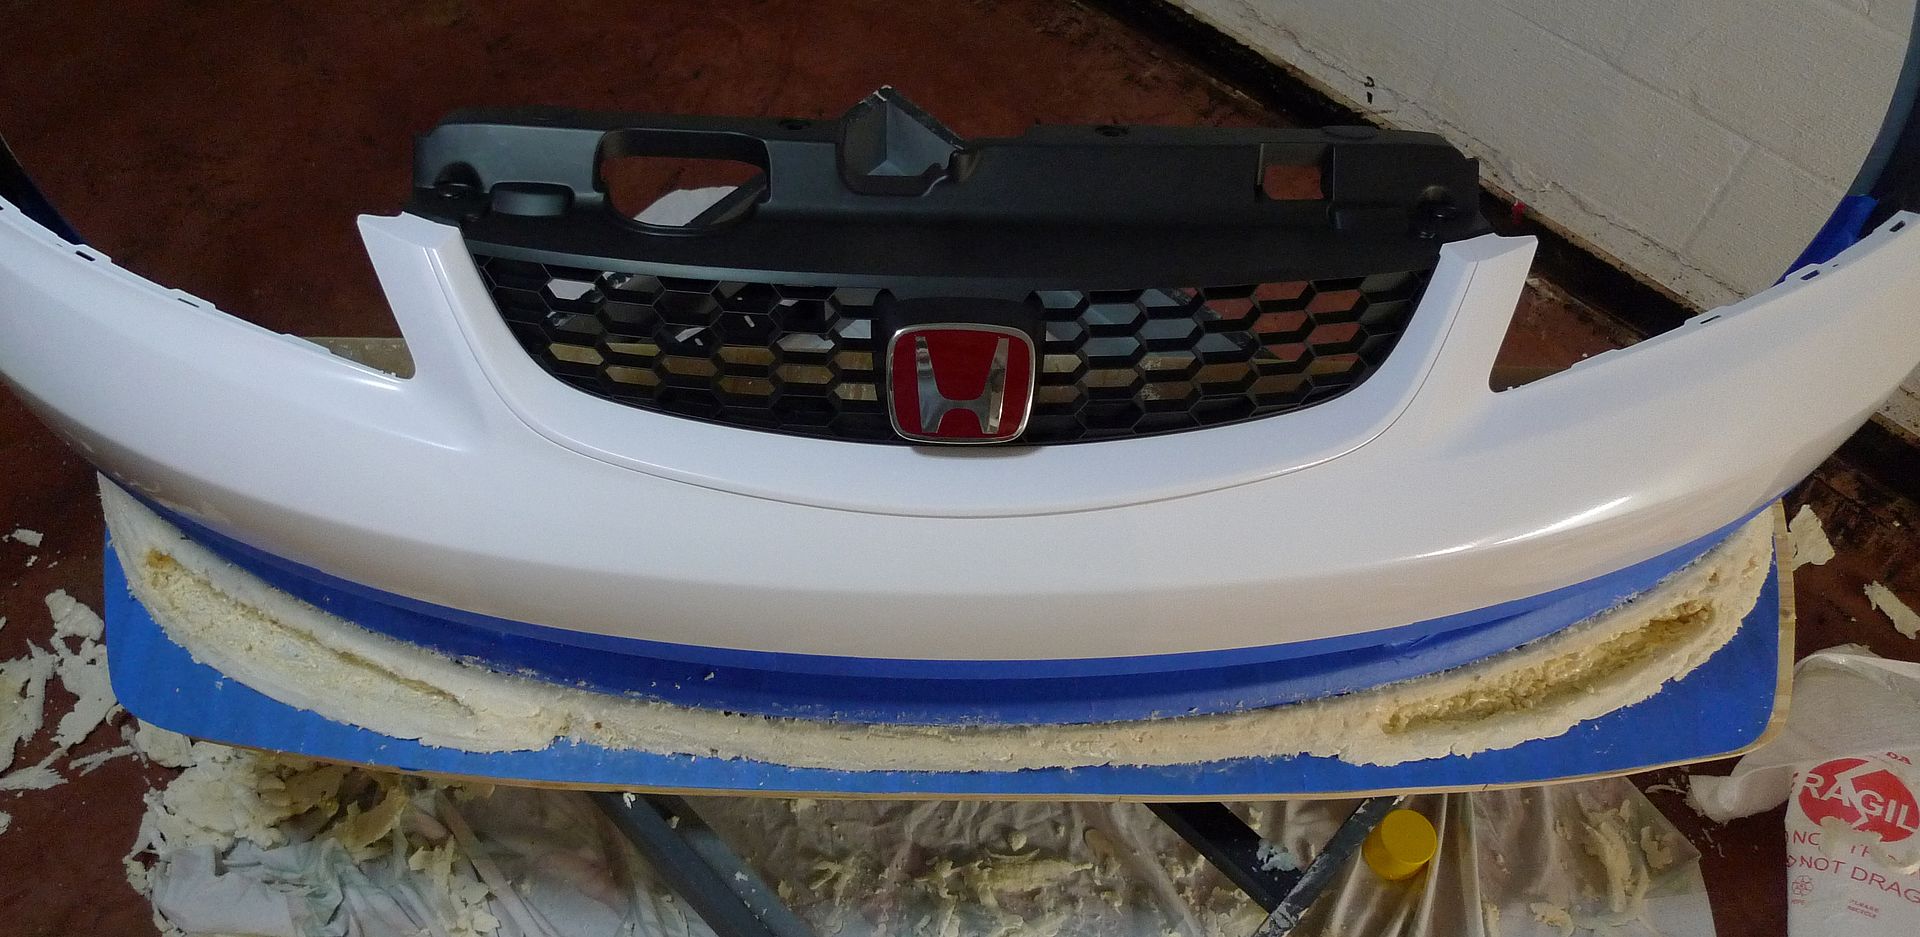
Decided to scrap the foam...it was too difficult to shape it. So on to the revision:
Made some progress over the weekend:
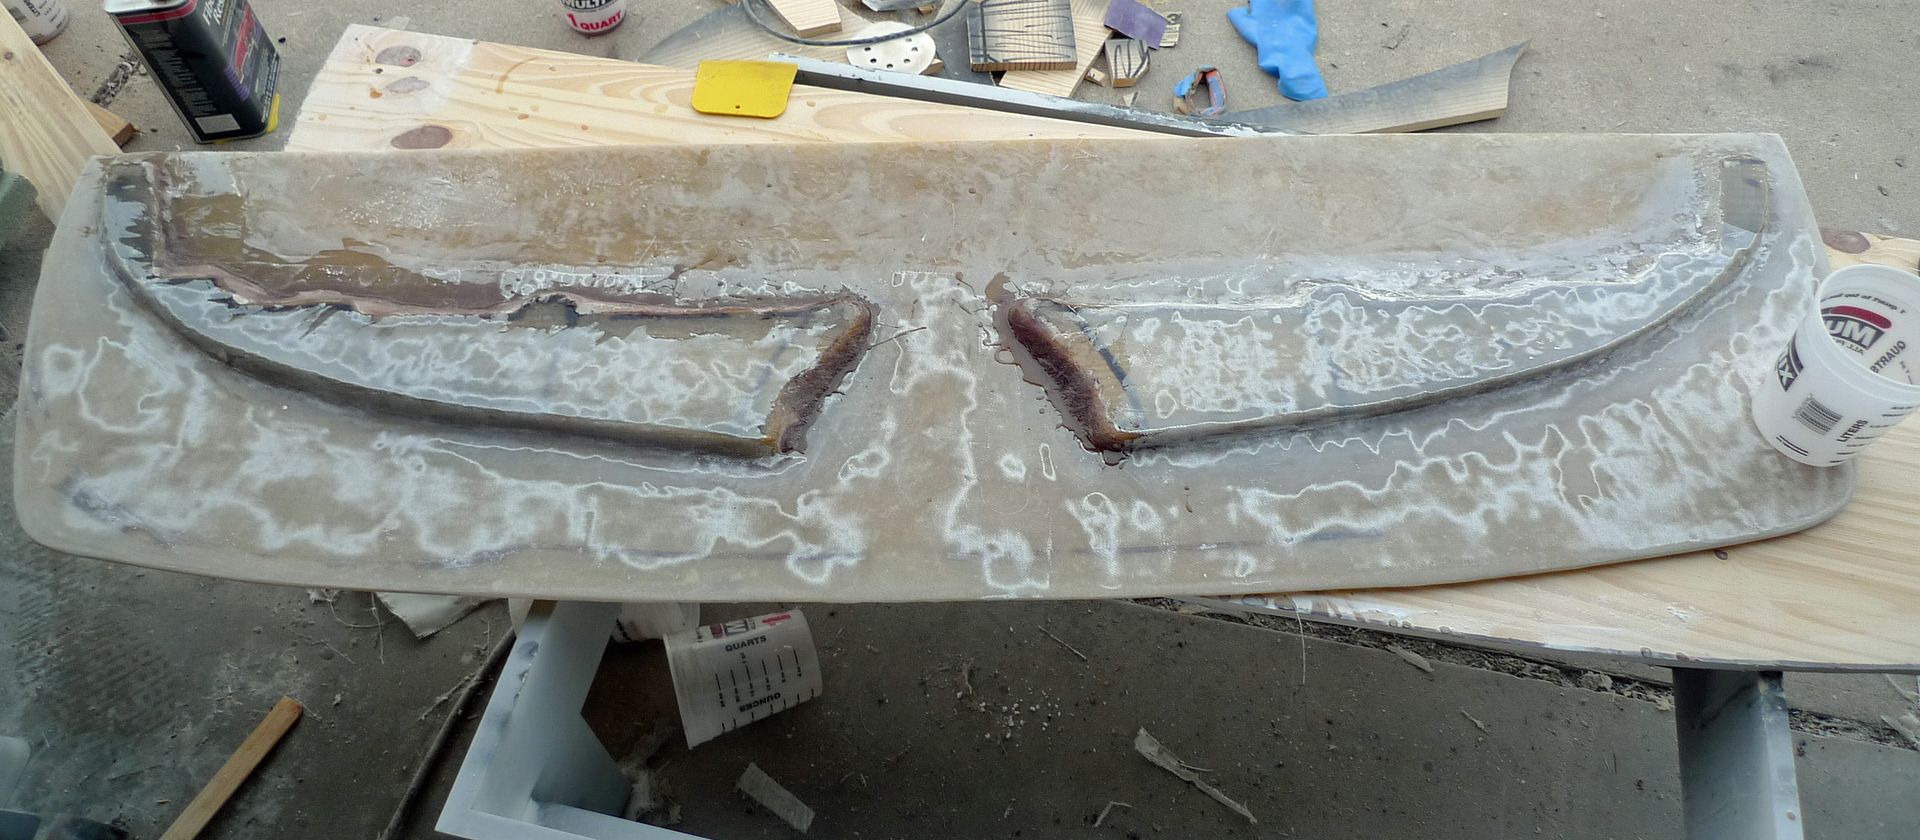
I got the splitter all finished:
Started working on the rear diffuser...

This is not the final shape...I will continue to shape it:
I'm going for something similar to this:

I made a tracing of the bumper and then extended the area slightly all around till I came up with an overall shape that I liked. I just made a template out of cardboard (no pics).
Then I traced the design on to a piece of REALLY flat wood and cut it out with a jig saw:
Then I covered it with aluminum foil and painter's tape so the fiberglass won't stick to the wood:
Then I ran out of blue and had to finish the last little bit with yellow painter's tape:
Then I laid down the first two layers of fiberglass cloth and resin:
This will dry overnight then I'll sand it and lay down two more layers. I am also going to mold in a lip to mount to the bumper. The bottom of the splitter will extend the length of the bumper and will be ADJUSTABLE. More to come...
I got the splitter sanded and removed it from the wooden template. I have some more pics showing step-by-step but my iPhone died. I'll post them when it's charged.
So the splitter will look like this under the bumper. I'm going to mold the bumper so that it transitions smoothly to the splitter. I want to incorporate a Type R lip as the transition:
And this pic shows how far back the splitter extends:
Some more progress. Got the bumper and splitter all taped up:
Here is a shot of the mounting...I used the holes already in the bumper:
And getting foamy with the Great Stuff. This is the basic form...it still needs some shaping, but you can see that the splitter really doesn't stick out that much once a lip is installed:
Coming along nicely...
Decided to scrap the foam...it was too difficult to shape it. So on to the revision:
Made some progress over the weekend:
I got the splitter all finished:
Started working on the rear diffuser...
This is not the final shape...I will continue to shape it:
I'm going for something similar to this:
For the front sussy, you just need to get some inverted tie-ends. On my 5R Teggy with the Toda sussy all around, I had some inverted tie-ends that allowed the front tie rods to sit in a more horizontal position and I was lowered approximately 50mm from stock height. Prior to this I had SWIFT SportMach's on the stock sussy and lowering was about 20~25mm and the tie rods were angled up some, but not to the point where handling was compromised.
Just something to look into. ;) As well as getting some sort of adjustable camber/toe front and rear. I had purchased new front knuckles with J's RCAs installed and J's rear adjustable arms.
Looking very nice indeed and awesome fiber work, though I wouldn't of expected any less after what you churned out with the door mirrors.

Thread Starter
|
Member
Joined: Apr 2010
Posts: 1,316
From: Minnesota
For the front sussy, you just need to get some inverted tie-ends. On my 5R Teggy with the Toda sussy all around, I had some inverted tie-ends that allowed the front tie rods to sit in a more horizontal position and I was lowered approximately 50mm from stock height. Prior to this I had SWIFT SportMach's on the stock sussy and lowering was about 20~25mm and the tie rods were angled up some, but not to the point where handling was compromised.
Just something to look into. ;)
Just something to look into. ;)
Re: adjustable camber/toe front and rear...this is a MUST on this chassis. Unfortunately the options are limited. I'll probably pick up the Hotchkis camber plates (these are good for about 3* camber and 1* caster).
I am getting some carbon fiber work on the interior by none other than Rogue 7. Here are some teaser pics: