
2nd Gen (GE) Intake System Review Thread

^^ no, I have an A/T. No CAI has been made for A/T due to pipe clearance issues and this is the very reason why I picked this intake up. It's more like a "tweener" intake... a take on both SRI & CAI.
The best links I have all go to private forums, and the juicy stuff which includes actual flow modelling and data are usually not kosher for me to post on public forums..

After enough work on trying to maximize VE across so many different engine types I can kinda just eyeball some of the stuff lol I like actual real world testing and numbers. But sometimes, like on my cars I just experiment and see what the ECU has to say.
So it should have increased low/mid range torque all other items kept the same, and according to him:
There you have it.
Obviously only an actual datalog or dyno pull could really give you the figures, but sometimes you don't need em to know a difference has been made. Hard numbers would be nice.
Last edited by DiamondStarMonsters; Mar 3, 2011 at 03:50 AM.
Member
Joined: Feb 2011
Posts: 97
From: Southwest US

I did a GB on this one but because the USD sux against the JYN... nobody took the plunge but only me  anyway, GB is still good if anyone is interested.
just so you guys would know... it's pretty much "baller" price...
https://www.fitfreak.net/forums/gaug...e8-intake.html
anyway, GB is still good if anyone is interested.just so you guys would know... it's pretty much "baller" price...
https://www.fitfreak.net/forums/gaug...e8-intake.html
NOTE: intakes are only butt-DYNOed
Brand/Model: Lyon[Nightroad] with aFe Pro 5R Filter - 24-25504
& HPS silicone reducer and coupler.
Rating: 4/5
4/5
Cost/Condition: $85 (cost depends on materials) NEW from stock intake part.
Rating:4/5
Year/Model/Engine/Transmission: 2010 / GE8 Sport / L15A7 / AT
Your Impression:
This is one sweet sounding responsive DIY SRI. Low grunt sound that is distinctive to that of an Infiniti FX exhaust. This could be attributed to an almost all rubber/silicone construction (silicone top & base filter, coupler, reducer). Very Nice transitioning sound from intake to exhaust. A/T owners will love this on S mode... vtakkk yo!!! A must DIY for anyone on a budget or has extra time on weekends. DIYers might encounter CEL. I got it to work without throwing a CEL. Butt-dyno approved.
Rating:4/5
Pros:
sound
looks
cost
Cons:
deletes vacuum hose.
breather required.
prone to leak that will throw a CEL when couplers are not tightened well.
over tightening of couplers will also induce leak and might break the abs plastic MAF inlet/outlet
Overall Rating:
3/5 (the cons killed it)
4/5 (if you get it right)
Pictures/Videos:


XXXXX
Brand/Model: PRM Jet Stream Intake System
Rating:4/5
Cost/Condition: $269 + SH. NEW.
Rating2/5
Year/Model/Engine/Transmission: 2010 / GE8 Sport / L15A7 / AT
Your Impression:
Like the cost effective DIY... it works as it should without CEL issues. This is one fatigue inducing screamer and can be annoyingly loud. Prominent mid-tone sound than grunt. It drowns out your exhaust and your stock audio sound. If I'm not mistaken, this intake has been dynoed and proved to have gains. Butt-dyno approved.
Rating:3/5
Pros:
has been dyno proven
straight forward design
direct bolt-on
Cons:
very expensive for a straight forward SRI
aluminum inlet and outlet still has shaving from the cut
aluminum tubing is rough to the touch on the inside
a screamer and can be annoyingly loud
thin plastic intake housing could be the culprit (a rubber base and top replacement filter might be a fix but adds to cost)
Overall Rating:2/5 (for the price... PRM should at least pick a better aluminum tubing and finish the ends with a good lathe job)
Pictures/Videos (Optional):


XXXXX
Brand/Model: Top Fuel Zero-1000 PowerChamber 2 TOP FUEL/ZERO-1000
Rating:5/5
Cost/Condition: $500 +/- depending on how the USD vs JPY conversion rate
Rating:4/5
Year/Model/Engine/Transmission: 2010 / GE8 Sport / L15A7 / AT
Your Impression:
Can be found here: https://www.fitfreak.net/forums/2nd-...ntake-ge8.html
Butt-dyno approved!!!
Rating:5/5
Pros:
well thought out design
well worth the price
a good mix between an SRI & CAI (note that there is no CAI made for A/T GE8)
top notch build and quality
sounds amazingly good for what it is
makes the engine bay 100x sexier
you'll definitely feel the pull on this one compared to DIY & PRM
dry filter
good step by step instructional manual in full color
Cons:
NONE
These are not cons but should be taken in consideration:
you need to source it out from Japan
if the exchange rate sucks for the USD... your f^cked
could be on the expensive side
3-4 months wait (typical of anything ordered from Japan)
faster EMS shipping would bump the cost up
Overall Rating:5/5
Pictures/Videos:
YouTube - Top Fuel zero-1000 PowerChamber 2 Honda FIT GE8


& HPS silicone reducer and coupler.
Rating:
4/5Cost/Condition: $85 (cost depends on materials) NEW from stock intake part.
Rating:
4/5Year/Model/Engine/Transmission: 2010 / GE8 Sport / L15A7 / AT
Your Impression:
This is one sweet sounding responsive DIY SRI. Low grunt sound that is distinctive to that of an Infiniti FX exhaust. This could be attributed to an almost all rubber/silicone construction (silicone top & base filter, coupler, reducer). Very Nice transitioning sound from intake to exhaust. A/T owners will love this on S mode... vtakkk yo!!! A must DIY for anyone on a budget or has extra time on weekends. DIYers might encounter CEL. I got it to work without throwing a CEL. Butt-dyno approved.
Rating:
4/5Pros:
sound
looks
cost
Cons:
deletes vacuum hose.
breather required.
prone to leak that will throw a CEL when couplers are not tightened well.
over tightening of couplers will also induce leak and might break the abs plastic MAF inlet/outlet
Overall Rating:
3/5 (the cons killed it) 4/5 (if you get it right)Pictures/Videos:
XXXXX
Brand/Model: PRM Jet Stream Intake System
Rating:
4/5Cost/Condition: $269 + SH. NEW.
Rating
2/5Year/Model/Engine/Transmission: 2010 / GE8 Sport / L15A7 / AT
Your Impression:
Like the cost effective DIY... it works as it should without CEL issues. This is one fatigue inducing screamer and can be annoyingly loud. Prominent mid-tone sound than grunt. It drowns out your exhaust and your stock audio sound. If I'm not mistaken, this intake has been dynoed and proved to have gains. Butt-dyno approved.
Rating:
3/5Pros:
has been dyno proven
straight forward design
direct bolt-on
Cons:
very expensive for a straight forward SRI
aluminum inlet and outlet still has shaving from the cut
aluminum tubing is rough to the touch on the inside
a screamer and can be annoyingly loud
thin plastic intake housing could be the culprit (a rubber base and top replacement filter might be a fix but adds to cost)
Overall Rating:
2/5 (for the price... PRM should at least pick a better aluminum tubing and finish the ends with a good lathe job)Pictures/Videos (Optional):
XXXXX
Brand/Model: Top Fuel Zero-1000 PowerChamber 2 TOP FUEL/ZERO-1000
Rating:
5/5Cost/Condition: $500 +/- depending on how the USD vs JPY conversion rate
Rating:
4/5Year/Model/Engine/Transmission: 2010 / GE8 Sport / L15A7 / AT
Your Impression:
Can be found here: https://www.fitfreak.net/forums/2nd-...ntake-ge8.html
Butt-dyno approved!!!
Rating:
5/5Pros:
well thought out design
well worth the price
a good mix between an SRI & CAI (note that there is no CAI made for A/T GE8)
top notch build and quality
sounds amazingly good for what it is
makes the engine bay 100x sexier
you'll definitely feel the pull on this one compared to DIY & PRM
dry filter
good step by step instructional manual in full color
Cons:
NONE
These are not cons but should be taken in consideration:
you need to source it out from Japan
if the exchange rate sucks for the USD... your f^cked
could be on the expensive side
3-4 months wait (typical of anything ordered from Japan)
faster EMS shipping would bump the cost up
Overall Rating:
5/5Pictures/Videos:
YouTube - Top Fuel zero-1000 PowerChamber 2 Honda FIT GE8
Last edited by ThEvil0nE; Mar 15, 2011 at 12:55 AM.
Placed an order for the Top Fuel just the day after the big one and received an email back stating unsure when the order can be completed. Until then, PRM stays on and I'm curious if I feel what you feel, I definitely don't hear what you heard with the PRM, but that has to do with the full J's 50RS with front pipe installed. I don't really hear the PRM whatsoever. 
Placed an order for the Top Fuel just the day after the big one and received an email back stating unsure when the order can be completed. Until then, PRM stays on and I'm curious if I feel what you feel, I definitely don't hear what you heard with the PRM, but that has to do with the full J's 50RS with front pipe installed. I don't really hear the PRM whatsoever.
 As for the ordering, I think we stumbled on what you were referring to... maybe they don't stock these intakes in bunches
  but did get a positive confirmation.
On my DIY, I could still hear my Tanabe Touring Medalion exhaust. With PRM, it just drowns the rather discrete sounding Touring Medalion exhaust. The Top Fuel on the other hand made my exhaust notes louder and meaner... exactly what the quiet exhaust needs. Before, when I was still on DIY and even PRM, I was weighing on a b-pipe or the WR header/down-pipe just to liven up my exhaust notes... Top Fuel intake fixed this
Last edited by ThEvil0nE; Mar 14, 2011 at 11:09 PM.
So much for a long wait, the intake was attempted to be delivered yesterday afternoon by Sagawa. So have it being delivered today after 6pm. For the price I picked it up for, nowhere in the neighborhood that the devil one got his for, sorry to say that, not too concerned with I feel a real improvement or not over the PRM, but TEO said he has felt more from his Fit. Combined with the J's reflash, which is designed around their intake box as well, maybe I will feel something more. Any little bit helps with the L15A.
Member
Joined: Dec 2008
Posts: 244
From: Norwalk, CA
M7 Japan Intake
Here is another intake for the Fit from M7 Japan.
Just picked it up today will be doing install and review either by this weekend or next week.
Company Info: M7 | Advanced Performance
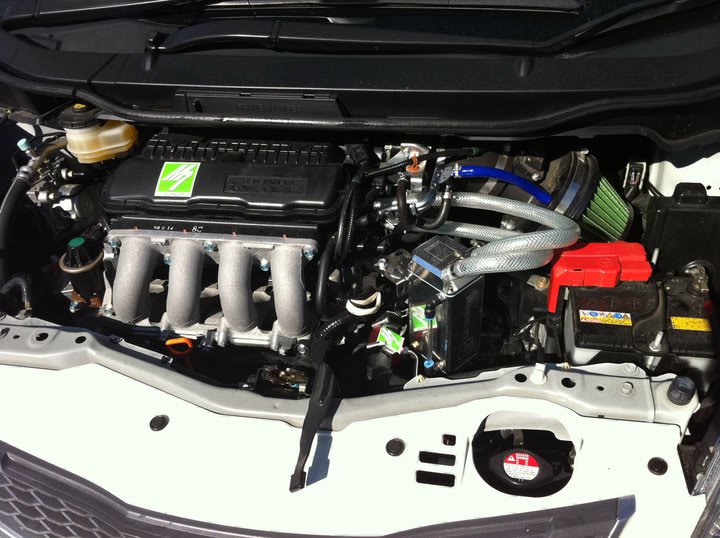
Installed Pic from Edo Performance Blog:
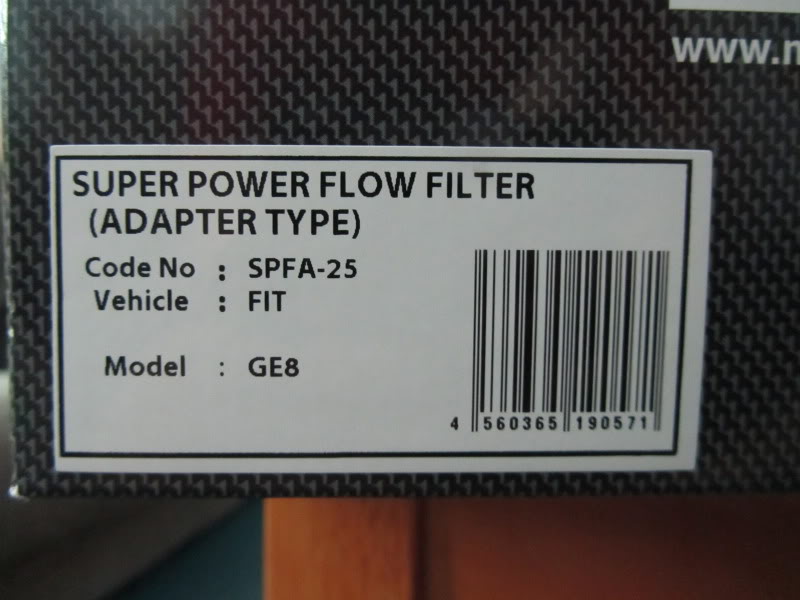
Box:
Part #:
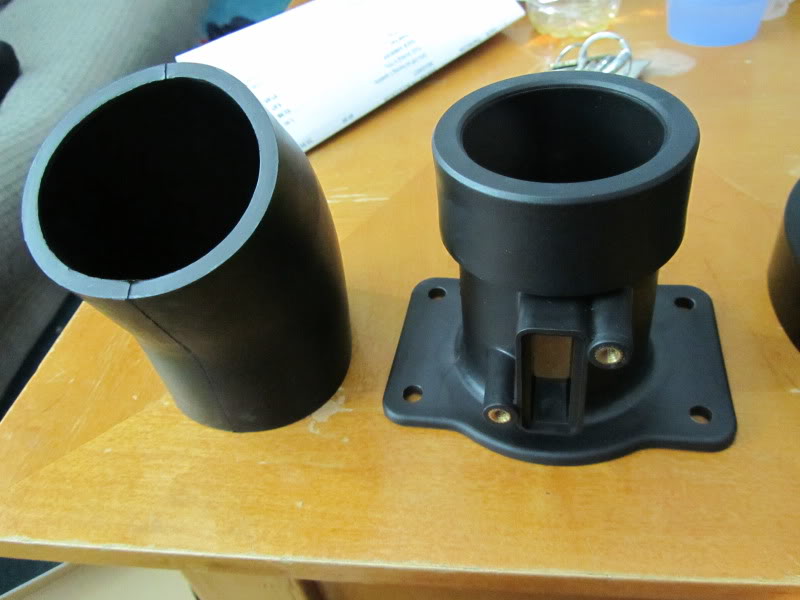
Maf Housing & Coupler:
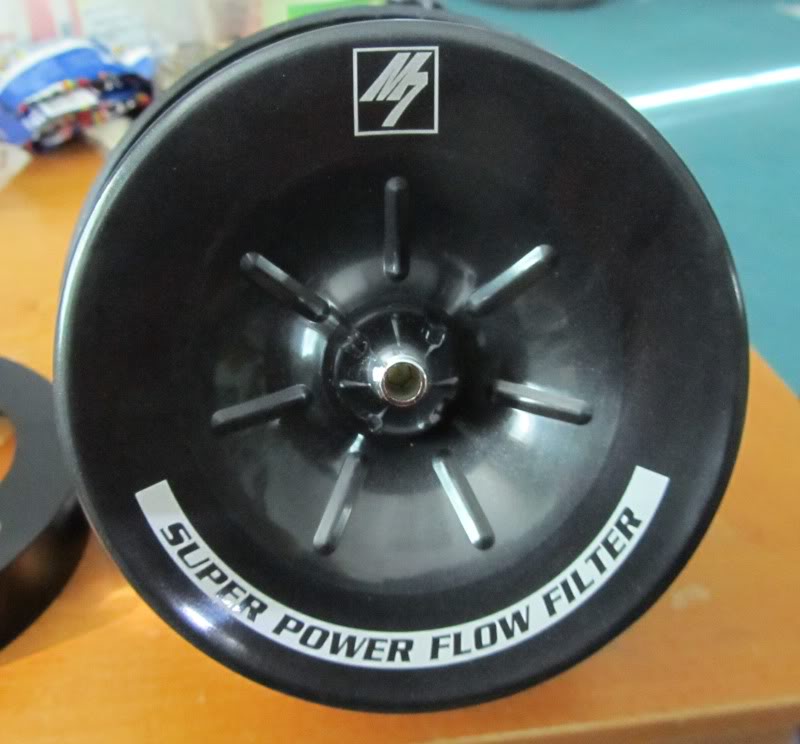
Filter (2 Piece):
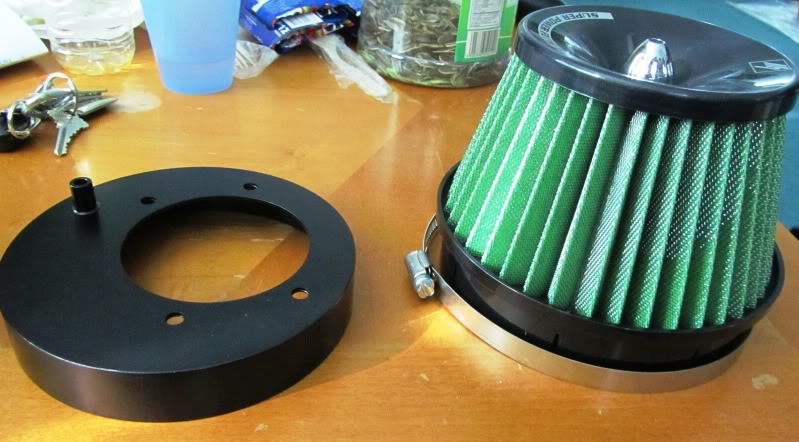
Filter Front:
Just picked it up today will be doing install and review either by this weekend or next week.
Company Info: M7 | Advanced Performance
Installed Pic from Edo Performance Blog:
Box:
Part #:
Maf Housing & Coupler:
Filter (2 Piece):
Filter Front:
Member
Joined: Dec 2008
Posts: 244
From: Norwalk, CA
will do, sorry for the lag since it is raining here l.a. plus i did get the recall notice so the car is going to the dealer this week


they used to have authorized dealer/s. Only logical way to get them is via your trusted local jdm shops. Try to pm 555sexydrive, he got his much cheaper than mine 
Newly installed
Just installed 69-1017 in my 2009 Fit Sport (manual) and there are several discrepancies with the instructions and I think it may have to do with the differences with the manual vs auto or production build.
For reference, I went by the supplied instructions as well as used resources on K&N's web site:
http://www.knfilters.com/instructions/69-1017_inst.pdf
2009 and 2010 Honda Fit 1.5L Air Intake Installation Video Air Intake Installation Video (video)
Overall I took my time and took me about 2 hours simply due to the fact the instructions did not match up to my install or they simply let a bit open for interpretation. I have installed a ton of intakes on cars in my life, so for me this should only have lasted about 15 mins max.
Couple of things I caught for anyone who may be installing as well:
Step 5 - the video shows a very large socket being inserted here, but in fact it is a 7/32" - which is in the Tool's Needed section. Would have bene benefical here to put in the instructions to use an extended reach 7/32 socket and do not use a philips screwdriver as the metal is just to soft for the clam and you will strip the head. Also, do not break the small plastic arm on the air box top that keeps the clap in place - otherwise you will be cursing as you try and get back to the firewall to reposition yourself.
Step 10 - my BIGGEST complaint. On my car, the ground strap on my tranny comes NO WHERE close to what I see in the instructions or video and this took way too much time to figure out that I was not going to use this mounting point. K&N simply needs to provide a much longer bracket here in order to meet the airbox. Otherwise, you do not need to use this mounting point as the pictures and video must be showing an automatic Fit or much earlier build of the GE.
Step 14-15 - I think it would have been very helpful here for K&N to tell you that you will be discarding the multiple vent tube connector harness (the aluminum tubes mated together) as well as clearly showing WHERE you will be connecting the end of the thermostat line. This is probably the most important step to the install and they should have taken their time here to be very specific.
Will post pics in a bit for reference. Overall, low end is much improved and paid just over $200 shipped for the unit.
Couple pics from my install. Would like to reroute the coolant line back on side of engine block like the OE, but it does get hot and will leave as is for now. Will try and get a shot of my grounding strap location to show how low it is.


Member
Joined: Dec 2008
Posts: 244
From: Norwalk, CA
no nothing yet, i'm sorry for the delay, i've been busy with school and work plus i have been working on my evo x a little more and the fit just got back from the recall so i should be able to install the intake this coming friday.
as far as info on where i got it from, i picked the intake from EDO Performance from Yohan, i can pm you his info if you want.
as far as info on where i got it from, i picked the intake from EDO Performance from Yohan, i can pm you his info if you want.
Member

Joined: Mar 2010
Posts: 38
From: Southern Arizona
I have the K&N intake installed on my GE8 M/T. I will try and post some pics within the next few days. I must say, the responsiveness has definitely gone up and the sound is great. I have it paired up with the HKS exhaust. They are great together. I just hit 10,000 miles the other day and have had the intake and exhaust since around 1,000. I am consistently averaging around 40 MPG give or take, and I do not drive the car for economy as often as I would like. Great buy, I would recommend this intake to anyone. I will try and get some pics up in the next few days.