
What did you do to your GE fit today?

#9082
 09-12-2013, 09:45 PM

Replaced the rotors and pads today. The rotors were the originals I'm pretty damn sure and nearing 100k miles so figured it was time. They had some pretty good lips on them. Everything went smoothly EXCEPT for the GOTDAMN rotor screws. Two on each rotor. Had to DRILL ALL FOUR OUT. They were super seized on there, and they're freaking phillips head so no way to really get a good grab on them. No clue why Honda even puts them on, and TWO for each rotor??? Just one would be fine. Only thing I can figure is it's an assembly line thing to keep the rotors on the hubs before the calipers then wheels get put on. I did not replace them. Put a couple lug nuts on to keep 'em in place while reattaching the calipers, and then when it's all said and done the wheels and lug nuts keep the rotors on. No need for those ridiculous screws. My brother is a BMW tech but used to work on the GM side of the shop and said none of the techs replaced rotor screws when changing them out. Holy shit Honda, STOP DOING THAT. Turned what should've been a two-ish hour job into an all afternoon job, with two trips out, first to the auto parts store then another to the hardware store.


#9085
09-13-2013, 12:18 PM
Haha yep. How often do "they" say you should replace the rotors? 100k miles seems like A LOT but to be honest the new rotors and pads don't actually feel like they stop any better. The previous pads weren't totally gone, so technically they still had some life in them, but I wanted to get it outta the way.
#9086
09-13-2013, 01:01 PM
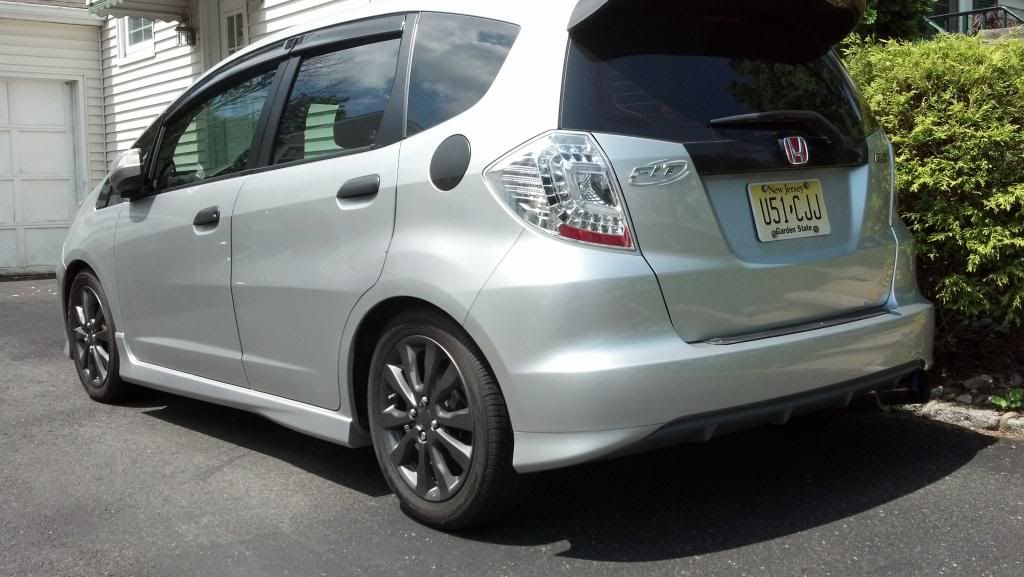
picked up my bumper from the dealer this morning and installed it right away.
Before:

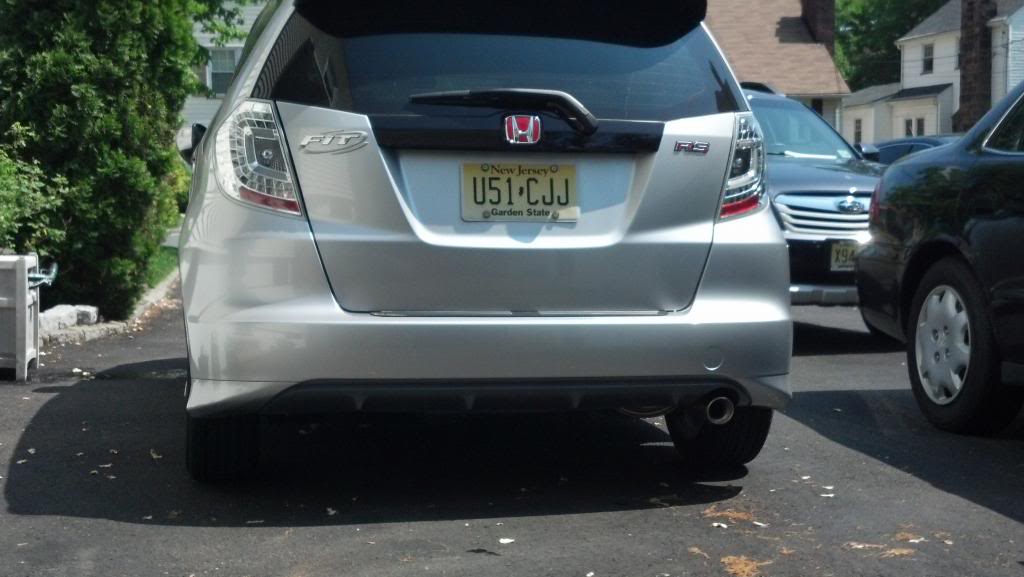
After:
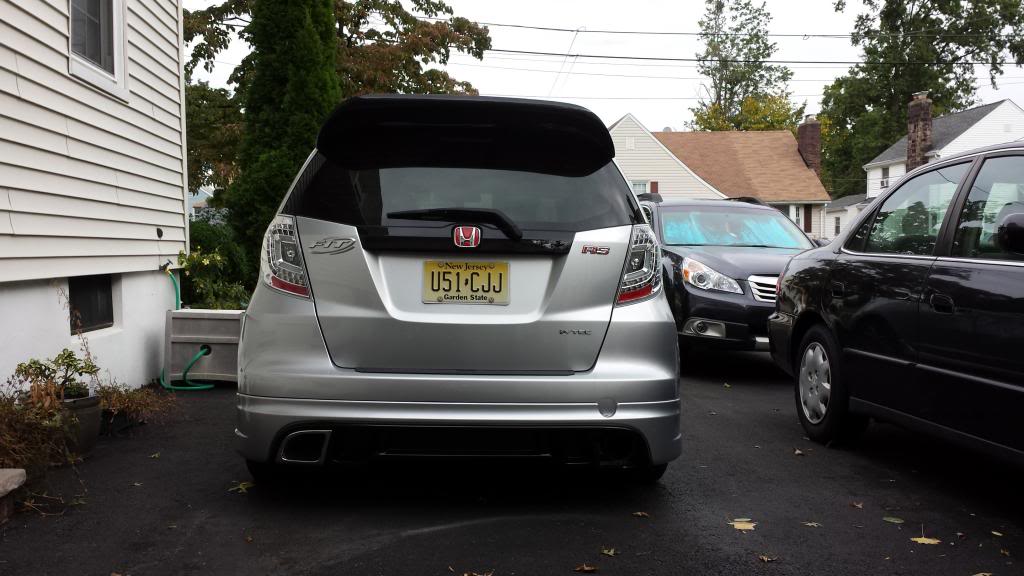

Had issues with my Greddy Ti-C and clearance. I had to saw off part of right exhaust cut out, and i still have issues with the chrome/aluminum finisher. My dremel is not up to cutting the damn metal, so i will leave it off for now since i have work soon. I think i'll loosen up the bolt for the exhaust and adjust it to hang lower.
#9089
09-13-2013, 01:17 PM

......
Had issues with my Greddy Ti-C and clearance. I had to saw off part of right exhaust cut out, and i still have issues with the chrome/aluminum finisher. My dremel is not up to cutting the damn metal, so i will leave it off for now since i have work soon. I think i'll loosen up the bolt for the exhaust and adjust it to hang lower.
Had issues with my Greddy Ti-C and clearance. I had to saw off part of right exhaust cut out, and i still have issues with the chrome/aluminum finisher. My dremel is not up to cutting the damn metal, so i will leave it off for now since i have work soon. I think i'll loosen up the bolt for the exhaust and adjust it to hang lower.
Lemme know, if you want I can pass thru, or meet up and bring my grinder, and Fein Multimaster if you need them.
#9090
09-13-2013, 01:30 PM
lol thanks. if anything i can remove the titanium tip off the greddy. i think its only attached by 3 small screws. i don't think it would affect the sound whatsoever.
mmm.... mugen fit shuttle front half spoiler for christmas... mmmm ... would cost about the same, since the shipping and the paint cost would even out. mugen spoiler would already come painted. just the shipping would hurt.
mmm.... mugen fit shuttle front half spoiler for christmas... mmmm ... would cost about the same, since the shipping and the paint cost would even out. mugen spoiler would already come painted. just the shipping would hurt.
Last edited by xxryu139xx; 09-13-2013 at 01:33 PM.
#9091
09-13-2013, 02:26 PM
Just bought
Kuo's Garage EBMC Bar (Engine Bay Master Cylinder) bar,
which basically a combo of Front Tower Strut Bar and Brake Master Cylinder Reinforcement Bracket (to prevent the soft pedal feel from firewall flex when you press the brake pedal hard)
This combine with a JDM Honda Civic Type R 1in brake master cylinder,
Full Mugen/Goodridge combo stainless steel braided brake line/hose
and upgraded front and rear disk brake (caliper/rotor/pads) should give the ULTIMATE feel for my brake pedal
FIT GE Engine Bay Master Cylinder stabilizer Strut Tower Bar ( EBMC Bar) -


and Kuo's garage Battery Tie Down Bar:
Battery Tie Down

Will take 3 weeks maximum Shipped directly from Taiwan
Kuo's Garage EBMC Bar (Engine Bay Master Cylinder) bar,
which basically a combo of Front Tower Strut Bar and Brake Master Cylinder Reinforcement Bracket (to prevent the soft pedal feel from firewall flex when you press the brake pedal hard)
This combine with a JDM Honda Civic Type R 1in brake master cylinder,
Full Mugen/Goodridge combo stainless steel braided brake line/hose
and upgraded front and rear disk brake (caliper/rotor/pads) should give the ULTIMATE feel for my brake pedal
FIT GE Engine Bay Master Cylinder stabilizer Strut Tower Bar ( EBMC Bar) -
and Kuo's garage Battery Tie Down Bar:
Battery Tie Down
Will take 3 weeks maximum Shipped directly from Taiwan
Last edited by BMW ALPINA; 09-13-2013 at 02:29 PM.


#9093
09-13-2013, 04:07 PM
Just bought
Kuo's Garage EBMC Bar (Engine Bay Master Cylinder) bar,
which basically a combo of Front Tower Strut Bar and Brake Master Cylinder Reinforcement Bracket (to prevent the soft pedal feel from firewall flex when you press the brake pedal hard)
This combine with a JDM Honda Civic Type R 1in brake master cylinder,
Full Mugen/Goodridge combo stainless steel braided brake line/hose
and upgraded front and rear disk brake (caliper/rotor/pads) should give the ULTIMATE feel for my brake pedal
FIT GE Engine Bay Master Cylinder stabilizer Strut Tower Bar ( EBMC Bar) -
Looks great. Do you have an overlay for your H emblem from Grafixpressions???
#9094
09-13-2013, 04:21 PM
Thank You MeatBaby,
I just read your previous post where you are having problem with the screw holding the rotor,
if I may suggest,
for the next rotor change, it is best to use the Impact ScrewDriver
like this one for example:

where you HAMMERED the screwdriver with a hammer which mean the shock/vibration help loosened the
screw and at the same time drove deeper to the screw grove so you won't strip the screw and
it also move the screw counter clockwise by each hammer blow...
or you can also use the Impact Power tools (which is even better)...
This way, you will not strip the head of the screw.
(Please take note that the amazon item above is just for example,
I bought that item and the bit that came with it is actually weaker than the Honda screw,
so don't buy the item above but just used it as example...
well I got cheap on this one only $16 shipped hahaha, I should buy a better impact screwdriver...,
yeah, I actually strip the socket bit that came with this impact screwdriver and the screw is fine...)...
also, those screw actually help center the rotor (beside the hub),
that is why Honda use 2 screw instead of one screw,
so if you can, it is best to always use the screw, so your rotor will be perfectly centered.
This screw actually enable you to upgrade to a larger/other Honda OEM rotor (but same PCD) which might have a larger center bore hole without the need of putting a hubcentric ring... and it will still be perfectly centered and balanced/no vibration.
edit:
also if you don't use the screw anymore, the thread (hole) on the hub will be corroded or filled with dirt from time to time,
and if somehow in the future you actually going to need to use it, the thread might be already broken...,
so it is best to use the screw again.
and applying an antiseize cream would help prevent it from seizing again later.
I just read your previous post where you are having problem with the screw holding the rotor,
if I may suggest,
for the next rotor change, it is best to use the Impact ScrewDriver
like this one for example:
where you HAMMERED the screwdriver with a hammer which mean the shock/vibration help loosened the
screw and at the same time drove deeper to the screw grove so you won't strip the screw and
it also move the screw counter clockwise by each hammer blow...
or you can also use the Impact Power tools (which is even better)...
This way, you will not strip the head of the screw.
(Please take note that the amazon item above is just for example,
I bought that item and the bit that came with it is actually weaker than the Honda screw,
so don't buy the item above but just used it as example...
well I got cheap on this one only $16 shipped hahaha, I should buy a better impact screwdriver...,
yeah, I actually strip the socket bit that came with this impact screwdriver and the screw is fine...)...
also, those screw actually help center the rotor (beside the hub),
that is why Honda use 2 screw instead of one screw,
so if you can, it is best to always use the screw, so your rotor will be perfectly centered.
This screw actually enable you to upgrade to a larger/other Honda OEM rotor (but same PCD) which might have a larger center bore hole without the need of putting a hubcentric ring... and it will still be perfectly centered and balanced/no vibration.
edit:
also if you don't use the screw anymore, the thread (hole) on the hub will be corroded or filled with dirt from time to time,
and if somehow in the future you actually going to need to use it, the thread might be already broken...,
so it is best to use the screw again.
and applying an antiseize cream would help prevent it from seizing again later.
Last edited by BMW ALPINA; 09-13-2013 at 04:58 PM.

#9096
09-13-2013, 04:47 PM
picked up my bumper from the dealer this morning and installed it right away.
Before:

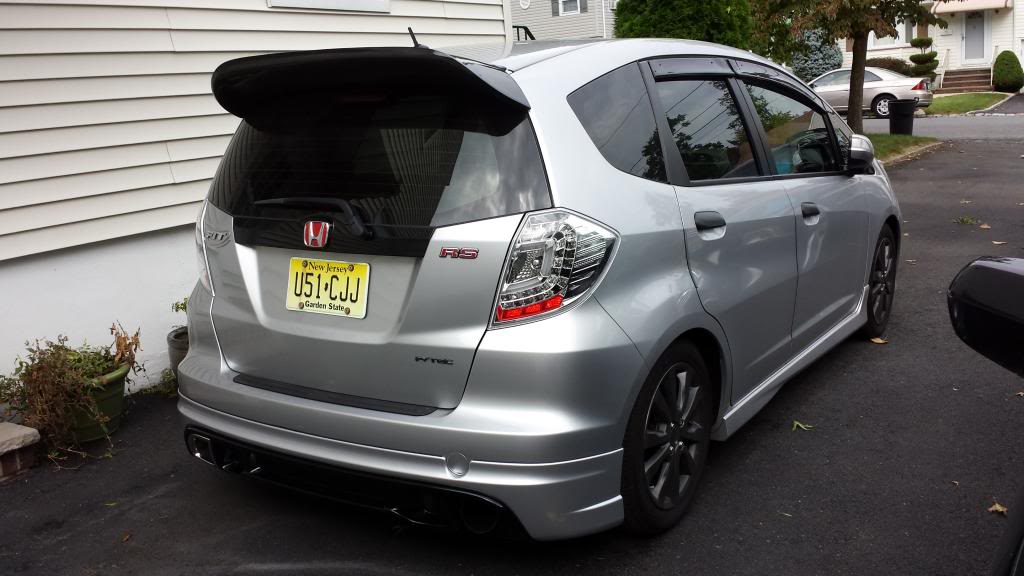
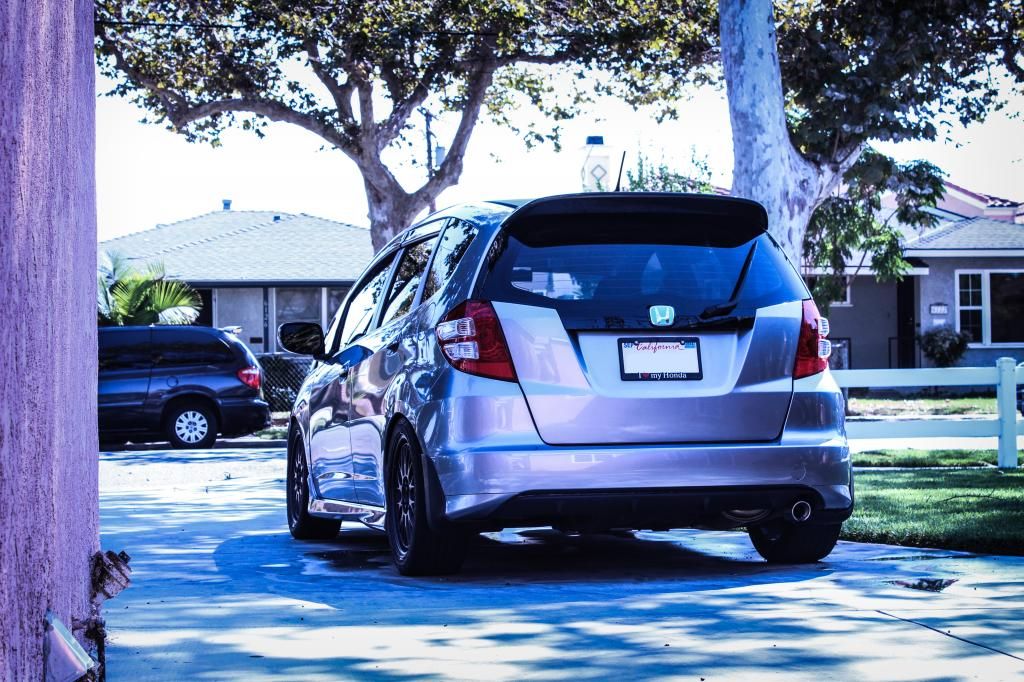
After:
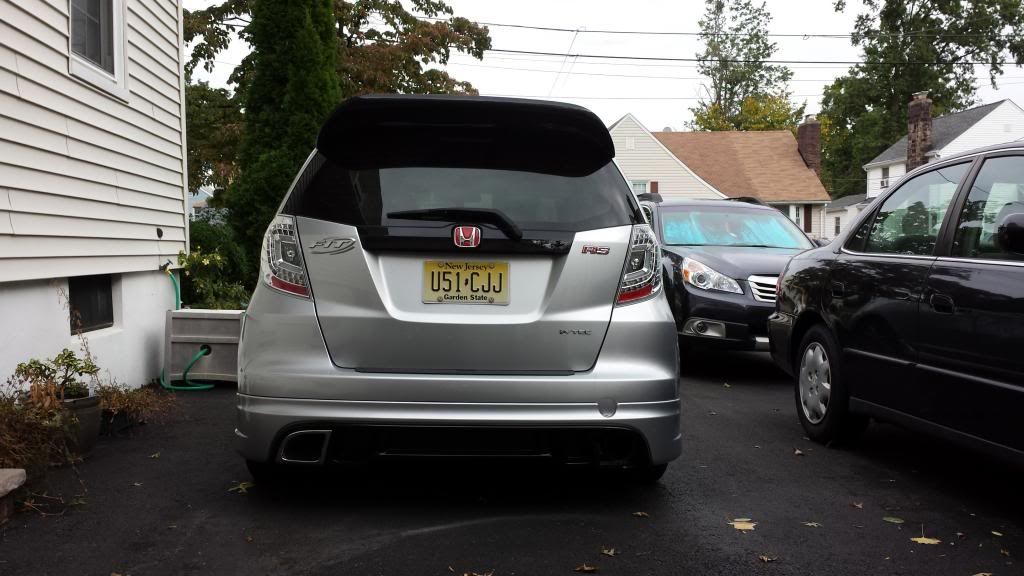
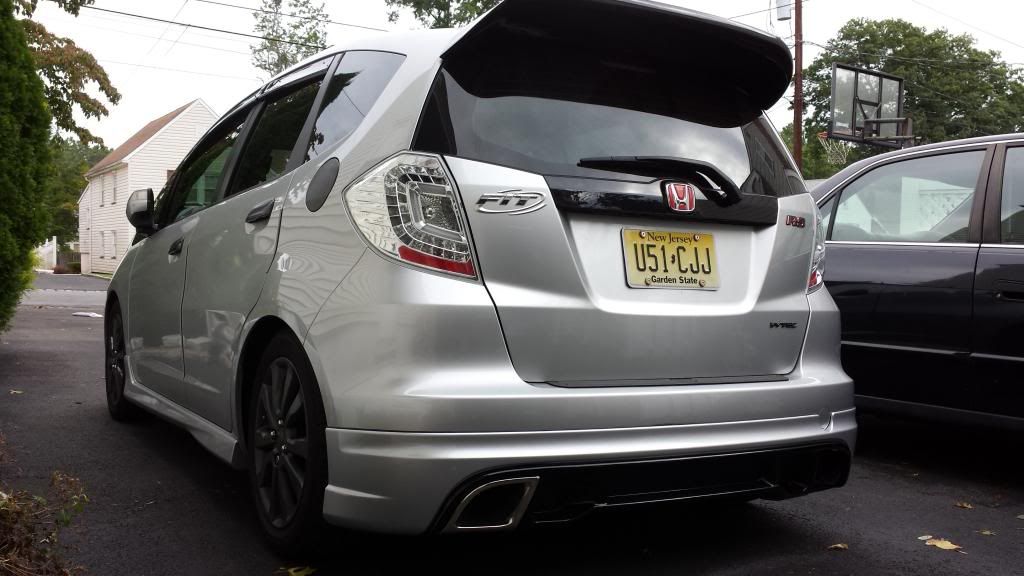

Had issues with my Greddy Ti-C and clearance. I had to saw off part of right exhaust cut out, and i still have issues with the chrome/aluminum finisher. My dremel is not up to cutting the damn metal, so i will leave it off for now since i have work soon. I think i'll loosen up the bolt for the exhaust and adjust it to hang lower.
Before:
After:
Had issues with my Greddy Ti-C and clearance. I had to saw off part of right exhaust cut out, and i still have issues with the chrome/aluminum finisher. My dremel is not up to cutting the damn metal, so i will leave it off for now since i have work soon. I think i'll loosen up the bolt for the exhaust and adjust it to hang lower.
Thanks for posting this. It looks awesome especially with the axis tails. I'm officially sold on the mugen rear lip.
#9097
09-13-2013, 05:24 PM
Thank You MeatBaby,
I just read your previous post where you are having problem with the screw holding the rotor,
if I may suggest,
for the next rotor change, it is best to use the Impact ScrewDriver
like this one for example:
1/2 inch Impact Screwdriver Set with Case and Phillips and slotted bits with 1-3/8" and 15/16" shanks (six bits total) - Amazon.com
where you HAMMERED the screwdriver with a hammer which mean the shock/vibration help loosened the
screw and at the same time drove deeper to the screw grove so you won't strip the screw and
it also move the screw counter clockwise by each hammer blow...
or you can also use the Impact Power tools (which is even better)...
This way, you will not strip the head of the screw.
(Please take note that the amazon item above is just for example,
I bought that item and the bit that came with it is actually weaker than the Honda screw,
so don't buy the item above but just used it as example...
well I got cheap on this one only $16 shipped hahaha, I should buy a better impact screwdriver...,
yeah, I actually strip the socket bit that came with this impact screwdriver and the screw is fine...)...
also, those screw actually help center the rotor (beside the hub),
that is why Honda use 2 screw instead of one screw,
so if you can, it is best to always use the screw, so your rotor will be perfectly centered.
This screw actually enable you to upgrade to a larger/other Honda OEM rotor (but same PCD) which might have a larger center bore hole without the need of putting a hubcentric ring... and it will still be perfectly centered and balanced/no vibration.
edit:
also if you don't use the screw anymore, the thread (hole) on the hub will be corroded or filled with dirt from time to time,
and if somehow in the future you actually going to need to use it, the thread might be already broken...,
so it is best to use the screw again.
and applying an antiseize cream would help prevent it from seizing again later.
Make sure to post pics once your strut/brake master bar and battery tie down are installed.
#9099
09-13-2013, 10:44 PM

hi can i ask what rims younhave on? any suggestions on my one.. im planning to change the stock tyres but got no idea what size to change em.. help!

#9100
09-14-2013, 12:21 AM
Thanks for the suggestion. I did actually have an impact driver like the one you pictured (just a hand tool, not powered or pneumatic). That still didn't do it. Perhaps a pneumatic tool would've done the job, but I don't own one and wasn't gonna buy one just for this, and then have it still possibly not work.
I have found that when removing these screws with a hammer impact to set the tool to tighten first give it a couple of whacks then turn it to remove. Worked every time for me.
ps: found this out by mistake set it wrong first then discovered the mistake. Worked so good I tried it on the other side and do it all the time now.