
Action Jackson's tinkering


Aliexpress : Genuine Leather Red Line Shift Knob Cover & Handbrake Cover for Honda Fit 2014 Jazz Automatic-in Gear Shift Collars from Automobiles & Motorcycles on Aliexpress.com | Alibaba Group
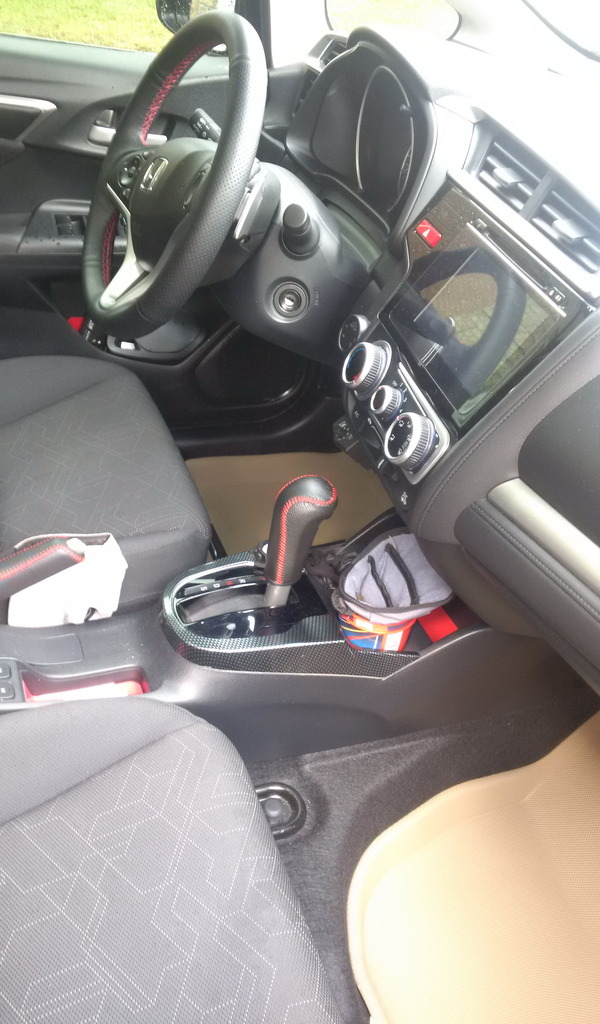
The CVT cover didn't fit perfectly. I had to use the thin double sided tape from the steering wheel cover to make it fit.
You can also get these:
http://www.aliexpress.com/item/XuJi-...08.0.46.h3KTXR
http://www.aliexpress.com/item/XuJi-...08.0.51.h3KTXR
http://www.aliexpress.com/item/Car-C...9-2529b2cf8f14
Last edited by Action Jackson; Jun 21, 2016 at 06:52 PM.
The big squeaky block of styrene foam seems likely to contribute to lowering road noise. Notice more noise with it out? Perhaps you could leave it in, under the plywood, or perhaps even better, glue styrene foam (the kind used behind the vinyl siding used for buildings) to the bottom of the plywood - completely cover the bottom of the plywood except for the part that is outside the tirewell - so that you will have insulation completely covering the tirewell - including around the outside of the tire - an area that the original sqeaky block didn't cover.
If I wanted to eliminate road noise, I'd lined the wheel well with sound insulation. As it stands, I listen at volumes that makes most of the road noise irrelevant, but I do understand what you are saying.

Member
Joined: Jul 2016
Posts: 65
From: longueuil, quebec, canada

hello action jackson , do you think the leather rap for the steering can fit on the 2016 dx ? , also you seems to modefied a lot of things , do you know if is really complex to change the head unit , i have a alpine single din with an amplifier that i remoove from my corolla ...
hello action jackson , do you think the leather rap for the steering can fit on the 2016 dx ? , also you seems to modefied a lot of things , do you know if is really complex to change the head unit , i have a alpine single din with an amplifier that i remoove from my corolla ...
I've kept the factory 7" screen and upgraded the rest of the audio, so I can't comment on what a single DIN system would be like, but you'd lose a lot of built in functionality.
Member
Joined: Jul 2016
Posts: 65
From: longueuil, quebec, canada
i dont know what built in functionality the 5" dx radio have ,
the rear camera : well i think i could live whitout
bluetoot + the steering button : i have already bluetoot on my alpine
so i would loose the steering button fonctionality , i can live also whit that
my alpine is a ida-x305 with amp
i am a little bit audio geek and plan to put componant speakers with tweeter
maybe if i have acces to trip computer like the one on the 7" i would reconsider
Last edited by fred9000; Jul 26, 2016 at 03:49 PM.

New Member
Joined: Nov 2016
Posts: 13
From: Dekalb, IL

Hello,
Good job on the leather wrapping! Where did you get this JDM hazard light? Also, do you have a guide on how to install it?
Thank you
I got the button from eBay. It's been awhile, but I think that I was able to pull the vent away (after removing the gauge cluster trim) to get access to the hazard switch.
That, or I had to pop out the screen a bit, when I upgraded the sound system. I believe, that it was a single bolt, that is accessible, from the bottom, once the cigarette lighter panel was popped out, and maybe, part of the dash panel, to the left of the AC controls.
New Member
Joined: Nov 2016
Posts: 13
From: Dekalb, IL
Thanks! I couldn't stand a thin steering wheel.
I got the button from eBay. It's been awhile, but I think that I was able to pull the vent away (after removing the gauge cluster trim) to get access to the hazard switch.
That, or I had to pop out the screen a bit, when I upgraded the sound system. I believe, that it was a single bolt, that is accessible, from the bottom, once the cigarette lighter panel was popped out, and maybe, part of the dash panel, to the left of the AC controls.
Thanks


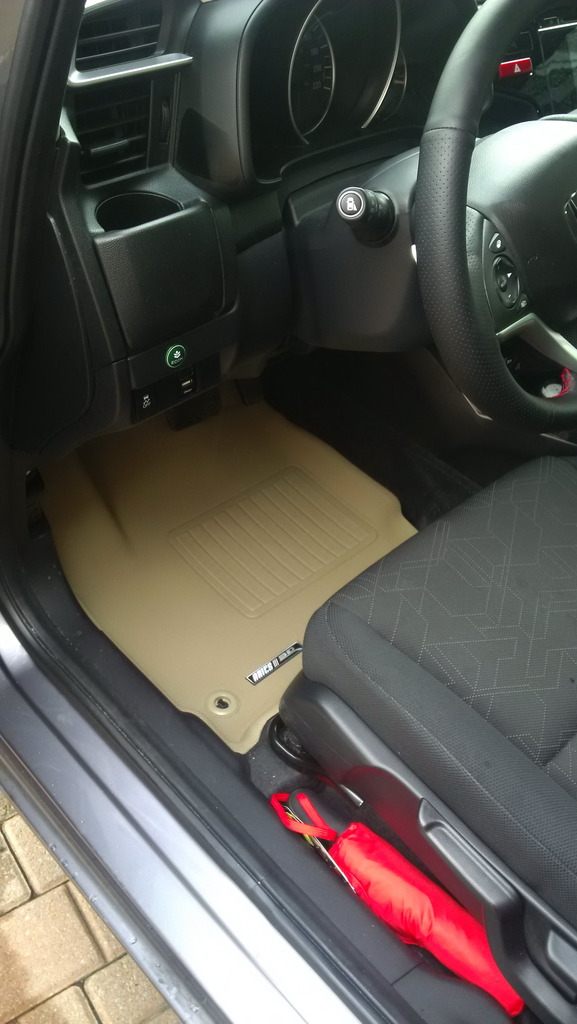
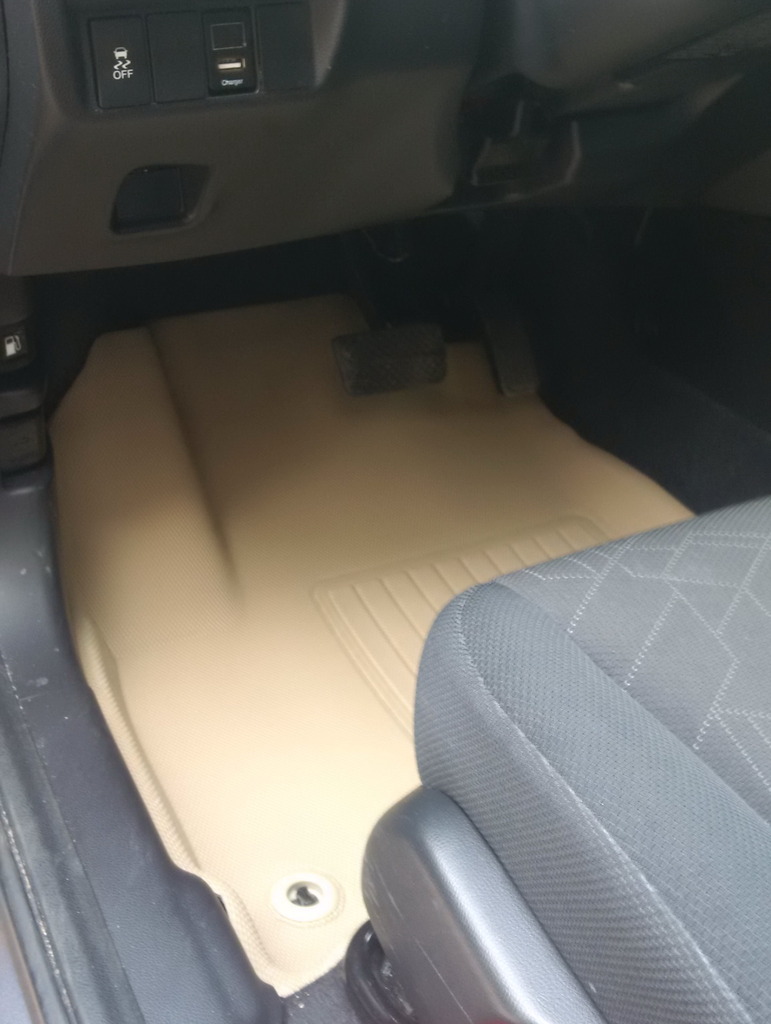
Aries 3D Tan Mats
Got these recently. This dull color is actually THE tan color.
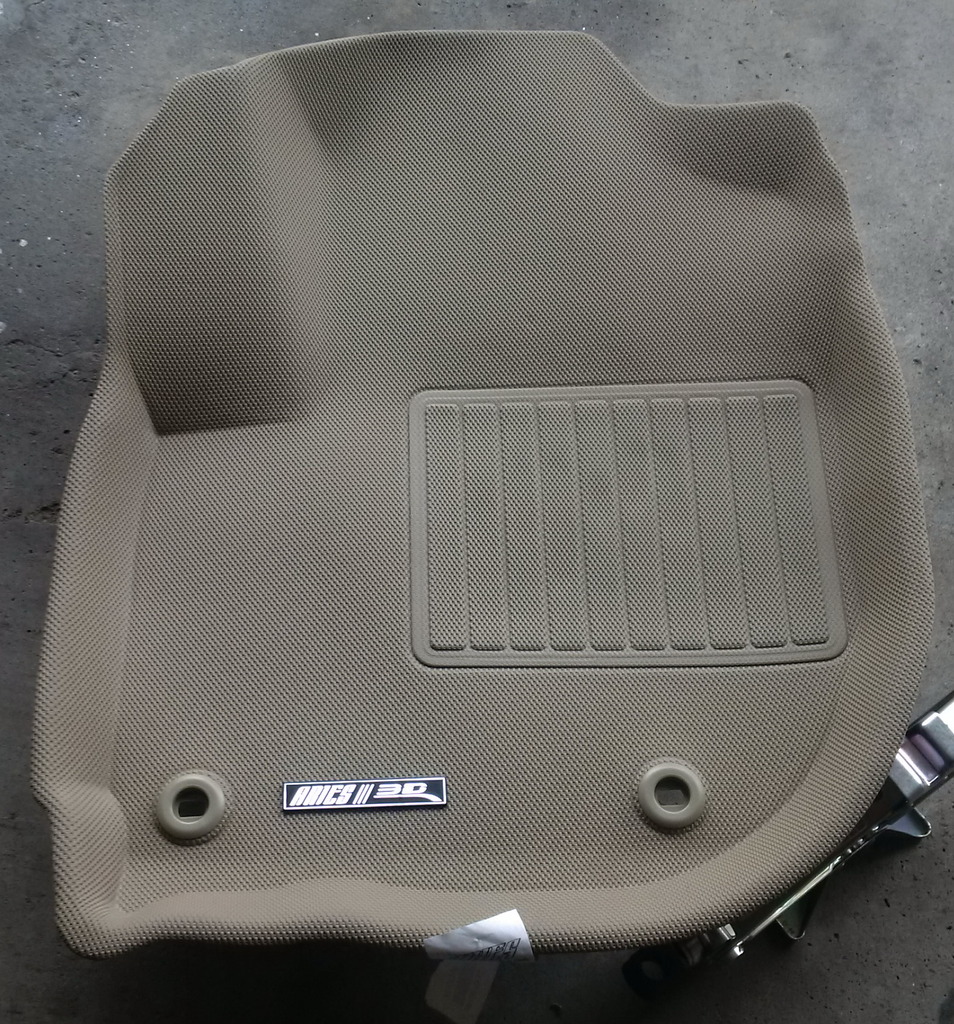
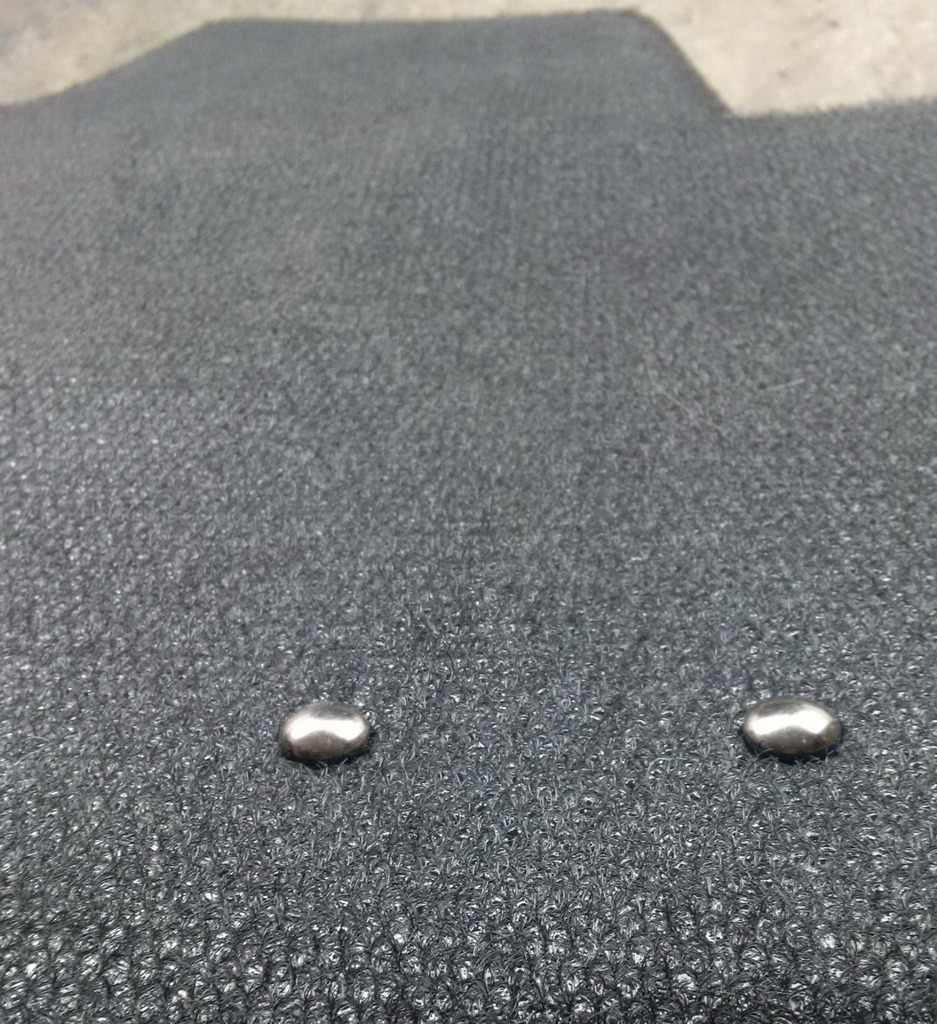
I can't believe that Aries thought that it was a good idea to put rivets through the nearly 'waterproof' mats:
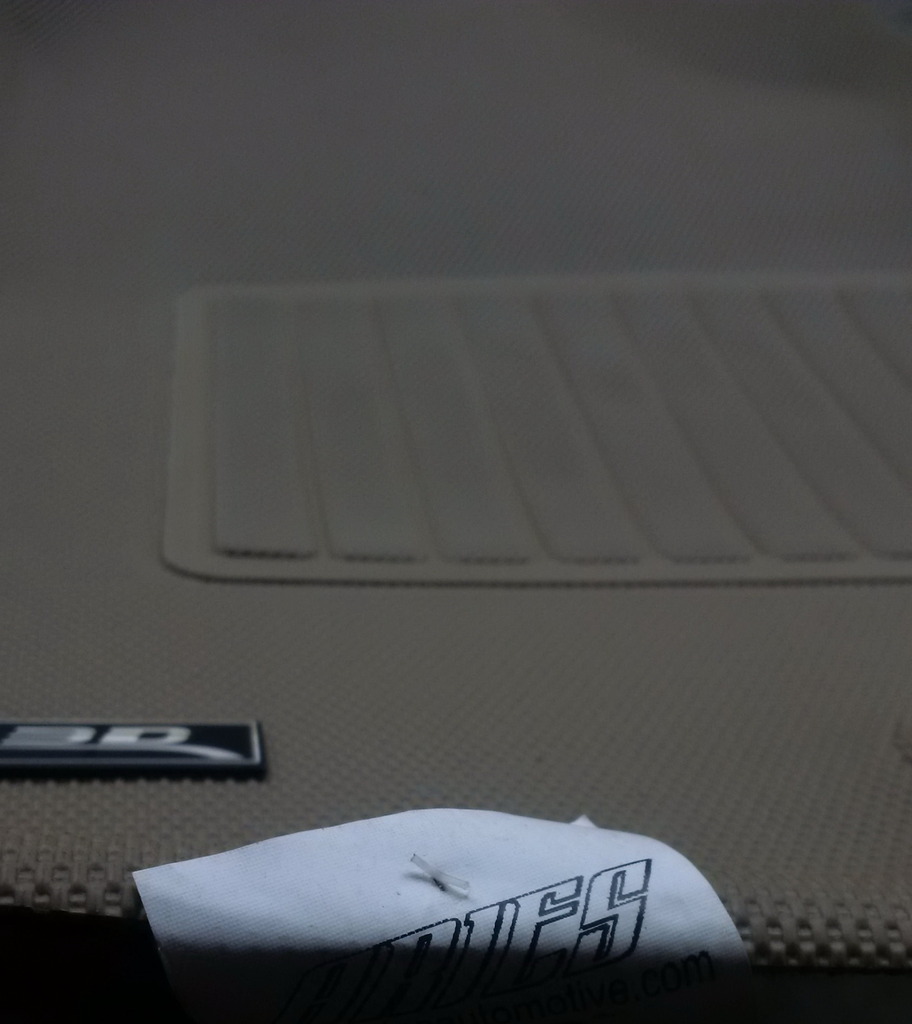
At least someone was considerate enough to puncture the tags on the upper part of the lip:
This color is way too light. It's actually darker than this:
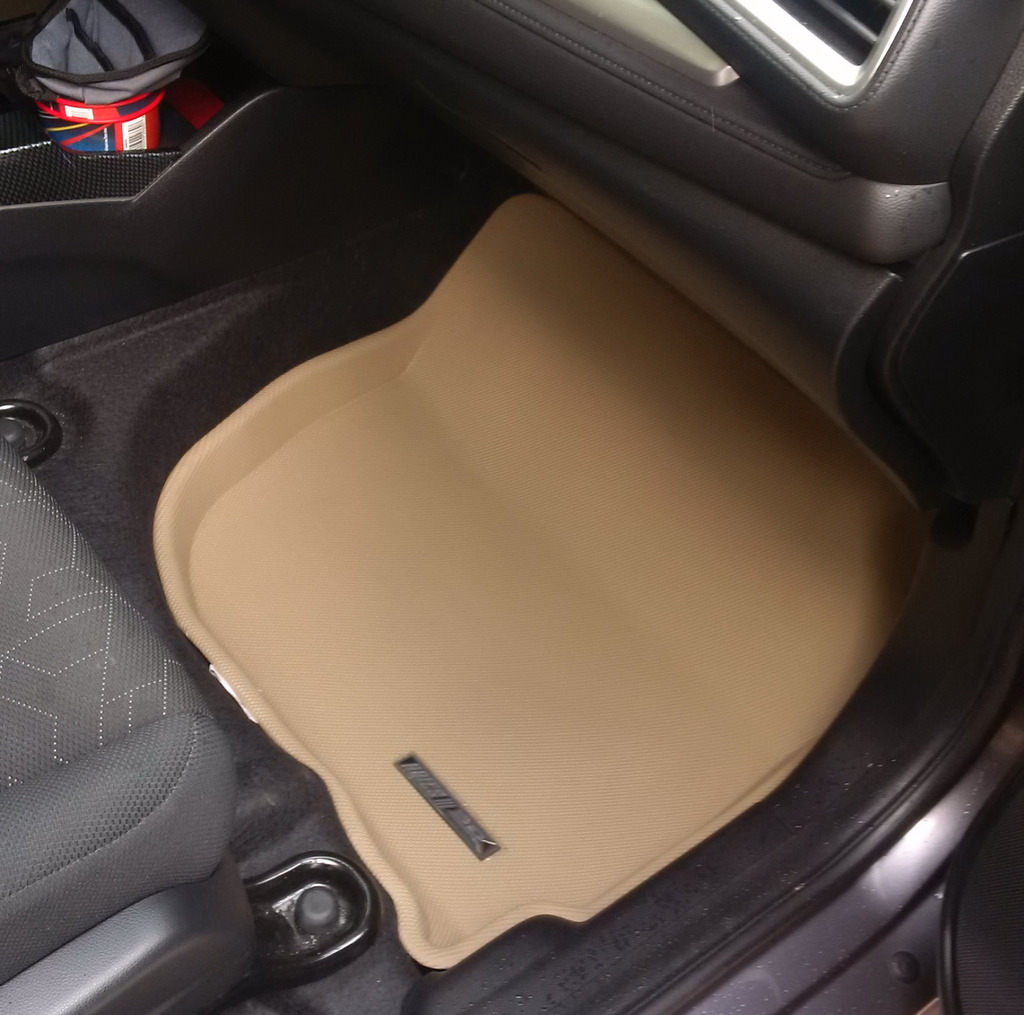
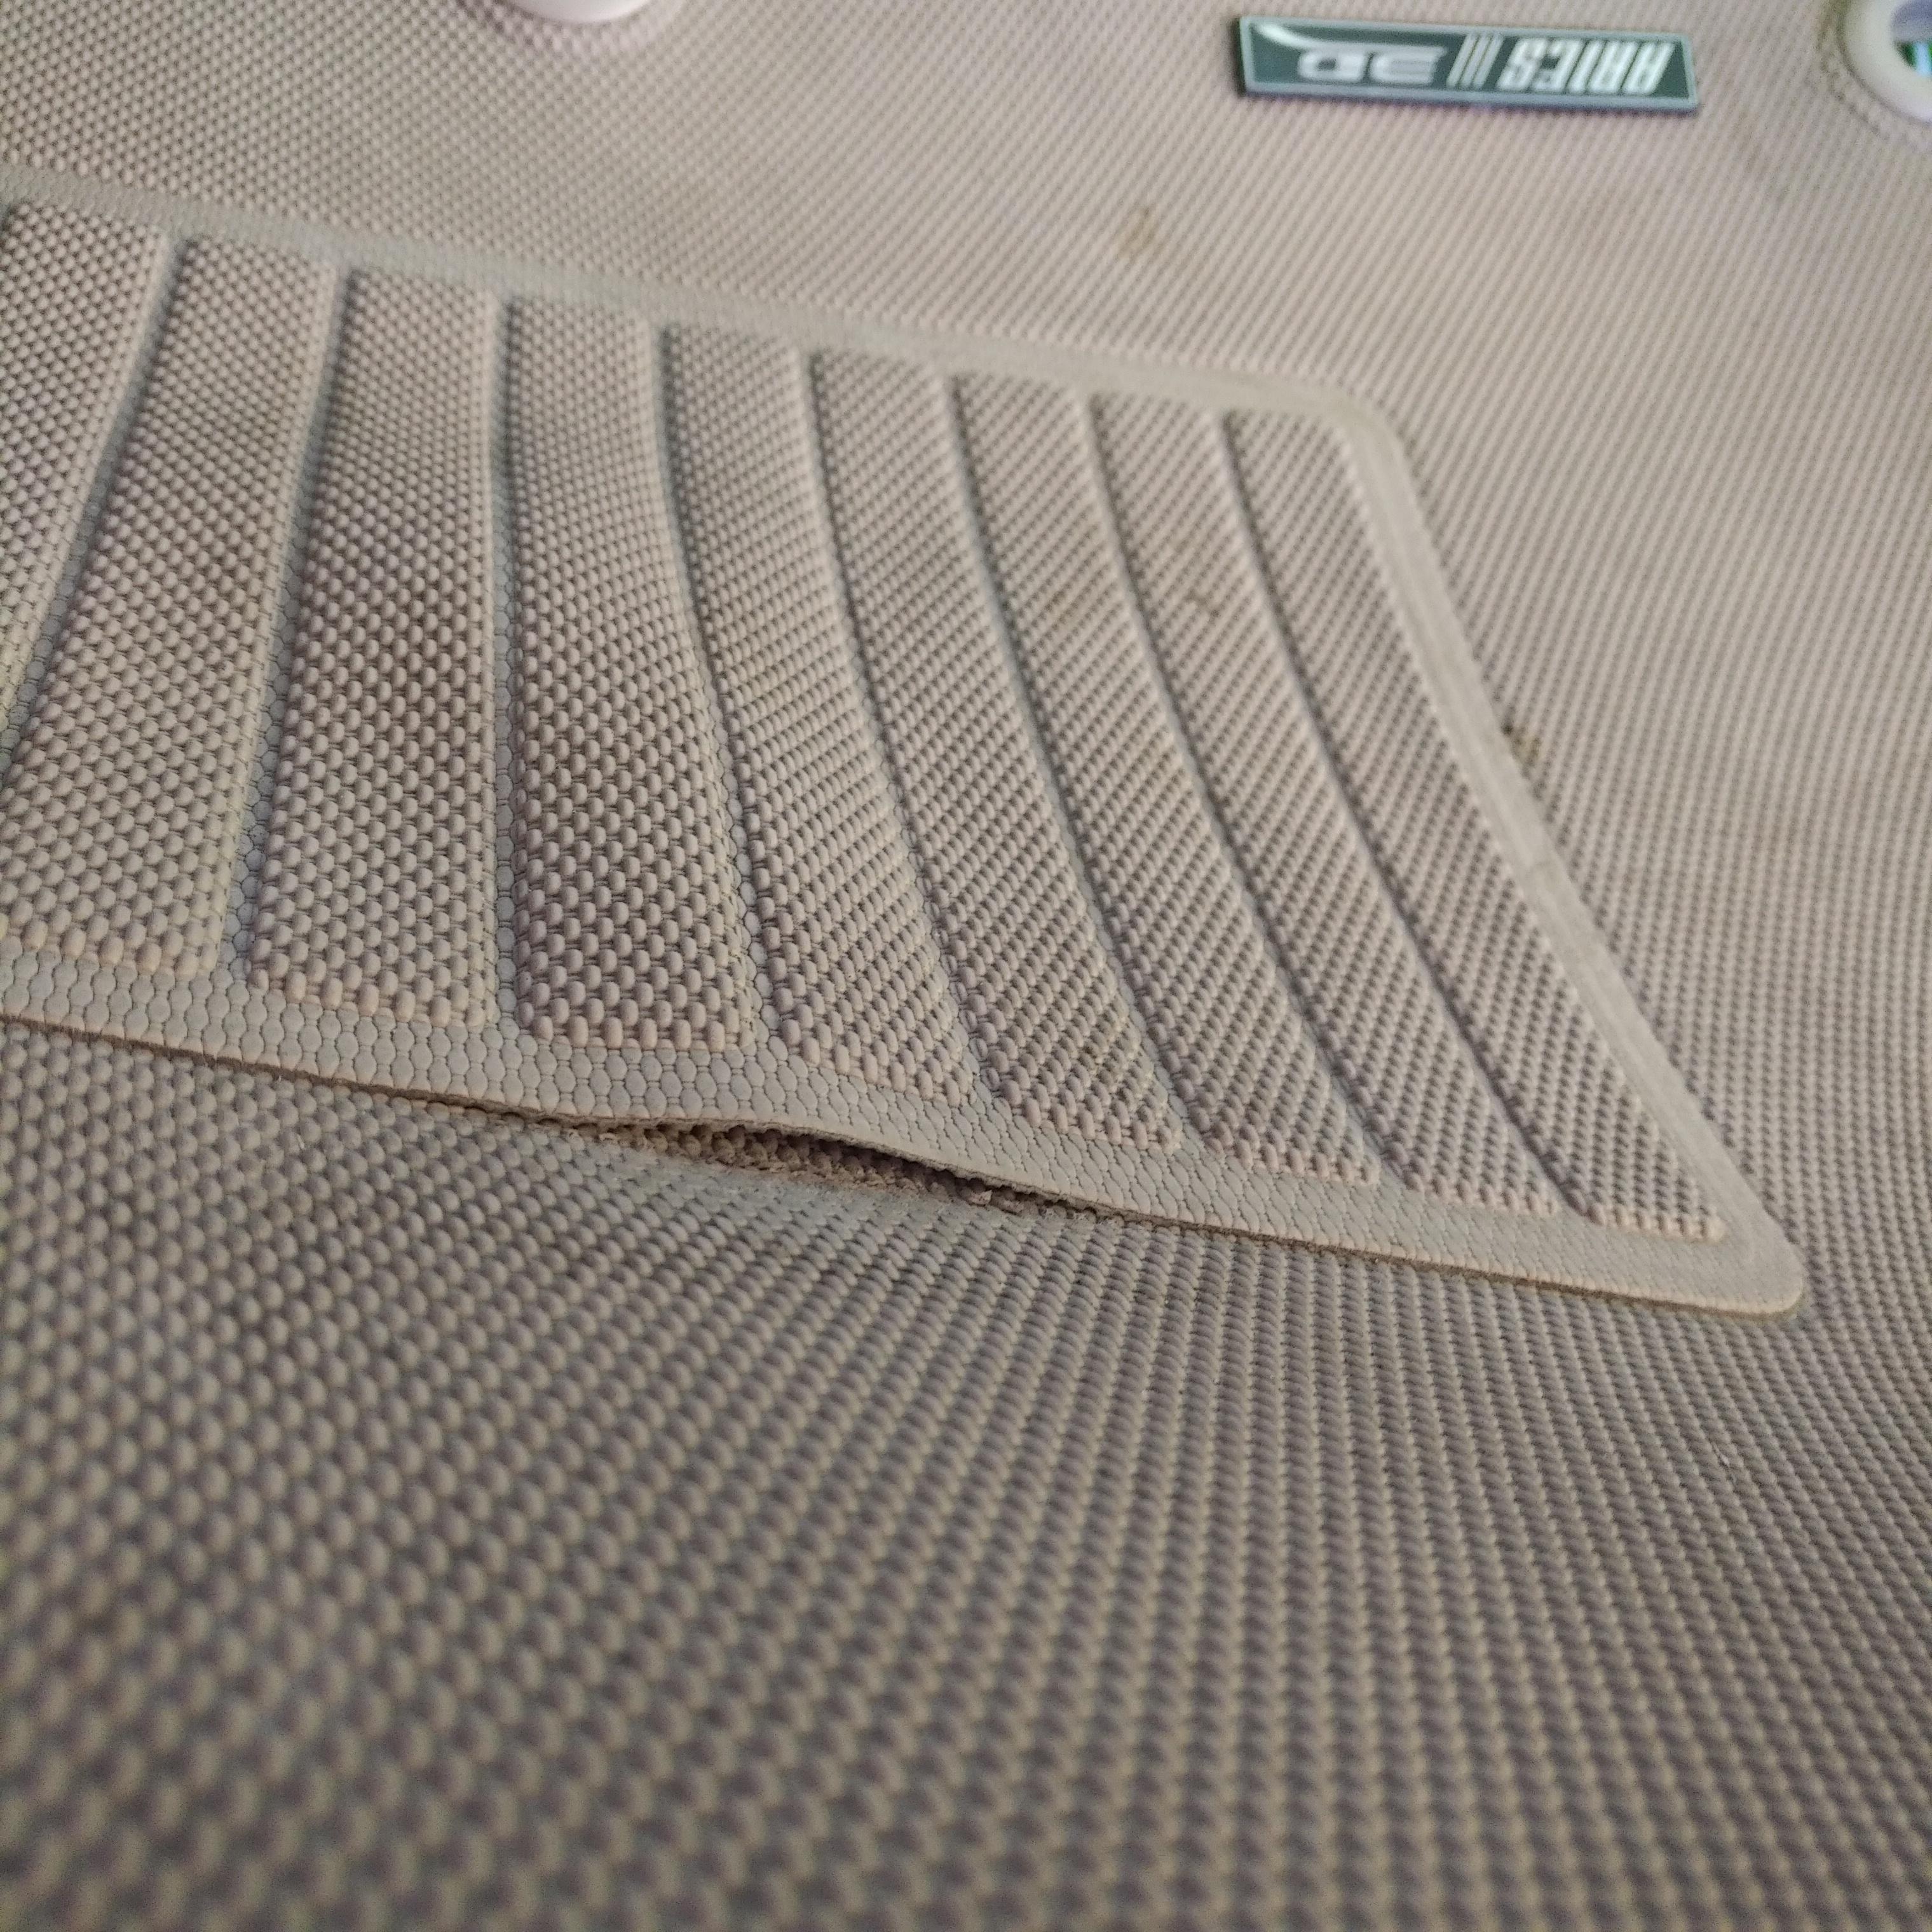
Heel section came undone. Fixed with clear shoe goo.

I can't believe that Aries thought that it was a good idea to put rivets through the nearly 'waterproof' mats:

At least someone was considerate enough to puncture the tags on the upper part of the lip:

This color is way too light. It's actually darker than this:


Heel section came undone. Fixed with clear shoe goo.
Last edited by Action Jackson; Mar 3, 2019 at 10:37 AM.

I purchased it after seeing it on this thread:
https://www.fitfreak.net/forums/3rd-...cessories.html
I barely used it, and have since sold it.
Pillar Lights with Brake and Turn Signal Function


The above is the right turn signal wire. Use this green to the pillar light signal (red).

The above is the left tail light wire bundle.

The above is another picture of the left side tail light bundle. You can see where I tapped into the green wire for the brake light.

The above is the left brake light wires. Use this green to both of the pillar light brake (yellow and green)

The above is the left turn signal wire. Use this yellow to the pillar turn signal (red).

The above shows my alternative to drilling a new hole. I removed this "guide pin" from the pillar light assembly.

The above shows that with the "guide pin" removed, the pillar light is still water sealed. I taped the wires to reduce chaffing. Extra wiring added, and all feed into the OEM rubber covering between the body and rear hatch door.

The above shows the OEM female counterpart to the "guide pin".

The above shows the damage to the gasket when removed. If you have suspected water leaks, this thin gasket may be the culprit. I had to splice some of the pillar light wires to fit them into the hole, as the connectors do not fit in the hole. I used duct tape to seal over the hole, although I may use something else later on.

Finally, I used some O-rings to prevent excessive movement and vibration. I may switch to flat rubber washers.
After a couple of years, clearcoat flaked off.
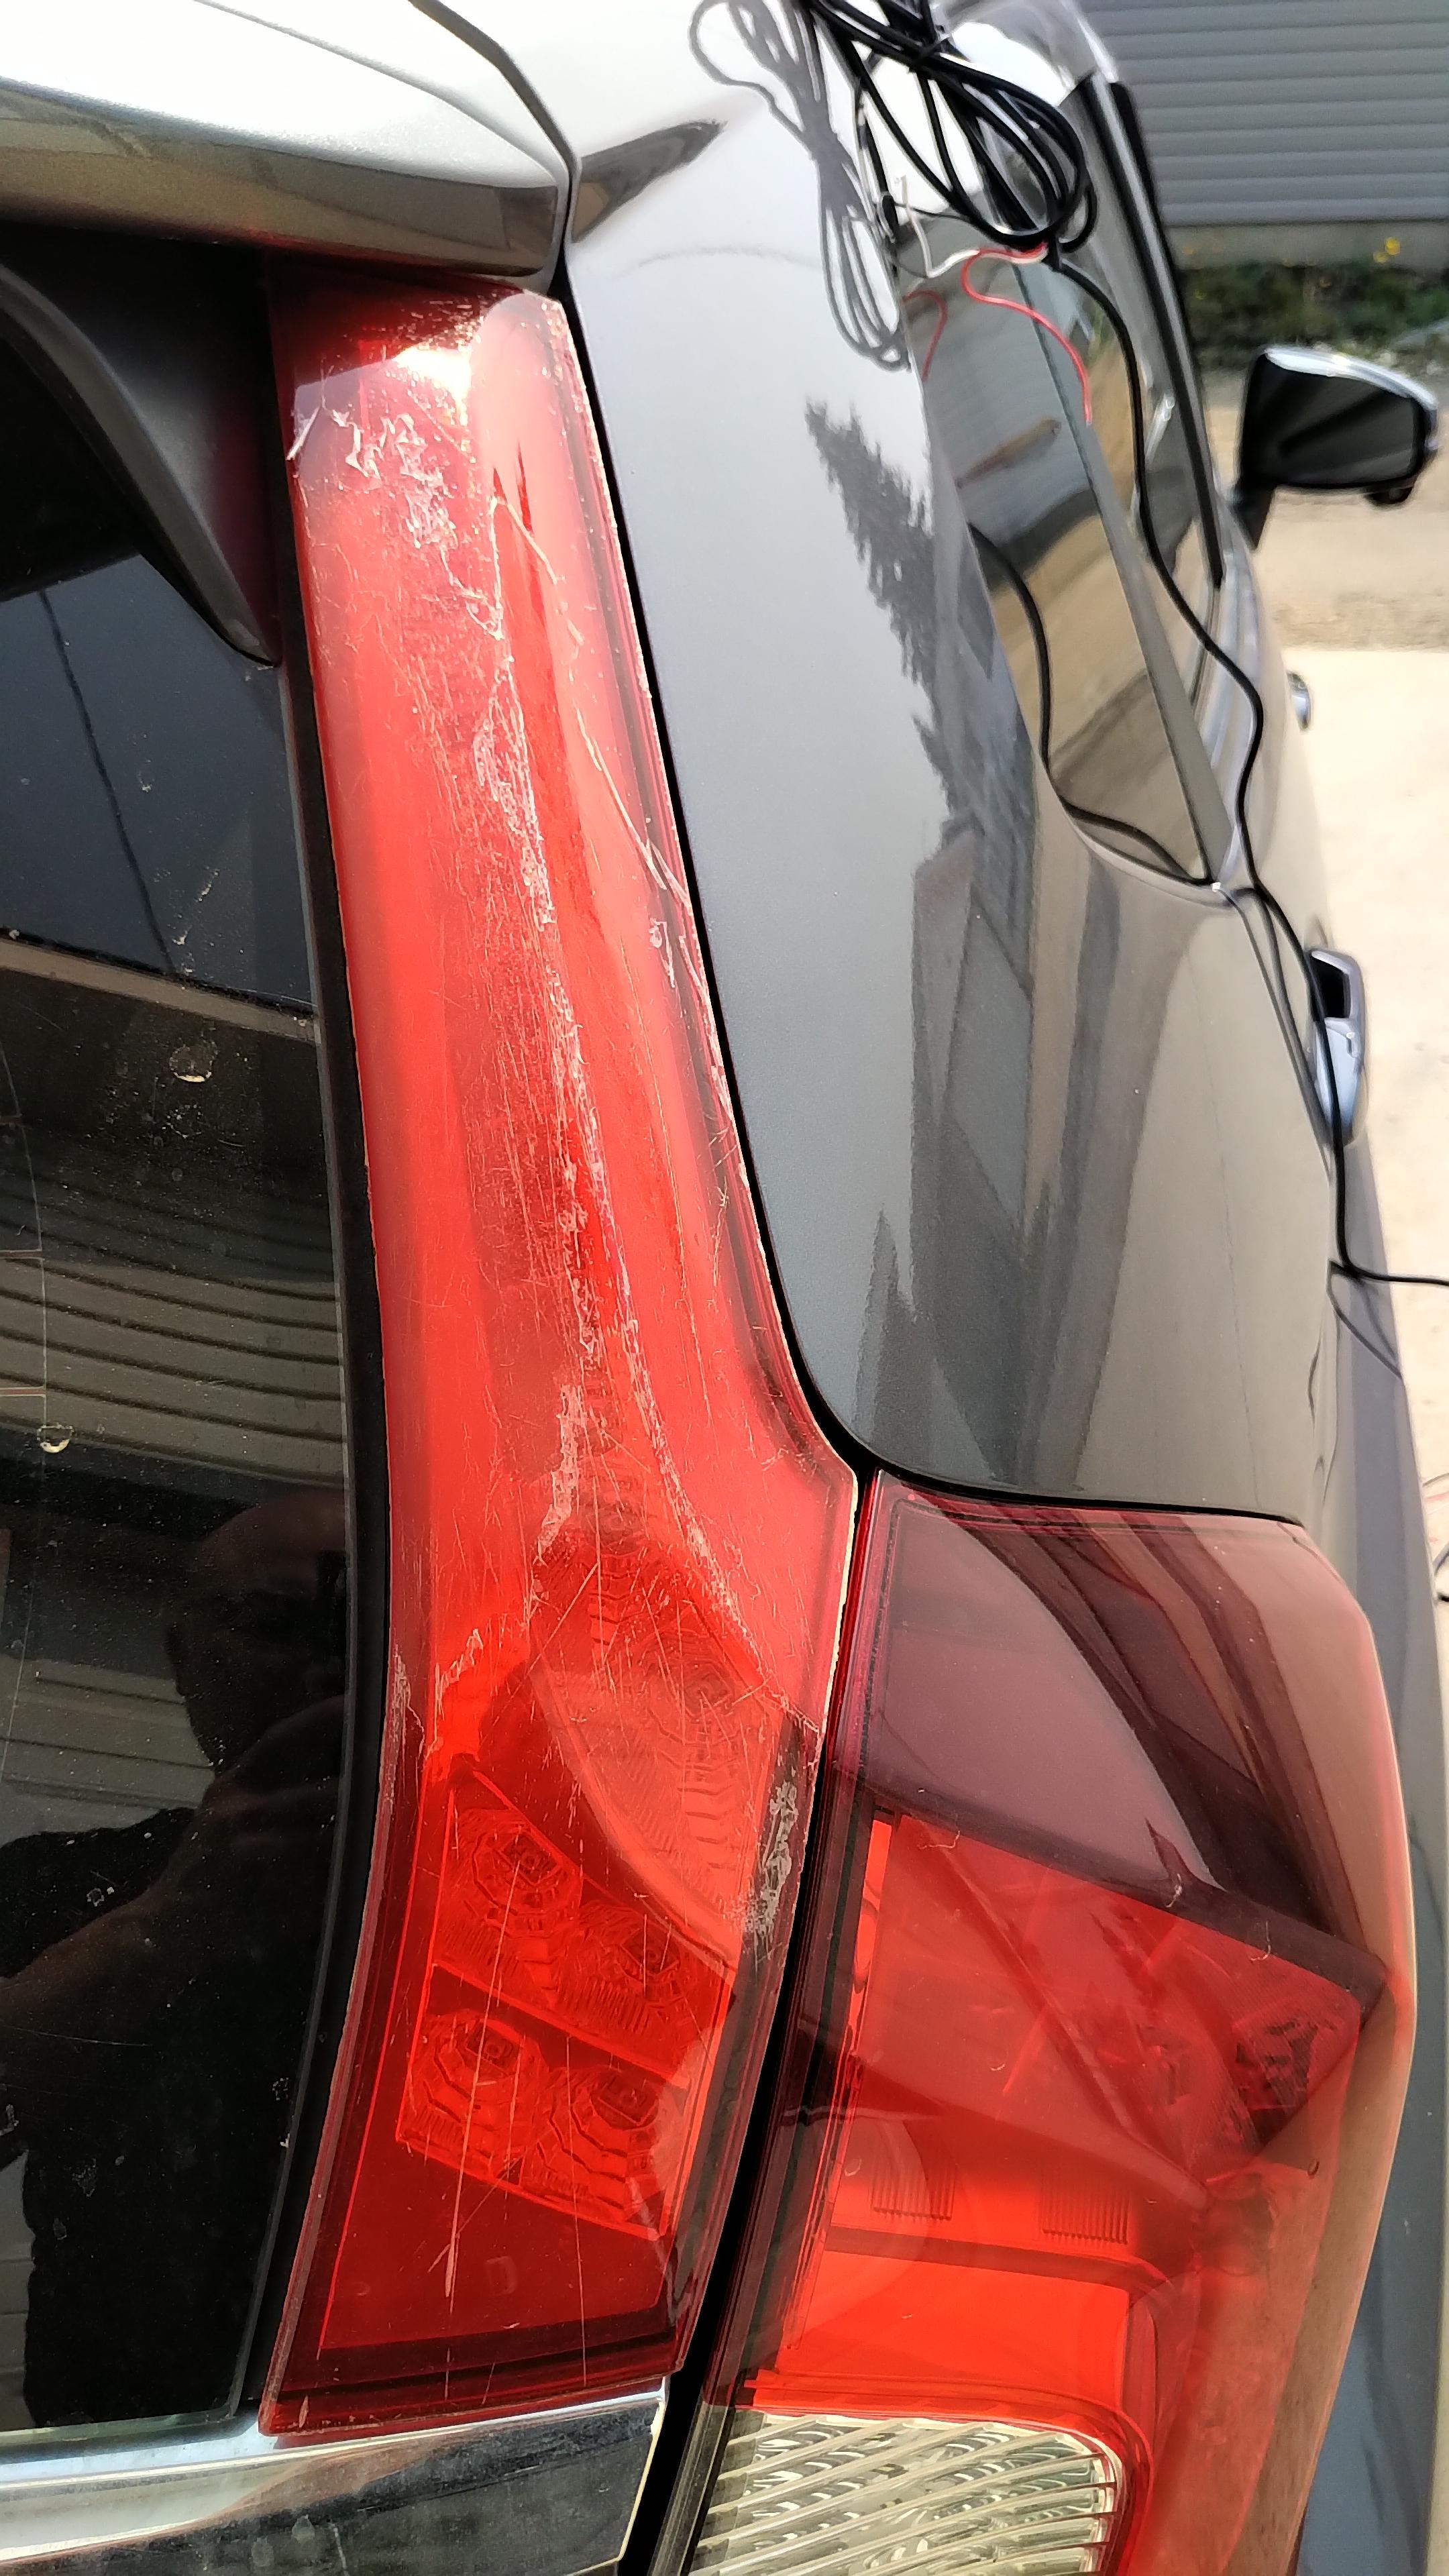
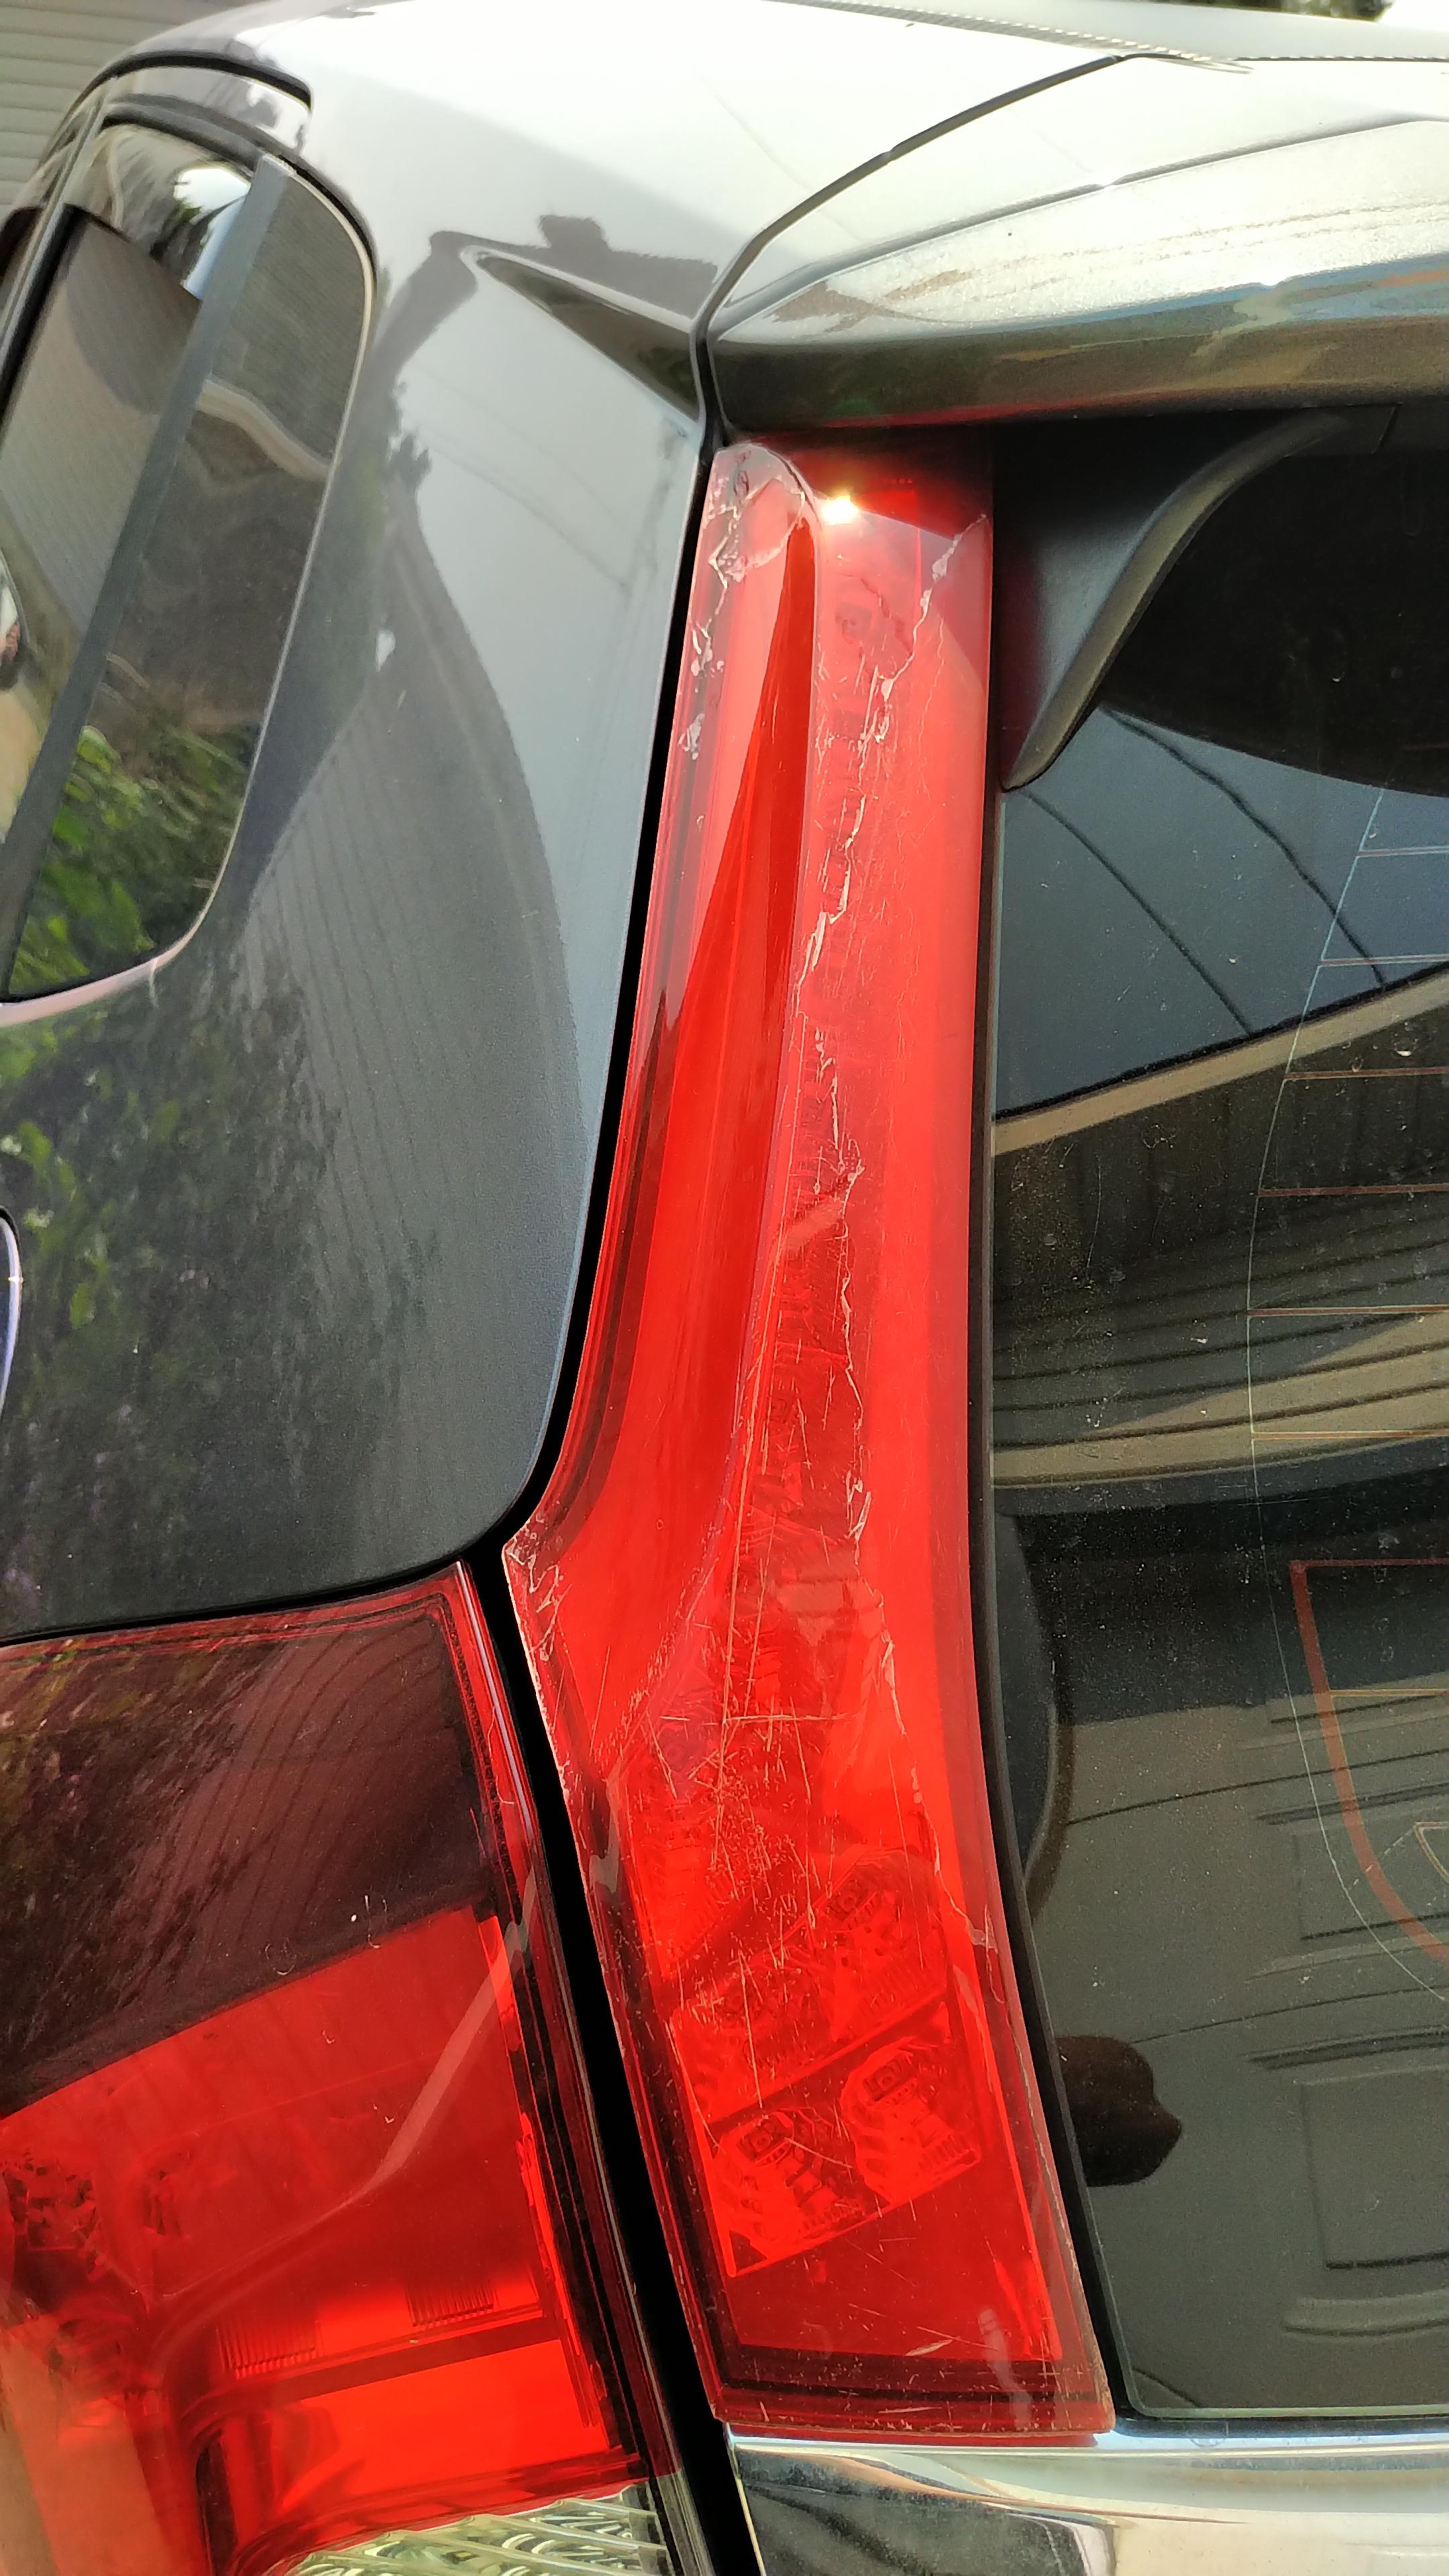
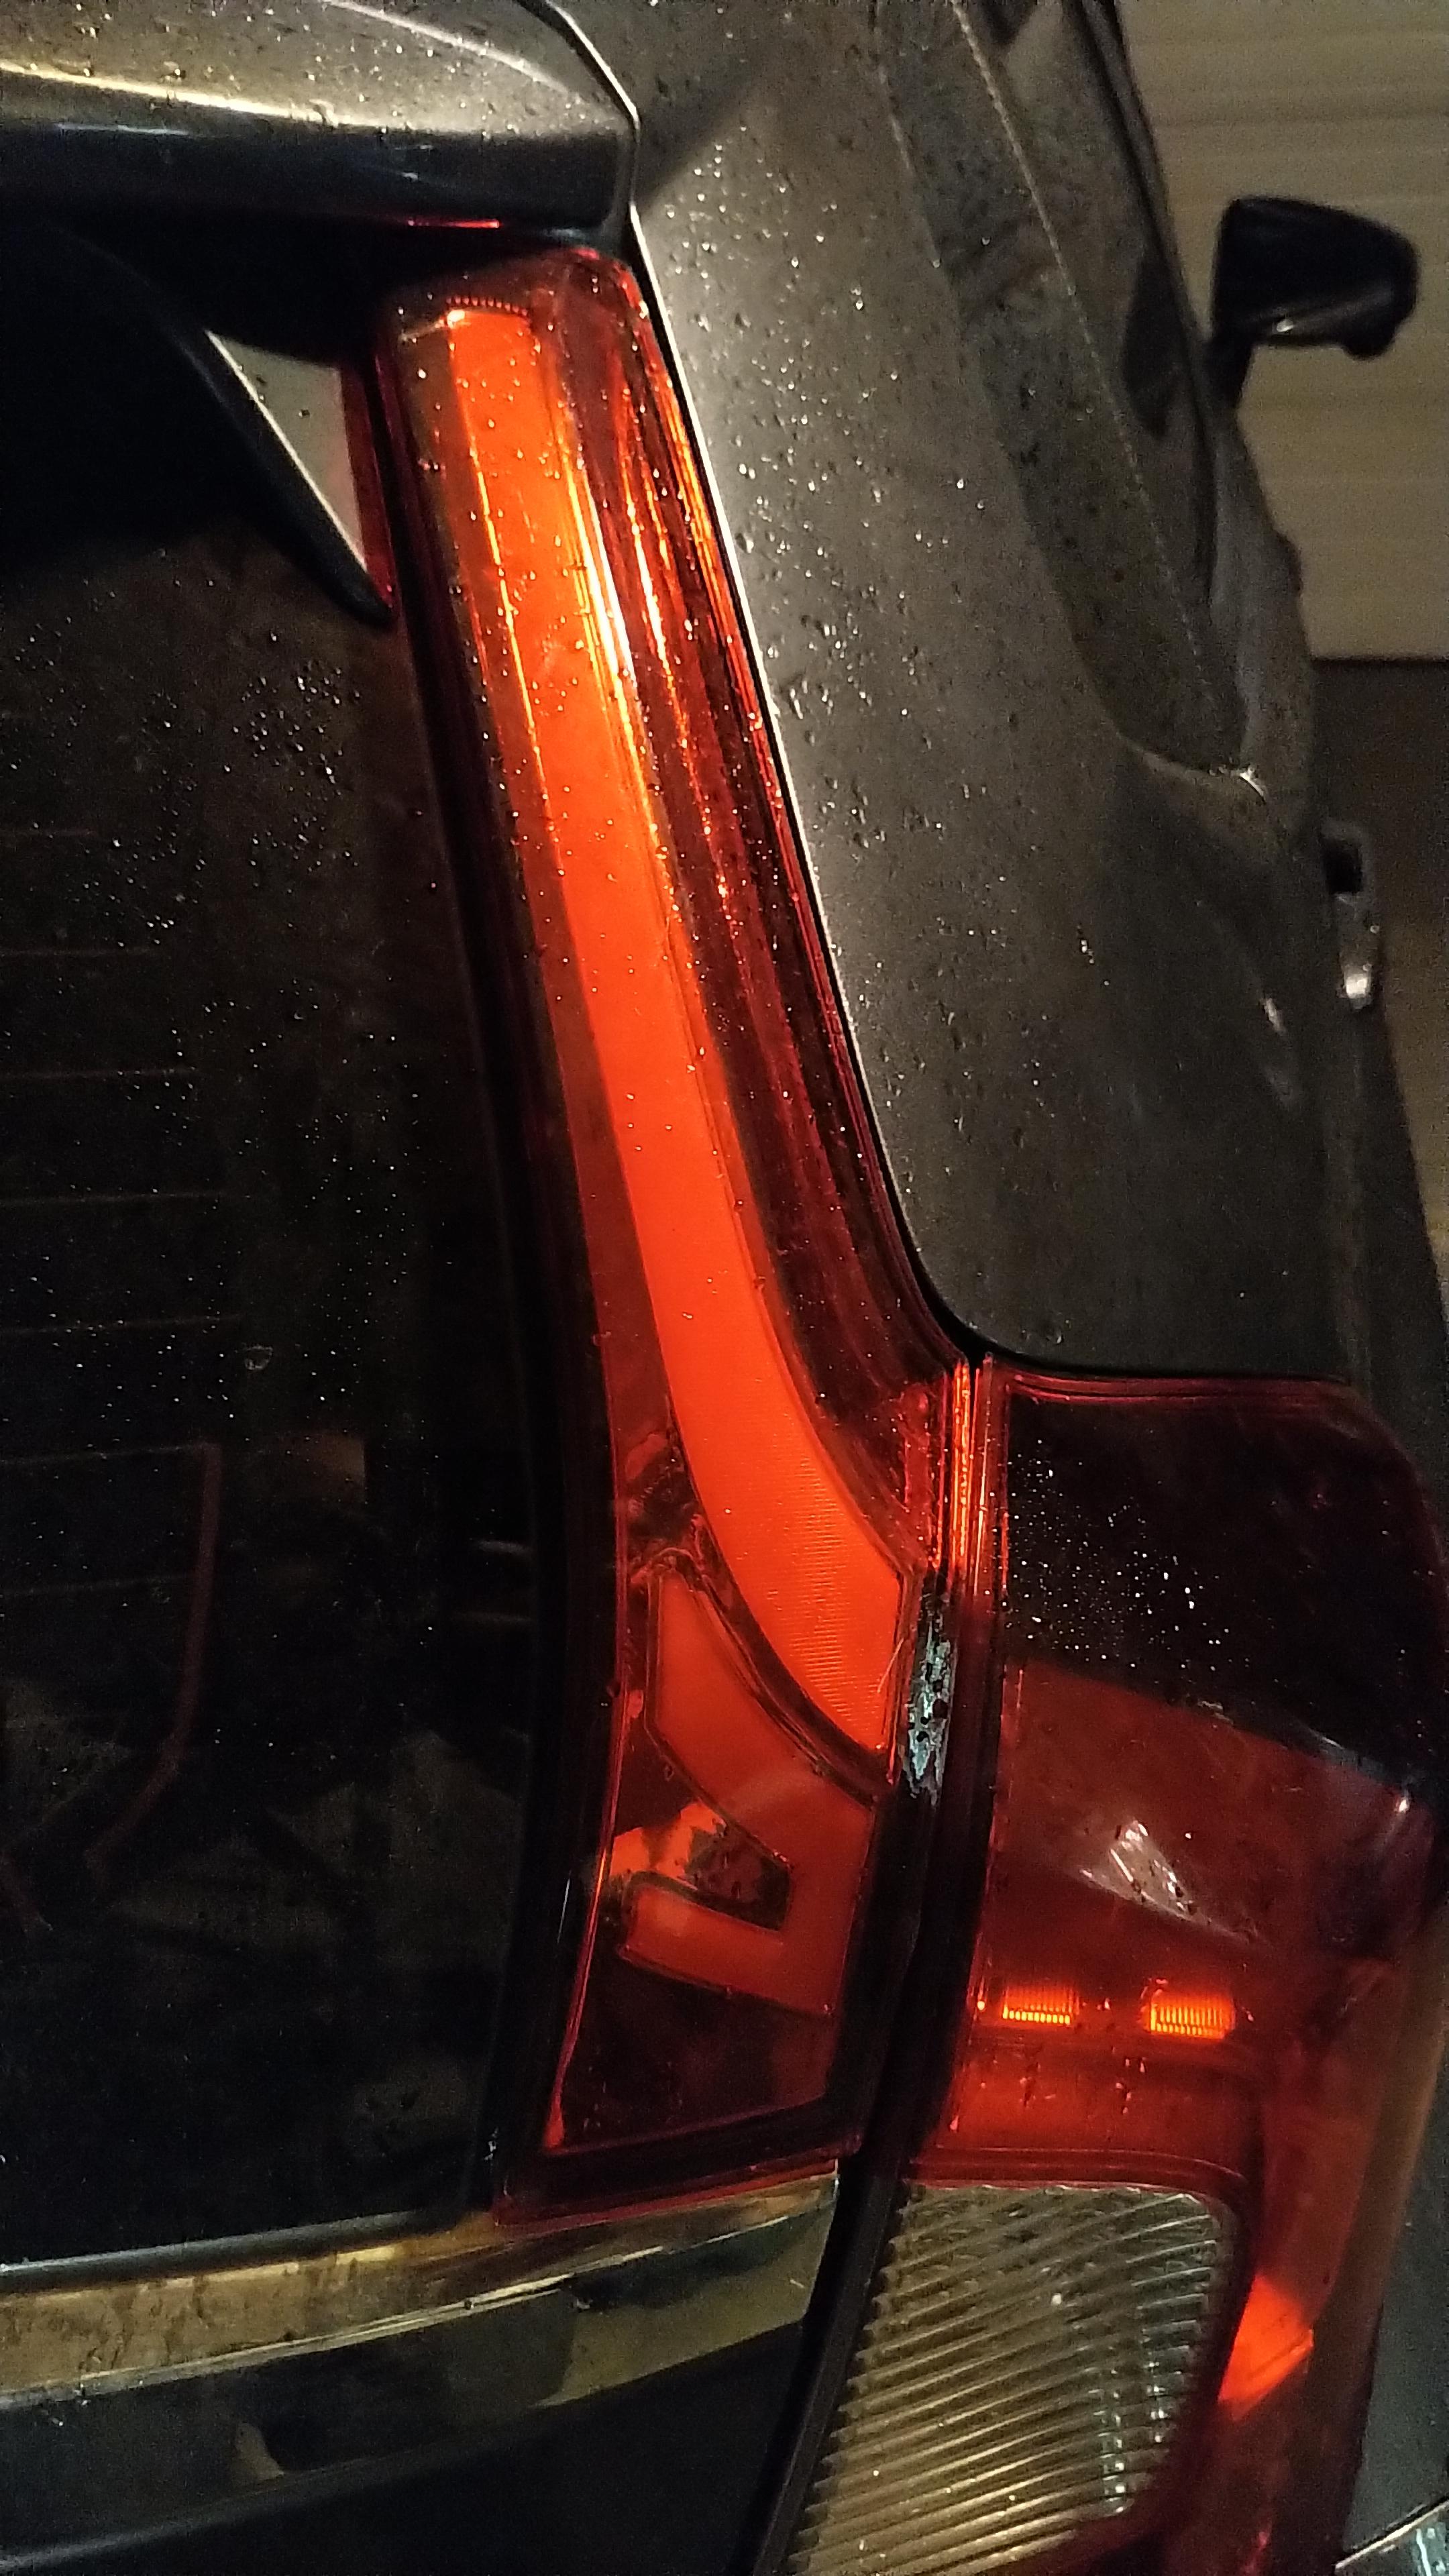
Replaced with COB version and 3M clear protected.
Last edited by Action Jackson; Aug 17, 2021 at 08:35 PM.

Added some 3M clear protection to where a roof rack mounting points would go, and to the front, rear and side of fender for kayak tie downs.
Also used Vvivid carbon fibre vinyl to do the roof, and smudge magnet points - front cowl, and the side pillars.
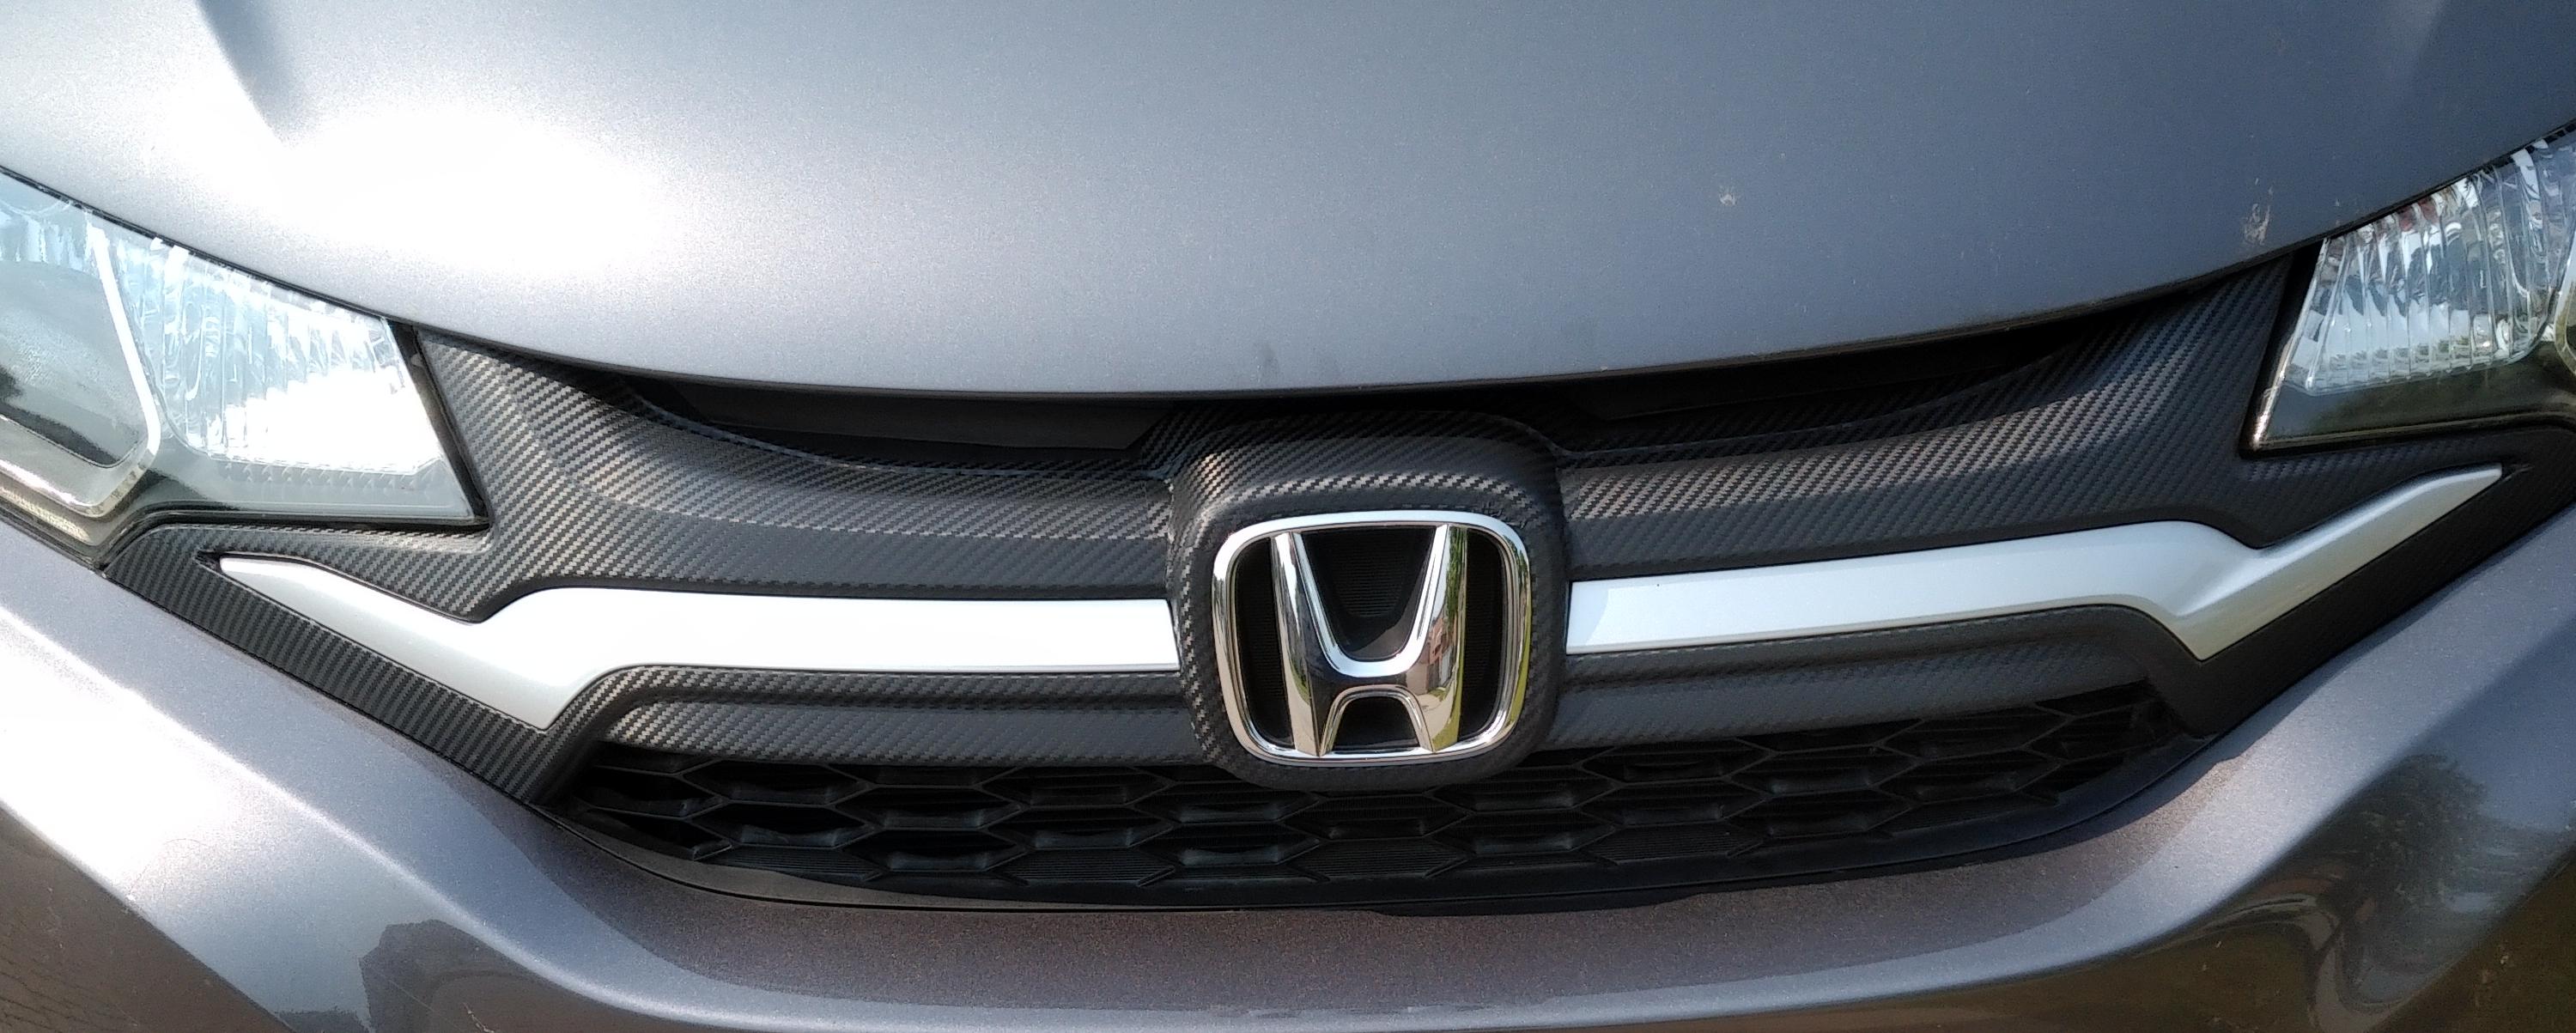
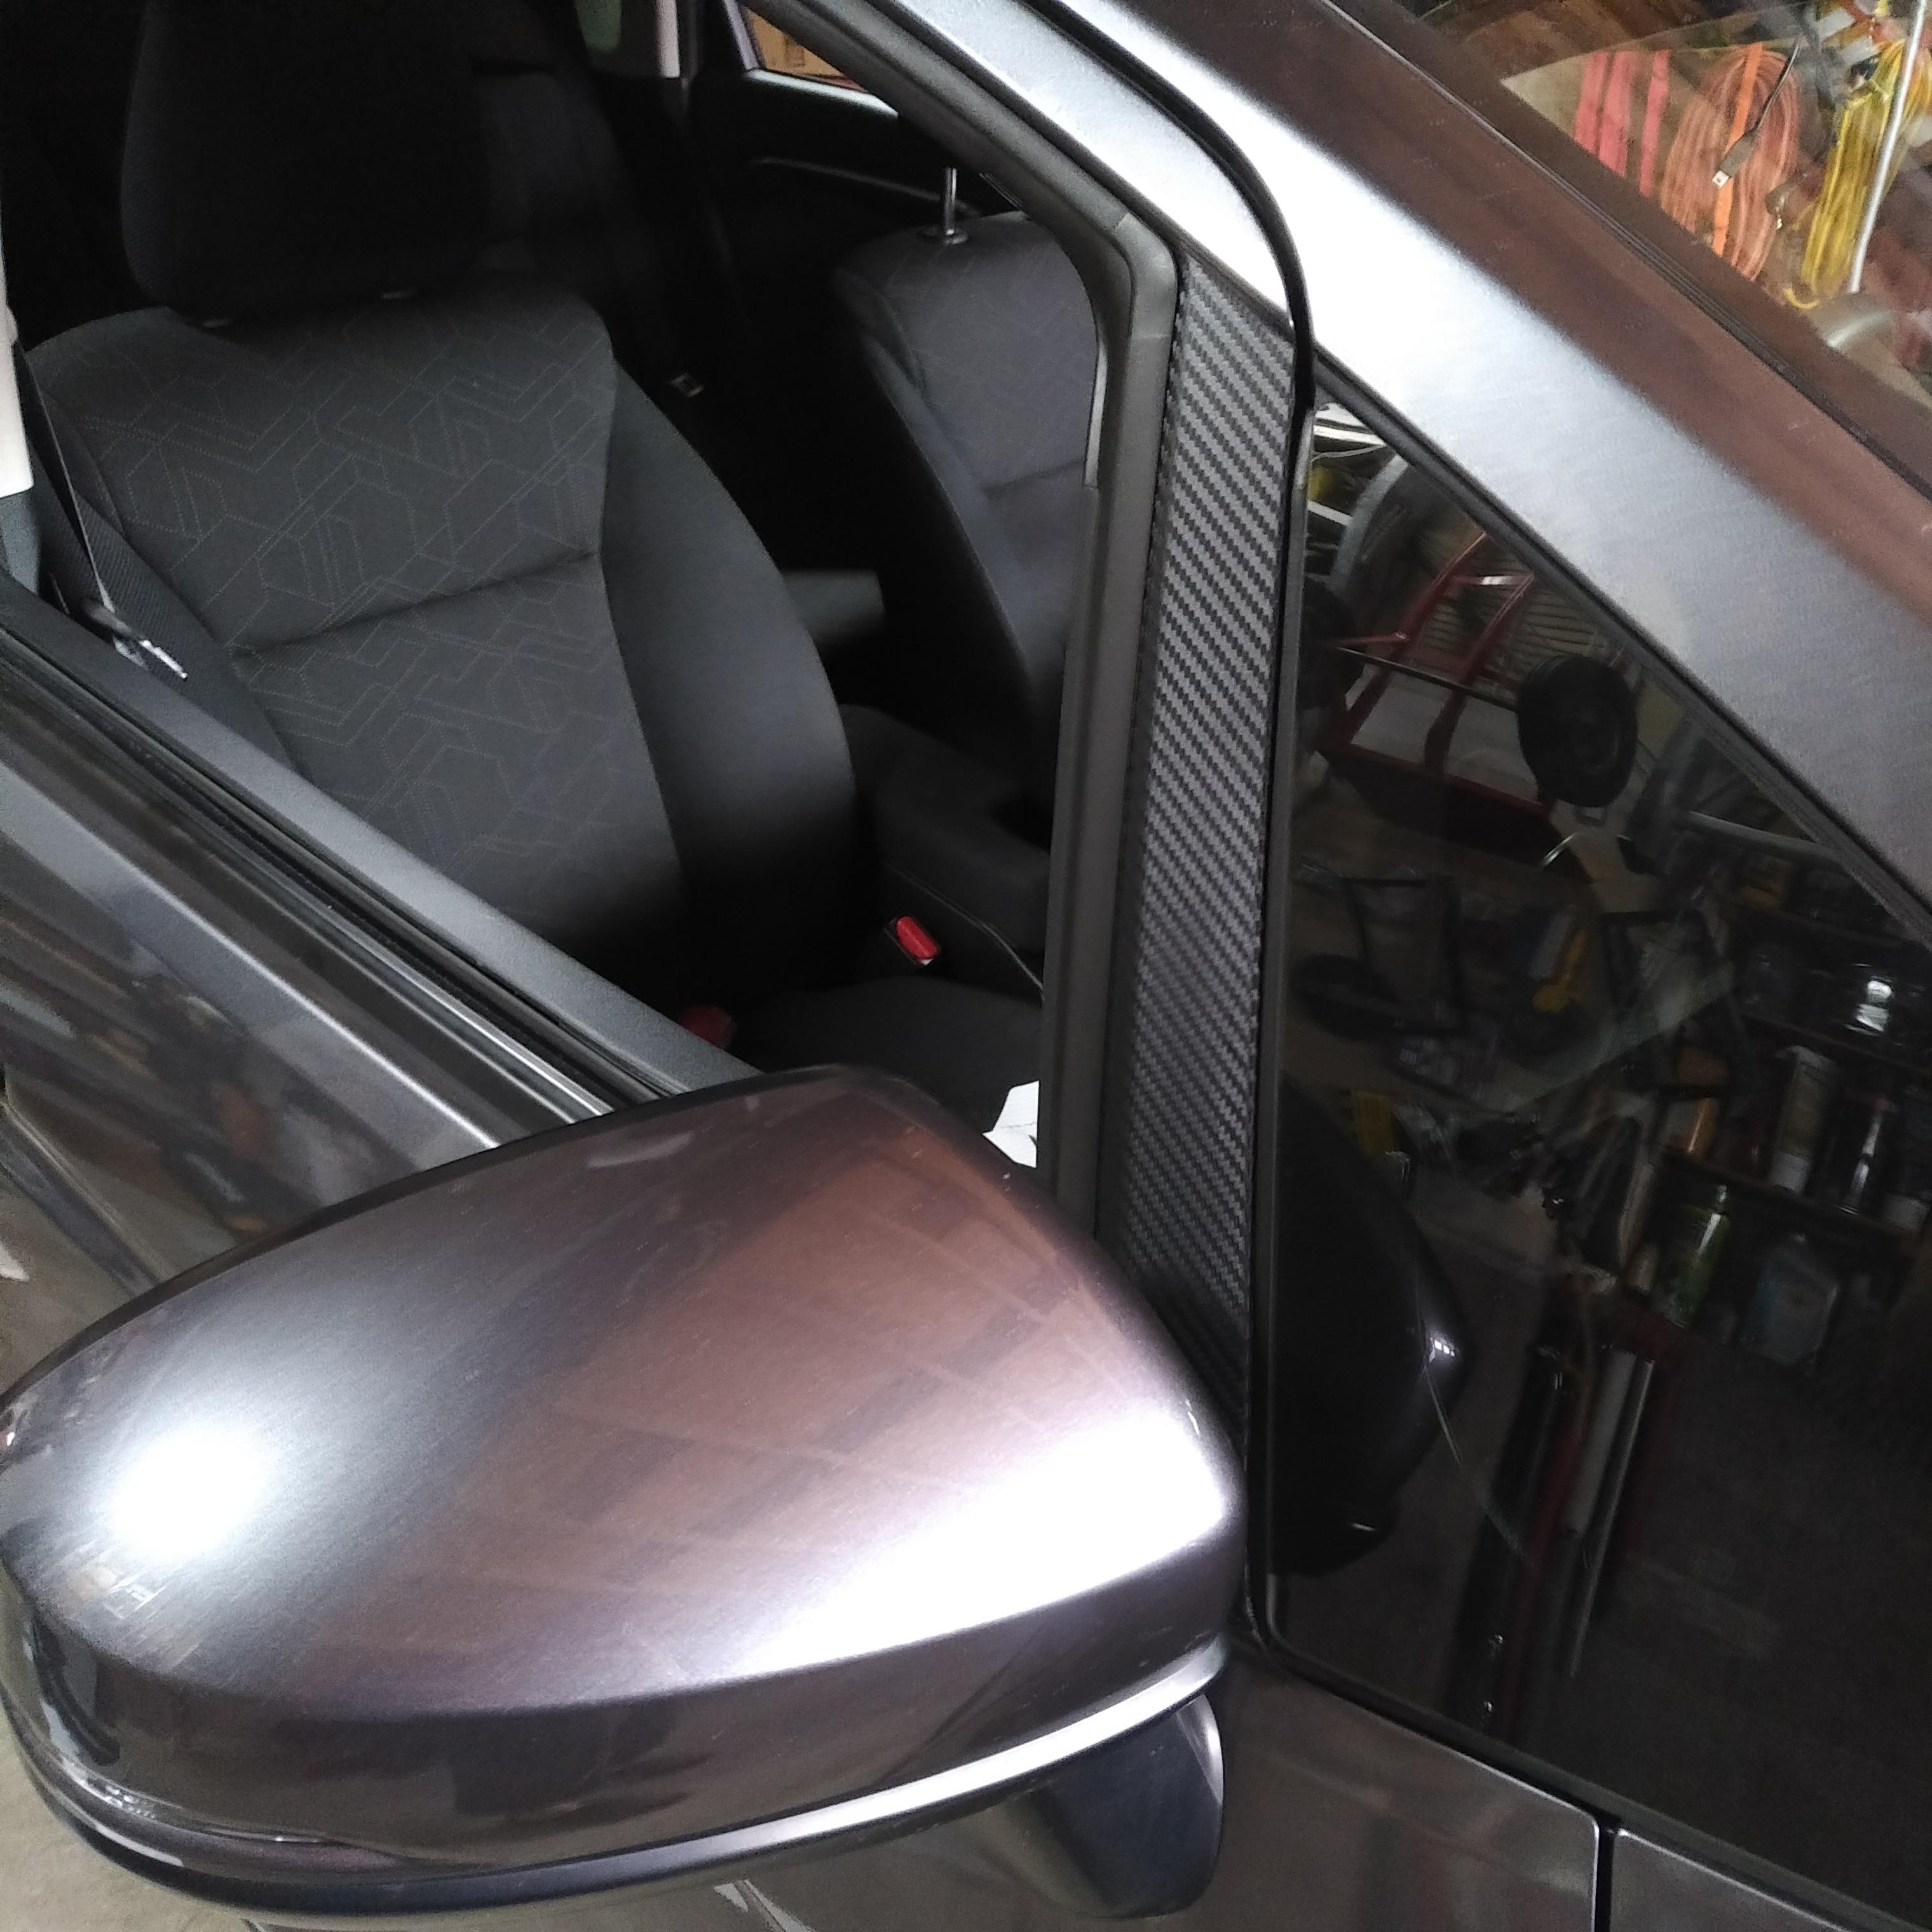
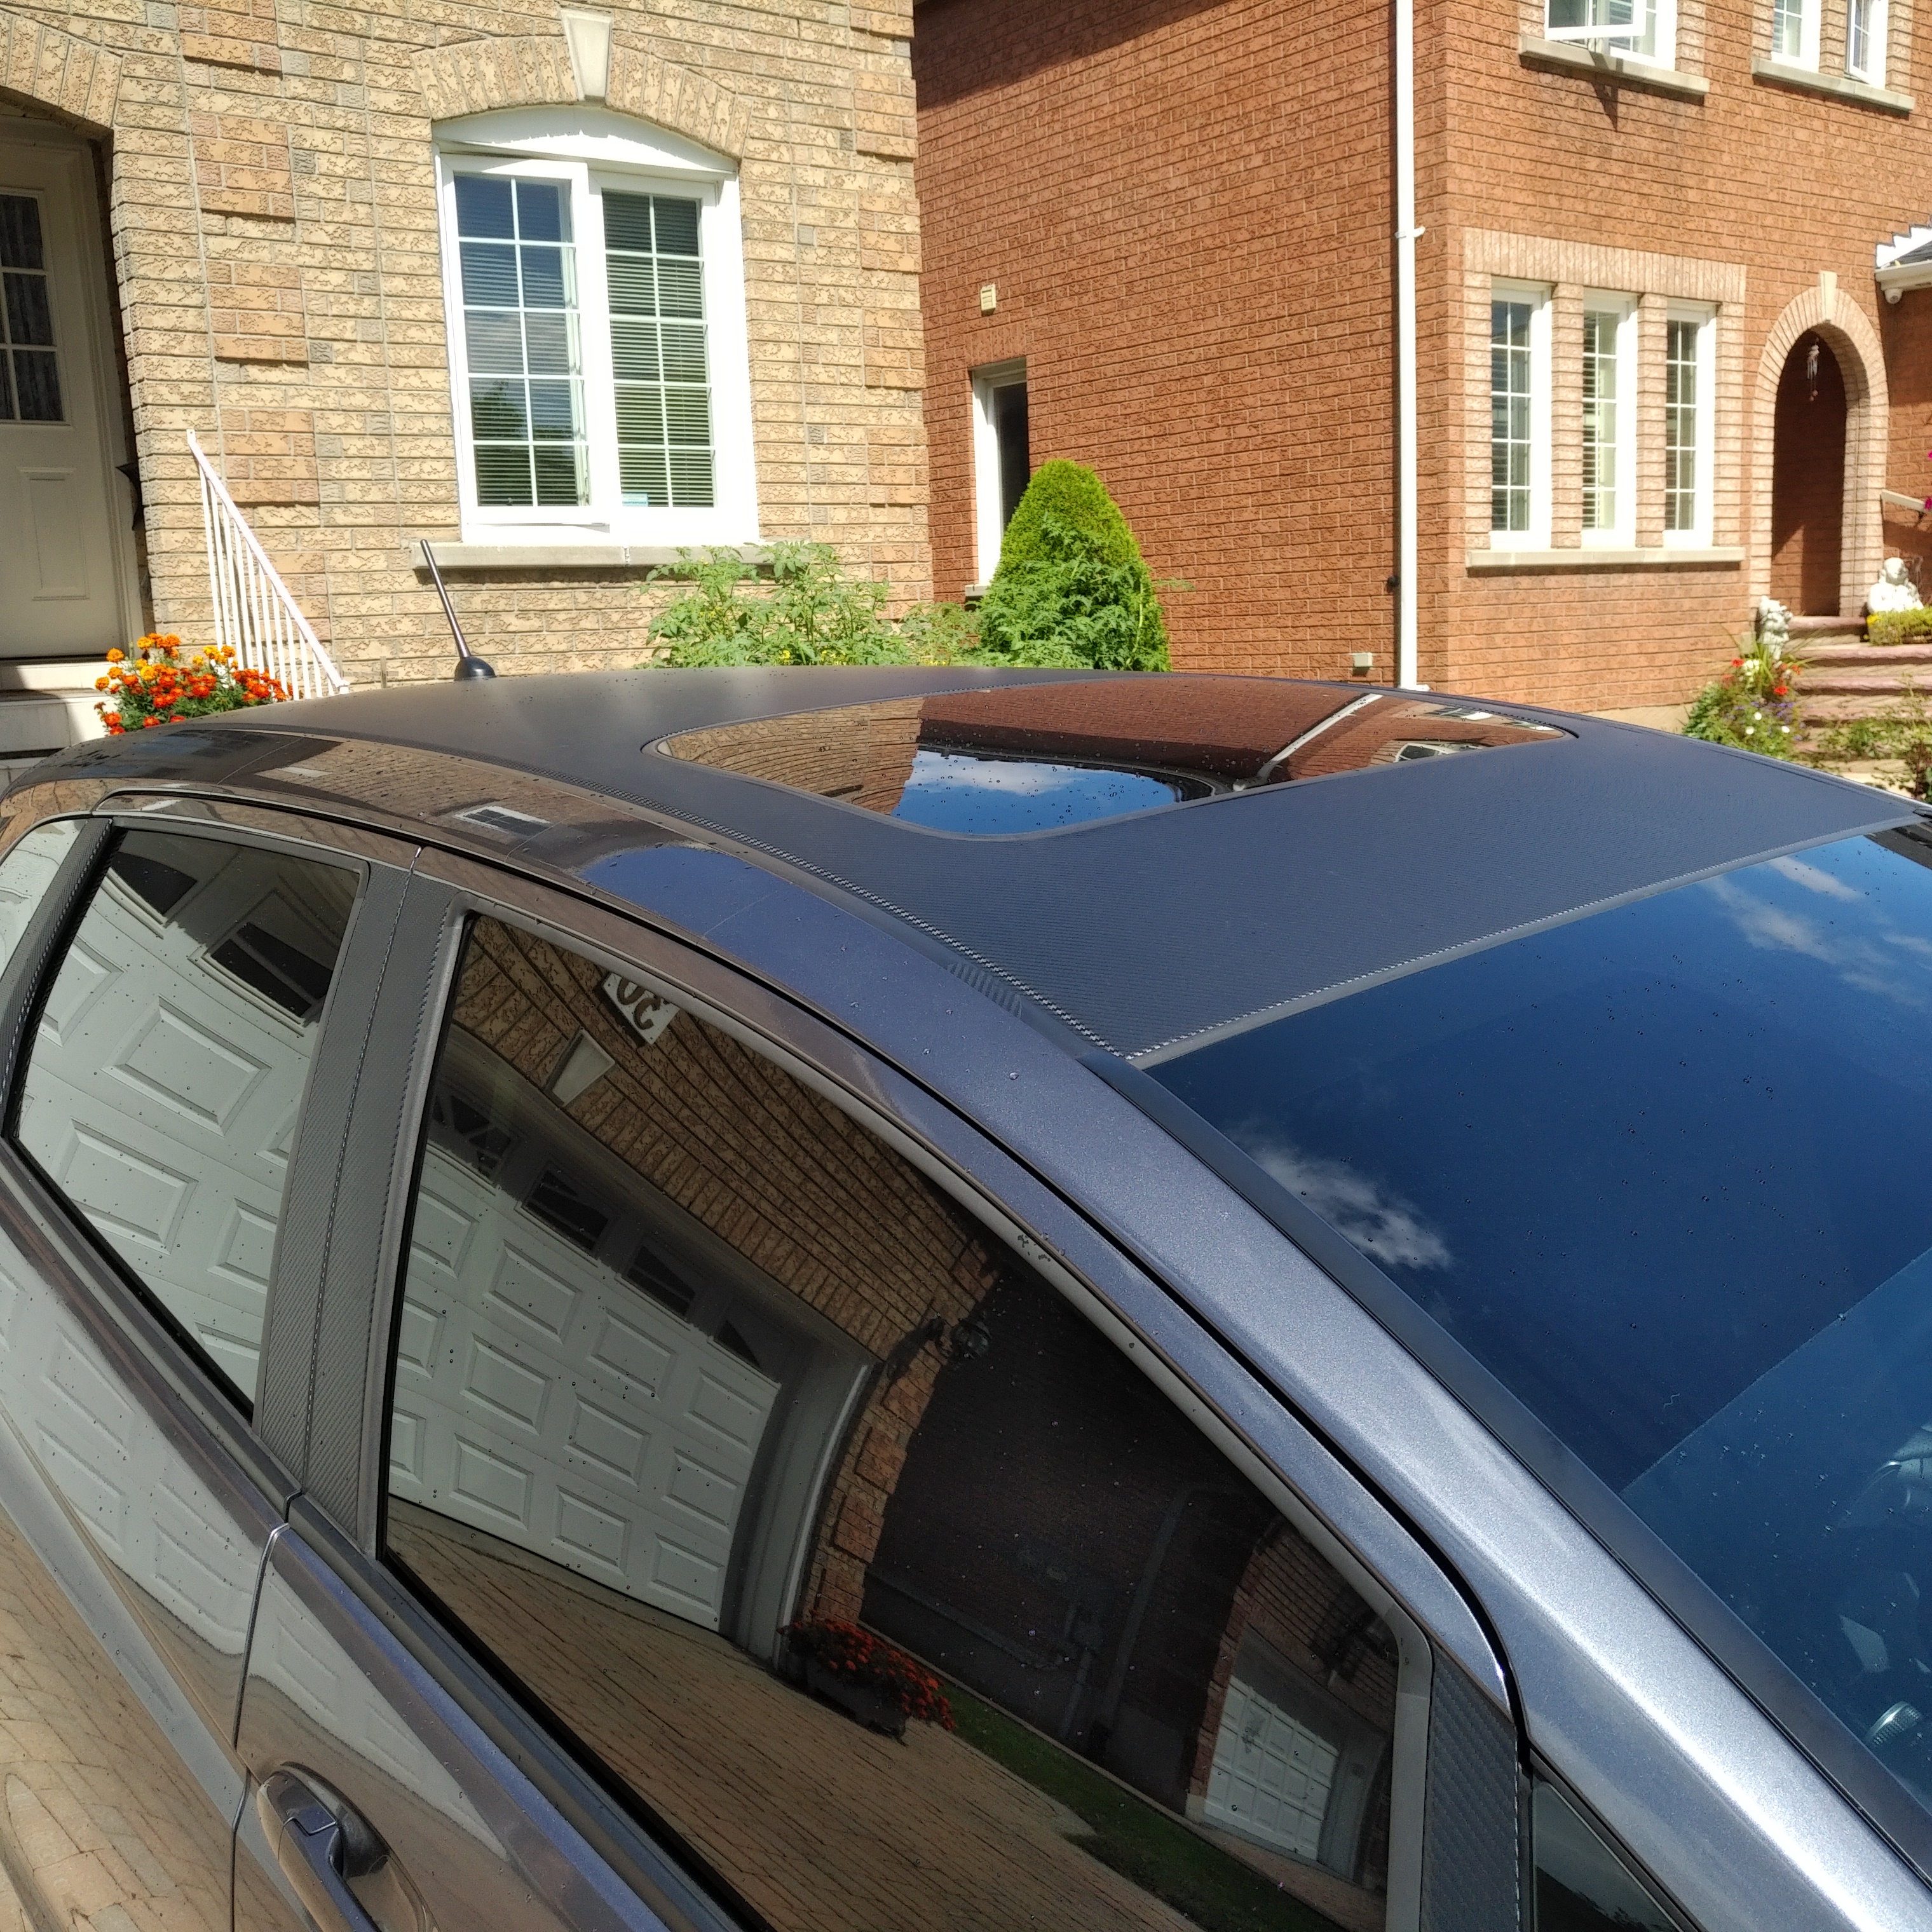
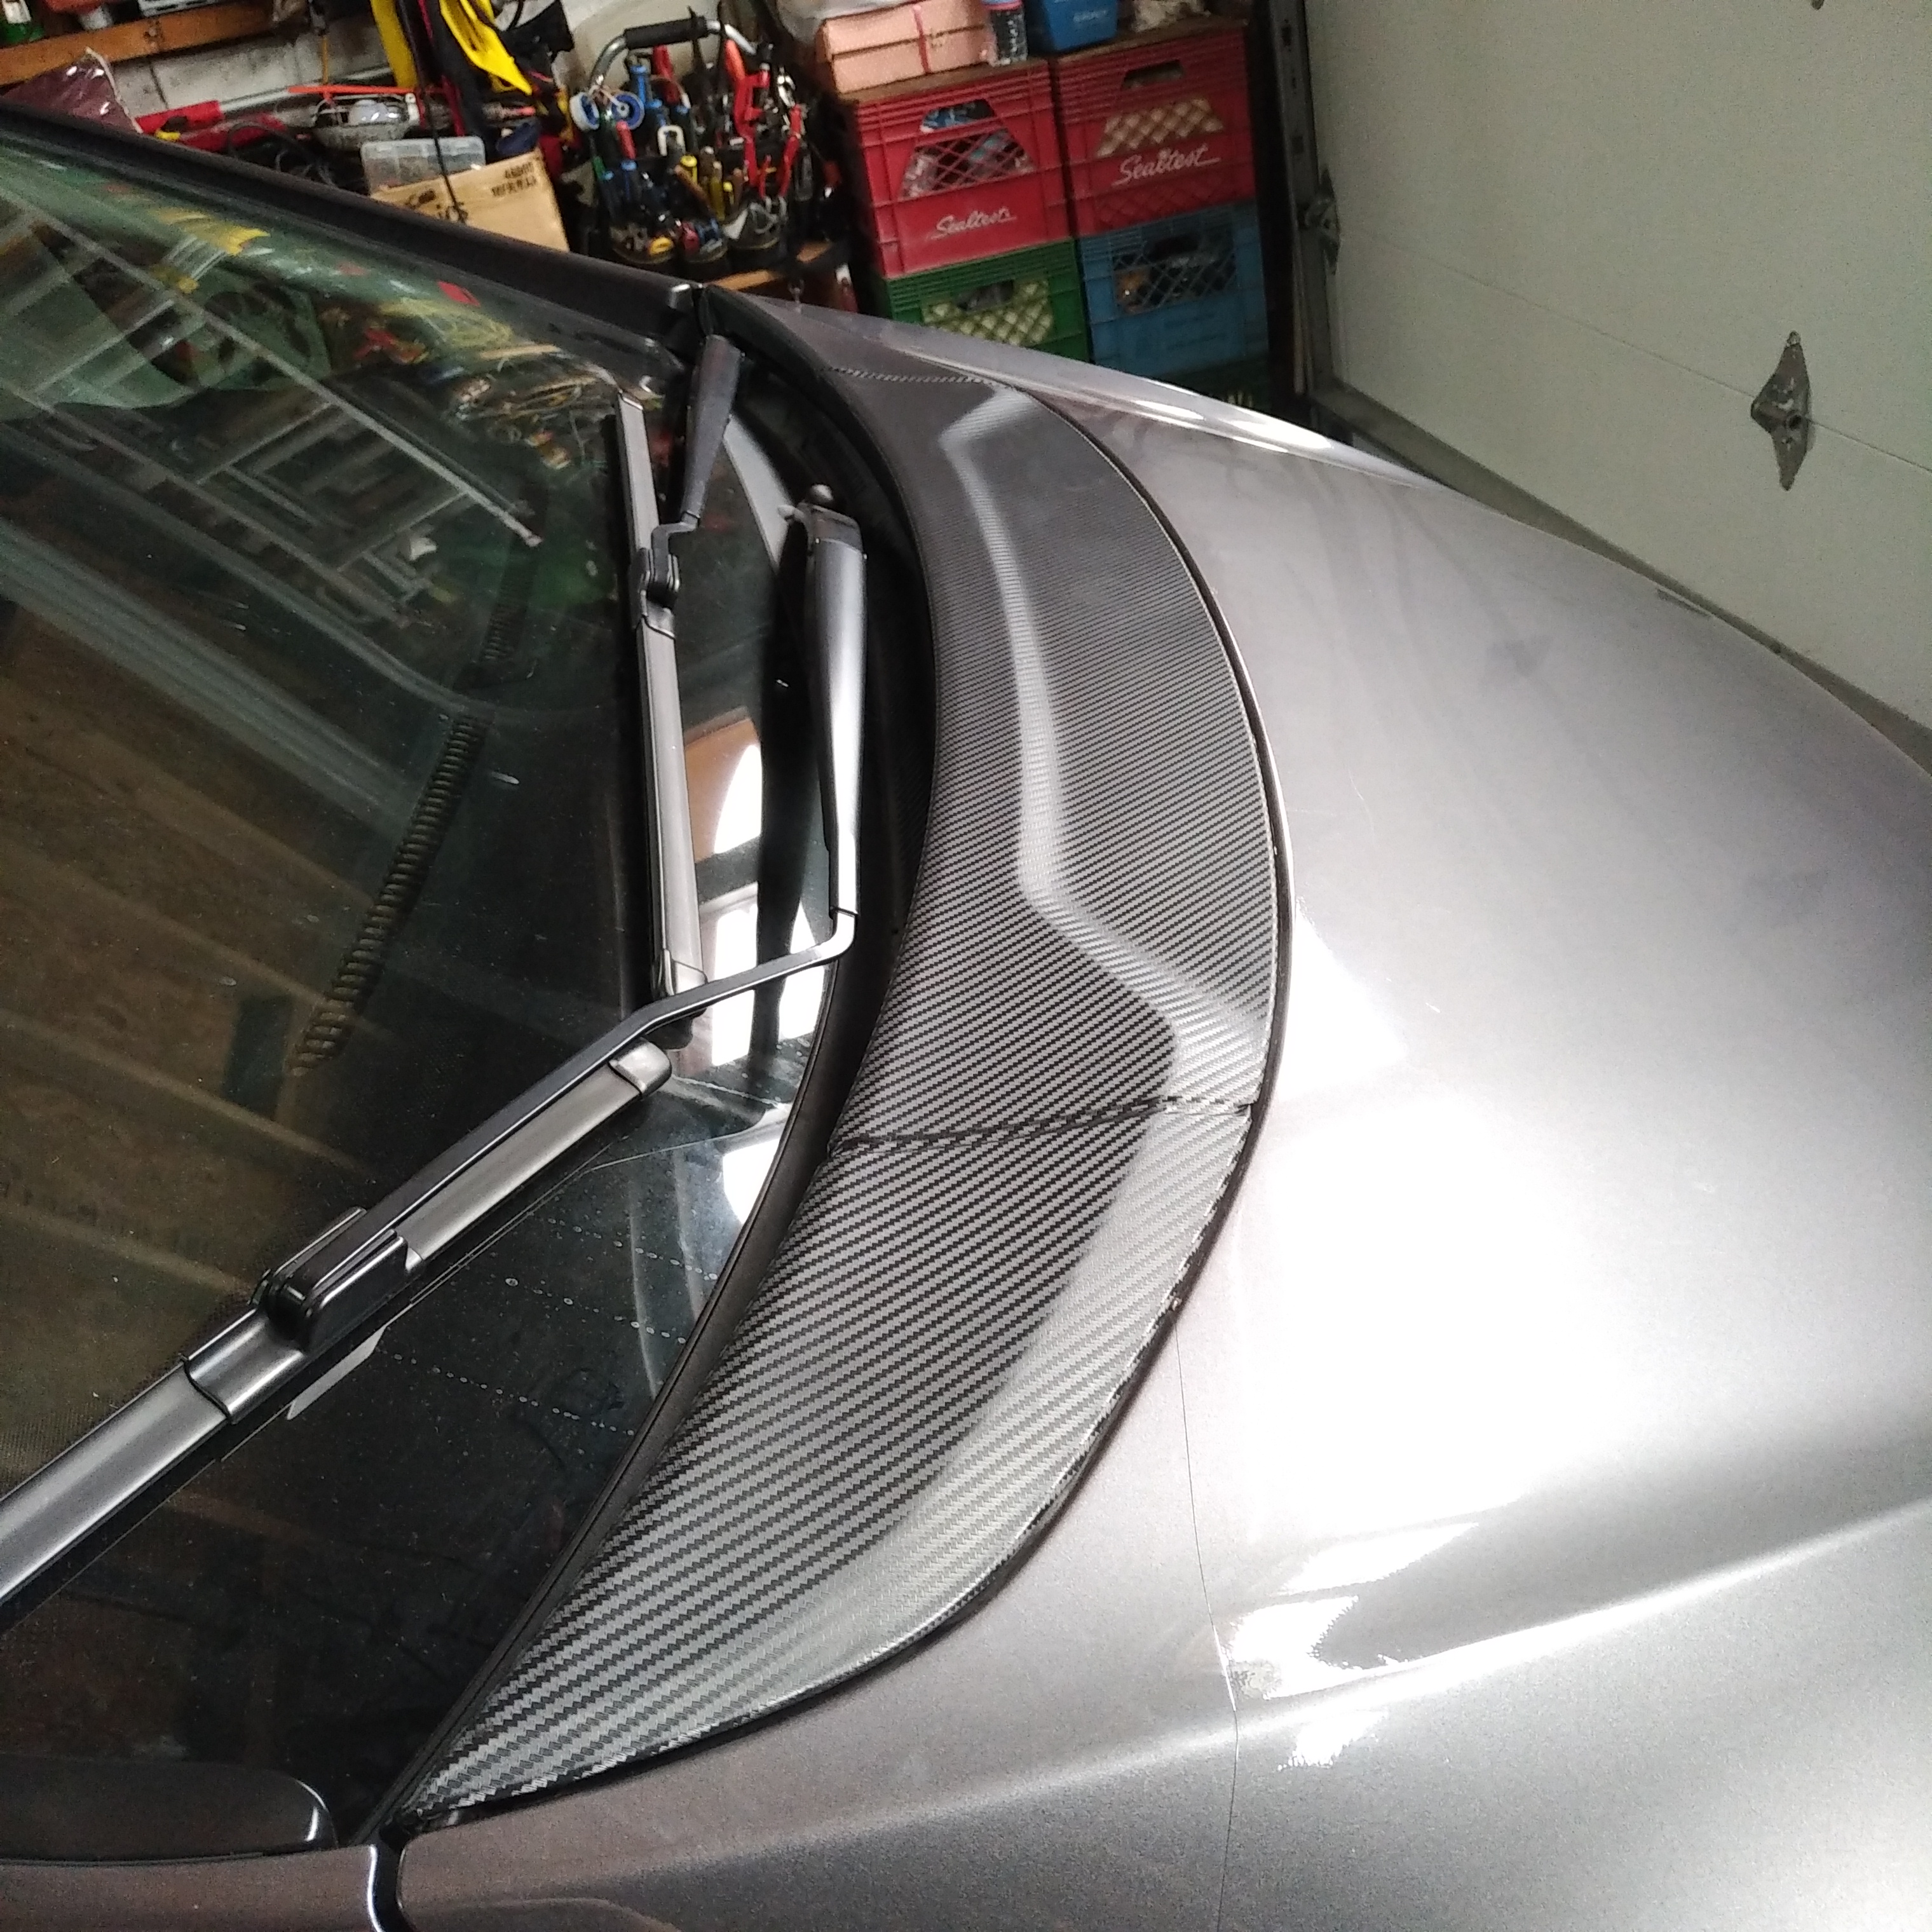
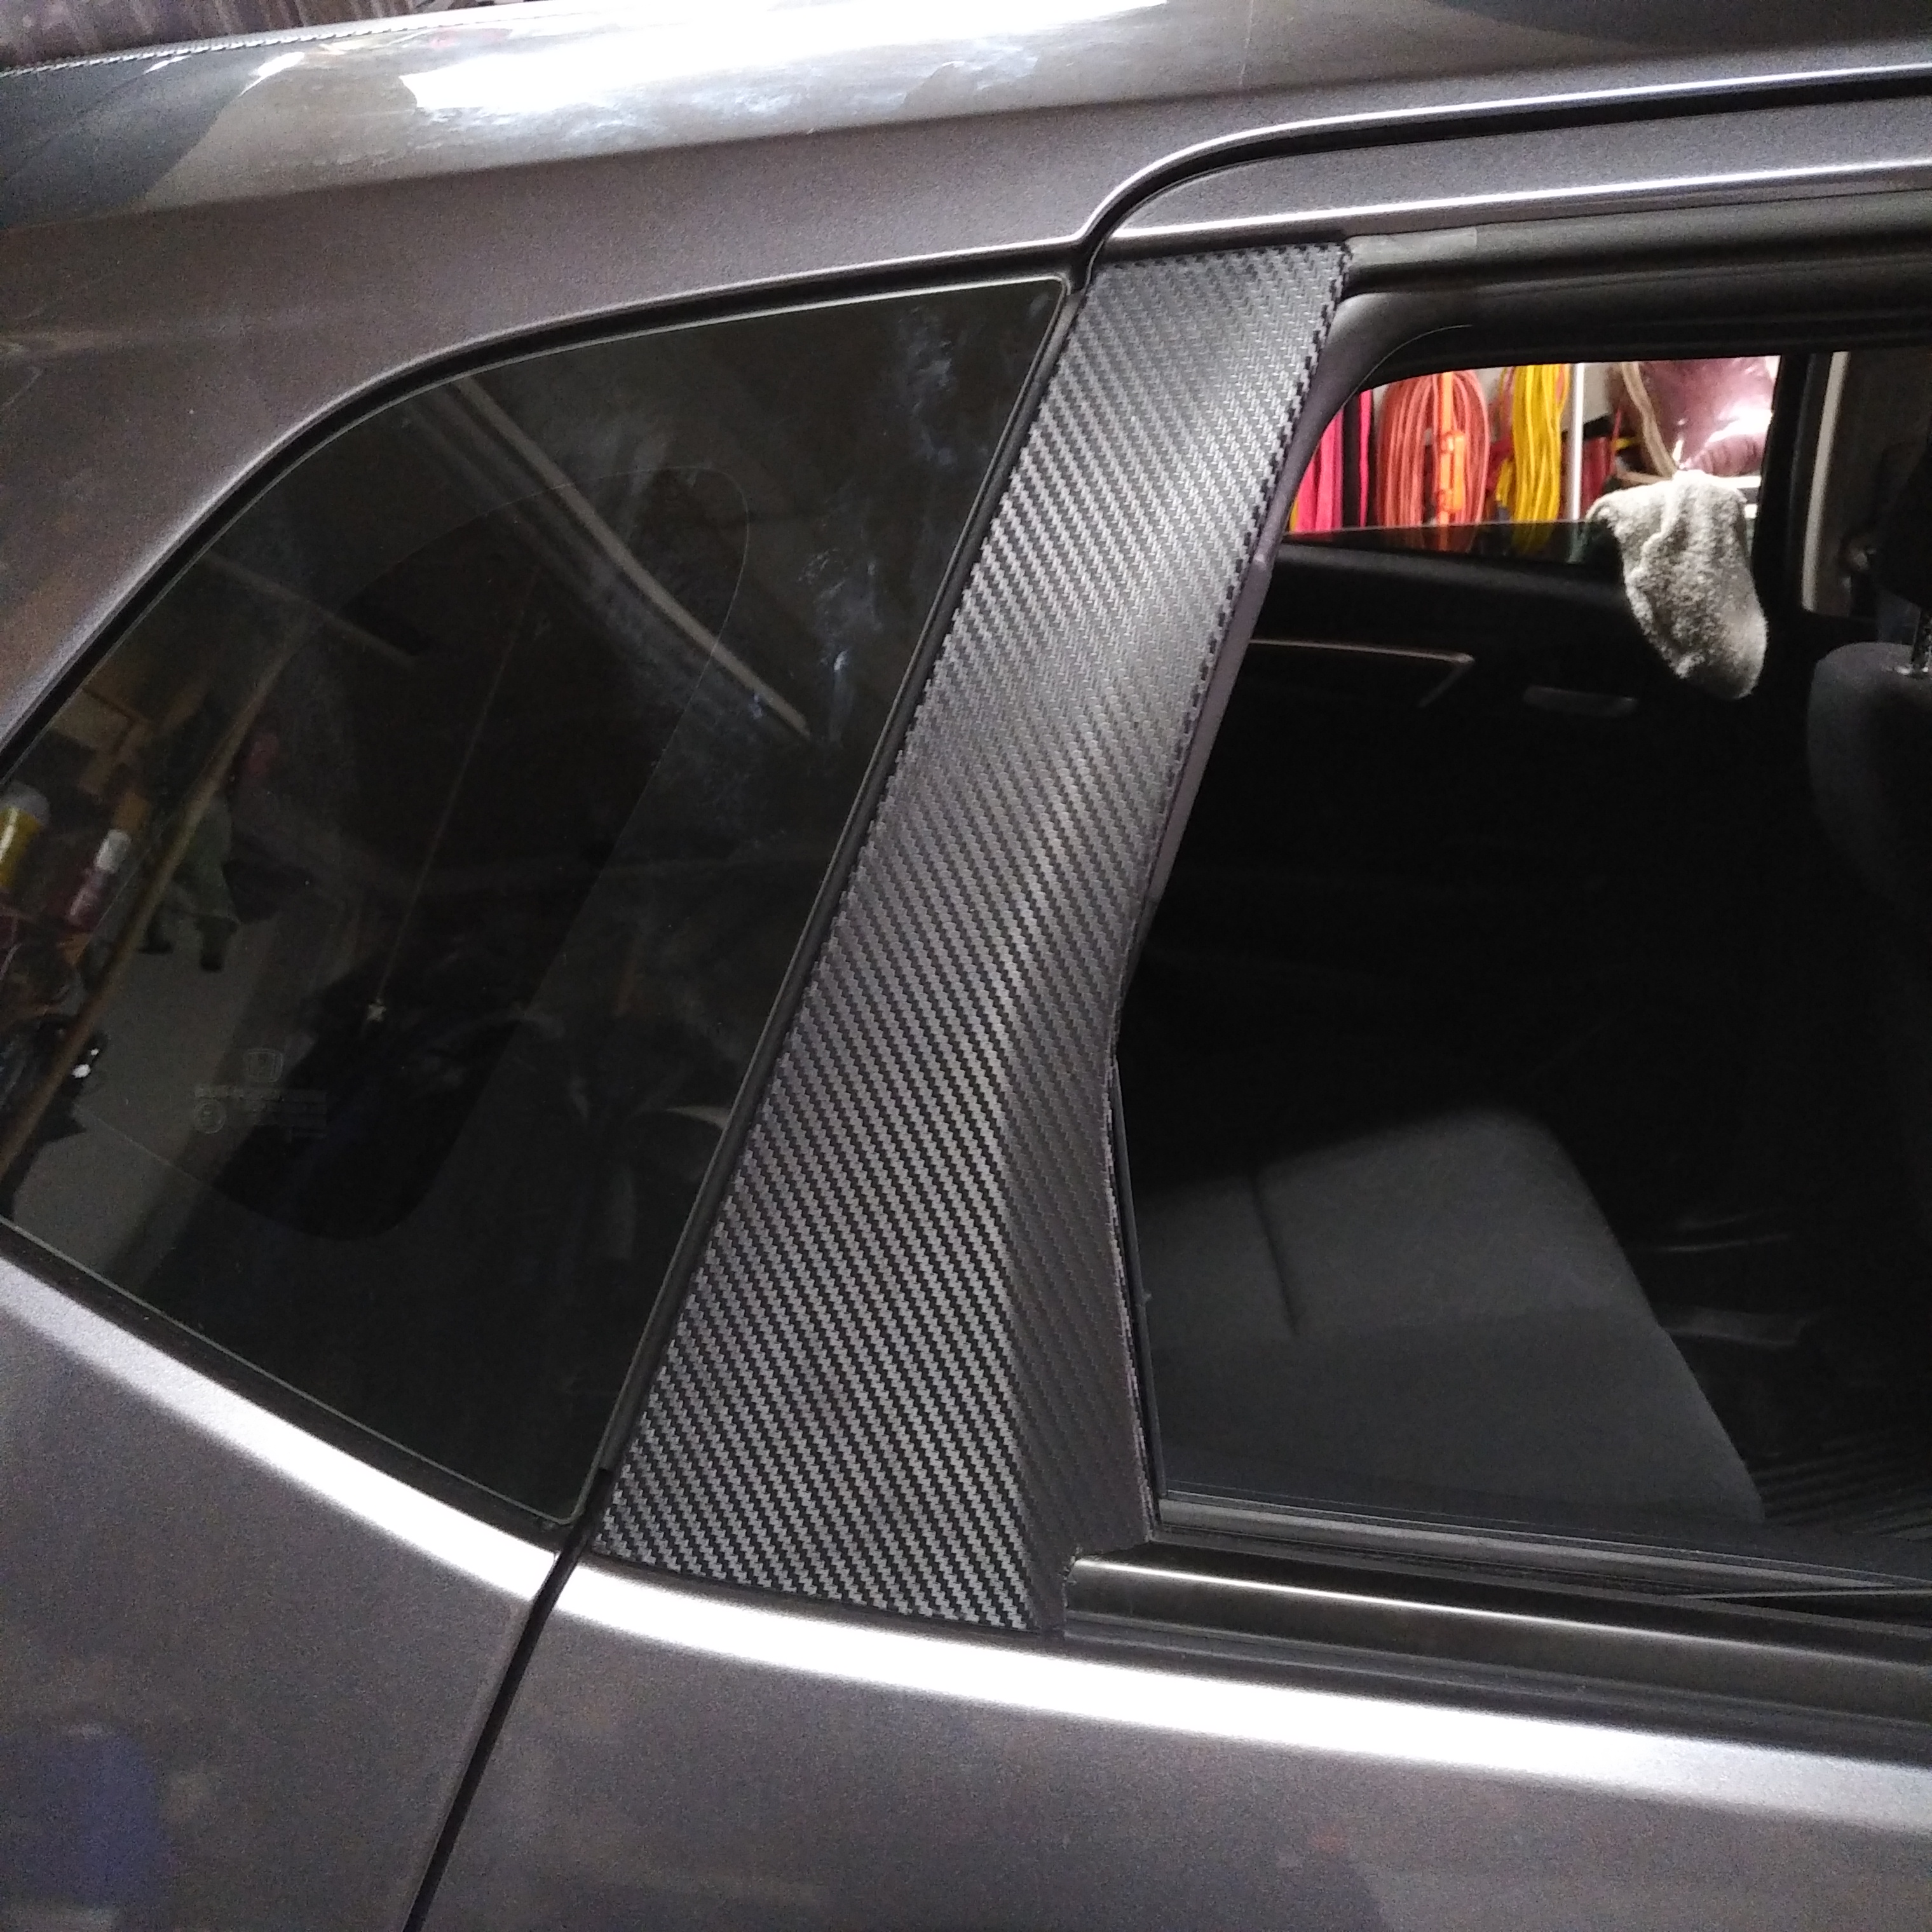
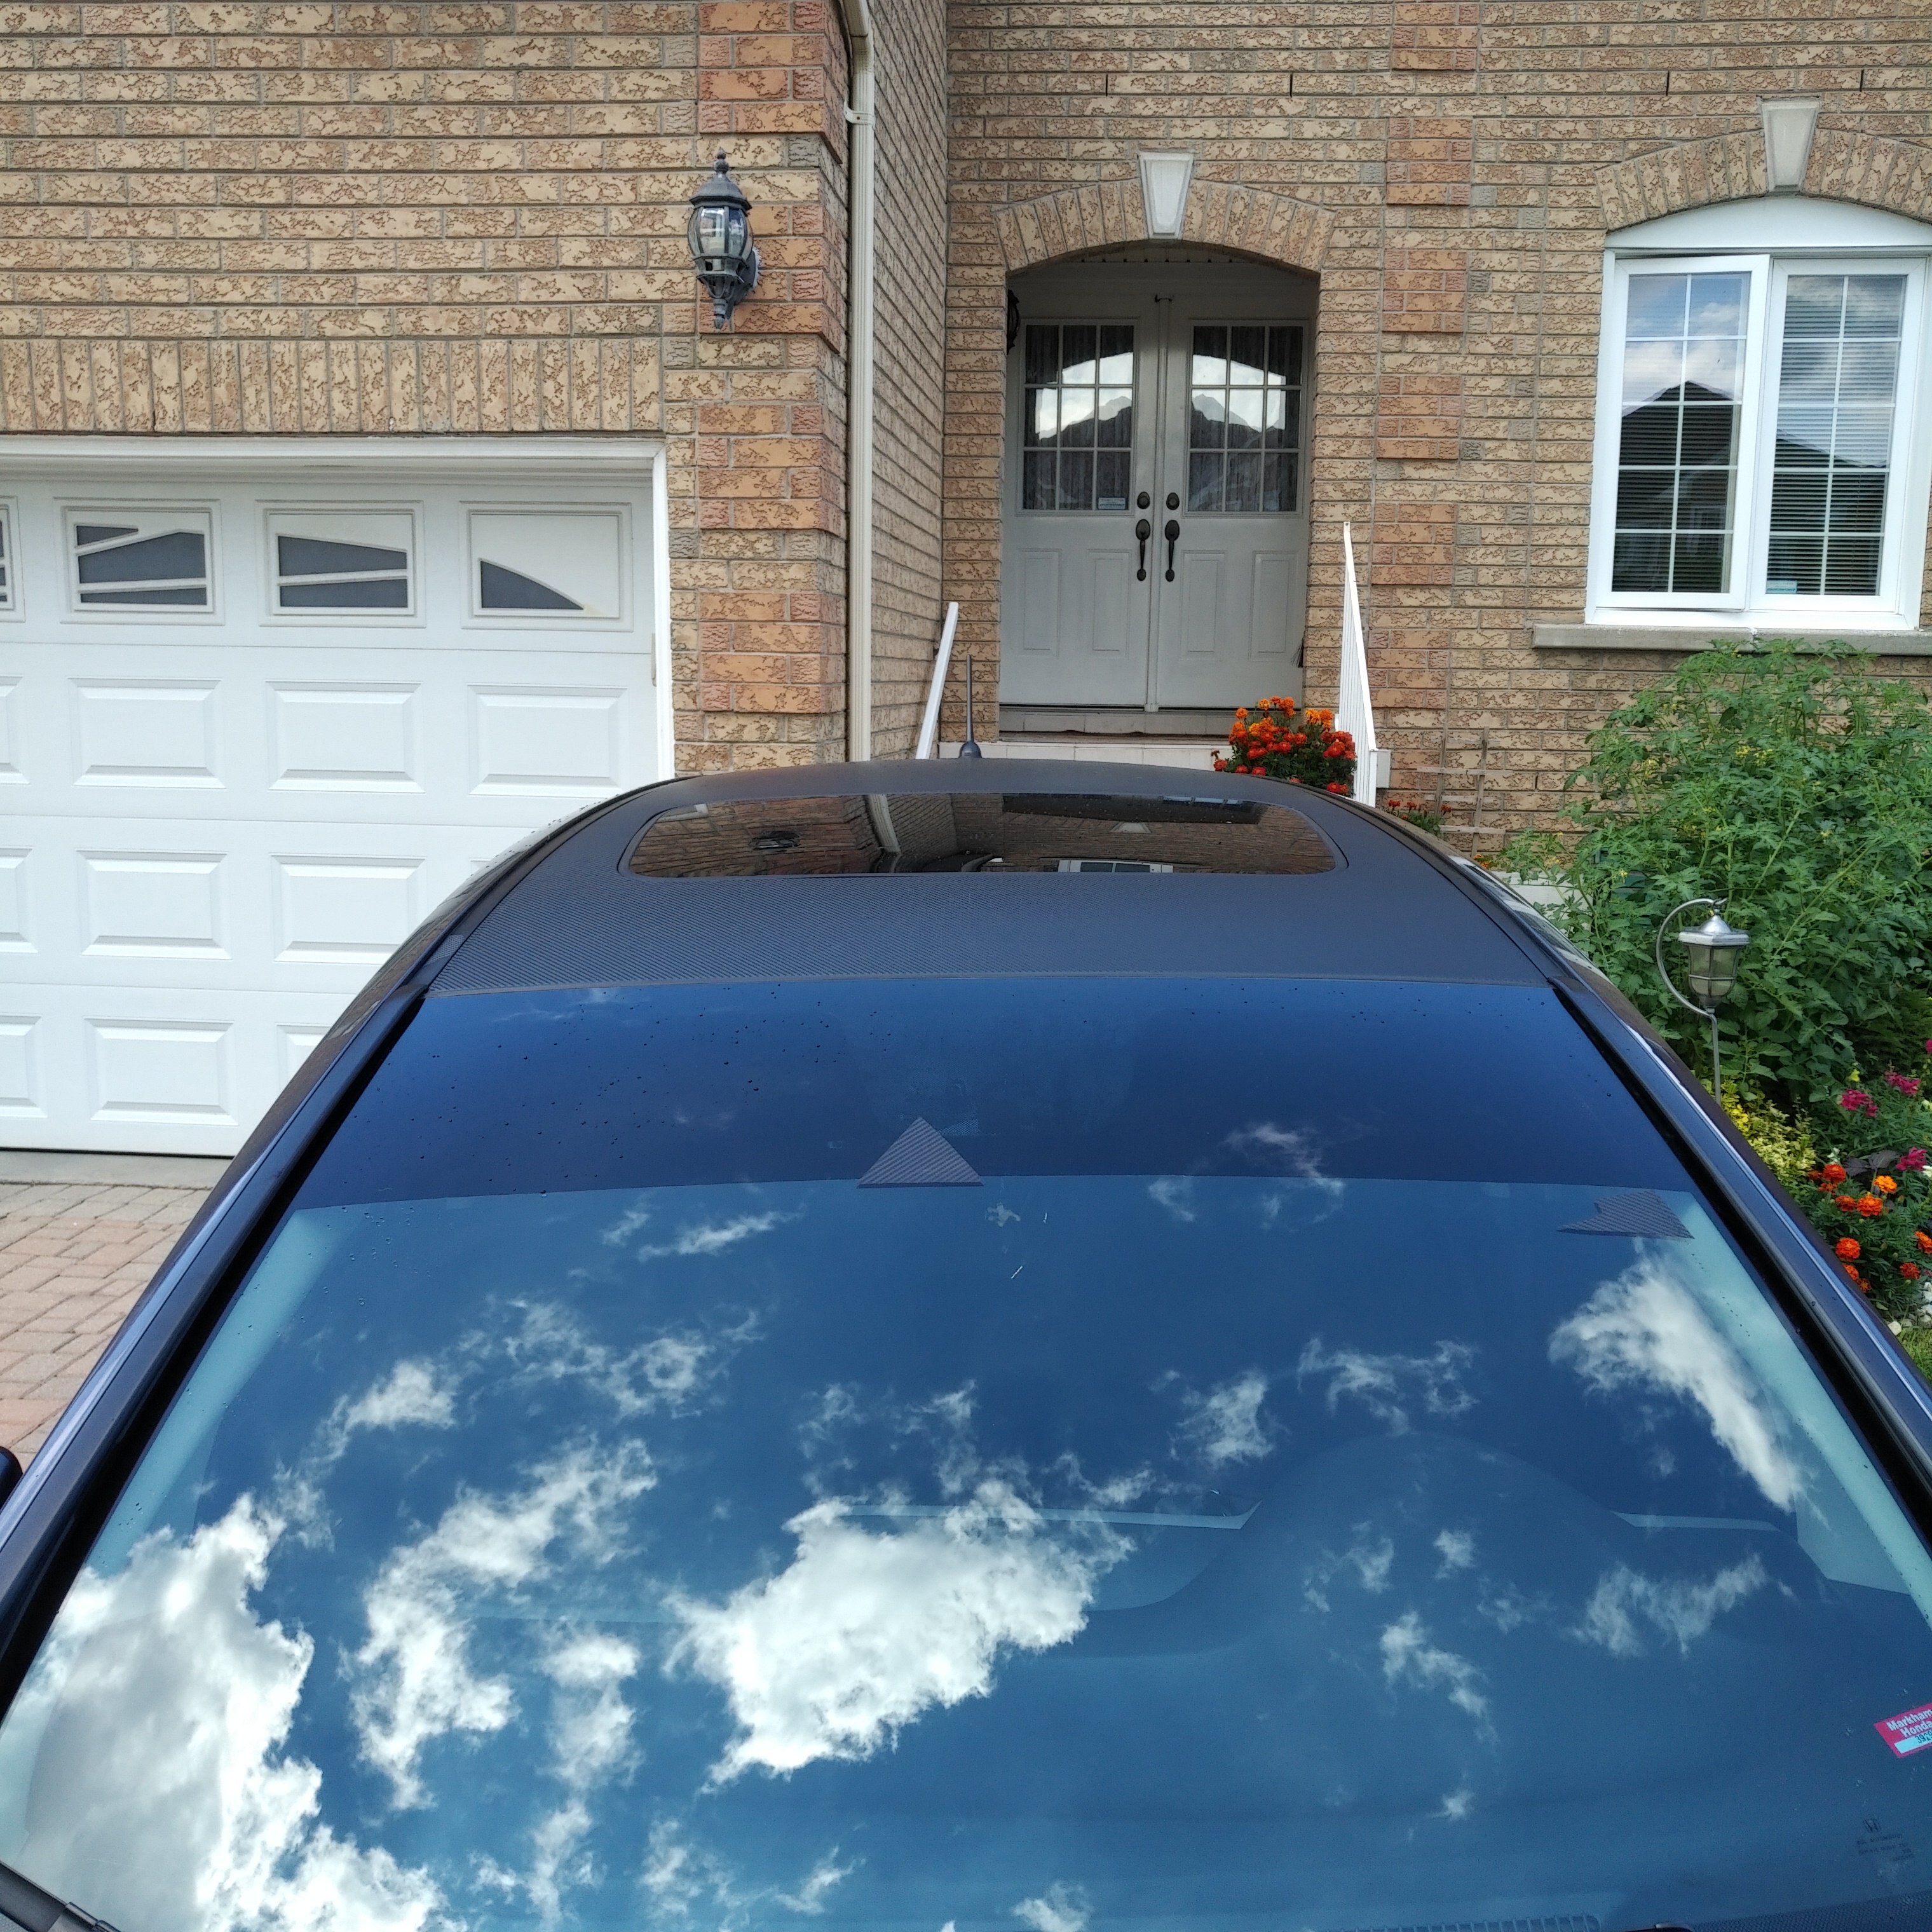
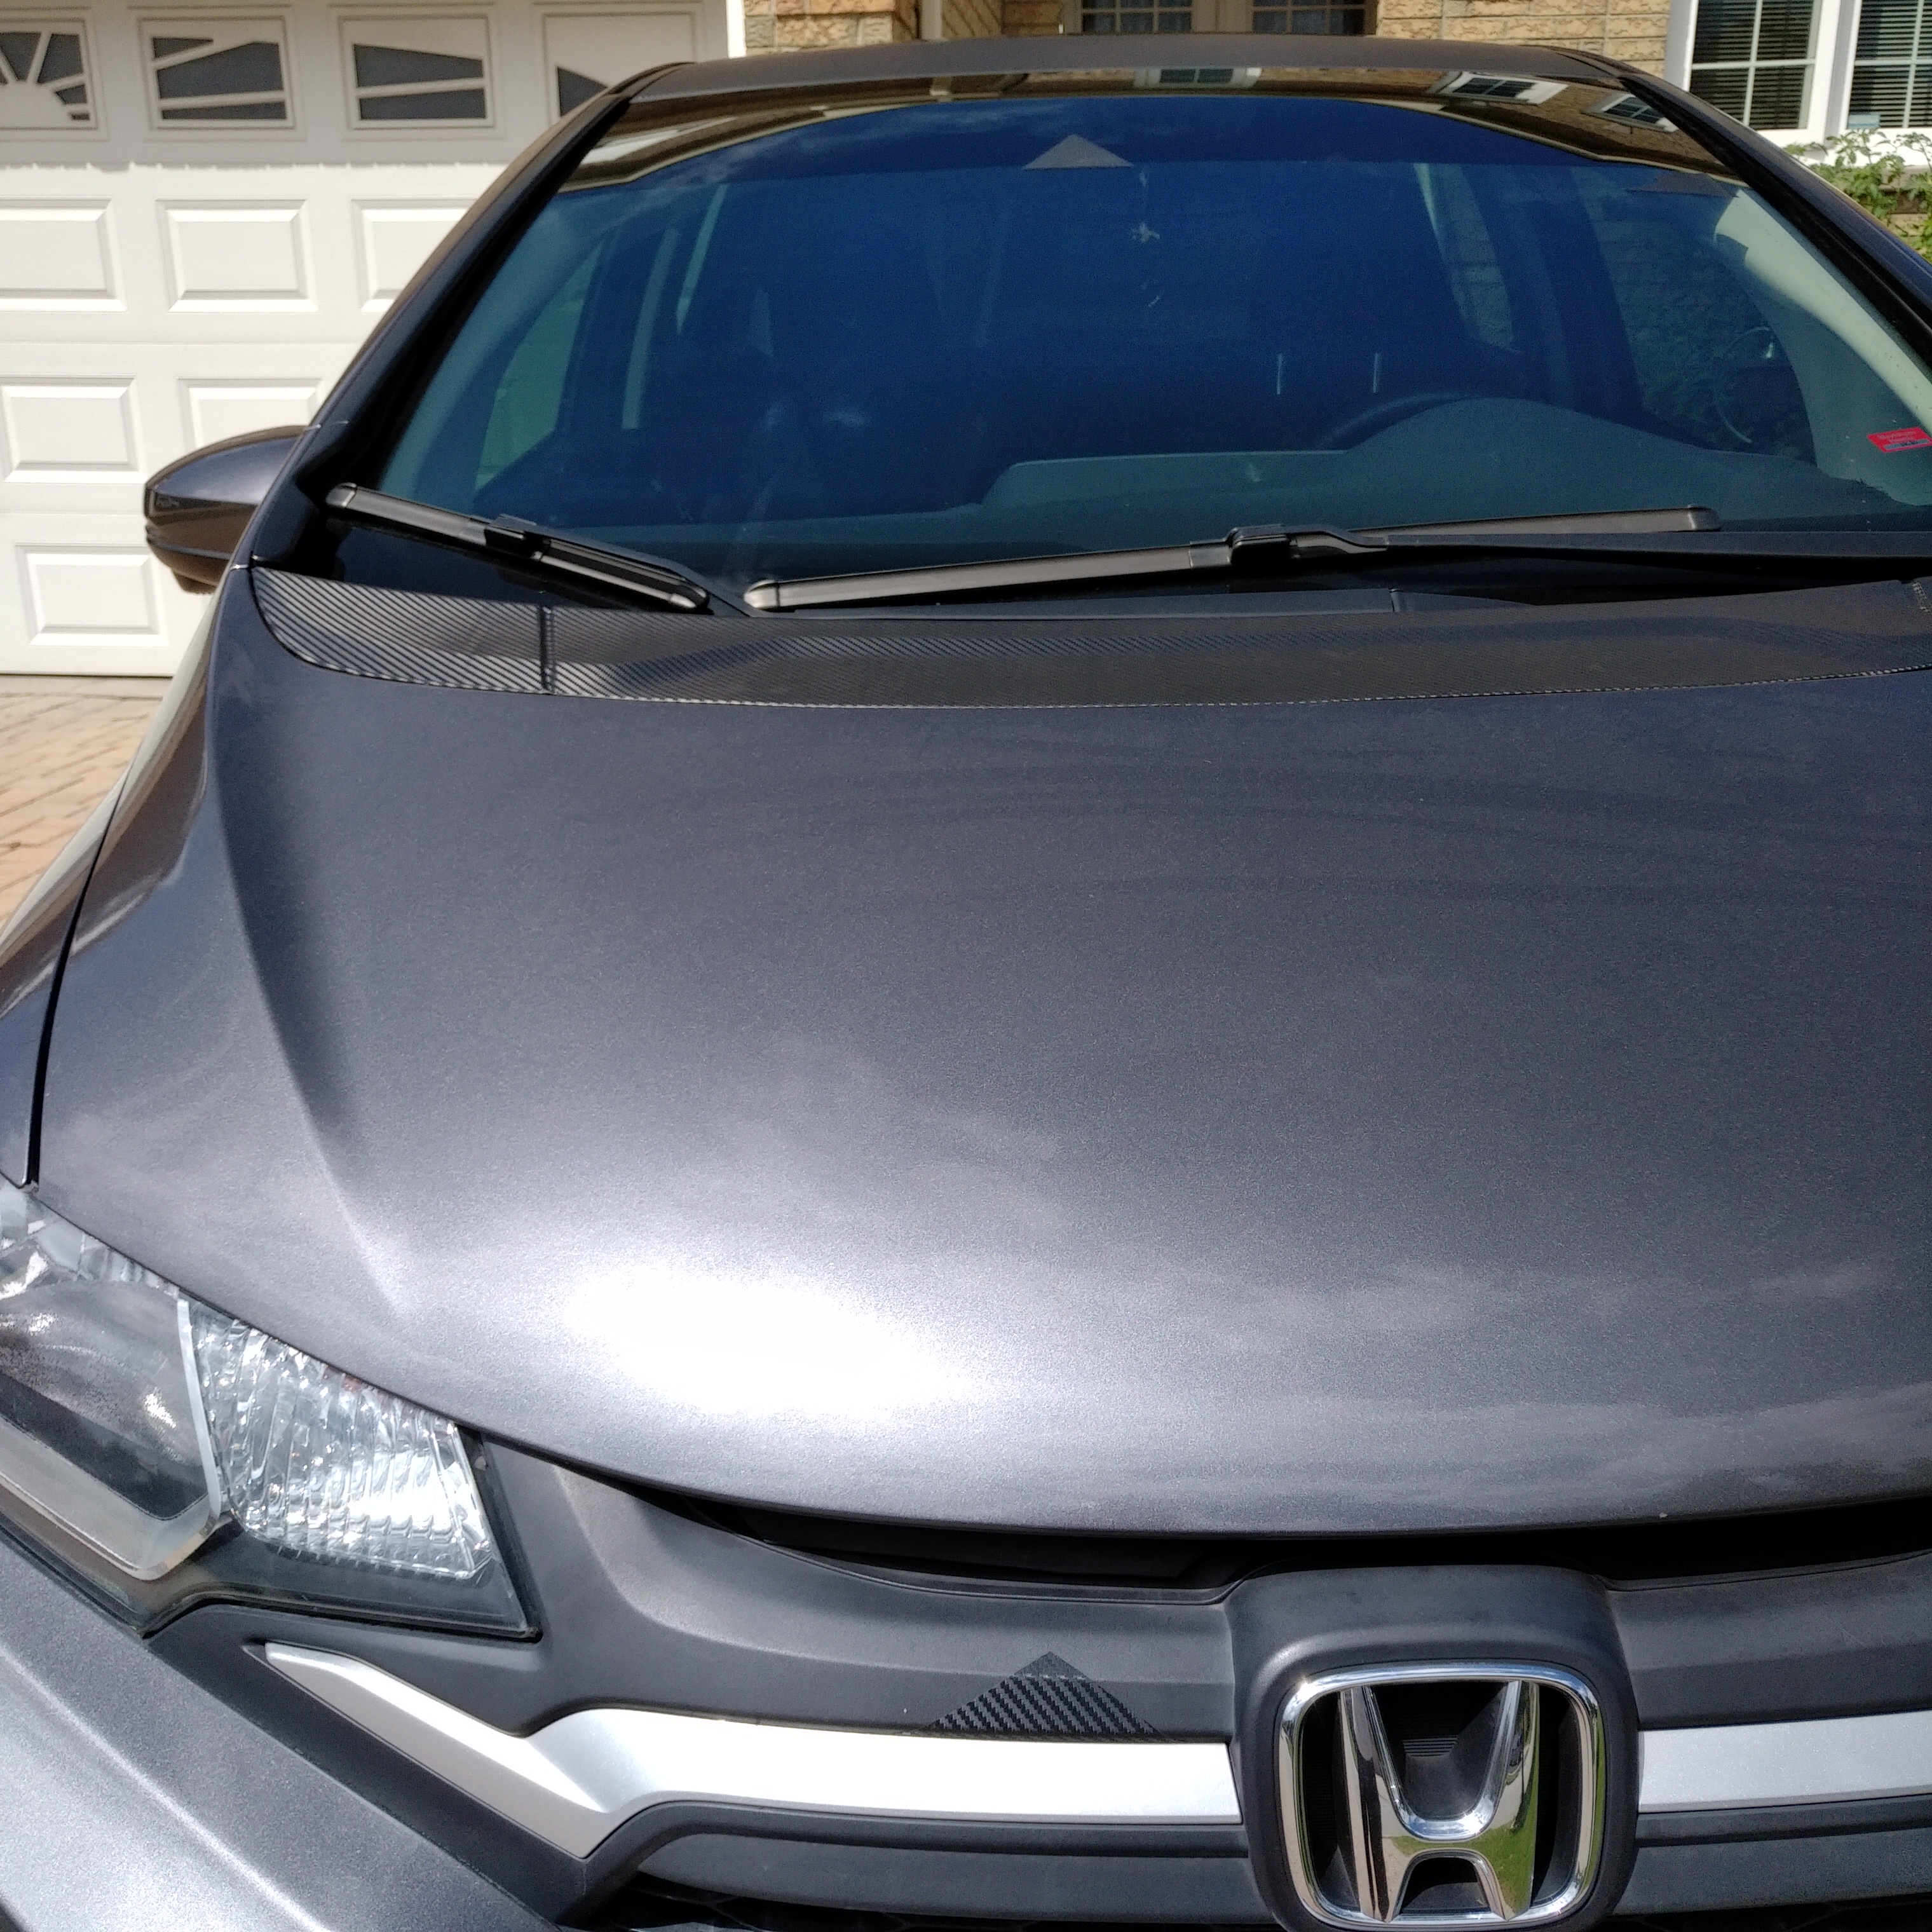
Also used Vvivid carbon fibre vinyl to do the roof, and smudge magnet points - front cowl, and the side pillars.
Last edited by Action Jackson; Mar 3, 2019 at 10:40 AM.


After blowing out some cheap midbass speakers during tuning, I decided to upgrade the front components from Boston S60's to Morel Maximus 602's.
For the Boston's I put only the woofers in the rear doors.
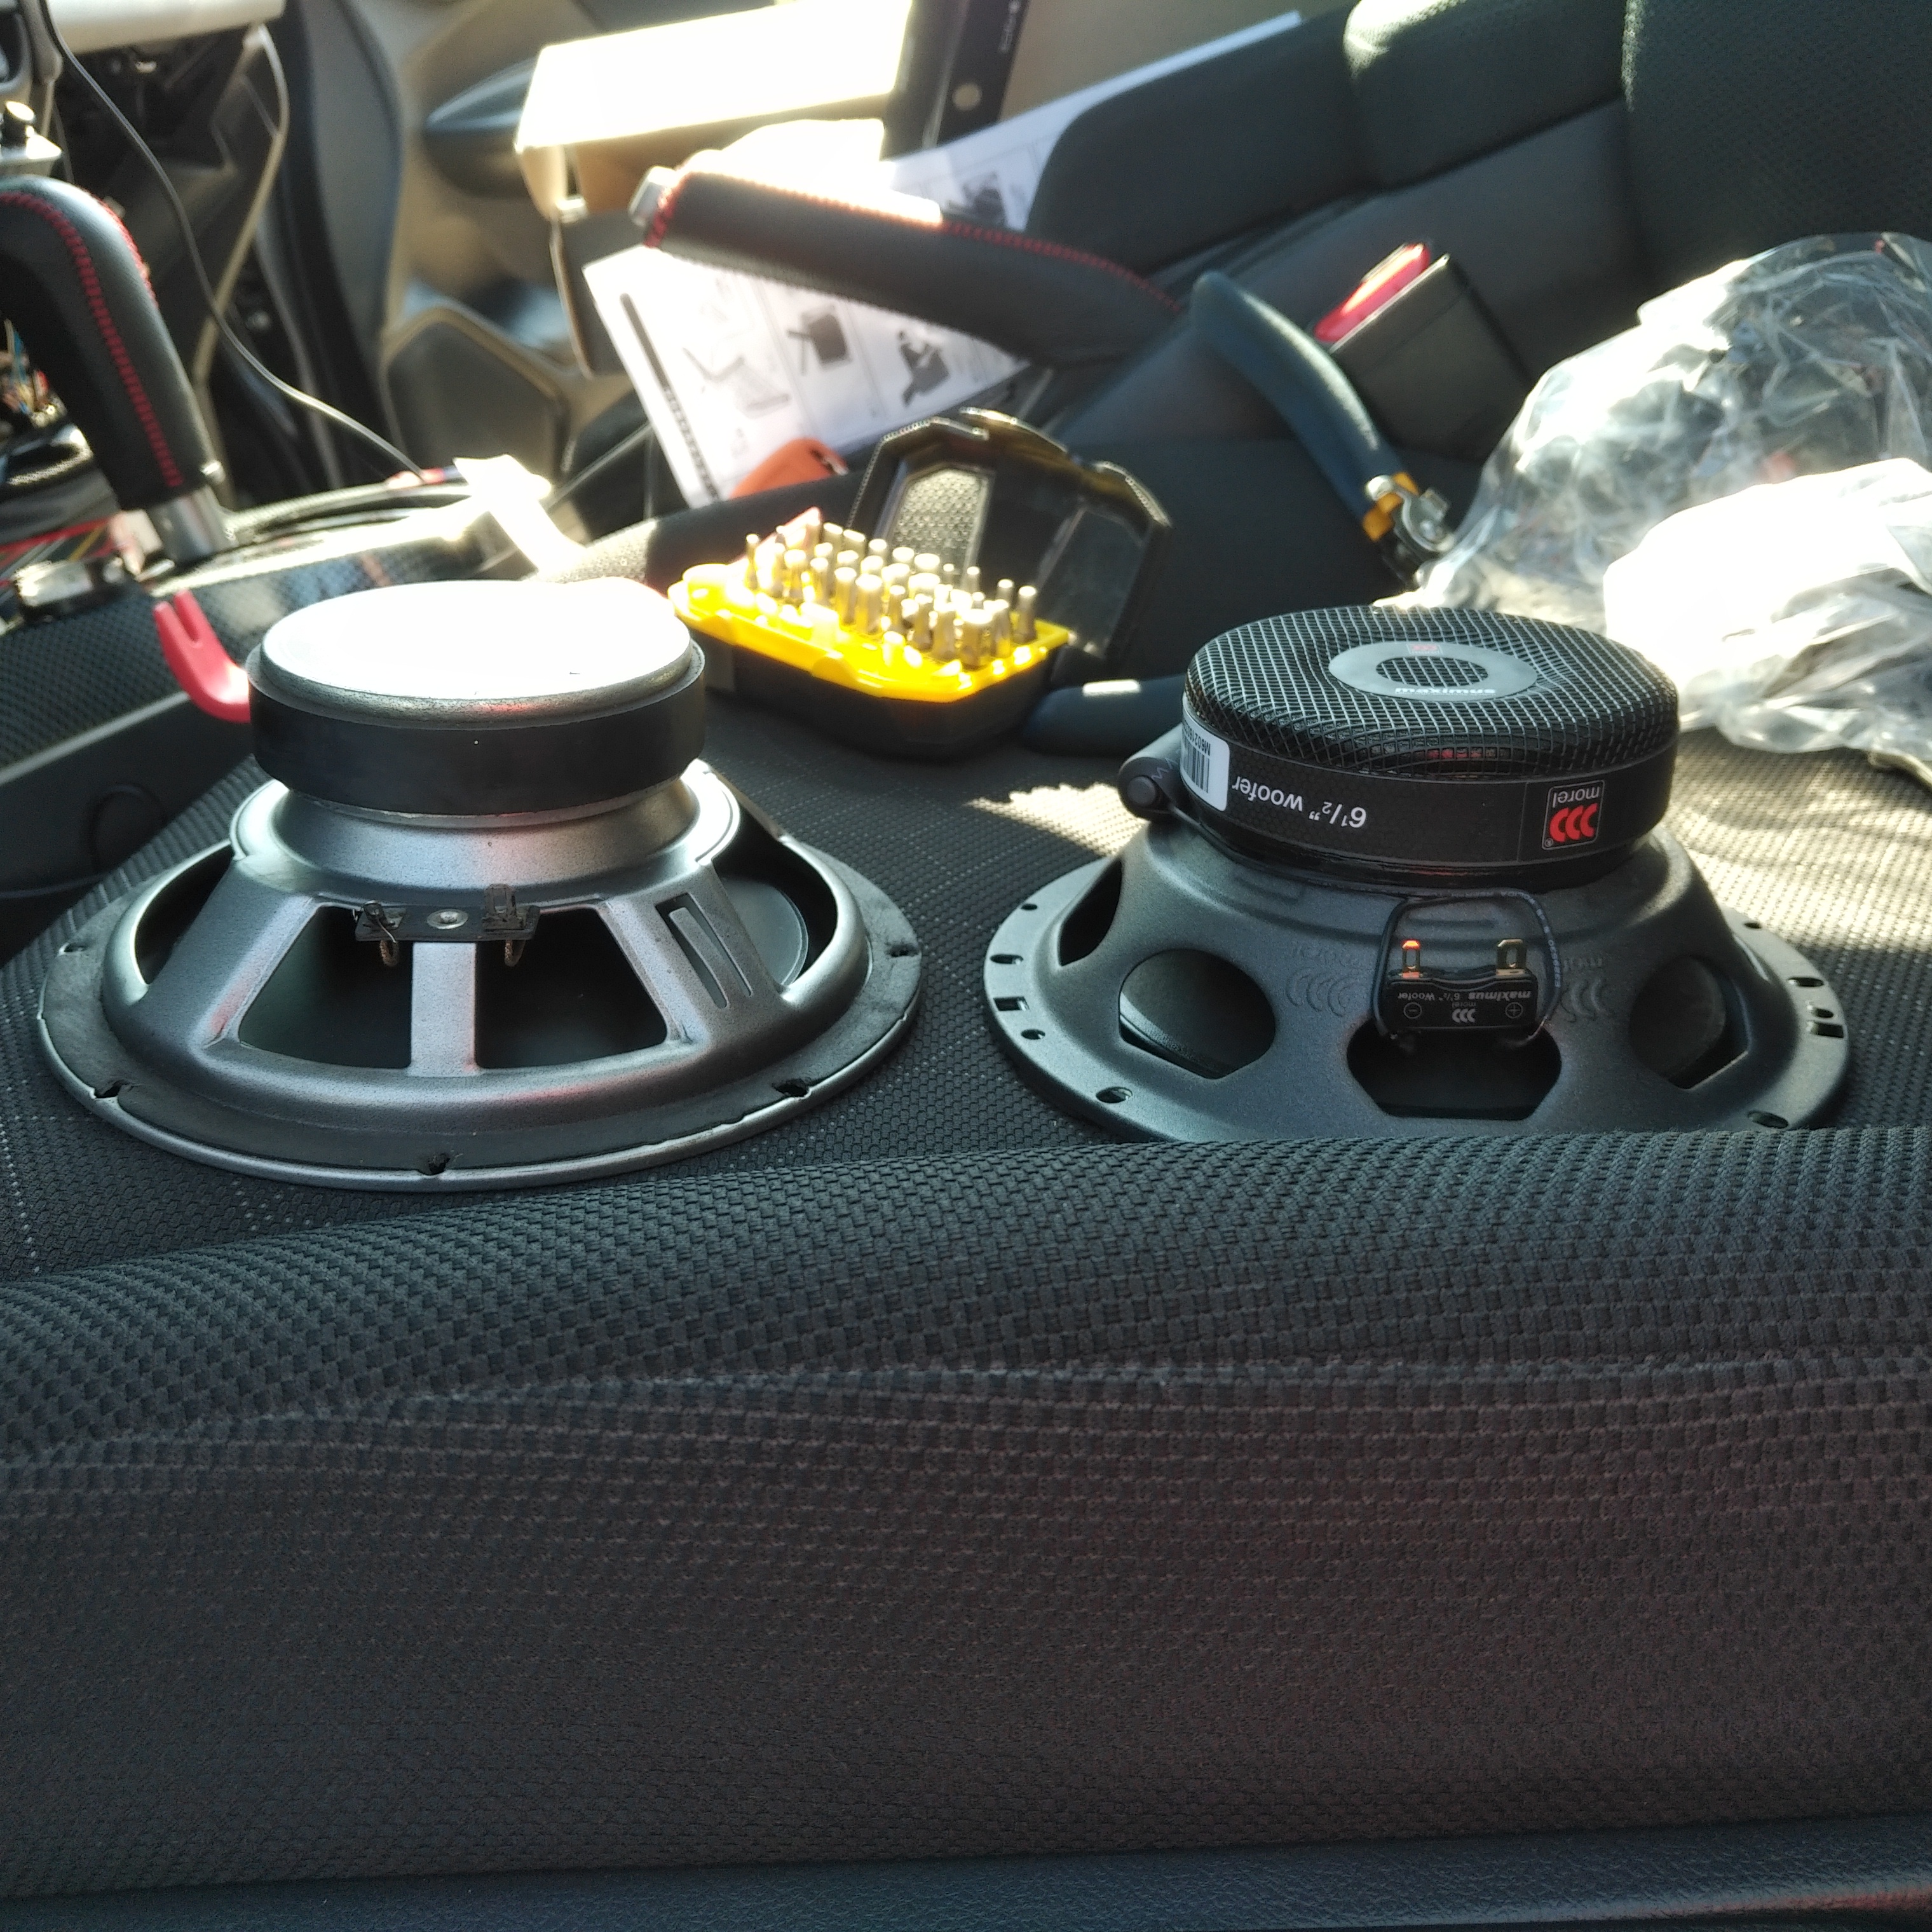
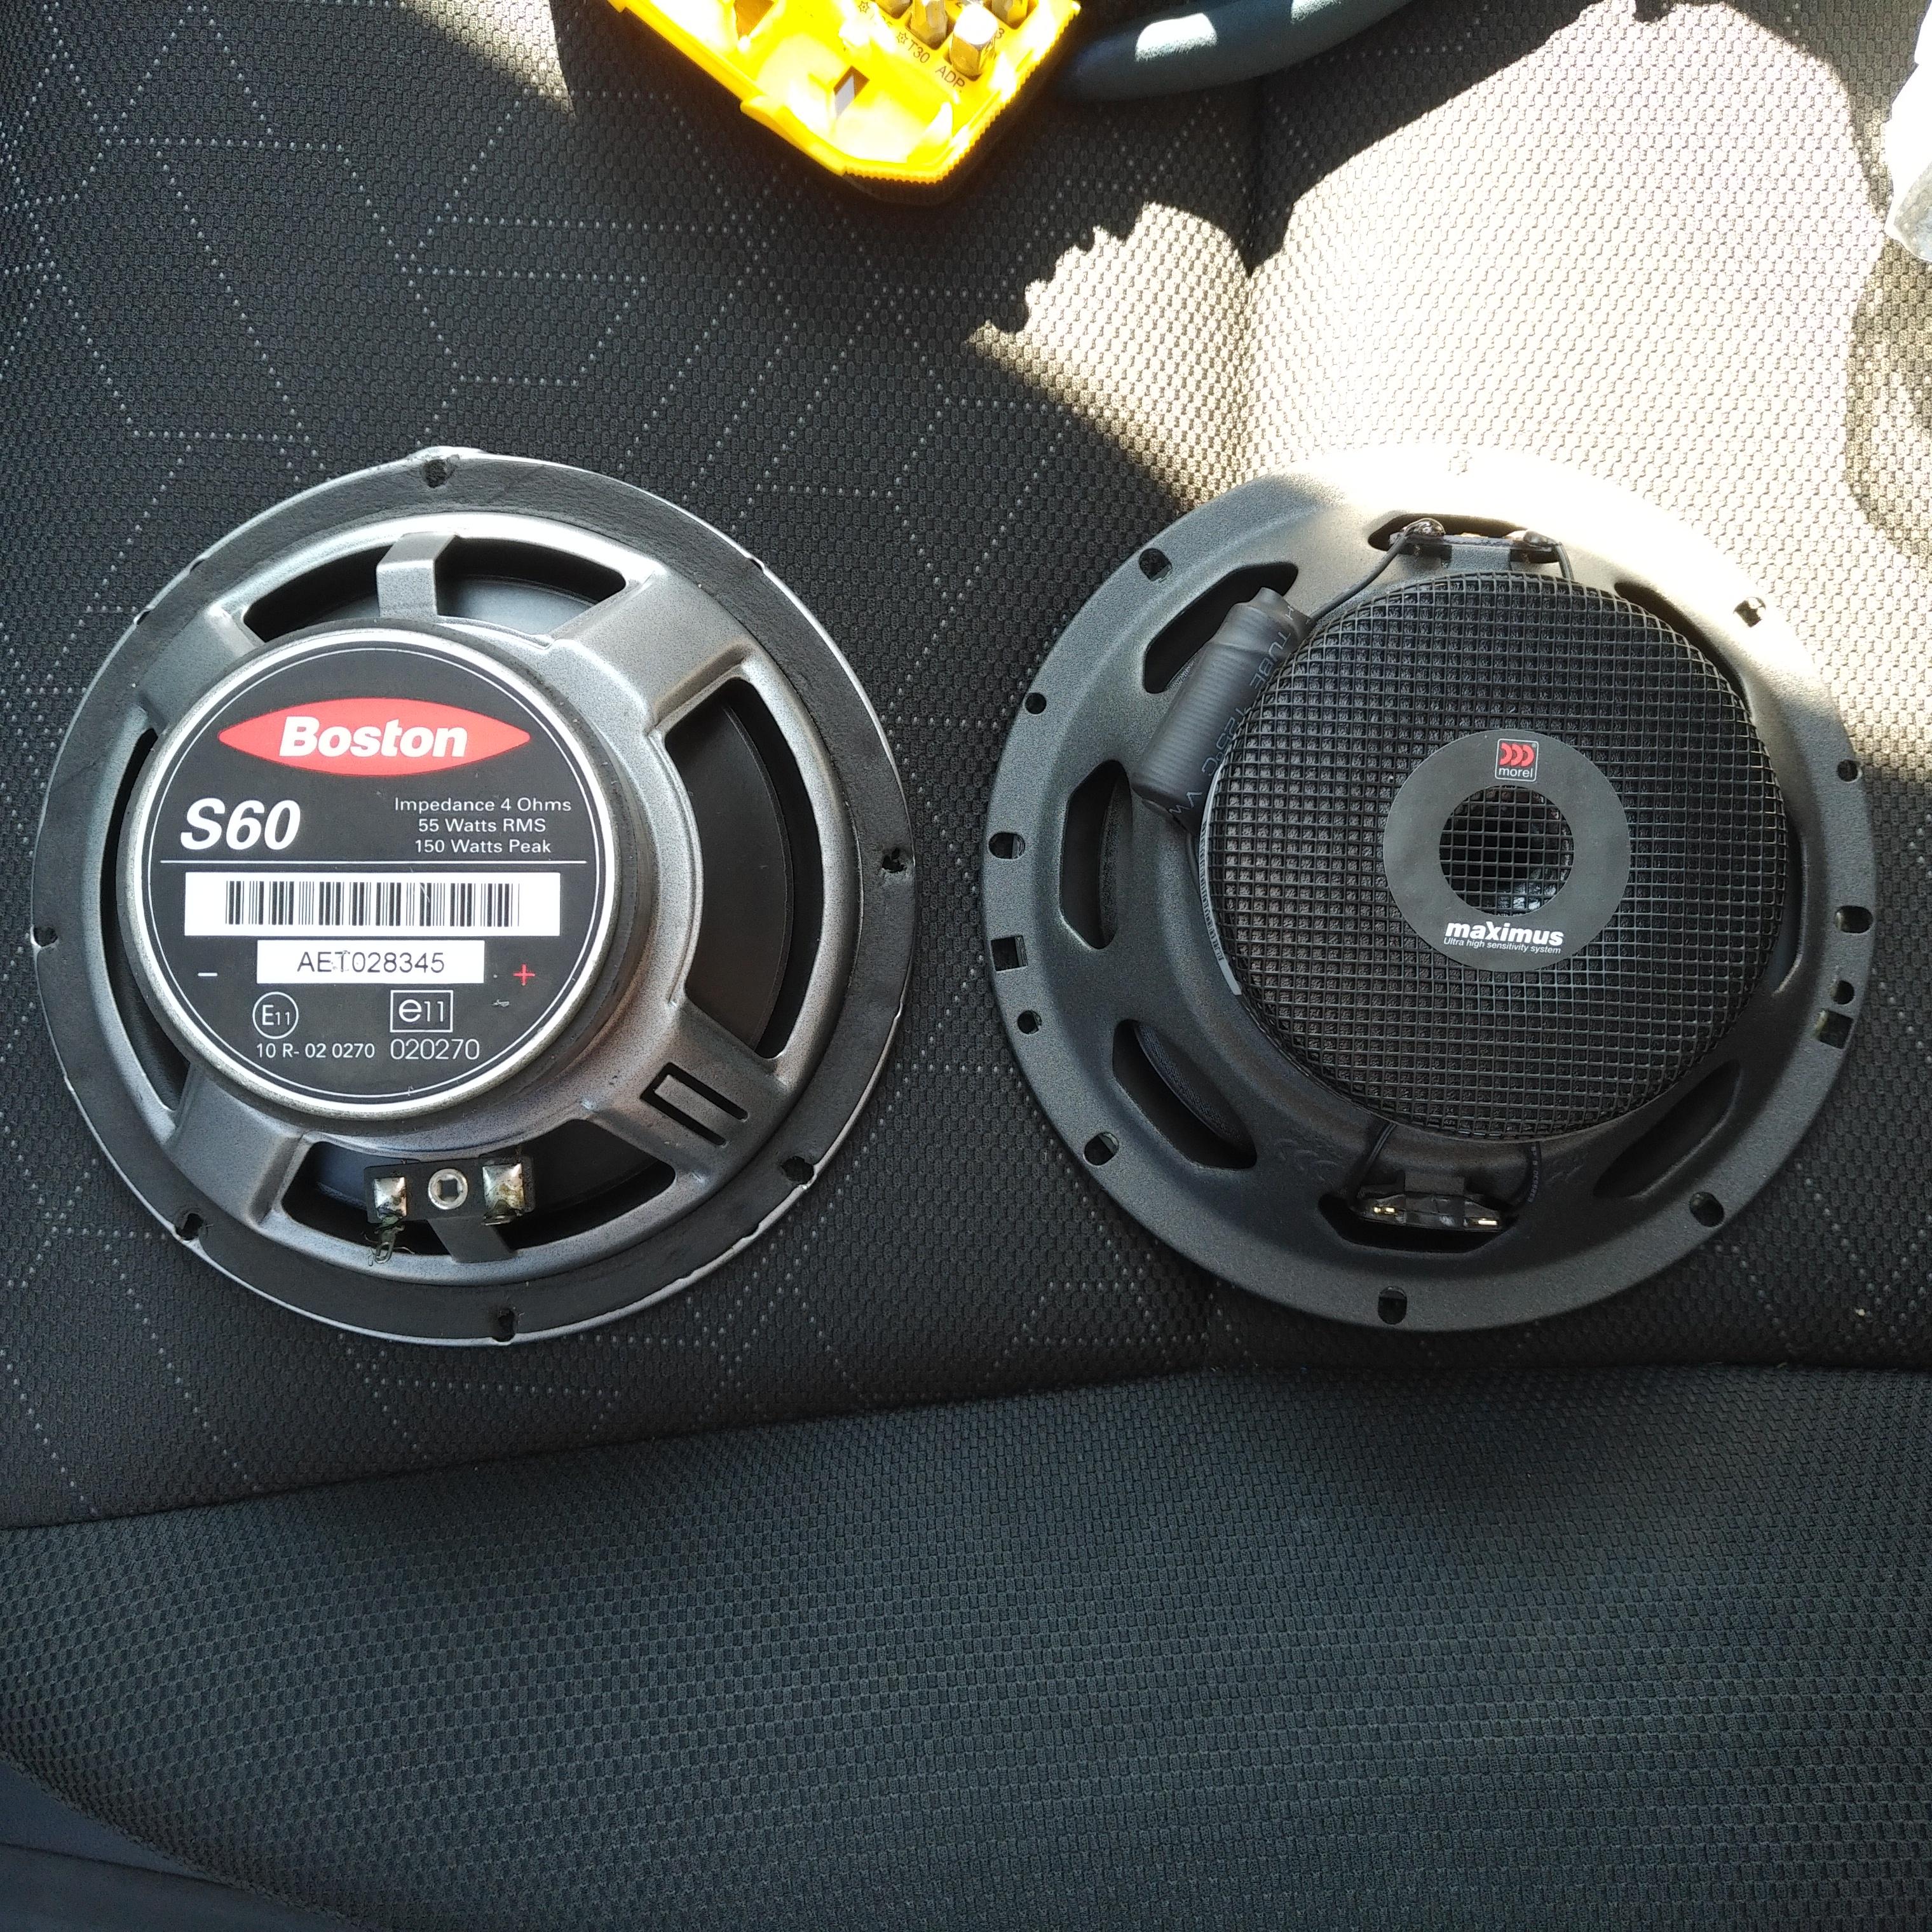
For the Boston's I put only the woofers in the rear doors.
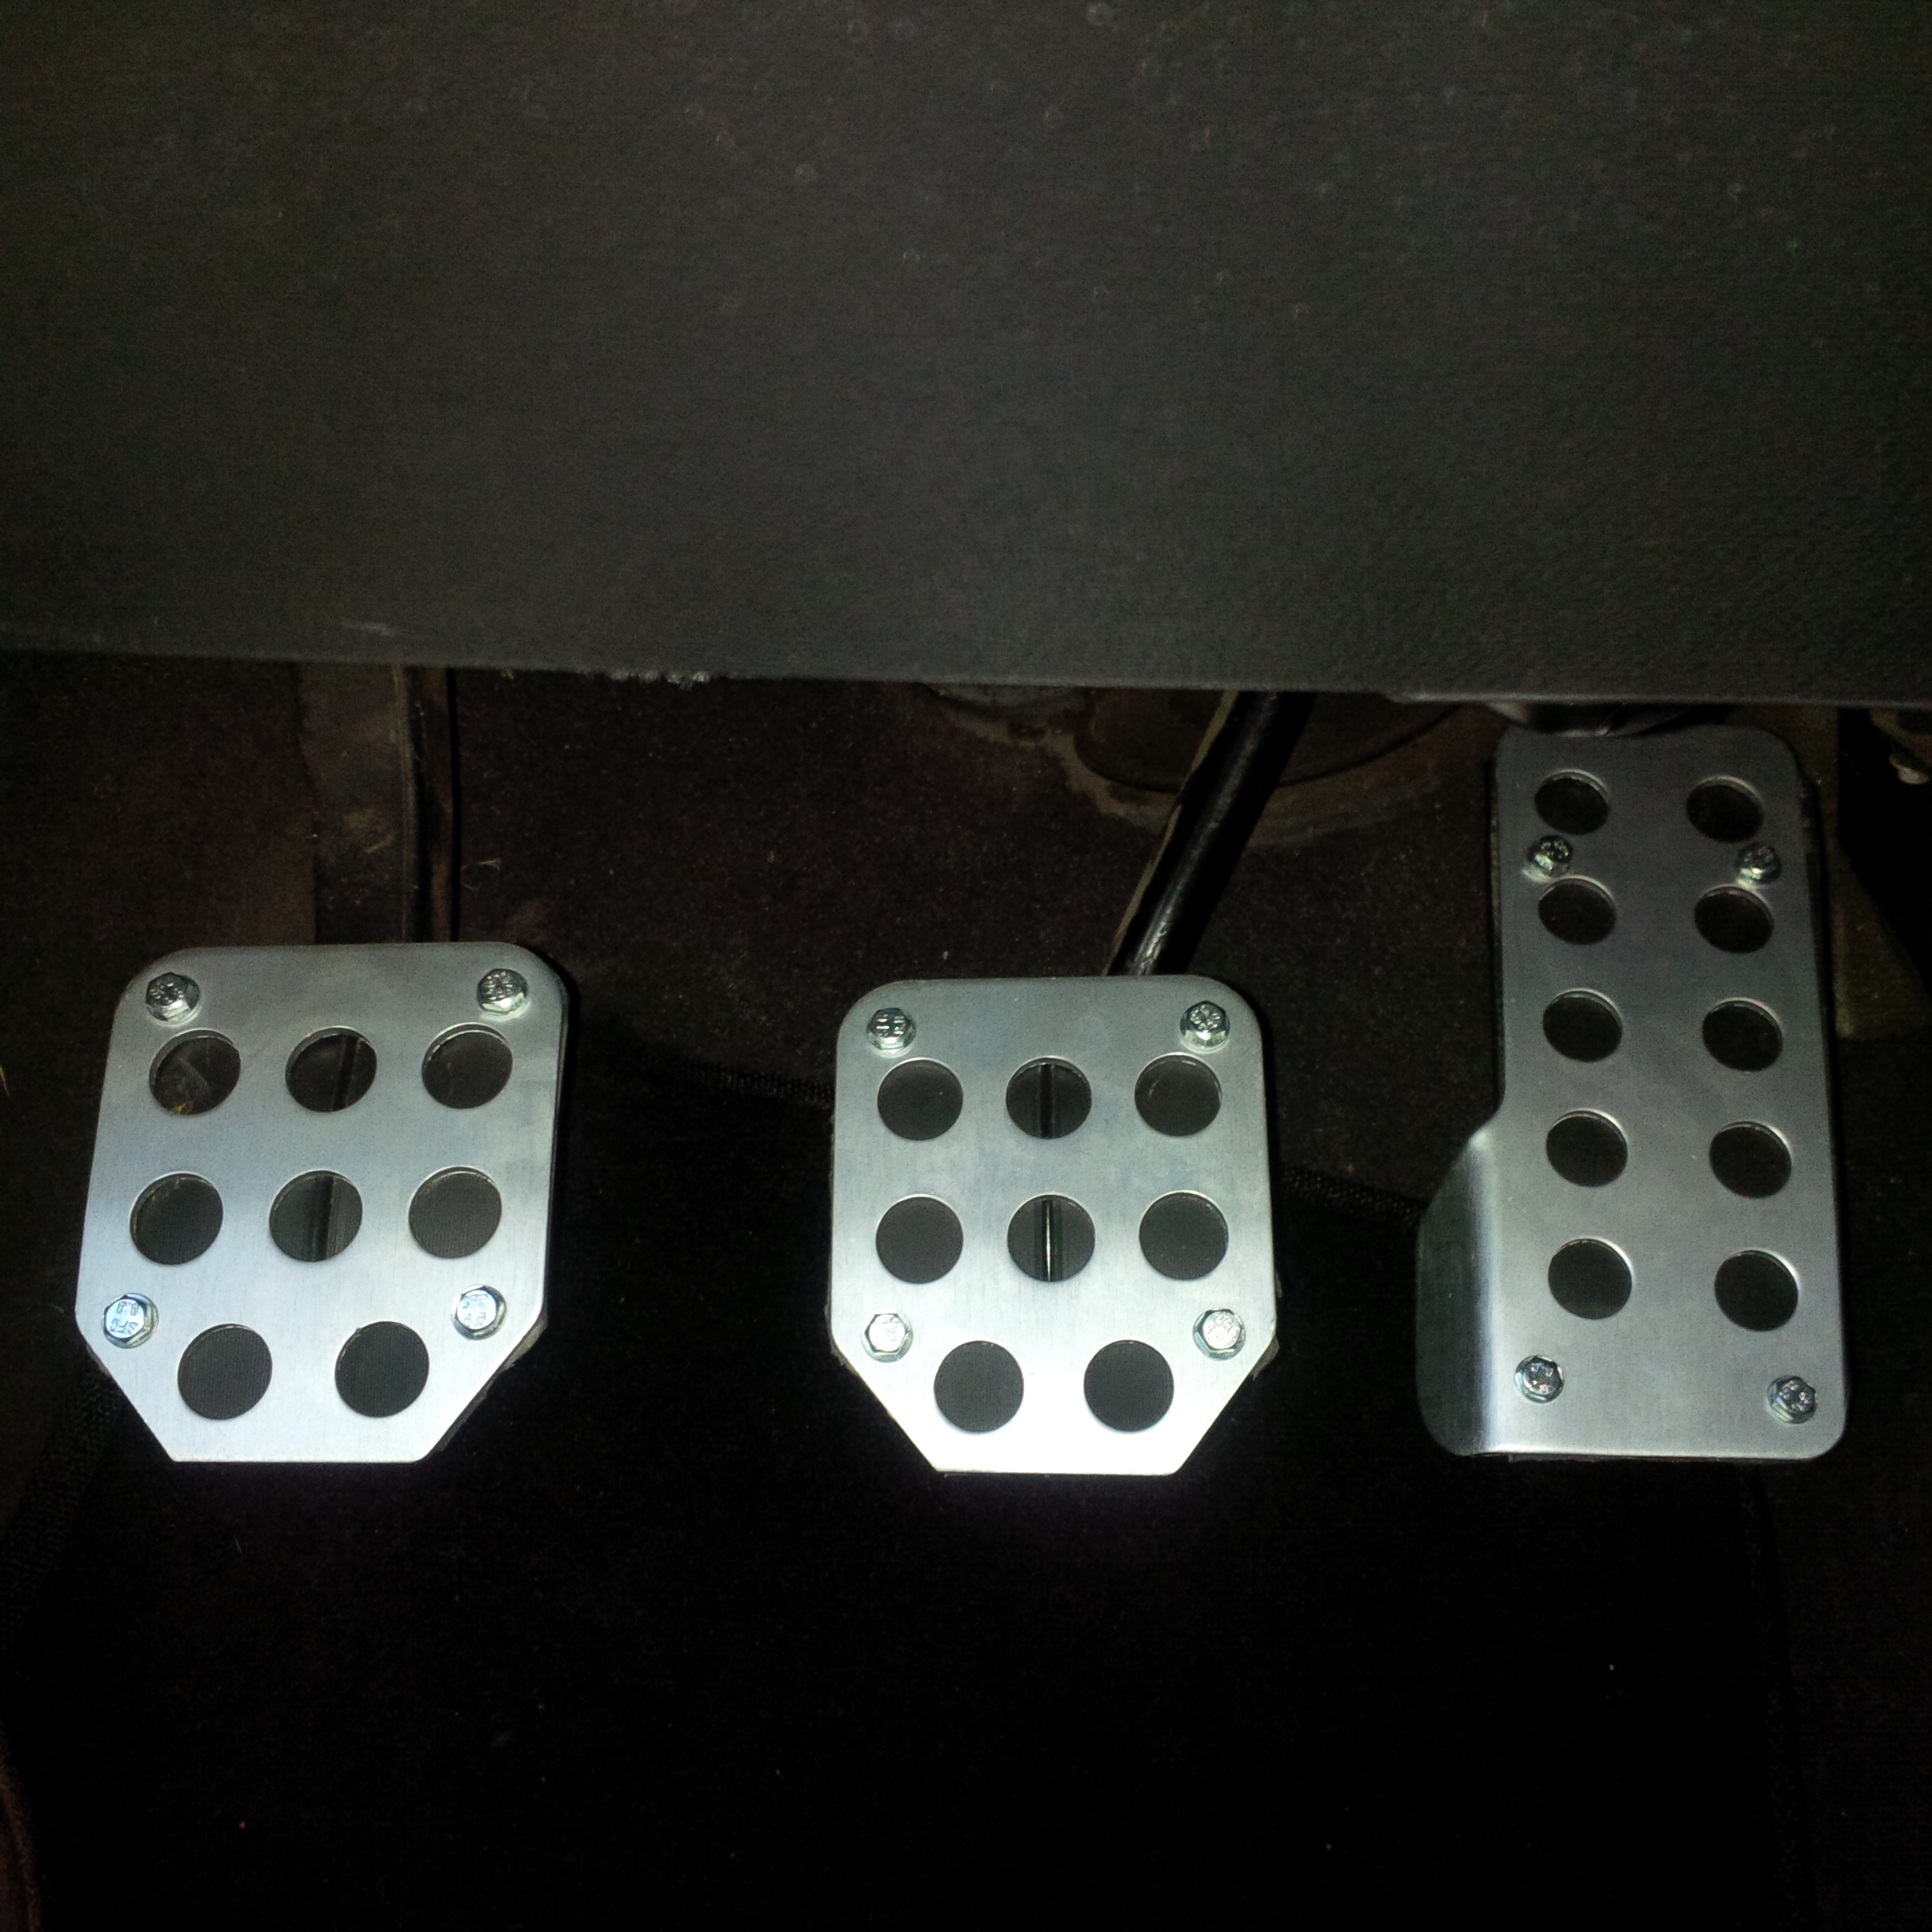
Installed some Razo Super Grip pedals RP121A (size small).
I tweeked this install by adding rubber strips on the pedals for the hardware to grip better, and to hide the hardware. I also used hexhead bolts to improve the grip. I found out the hard way that wet shoes makes these style of pedals slippery like grease, so I've used hexheads since.
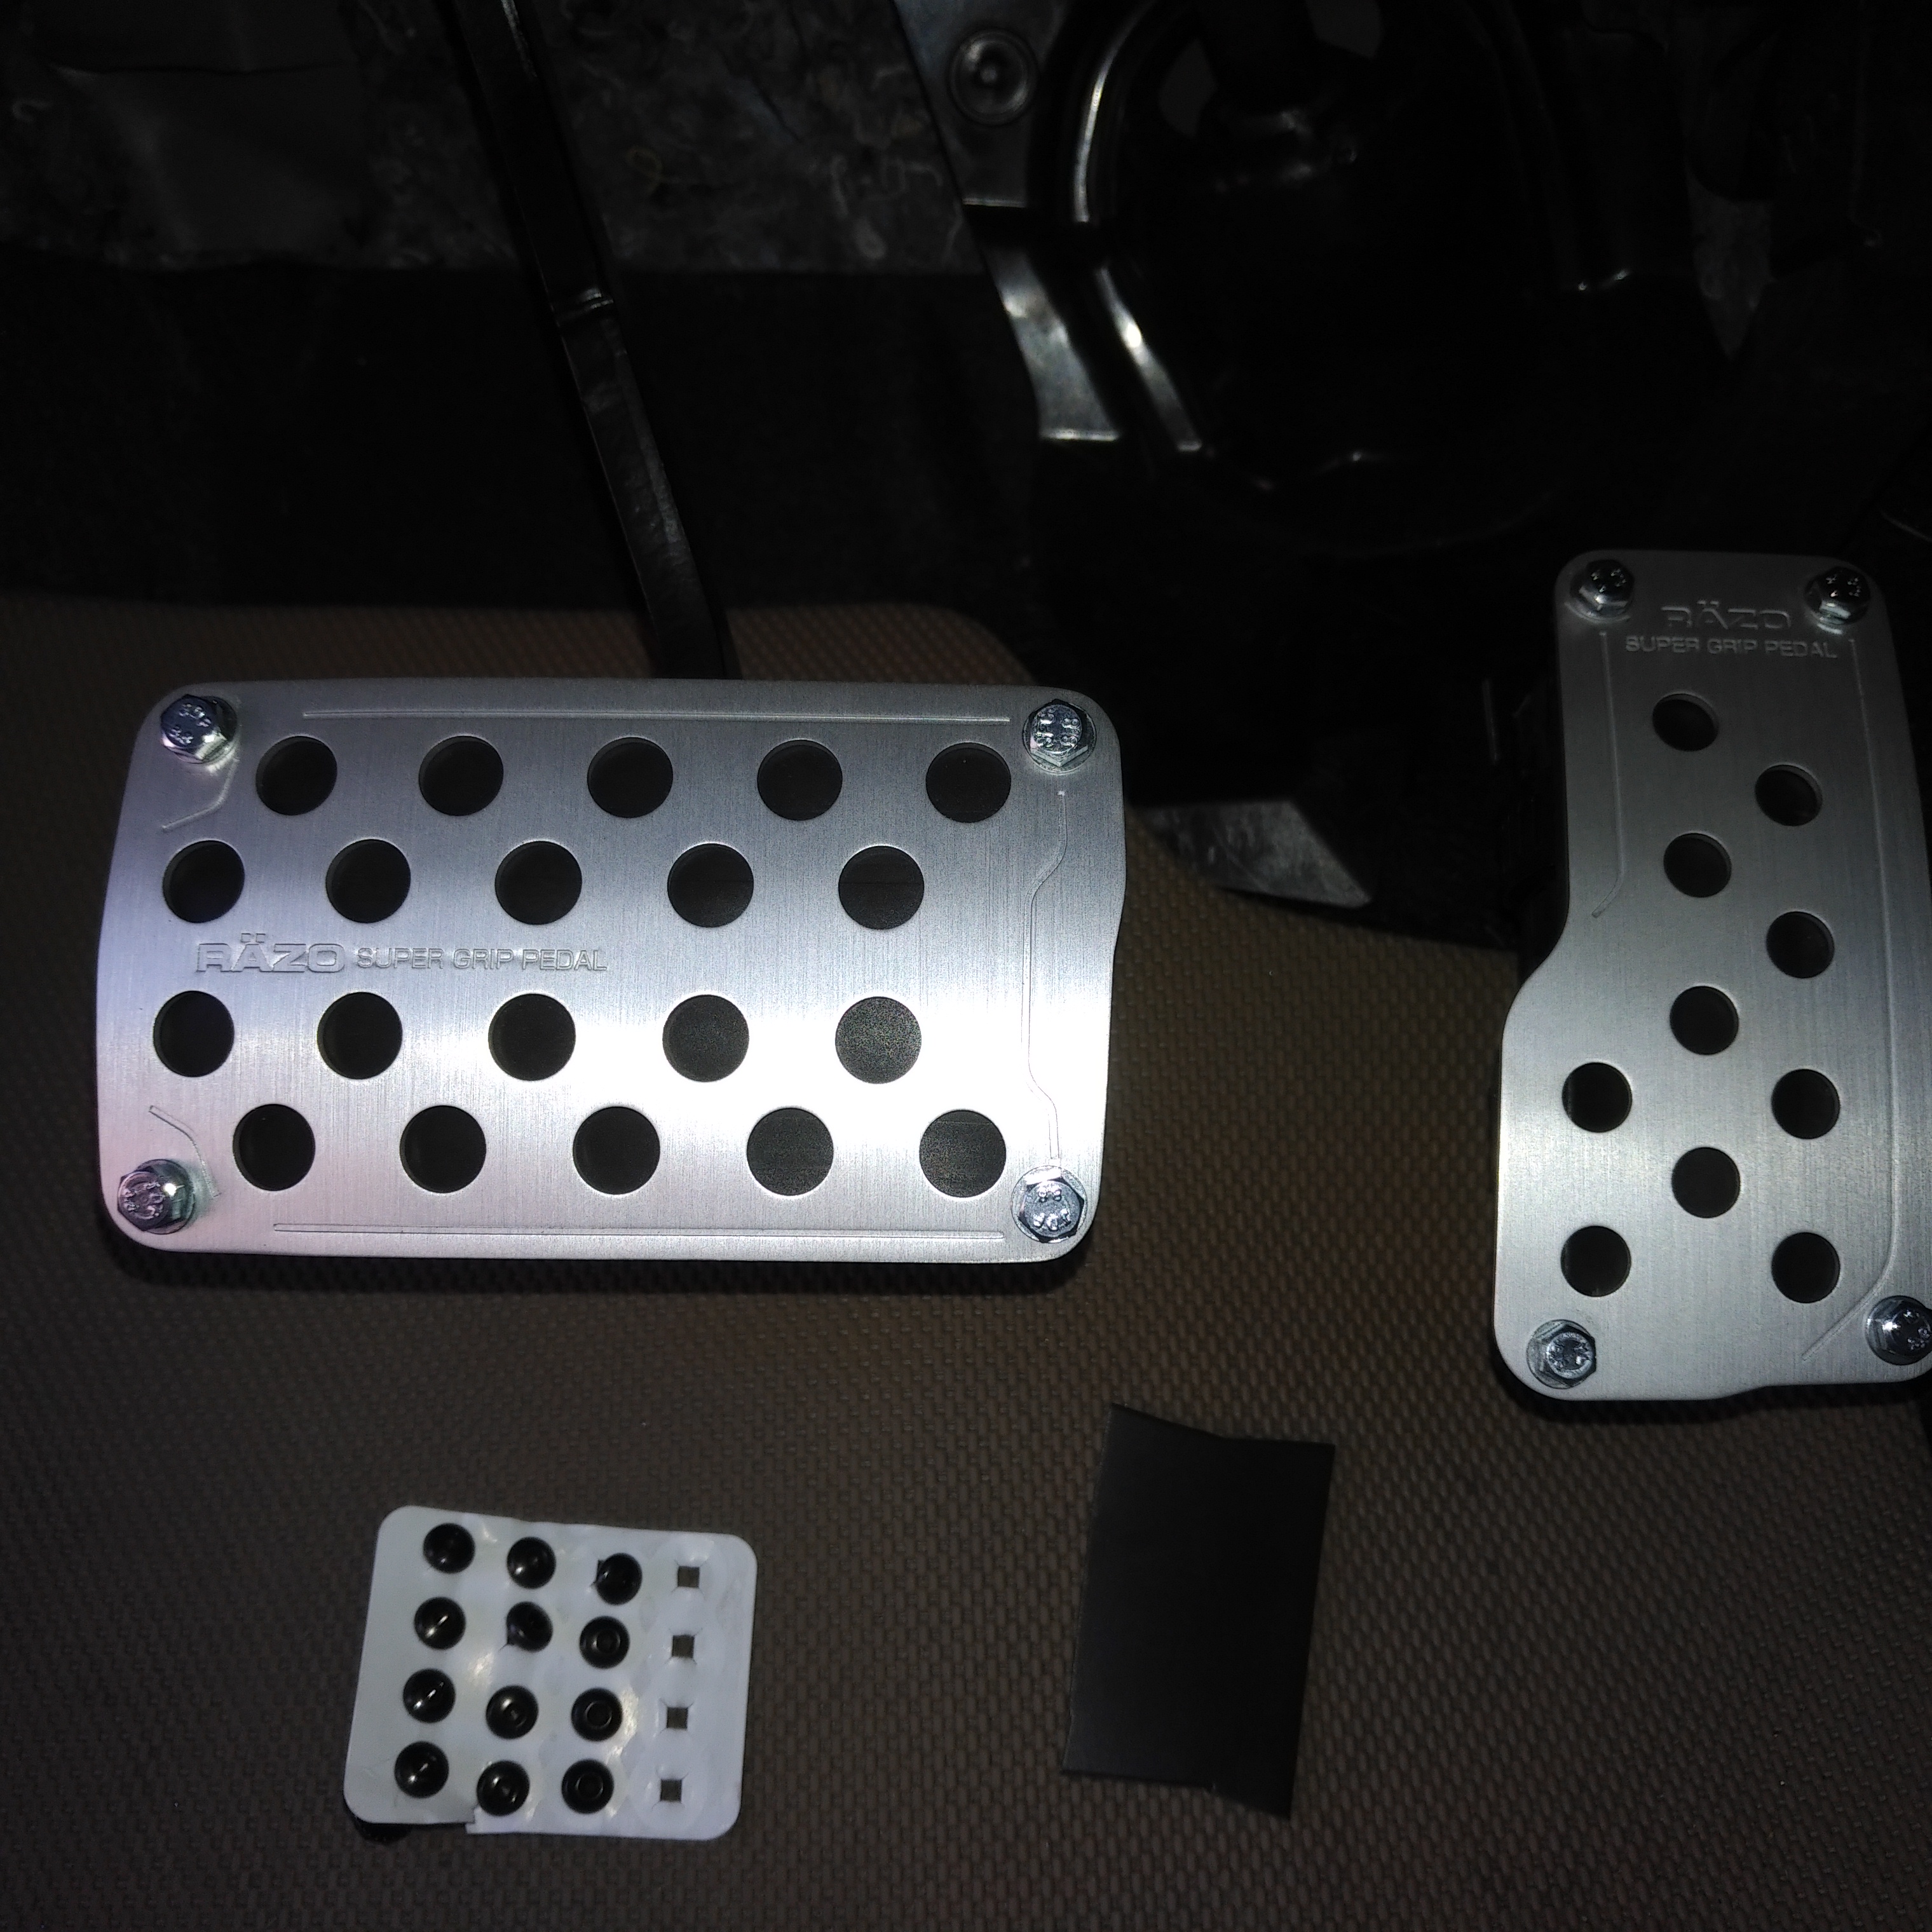
These were on my Saturn Astra, which used to be on my Integra.
I tweeked this install by adding rubber strips on the pedals for the hardware to grip better, and to hide the hardware. I also used hexhead bolts to improve the grip. I found out the hard way that wet shoes makes these style of pedals slippery like grease, so I've used hexheads since.
These were on my Saturn Astra, which used to be on my Integra.
Last edited by Action Jackson; Sep 22, 2017 at 08:31 PM.