When you click on links to various merchants on this site and make a purchase, this can result in this site earning a commission. Affiliate programs and affiliations include, but are not limited to, the eBay Partner Network.
Thanks, Yeah, definitely over thinking this. There is a Honda dealer about 20 miles from me, think I'll pack a lunch, drive over there and get what I need one day this week.
Respect to my colleague Carbuff, but I like the new gasket idea. A good thing for your car, not a lot of money and, if a reused old one fails, just think of how much you are not going to enjoy redoing the job because of a gasket.
BAM! Did the valve clearance today and the thing is purring! This motor has had a rough idle (worse when cold) for about 50K miles. The clearance was WAY off, Intakes were all over (about .012-.009) and the Exhaust were all under (about .004-.006). It took some time, but someone without O.C.D. could do the job in a couple of hours. I left the throttle body attached to the upper intake, I replaced the valve cover gasket (probably didn't need to), and reused the Upper to Lower intake gasket because it looked like better quality than the aftermarket one I bought on line. Thanks again to everyone that contributes to this forum, great info here!
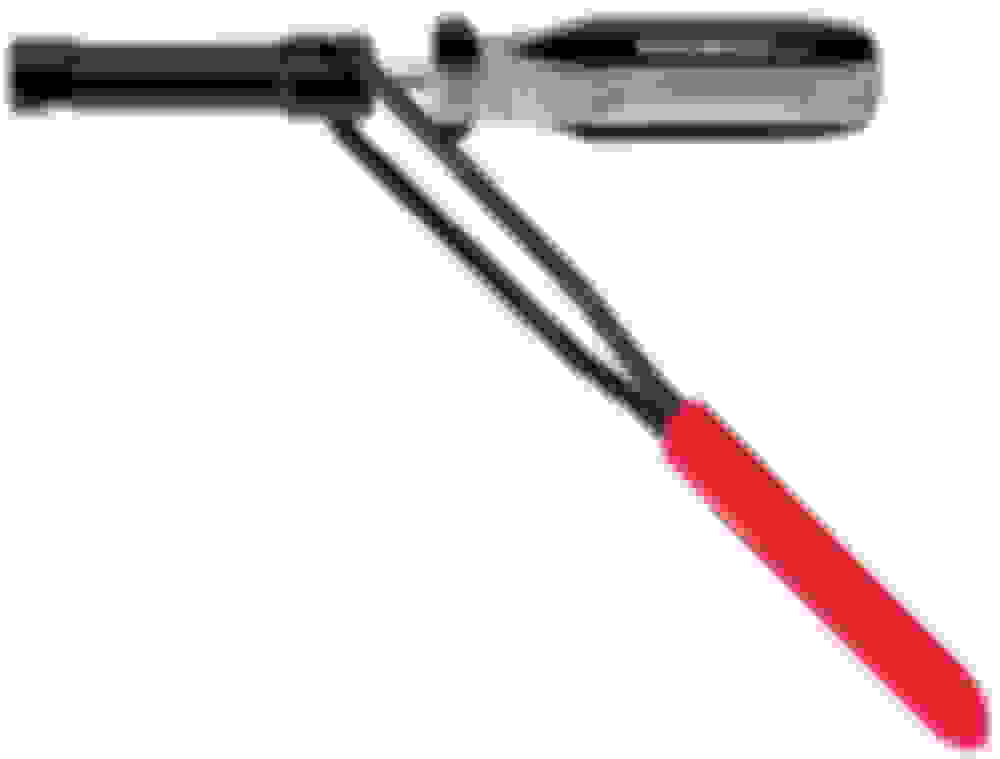
In case anyone doesn't know, there is a tool for this job. Much easier not having to hold a wrench and screwdriver simultaneously. Highly recommend, especially for this price.
I did the valve adjustment and it took care of the car dying at stop lights when cold. However, now it cranks (CH CH CH CH...) for a while before it will start, sometimes it takes a good ten or fifteen seconds to actually start. Once it starts it runs just fine. My engine light is on with code P0365 (Camshaft Position Sensor "B" Circuit Bank 1). Any ideas would be much appreciated.
I did the valve adjustment and it took care of the car dying at stop lights when cold. However, now it cranks (CH CH CH CH...) for a while before it will start, sometimes it takes a good ten or fifteen seconds to actually start. Once it starts it runs just fine. My engine light is on with code P0365 (Camshaft Position Sensor "B" Circuit Bank 1). Any ideas would be much appreciated.
Are you sure the crank was perfectly at top dead center and at the correct mark for the cylinder you were adjusting?
Are you sure the crank was perfectly at top dead center and at the correct mark for the cylinder you were adjusting?
As far as I could tell. It seemed to me there was a bit of eyeball work that went into it. If it were off by a milimeter would that make a difference? If so how do you ensure that it's parallel?
I did the valve adjustment and it took care of the car dying at stop lights when cold. However, now it cranks (CH CH CH CH...) for a while before it will start, sometimes it takes a good ten or fifteen seconds to actually start. Once it starts it runs just fine. My engine light is on with code P0365 (Camshaft Position Sensor "B" Circuit Bank 1). Any ideas would be much appreciated.
Well, it could be the mistake I made both times I adjusted my valves. The first time I had the check engine light on and went to Advance Auto and had them read the codes. Went home and started checking things out. I had forgot to plug in one of the connectors that I had taken off to remove the valve cover. The second time, it was a different plug but when I saw the light, I started checking connectors. I would start there first as long as you didn't have the issue before you did the adjustment.
Just did the valve adjustment for the first time on an 08 Fit at 60K miles. Thank you everyone for all the info provided here!
My SO immediately said that the car drove more smoothly, and shifted more smoothly. Not sure why that is, but i remember reading others said the same thing after doing the adjustment. I just wanted to add a couple thoughts that hopefully help others that are planning on doing this. Some might be repeats, but if so i think they bear repeating!
1) You definitely don't need to remove the passenger side wheel or raise the car, just turn the wheel all the way to the right and you can reach the crankshaft bolt through the "star" perforation in the wheel well with a long extension. My extension was long enough that i could turn the socket wrench while looking directly at the engine to line things up.
2) I was most worried about turning the crankshaft the wrong way, but as long as you use a ratcheting socket wrench, and set it to only torque when turning clockwise, you don't really have to worry about turning it the wrong direction - the wrench will not allow you to provide torque counterclockwise.
3) Get some bright tape, i used yellow electrical tape, to mark all the wires you disconnect. It makes it really difficult to forget to reconnect them after you are all done. It's a little bit of extra work, but you'll thank yourself at the end, as it will save time having to triple check everything.
4) there is definitely a bit of a learning curve with the valve clearance adjustment. By the time i finished all 16 valves, i decided I should redo the first set of 4. They definitely needed a little more fine tuning.
5) people mentioned things sounding weird afterwards, and having to redo the procedure. to reduce that possibility, i rechecked the tightness of all the bolts with a torque wrench (with 10mm flare crowfoot attached
and on top of that, they point out near the end of the video that while you have everything out, you can access the automatic transmission fluid filter. I had changed my fluid a few times, but never changed the filter, so it was the perfect time to do it. The part # for my 08, at least, was 25430-PLR-003 . You'll need to remove the battery holder, which is 3 bolts. 2 are obvious, one is up on the side of the firewall and doesn't look like it has anything to do with that piece of metal.
8) I removed the battery to make things easier to access, i definitely recommend it. Just be sure to do the engine idle relearn procedure. Let the car run (or rev the engine up to 3K for a bit), until the engine fan comes on. Then set a timer for 5 minute and let the car idle (no more revving). Don't count any time that the engine fan is on in that 5 minutes. Once that's done, the idle relearn procedure should be done and you can go drive the car
Last edited by FitFiFit; Mar 27, 2017 at 03:29 PM.
Performed first valve adjustment on my Fit this afternoon at 145k miles. Took about 2.5 hours. Ive been noticing a slight miss at idle sort of like when I noticed a coil going bad at 70k I thought they might be wearing out again. I never bothered with the valves since manual said to adjust when noisy. But I noticed my engine actually getting quieter with age I thought it was just "wearing in". I remember when new it had quite a bit if valve clatter.
Then I read here that quiet valves were not a good thing so it was time to check.
All intake valves were loose - - didn't measure how loose just felt that the 0.007" was way too loose. Adjusted all intake valves to the tighter end at 0.006"
All exhaust valves were tight. Didn't know if it was better for the engine to err tighter or looser so I settled in the middle at 0.012"
Cleaned throttle body while I had it off but wasn't bad for 145k.
Upon startup I immediately noticed the valve clatter like I used to hear. It was actually a nice sound to hear compared to the quiet "tight" sound it had developed.
I noticed it has better low end torque and throttle response. It likes to run at high rpms again just like it was new. Lately it had been sounding "loud" at higher rpms but thought maybe it was just the age.
It was a much easier job than I expected and the most worthwhile maintenance I've done on the car so I'll definitely be checking again in 40-50k.
About halfway through I also realized that holding the bent feeler gauge correctly was key. Holding it aligned with the angle of the valve and making sure it was sitting flat on top, not angled up or down was key to feeling the correct drag. The first few I wasn't feeling correctly which led to those being too loose. The go-no-go method would avoid this problem but I liked going for feeling drag of the right gauge than trying to jam a gauge in to make sure it wouldn't go.
Last edited by phoenity; Mar 27, 2017 at 10:11 PM.
Just finished with valves and spark plugs. Seems to be running great, but the ticking is noticeably louder than before. Not sure if I should be worried. I didn't adjust intakes at all at set exhaust at a loose .010.
The valve system on this engine is a solid roller system, there are no parts in the valve train to absorb play so there is always a small amount of slack that you'll hear when everything is adjusted properly. The VTEC rocker pistons also likely cause a small amount of chatter between the two affected rockers on each cylinder when not engaged.
alright guys, i trust you Man, it's still a little spooky though. I may do it over again, because my feelers stopped at .008, so I couldn't do intake even if I wanted to. Glad I did the plugs while I had it off - the "autolite xps" that were in there looked pretty rough. went with ngk lasers and hoping I dont have to touch them again since ive already got 195xxx on the clock.
Finally got around to doing this and man, I waited way too long. My Fit has 170XXX miles on the odometer and was stalling upon cold start and hesitating when accelerating. There was also a strong gas smell from the exhaust when cold starting too. Adjusting the valves fixed all of that up.
For me the hardest part was finding out how to remove the entire intake system to get to the valve cover. I had to remove the battery since I've replaced my battery with the larger one awhile back.
As the majority of the folks on here had stated already, my exhaust valves were very tight. I couldn't even fit the .007 mm gauge in the valve. Drives great now.


 Man, it's still a little spooky though. I may do it over again, because my feelers stopped at .008, so I couldn't do intake even if I wanted to. Glad I did the plugs while I had it off - the "autolite xps" that were in there looked pretty rough. went with ngk lasers and hoping I dont have to touch them again since ive already got 195xxx on the clock.