
The Late Bloomer: Hootie's 2008 GD3 Build


The Late Bloomer: Hootie's 2008 GD3 Build
Hi everyone, finally decided to pull the trigger and start having a bit of fun with my GD3. I've had this Fit since November 28th of 2007 with 4 miles on the odometer and as of today its is currently at 80,015 miles with a little typical wear and tear showing on a daily driven vehicle.
I'm posting up this thread as a bit of a time line/build progress for now and so far my GD has been a practical and fun daily driver... Now, its time for a change. Let's begin.
Hootie's 2008 GD3 Build
DSC_1289edited_zps5ca6e5e0.jpg?t=1378405130
For the last 5 and half years like I said its been serving as a daily driver so keeping it simple and functional was the priority at this time. So creature comfort and simplicity was the primary focus, starting out with a set of 15lb 15x6.5 Konig Quiz wheels, a Zeta dead pedal, HFP axle back, and Honda Access Slim Visors which was a good start for the initial 2 years...

... Until I met some autocross and road racing guys.
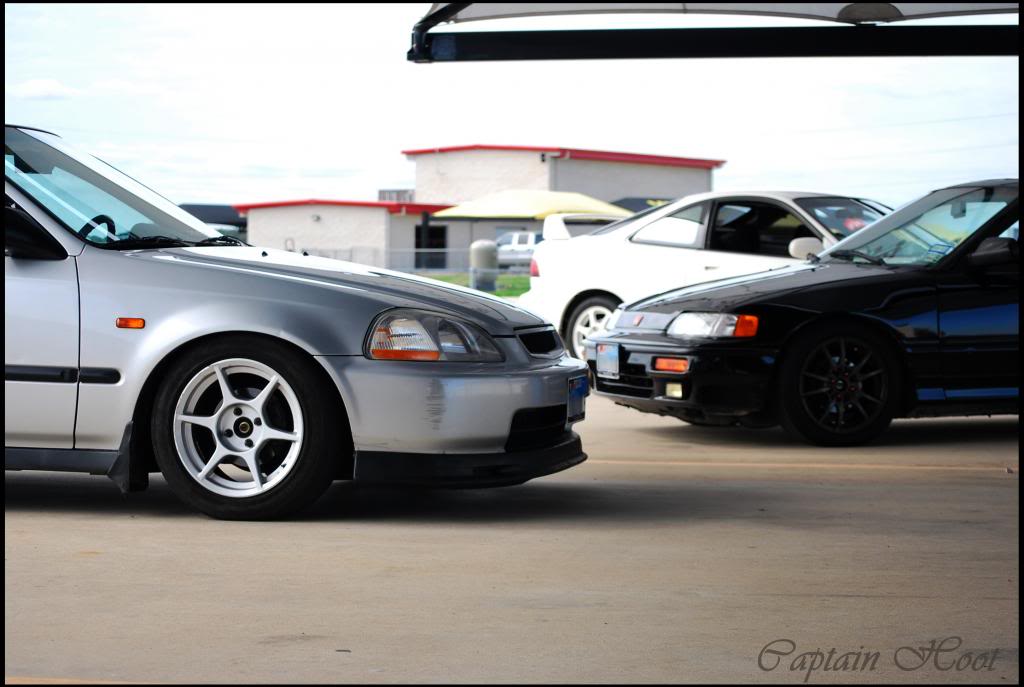
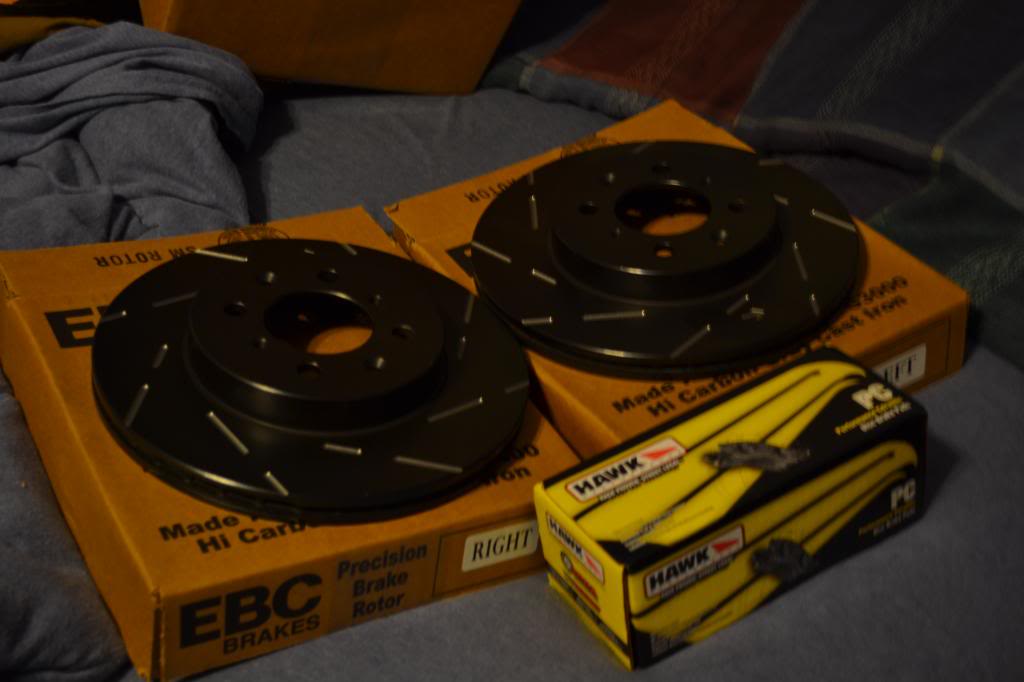
A change of pace was needed at that point, going on 4 years of ownership then (around 50k miles) and the only thing changed were tires and the installation of a Progress RSB which was acquired from member allgocrx. The bar was a nice addition but there was something still missing. I've been getting more comfortable with being able to control the car during spirited drives but have occasionally had issues with brake cooling AND the front rotors were warped. So, I picked up a pair of EBC USR 850 rotors with some Hawk Performance Ceramic pads then ditched the Konigs for a set of 15x7 ET+42 TRMotorsport C1s (12.8lbs per wheel).
DSC_8308.jpg?t=1378351926
Also installed a set of Clazzio seat covers to change up/freshen up the interior a bit.
DSC_8732_zps9446c6ff.jpg?t=1378406161
After the rotor, pad, and wheel install the brake cooling issue was resolved... maybe perhaps a bit too well since its for daily use and the initial bite does not feel as prominent as stock in stop and go traffic. Primarily due to the slotted rotors being better at dissipating heat better than the OEM solids and pads. To remedy this, I gave Carbotech a call and ordered some AX6 pads for the front (autocross compound) and 913 compounds for the drum shoes. These should be installed soon.
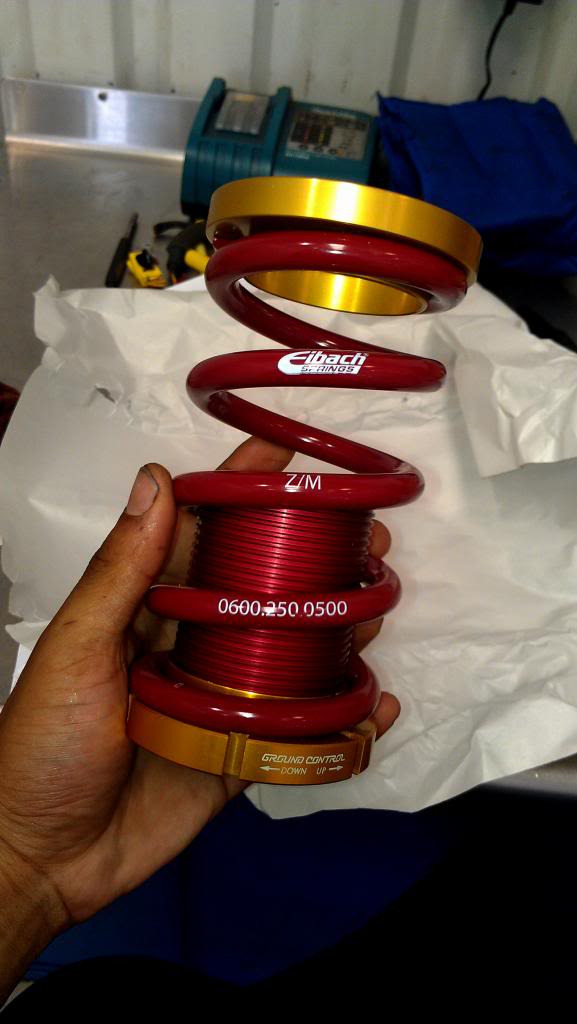
While hunting for a more aggressive brake setup, I decided that I would like to set the car up to be "decently competitive" for autocross and still be streetable. With that said, I ordered a set of Tokico HTSs (thanks Spencer at Bean Garage), Ground Control's coilover kit which features Ground Control ride height adjustment sleeves and Eibach springs (thanks Donovan at GC). Spring rates chosen were 500lbs per inch up front and 400 lbs for the rear.
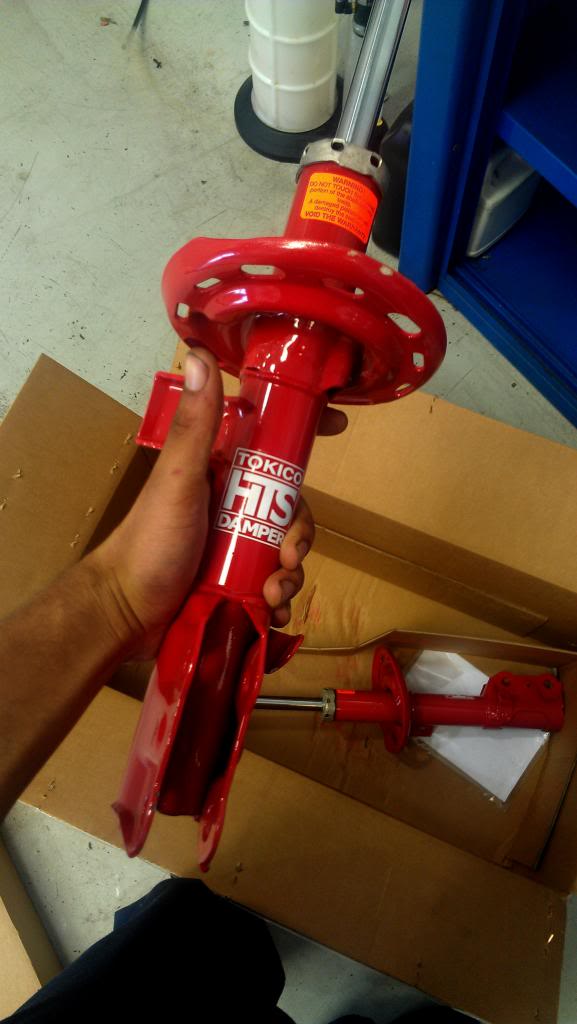

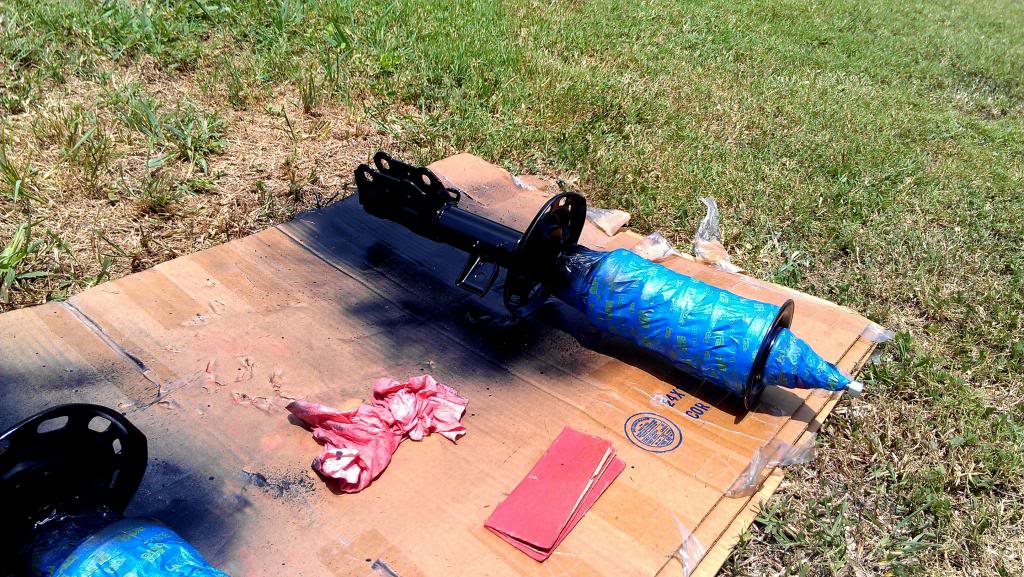
Here's a shot of the set front struts test fitted. As you can see the Ground Control sleeves simply slide onto the strut and rest on top of the natural colored gray metal ring on the strut body. Not shown in the image but there are rubber O-rings that must be installed on the strut prior to installing the adjustment sleeve to assist in reducing any horizontal play between the strut and sleeve.
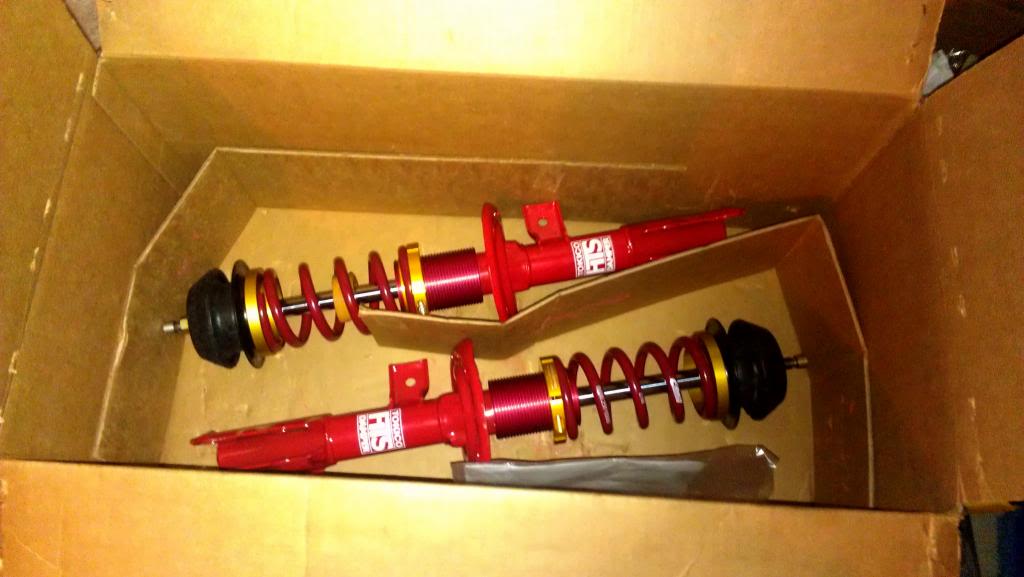
After test fitting and looking at the dampers in the sun, I decided the red was too damn obnoxious and rattle canned them Rustoleum's Satin Black. The end result was adjustable dampers that look OEM at a glance.
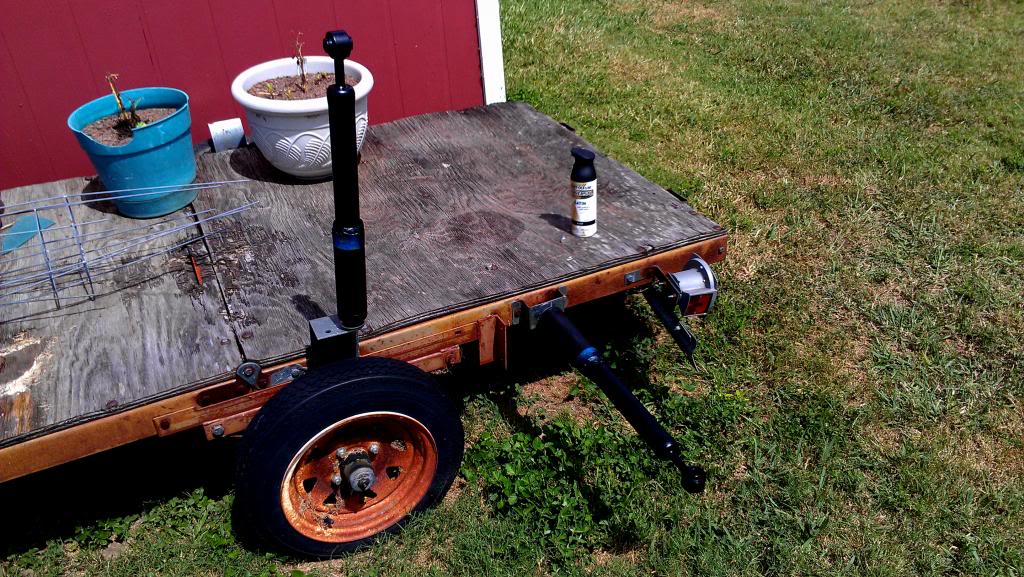
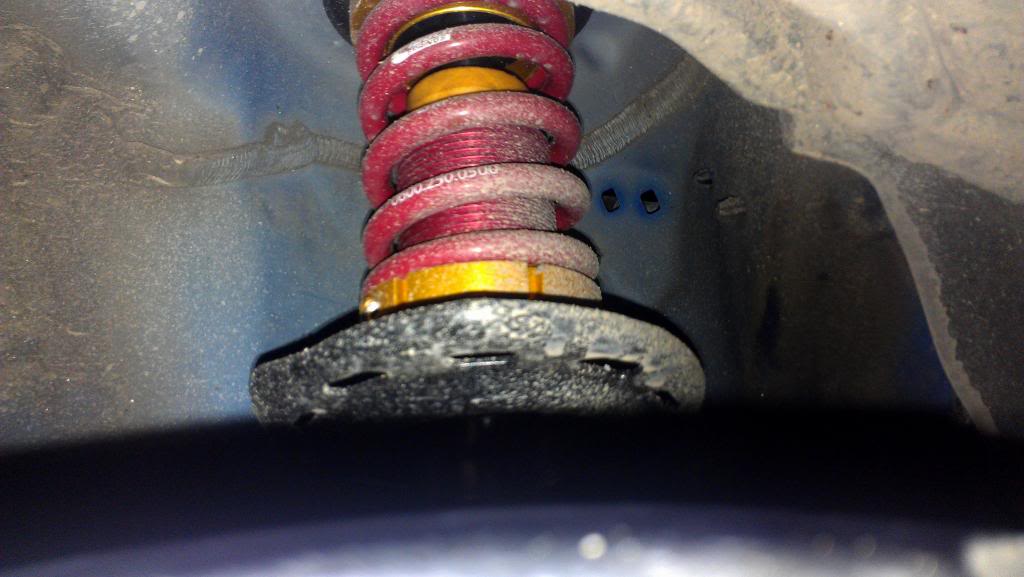
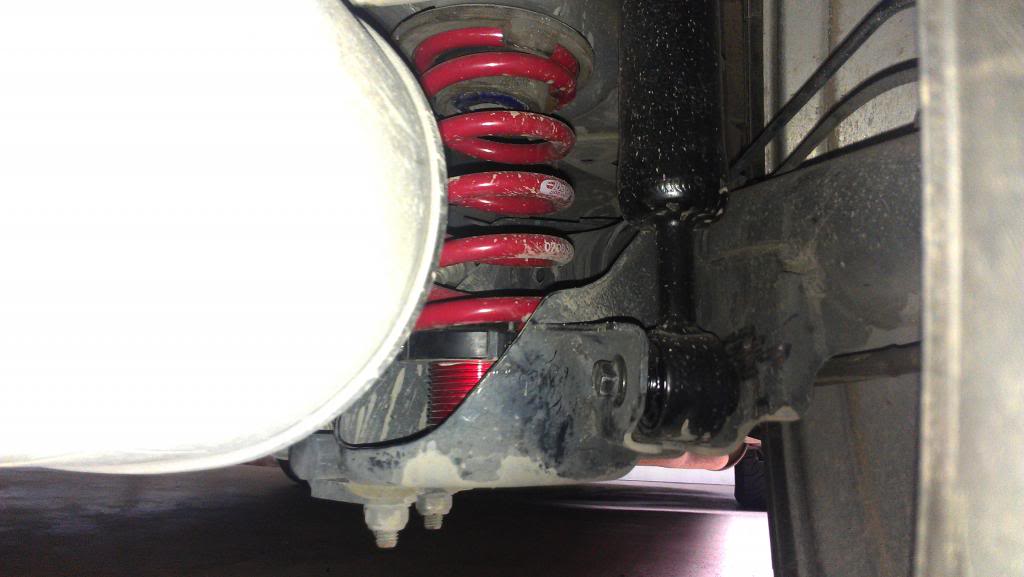
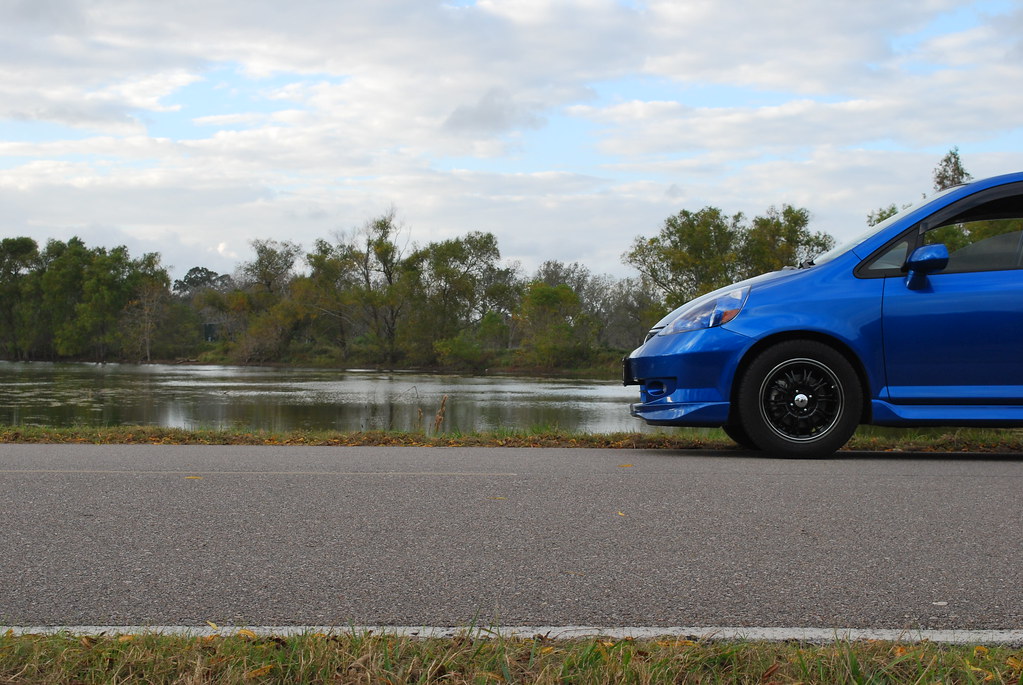
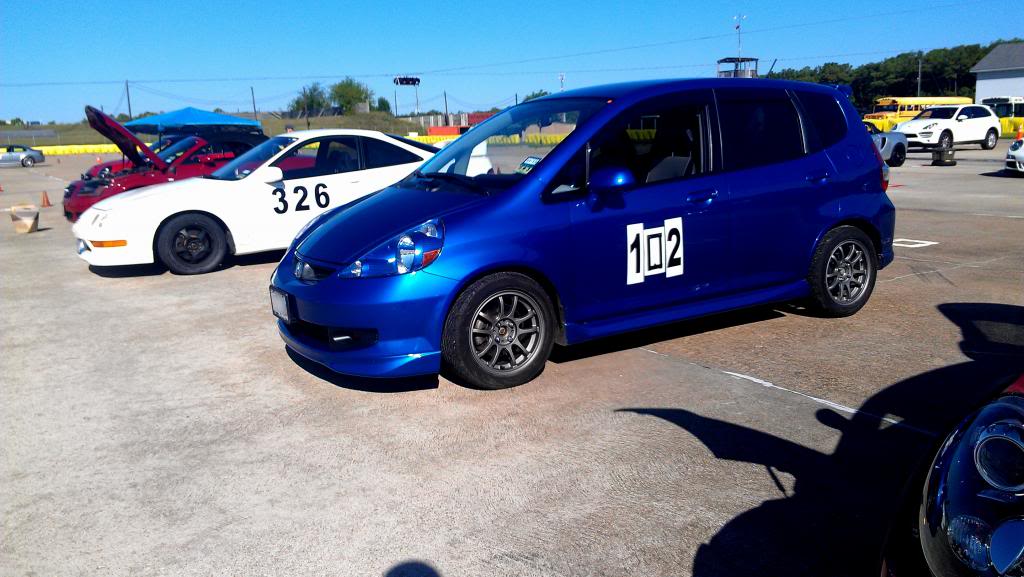
The only giveaway or hint there is any suspension changes is the bright red Eibach springs, red GC sleeves, and a slight forward rake (front end lower than rear). During the coilover install, I put on my 205/50R15 Yokohama Advan Neova AD08s that I had stashed away for this special occasion. The end result: A "stock-ish" looking Fit that should be able to hold its own on the autocross course or backroad. 
IMAG0305_zps3100fbd0.jpg?t=1378406199
More to come... Prepping for Tail of the Dragon in October.
I'm posting up this thread as a bit of a time line/build progress for now and so far my GD has been a practical and fun daily driver... Now, its time for a change. Let's begin.
Hootie's 2008 GD3 Build
DSC_1289edited_zps5ca6e5e0.jpg?t=1378405130
For the last 5 and half years like I said its been serving as a daily driver so keeping it simple and functional was the priority at this time. So creature comfort and simplicity was the primary focus, starting out with a set of 15lb 15x6.5 Konig Quiz wheels, a Zeta dead pedal, HFP axle back, and Honda Access Slim Visors which was a good start for the initial 2 years...
... Until I met some autocross and road racing guys.
A change of pace was needed at that point, going on 4 years of ownership then (around 50k miles) and the only thing changed were tires and the installation of a Progress RSB which was acquired from member allgocrx. The bar was a nice addition but there was something still missing. I've been getting more comfortable with being able to control the car during spirited drives but have occasionally had issues with brake cooling AND the front rotors were warped. So, I picked up a pair of EBC USR 850 rotors with some Hawk Performance Ceramic pads then ditched the Konigs for a set of 15x7 ET+42 TRMotorsport C1s (12.8lbs per wheel).
DSC_8308.jpg?t=1378351926
Also installed a set of Clazzio seat covers to change up/freshen up the interior a bit.
DSC_8732_zps9446c6ff.jpg?t=1378406161
After the rotor, pad, and wheel install the brake cooling issue was resolved... maybe perhaps a bit too well since its for daily use and the initial bite does not feel as prominent as stock in stop and go traffic. Primarily due to the slotted rotors being better at dissipating heat better than the OEM solids and pads. To remedy this, I gave Carbotech a call and ordered some AX6 pads for the front (autocross compound) and 913 compounds for the drum shoes. These should be installed soon.
While hunting for a more aggressive brake setup, I decided that I would like to set the car up to be "decently competitive" for autocross and still be streetable. With that said, I ordered a set of Tokico HTSs (thanks Spencer at Bean Garage), Ground Control's coilover kit which features Ground Control ride height adjustment sleeves and Eibach springs (thanks Donovan at GC). Spring rates chosen were 500lbs per inch up front and 400 lbs for the rear.
Here's a shot of the set front struts test fitted. As you can see the Ground Control sleeves simply slide onto the strut and rest on top of the natural colored gray metal ring on the strut body. Not shown in the image but there are rubber O-rings that must be installed on the strut prior to installing the adjustment sleeve to assist in reducing any horizontal play between the strut and sleeve.
After test fitting and looking at the dampers in the sun, I decided the red was too damn obnoxious and rattle canned them Rustoleum's Satin Black. The end result was adjustable dampers that look OEM at a glance.
The only giveaway or hint there is any suspension changes is the bright red Eibach springs, red GC sleeves, and a slight forward rake (front end lower than rear). During the coilover install, I put on my 205/50R15 Yokohama Advan Neova AD08s that I had stashed away for this special occasion.
The end result: A "stock-ish" looking Fit that should be able to hold its own on the autocross course or backroad. IMAG0305_zps3100fbd0.jpg?t=1378406199
More to come... Prepping for Tail of the Dragon in October.
Last edited by Hootie; Sep 6, 2013 at 12:41 AM. Reason: Being OCD with spacing


Thanks guys.  I've got a few things that I plan do get done sometime in the next few days. Tomorrow I'm at least installing my AX6 pads at work and possibly the rear shoes as well if time permits since I need to change my oil and rotate tires anyway.
I also have some Techna-Fit stainless steel brake lines, Speed Bleeders brake bleeders (mouth full to say), a OEM airbox that needs to be gutted and have the resonators deleted (not sure if I'll have it done for TOTD or not, looking for a good DIY), some exhaust goodies stashed away and maybe a couple of other bits that I cannot think of at this time.
I've got a few things that I plan do get done sometime in the next few days. Tomorrow I'm at least installing my AX6 pads at work and possibly the rear shoes as well if time permits since I need to change my oil and rotate tires anyway.I also have some Techna-Fit stainless steel brake lines, Speed Bleeders brake bleeders (mouth full to say), a OEM airbox that needs to be gutted and have the resonators deleted (not sure if I'll have it done for TOTD or not, looking for a good DIY), some exhaust goodies stashed away and maybe a couple of other bits that I cannot think of at this time.

Airbox stuff is recommended...
I did a 2.5" pipe from the box to the tb, and replaced the inlet/snorkel to the box with a 2.5" pipe as well... Also deleted the resonators (time intensive)... Throttle response is much improved...
I did a 2.5" pipe from the box to the tb, and replaced the inlet/snorkel to the box with a 2.5" pipe as well... Also deleted the resonators (time intensive)... Throttle response is much improved...

Update: Ditched the Hawk Performance Ceramic pads and replaced them with the Carbotech AX6 pads (Thanks to Mike Jr at Carbotech Brakes). Also installed the Techna-Fit stainless brakes lines (extremely messy job HA) and Speed Breeders brake breeders while using Motul RBF600 brake fluid to top off in addition to an oil & filter change with tire rotation.
Here's a shot of the goods pre-install.
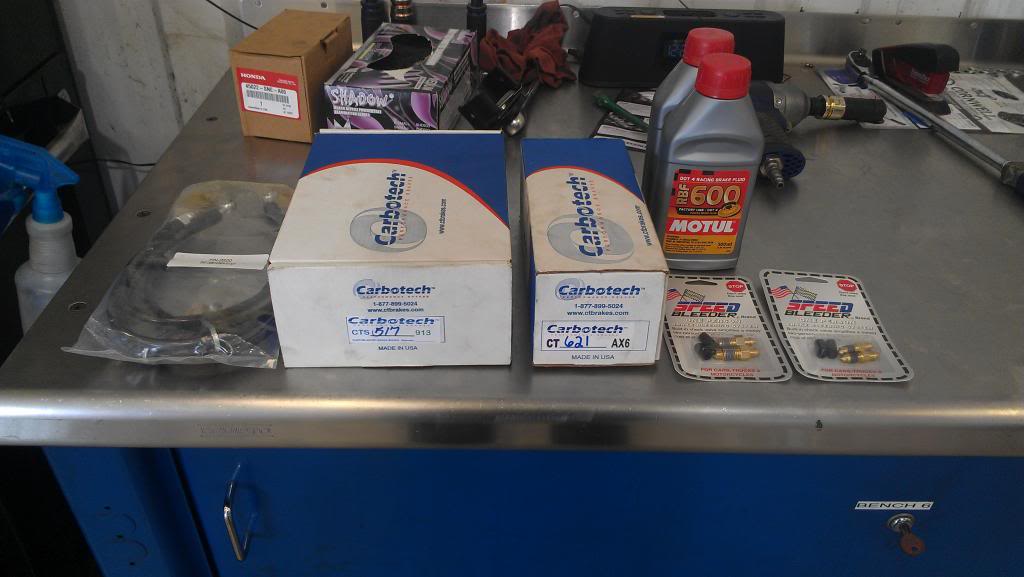
The Speed Bleeders are direct replacement bleeder screws for the calipers and drums. They feature a sprung "check ball" inside of them which allow brake fluid and air to escape from the bleeder and of course out of the brake system during pedal depression. Once the pedal is back in the "at rest state" (foot off brake) the spring inside pushes the check ball inside, closing the bleeder and not allowing any air or brake fluid in or out. I will need to reorder a set for the drums as my Kobalt and Gearwrench 8mm wrenchs rounded off the head of the drum bleeders. (Yes, I am that OCD) -.-
IMAG0420_zps68197b57.jpg?t=1378516530
Initial impressions during test drive: Initial/cold bite is noticeably prominent as I drove around the parking lot to begin the pad bed in process. Brake pedal feedback wise, the brake pedal is much firmer that before the brake line install. I'll be taking it easy for the next week or so and taking alternative routes that require more frequent stopping to bed these pads in sooner then touch basis on this with a later post.
Here's a shot of the goods pre-install.
The Speed Bleeders are direct replacement bleeder screws for the calipers and drums. They feature a sprung "check ball" inside of them which allow brake fluid and air to escape from the bleeder and of course out of the brake system during pedal depression. Once the pedal is back in the "at rest state" (foot off brake) the spring inside pushes the check ball inside, closing the bleeder and not allowing any air or brake fluid in or out. I will need to reorder a set for the drums as my Kobalt and Gearwrench 8mm wrenchs rounded off the head of the drum bleeders. (Yes, I am that OCD) -.-
IMAG0420_zps68197b57.jpg?t=1378516530
Initial impressions during test drive: Initial/cold bite is noticeably prominent as I drove around the parking lot to begin the pad bed in process. Brake pedal feedback wise, the brake pedal is much firmer that before the brake line install. I'll be taking it easy for the next week or so and taking alternative routes that require more frequent stopping to bed these pads in sooner then touch basis on this with a later post.
Last edited by Hootie; Sep 7, 2013 at 09:48 PM. Reason: ... because racecar.
I've been looking around on the internet off and on for some hard plastic tubing that would work with my airbox. The reason for plastic is due to weight and heat dissipation. Been needing to invest in a plastic welder for this project as well.
The Speed Bleeders are direct replacement bleeder screws for the calipers and drums. They feature a sprung "check ball" inside of them which allow brake fluid and air to escape from the bleeder and of course out of the brake system during pedal depression. Once the pedal is back in the "at rest state" (foot off brake) the spring inside pushes the check ball inside, closing the bleeder and not allowing any air or brake fluid in or out. I will need to reorder a set for the drums as my Kobalt and Gearwrench 8mm wrenchs rounded off the head of the drum bleeders. (Yes, I am that OCD) -.-
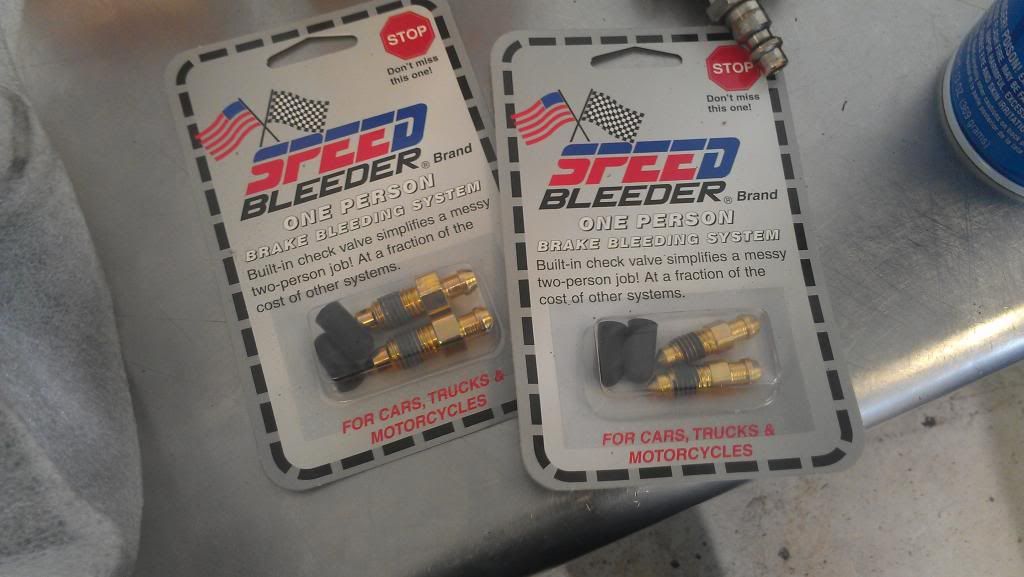
May I know the part number for the Speed Bleeder that fit our car brake caliper? and where did you buy them from?
Thanks
Its funny that you mention that, I've been meaning to contact you regarding your airbox setup. What kinda piping are you using (material wise) and where did you get it?
I've been looking around on the internet off and on for some hard plastic tubing that would work with my airbox. The reason for plastic is due to weight and heat dissipation. Been needing to invest in a plastic welder for this project as well.
I've been looking around on the internet off and on for some hard plastic tubing that would work with my airbox. The reason for plastic is due to weight and heat dissipation. Been needing to invest in a plastic welder for this project as well.
I'm using some fairly basic aluminum piping... One of the vendors on the ptgt site I frequent got me set up with a custom length... 2.5 piping (3" will make fitting it much more difficult and won't really benefit that much between the box and tb) and I had him do the tightest 90* angle he could and then leave a short and a long leg so I could use the long one for the snorkel replacement...
Plastic you could certainly weld on there... I just didn't want to mess with getting a plastic welder at the time or doing nasty welds with my soldering iron...
Take a look through my picture trail and through the modifying a stock airbox thread... It's all there... Lmk if I can help

Speed Bleeders Home Page
ON THE OTHER HAND, I did a cross reference on the parts numbers for OEM bleeders and it looks like they're directly interchangeable but please do a double check on the part numbers prior to ordering since I did notice that there was a misprint in the diagrams on the Honda parts site I was using (Bernardi Parts). Here are the part numbers below on the OEM bleeders I got during cross referencing.
GD3 front - 43352-SM4-951
GE8 front - 43352-SM4-951
GD3 rear - 43352-586-003
GE8 rear - 43352-586-003
First off- thumbs up for carbotechs...
I'm using some fairly basic aluminum piping... One of the vendors on the ptgt site I frequent got me set up with a custom length... 2.5 piping (3" will make fitting it much more difficult and won't really benefit that much between the box and tb) and I had him do the tightest 90* angle he could and then leave a short and a long leg so I could use the long one for the snorkel replacement...
Plastic you could certainly weld on there... I just didn't want to mess with getting a plastic welder at the time or doing nasty welds with my soldering iron...
Take a look through my picture trail and through the modifying a stock airbox thread... It's all there... Lmk if I can help
I checked out your posts regarding your airbox modification and it turned out pretty darn good. I may do something similar to your set up except using plastic tubing since I do want to retain both "ears" that secure the airbox in the engine bay. I seen last night during a quick search that Air Raid makes a plastic tubing kit for air intake applications so I try to find one of their kits (with a reasonable diameter of course) to be able to create the "90*" bend from the box lid to throttle body and maybe a combination of a straight plastic tube and a naca duct to create a ram air intake of some sort (thinking somewhat out loud here).
Thanks again for your insight and sharing info on your airbox setup.
Last edited by Hootie; Oct 3, 2013 at 09:53 PM. Reason: Part number correction. Thanks onemiglandicho.

You got it...
There's one scooped intake that gathered air from in front of the rad and routes it over the upper rad support... It's super slick and front the highest pressure area on the front of the car...
I may still duct my snorkel to the drivers side "scoop" on the lower grille opening... To be seen... Suspension, belt, and valve adjust first
Just chiming in with an update.
As of yesterday evening, I do believe that my AX6s are finally bedded in. I happened to apply (what felt like) medium pedal effort (due to stainless lines) at around 40 to 45 MPH in my neighborhood... The bite of these things caught me completely off guard, dropping to 20 felt almost instant. I can't wait to see what these due in a couple weeks at the Houston Police Academy for the BMW SCCA autocross event.
... Just need to figure out what class I'll be in prior to entry. I'm thinking STF due to having 205s on a 7 inch wide wheel, coilovers,and a rear sway bar. Will have to check the rule book TPColgett linked me in another thread.
Still haven't had a chance to install the 913 drum shoes yet but that MORE THAN LIKELY will happen in the latter part of this month with the rate my current schedule is. On the flip side of things, I finally did install my Spoon N1 axle back. ^.^

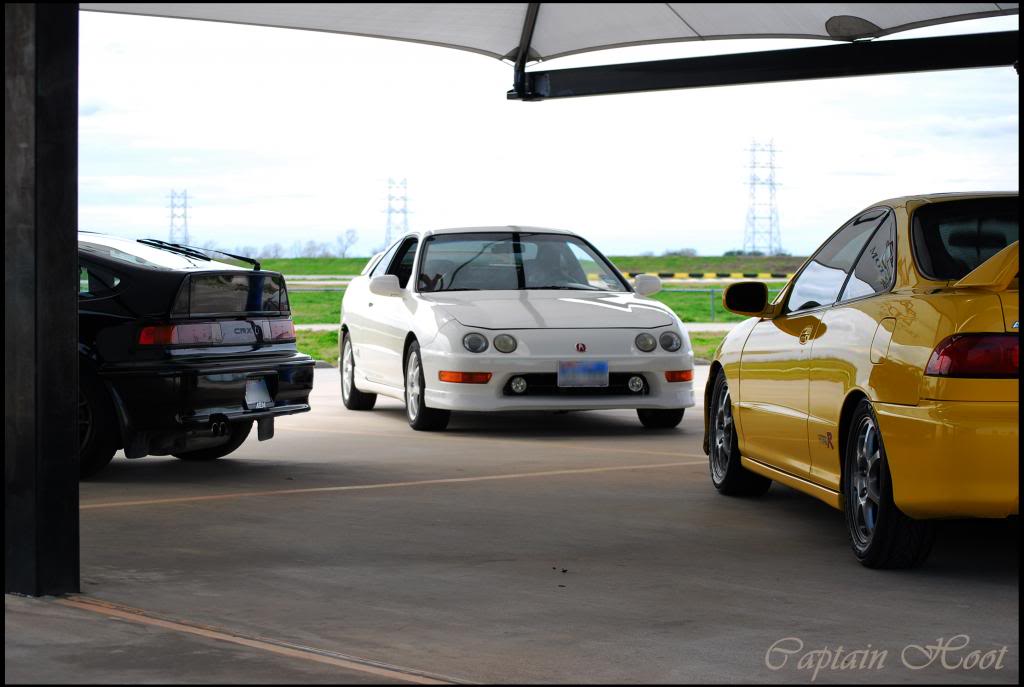
Went to an autocross event yesterday with a couple of friends, one had a DC2R and the other a DC5S. This was my first time running the Fit in auto-X, second time competing. I was quite pleased with how the Fit did though I felt that I could definitely have driven harder but I was still relearning the car since the coilover and front pad install.

Was about 2 seconds slower than the DC5S, about 4 seconds lower than the DC2R.
Was about 2 seconds slower than the DC5S, about 4 seconds lower than the DC2R.
Last edited by Hootie; Oct 3, 2013 at 11:23 PM. Reason: Added pictures.