
My Fit's 48hr makeover.


Thread Starter
|
New Member
Joined: May 2012
Posts: 14
From: Detroit, MI
My Fit's 48hr makeover.
My gf has a 08' base model a/t fit and the suspension is blown. With her tax return she wanted to fix her suspension, and make it a little "quicker"... ok sounds like fun. So I do a little research (mostly with the help of Fitfreak) and started ordering. After a TON of complications as well as 7 returned orders, all the parts are either here or will be soon. In the next 48 hours I am installing kyb Excel-g struts with Progress springs, denso iridium plugs (one step colder) and a Fujita Championship Bronze short ram intake. Once everything is working as it should the rear 5 windows are receiving 35% tint, and an impressive professional detail inside and out. If all goes to plan the fit should be done by wednesday.

Thread Starter
|
New Member
Joined: May 2012
Posts: 14
From: Detroit, MI
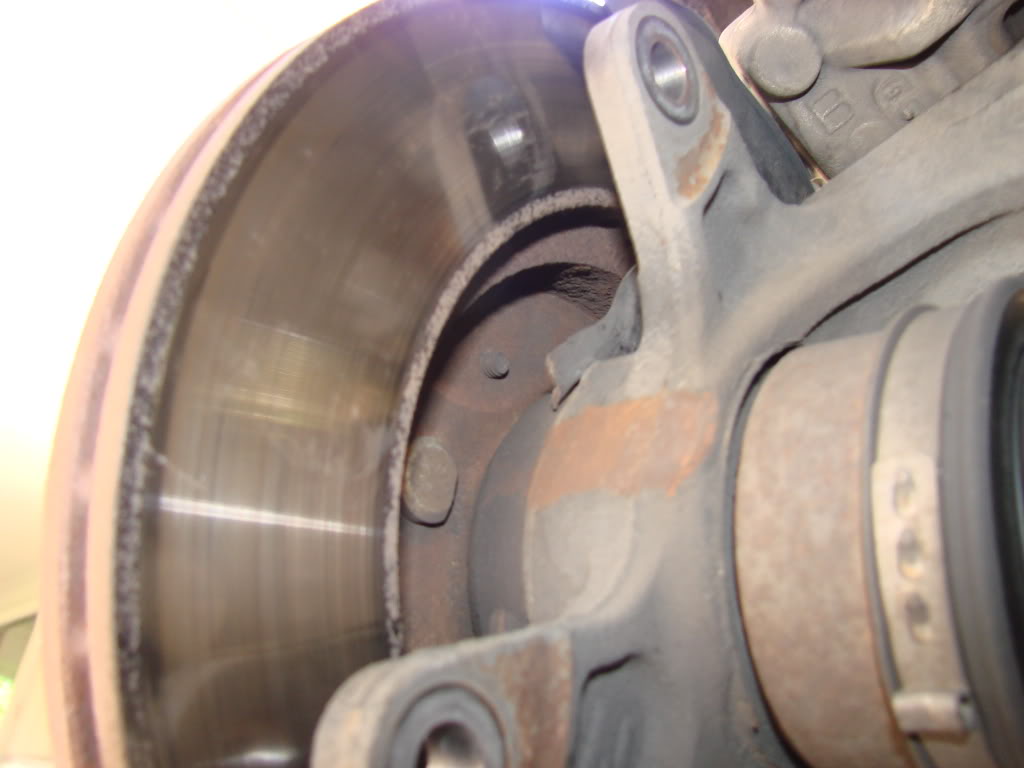
So the suspension went flawlessly until I went to go put the wheels back on and I snapped a stud... I had a terrible time getting the brake rotor off and now I don't have clearance to get the studs in/out. So I am about to take the hub apart to allow for clearance. I knew it was going too well. Shit.

Its possible to replace studs without disassembling the stud. You have to do some grinding but its pretty straight forward. Let me try and find a link. If not ill take some pics to try and show you what I mean.
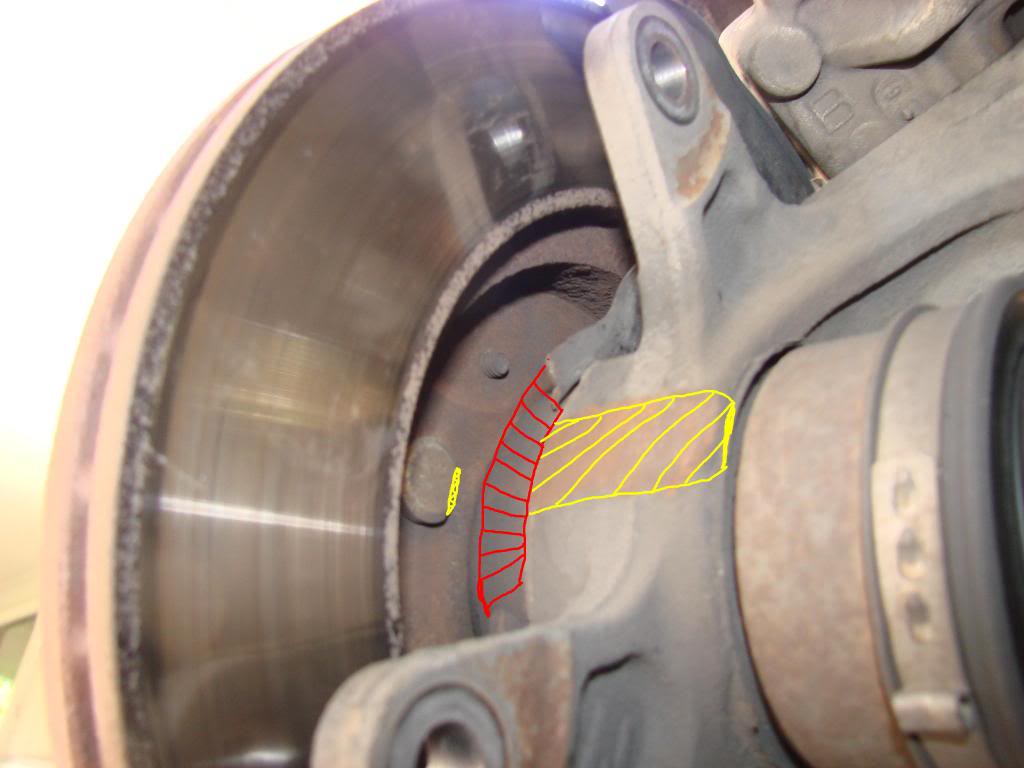
the red area is where the dust shield has been cut and removed. the yellow areas are where the grinder was used you could use a file id imagine. with a normal length stud i dont think youd have to grind on the hub , just grinding the stud base should suffice. use a bfh or dead hammer knock out the old one. make sure the stud will enter nice and straight to avoid messing up the threads. once you have the stud in put a few washers on the stud place the nut back on and tighten the nut causing the stud to pull itself into place. more like a press would i wouldnt hammer the stud in but it could be done. i hope makes sense. if not pm me any questions.
Thread Starter
|
New Member
Joined: May 2012
Posts: 14
From: Detroit, MI
the red area is where the dust shield has been cut and removed. the yellow areas are where the grinder was used you could use a file id imagine. with a normal length stud i dont think youd have to grind on the hub , just grinding the stud base should suffice. use a bfh or dead hammer knock out the old one. make sure the stud will enter nice and straight to avoid messing up the threads. once you have the stud in put a few washers on the stud place the nut back on and tighten the nut causing the stud to pull itself into place. more like a press would i wouldnt hammer the stud in but it could be done. i hope makes sense. if not pm me any questions.

Thread
Thread Starter
Forum
Replies
Last Post
NEGD3
1st Generation (GD 01-08)
89
Mar 7, 2021 06:06 PM
TumTum2570
Fit Engine Modifications, Motor Swaps, ECU Tuning
5
May 11, 2012 01:57 AM