
DIY Turn Signal Mirrors (winkers)


Bring em sunday and well put em while doing the headlights (assuming you dont install them before). Not sure how complicated they may be though.
Last edited by qbmurderer13; Apr 3, 2009 at 10:37 PM.
Joined: Aug 2008
Posts: 1,929
From: Palm Coast FLA

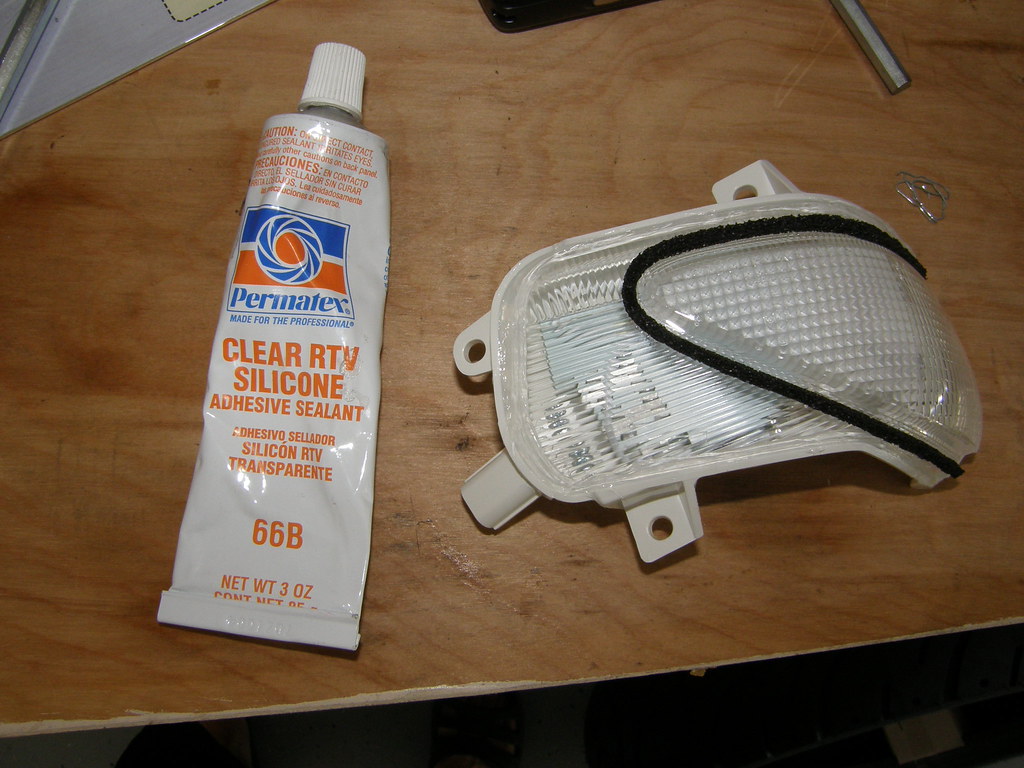
to start i'll show you what tools you'll need.

also before we get started.
silicone is your best friend.
when ever i change my lights i usually
silicone the edges. where the lens meets
the housing. this stops any future leaks.
also before we get started.
silicone is your best friend.
when ever i change my lights i usually
silicone the edges. where the lens meets
the housing. this stops any future leaks.
Last edited by niko3257; Apr 4, 2009 at 08:51 PM.
Joined: Aug 2008
Posts: 1,929
From: Palm Coast FLA
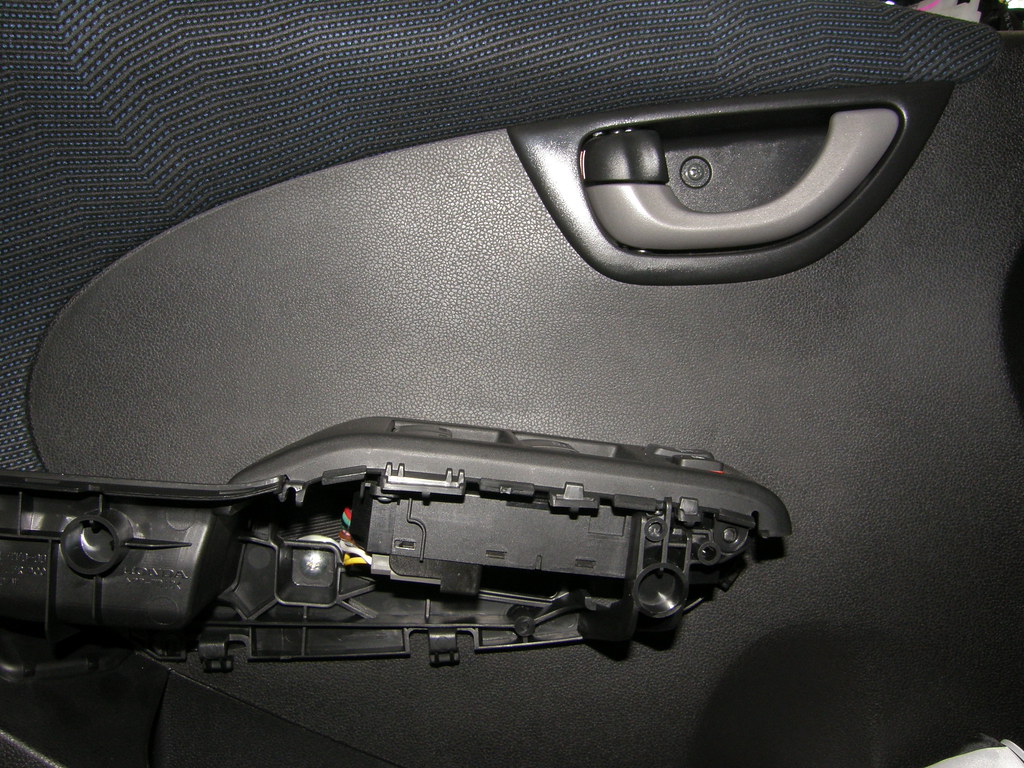
okay now you can start by taking the door handle
cover off. it has three tabs at the bottom.
i just pulled it and it came right off.

look at pics to see the tabs

here is what it looks like off.
also look and you will see two philips screws that you
will have to remove. one is right next to the door lock
and the other is behind the panel you took off.
also unclip the power to the window switches.
now that the screws are off it's time to take off the door panel.
i used a window crank removal too to do this.
like so.


make sure you twist the door lock so it goes out of the door panel.
now that the door panel is off you need to take off the speaker.

cover off. it has three tabs at the bottom.
i just pulled it and it came right off.
look at pics to see the tabs
here is what it looks like off.
also look and you will see two philips screws that you
will have to remove. one is right next to the door lock
and the other is behind the panel you took off.
also unclip the power to the window switches.
now that the screws are off it's time to take off the door panel.
i used a window crank removal too to do this.
like so.
make sure you twist the door lock so it goes out of the door panel.
now that the door panel is off you need to take off the speaker.
Last edited by niko3257; Apr 4, 2009 at 08:53 PM.
Joined: Aug 2008
Posts: 1,929
From: Palm Coast FLA
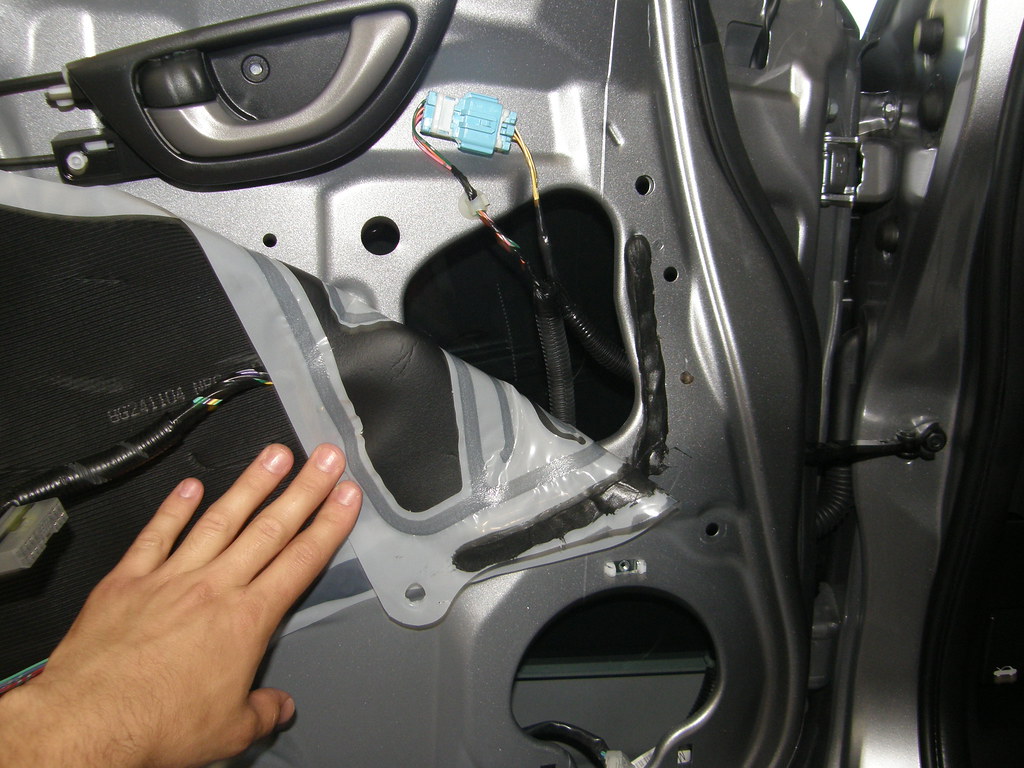
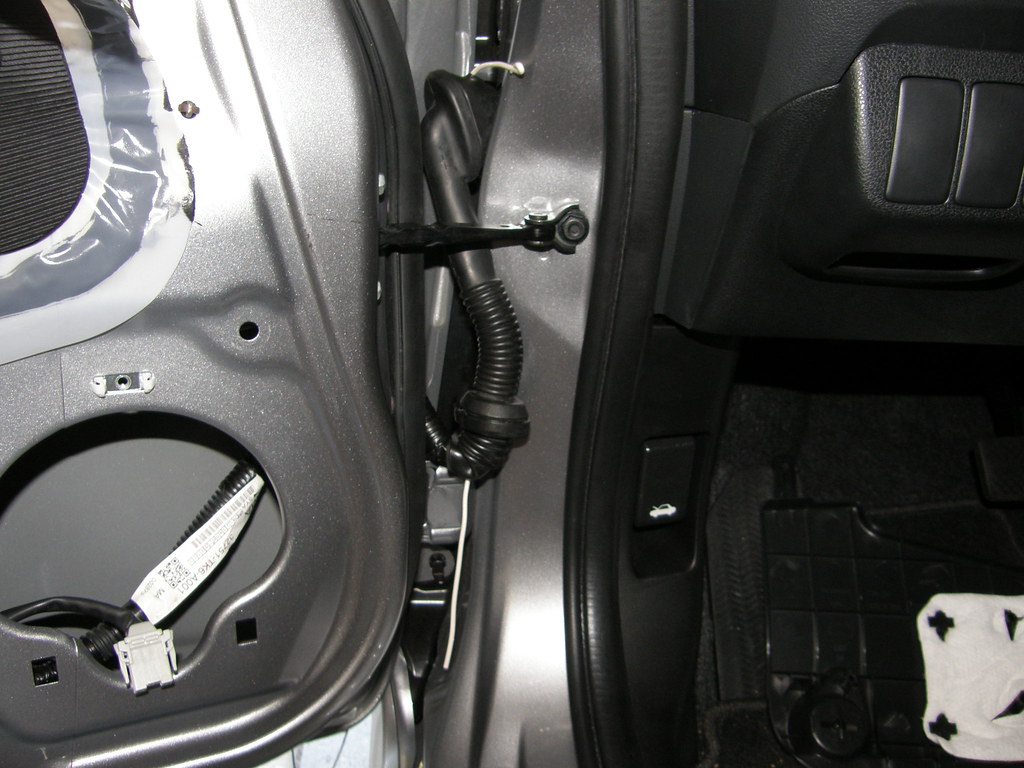
now peel back the plastic like so.
use a piece of tape to hold it back.
if you have gloves wear them. that sealant
is nasty stuff.
now unclip the blue/white clip in the picture.
next take off the small panel behind the mirror.
a small screw driver will do the job.
just pry on it from the top or bottom.
it will pop right out.
now pull the blue wire you unclipped all the way out of the door.
Last edited by niko3257; Apr 4, 2009 at 08:56 PM.
I don't think you need the sealant. The way that the LED is designed it should be fine. It's just about a perfect fit on mine and when you wash the car it's possible for some water to get in there but barely.

OK Guys here are the color codes that you will need for wiring up the winkers..
Color Codes
Left winker + wire color BLUE
Left winker - wire color BLACK or Ground the wire
Right winker + wire color WHITE
Right winker - wire color BLACK or Ground the wire
These wires can be found near the fuse box..
Color Codes
Left winker + wire color BLUE
Left winker - wire color BLACK or Ground the wire
Right winker + wire color WHITE
Right winker - wire color BLACK or Ground the wire
These wires can be found near the fuse box..
Joined: Aug 2008
Posts: 1,929
From: Palm Coast FLA
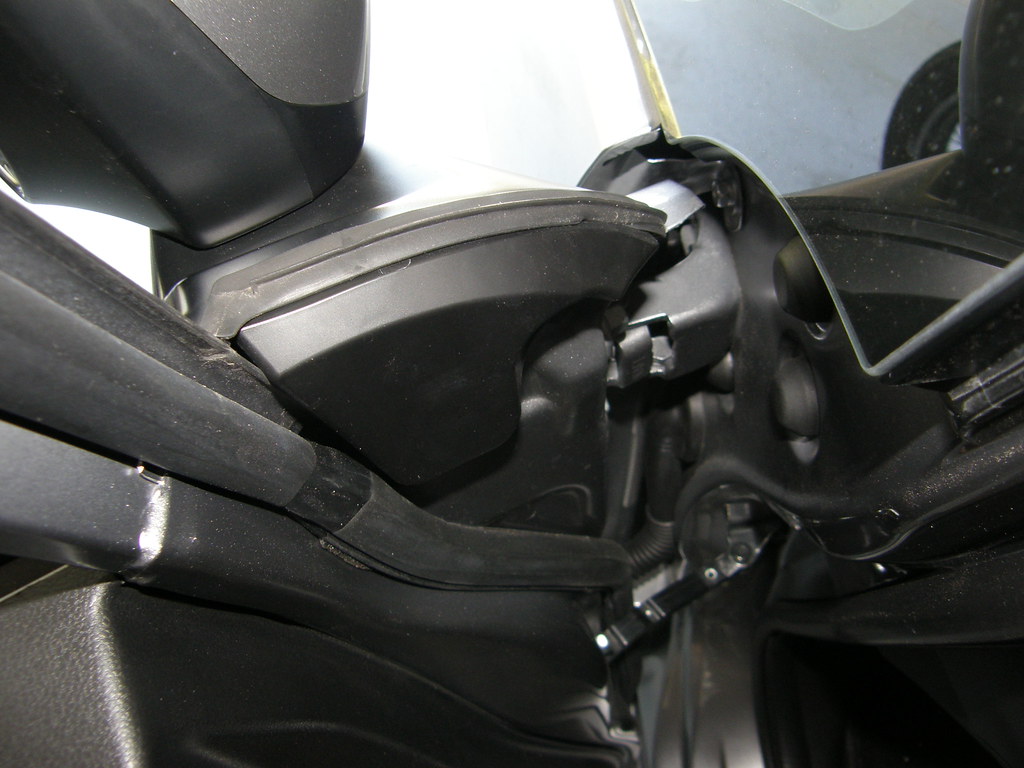
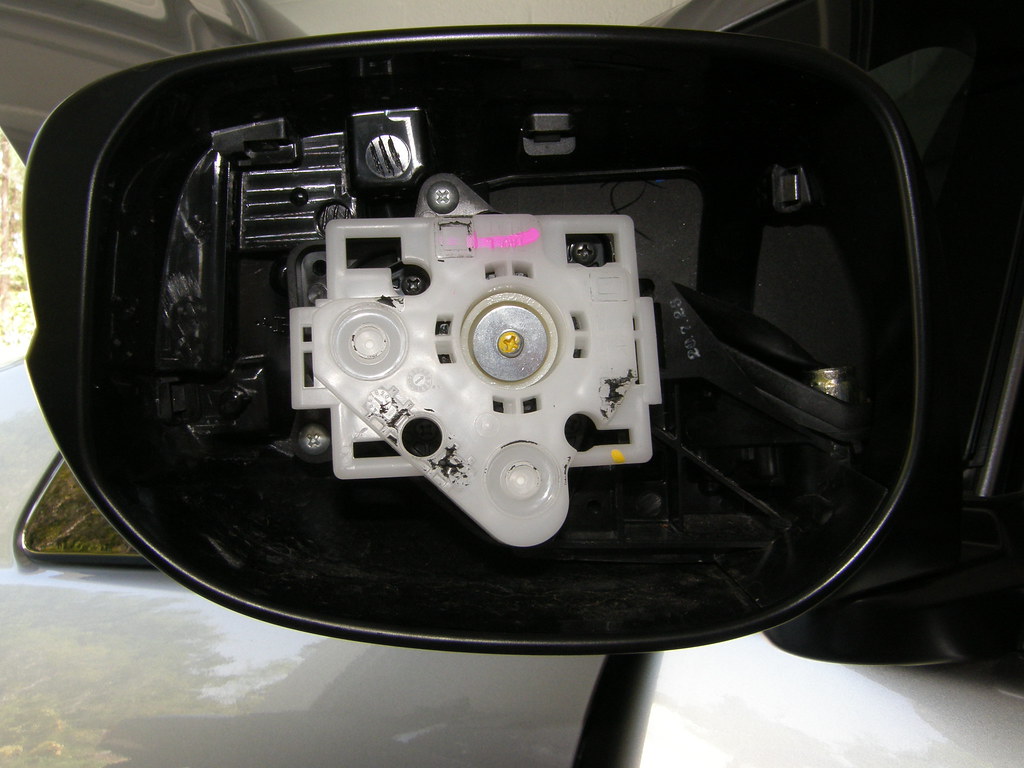
now you'll want to take your mirror off.
take a look at the pic and see where my thumb is.
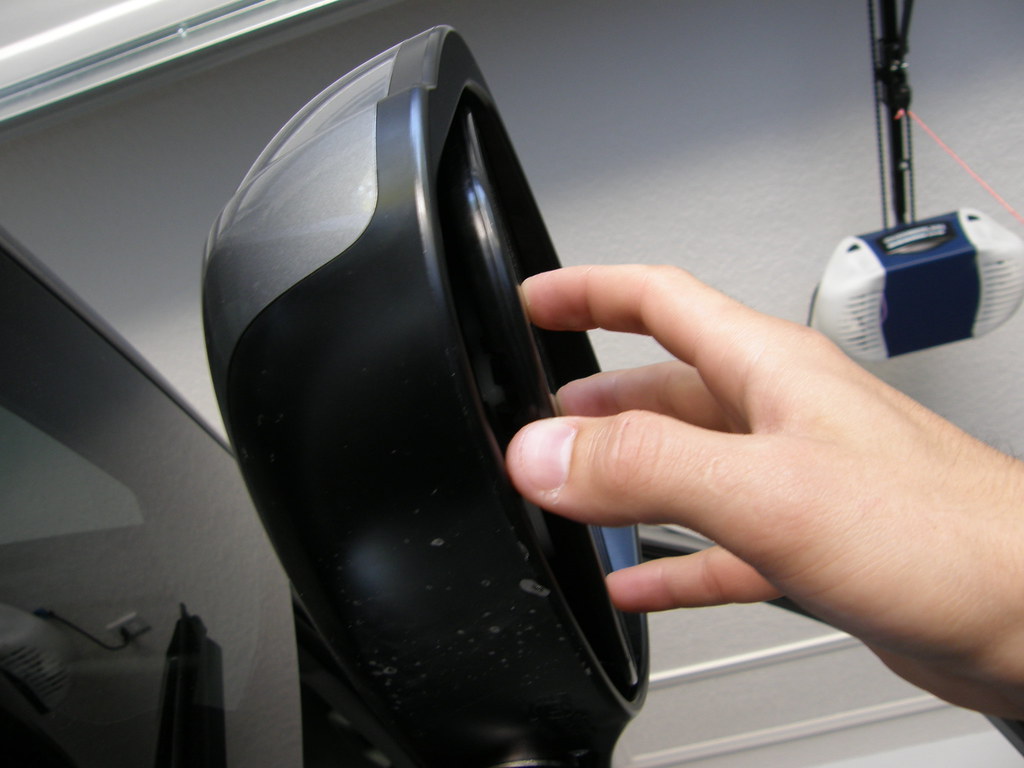
here is another pics of it off just so you can see where i'm talking about.
see the slot at the bottom right hand corner.
that is the one.
make sure you tilt your mirror up towards the sky and in towards
the car in order to see the slots.
you will need to put a flat head screw driver in the slot between the
white plastic and the mirror. you'll see what i'm talking about once
you look up at it.
then proceed and twist your screw driver. this will pop out the bottom
half of your mirror. now all you need to do is tilt the mirror up and it
will come right out.
now you have this.
take a look at the pic and see where my thumb is.
here is another pics of it off just so you can see where i'm talking about.
see the slot at the bottom right hand corner.
that is the one.
make sure you tilt your mirror up towards the sky and in towards
the car in order to see the slots.
you will need to put a flat head screw driver in the slot between the
white plastic and the mirror. you'll see what i'm talking about once
you look up at it.
then proceed and twist your screw driver. this will pop out the bottom
half of your mirror. now all you need to do is tilt the mirror up and it
will come right out.
now you have this.
Joined: Aug 2008
Posts: 1,929
From: Palm Coast FLA
OK Guys here are the color codes that you will need for wiring up the winkers..
Color Codes
Left winker + wire color BLUE
Left winker - wire color BLACK or Ground the wire
Right winker + wire color WHITE
Right winker - wire color BLACK or Ground the wire
These wires can be found near the fuse box..
Color Codes
Left winker + wire color BLUE
Left winker - wire color BLACK or Ground the wire
Right winker + wire color WHITE
Right winker - wire color BLACK or Ground the wire
These wires can be found near the fuse box..
thanks Dave those are the ones.
a little tricky finding them but i did.
pics soon.
also for me the silicone is peace of mind.
if no one wants to do it you don't have to.
i just have a habit of doing it to all my cars.
Last edited by niko3257; Oct 1, 2009 at 12:21 AM.
Joined: Aug 2008
Posts: 1,929
From: Palm Coast FLA
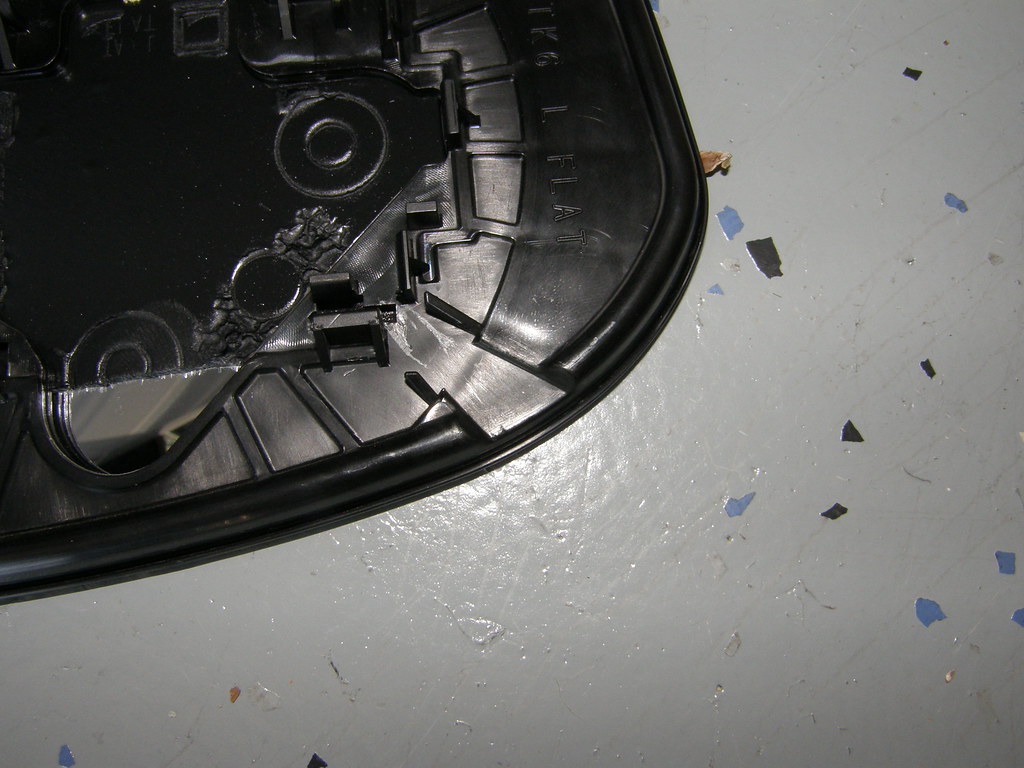
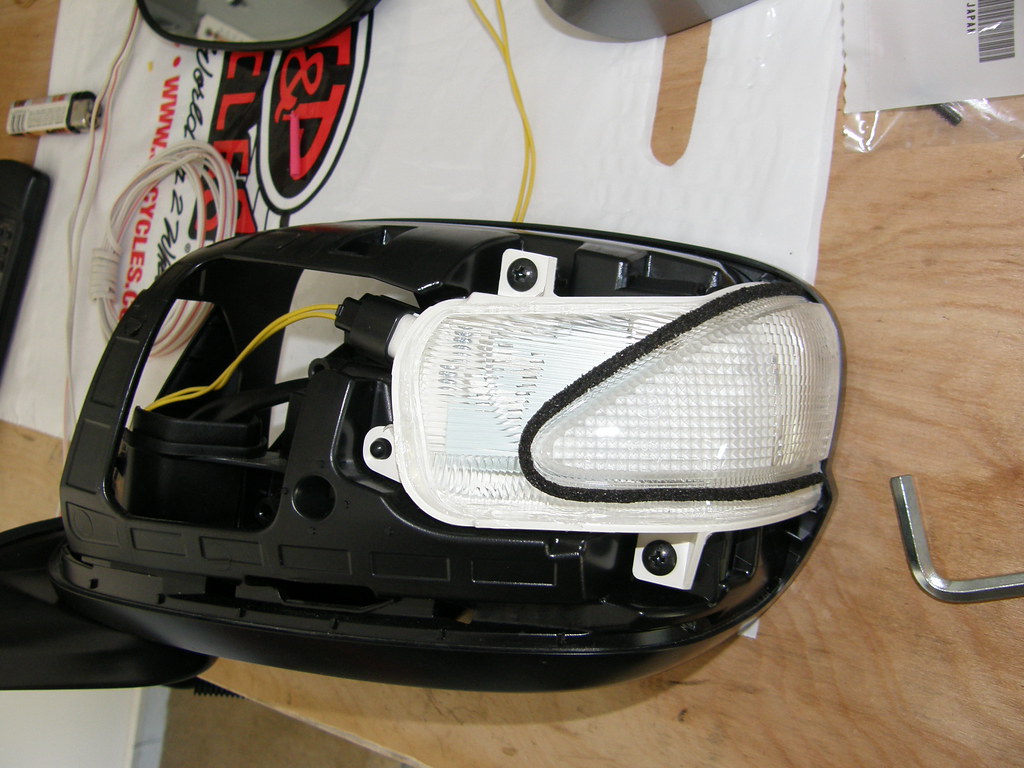
now if you look at your new covers you can see all the clips
that hold it on. you can also look inside the mirror like so.
there is about 6 clips.
push on them and the cover will pop out.
now unbolt the mirror using a 10mm socket set up.
take it to you bench/table what ever you have.
you can now screw on your blinkers.
now pop this cover off at the bottom of your mirror
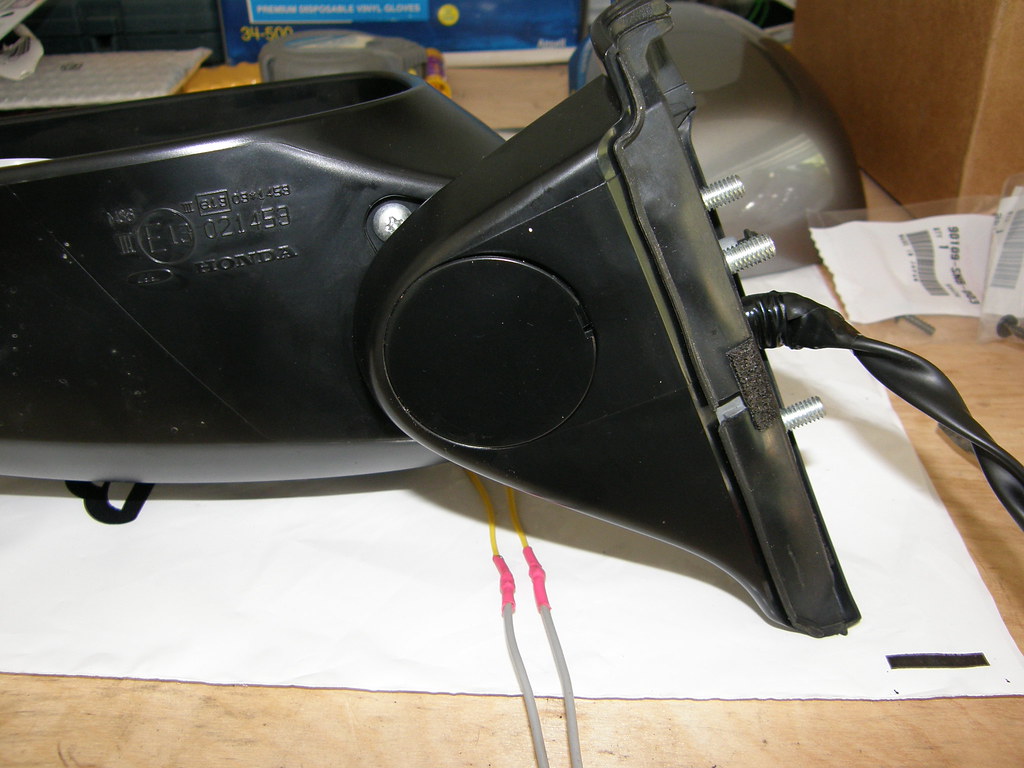
like so
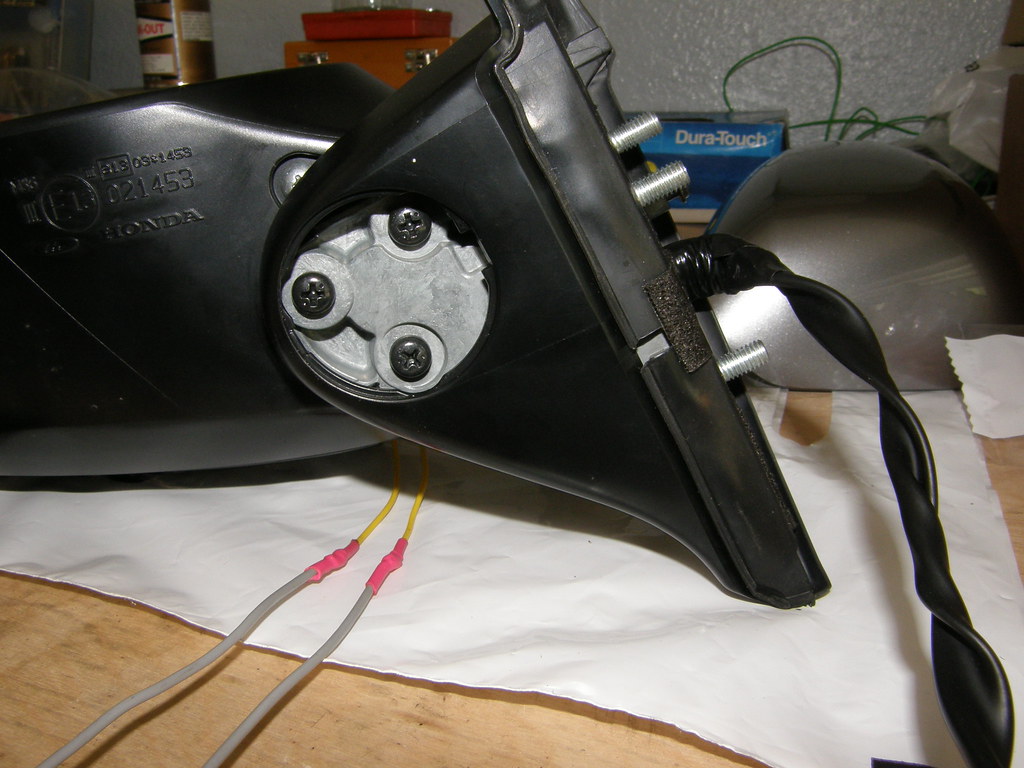
take the three screws off and now you can run the wires
through the mirror.
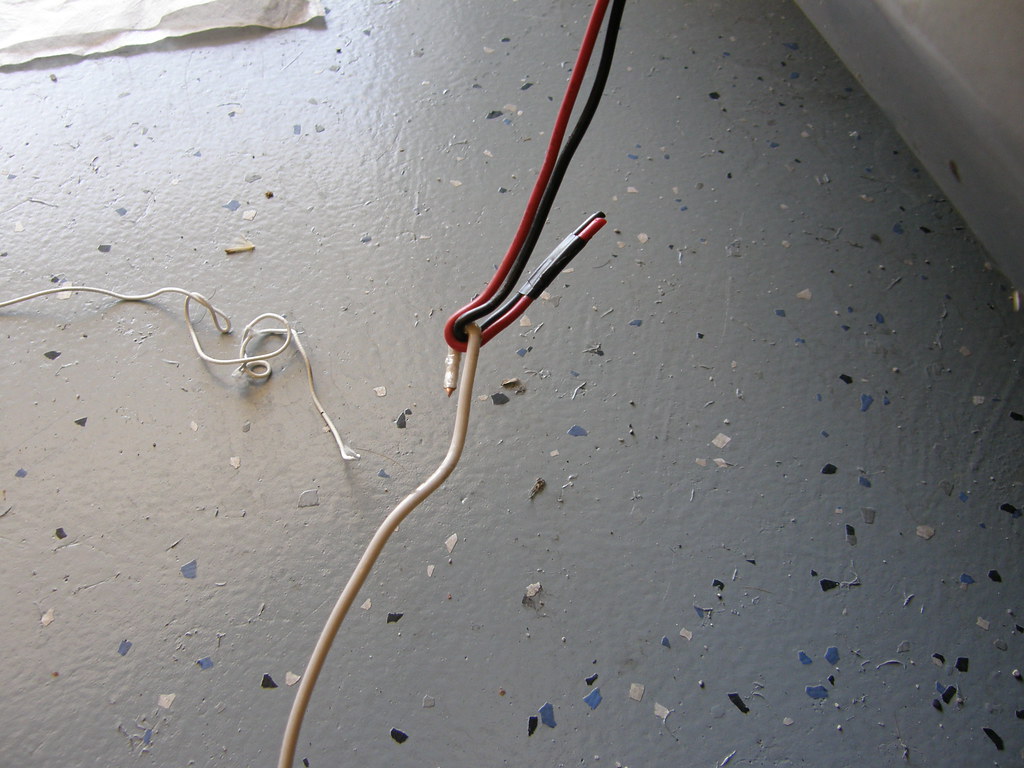
also before i ran my wires i soldered them together.
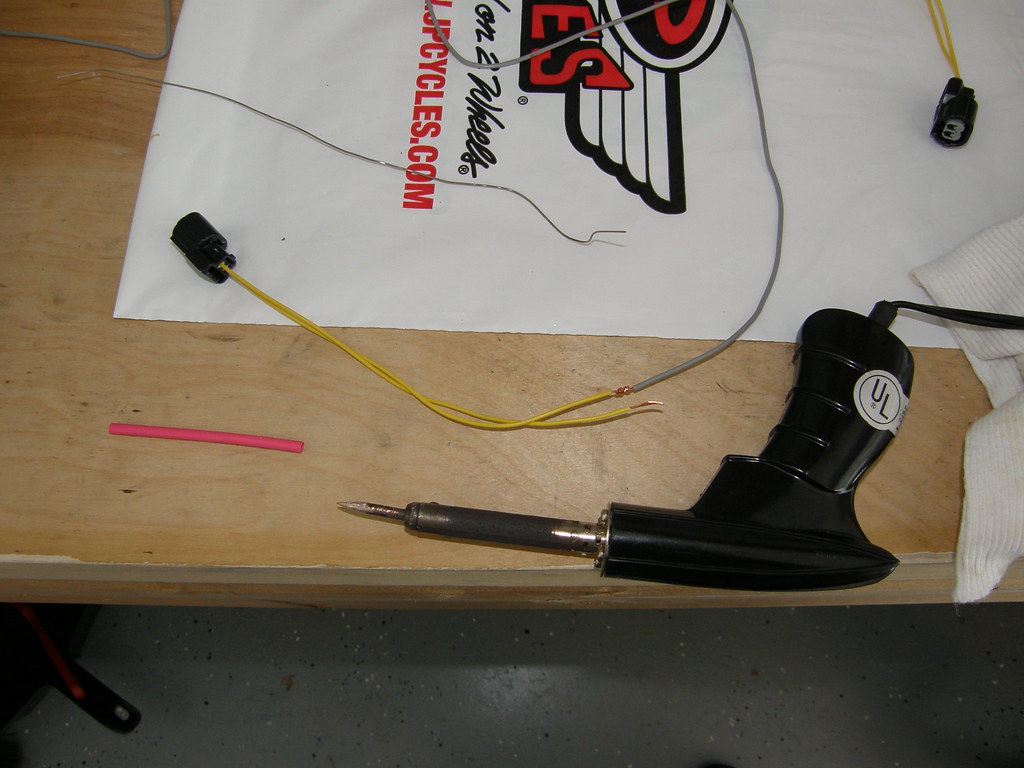
after that it will look something like this.

that hold it on. you can also look inside the mirror like so.
there is about 6 clips.
push on them and the cover will pop out.
now unbolt the mirror using a 10mm socket set up.
take it to you bench/table what ever you have.
you can now screw on your blinkers.
now pop this cover off at the bottom of your mirror
like so
take the three screws off and now you can run the wires
through the mirror.
also before i ran my wires i soldered them together.
after that it will look something like this.
Joined: Aug 2008
Posts: 1,929
From: Palm Coast FLA
i also taped all my wires so they look good.

now look at this pics and you will see a white clip behind where the speaker
was. just unclip it so you can get some slack out of the wire.

now take that piece of #12 wire i had in the tool list.
look at my pic and you'll get the idea.
pull apart the rubber seal from both ends and run run
the #12 through it.
like so.
now use some electrical tape and tape the wires you
are running to the #12 wire.
hook it like this so you can pull it through.
now look at this pics and you will see a white clip behind where the speaker
was. just unclip it so you can get some slack out of the wire.
now take that piece of #12 wire i had in the tool list.
look at my pic and you'll get the idea.
pull apart the rubber seal from both ends and run run
the #12 through it.
like so.
now use some electrical tape and tape the wires you
are running to the #12 wire.
hook it like this so you can pull it through.
Last edited by niko3257; Apr 4, 2009 at 04:31 PM.
Joined: Aug 2008
Posts: 1,929
From: Palm Coast FLA
now you can finally start putting stuff back together.
bolt your mirror back up. make sure you run all your wires
like they came out.
i taped and zip tied my wires to the oem mirrors wires and
power door lock wires.

bolt your mirror back up. make sure you run all your wires
like they came out.
i taped and zip tied my wires to the oem mirrors wires and
power door lock wires.
Last edited by niko3257; Apr 4, 2009 at 04:45 PM.
Joined: Aug 2008
Posts: 1,929
From: Palm Coast FLA
by now if you don't have your inside panels out get them out.
like so.


now do the other side the same way and put it back together.
run your wires nice and neat under the dash.
like i said earlier i taped and zip tied all my wires.
like so.
now do the other side the same way and put it back together.
run your wires nice and neat under the dash.
like i said earlier i taped and zip tied all my wires.
Last edited by niko3257; Apr 4, 2009 at 05:10 PM.
Joined: Aug 2008
Posts: 1,929
From: Palm Coast FLA
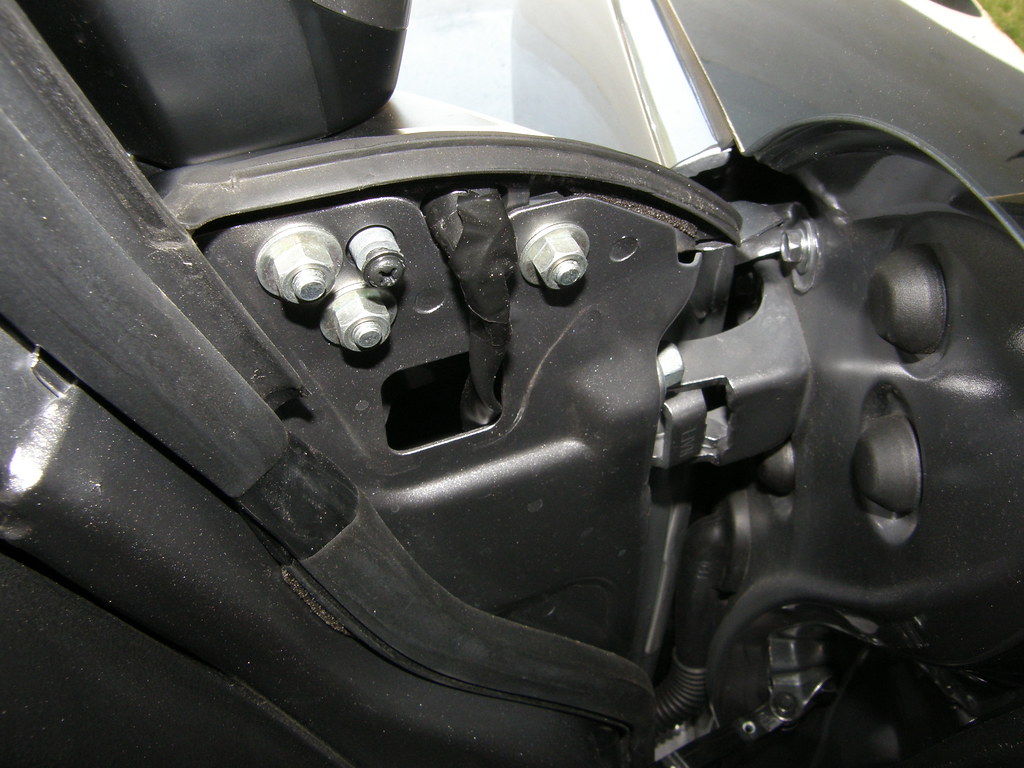
now we can locate the blue and white wires that Dave let us
know about.
thanks Dave
look at the pics. white is at the top blue is at the bottom.


Blue is left +
white is right +
the negatives i put together.
then i bolted them to the hood release bracket.
now we can hook up the positive blue and white.
like so.


know about.
thanks Dave
look at the pics. white is at the top blue is at the bottom.
Blue is left +
white is right +
the negatives i put together.
then i bolted them to the hood release bracket.
now we can hook up the positive blue and white.
like so.