***The Official SSR Intake DIY Thread (Sid Short Ram Intake)***


***The Official SSR Intake DIY Thread (Sid Short Ram Intake)***
Here is the official DIY thread everyone has been asking me for with the Sid Short Ram Intake System or SSR Intake for short. This system has been working great for a lot of people including myself and it costs a whole lot less than any other short/cold air intake system on the market.
Of course, as usual, perform this modification at your own risk. Neither myself nor Fit Freak is guaranteeing this or any modification you might perform to your vehicle.
You will get a more aggressive induction sound, but even at WOT, it's not annoying. It's easy to install and looks very clean under the hood, with no clearance issues whether you are a manual or automatic transmission car.
Tools you will need include the following:
Flat blade screwdriver
5/8" hole saw or drill bit for IAT
As far as the parts you will need, Autozone has several colors to choose from for the Spectre filters and couplers. I am going to list only one set or numbers, but check with your local Autozone or Spectre dealer for other colors.
Parts you will need:
3" High Flow Red Air Filter Part Number: 8132 ($24.99)
AutoZone.com | Shopping | Accessories | Product Detail - Spectre High Flow Red Air Filter

Chrome 90 degree bend Part Number: 8698 ($10.99)(I have now installed a second 90 degree elbow, so you may want to get two of these)
AutoZone.com | Shopping | Accessories | Product Detail - Spectre 90 Degrees Elbow Intake Tube

3"-2.5" Red Silicone Coupler/Reducer Part Number : 8752 ($6.99)
AutoZone.com | Shopping | Accessories | Product Detail - Spectre 3 in. to 2 1/2 in. Red Coupler Reducer

Red & Chrome Breather Filter Part Number: 3992 ($8.99)
AutoZone.com | Shopping | Accessories | Product Detail - Spectre Red and Chrome Breather Filter

Total cost of parts: $52.96 plus tax (or $63.97 with two 90 degree bends)
Procedure:
You will need to remove the factory intake system. Check out gettinafit's awesome thread for the procedure and tools needed. https://www.fitfreak.net/forums/fit-...commended.html
Pay attention and be careful with the IAT when removing it from the factory tubing, you don't want to bang it around or damage it. You will not have to unplug the IAT from the harness. I believe the reason some people get a temporary engine light to come on after installing the intake is because they unplug the IAT. If you do get an engine light, do not despair, it will go away after a couple cycles of driving.
First place the 3"-2.5" reducer onto the throttle body using the 2.5" side of course. Don't tighten the worm gear clamp yet.
Then you want to mark a spot on the back side of the 90 degree elbow, about in the middle, to drill the hole for the IAT.
I used a 5/8" wood type hole saw bit on my cordless drill, but you can use a 5/8" bit at well. After drilling out the hole, make sure and blow out or wipe away any plastic shavings.
Remove the rubber 'o' ring from the factory IAT position on the OEM intake tube. Place that 'o' ring into the newly drilled hole in the chrome 90 degree bend.
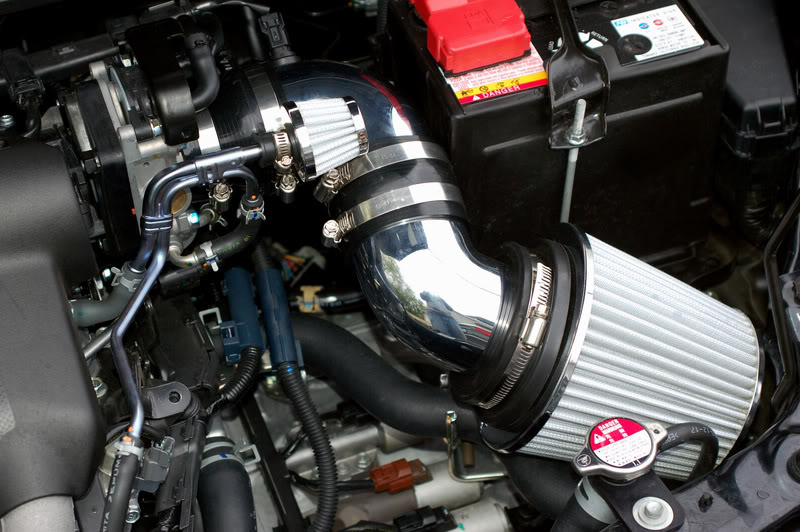
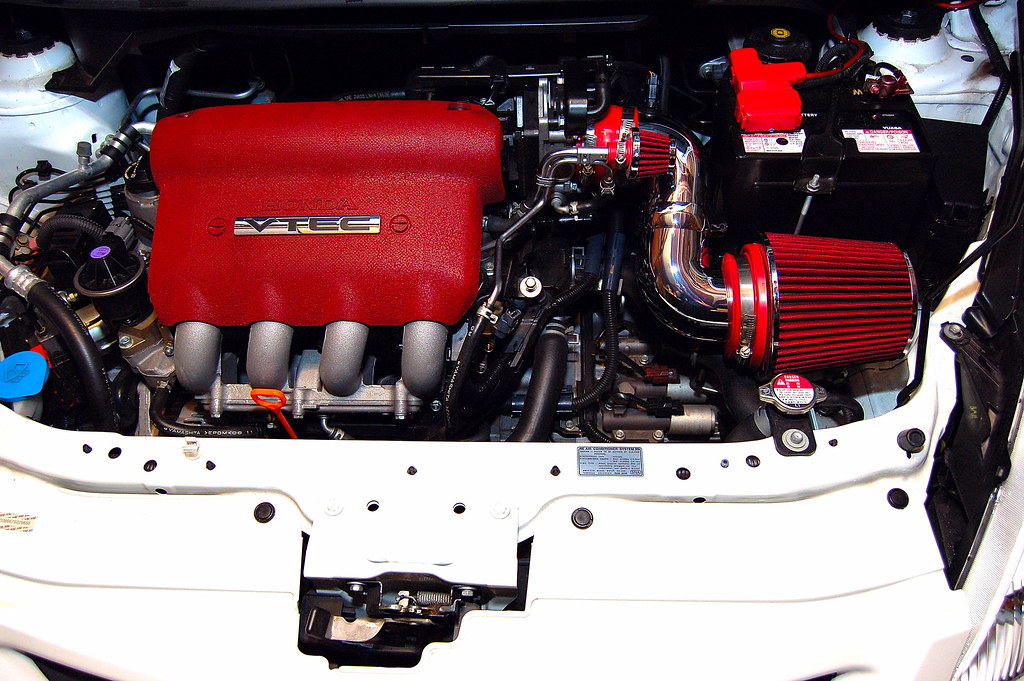
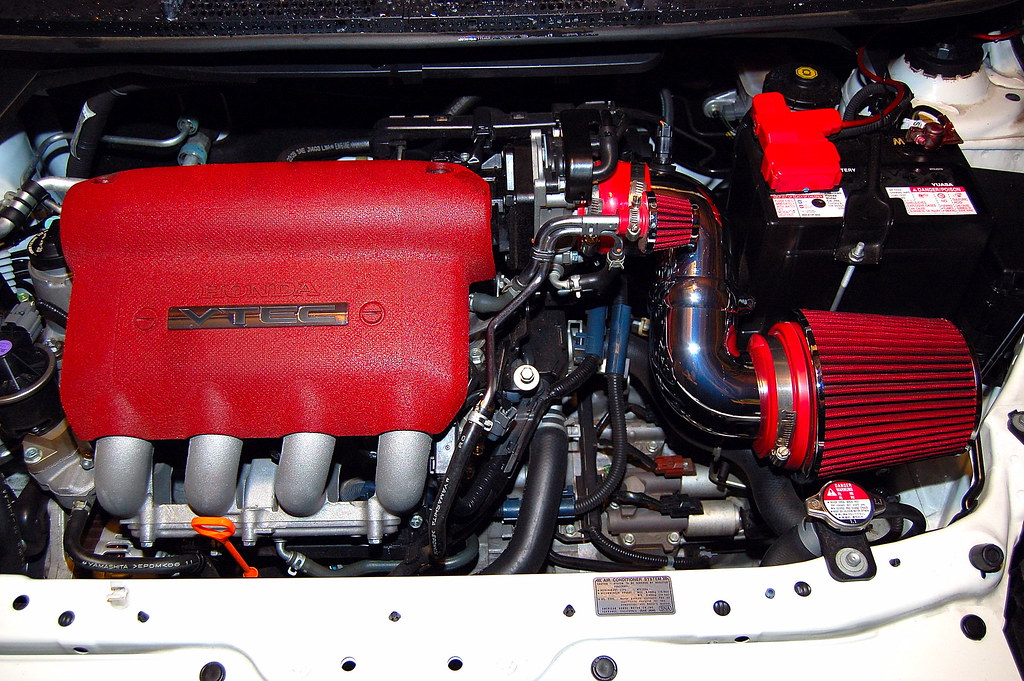
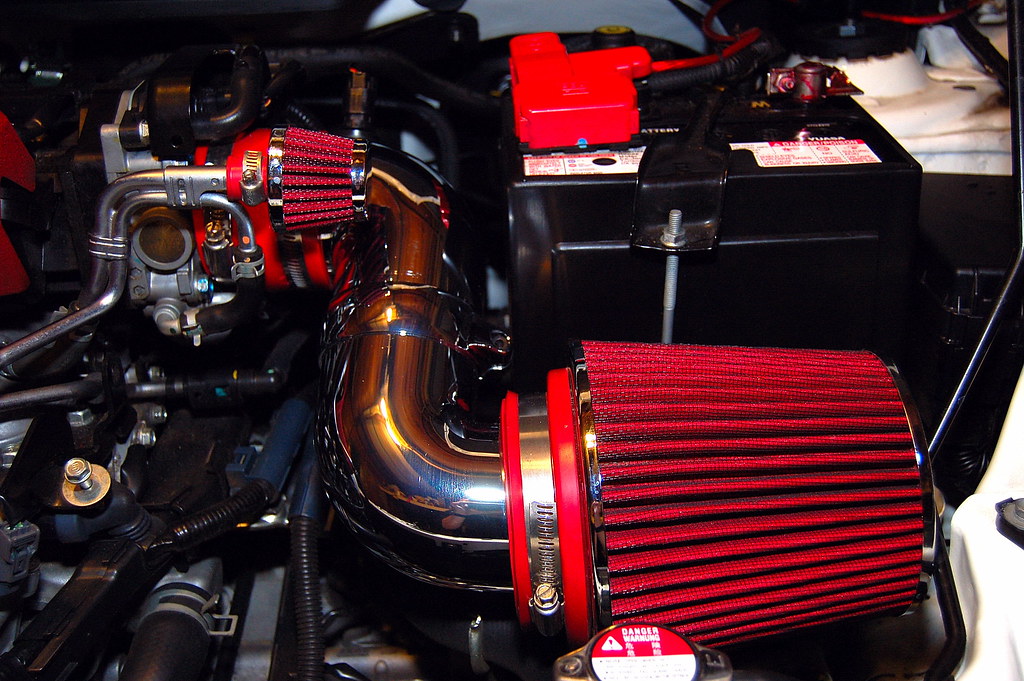
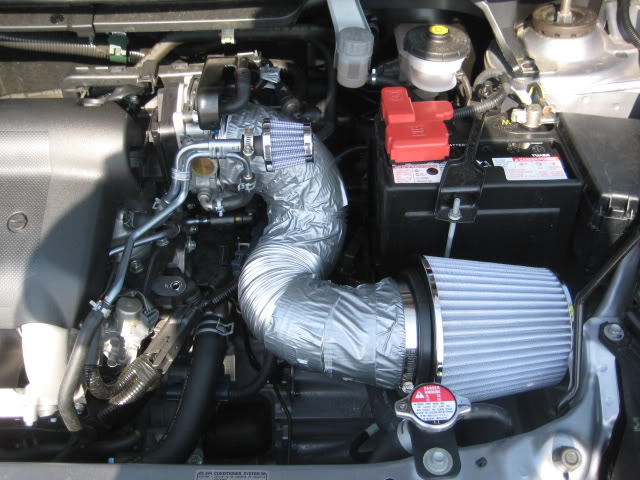
Slide the chrome 90 degree bend into the 3" side of the reducer, which is already on the throttle body. You can slightly tighten the worm clamps now to hold things steady. Since there has been overwhelming positive feedback concerning the SSR Intake with an additional bend added, I have now also installed another chrome 90 degree bend to place the 3" filter in front of the battery, further away from engine heat and better positioned to receive colder air. Please note the new photos I have posted below.
Now you can slip on the 3" open element filter on the other end of the chrome tube and slightly tighten down the clamp.
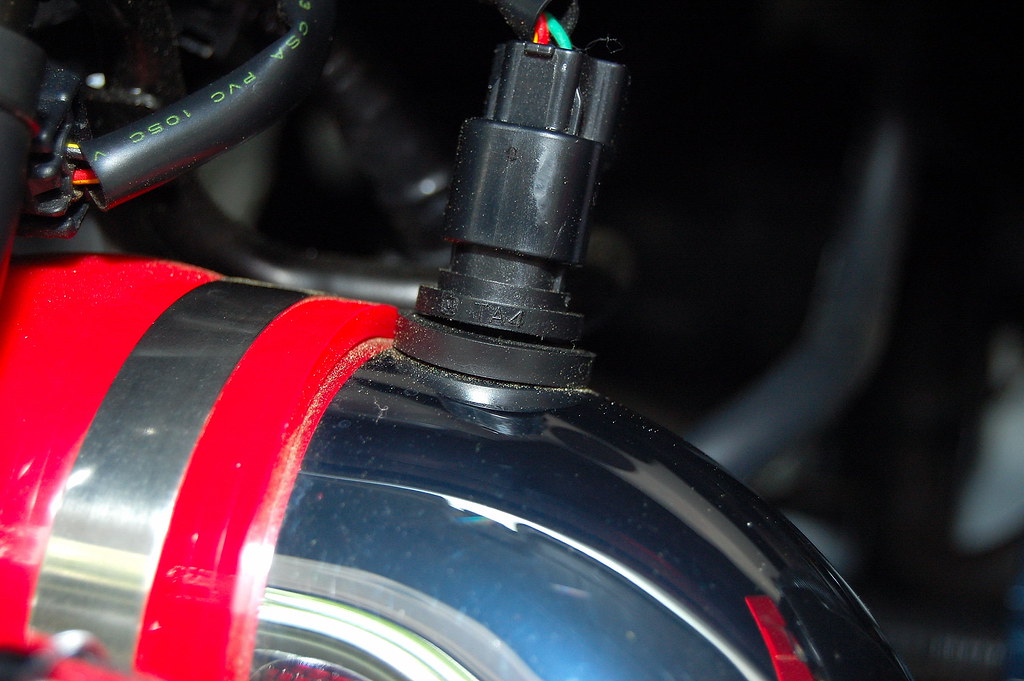
Now install the IAT into the 'o' ring making sure it is a snug fit and all the way in. Make sure the plug is secure connecting to the IAT in case you unplugged it.
Now slip on the small filter to the metal breather tube that once connected to the factory tube.
Now take your screwdriver and tighten all worm clamps to ensure a tight seal. After driving for 50-100 miles, re-tighten the clamps and you are good to go!
Don't worry if you get a CEL (check engine light) This is a normal thing that happens anytime you unplug the IAT. Make triple sure you plugged you IAT back in properly, and drive around for a few miles. After cycling through the stop/start engine procedure, the CEL will clear on it's own. No need to go to the dealer, unless it were to stay on for some reason for several days. So far, everyone's CEL has cleared, if they ever got one to start with.
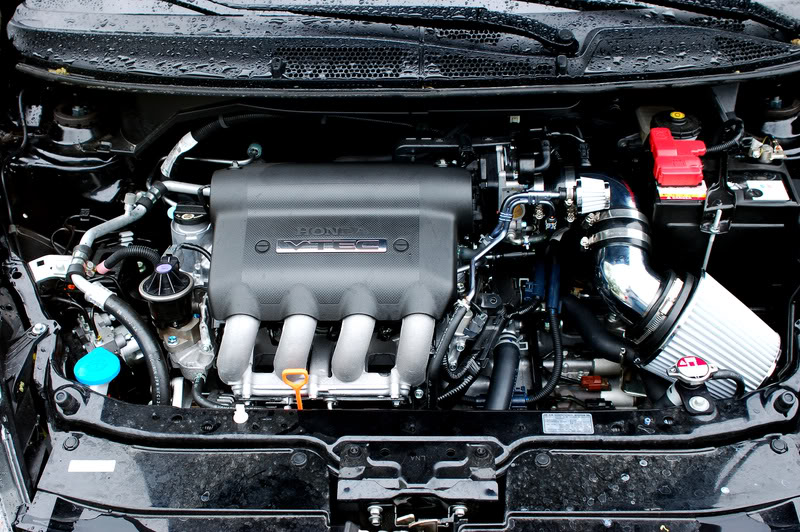
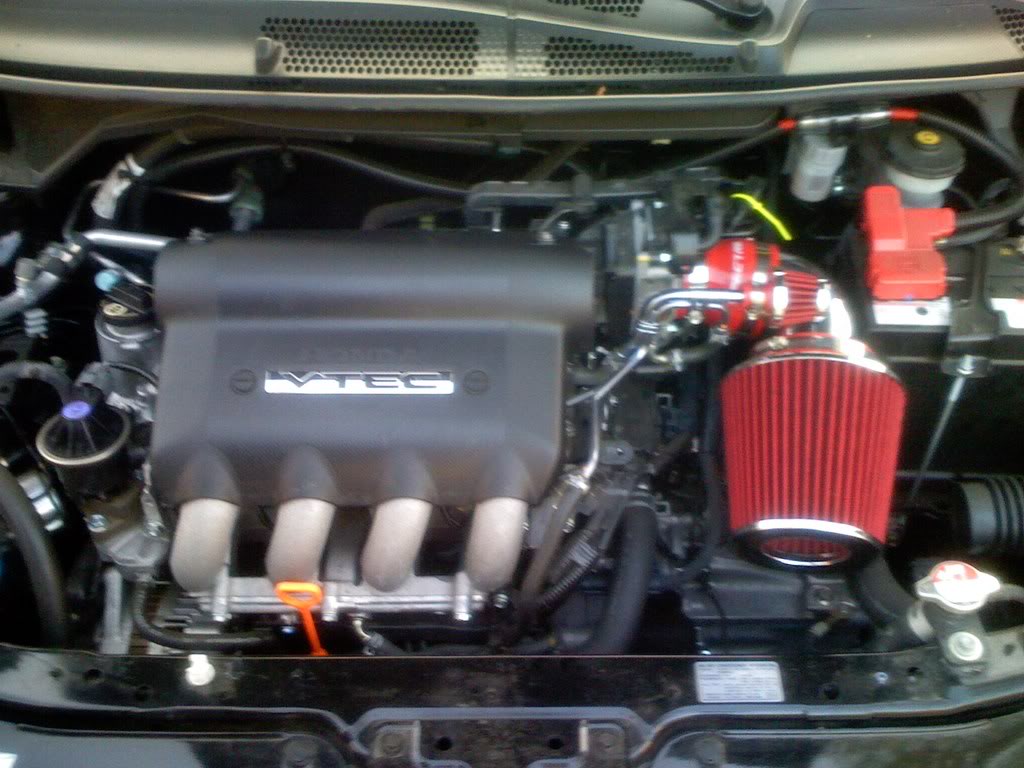
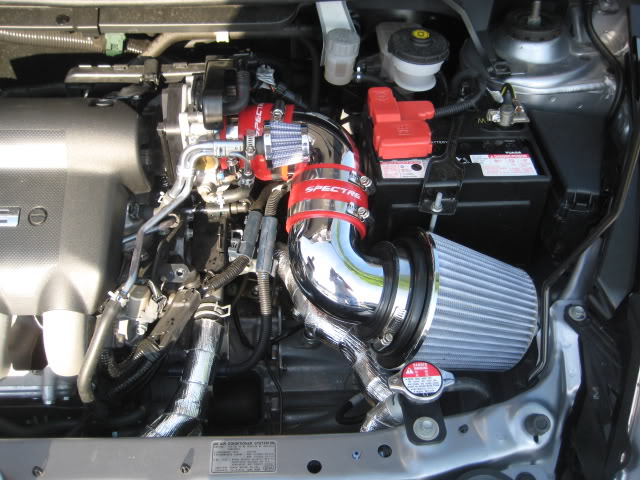
You're finished product should look like this:


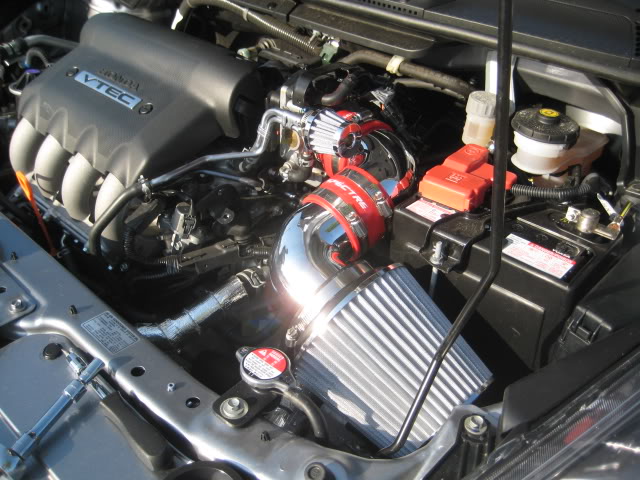
And here you can see IAT placement more clearly.


Here is the original thread :https://www.fitfreak.net/forums/fit-...am-intake.html
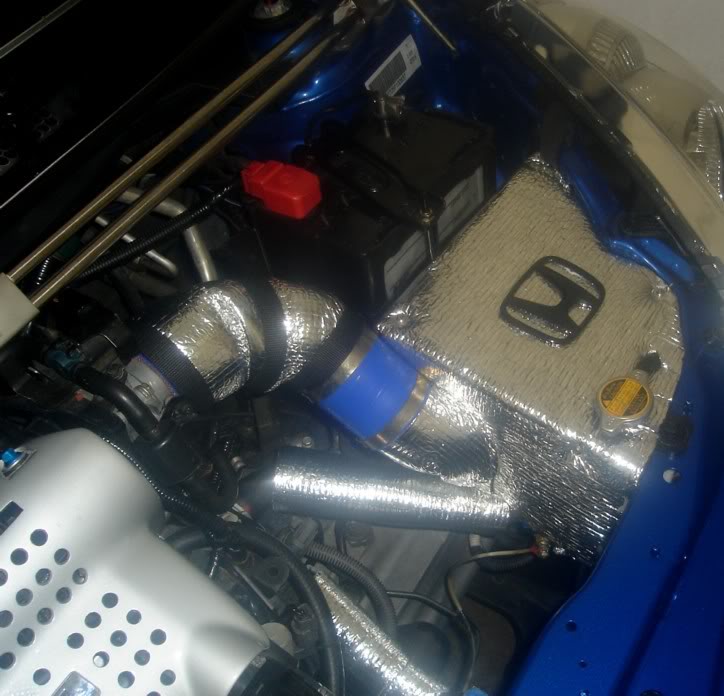
NINJA EDIT UPDATE.......I updated my SSR intake in my personal Fit with the addition of another 90 degree elbow. Since everyone has commented that this would lower the intake temps, I decided it was worth a try.
Here are the pics.

Other versions and variations:
07fitsport

ciburri

osborne

claymore
ezduzit

jeffquach
isitafox
m1kel

kmdebit

fitcapo

HarumaN

Of course, as usual, perform this modification at your own risk. Neither myself nor Fit Freak is guaranteeing this or any modification you might perform to your vehicle.
You will get a more aggressive induction sound, but even at WOT, it's not annoying. It's easy to install and looks very clean under the hood, with no clearance issues whether you are a manual or automatic transmission car.
Tools you will need include the following:
Flat blade screwdriver
5/8" hole saw or drill bit for IAT
As far as the parts you will need, Autozone has several colors to choose from for the Spectre filters and couplers. I am going to list only one set or numbers, but check with your local Autozone or Spectre dealer for other colors.
Parts you will need:
3" High Flow Red Air Filter Part Number: 8132 ($24.99)
AutoZone.com | Shopping | Accessories | Product Detail - Spectre High Flow Red Air Filter
Chrome 90 degree bend Part Number: 8698 ($10.99)(I have now installed a second 90 degree elbow, so you may want to get two of these)
AutoZone.com | Shopping | Accessories | Product Detail - Spectre 90 Degrees Elbow Intake Tube
3"-2.5" Red Silicone Coupler/Reducer Part Number : 8752 ($6.99)
AutoZone.com | Shopping | Accessories | Product Detail - Spectre 3 in. to 2 1/2 in. Red Coupler Reducer
Red & Chrome Breather Filter Part Number: 3992 ($8.99)
AutoZone.com | Shopping | Accessories | Product Detail - Spectre Red and Chrome Breather Filter
Total cost of parts: $52.96 plus tax (or $63.97 with two 90 degree bends)
Procedure:
You will need to remove the factory intake system. Check out gettinafit's awesome thread for the procedure and tools needed. https://www.fitfreak.net/forums/fit-...commended.html
Pay attention and be careful with the IAT when removing it from the factory tubing, you don't want to bang it around or damage it. You will not have to unplug the IAT from the harness. I believe the reason some people get a temporary engine light to come on after installing the intake is because they unplug the IAT. If you do get an engine light, do not despair, it will go away after a couple cycles of driving.
First place the 3"-2.5" reducer onto the throttle body using the 2.5" side of course. Don't tighten the worm gear clamp yet.
Then you want to mark a spot on the back side of the 90 degree elbow, about in the middle, to drill the hole for the IAT.
I used a 5/8" wood type hole saw bit on my cordless drill, but you can use a 5/8" bit at well. After drilling out the hole, make sure and blow out or wipe away any plastic shavings.
Remove the rubber 'o' ring from the factory IAT position on the OEM intake tube. Place that 'o' ring into the newly drilled hole in the chrome 90 degree bend.
Slide the chrome 90 degree bend into the 3" side of the reducer, which is already on the throttle body. You can slightly tighten the worm clamps now to hold things steady. Since there has been overwhelming positive feedback concerning the SSR Intake with an additional bend added, I have now also installed another chrome 90 degree bend to place the 3" filter in front of the battery, further away from engine heat and better positioned to receive colder air. Please note the new photos I have posted below.
Now you can slip on the 3" open element filter on the other end of the chrome tube and slightly tighten down the clamp.
Now install the IAT into the 'o' ring making sure it is a snug fit and all the way in. Make sure the plug is secure connecting to the IAT in case you unplugged it.
Now slip on the small filter to the metal breather tube that once connected to the factory tube.
Now take your screwdriver and tighten all worm clamps to ensure a tight seal. After driving for 50-100 miles, re-tighten the clamps and you are good to go!
Don't worry if you get a CEL (check engine light) This is a normal thing that happens anytime you unplug the IAT. Make triple sure you plugged you IAT back in properly, and drive around for a few miles. After cycling through the stop/start engine procedure, the CEL will clear on it's own. No need to go to the dealer, unless it were to stay on for some reason for several days. So far, everyone's CEL has cleared, if they ever got one to start with.
You're finished product should look like this:
And here you can see IAT placement more clearly.
Here is the original thread :https://www.fitfreak.net/forums/fit-...am-intake.html
NINJA EDIT UPDATE.......I updated my SSR intake in my personal Fit with the addition of another 90 degree elbow. Since everyone has commented that this would lower the intake temps, I decided it was worth a try.
Here are the pics.
Other versions and variations:
07fitsport
ciburri
osborne
claymore
ezduzit
jeffquach
isitafox
m1kel
kmdebit
fitcapo
HarumaN
Last edited by Sid 6.7; Aug 16, 2008 at 03:17 PM.
Member
Joined: Jul 2007
Posts: 249
From: Central Coast, CA
Once again, that is probably the worst place under the hood to locate your filter as far as intake temperature goes.
Even when you're driving and getting some air flow, temps go up in that zone instead of down.
Unless you add another 90 or 60 degree elbow to locate the filter in front of the battery, you're going to sucking hot air.
ez
Even when you're driving and getting some air flow, temps go up in that zone instead of down.
Unless you add another 90 or 60 degree elbow to locate the filter in front of the battery, you're going to sucking hot air.
ez

Member

Joined: May 2007
Posts: 241
From: west virginia
Once again, that is probably the worst place under the hood to locate your filter as far as intake temperature goes.
Even when you're driving and getting some air flow, temps go up in that zone instead of down.
Unless you add another 90 or 60 degree elbow to locate the filter in front of the battery, you're going to sucking hot air.
ez
Even when you're driving and getting some air flow, temps go up in that zone instead of down.
Unless you add another 90 or 60 degree elbow to locate the filter in front of the battery, you're going to sucking hot air.
ez
Have your read the other thread
This is a sick wri essentially. He got 7mpg more than before. Yes some people like getting 7 mpg more, and are willing to give up top speed by a few mph's.
Thanks soo much Sid for this killer thread
Once again, that is probably the worst place under the hood to locate your filter as far as intake temperature goes.
Even when you're driving and getting some air flow, temps go up in that zone instead of down.
Unless you add another 90 or 60 degree elbow to locate the filter in front of the battery, you're going to sucking hot air.
ez
Even when you're driving and getting some air flow, temps go up in that zone instead of down.
Unless you add another 90 or 60 degree elbow to locate the filter in front of the battery, you're going to sucking hot air.
ez
If you want cold air, then by all means, spend $350+ on a cold air intake.
If you want a short ram intake, and everything that comes with it, then spend $50 at Autozone or $200+ on a name brand.
At least you have choices.
As far as pros and cons, I'll let those with degrees and such lay into you. Because obviously you beat my knowledge of all things automobile, with my pitiful 15 years in building, street racing and blowing up stuff.
Funny, really. Just because you own a Honda Fit, people assume you live your life vicariously through Fast and the Furious and import mags. As if I was some kind of bench racer, keyboard jockey, wannabe. And that I haven't been there, done that, rode it hard, and put it up wet.

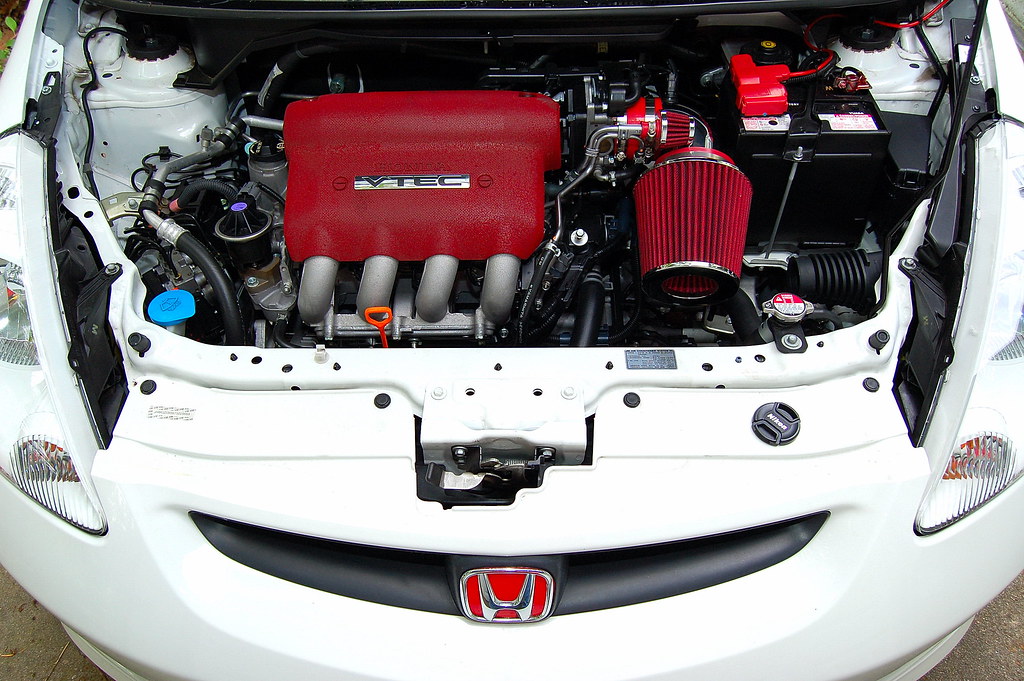
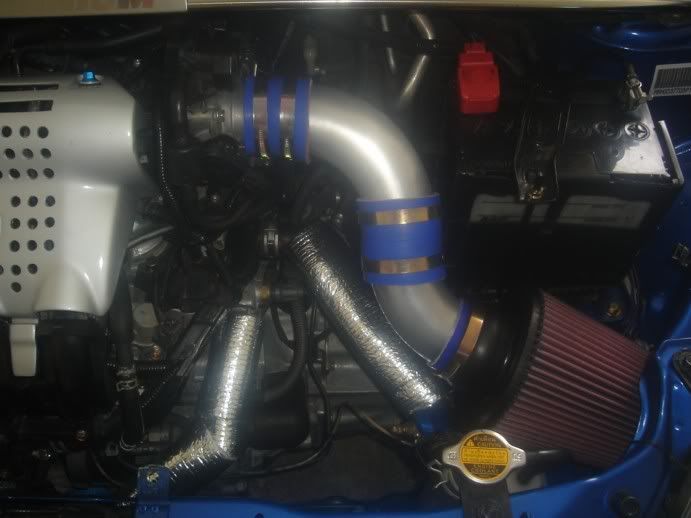
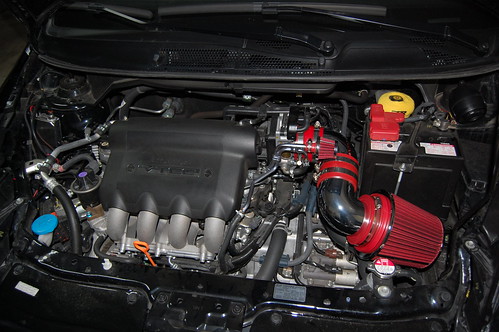
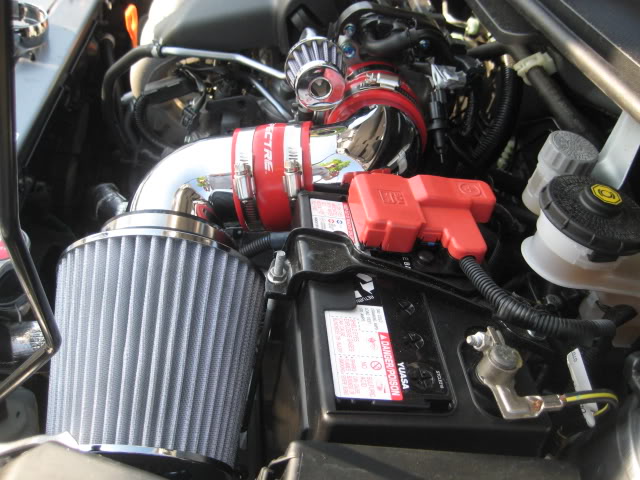
Well thanks to u sid for the other thread you started awhile back on this, i built mine about 3 months ago and have added alittle to the looks and also adressed the hot air situation since then. Here's a pic, hope you guys like and if you dont keep it 2 urself bc that craps getting old. Well THANKS again sid and hope u like! enjoy

Last edited by pastadog; Apr 28, 2008 at 02:23 PM.

Member
Joined: Jul 2007
Posts: 249
From: Central Coast, CA
I didn't see anybody calling this a cold air intake. It is a short ram. And as such, has it's place within the world of intake systems.
If you want cold air, then by all means, spend $350+ on a cold air intake.
If you want a short ram intake, and everything that comes with it, then spend $50 at Autozone or $200+ on a name brand.
At least you have choices.
As far as pros and cons, I'll let those with degrees and such lay into you. Because obviously you beat my knowledge of all things automobile, with my pitiful 15 years in building, street racing and blowing up stuff.
Funny, really. Just because you own a Honda Fit, people assume you live your life vicariously through Fast and the Furious and import mags. As if I was some kind of bench racer, keyboard jockey, wannabe. And that I haven't been there, done that, rode it hard, and put it up wet.
Of course, if you want to save $10 and lose power, that's up to you bro.
It does look very sexy with just the one elbow.
ez

Member
Joined: Jul 2007
Posts: 249
From: Central Coast, CA
Not sure what you mean but with a Scangauge it's very easy to check intake temps.
A cheaper method would be to use a thermometer. One of those digital cooking thermometers with a wire and remote LCD display would be a good way to check temps at different locations without the expense of a Scangauge.
ez
A cheaper method would be to use a thermometer. One of those digital cooking thermometers with a wire and remote LCD display would be a good way to check temps at different locations without the expense of a Scangauge.
ez

Member
Joined: Jul 2007
Posts: 249
From: Central Coast, CA
Sure glad I didn't hold my breath waiting for that to happen

ez
Member
Joined: Feb 2008
Posts: 138
From: Fayetteville, NC
Was super excited to do this intake cuz I'm anxious about the KWSC. Gonna sell this to my buddy for his civic, mostly, or try to incorporate it with the KWSC...
Fail...
FTW
Will drill hole for AIT tomorrow. I haves no drills.
Fail...
FTW
Will drill hole for AIT tomorrow. I haves no drills.