
MODS/ACCESSORIES for the GK

Member
Joined: Jan 2015
Posts: 367
From: Doraville
Member
Joined: Jan 2015
Posts: 367
From: Doraville
Already got:
- Ultragauge INSTALLED
- reverse park sensor kit (Ebay) w/ LED/beep display
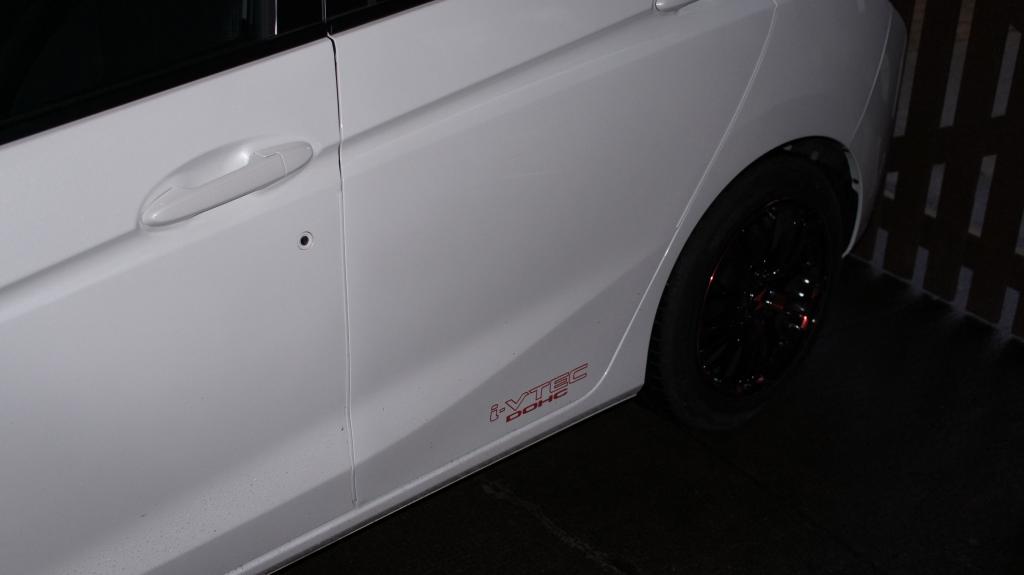
- i-vtec DOHC stickers (both rear doors) and plaque (rear hatch area) INSTALLED
- Garmin Nuvi 2757LM 7" GPS INSTALLED
- BlackBox G1W 1080p Dash Cam INSTALLED
- Front grill JDM emblem red badge sticker inserts F & R & steering wheel INSTALLED
- F & R JDM RS emblems
- Stainless exhaust tip INSTALLED
- non-OEM CHROME Wheel locks INSTALLED
- LED bulbs for the interior INSTALLED
- 16" alloys (HD w/ 185/55x16 Kumho PA31 tires placed order 6/14 finally arrvd. 6/28) INSTALLED
- OEM Door visors, rear applique, Nose mask, cargo liner, Door Edge film, Cargo net, All-season mats INSTALLED
- OEM JDM rear LED upper piping tail-lights (as in JDM GK Hybrid) INSTALLED
- OEM illuminated door sills, rear seat covers, cargo tray, cargo net INSTALLED
- OEM Sport Pedals INSTALLED
- OEM Cargo organizer, First Aid Kit, WOP door moudlings INSTALLED
- Blox 6 Spd. Shift knob w/ Shift boot adaptor (to be soon replaced by OEM GK RS leather knob) INSTALLED
- Wheelskins Leather steering wheel cover INSTALLED
- 15% tint on rear door windows & hatch glass (Llumar CTX ceramic) INSTALLED
Stereo upgrade parts: INSTALLED
- Polk DB6501 (two sets) - Kenwood KSC-SW11 8" powered sub - Kenwood Excelon XR400-4 channel amp.
- Audison BIT TEN D Processor - 100 ft. of oxygen-free speaker wire 16 g. - T-Spec install kit
- SOUND DEADENING: Dynamat Extreme (CLD tiles bulk) - MLV (40 sq. ft.) - Ensolite foam (CCF w/ adhesive backing)
Will paint the front calipers and ordered heat-resistant stickers:
link: Honda Accord Brake Caliper Decals 6pc Stickers 2013 INSTALLED
Other items:
- retrofit aftermarket perimeter entry + OEM push/start (after spending too much money on all other accessories, now that the Fit is here, decided against this) Decided I can live with the LX Set-up after all!!!
- not to foget. Yes, I am putting a hawaiian dancing cupie doll on the dash!!!
7 years and never bought any toys for my GD. Joined FF last March and now, have gone overboard with plans for add-ons. This forum is just "BAD". Thanks a lot, everybody here!!!
What are you planning on???
- Ultragauge INSTALLED
- reverse park sensor kit (Ebay) w/ LED/beep display
- i-vtec DOHC stickers (both rear doors) and plaque (rear hatch area) INSTALLED
- Garmin Nuvi 2757LM 7" GPS INSTALLED
- BlackBox G1W 1080p Dash Cam INSTALLED
- Front grill JDM emblem red badge sticker inserts F & R & steering wheel INSTALLED
- F & R JDM RS emblems
- Stainless exhaust tip INSTALLED
- non-OEM CHROME Wheel locks INSTALLED
- LED bulbs for the interior INSTALLED
- 16" alloys (HD w/ 185/55x16 Kumho PA31 tires placed order 6/14 finally arrvd. 6/28) INSTALLED
- OEM Door visors, rear applique, Nose mask, cargo liner, Door Edge film, Cargo net, All-season mats INSTALLED
- OEM JDM rear LED upper piping tail-lights (as in JDM GK Hybrid) INSTALLED
- OEM illuminated door sills, rear seat covers, cargo tray, cargo net INSTALLED
- OEM Sport Pedals INSTALLED
- OEM Cargo organizer, First Aid Kit, WOP door moudlings INSTALLED
- Blox 6 Spd. Shift knob w/ Shift boot adaptor (to be soon replaced by OEM GK RS leather knob) INSTALLED
- Wheelskins Leather steering wheel cover INSTALLED
- 15% tint on rear door windows & hatch glass (Llumar CTX ceramic) INSTALLED
Stereo upgrade parts: INSTALLED
- Polk DB6501 (two sets) - Kenwood KSC-SW11 8" powered sub - Kenwood Excelon XR400-4 channel amp.
- Audison BIT TEN D Processor - 100 ft. of oxygen-free speaker wire 16 g. - T-Spec install kit
- SOUND DEADENING: Dynamat Extreme (CLD tiles bulk) - MLV (40 sq. ft.) - Ensolite foam (CCF w/ adhesive backing)
Will paint the front calipers and ordered heat-resistant stickers:
link: Honda Accord Brake Caliper Decals 6pc Stickers 2013 INSTALLED
Other items:
- retrofit aftermarket perimeter entry + OEM push/start (after spending too much money on all other accessories, now that the Fit is here, decided against this) Decided I can live with the LX Set-up after all!!!
- not to foget. Yes, I am putting a hawaiian dancing cupie doll on the dash!!!
7 years and never bought any toys for my GD. Joined FF last March and now, have gone overboard with plans for add-ons. This forum is just "BAD". Thanks a lot, everybody here!!!
What are you planning on???

Member
Joined: Dec 2013
Posts: 360
From: IL
I placed an extra Nexus 7 screen protector on the 7" touchscreen. It fits so-so, the actual glass of the radio is kind of long, so the protector doesn't cover all of it, but it covers most of it and the parts that are touched. The funny part is that there are two holes because the Nexus 7 has a camera and some other sensor at the top of the screen. Besides that it works great and there is no trouble of the radio not sensing when I touch it.

I also tapped into fuse 37 for the remote wire to my subwoofer amplifier. I used an Add-A-Circuit to piggy back on the accessory fuse. I learned that the fuses that were already in the panel have the stubby connectors and that it won't work with the piggy back fuse holder. Fortunately, the Add-A-Fuse came with 4 fuses, 3.5, 5.0, 7.5, and 10.0 amps. The Accessory fuse is a 7.5A so it's all set. I checked for power with the car off and there is no power going through the fuse. As soon as I turn on accessory it gets power. So that should work well for turning the amp on and off.


I also tapped into fuse 37 for the remote wire to my subwoofer amplifier. I used an Add-A-Circuit to piggy back on the accessory fuse. I learned that the fuses that were already in the panel have the stubby connectors and that it won't work with the piggy back fuse holder. Fortunately, the Add-A-Fuse came with 4 fuses, 3.5, 5.0, 7.5, and 10.0 amps. The Accessory fuse is a 7.5A so it's all set. I checked for power with the car off and there is no power going through the fuse. As soon as I turn on accessory it gets power. So that should work well for turning the amp on and off.


Member
Joined: Jul 2014
Posts: 3,278
From: Shokan, NY

For a while, Amazon was selling ZaggShield kits for the Apple Bacbook Pro for $10. They had enough plastic to cover the entire computer. I got two and made good use of them.
The price has gone up.
The price has gone up.

Member
Joined: Jun 2014
Posts: 78
From: Brisbane, Australia
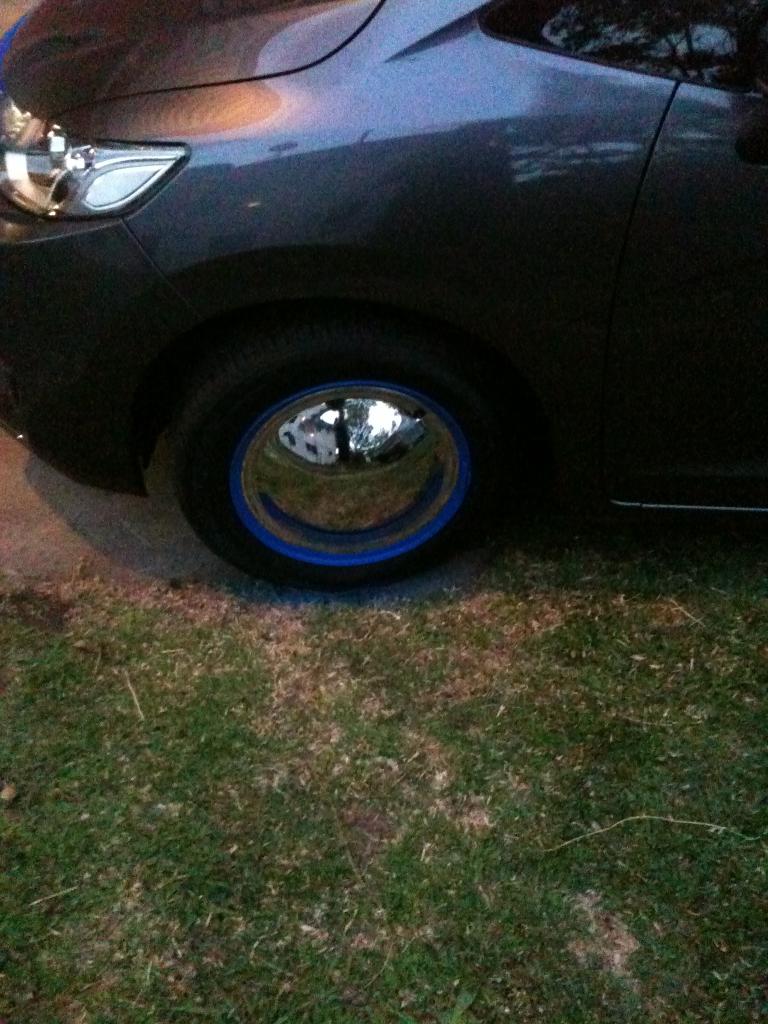
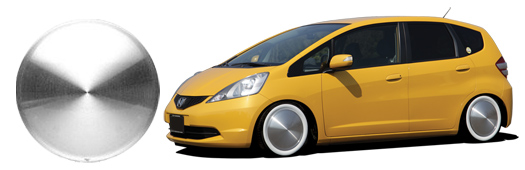
I have gone with the Moon Spacer discs and then used spray vinyl on the rims to give this effect. When I replace the blue vinyl (duplicator recommends every six months) I will be spraying them white to give a white wall effect. I need to take a full profile pic but this will give you an idea of the outcome.
Member
Joined: Dec 2013
Posts: 360
From: IL
I didn't know if I was going to get my subwoofer into the car this weekend or not. I just finished painting it this morning and got the rest of the wiring done as posted above. It may take up almost all of the trunk, but it sounds good.
Before I was really disappointed in the sound. I compare it to a set of headphones where I can hear the sound really well from the left and right, but the car just isn't filled with sound. I didn't realize it, but what it needed was the non-directional low end. The different was night and day. Even with everything else stock, it sounds WAY better.

Before I was really disappointed in the sound. I compare it to a set of headphones where I can hear the sound really well from the left and right, but the car just isn't filled with sound. I didn't realize it, but what it needed was the non-directional low end. The different was night and day. Even with everything else stock, it sounds WAY better.

Thread Starter
|
Someone that spends his life on FitFreak.net
Joined: Mar 2014
Posts: 1,116
From: Hawaii: relocated to Western Canada Sept, 2015
Acc. added for 2015!!!
Thought the bleeding ceased, but happily, not yet!!!
Here's add'l stuff added this year.
OEM body colored door mouldings. These fit perfectly. Used a rubber mallet to secure it in place.
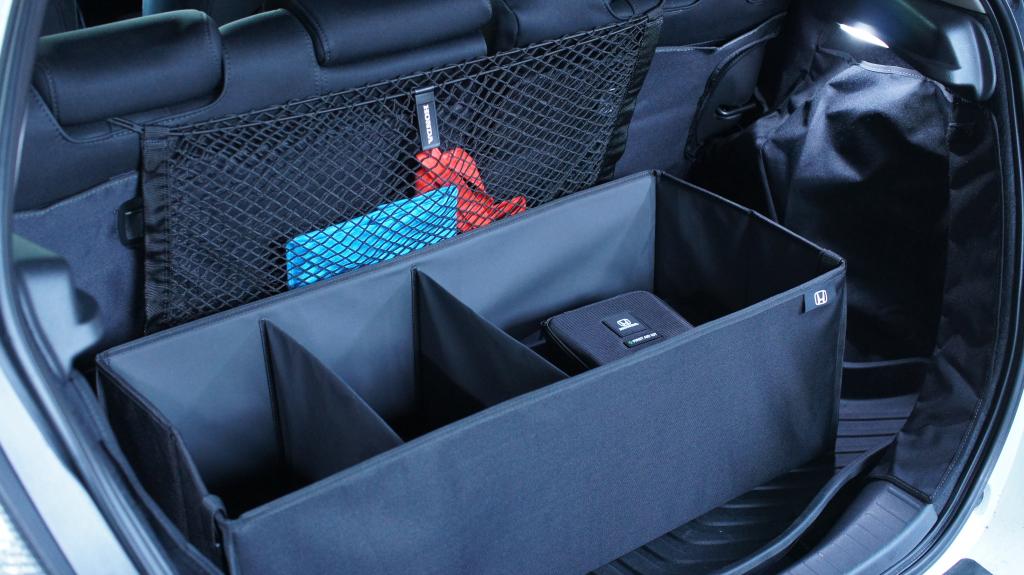
OEM storage organizer. Wife got me one (Amazon) last year. Decent, but not that rigid. Ordered this one from Bernardi's (on sale) last Dec. Great quality, folds flat, w/ 3 compartments.
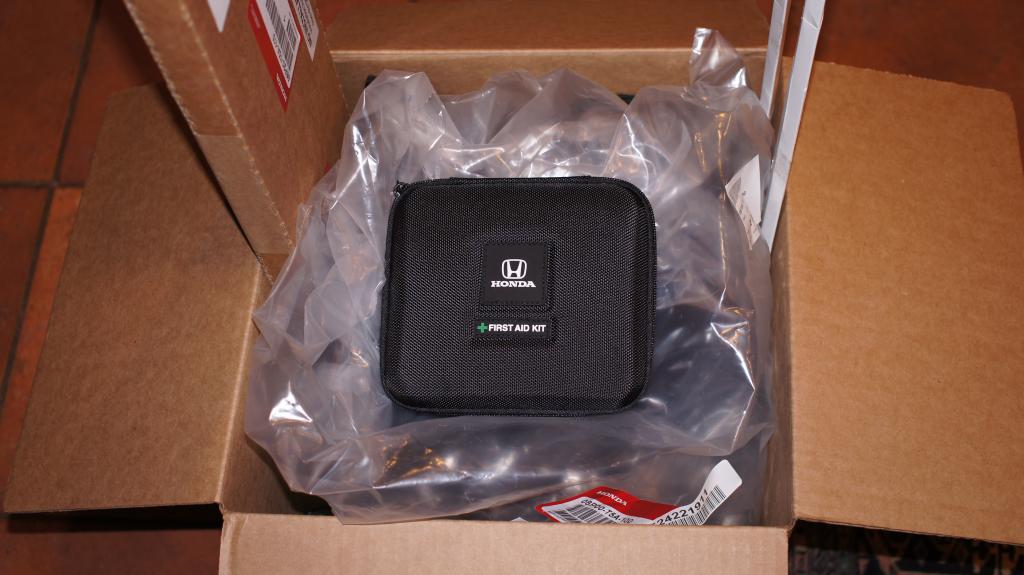
OEM First Aid Kit. Lets hope this never gets used!!!
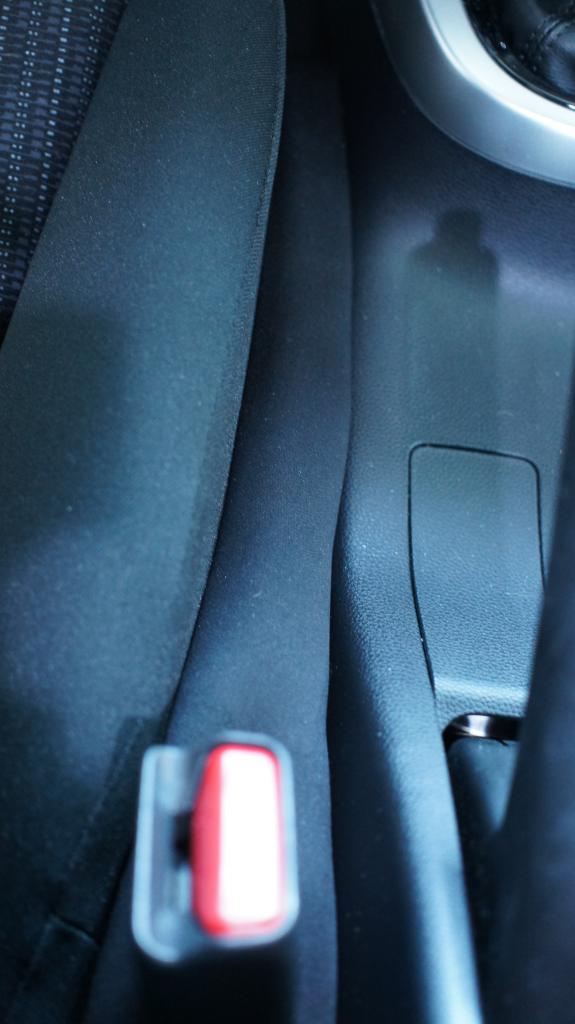
"Drop-stop". Got the idea from my niece last July who installed a generic "made in China" on my previous '08 GD. With a $10 difference (its $20 shipped), decided to get the "original". Glad I did cause is thicker which makes it stay in place better than the thinner "knock-offs".
With my boys home last Dec. they had a fun time driving the GK. Mileage has dropped as they enjoy hearing that V-tec in action, plus driving their friends all over the island. They did comment on how "nice" the doors felt when closing and how much quieter it is compared to our former GD. The 100 lbs. of sound-deadening is getting the job done!!!
What's else is coming??? Ordered a set (F & R) of Husky WeatherBeaters ($118.96 shipped - mainland only). Will post pics when they arrive later this month or in Feb.
Used a Garmin Friction Mount for my 2757. Scroll back to page #39 post 763 for the pic. Liking the 7" as its highly visible and using the touch-screen is instantaneous.
Here's add'l stuff added this year.
OEM body colored door mouldings. These fit perfectly. Used a rubber mallet to secure it in place.
OEM storage organizer. Wife got me one (Amazon) last year. Decent, but not that rigid. Ordered this one from Bernardi's (on sale) last Dec. Great quality, folds flat, w/ 3 compartments.
OEM First Aid Kit. Lets hope this never gets used!!!
"Drop-stop". Got the idea from my niece last July who installed a generic "made in China" on my previous '08 GD. With a $10 difference (its $20 shipped), decided to get the "original". Glad I did cause is thicker which makes it stay in place better than the thinner "knock-offs".
With my boys home last Dec. they had a fun time driving the GK. Mileage has dropped as they enjoy hearing that V-tec in action, plus driving their friends all over the island. They did comment on how "nice" the doors felt when closing and how much quieter it is compared to our former GD. The 100 lbs. of sound-deadening is getting the job done!!!
What's else is coming??? Ordered a set (F & R) of Husky WeatherBeaters ($118.96 shipped - mainland only). Will post pics when they arrive later this month or in Feb.
Used a Garmin Friction Mount for my 2757. Scroll back to page #39 post 763 for the pic. Liking the 7" as its highly visible and using the touch-screen is instantaneous.
Last edited by ROTTBOY; Jan 26, 2015 at 09:34 AM.
Member
Joined: Jul 2014
Posts: 3,278
From: Shokan, NY
"Drop-stop". Got the idea from my niece last July who installed a generic "made in China" on my previous '08 GD. With a $10 difference (its $20 shipped), decided to get the "original". Glad I did cause is thicker which makes it stay in place better than the thinner "knock-offs".
The 100 lbs. of sound-deadening is getting the job done!!!
The 100 lbs. of sound-deadening is getting the job done!!!
That 100 lb of sound deadening, did you add that yourself, or is that the difference from a previous Fit? I plan to put Dynamat in my car in the spring. I had it in another car, and it made a huge difference. It's in the garage waiting for warmer weather.
REPLY: There is enough room for the Drop-stop. Small item but damn, its brilliant!!! Really prevents, things from wedging into that dreaded console-seat "deep PIT"!!!
Did the sound deadening myself. Scroll back and the progression of the install (CLD, CCF and MLV) are pictorialized. Dynamat (CLD) is great, but look into adding both CCF and MLV. Makes a significant difference!!!
For those of us who bought the GK, its a subcompact. Its no luxury vehicle.
Those that may have issues with wind noise, tire roar etc... should consider looking in a better category or consider sound-deadening. It ain't cheap and it does add weight. In the end, for my purpose (to improve audio quality), the end-effect is worth it all!!!!
BTW, what is that red wire coming out of your right front console??? Did you ever plug up that hole? - rttby
Last edited by ROTTBOY; Jan 26, 2015 at 09:55 AM.
Member
Joined: Jan 2015
Posts: 367
From: Doraville
Thanks Rottboy, we will target the friction mount along with the Garmin, and will be able to move it back and forth between my wife's '96 Civic (she will not let go; uses it for merchandizing errands in iffy parking lots) and our 'touring car', the '15 EX. Your pictures are excellent, and truly serve to whet the appetite for 'ups'! And since its still January, Happy New Year to you too!
REPLY: the wife's '96 Civic??? IMO, any Civic is worth keeping!!!!
Glad your focusing on the Friction Mount. Got that idea from a previous FF post and watched it in action on YouTube before purchasing. Works great!!!
Appreciate the kind words and wishing you a belated Happy New Year too!!!! Just a warning though, once you start with a few mods/accessories, its pretty hard to stop. Ask all the FF GD/GE owners. I have only them to blame!!!
Post whatever you decide to add. Thats what this forum is all about. Sharing makes everyone the wiser!!! - rttby
REPLY: the wife's '96 Civic??? IMO, any Civic is worth keeping!!!!
Glad your focusing on the Friction Mount. Got that idea from a previous FF post and watched it in action on YouTube before purchasing. Works great!!!
Appreciate the kind words and wishing you a belated Happy New Year too!!!! Just a warning though, once you start with a few mods/accessories, its pretty hard to stop. Ask all the FF GD/GE owners. I have only them to blame!!!
Post whatever you decide to add. Thats what this forum is all about. Sharing makes everyone the wiser!!!
- rttby
Last edited by ROTTBOY; Jan 26, 2015 at 03:53 PM.

Member
Joined: Jan 2015
Posts: 20
From: So Cal
one week old and modding has begun front and rear red H emblems and Mugen visors
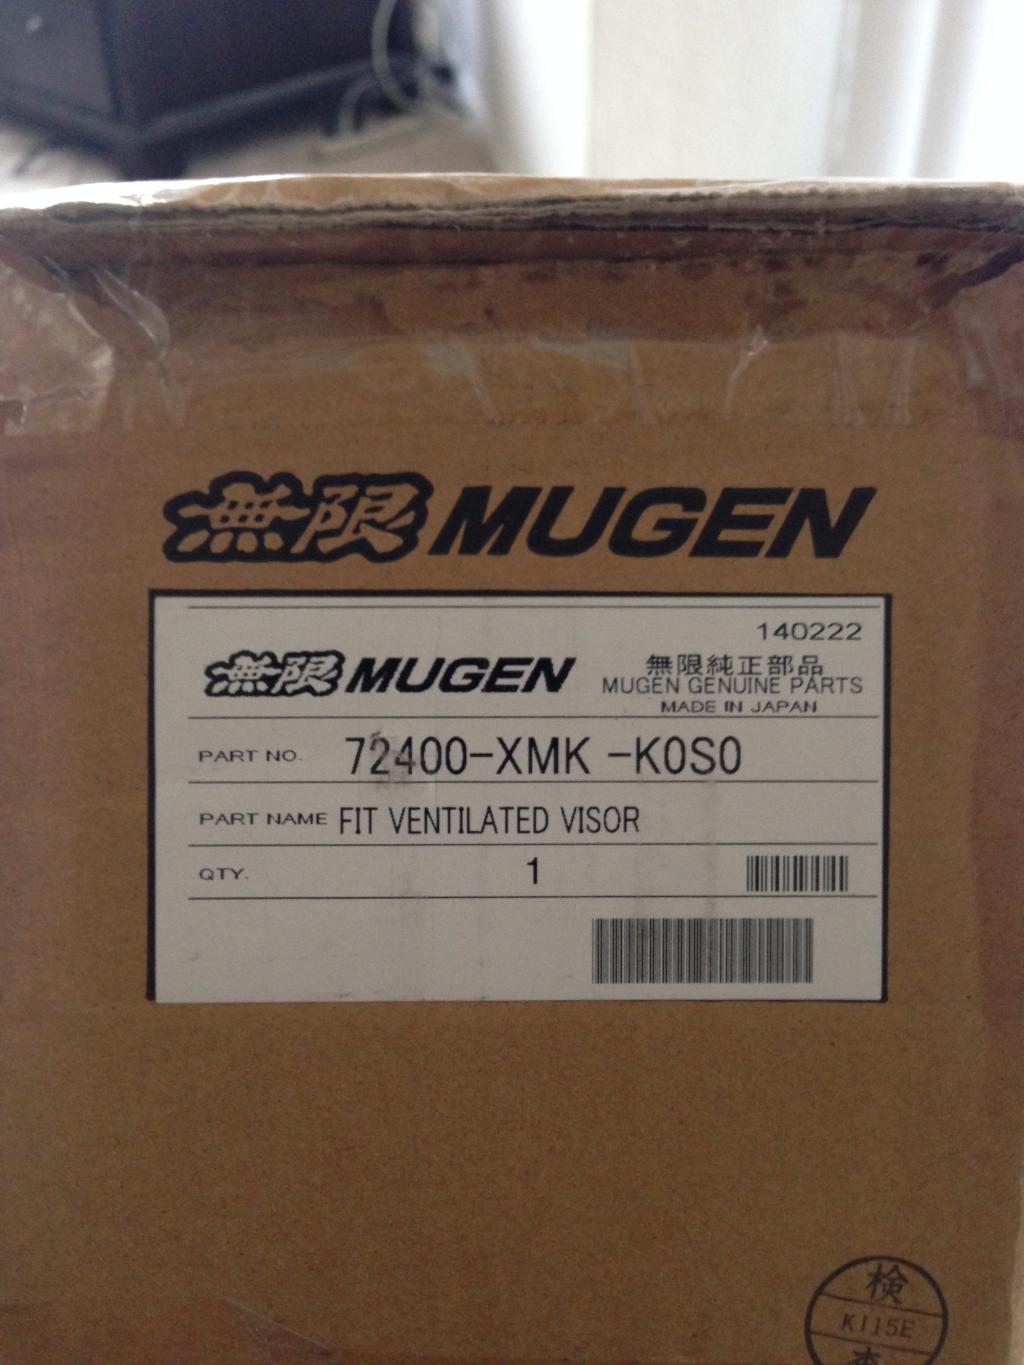
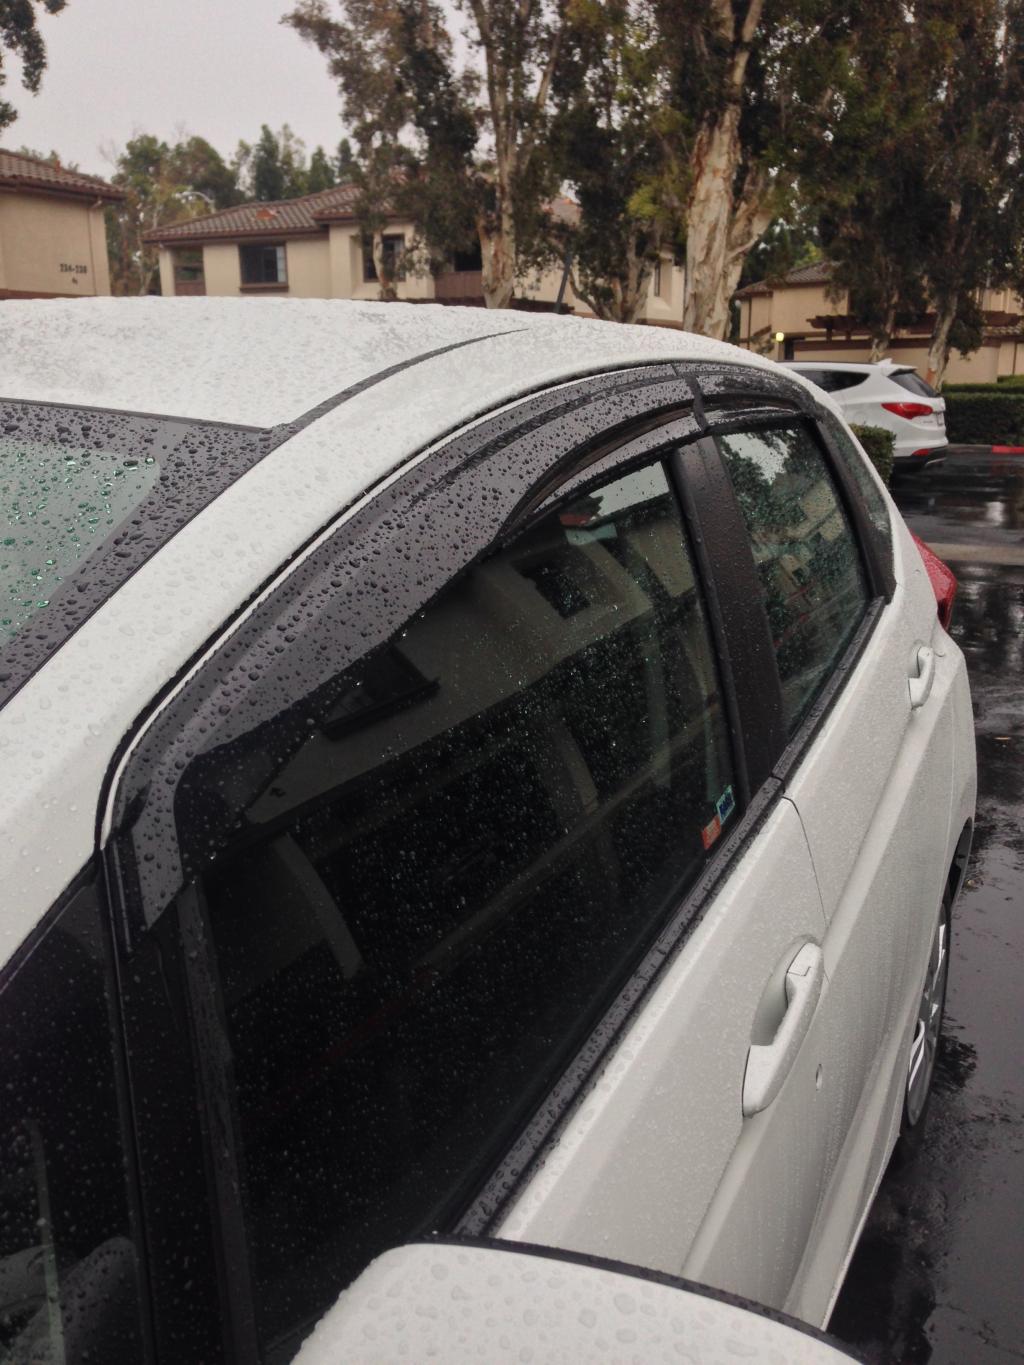
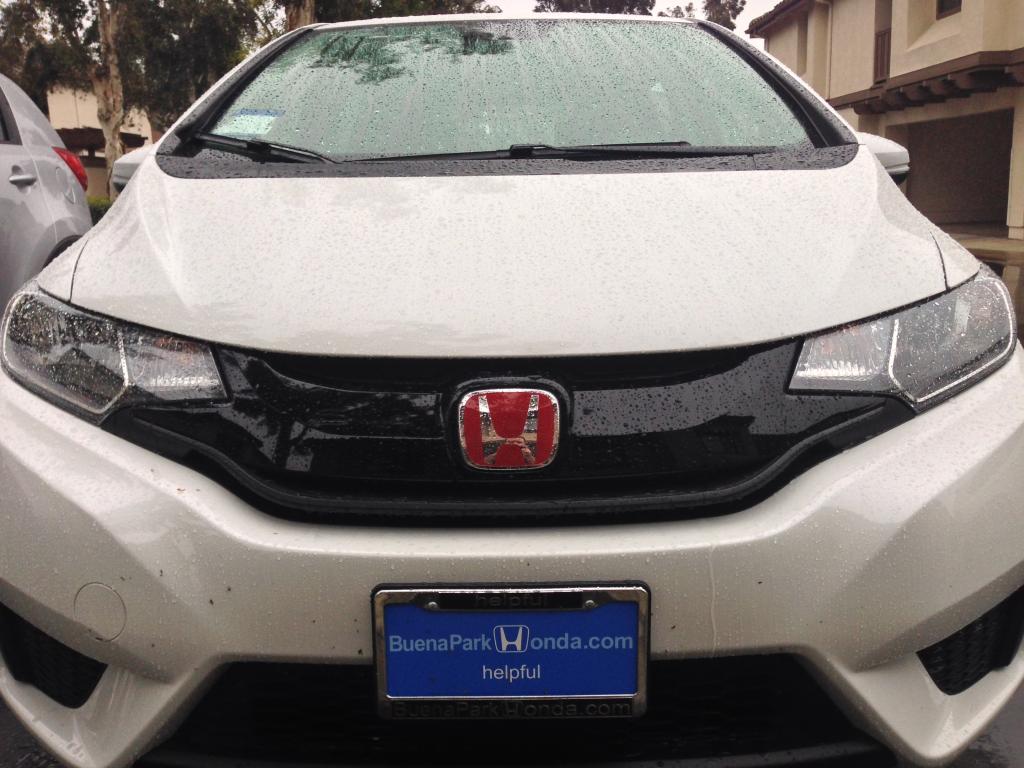

COMMENT: The Mugens look better than OEM stuff. Very nice. Sharp looking emblems!!!! (Thanks gotta go likewise to TofuShop for posting pics and his sources months ago). He pioneered a trend many are following. From the way your starting, am looking forward to your future postings. Good job and keep up the share. - rttby


COMMENT: The Mugens look better than OEM stuff. Very nice. Sharp looking emblems!!!! (Thanks gotta go likewise to TofuShop for posting pics and his sources months ago). He pioneered a trend many are following. From the way your starting, am looking forward to your future postings. Good job and keep up the share. - rttby
Last edited by ROTTBOY; Jan 26, 2015 at 08:21 PM.
Thread Starter
|
Someone that spends his life on FitFreak.net
Joined: Mar 2014
Posts: 1,116
From: Hawaii: relocated to Western Canada Sept, 2015
Mudguard Kit Install - finally
Had this OEM kit since July before the LX arrived last Sept. For whatever reason, my Fit was delivered with front mudguards. Never complained and didn't think of installing the rears till now.
The instructions are straightforward and took me 1 1/2 hours. Aside from making sure that the rear wheel liners were CUT and DRILLED properly, decided to give the inside of the rear bumper and wheel wells a nice power wash.
For the few of us, who did not get complimentary mud guards from your selling dealer, if planning to do this job, make sure you have a very short Phillips screwdriver (I used a mini-rachet with a Phillips head). REgular tools can be used but you'll have to remove wheels to obtain the necessary clearance for the right angle to the screwheads.
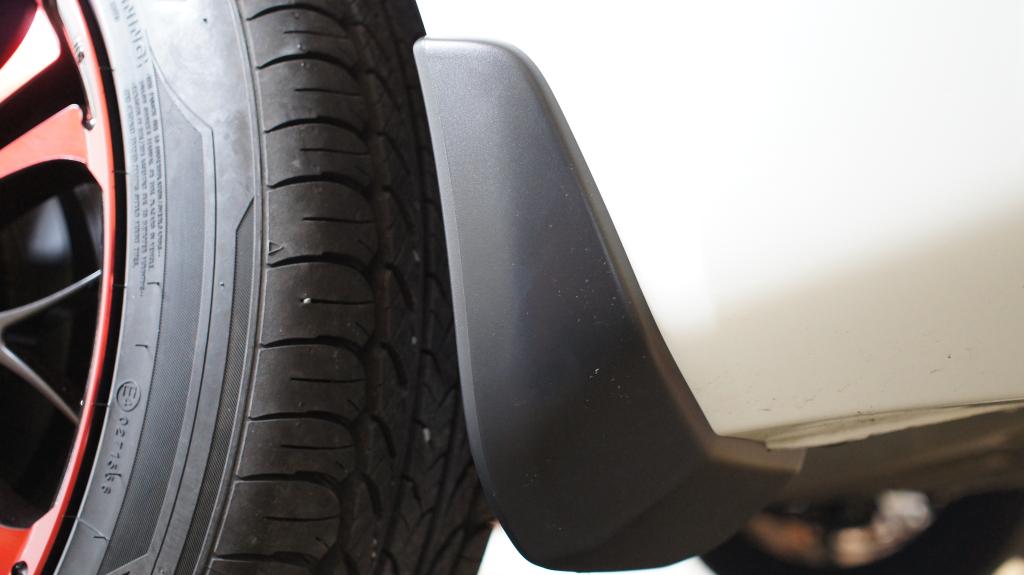
My neighbor buddy went the aftermarket route and got his from Ebay. Way cheaper and easier to install as they use existing holes. There is a clear difference in the quality of plastic material plus is bulkier. With the OEM kit there are no spaces between the mudguard and the body. The aftermarket does have noticeable gaps. Then again he installed it, not me!!! LOL!!!!!
Rear Right MudGuard
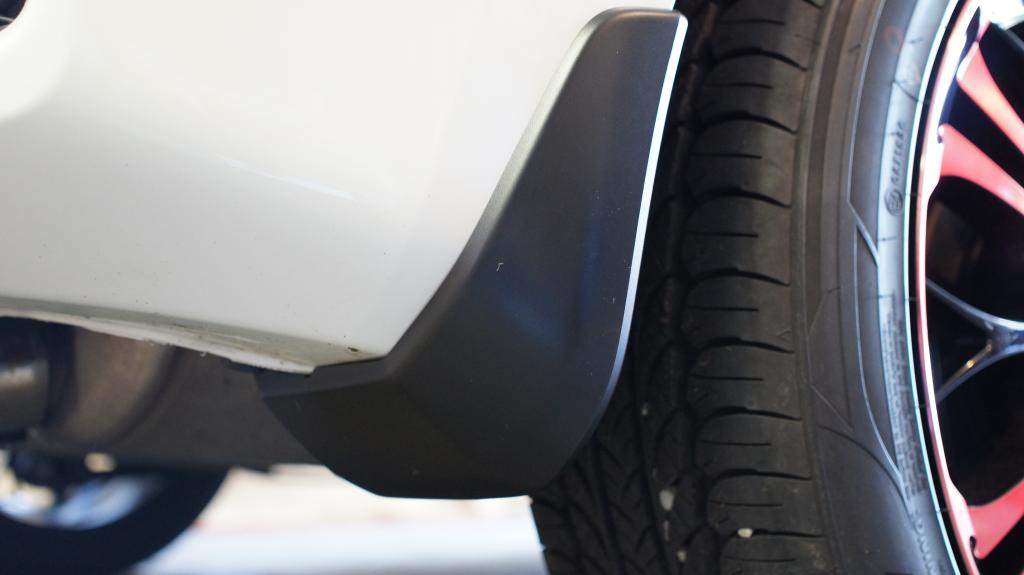
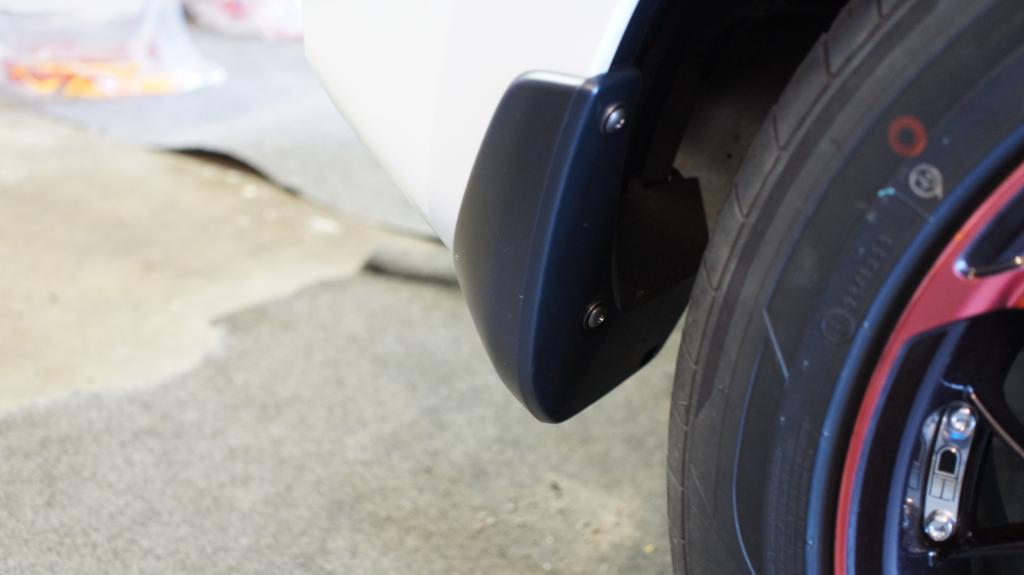
Left Rear MudGuard
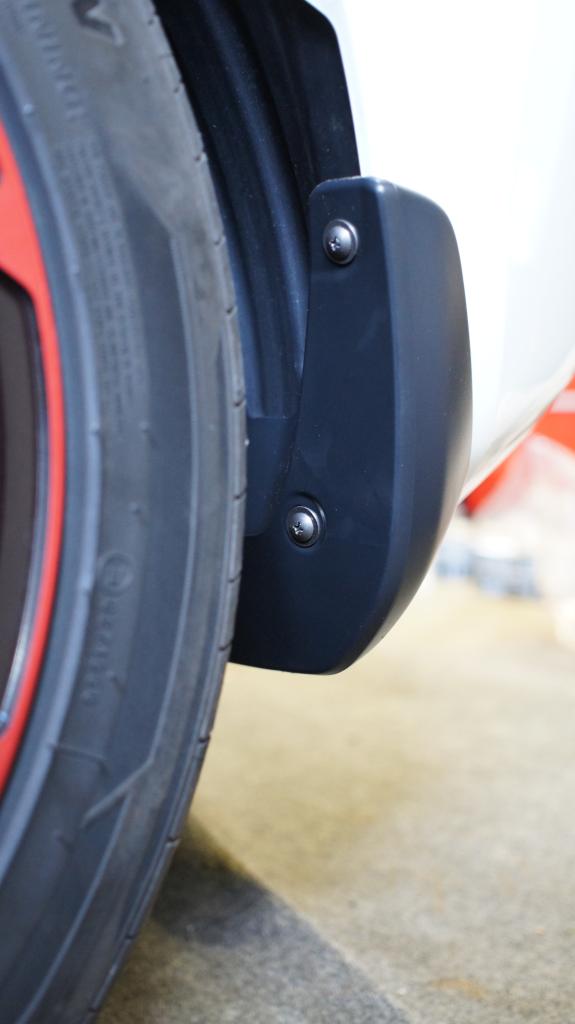
If I had to do them, the Front MudGuards are a simpler install. One screw and 2 fasteners. Literally a 5 minute job.
The instructions are straightforward and took me 1 1/2 hours. Aside from making sure that the rear wheel liners were CUT and DRILLED properly, decided to give the inside of the rear bumper and wheel wells a nice power wash.
For the few of us, who did not get complimentary mud guards from your selling dealer, if planning to do this job, make sure you have a very short Phillips screwdriver (I used a mini-rachet with a Phillips head). REgular tools can be used but you'll have to remove wheels to obtain the necessary clearance for the right angle to the screwheads.
My neighbor buddy went the aftermarket route and got his from Ebay. Way cheaper and easier to install as they use existing holes. There is a clear difference in the quality of plastic material plus is bulkier. With the OEM kit there are no spaces between the mudguard and the body. The aftermarket does have noticeable gaps. Then again he installed it, not me!!! LOL!!!!!
Rear Right MudGuard
Left Rear MudGuard
If I had to do them, the Front MudGuards are a simpler install. One screw and 2 fasteners. Literally a 5 minute job.

Member
Joined: Aug 2014
Posts: 179
From: Some where
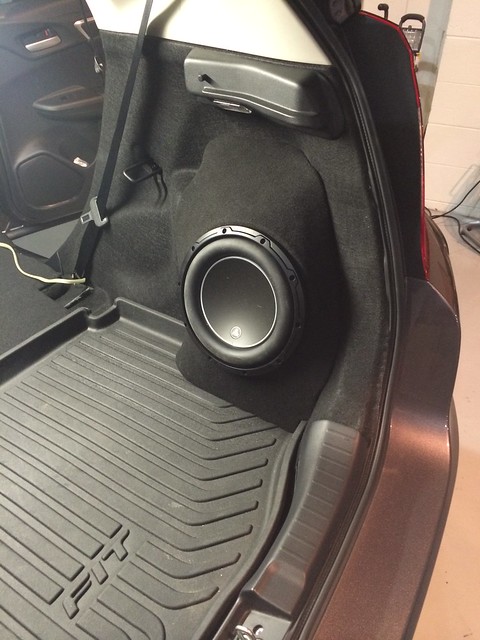
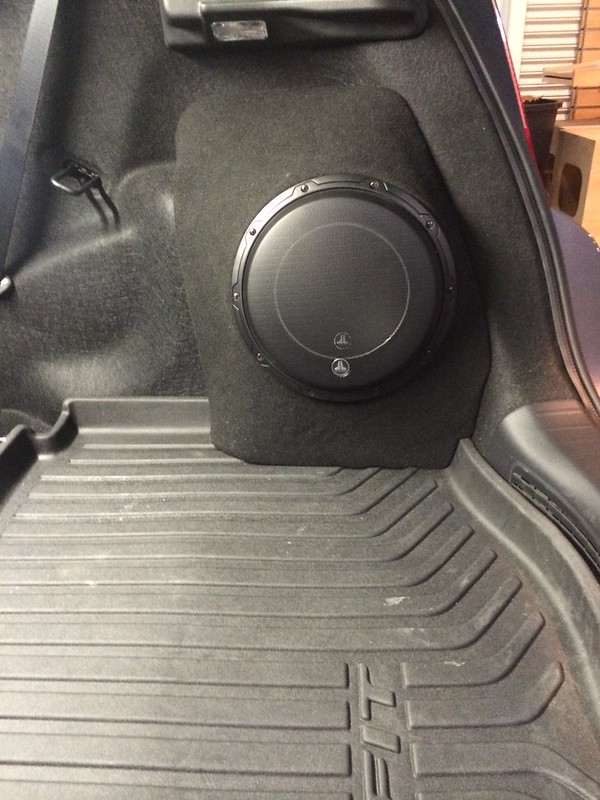
Just finish adding a JL audio 10W6 V3-D4 I had it made using just the small corner of the trunk and also still short enough to not block the only trunk light. I'm giving this sub 1000 watts RMS and this thing hit very hard and the bass is very clean. Here is some photos.

Member
Joined: Jul 2014
Posts: 3,278
From: Shokan, NY
Just finish adding a JL audio 10W6 V3-D4 I had it made using just the small corner of the trunk and also still short enough to not block the only trunk light. I'm giving this sub 1000 watts RMS and this thing hit very hard and the bass is very clean. Here is some photos.
Member
Joined: Aug 2014
Posts: 1,620
From: Connecticut
1k watts RMS huh? That from your amp rating at 4 ohm? Even with a dual voice coil the max your sub is rated at 600 watts RMS. The extra 400 watts is for headroom. Pushing it any harder than 600 watts RMS is not creating more decibel volume but more heating of the voice coil.
Great job on the enclosure too!!!! My only critique as when making any custom enclosures for speakers is the sacrifice of efficiency of the driver. Every speaker has an ideal air volume space, resonance, etc all defined by its Thiel & Small parameters. Anything outside the ideal air chamber means your speaker is less efficient, wont reach its max db/cubic meter, and work harder to displace air.
Also, did you upgrade to a high output alternator? Class A/B or Class D amps are still power hungry for the FITs mini electrical system.
Member
Joined: Jul 2014
Posts: 3,278
From: Shokan, NY
A tip: See those rusty areas on the hub? I've had wheels get rusted on so thoroughly that they were very difficult to remove. Now I put a light coating of Never-Seez on that area. I got that tip from a tire store.
Member
Joined: Dec 2014
Posts: 647
From: San Diego - Carlsbad, CA
Installed door scuff plates.
What I like about these is that they wrap some protection around the outermost corner.
Front:
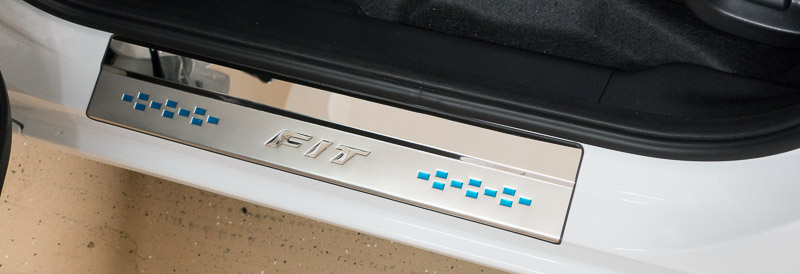
Rear:
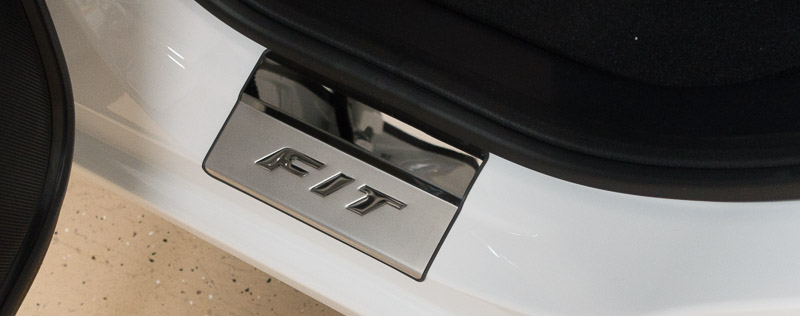
Found on aliexpress for about $20
Fashion!!So Cool!Stainless steel door sill scuff plate door threshold cover trim 4pcs for Honda Fit 2014 2015-in Chromium Styling from Automobiles & Motorcycles on Aliexpress.com | Alibaba Group
What I like about these is that they wrap some protection around the outermost corner.
Front:
Rear:
Found on aliexpress for about $20
Fashion!!So Cool!Stainless steel door sill scuff plate door threshold cover trim 4pcs for Honda Fit 2014 2015-in Chromium Styling from Automobiles & Motorcycles on Aliexpress.com | Alibaba Group
Member
Joined: Aug 2014
Posts: 179
From: Some where
1k watts RMS huh? That from your amp rating at 4 ohm? Even with a dual voice coil the max your sub is rated at 600 watts RMS. The extra 400 watts is for headroom. Pushing it any harder than 600 watts RMS is not creating more decibel volume but more heating of the voice coil.
Great job on the enclosure too!!!! My only critique as when making any custom enclosures for speakers is the sacrifice of efficiency of the driver. Every speaker has an ideal air volume space, resonance, etc all defined by its Thiel & Small parameters. Anything outside the ideal air chamber means your speaker is less efficient, wont reach its max db/cubic meter, and work harder to displace air.
Also, did you upgrade to a high output alternator? Class A/B or Class D amps are still power hungry for the FITs mini electrical system.
Great job on the enclosure too!!!! My only critique as when making any custom enclosures for speakers is the sacrifice of efficiency of the driver. Every speaker has an ideal air volume space, resonance, etc all defined by its Thiel & Small parameters. Anything outside the ideal air chamber means your speaker is less efficient, wont reach its max db/cubic meter, and work harder to displace air.
Also, did you upgrade to a high output alternator? Class A/B or Class D amps are still power hungry for the FITs mini electrical system.
I wired the 10w6 dual voice coil parallel for 2ohm which gives 1000 watts with the audition av5.1k. I know I only need 250-600watts max but more is always better =). and the sub requires very little volume 0.55 cu ft / 15.57 L which is why I went with this sub compared to the 10w7. I also have a 10 farad cap from nvx which looks like a small amp and installed it under the driver seat and Im getting zero dimming when turning up the volume. The amps tweeter channel is A class, the mids is A/B and the sub is D class. I really do not think I need to change the alternator unless Im adding another amp. For now Im extremely happy about how the system sounds.
COMMENT: To give everyone an idea of PAYLUDER's other audio equipment:
Audison Bit one.1
Audison Voce K6 6.5 components
Audison Voce AV 5.1k 1650 watt
Audison Bit in
NVX 10 farat cap
These are all upper level components in the audio world. No wonder he's "extremely happy". Good share including the latest post on your rear sub. Very neat looking, indeed!!!
- rttby
Last edited by ROTTBOY; Jan 27, 2015 at 11:07 PM.