
2RISMO2 - Commuter Life Chronicles


Also did did the Sport Horns from College Hills Honda. While I was in there I tackled the sagging front bumper.
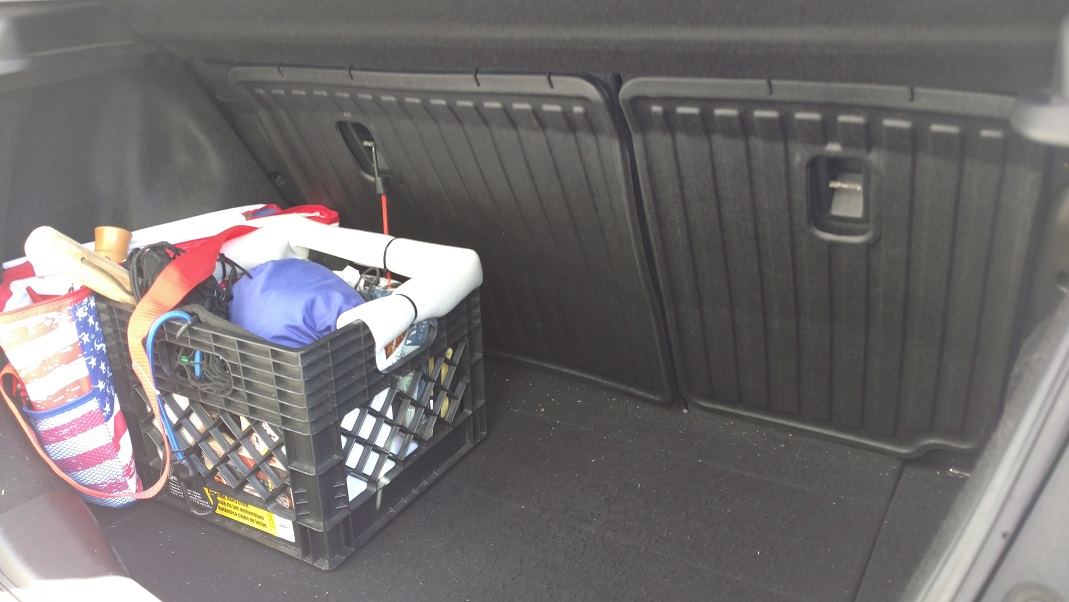
First the Sport horns. Here they are on the left side. You don't have to completely take off the bumper. The install video is a few posts up:
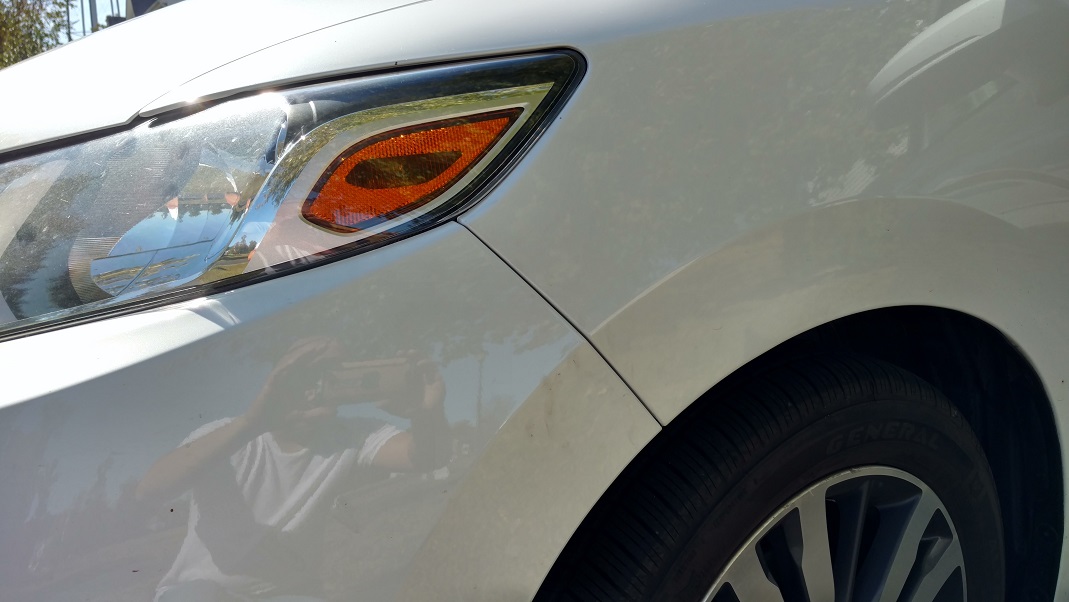
Here are some before and after pictures of the sagging bumper:
Before:

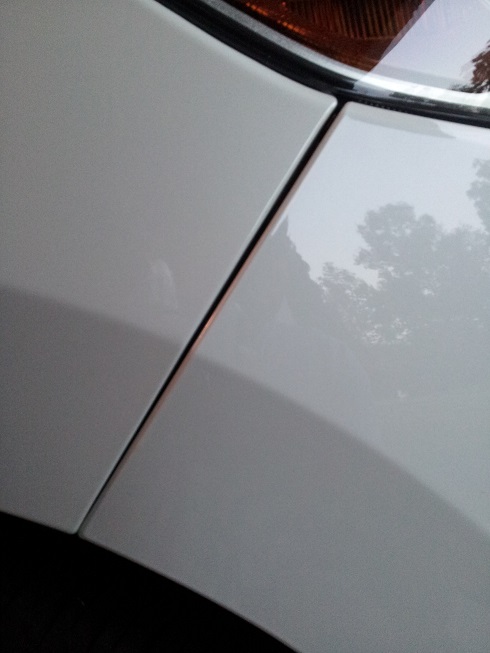
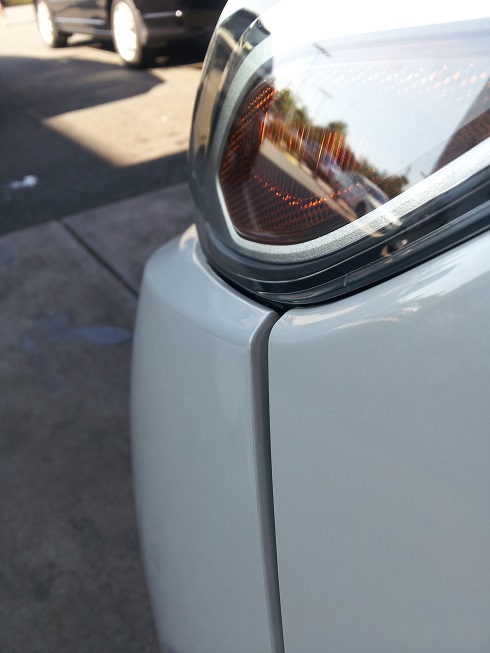
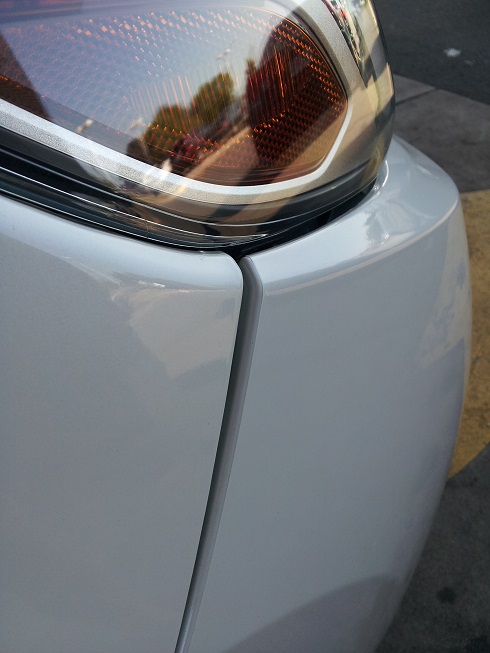
After

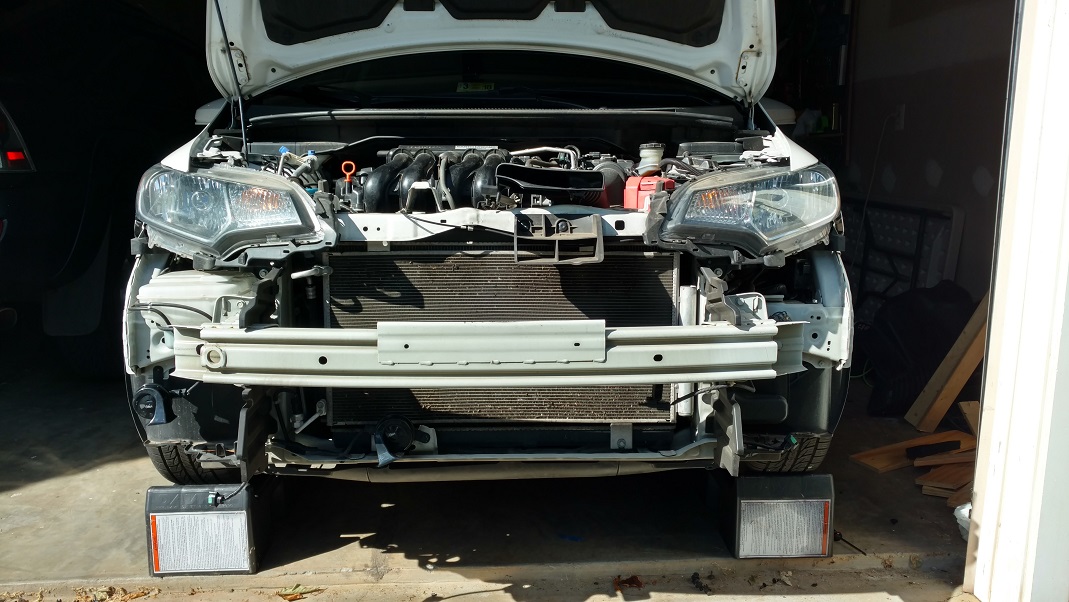
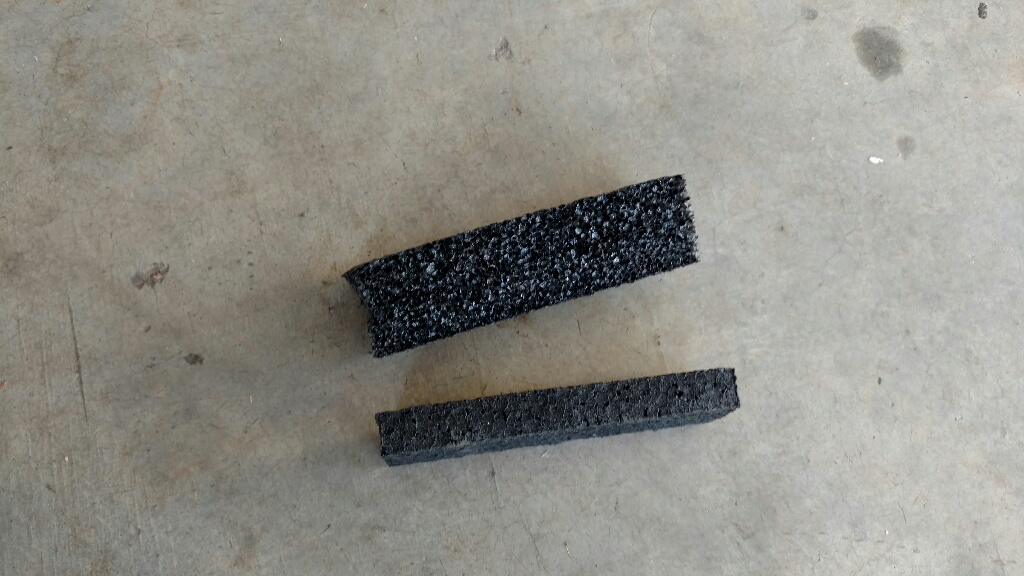
The issue is caused by what I believe is this foam piece that had come off. I decided to use a piece of dense foam I had on hand. It's thicker than the OEM:
While looking at the back of the bumper, the foam piece is here. I attached it with some 3M double sided tape:
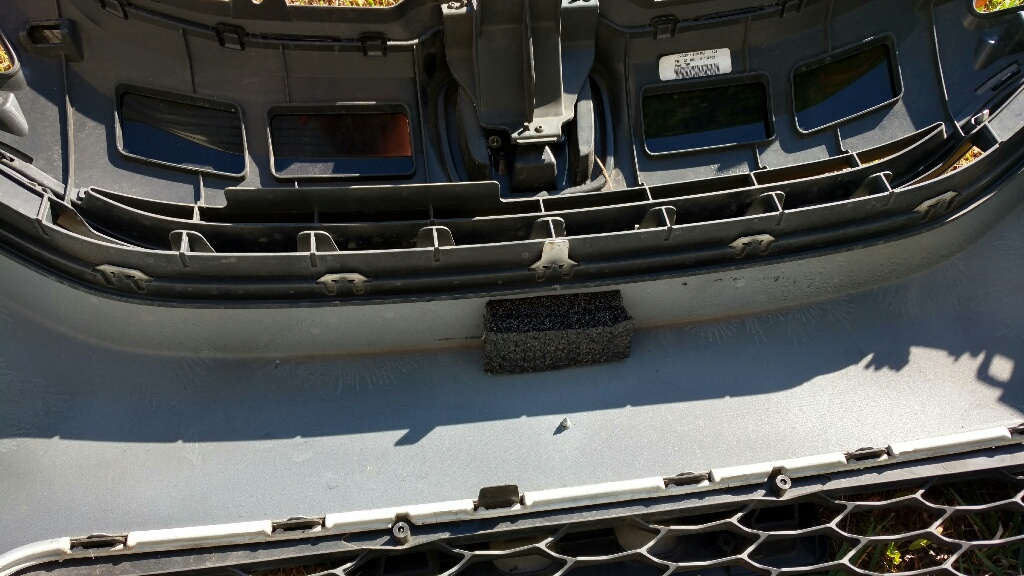
This is where it sits on the actual metal bumper, see the black smudges:
So this fixed my sagging bumper! I took it for a test drive and no weird sounds. One thing to note, I did break the plastic push pin on the drivers side wheel well area. Looks like it just helps hold the wheel well splash shield. I'll source a new one from next week. Other than that it was pretty easy to fix.
Credit goes to JHN who had mentioned that foam piece previously. I finally got sick and tired of looking at it and decided to do something. Good excuse to throw in the sport horns
Here is a post I made after a few months of ownership: https://www.fitfreak.net/forums/3rd-...-warranty.html
First the Sport horns. Here they are on the left side. You don't have to completely take off the bumper. The install video is a few posts up:
Here are some before and after pictures of the sagging bumper:
Before:
After
The issue is caused by what I believe is this foam piece that had come off. I decided to use a piece of dense foam I had on hand. It's thicker than the OEM:
While looking at the back of the bumper, the foam piece is here. I attached it with some 3M double sided tape:
This is where it sits on the actual metal bumper, see the black smudges:
So this fixed my sagging bumper! I took it for a test drive and no weird sounds. One thing to note, I did break the plastic push pin on the drivers side wheel well area. Looks like it just helps hold the wheel well splash shield. I'll source a new one from next week. Other than that it was pretty easy to fix.
Credit goes to JHN who had mentioned that foam piece previously. I finally got sick and tired of looking at it and decided to do something. Good excuse to throw in the sport horns
Here is a post I made after a few months of ownership: https://www.fitfreak.net/forums/3rd-...-warranty.html
Last edited by 2Rismo2; Nov 9, 2017 at 10:59 AM.
kinda like wearing a fire suit without a fire helmet?
Also did did the Sport Horns from College Hills Honda. While I was in there I tackled the sagging front bumper.
First the Sport horns. Here they are on the left side. You don't have to completely take off the bumper. The install video is a few posts up:
Here are some before and after pictures of the sagging bumper:
Before:
After
The issue is caused by what I believe is this foam piece that had come off. I decided to use a piece of dense foam I had on hand. It's thicker than the OEM:

While looking at the back of the bumper, the foam piece is here. I attached it with some 3M double sided tape:

This is where it sits on the actual metal bumper, see the black smudges:

So this fixed my sagging bumper! I took it for a test drive and no weird sounds. One thing to note, I did break the plastic push pin on the drivers side wheel well area. Looks like it just helps hold the wheel well splash shield. I'll source a new one from next week. Other than that it was pretty easy to fix.
Credit goes to JHN who had mentioned that foam piece previously. I finally got sick and tired of looking at it and decided to do something. Good excuse to throw in the sport horns
Here is a post I made after a few months of ownership: https://www.fitfreak.net/forums/3rd-...-warranty.html
First the Sport horns. Here they are on the left side. You don't have to completely take off the bumper. The install video is a few posts up:
Here are some before and after pictures of the sagging bumper:
Before:
After
The issue is caused by what I believe is this foam piece that had come off. I decided to use a piece of dense foam I had on hand. It's thicker than the OEM:
While looking at the back of the bumper, the foam piece is here. I attached it with some 3M double sided tape:
This is where it sits on the actual metal bumper, see the black smudges:
So this fixed my sagging bumper! I took it for a test drive and no weird sounds. One thing to note, I did break the plastic push pin on the drivers side wheel well area. Looks like it just helps hold the wheel well splash shield. I'll source a new one from next week. Other than that it was pretty easy to fix.
Credit goes to JHN who had mentioned that foam piece previously. I finally got sick and tired of looking at it and decided to do something. Good excuse to throw in the sport horns
Here is a post I made after a few months of ownership: https://www.fitfreak.net/forums/3rd-...-warranty.html
Last edited by TougeMonster_GK5; Oct 27, 2017 at 11:34 AM.


Fixed the original post with the pertinent pictures. Let me know if it's not clear and I'll explain it but it's easy to figure out while you're back there. Sorry about that!
Last edited by 2Rismo2; Oct 27, 2017 at 01:30 PM.
Quick demo of my lighting situation. Running NOKYA NOK7623 foglights and PIAA Xtreme White Plus H4 bulbs
https://drive.google.com/file/d/0B2g...ew?usp=sharing
In the video it starts with both headlights and foglights on. Then quickly turn off fog lights, turn them back on. Then I turn hi-beams on and run that way for a while. Near the end I turn hi-beams back off.
Captured with a Rexing V1 dash cam. It's hard to pick up, but foglights do throw a decent beam to the left and right of the car, as well as illuminating the area directly in front. Also for some reason it looks darker with high beams on, but that's probably just the way the dash cam picks up the lighting. It's much brighter in real life.

I had those same yellow Nokya fog bulbs. Wasn't yellow enough, so I put yellow film on the fog lenses. I find them ok, but wish the beam was wider.
I just put in some yellow LED fog bulbs and will have to test. I know these LED's are brighter than my Nokya's.
I just put in some yellow LED fog bulbs and will have to test. I know these LED's are brighter than my Nokya's.
Today's morning commute was very icy. Saw a couple cars spun out. I found using ECON mode really helped with accelerating from a stop to minimize tire spin.
I'm glad it's going to be warming up for the mid-atlantic. This cold weather has really killed my mileage. Normally I average low 40's MPG, but last week's chill brought me down to 38MPG. Lowest I've seen in over a year!
I'm glad it's going to be warming up for the mid-atlantic. This cold weather has really killed my mileage. Normally I average low 40's MPG, but last week's chill brought me down to 38MPG. Lowest I've seen in over a year!
Member
Joined: May 2015
Posts: 938
From: Toronto, ON, Canada

That storm was huge.We've not had -25C/-13F in a long time, and that does not include windchill. Do you have winter tires?
Last edited by TorontoBoy; Jan 9, 2018 at 09:43 AM.
No on the winter tires. In Virginia we don't get the ice/snow that requires it IMO. I'm sure the extra siping and tire compound would help, but don't think it's worth the extra cost where I am.
My other vehicle is a Toyota 4Runner 4WD with Bridgestone Dueler REVOs. So if I really need to get out I use that
Wow those are some extreme temps! We got into 1F where I am, and I thought that was plenty cold.
My other vehicle is a Toyota 4Runner 4WD with Bridgestone Dueler REVOs. So if I really need to get out I use that
Wow those are some extreme temps! We got into 1F where I am, and I thought that was plenty cold.
Bought a
for myself after Christmas and finally got around to installing. I already have a Rexing V1, but after I installed one of these dash cam mirrors in the 4Runner, I really like the functionality integrated into the mirror. It also has a newer image sensor and the night time video is better quality.
It clears the sun visors. The driver side visor kind of blocks the view of the mirror when it's halfway down, but moved all the way forward it's clear. No issue with the passenger side visor. One thing I didn't know that I'm getting used to is that there is a red light on the top side that indicates it's recording.
I chose to mount the rear view camera on the plastic panel that hides the car seat tether achor point on the roof. The cable goes through it into the headliner, then I snaked it on the passenger side of the car to the front unit. I did not connect the rear camera to the reverse lights, as I don't need an additional backup camera. The backup camera lights are bright white and they come on if you connect the rear camera to a 12V source.
I'll post up a video sample soon.
Last edited by 2Rismo2; Jan 19, 2018 at 02:00 PM.
Also did did the Sport Horns from College Hills Honda. While I was in there I tackled the sagging front bumper.
First the Sport horns. Here they are on the left side. You don't have to completely take off the bumper. The install video is a few posts up:
Here are some before and after pictures of the sagging bumper:
Before:
After
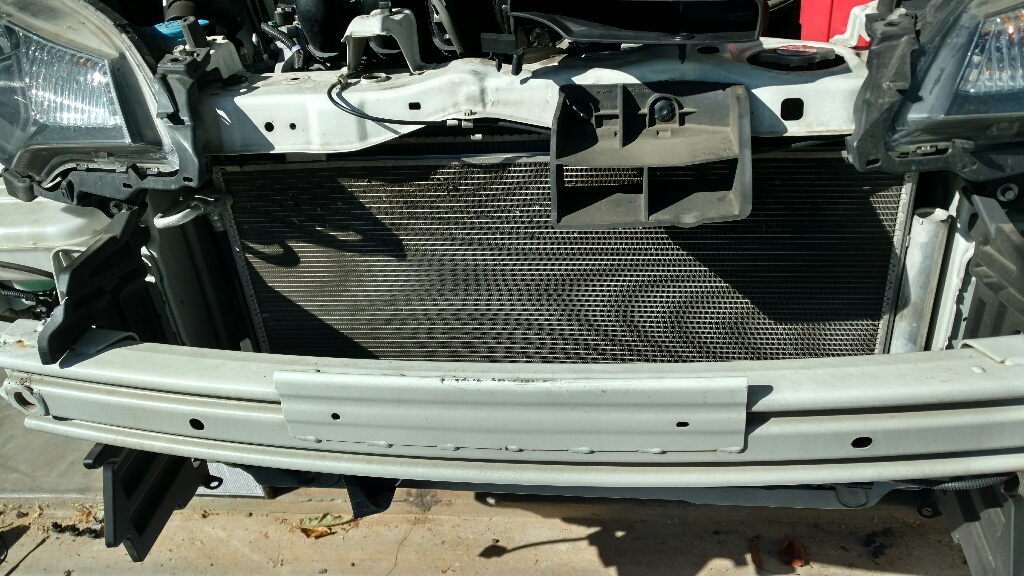
The issue is caused by what I believe is this foam piece that had come off. I decided to use a piece of dense foam I had on hand. It's thicker than the OEM:
While looking at the back of the bumper, the foam piece is here. I attached it with some 3M double sided tape:
This is where it sits on the actual metal bumper, see the black smudges:
So this fixed my sagging bumper! I took it for a test drive and no weird sounds. One thing to note, I did break the plastic push pin on the drivers side wheel well area. Looks like it just helps hold the wheel well splash shield. I'll source a new one from next week. Other than that it was pretty easy to fix.
Credit goes to JHN who had mentioned that foam piece previously. I finally got sick and tired of looking at it and decided to do something. Good excuse to throw in the sport horns
Here is a post I made after a few months of ownership: https://www.fitfreak.net/forums/3rd-...-warranty.html
First the Sport horns. Here they are on the left side. You don't have to completely take off the bumper. The install video is a few posts up:
Here are some before and after pictures of the sagging bumper:
Before:
After
The issue is caused by what I believe is this foam piece that had come off. I decided to use a piece of dense foam I had on hand. It's thicker than the OEM:
While looking at the back of the bumper, the foam piece is here. I attached it with some 3M double sided tape:
This is where it sits on the actual metal bumper, see the black smudges:
So this fixed my sagging bumper! I took it for a test drive and no weird sounds. One thing to note, I did break the plastic push pin on the drivers side wheel well area. Looks like it just helps hold the wheel well splash shield. I'll source a new one from next week. Other than that it was pretty easy to fix.
Credit goes to JHN who had mentioned that foam piece previously. I finally got sick and tired of looking at it and decided to do something. Good excuse to throw in the sport horns
Here is a post I made after a few months of ownership: https://www.fitfreak.net/forums/3rd-...-warranty.html

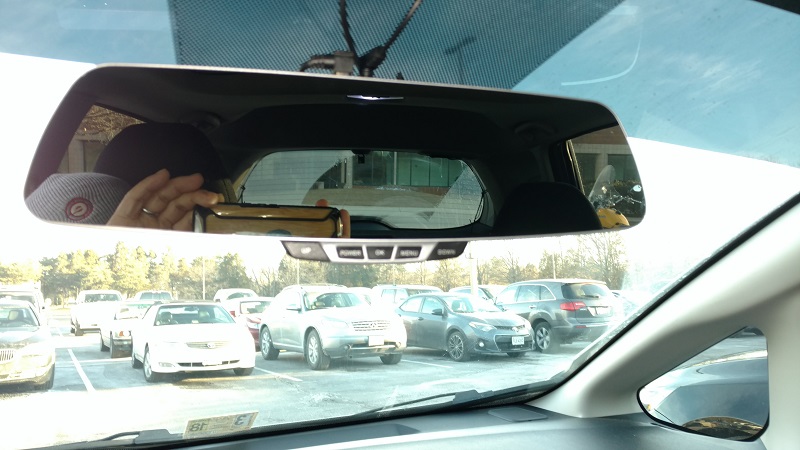
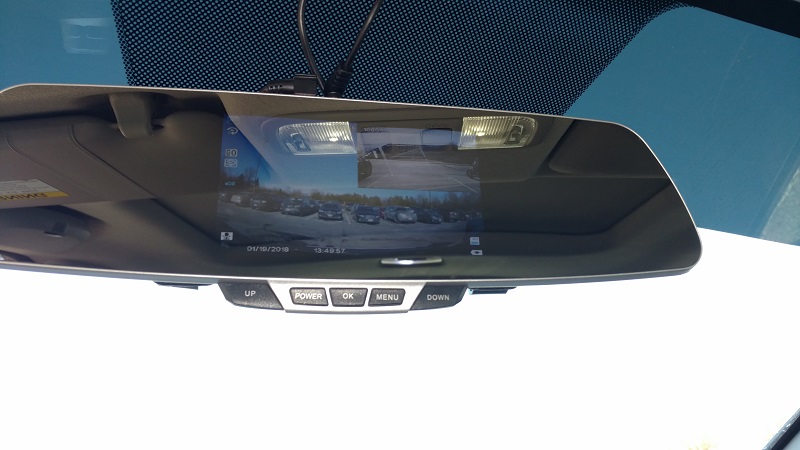
Bought a OUMAX RV50HD-S for myself after Christmas and finally got around to installing. I already have a Rexing V1, but after I installed one of these dash cam mirrors in the 4Runner, I really like the functionality integrated into the mirror. It also has a newer image sensor and the night time video is better quality.
It clears the sun visors. The driver side visor kind of blocks the view of the mirror when it's halfway down, but moved all the way forward it's clear. No issue with the passenger side visor. One thing I didn't know that I'm getting used to is that there is a red light on the top side that indicates it's recording.
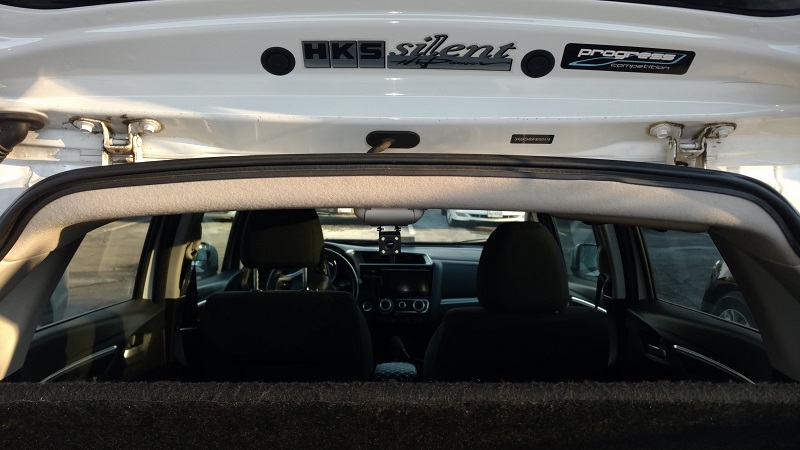
I chose to mount the rear view camera on the plastic panel that hides the car seat tether achor point on the roof. The cable goes through it into the headliner, then I snaked it on the passenger side of the car to the front unit. I did not connect the rear camera to the reverse lights, as I don't need an additional backup camera. The backup camera lights are bright white and they come on if you connect the rear camera to a 12V source.
I'll post up a video sample soon.
It clears the sun visors. The driver side visor kind of blocks the view of the mirror when it's halfway down, but moved all the way forward it's clear. No issue with the passenger side visor. One thing I didn't know that I'm getting used to is that there is a red light on the top side that indicates it's recording.
I chose to mount the rear view camera on the plastic panel that hides the car seat tether achor point on the roof. The cable goes through it into the headliner, then I snaked it on the passenger side of the car to the front unit. I did not connect the rear camera to the reverse lights, as I don't need an additional backup camera. The backup camera lights are bright white and they come on if you connect the rear camera to a 12V source.
I'll post up a video sample soon.
Haha ya do it sooner than later and don't forget to get that bumper pad I had mentioned to you before. I don't have the sag anymore, but the bumper kind of pokes out a bit on the side. It doesn't sit flush with the quarter panel. I think because the clips have been bent from 50K of driving. Oh well, I'll live with it.
