What did you do to your GE fit today?


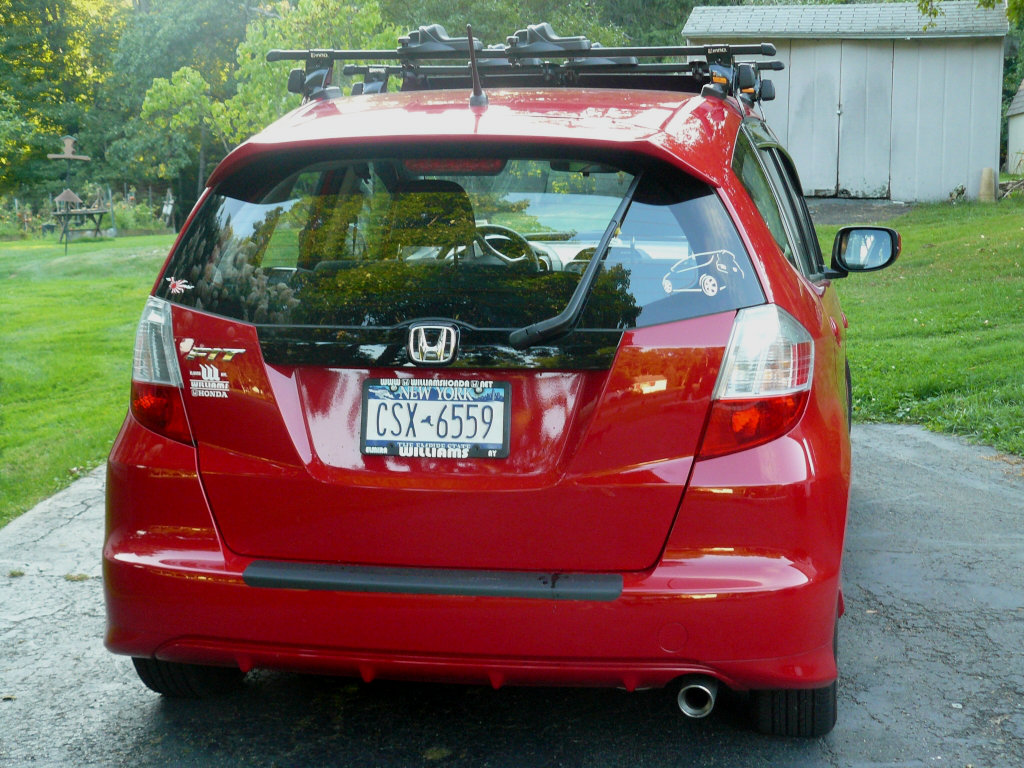
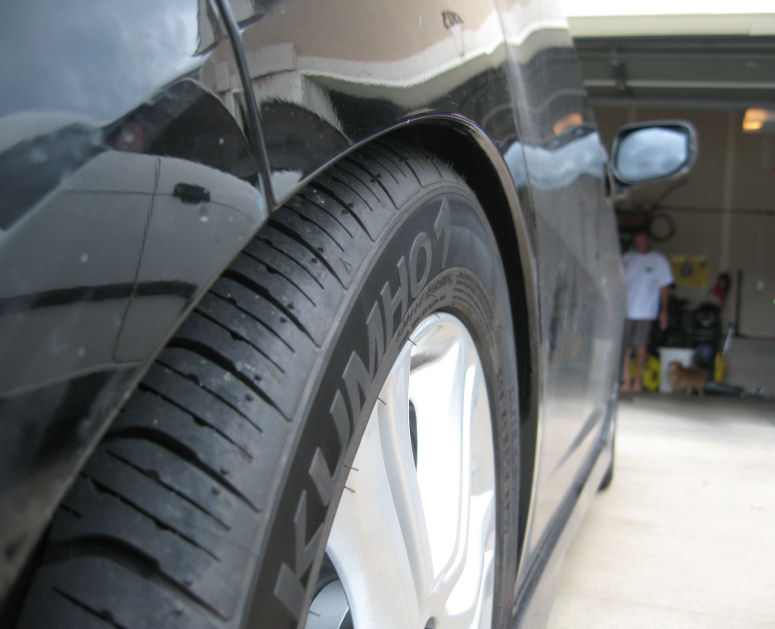
Met up with Kazu of J's Racing in Saitama for a J's sale event, decided to check my alignment out, as something felt a bit out of wack even though it tracked straight. Pre-alignment, left front -1.25mm toe and -2.24 camber, right front +1.25mm toe and -1.57 camber.
After is -2.4 camber and +1mm toe both sides. Also picking up the gold titan shift knob to replace the blue titan.
After is -2.4 camber and +1mm toe both sides. Also picking up the gold titan shift knob to replace the blue titan.

Member
Joined: Aug 2012
Posts: 165
From: San Ramon, CA
Had my son try to install the knockoff center armrest in my 2012 base Fit today...what a waste of time and money. It didn't come with the metal brackets that true Honda center armrests use, so there is no way to mount it securely. As soon as I remember which site I bought it from I'm seeing if I can return it...and next time using genuine Honda parts. My bad for trying to save $50.
Member
Joined: Aug 2012
Posts: 165
From: San Ramon, CA
Aftermarket armrest worked after all.
Had my son try to install the knockoff center armrest in my 2012 base Fit today...what a waste of time and money. It didn't come with the metal brackets that true Honda center armrests use, so there is no way to mount it securely. As soon as I remember which site I bought it from I'm seeing if I can return it...and next time using genuine Honda parts. My bad for trying to save $50.
Well, it wasn't that bad after all. My mistake was watching Honda install videos and instructions, and assuming the knockoff would go in the same way. It doesn't: Rather than bolting to a metal bracket, it just fits and sits snugly in the rear center consoe cupholder. Once the light dawned all I did was to tinker toy the 3 main pieces together and put it in the cupholder. Not as secure as the Honda one would have been, but I think was about half the installed Honda price (over $300 for Honda's, installed...$200 just for the Honda part.) Now if only I remembered what web site I got this from. (Would have avoided all the trouble had they included ANY instructions or a parts list.)
The finished product, LOOKs as good as a true hONDA PART:
Paul H (even did it essentially 1 handed after removal of head from @#$)
That's very interesting! What are they made of and how to they attach? My biggest question of course is cost. Will we have to get them painted ourselves in the event of a group buy?
The big advantage IMO is the ability to match the OEM colour.
PS I changed my parking lights to blue initially but now running white LED's like you....way better than the OEM yellow bulbs eh?

The big advantage IMO is the ability to match the OEM colour.
PS I changed my parking lights to blue initially but now running white LED's like you....way better than the OEM yellow bulbs eh?
Last edited by Dwalbert320; Aug 25, 2012 at 07:22 PM.
That's very interesting! What are they made of and how to they attach? My biggest question of course is cost. Will we have to get them painted ourselves in the event of a group buy?
The big advantage IMO is the ability to match the OEM colour.
PS I changed my parking lights to blue initially but now running white LED's like you....way better than the OEM yellow bulbs eh?
The big advantage IMO is the ability to match the OEM colour.
PS I changed my parking lights to blue initially but now running white LED's like you....way better than the OEM yellow bulbs eh?
https://www.fitfreak.net/forums/gaug...s-eyelids.html
My corner lights are actually xenon bulbs. I had put LED's in there but they were way brighter than I wanted. I do agree though, white bulbs are better than the ambers.
Rolled my rear fenders with my new fender roller and heat gun. Pretty simple task. Did it so I could use my 20mm spacers on the rear again w/o raising my ride height. Not that low, I know. Going to roll my fronts when I get spacers for them, then I can go lower. Got the fenders just right tho so there's just enough clearance for the tire when doing hard turns - no rubbing!
Oh and it's been really rainy out, so everything's dirty.

Oh and it's been really rainy out, so everything's dirty.
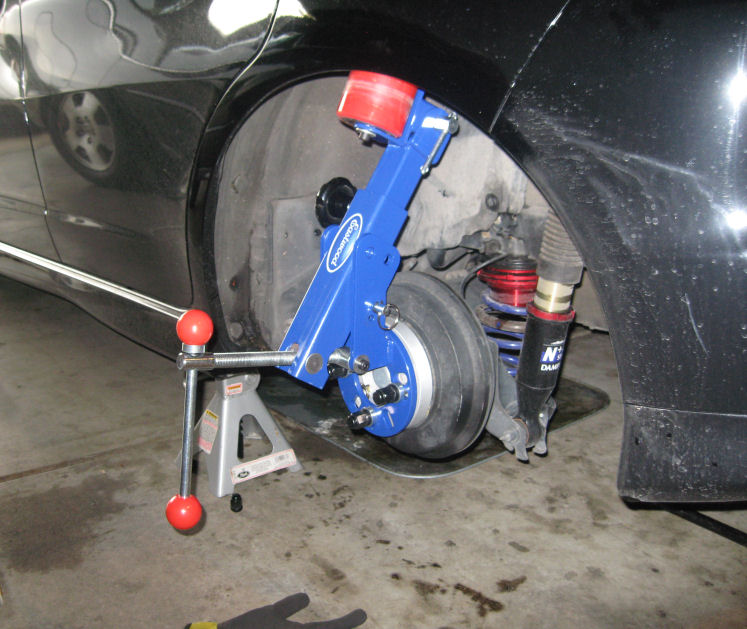
^^ meatbaby- looking good!  does the tool accept all sorts of PCD? like 4x100, 5x100, 5x114.2, 5x120, etc etc?
for me, ordered up front camber bolts. i want to give the front more neg camber. going to probably max it out (spc) at -1.75.
does the tool accept all sorts of PCD? like 4x100, 5x100, 5x114.2, 5x120, etc etc? for me, ordered up front camber bolts. i want to give the front more neg camber. going to probably max it out (spc) at -1.75.
why so wide? Seems like your just replacing the weight you save with the PF01's with more rubber.

Member

Joined: Aug 2009
Posts: 2,462
From: Vermont
 . This way he's balancing out the "Meat" by bringing down the weight of the wheel to compensate. Plus the Enkeis just look nice!
~SB
Member
Joined: Aug 2012
Posts: 165
From: San Ramon, CA
Cheap + Fast lower grill
I've had Fit 3.5 weeks now, time to address the lower grill, or should I say non-grill, as there is nothing to protect my AC from being hit by road debris:

So what to do? I perused OSH for ideas...originally I was going to buy some expanded steel or aluminum from their welding supplies, but none was wide enough and I didn't want this to become an actual welding project.
Then I spied some black plastic fencing, in a 1/2" square grid pattern. Humm, trimmable with scissors, mountable with Zip ties, and enough protection for my purposes. I used maybe $3 worth of the scrap fencing I bought, and 5 white zip ties, so they don't stick out too drastically around my TW bumper pieces. When all done I saw I didn't stretch it tightly enough, there is a slight belly in the "netting". I'll open it up and re-ziptie it tomorrow.

I had no trouble with the clips that held the plastic piece that had to be removed for access, once I realized trick was to pop up the center piece of clip with a screwdriver wrapped in a cloth to avoid scratching. And the two slightly longer clips are the ones at the extreme right and left sides of the plastic.
Now to just figure how to remove horn wire, or to get enough slack to splice a wire to it, so I can power up the aux horn I mounted to the same horn mounting bolt. But as Scarlet O'Hara would say, "I'll worry about that another day."
Paul H
So what to do? I perused OSH for ideas...originally I was going to buy some expanded steel or aluminum from their welding supplies, but none was wide enough and I didn't want this to become an actual welding project.
Then I spied some black plastic fencing, in a 1/2" square grid pattern. Humm, trimmable with scissors, mountable with Zip ties, and enough protection for my purposes. I used maybe $3 worth of the scrap fencing I bought, and 5 white zip ties, so they don't stick out too drastically around my TW bumper pieces. When all done I saw I didn't stretch it tightly enough, there is a slight belly in the "netting". I'll open it up and re-ziptie it tomorrow.
I had no trouble with the clips that held the plastic piece that had to be removed for access, once I realized trick was to pop up the center piece of clip with a screwdriver wrapped in a cloth to avoid scratching. And the two slightly longer clips are the ones at the extreme right and left sides of the plastic.
Now to just figure how to remove horn wire, or to get enough slack to splice a wire to it, so I can power up the aux horn I mounted to the same horn mounting bolt. But as Scarlet O'Hara would say, "I'll worry about that another day."
Paul H
Yup, it's basically universal. Fits any 4 or 5 lug bolt pattern up to 120.6mm. The manufacturer is Eastwood.